Cord Commander cord and charger organizer review


We all love our gadgets, but until the day comes when the can all recharge wirelessly, we need charging adapters and charging cables. Keeping the adapters and cables together and neatly organized isn’t an easy task unless you have help like the Cord Commander. Let’s check it out.

What is it?

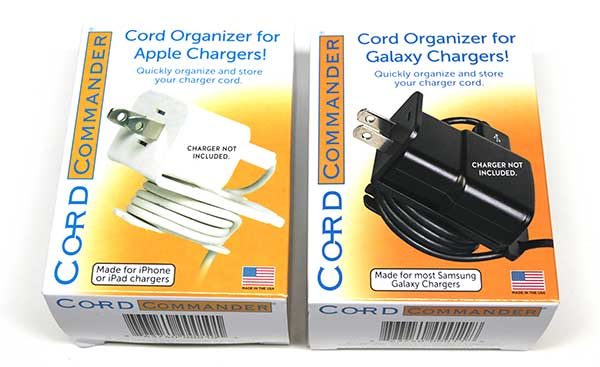
The Cord Commander is a simple product that has been designed and made in the USA to help manage cable clutter for Apple and Samsung charging adapters.

What’s in the box?

Each box has one Cord Commander and a sheet of simple instructions.

Made of tough but flexible plastic, the Cord Commander is available in two versions. There’s a version that’s compatible with Apple iPhone and iPad style chargers and another version that works with Samsung phone and tablet chargers.

The folks at Cord Commander sent me one of each style. The Apple Cord Commander is shown above on the left and the Samsung version is on the right.

The Cord Commander has a “shelf” with slots in it for the prongs on the adapter and two “wings” on the back that are designed to wind excess cord.

It’s important to pay attention to the orientation of the power adapter when you insert it into the Cord Commander.

If it’s turned the wrong way, it won’t sit flat on the “shelf”.

But once inserted correctly and with the cable wrapped around the wings, the combo is neat and tidy, making it less of a mess in a drawer, gear bag, etc.

There are four cord catch notches on the top edge of the Cord Commander that are used to lock the loose end of the cable in place. Two of the cord catches are larger to accommodate larger diameter cords.

Note that even the larger cord catches might not allow extra thick cables to snap in place as is the case with a Choetech cable TYPE-C charging cable that I use with a Samsung adapter.

Final thoughts

The Cord Commander is more convenient to use than a twist tie or a rubber band because everything you need is right there without any separate parts.

If you have been looking for an easy way to keep your Apple or Samsung adapters and cables more organized, the Cord Commander is a good solution. It’s easy to use and requires no modification to the adapter or existing cable.

Source: The sample for this review was provided by Cord Commander. Please visit their site for more info and order through eBay.


Product Information

Price: $7.99
Manufacturer: Cord Commander
Retailer: eBay
Pros:
  • Easy to use
  • Keeps adapters and cords neat and together
Cons:
  • Some cables are too thick to snap into the cord catches

Filed in categories: Reviews

Tagged: ,

Cord Commander cord and charger organizer review originally appeared on on June 18, 2017 at 5:42 pm.

Note: If you are subscribed to this feed through FeedBurner, please switch to our native feed URL http://the-gadgeteer.com/feed/ in order to ensure continuous delivery.

Archeer 2 in 1 Apple Watch Stand and iPhone Charging Dock Station review


If you own an iPhone and an Apple Watch, you may find this beautiful aluminum dock station to be something you’re not sure how you’ve lived without.  I used to charge my phone by my bed, then charge my Apple Watch near my computer and I didn’t really have a system as to when I’d connect them. With the Archeer 2, I never have to part with my beloveds and somehow my life feels more organized and complete. There was some simple set up involved, that I detailed with pics.  Let take a look. 

Above is the bottom of the charging station and you can see that there are 4 screws that need to be taken out.  There is a lightning cable already installed in the station which you will see in detail in the pic below.  There is nothing you need to do with that half of the device. It’s ready for you to plug into a USB port or outlet and connect your iPhone, right from the get go. What we will be doing is installing the standard Apple Watch charger (not included) into the charging station.

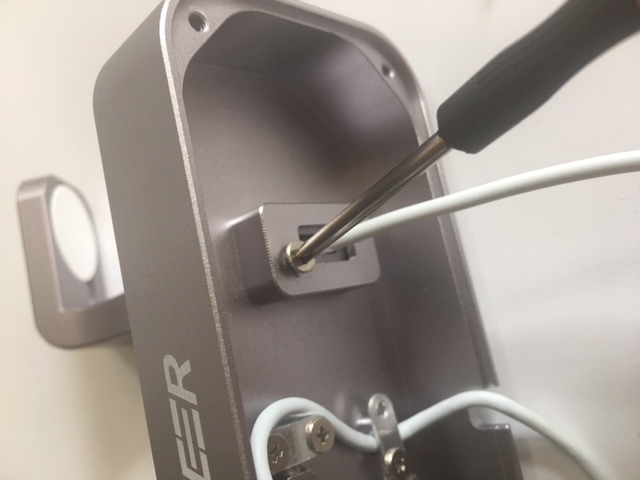
After the four screws are removed, there are an additional two screws that need to be removed to free the bracket that holds the watch.  In the pic above you can see the lightning cable threaded through the device, and the two screws to the right of those are the ones to take out.

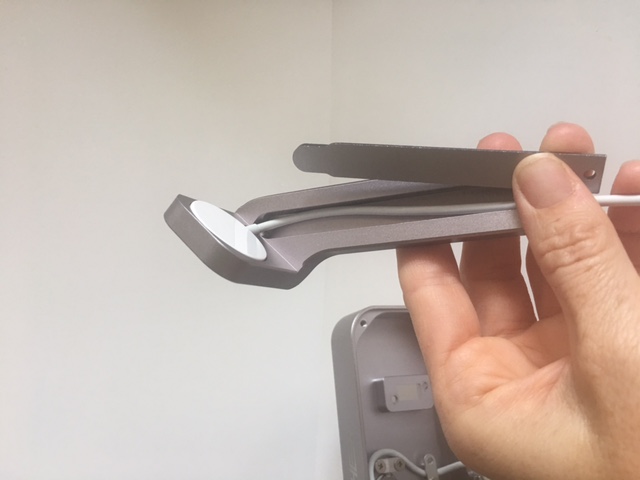
Now that all the screws are removed, slide the long metal piece out of the bracket and pop the round head of the standard Apple Watch charger that came with your watch into the bracket.

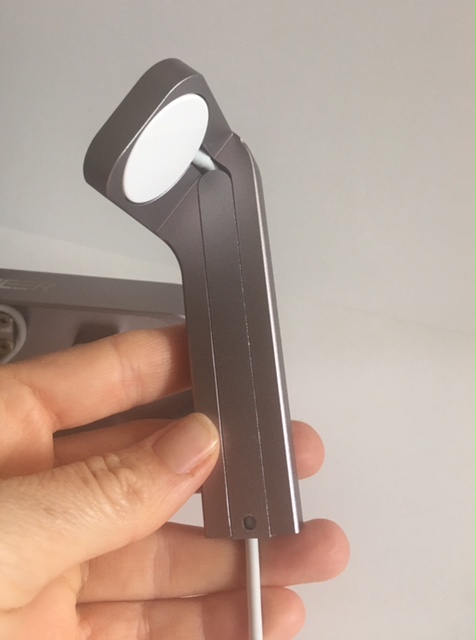
Make sure that the cord is tucked nicely inside the groove in the bracket and slide the metal cover back on.

Now all that’s left is to slide the bracket back into the charging station and reaffix it to the base with the two screws that were removed. Then put the back cover on with the four screws that were taken out in the first step and you are ready to charge. Note: a small screw driver came with the device, but I was unable to unscrew two of the screws with it because it was very thin and I could not get a good grip on it, so I just used my own.

I have a case that I normally have on my phone that would not allow me to charge it while it was on, so I need to remove it when charging.  It seems to work for me though because I do it just once a day and it’s right on my desk so when it’s done charging I can put the case back on for the rest of the day.  However, if I had the Utomic Edge case I would have the perfect setup as only the corners of the phone are covered. Ahhh….a girl can dream…

Now all that’s left is to find two USB ports (a dual USB wall plug would work great) or wall adapters to plug the two cords into and you can let the charging begin!

I found a great place in the corner of my desk to use as a new home for the charging station and my two favorite mobile devices.  I can sit and work all day and even use the phone while it’s on the charger. I think the station looks great on my desk and would look good on my night stand too if I decide to move it into my bedroom.

All in all, I think this is a great charging station. It does the job and looks good doing it!  The only downside is that I have to remove the case that I use in order to charge my iPhone, and if this was my only watch charger, I would have to disassemble the unit to remove the charger or take the whole thing with me when I travel.

Source: The sample for this review was provided by Archeer. Visit their site for more information or find them on Amazon.


Product Information

Price: $32.99
Manufacturer: Archeer
Retailer: Amazon
Requirements:
  • Minor assembly
  • Apple Watch charger
  • 2 USB ports
Pros:
  • Sleek simple design
  • All aluminum and durable
  • Convenient place to charge devices together
Cons:
  • May need to remove iPhone case (depending on case) to charge
  • If traveling, you'd have to disassemble to remove Watch charger, or take the whole thing with you

Filed in categories: Reviews

Tagged: ,

Archeer 2 in 1 Apple Watch Stand and iPhone Charging Dock Station review originally appeared on on June 17, 2017 at 9:00 am.

Note: If you are subscribed to this feed through FeedBurner, please switch to our native feed URL http://the-gadgeteer.com/feed/ in order to ensure continuous delivery.

Ventev Chargestand backup battery and device stand review


So, external batteries are something that everyone who uses a smartphone is aware of needing. Ventev has released a new take on the battery pack, the ChargeStand. What makes it different? Take a look.

Note: Photos may be tapped or clicked for a larger image.

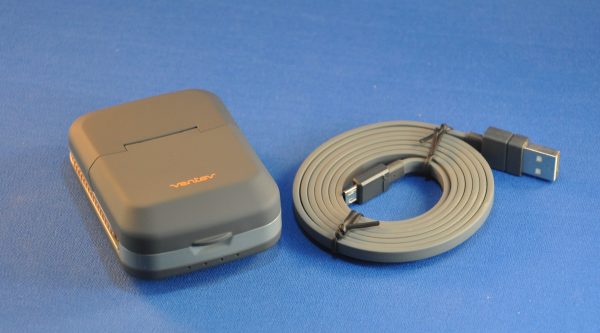
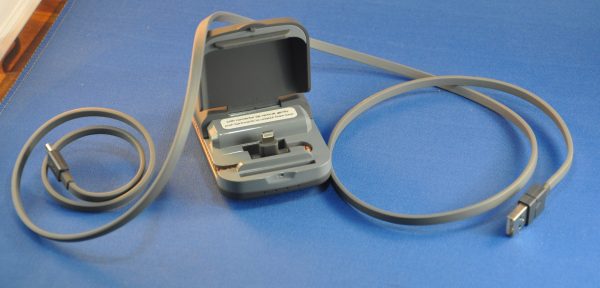
The ChargeStand comes with a flat USB to microUSB cable that is about 4′ long. You’ll have to supply your own power source (which shouldn’t be hard these days!), and remember to carry the cord with you when you travel. It doesn’t charge with a USB to Lightning cable.

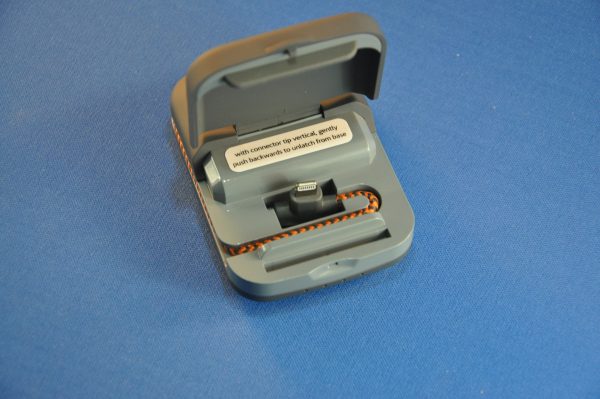
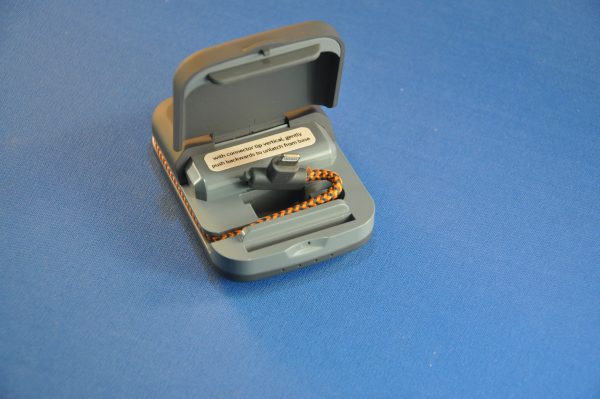
The unit itself is 3.5″ x 2.25″ and tapers on the narrow edge from 0.875″ to 1.125″. It opens on the large end to reveal a hard plastic stand holding a moveable lightning adapter and a soft, flexible fusion on the lid to rest your device against.

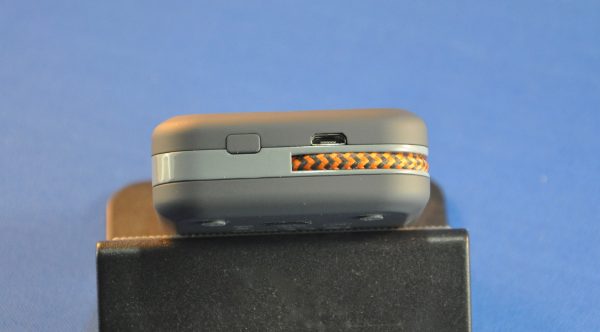
On the rear side (away from the opening) is the charging port and a button to activate the charger when something is plugged in. (I used to not like this, but there have been more than a few times that I’ve found batteries drained because they didn’t have that type function.)

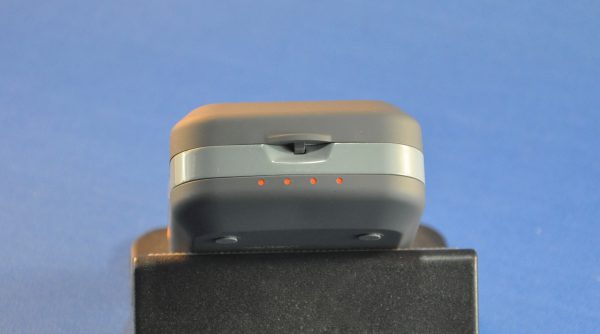
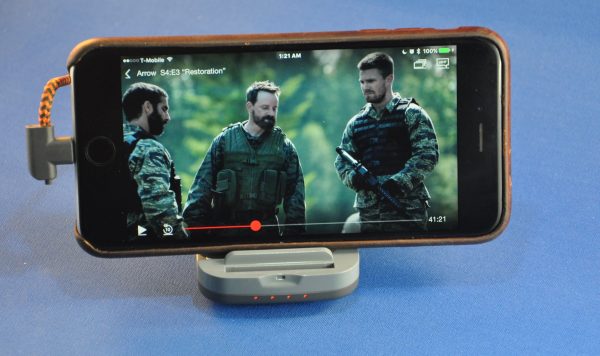
The lip that you raise to open the stand has a slight indent to get your finger under, as well as 4 orange LEDs to let you know charge level when you press the button. These do go out after a few seconds, but I tripped them on in order to show them as well as the battery connection (top right of the frame from “Arrow” below.)

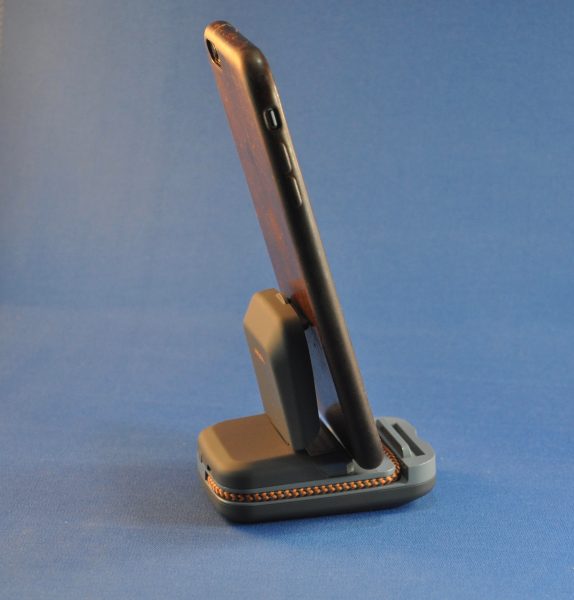
The Ventev can be a stand for devices in portrait or landscape mode. For Portrait mode, the lightning connector is slotted into the base, and hinges back and forth, depending on the angle of your device.

For landscape orientation, the charging tip can be released from the base and attached to your iOS device on either side via a flexible, braided cable. This works for all sizes of iPhones and iPods touch, but iPads are too large and tend to topple over.

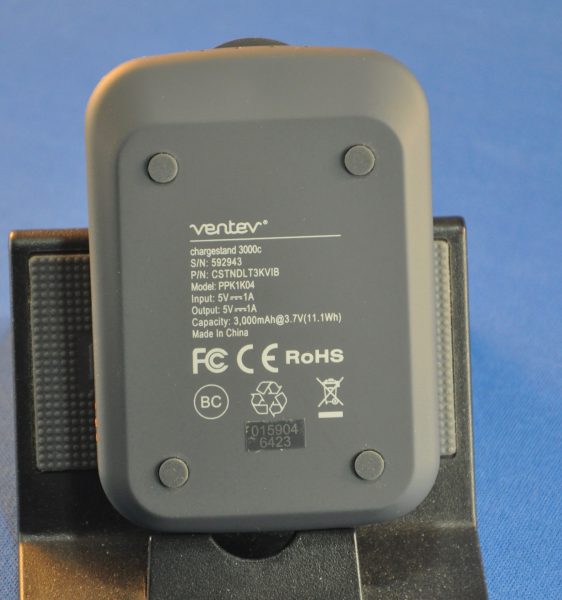
At 3.5 oz, it’s not weighty enough to hold down a full-sized iPad. The iPad mini works OK, but I would make sure and have plenty of room on the table around the stand, in case it falls over. In landscape mode, the iPad mini doesn’t quite connect. At 3000 mAh, it s not going to keep your phone charged during a weekend camping trip, but it is good for one full charge to my iPhone 6s Plus, which has a 2750 mAh battery. (Interesting discussion of power banks and their charging abilities here.)


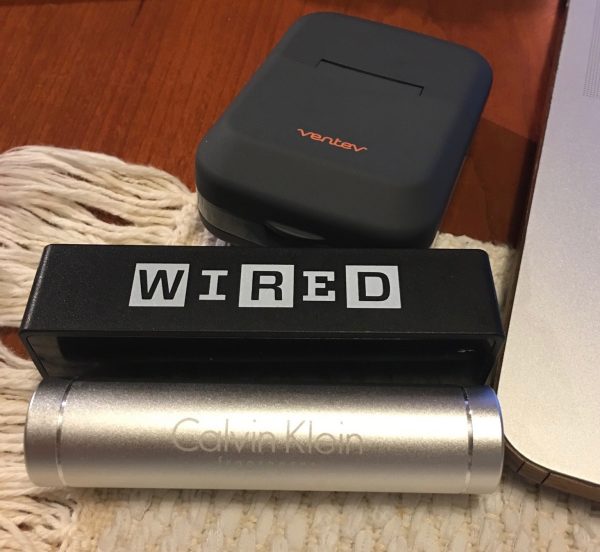
I’ve got a drawer full of batteries that will give me an “iPhoneful” of charge, but none of them have the flexibility of a stand with a cable attached. Many of those other batteries have been give-aways from everything from Wired Magazine to Calvin Klein Fragrances. (What can I say, I worked retail last holiday season!). Of course, more than a few of those don’t give a full charge, even though they are rated for it. For the $43.88 price, even with the stand and captive cable, though, I’m not sure I would buy the Ventev Chargestand. I don’t consider 3000 mAh enough to be table stakes in 2017. Better to pay a little more and get a lot more potential energy in my pocket.

Source: The sample for this review was provided by Ventev. Please visit their site for more info and Amazon to order.


Product Information

Price: $43.88
Manufacturer: Ventev
Retailer: Amazon
Requirements:
  • USB power supply to charge battery
Pros:
  • Small, light, and a decent stand.
  • Innovative design with captive cable and stand.
Cons:
  • Too light for many iOS devices.
  • Battery far to small for the price.

Filed in categories: Reviews

Tagged: ,

Ventev Chargestand backup battery and device stand review originally appeared on on June 16, 2017 at 10:00 am.

Note: If you are subscribed to this feed through FeedBurner, please switch to our native feed URL http://the-gadgeteer.com/feed/ in order to ensure continuous delivery.

myCharge HubPlus C portable charger review


You can never have too many portable chargers in my opinion.  I have them everywhere, at my house, my office, and my car.  I also give them as gifts to my friends and family, and I have reviewed many of them here at the Gadgeteer.  So I am always on the lookout for new features in chargers that I haven’t seen before, and the myCharge HubPlus C portable charger brings new features to the table.  Let’s find out what they are!

So let’s start with the specs and product features from the manufacturer:

Battery: 6700mAh Lithium Ion

Product Dimensions: 4 in x 2.5 in x 0.9 in

Product Weight: 0.43 lbs.

Output: 18W

Smart-sense: ensures complete device compatibility

Hyper-charge: ultra-fast charging of your devices; up to 65% faster than competitors with Qualcomm Quick charge 3.0

Devices compatible with quick charge: Google Pixel, Samsung S8, Type C Smartphones

Power-stay: maintains battery power for up to 1 year

Max-power: maximum power transfer from power bank to device

High-density battery: the smallest and lightest power bank

Safe-cell: provides the highest level of battery safety

Rapid-recharge: power bank recharges up to 50% faster than competitors

Pass Through Charging: will charge the power bank and connected device simultaneously

What I liked

The myCharge HubPlus C is easy to hold with one side nicely curved. It has 2 built-in cables (micro-USB and USB-C) that fold-out when in use and tuck neatly into the side of the HubPlus C when you don’t need them, so you never have to carry your cable with you.  And it has a built-in fold-out power plug so all you have to do to charge it is fold-out the plug and insert it into the nearest wall socket.  And it also has a standard USB-A port to charge any USB device you want.

The HubPlus C also has pass-through charging, which means it can be plugged up to the wall to charge and then you can plug up your device to the HubPlus C to charge your device at the same time.  That isn’t the case with most portable chargers, so that is a definite advantage.  It also automatically turns on when you plug up your device to the HubPlus C so you don’t have to press the power button on the side.  In fact, the only use I can find for that button is to see the 4 status lights on the side that display how much charge is left inside.

The capacity of 6,700mAh means that I can fully charge my Samsung Galaxy S6 Edge+ twice with just a little bit left over.  I have other chargers that are about the same size as the HubPlus C that have much higher capacities, so it would be nice if the HubPlus gave me a few more charges with all the other great features it comes with.

Left: compared to my Galaxy S6 Edge+ Right: the HubPlus C is quite thick.

The downside

Although the HubPlus C has Quick charge 3.0 from Qualcomm, there are only certain devices that can utilize it. So my Galaxy S6 Edge+ doesn’t use the Quick charge feature.  It does charge pretty fast, no doubt, but I don’t get true Quick charge with my phone.  Also, when you charge multiple devices at the same time, the 18 amps output is divided up pretty quickly and you pretty much get standard charging rates.

I also don’t like that the cables are so short.  I mean, one of the great features of the HubPlus is that the cables are built-in.  But that is also a detriment because if you want to take a call while your phone is charging, you have to awkwardly hold both of them up to your head.  And if you want to plug up the HubPlus C to the wall outlet and charge your phone at the same time, you could find your phone dangling from the wall and the cables awkwardly twisted.

Bottom line

The HubPlus C is portable, the built-in cables and power plug are convenient, and the Quick charge is great for those who can take advantage of it.  The HubPlus C is worth the price of $79.95 in my opinion, despite the downsides that I listed.  I can live with those because the HubPlus C is a quality product that has enough features to make just about anybody happy.

Source: The sample for this review was provided by myCharge. Please visit their site for more info and check their offerings on Amazon.


Product Information

Price: $79.95
Manufacturer: myCharge
Retailer: Amazon
Pros:
  • Built-in cables
  • Small and portable
  • Built-in wall-prong
  • Pass-through charging
Cons:
  • Small capacity
  • Short cables
  • Only rapid charges certain devices

Filed in categories: Reviews

Tagged:

myCharge HubPlus C portable charger review originally appeared on on June 14, 2017 at 7:04 am.

Note: If you are subscribed to this feed through FeedBurner, please switch to our native feed URL http://the-gadgeteer.com/feed/ in order to ensure continuous delivery.