Things to think about before you buy a wireless HD antenna so you can “cut the cord”

ARTICLE – There seems to be a lot of interest lately in those little indoor, plastic-panel wireless HD antennas.  People want to drop cable and find a cheaper way to watch TV programming.  Those indoor, omni-directional antennas seem like just the answer, especially when some of them promise things like how you can still watch the top 25 shows using their antenna and make it sound as if you’ll receive dozens and dozens of channels.  I’m not saying all HD antenna manufacturers do that, but some do make it sound as if you’ll still be able to see everything with their antenna that you can see with cable.  This is NOT true.

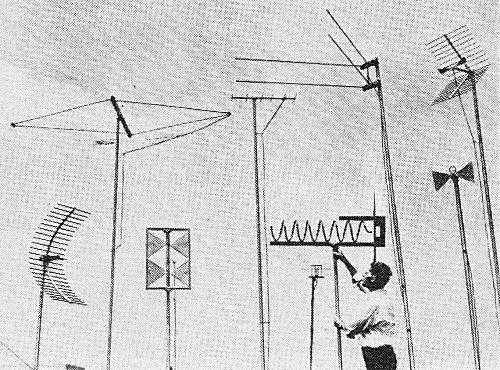
Some of you are too young to remember the dark ages when there were basically only three channels – ABC, CBS, and NBC.  Every house had an antenna attached to their TV, either a set of rabbit ears or a big antenna attached to the top of the house, like in the above image.  When you changed from one station to another, you’d probably have to get up and adjust the orientation of the antenna to better receive signals from the new station.  You see, all TV stations broadcasted their signals through the air for free, and your metal antennas could pull those signals out of the air and send them to your TV set.

I mentioned that there were basically three networks back then, but that didn’t mean you could see all three of those stations at your house.  TV signals were sent out relatively low to the ground.  They were low enough to the ground that the terrain in your area – and even the curvature of the earth – could block signals from getting to your antenna.  If you lived in a valley or at the base of a mountainous area, there were probably TV stations that you couldn’t receive.  If there was a city with big buildings between you and the station, signals could be blocked.  If you lived too far away from one of the stations, the signals could be so weakened by the distance traveled to get to you that you couldn’t watch that station either.  And even bad weather could cause interference and disrupt your viewing experience.  It’s a good thing that over-the-air TV signals were free, because you certainly couldn’t count on getting a clear picture in your home.

It was because of these problems that cable companies were created.  Some of the first ones were simply a group of neighbors putting a big antenna up in a high place and running cables down to the neighborhood to share the signal.  Things started to get more involved when amplifiers were added to the cable to boost the signals to make sure all the houses got a good signal.  Then eventually companies started offering their services to get a usable signal to you.  Paying for cable service was so much better than having to deal with antennas that it became the norm for many, and people started to forget that they once were able to watch some programming for free.

As you know, cable companies now offer far more channels than those three networks mentioned earlier.  Companies like HBO, Showtime, and all those hundreds of other services sprang up, but they don’t transmit their signals for free.  They protect their signals so that no one can watch their programming without paying for it, and they certainly don’t sent it out over the air in a method that any home antenna can receive it for free.

Those over-the-air signals that used to be the only way to receive TV programming are still there.  Those same big networks, like ABC, CBS, NBC, Fox, and The CW, still have their signals broadcast over-the-air for free by their local affiliates.  There are probably various other little local stations that broadcast in your area, too.  These are the kind of stations that you might be able to receive in your area using one of those little plastic-panel antennas.  I say “might be able to receive” because all of those problems inherent with broadcasting over the air still exist and still impact what you’ll be able to receive with those little indoor antennas.  A few things have changed since then.  The signals they broadcast are now HD instead of analog, so you might expect a clearer, sharper picture than back in the day, but you can still expect the same interferences mentioned above.

A few years ago, I reviewed the WallTenna Indoor Omni-Directional Antenna to review.  I received a lot of information from the WallTenna company about how over-the-air signals worked.  Instead of re-inventing the wheel, I’m just going to quote from that old review here.  Even though I talk about the WallTenna, most of the following information about antenna abilities and limitations will apply to any of these little plastic, indoor antenna.

Snowdon Parlette, the owner of WallTenna, was inspired to design the antenna while living in New York City.  After he got a beautiful new HD flatscreen, he realized that his old rabbit ears just weren’t up to the challenge of receiving digital signals.  With the old analog signals, indoor antennas could pull in distant signals that were fuzzy but were almost clear enough to watch.  Digital signals are an all-or-nothing proposition – antennas just don’t pick up weak signals at all.  He exhausted all commercial digital antenna options without finding anything to suit his needs, so he set about designing the WallTenna.

The WallTenna is designed to receive the free, over-the-air (OTA) digital TV signals that are available in the US.  If your TV was sold after May 25, 2007, it is has a built-in ATSC digital tuner, and you won’t need anything other than the WallTenna and its cable to receive these OTA signals.  If your TV was sold before that date, you’ll need a converter box.

These free OTA signals are digital, but not all are high-definition.  Digital signals, even the standard-def ones, are all much clearer than the old analog signals that used to be the standard for television transmission.  Most stations transmitted in the VHF (very-high frequency) range before the digital switchover, and a few channels used the UHF (ultra-high frequency) range.  Rabbit ears antennas were designed to pick up the VHF signals.  As analog stations began to use UHF frequencies, a loop was added to the base of the rabbit ears for better reception in this range.  With the digital switchover, about 75% of stations switched to UHF frequencies.  Although there’s really not an “HDTV antenna,” those optimized for UHF will work better for receiving digital transmissions.  The WallTenna, like most indoor antennas, can receive signals from transmitters up to 30 miles away.  Of course, hills or mountainous terrain can interfere with reception, as can trees, buildings, and other structures.

Digital OTA signals can transmit in full 1080 HD tv.  With a good antenna, you should be able to receive TV signals that rival or exceed the clarity of cable signals.  WallTenna tells us “at best, cable can only match the quality of the free broadcast signal. All cable companies compress their HD signals in order to fit in the hundred-odd junk channels included in their packages. The result is a degraded signal that is usually inferior to OTA broadcast.”

WallTenna directed me to the TV Fool website where I learned what OTA channels I should be able to receive for my address.  They go into far more detail than I can understand – or care to.  Suffice it to say, you enter your street address and TV Fool gives you a list of local broadcasters, their distance from you, the direction you should point your antenna to best receive their signals, and the strength of their signals at your location.

Above is the report I received for my street address.  The stations shown with a green background should be available with an indoor set-top antenna.  Yellow means an attic-mounted antenna would probably be required for reception, red means a roof-top antenna is probably required, and gray means the signals are so weak at my location that extreme measures are required for reception.  The bullseye diagram shows where the stations are in relation to my house so that I know which direction to point an antenna to receive the strongest signal.  The WallTenna is omni-directional, so I won’t have to worry about reorienting the antenna each time I change the station.  According to the report, I should get ABC, CBS, CW, Fox, Ion and a couple of other stations, but NBC is probably out of range.

When I reviewed the WallTenna, the FCC still allowed over-the-air analog broadcasting, so I may have been able to receive a few more stations then than I could receive now.  I was able to receive the stations the TV Fool report showed that I should be able to receive.  They were the networks and some local broadcasters, but they weren’t any of the premium cable stations.

Before you decide to purchase any indoor antenna, I suggest that you first go to the TV Fool website and see what you might be able to receive at your home address.  And before you decide to purchase multiple antennas to outfit every TV in your house, first just purchase one to see how it works for you.  And be aware that you’ll need to pay for a streaming service or buy DVDs if you want to watch programming from HBO and other premium cable services.

The post Things to think about before you buy a wireless HD antenna so you can “cut the cord” appeared first on The Gadgeteer.

Filed in categories: Articles

Tagged:

Things to think about before you buy a wireless HD antenna so you can “cut the cord” originally appeared on The Gadgeteer on July 8, 2018 at 11:00 am.

Note: If you are subscribed to this feed through FeedBurner, please switch to our native feed URL http://the-gadgeteer.com/feed/ in order to ensure continuous delivery.

Julie’s gadget diary – I’m still MacBook-less

Last week I told you that my 12-inch MacBook had to be admitted into the hospital to get its keyboard fixed. It’s been at the MacExperience store in Bloomington, IN since Saturday. They told me that the turn around time would be 3-5 business days. With the July 4th holiday yesterday, I’ve been a little worried that I wouldn’t be fixed in time for me to pick it up this coming Saturday. That fear is getting worse since I just received an automated email telling me that my MacBook is only just now going through the diagnosis stage. Ugh 🙁

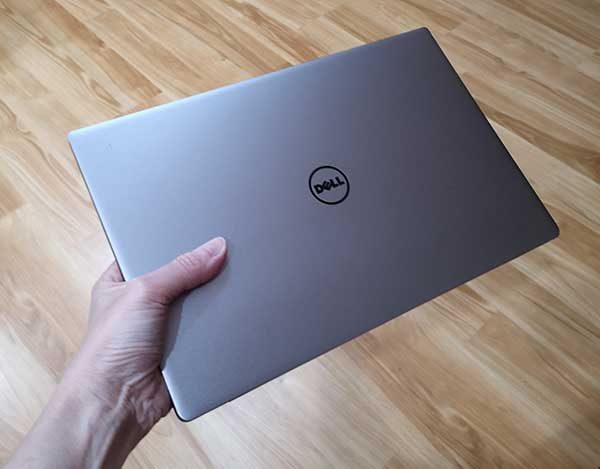
It’s not like I don’t have another laptop to use right now, because I do. I have a 3yr old Dell XPS 13-inch laptop which is allowing me to get my Gadgeteer work done just fine. As I had said in my first article. Besides Photoshop and Todoist which I’ve been testing, most of my Gadgeteer work is done in a browser, so it really doesn’t matter that much what type of computer I use. But one app that I immediately felt lost without was TypeIt4Me. TypeIt4Me is a text expander tool that saves me a crazy amount of time by letting me create text macros that get expanded when I type something like !sig and it immediately expands to:

Thank you,
Julie Strietelmeier
https://the-gadgeteer.com

I ended up installing a similar program for Windows called AutoHotKey that works just like TypeIt4Me but it requires that you edit a text file to add all the text macros. But it’s free, so I won’t complain.

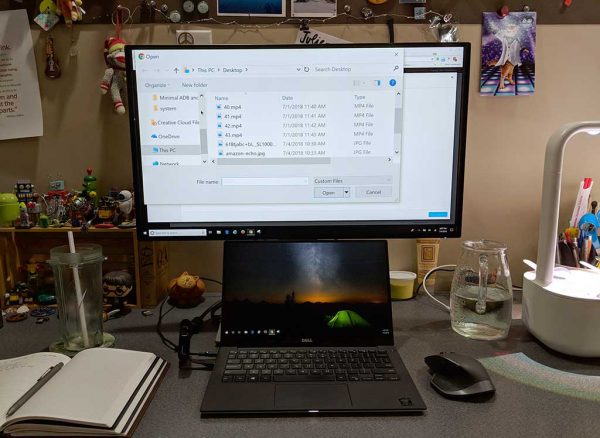
I’m also getting used to dealing with weird little Windows 10 glitches and idiocracies like when I open a file manager window from some apps and it’s magnified about 10x too big on the 27-inch BenQ monitor that I have the XPS connected to, but in other apps it’s just fine.

I’ll admit that my eyesight isn’t what it used to be, but come on, this is a little ridiculous don’t you think?

Then there’s the weird sound that I kept hearing the other day and finally figured out that it was coming from the XPS. I recorded it for you. Take a listen but be sure to turn up your volume:

I think the noise is some type of interference and not the built-in fan because when the fan does run, it’s much more noticeable. Which reminds me that I’m not a fan of laptop’s with fans because I like quiet and lots of it.

Am I nitpicking and whining for no real reason? Yes, most definitely. I am thankful that I have another computer to use while my daily driver is in the shop. But that said, this little vacation from macOS has made me realize that I do prefer it to Windows 10. I’m not saying that to start an OS war, but honestly, I just like my little 12-inch MacBook with macOS better than the 13-inch Dell XPS with the latest version of Windows 10. It even feels faster to me.

It looks like I’m going to have to just suck it up though because I think I’m going to be using the Dell for another week. <sniff>

The post Julie’s gadget diary – I’m still MacBook-less appeared first on The Gadgeteer.

Filed in categories: Articles

Tagged:

Julie’s gadget diary – I’m still MacBook-less originally appeared on The Gadgeteer on July 5, 2018 at 5:20 pm.

Note: If you are subscribed to this feed through FeedBurner, please switch to our native feed URL http://the-gadgeteer.com/feed/ in order to ensure continuous delivery.
Julie’s gadget diary – My MacBook has to go to the hospital

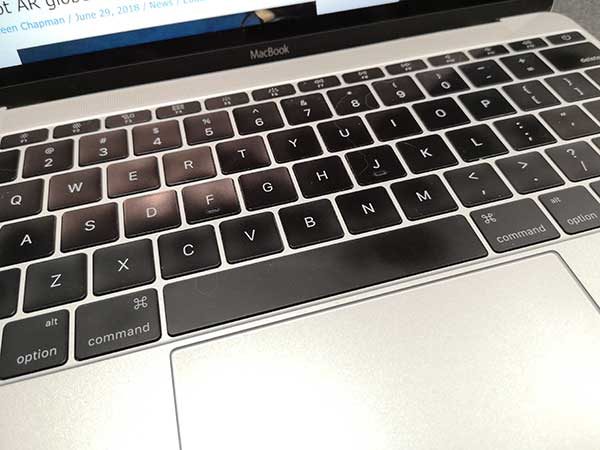
ARTICLE – Sadly, my 12-inch MacBook is sick and needs surgery. It’s suffering from a debilitating SKD (Stuck Key Disease). Yes, it’s one of the 1000’s, maybe millions of Apple MacBooks with the newer generation keyboards that are obviously flawed due to their thinner mechanisms that are susceptible to breakage.

I’ve been dealing with a sticky spacebar for many months, but recently my delete key started exhibiting the same behavior. It’s annoying when you’re a fast touch typist like myself and have to stop in mid-sentence to back up (when the delete key works) to add a space between words.

Our own Dave Rees had his own 12-inch MacBook keyboard replaced a couple months ago. His was under AppleCare though. I bought my MacBook as a refurb and didn’t buy the AC. A repair without AC was priced around $600 and I didn’t want to shell out that kind of money to fix a 2016 MacBook who’s battery capacity is starting to show signs of aging.

I decided that I could live with my come and go sticky spacebar issues until I decided that it was time to upgrade to a new laptop. But then the delete key problems started and I feared I would need to upgrade sooner rather than later. But then, Apple caved in to the pressure of a class action lawsuit last week and owned up to the problem and began offering free keyboard repairs and refunds to people who had paid to have theirs fixed. Lucky me!

Since the closest Apple store is about 70 miles away, I’m taking my MacBook to an authorized repair store in Bloomington, IN tomorrow and will leave it there for the week and return the following Saturday to pick it up. That means I’ll be without a laptop for Gadgeteer writing for the next 7 days. How will I survive? I plan to use my HUAWEI MediaPad M5 Android tablet for casual tasks like checking my email, approving site comments, and reading my news feeds. But for real work, I’ve busted out my 3-year-old Dell XPS 13.

I rarely use this laptop, so I took it with me to work today to install all the updates (there was at least a dozen!) so it would be ready to go tomorrow once I turned my MacBook over to the doctors at the MacExperience store.

I used it a little bit today and was surprised by how nice the keyboard felt compared to what I’ve been living with lately. Even the trackpad which gave me troubles back when I was first reviewing this laptop felt fine to me.

Of course, this is a Windows 10 laptop and even though I use a Windows 8 laptop all day long at my day job, I have been firmly planted in the macOS camp when it comes to my Gadgeteer/home use computing. So I think this will be a fun trial by fire experiment for the next 7 days and it might even make me seriously consider switching back to a Windows laptop when it comes time for me to buy my next computer.

I’ll be sure to let you all know how things are going in a few days. And please send get well thoughts to my MacBook 🙂

The post Julie’s gadget diary – My MacBook has to go to the hospital appeared first on The Gadgeteer.

Filed in categories: Articles

Tagged: ,

Julie’s gadget diary – My MacBook has to go to the hospital originally appeared on The Gadgeteer on June 29, 2018 at 5:25 pm.

Note: If you are subscribed to this feed through FeedBurner, please switch to our native feed URL http://the-gadgeteer.com/feed/ in order to ensure continuous delivery.

Julie’s gadget diary – 5 lessons I learned from my last vacation


I recently returned from an epic vacation to California where Jeanne and I explored 3 different locations over the course of 7 days.  As with most trips, I always struggle with the gear that I want to take with me. I am a minimalist at heart, so I like to pack the least amount of items while getting the greatest benefit from their usefulness. My biggest gear decisions for this trip were whether I wanted to take my 12-inch MacBook or my Samsung Galaxy Tab 3 Android tablet and if I wanted to splurge and buy a small camera just for the trip.

Time to pack the gadgets

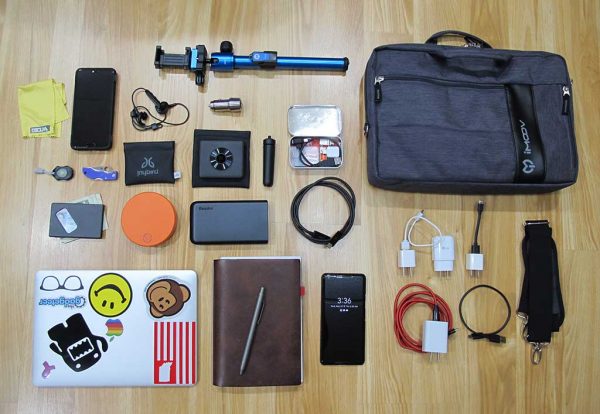
In the image above, you can see the tech that I took with me on this trip. Here is the list of items:

12-inch MacBook
Pixel 2 XL
Huawei P20 smartphone
Xaiomi Mi Sphere Camera
Skyroam SOLIS 4G LTE Global WiFi hotspot
Identity wallet
Selfie stick portion of the MeFoto Backpacker Air tripod
Jaybird Freedom 2 Bluetooth earbuds
EasyAcc MegaCharge Doubin 16750mAh USB-C Power Bank
X47 journal
Big Idea Design Ti Click Classic pen
Altoids tin with small cables, adapters, and thingamabobs
Lens cleaning cloth
Photon X-Light Macro flashlight
Spyderco Ladybug pocket knife
ThanoTech stainless steel USB car charger
Various cables and AC chargers
Generic shoulder bag

Other items that I packed but weren’t included in the photo above include:

SCOTTeVEST Hoodie Cotton jacket
Showers Pass Trailhead Bamboo-Merino Wool hoodie
Duluth Trading Company firehose cargo pants

Every time I go on a vacation, I revisit the idea of only taking a tablet and then every year that I do that, I complain that the experience was painful because I wasn’t able to get work done on the tablet as easily as I can on the MacBook. I’m happy to report that I saved myself that headache this year and decided to take the MacBook. In the end, the 12-inch MacBook takes up less space than a 10-inch tablet, a Bluetooth keyboard, and a Bluetooth mouse. Also, I didn’t need to take the dedicated Apple power adapter because the MacBook uses USB-C, so I was able to use the same charger for it as I used for my phones.

I mentioned that I also toyed with the idea of purchasing a camera just for the trip because I knew we’d be having some excellent scenic photo opportunities. In the end, I decided NOT to buy a new camera because again I’m a minimalist… Also, I was packing the Huawei P20 smartphone that I was in the process of reviewing and the Xaiomi Mi Sphere 360-degree camera along with my Pixel 2 XL. So 3 cameras would be plenty right? Hmmmm, I think maybe my definition of minimalism is flawed 😉

California here we come!

The trip started with us flying from Indianapolis to Dallas and then from Dallas Texas to Fresno California. During that leg of the trip, I used my Pixel to surf, keep up with emails, read news feeds, and read a few pages here and there on the book I’m currently reading (Chaser by John W. Pilley). I also ended up using the EasyAcc power bank while waiting in the Dallas airport for our connecting flight because all the outlets and charging stations at our gate were already being used by other people. I think this might be the first time that I’ve actually used a power bank for real-world use instead of just testing it for a review. It worked out great and allowed me to easily top off my Pixel’s battery before and during a couple of our flights.

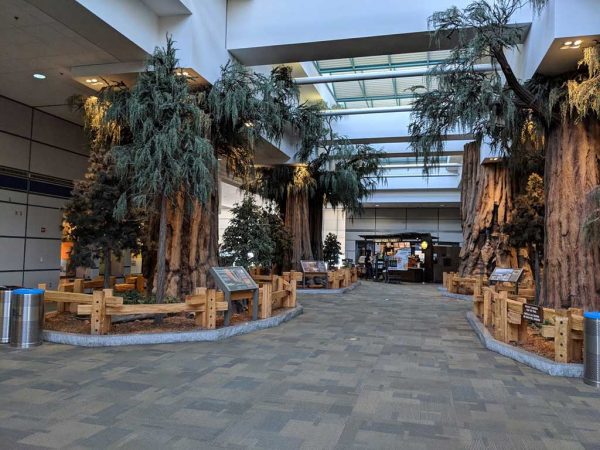
When we landed in Fresno, we were greeted by a display that reminded us why we were there in the first place. Giant Sequoia trees! So we grabbed our bags, got a rental car, plugged in the ThanoTech car charger and used my Pixel 2 XL to navigate us to King’s Canyon National Park and the John Muir Lodge where we would be staying.

Lesson 1 – Offline Google Maps are your friend

Make sure you download your Google Map trip navigation info on your phone before you get into the middle of the drive to your destination. I already knew that cell coverage was going to be pretty much non-existent inside the King’s Canyon National Park, but it was also spotty on the drive from Fresno to the King’s Canyon National Park. That’s why I was really glad that I had planned ahead and had set up Google Maps on my phone with an offline map/directions from the airport to the park and also from the park to our second destination.

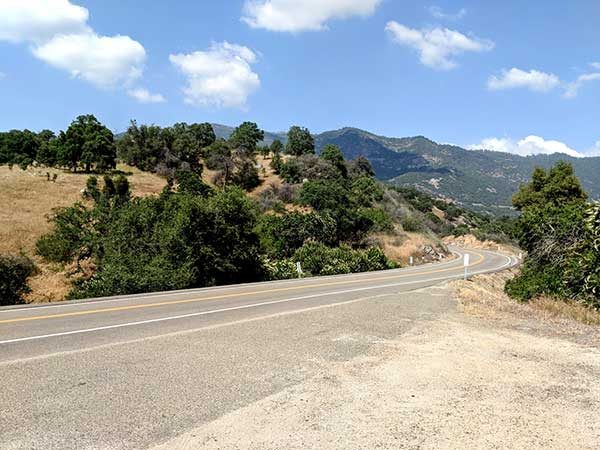
The drive from the Fresno airport to King’s Canyon National Park inside the Sequoia National Forest was our first taste of California and it didn’t disappoint.


Jeanne who loves plants and flowers kept wanting to stop at every turnout (wide gravel berms on the side of the highway where you can pull over so faster drivers can go by) so she could see and photograph various wildflowers that we don’t see in Indiana.

The scenery changed dramatically from what looked and felt like a desert landscape into a fairy tale world as soon as reached the Sequoia National Forest.

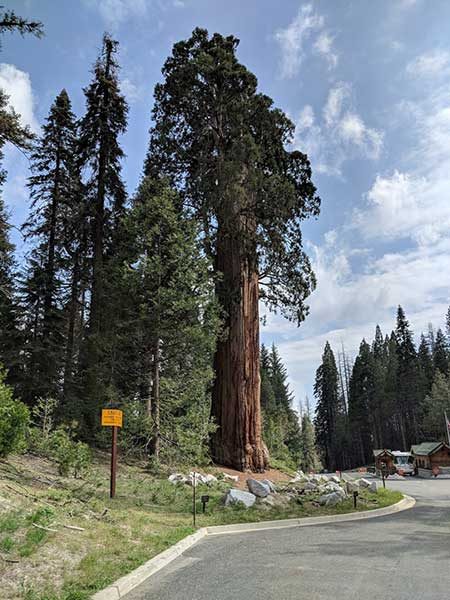
This was our first look at one of the giant sequoia trees as we drove into the King’s Canyon National Park which is inside Sequoia National Forest. We were impressed and had to get out and snap a few pictures. We would soon come to learn that this one was just a ‘baby’ compared to others we’d see the following day.

We checked into our room at the John Muir Lodge and then had a quick dinner at the lodge restaurant where they had free (although insanely slow) WiFi. Afterward, we went back to our room where I promptly crashed due to not sleeping at all the night before in the hotel where we had stayed near the Indianapolis airport so that we wouldn’t have to get up so early to drive from Columbus to Indy for our 8am flight to Fresno, CA. I ended up sleeping from 6pm to about 8am the next morning. I guess I was tired and the time difference from EST to PST caught me.

When we got up that next morning I checked again to see if I had any T-mobile coverage and nope, nothing. Then I checked to see if there was open WiFi in the room. Nope. Then just for kicks, I tried the Skyroam 4G WiFi hotspot. Again nothing. I wasn’t surprised though as I already knew I was going to be off the grid during the first part of our vacation. I’d already prepared to be incommunicado by scheduling Gadgeteer news and reviews posts for several days in advance and I surrendered to the fact that I would be able to catch up on emails once we made our way over to the coast to our final vacation destination in Carmel.

What I hadn’t completely prepared for was just how freaking cold it was in King’s Canyon National Park. We had checked the weather for King’s Canyon when we were packing before we left Indiana and thought the forecast was screwy because it had shown temps in the 30’s and 40’s. We figured it was showing the forecast for farther up in the mountains or something. But when I checked out on the porch outside our room at the lodge that morning, I was pretty surprised by how cold it was. But it wasn’t just cold, it was also foggy and drizzling. Luckily, we’d each brought sweatshirts, along with t-shirts and a jacket.

Lesson 2 – I still love my SCOTTeVEST Hoodie

When we were packing for the trip, I had originally decided to take the BauBax Women’s Sweatshirt jacket because I’d just posted my review but hadn’t actually put it through any real-world travel scenarios and wanted to do so for a later review update. But in the end, I changing my mind and packed the SCOTTeVEST Hoodie Cotton Jacket because I just like the SeV jacket better.

I’m glad I did make the swap because the SeV jacket is a heavier weight and kept me warmer than the BauBax would have been able to do. The SeV jacket also has a better layout of pockets that were perfect for 2 phones and the Xiaomi camera that I carried with me every day while on the trip.

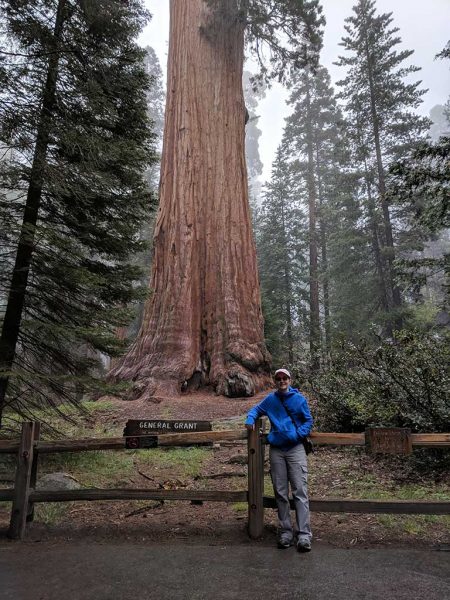
That first day we walked around looking at some of the trees in King’s Canyon near the John Muir Lodge where we were staying. But the weather was so bad and it was so foggy that we packed it in earlier than anticipated and drove to our 2nd destination which was Three Rivers.

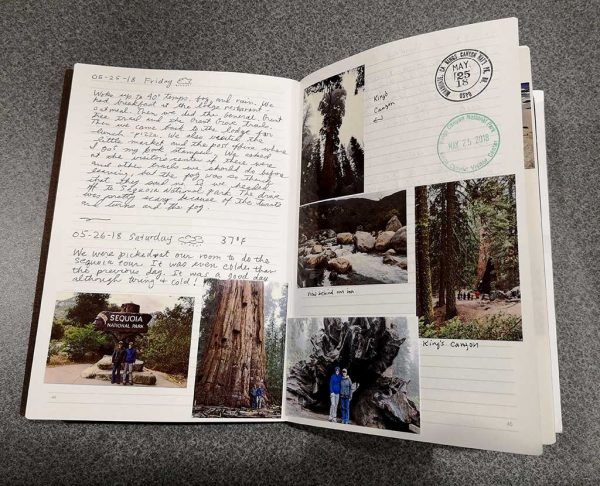
But before we left King’s Canyon National Park, I got my journal stamped. One stamp was a postmark from the tiny post office near the lodge and the other one was from the park visitor center. And that’s one reason why I still love my paper journals. I like collecting little mementos to tape, or glue in my journal so I can flip back and remember the fun we had and things we did and saw.

Lesson 3 – Don’t forget the panorama mode on your camera

The panorama mode on my smartphone’s camera isn’t normally something I think about using on a daily basis. But on this vacation, it was the perfect way to capture pictures of the giant sequoia trees and other landscape shots. Here are some examples which you can click if you want to see the full-sized image.


Panoramic images aren’t perfect. They often have a fisheye or warped appearance like the giant sequoia images above. But I still think they are cool because you can get all of your subject in one photo where it would otherwise only show a small portion of it.

It’s also amazing how many people don’t know about this feature. When we were on a tour of the Sequoia National Park, one of the other people with our group asked what I was doing when I was taking panos of the trees. When I showed her how to do it with her iPhone, she was overjoyed to learn that she could do that.

Lesson 4 – I didn’t have access to the internet for almost 3 full days and I survived!

When we were staying in Three Rivers, our room at the Gateway Inn had internet, so I was able to check my email and surf when we were there in the room – which was only in the morning and evening since the other part of the day we were in the park which has zero internet/cell coverage.

Before the trip, I was a little anxious about not being able to keep up on my email, news feeds, and Gadgeteer stuff. But once I gave in to the fact that I wouldn’t have control over that part of the trip, I stayed calm and carried on. It was actually pretty liberating. For someone who likes to stay connected and on top of things, this was a big accomplishment for me and I am glad that the trip worked out the way it did because now I know that taking a break from the digital world is not going to kill me. 🙂

Lesson 5 – My 12-inch MacBook is a great travel computer but for my next trip I may go with a tablet or nothing at all

Shocking right? But seriously, now that I’ve survived without working for a week, I’m going to look forward to doing that more often. Of course, it did take some preparation beforehand. I had to schedule news and review posts to publish days in advance and I had Janet take over comment moderation and take the wheel while I was away.

I also used the Newton Mail client on my phone when I needed to file emails and the Gmail app with the canned reply feature for quick responses. These two tools helped me to keep my inbox clean, which is important to me so I don’t get that I’m never going to catch up feeling that can happen when there are dozens of messages awaiting a reply.

Our next vacation is this fall when we’ll go to Sanibel Island, Florida. I’m seriously considering just taking a tablet this time. No, I’m not going to try to make it bend to my will and become a laptop. I won’t even take a Bluetooth keyboard with me. I’d just use it for surfing and a few games when the mood strikes. With Newton Mail and Gmail, I can keep my inbox clean and as for working on Gadgeteer reviews and articles, I now know that I can relax and take a vacation.

The post Julie’s gadget diary – 5 lessons I learned from my last vacation appeared first on The Gadgeteer.

Filed in categories: Articles

Tagged: ,

Julie’s gadget diary – 5 lessons I learned from my last vacation originally appeared on The Gadgeteer on June 22, 2018 at 5:09 pm.

Note: If you are subscribed to this feed through FeedBurner, please switch to our native feed URL http://the-gadgeteer.com/feed/ in order to ensure continuous delivery.
My first experiences with the Nest Temperature Sensor

My condo is a rectangle, with the HVAC unit and thermostat at one end and the bedrooms at the opposite end of the condo on the long axis.  The air flows out and has a straight path to the living and dining room areas, but it has a 90° turn to the hallway towards the bedrooms and another 90° turn back to the office.  This means the living/dining areas are freezing in the summer / hot in the winter and the bedrooms and office are uncomfortably warm in summer /cold in winter.  We replaced our ancient HVAC unit last summer, which did greatly improve the amount of air flowing to the bedrooms, but they are still too warm this summer.  When the HVAC unit was replaced, we had a Nest Learning Thermostat installed.  This made it easier to adjust the thermostat settings without having to get up in the middle of the night, but the Nest alone couldn’t make our bedrooms more comfortable.  That’s why I was so interested to learn about Nest’s Temperature Sensor.

The Sensor works with the Nest thermostat to send information about the “local” temperature to the Nest.  The Nest app can then prioritize that sensor temperature to control the behavior of the HVAC unit if desired.  I purchased a Sensor from my local Lowes and installed it in the master bedroom.  Adding the Sensor to the Nest system was easily accomplished by simply following the instructions included with the Sensor.

The Temperature Sensor is powered by a CR2 3V lithium battery (included); Nest says you’ll get up to two years from the battery.  It connects to your Nest thermostat (either the 3rd-gen Learning or the Thermostat E model) via Bluetooth Low Energy and can be placed up to 50 feet away from the thermostat.  This distance may vary depending on the construction of your home and sources of interference.  My Sensor connected to my 3rd-gen Learning thermostat with no problems.  I placed it on a wall close to the bed and out of the direct flow of air from the vent in the master bedroom.

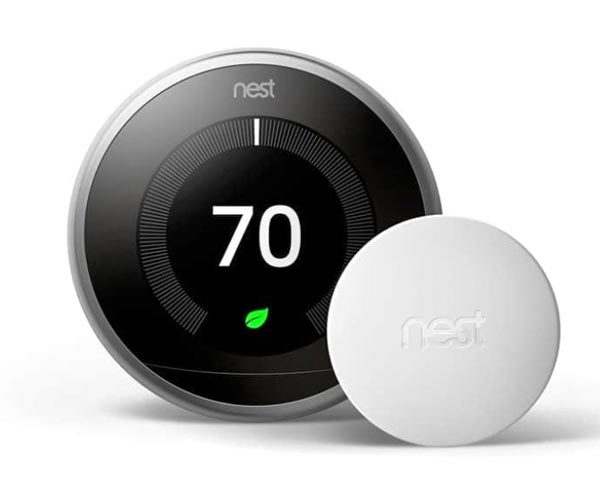
You can see the Sensor in the above image.  It’s a white plastic puck with a 1.9″ diameter and a 0.8″ thickness.  It comes with a special hanging screw to allow you to take it down to change the battery when needed.

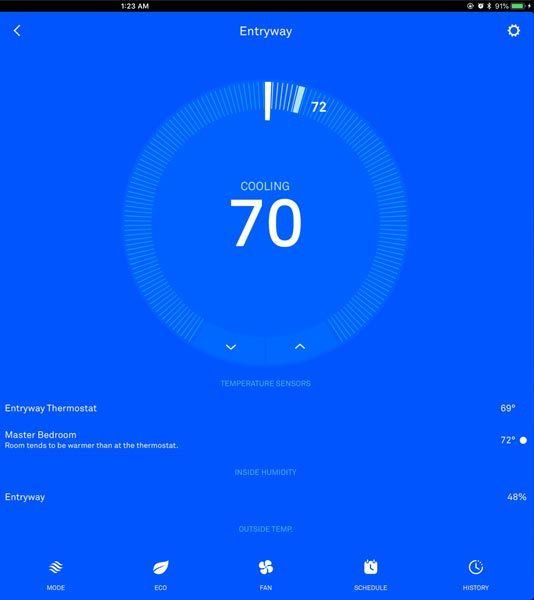
The Sensor shows up in the Nest app under the thermostat information.  If you aren’t familiar with the app, the circle shows the set point (longer white marker) and the current temperature (shorter blue line with the current temp shown beside it).  Under that, you’ll see the temperature measured by the thermostat and by the sensor.  The white dot beside the master bedroom temperature shows that I have manually selected that sensor to be prioritized by the thermostat.  You can see that the bedroom is still three degrees warmer than the dining room area with the thermostat.

However, I was able to increase my set point after I installed the Sensor.  I used to have the set point at 67° to try to get the bedrooms cooled down a bit.  The living and dining rooms would be uncomfortable to stay in without a blanket or sweater, and the bedrooms would still be uncomfortable for sleeping.  The bedroom used to be about 76° at the coolest.  Now that I have the Sensor controlling the HVAC unit, the bedroom is much more comfortable and the living and dining rooms are, too.

You can have 6 Nest Temperature Sensors supported per connected thermostat and up to 18 Nest Temperature Sensors supported per home.  With multiple sensors in your house, you can use the Nest app to schedule which Sensor will be prioritized during various hours during the day.  I don’t need a schedule, because I need the bedrooms always prioritized.  Since adding the sensor, I haven’t had to use a fan to make the room more livable.  This makes me very happy because I can’t stand the sound of the fan.  Having a cool bedroom to sleep in was well worth the cost of the sensor for me.

The Nest Temperature Sensor is $39.00, or you can purchase a three-pack for $99.00 from Nest and other retailers like Target.

Filed in categories: Articles

Tagged:

My first experiences with the Nest Temperature Sensor originally appeared on The Gadgeteer on June 15, 2018 at 11:00 am.

Note: If you are subscribed to this feed through FeedBurner, please switch to our native feed URL http://the-gadgeteer.com/feed/ in order to ensure continuous delivery.