Juku 3Doodler 3D printing pen review

REVIEW – The Juku is the newest 3D printing pen from the 3Doodler Create/Wobbleworks team. Their first pen launched back in Q1 of 2013 and was fully funded in a few hours. It was something unseen in the 3D printing space and enabled freehand creation and exploration without CAD. Fast forward to now and they’re at it again with a pen that feels infinitely more refined and professional. Let’s take a look.

What is it?

In short, the Juku is a handheld extruder. It’s a slightly crude analogy, but think glue gun, but with a fine tip and better aim. You can choose from a few different materials, lots of colors and let your imagination run wild.

What’s in the box?
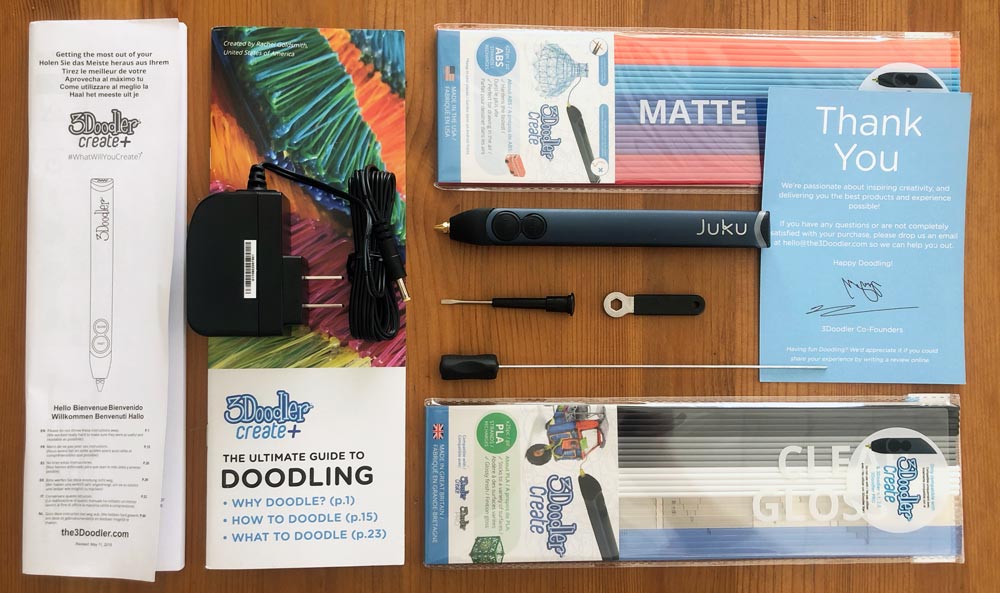
  • Juku Doodler
  • Power adapter
  • Tools: Mini Screwdriver, Mini Spanner, Unblocking Tool
  • Instruction Manual
  • Doodling Guide
  • ABS and PLA sample packs (25 strands each)

Hardware specs

Power Adapter Specs:
• Input 120-240v AC, 0.5A max, 50-60Hz
• Output+5v DC, 1.2A
• CE certification
Controls:
• Off, Lo, Hi switch for adjusting temperature/material choice
• Fast and slow buttons for adjusting feed speed
• Temperature adjuster for fine tune temp control
Additional:
• LED for communicating Doodler is ready to use
• Nozzle where material is extruded
• Maintenance cover for seeing what’s going on
• Drive gear which pushes material through the pen
• Control port

Design and features

To really appreciate the Juku it helps to take a look at the original 3Doodler first, so here’s a shot of them side by side. Their first pen was a full hand hold with larger fan to help keep things cool.
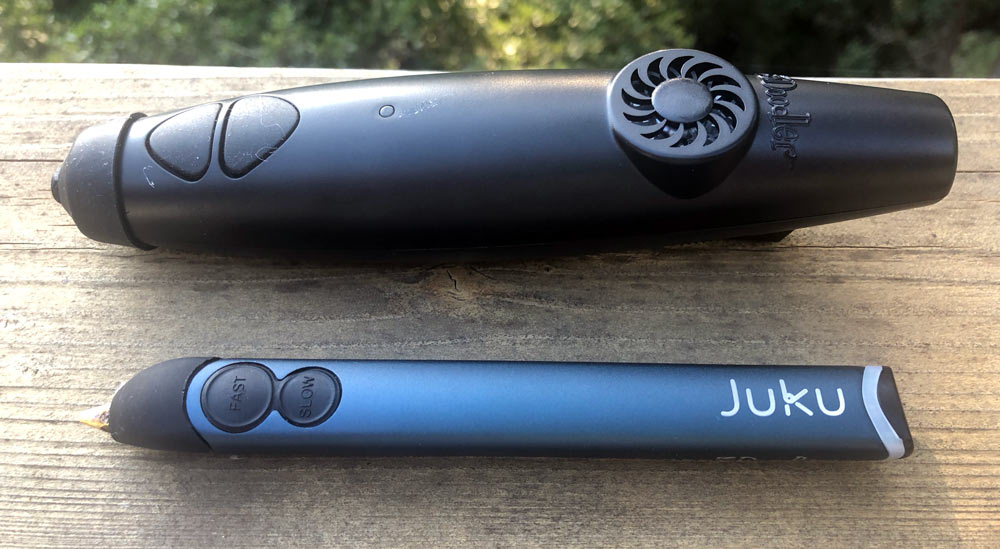
As you can see, the new Juku is significantly smaller with a trapezoidal shape that is much easier and very comfortable to hold.
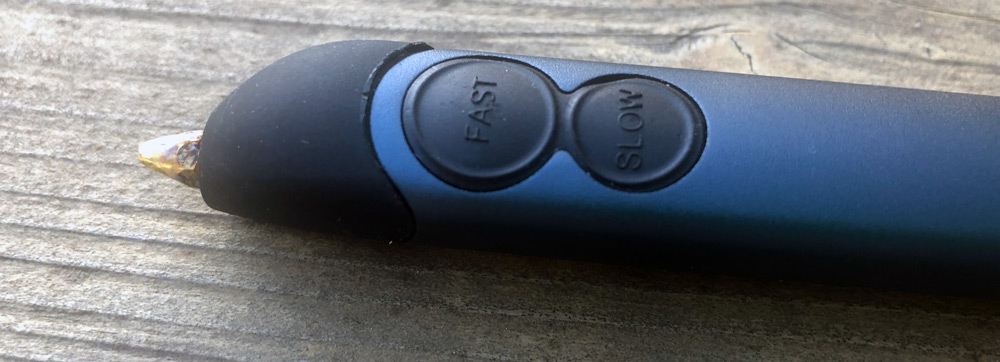
The fast and slow speed buttons are clearly labeled and easy to press, although the act of pressing can result in some wobble in your print.

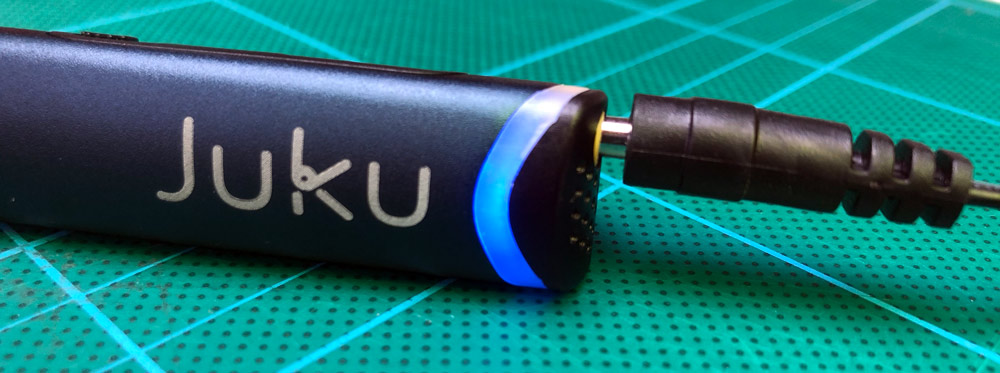
All your warnings, serials and CE markings are on the underside of the pen. The clear back end is the LED for ready status and the clear section toward the front is a maintenance cover that exposes the inner workings.
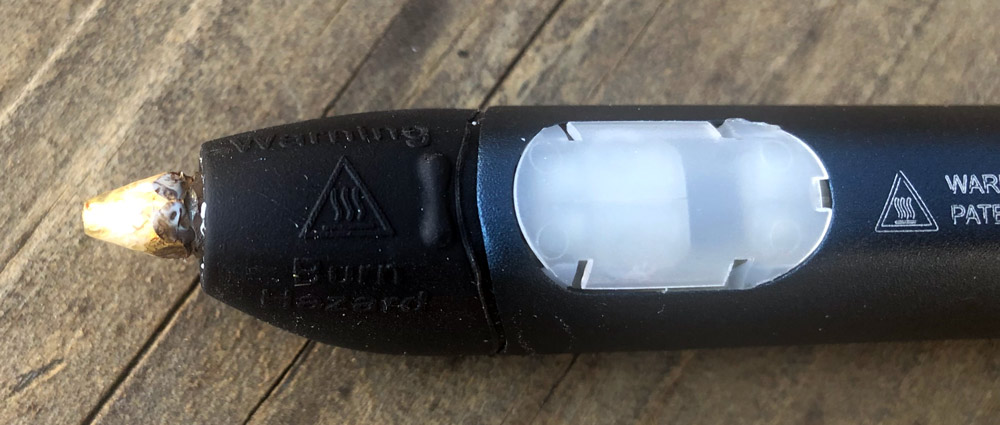

The front rubber cover helps to protect you from heat and has the temperature warnings molded in.
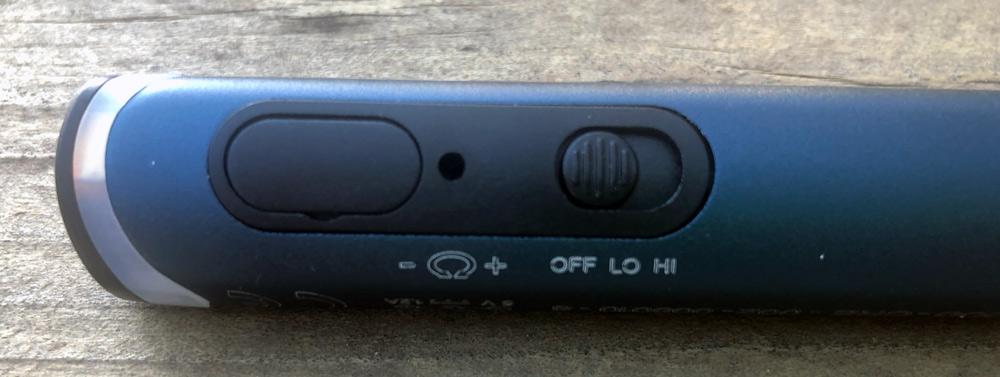
The final controls are the Off/Lo/Hi switch which is primarily a temperature control for the material types. PLA uses LO and ABS uses HI. The small hole allows for finer control over those temperature settings with the included small screwdriver.

The large oval is a cover that exposes the control port. Info on this port is absent on their website, but seems to be aimed at expansion around foot pedals, CNC connection and DIY.

Setup

Here’s the setup as described in the instruction manual in italics. My additional comments follow each step.

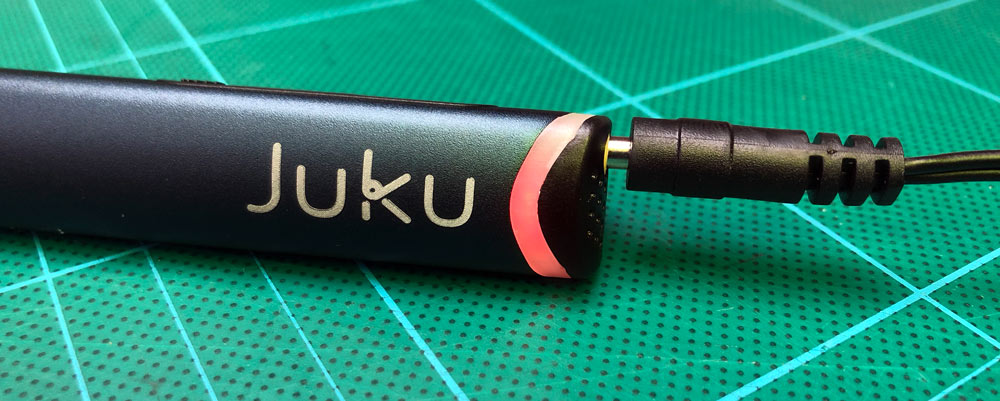
1. Plug the adapter into the wall, and the connector into the end of the pen. Switch the unit on into the HI position for ABS and wait for the LED to change from RED to BLUE signifying it’s ready. The barrel jack connector is long and has a gap when fully seated, so don’t try to push it all the way.
2. Select your ABS strand color and then click on the FAST button and push the plastic strand into the back of the pen until you feel it get pulled in. Start Doodling. To stop, click any button once.

3. Push down onto a surface as you start doodling for it to stick then you can lift up, holding steady to doodle in the air.

Performance

Off the bat, I think it’s helpful to set expectations. If I were to hand art pens to a few different people, the resulting art would vary wildly depending on the user. Juku is similar in that anyone can start using it with very little instruction, but they should expect to have a bit of a learning curve. As you browse 3Doodler’s site or see some of the creations in their email blasts, it’s clearly possible to do amazing things.

I gave the pen a quick run through with a cutting mat and its built-in grid. Getting the material strand inserted and correctly pulled is pretty easy although it’s a bit tricky to initially tell that it’s being pulled.

When drawing you need to press against your drawing surface to get it to stick and then you draw. To change directions significantly you’ll need to again press against your surface beforehand.
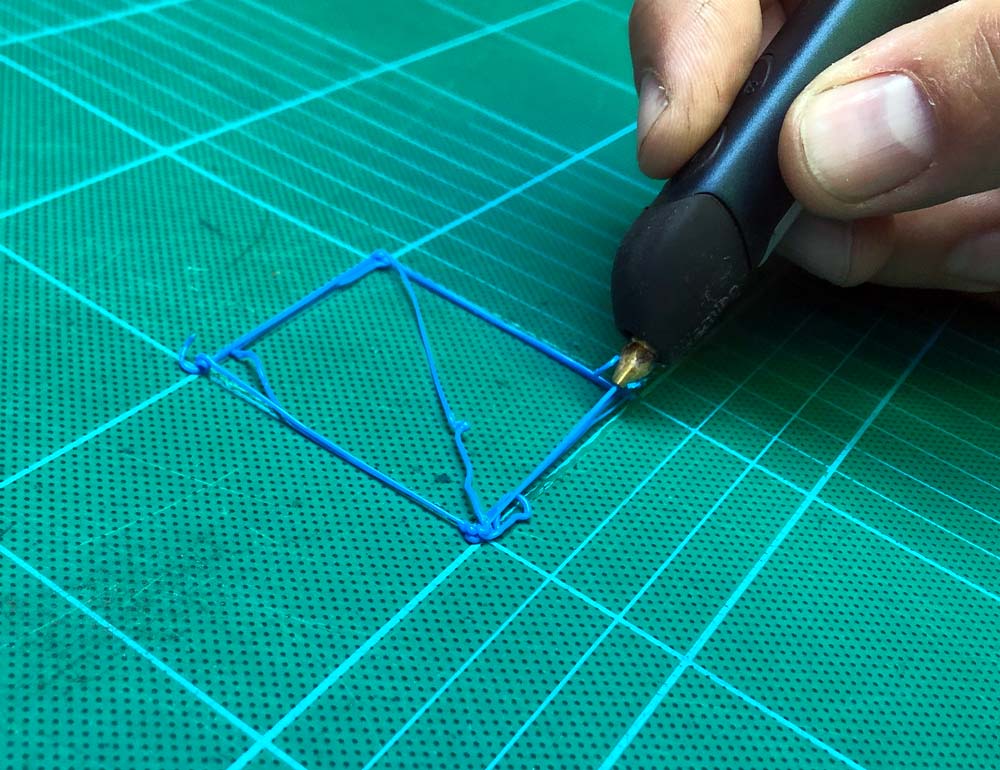
In the square I’ve drawn above, you can see that it has some extra material in a few places. First, this is literally the initial thing I ‘drew’. Second, there’s a bit of a delay in starting and stopping the process which takes some time to get a feel for. As you get used to using the Juku you’ll want to plan what you’re drawing and think about where you’d want to overshoot lines and trim ends.
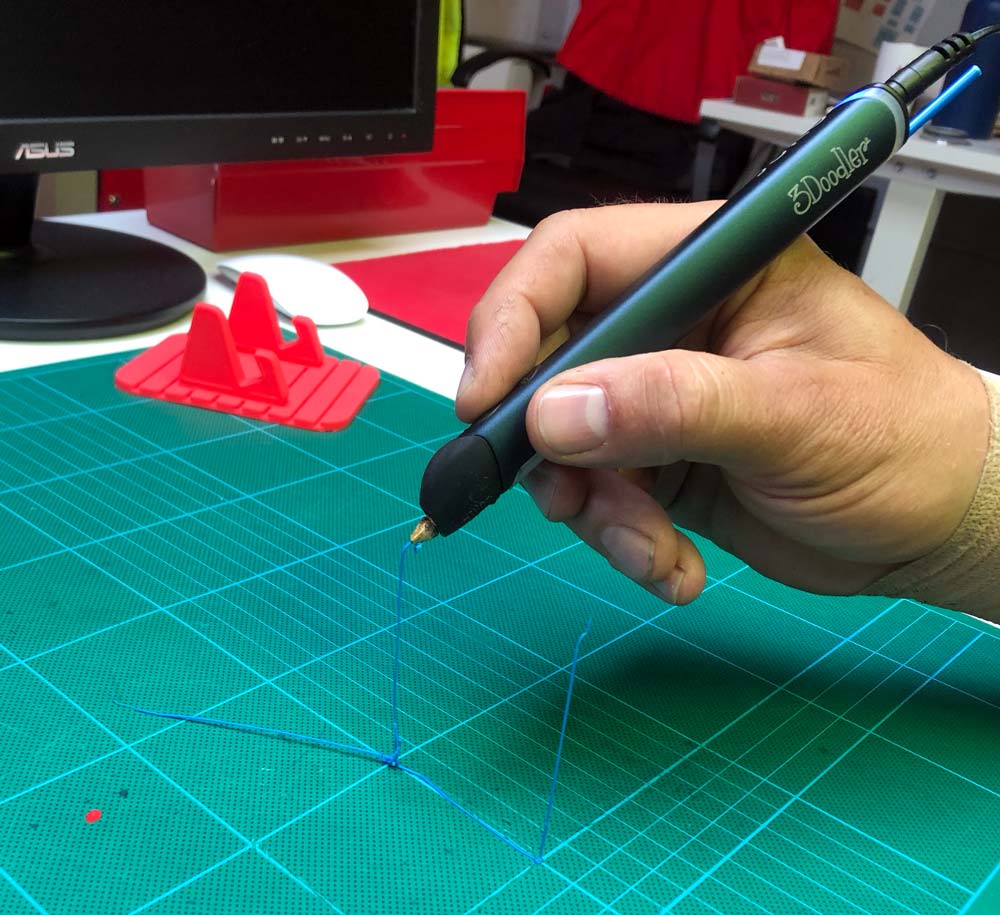
Above, I’m attempting the drawing “in-air” they’ve described. It’s a process of matching your speed to the rate of extrusion and cooling. It’s a lot easier to layer organic curves and shapes than it is to try to make angles as you would need to pause to end and then restart in the new direction. Here’s something my son doodled which is the layered approach.
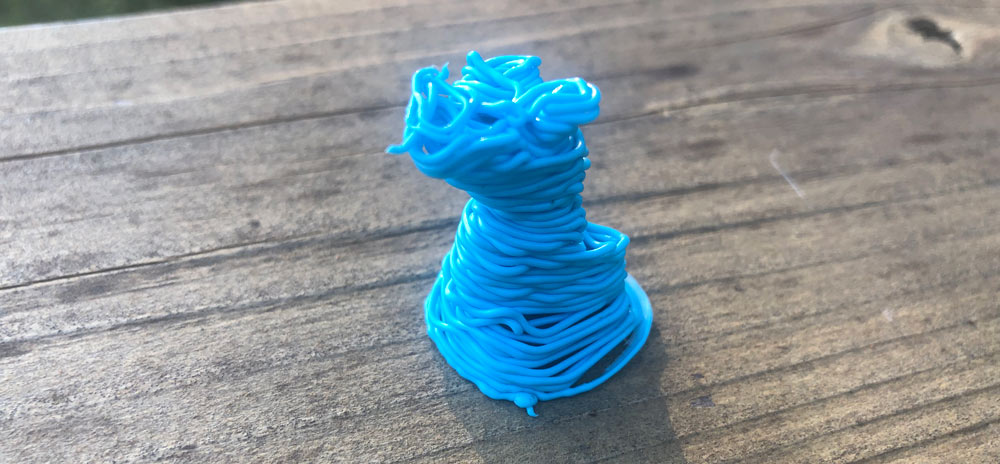

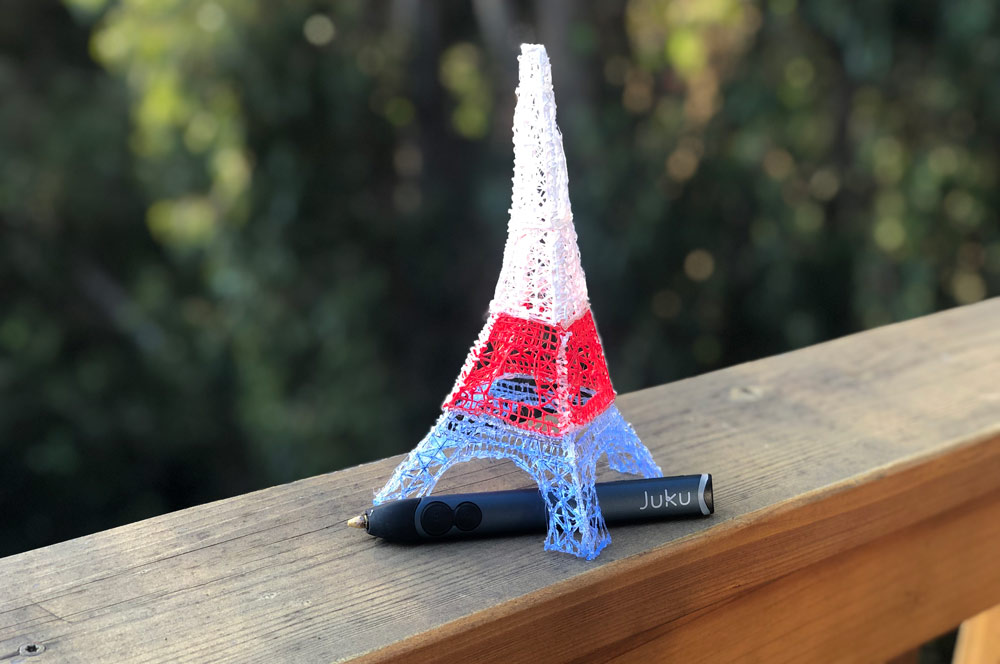
I asked my teenage daughter to have a crack at using the Juku without my input. School’s out for the summer so it made for a lazy, but creative day at home. She dove right in using a template of the Eiffel tower from the creation guide. That template and many others works by building flat sections that you then weld together. Take a look.
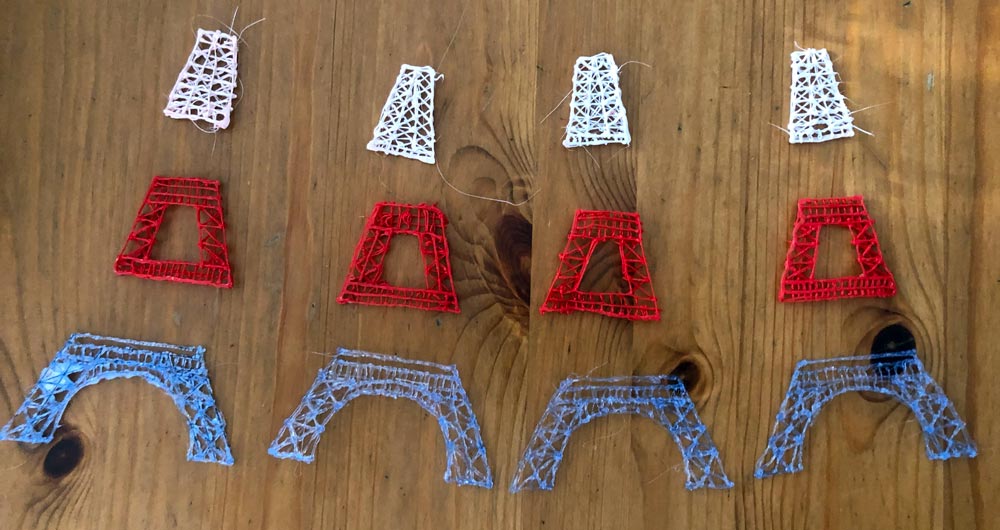
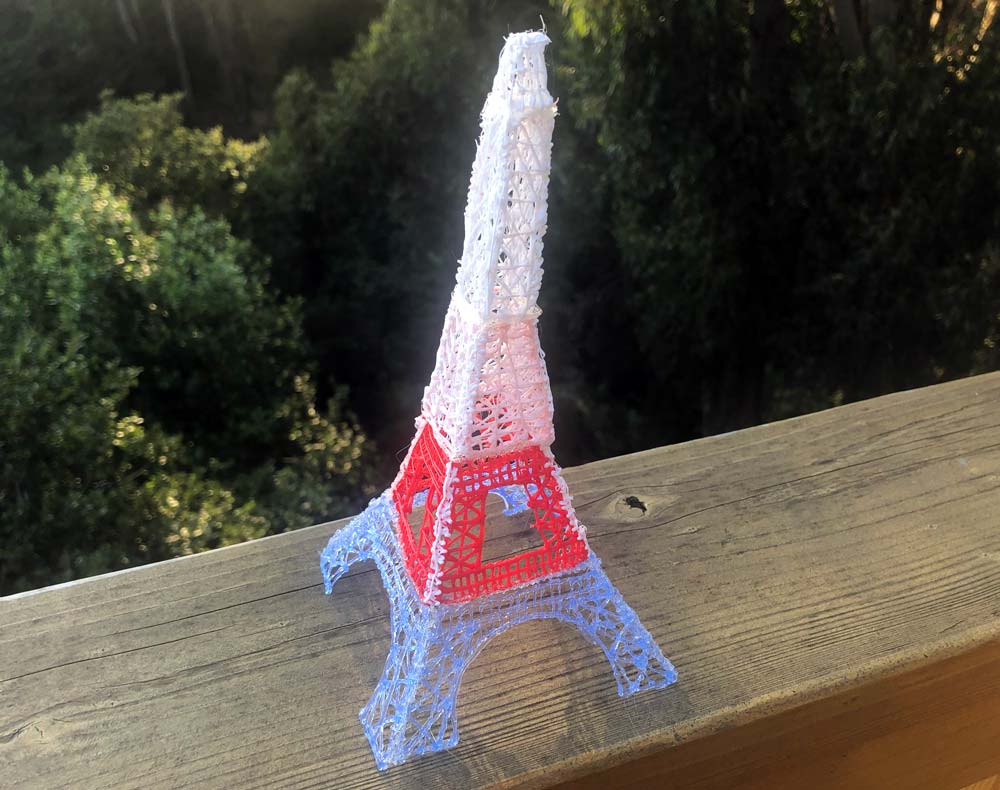
The majority of her build was done with the PLA material at the slow feed setting. It turns out, she did not read the instructions and ran the pen at the higher ABS temperature. It did not cause any issues other than possibly being a bit too fluid which contributed to the blobby spots in a few areas. Here’s the finished tower which took about 3 hours of effort.
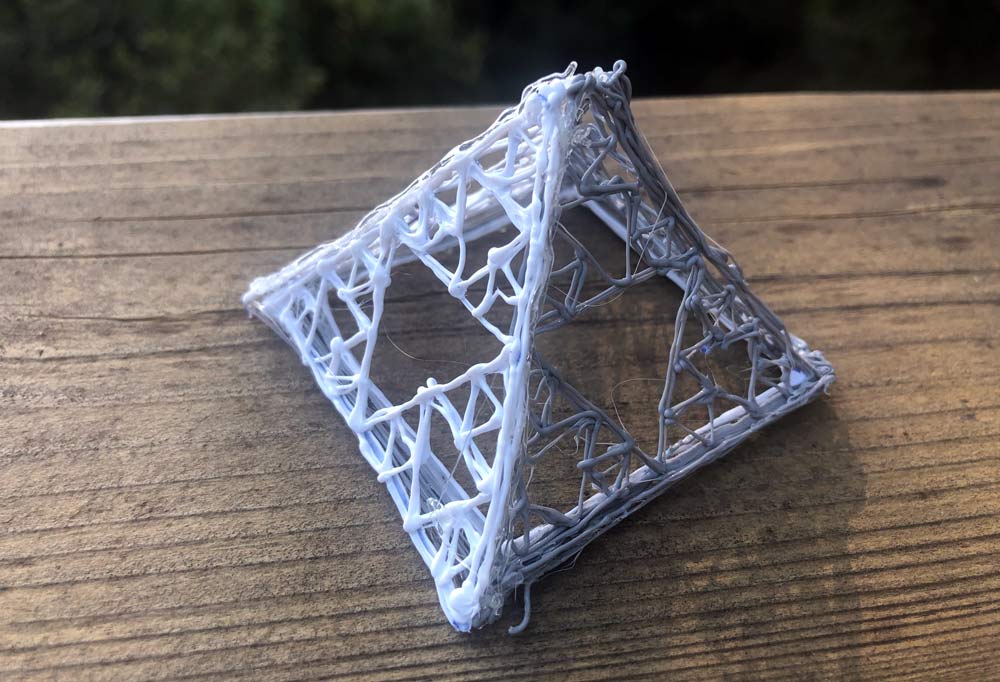
Here’s a pyramid that my son drew from his own freehand template.
Here’s a couple of things you’ll want to know. The pen does get warm and at the ‘printing’ end it does get very hot. You will want to supervise younger creators closely. You’ll also want to make sure you protect the surface you’re working on. The cutting mat I used worked great, but that material isn’t too far off of the extruding material and melted in a couple of spots. We had the best result with thicker craft paper on top of a cutting mat.

For now, the Juku is available exclusively at Office Depot and is not present on 3Doodler’s site.

What I like

  • Small and compact
  • Easy to start, create and experiment
  • Hours of fun

What I’d change

  • Heat reduction – the front end can get pretty hot
  • Faster start and stop control
  • Longer power cable

Final thoughts

The Juku is a fun creativity tool. It’s not a toy, but it’s also not a precision prototyper. I’d put it in a creative craft category or the maker/stem area for sure. It’s fun to use and lets you build things that can feel substantial. The best advice I can provide is that you’ll want to manage expectations on output on first builds until you get a feel for the start/stop cadence and other material quirks.

Price: $74.99
Where to buy: Office Depot
Source: The sample of this product was provided by 3Doodler.

Filed in categories: Reviews

Tagged:

Juku 3Doodler 3D printing pen review originally appeared on The Gadgeteer on June 29, 2019 at 11:00 am.

Note: If you are subscribed to this feed through FeedBurner, please switch to our native feed URL http://the-gadgeteer.com/feed/ in order to ensure continuous delivery.

Longer Home 3D Printer Cube review

REVIEW – I’ll admit that I am a novice when it comes to 3D printing, but I do have an expert on call in my teenager (he built his own printer). We’ve been playing with the Longer Home 3D Printer Cube, which Longer says is an ideal starter printer for kids and adults. How does it measure up to my expert’s standards? To the review!

What is it?

It’s a starter 3D printer for kids, designed to be cost-effective and easy to use.

What’s in the box?

You’ve got everything you need to get started in the package, including:

  • The printer, pre-assembled and ready for work
  • A stand/spool for the filament roll
  • A small roll of starter filament
  • Some tools to make adjustments
  • An SD card pre-loaded with the software

An instruction sheet is also included in the package.

Hardware specs

  • Base unit is 9.5″ by 9″ by 10.5″, with a weight of about 8 pounds
  • Operating Temperature:5-35; Relative Humidity:30%-90%
  • Electricity:Input:110-240VAC 50-60Hz; Output:24V 3A. MaxPower:72W
  • Build Volume:140mm(L)*120mm(W)*105mm(H)
  • Layer Thickness:0.1-0.3mm. Printing Speed: 30-60mm/s
  • Heated Bed: NO
  • Filament Diameter:1.75mm.Filament Type:PLA
  • Compatible Software:Cura, Repetier,etc
  • Operating Systems:Windows/Mac/Linux
  • File Format: Gcode,STL
  • Connection:SD card

Design and features

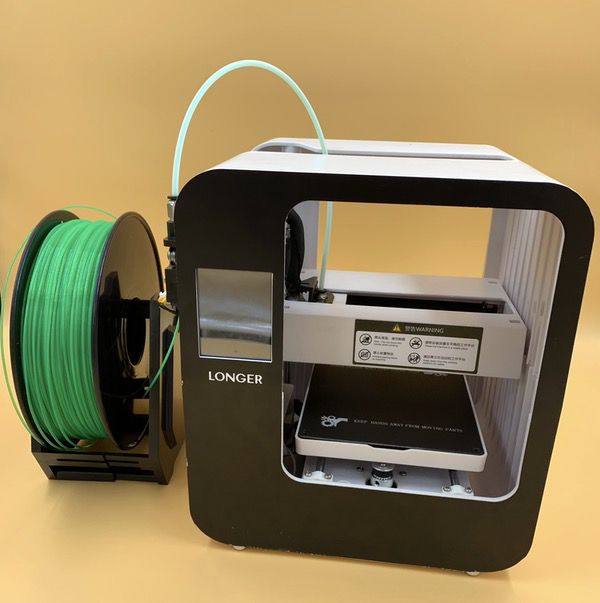
The Longer Home 3D Printer Cube is designed for ease of use. The footprint is about 9″ by 9.5″ by 10.5″ deep, so it fits neatly on the corner of a desktop or counter. It also comes pre-assembled in a complete unit. Here’s the front face:

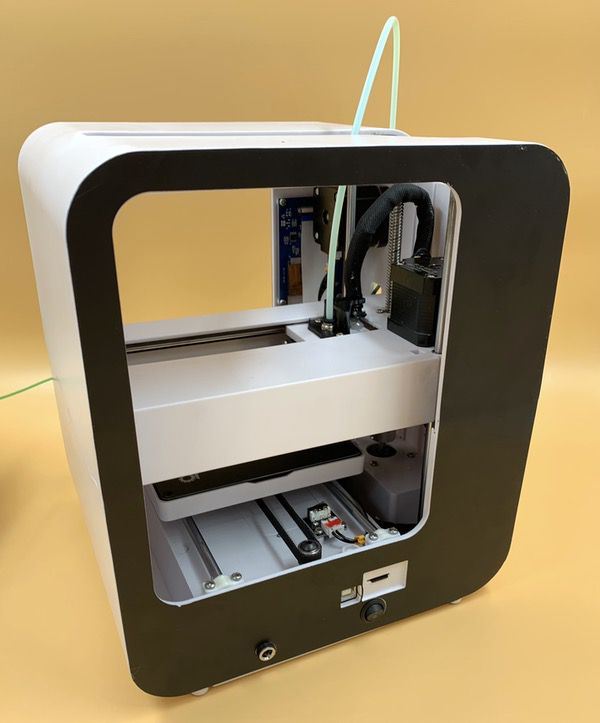
The rear face of the unit is where your power cord goes, and where the SD card port is to upload your models:

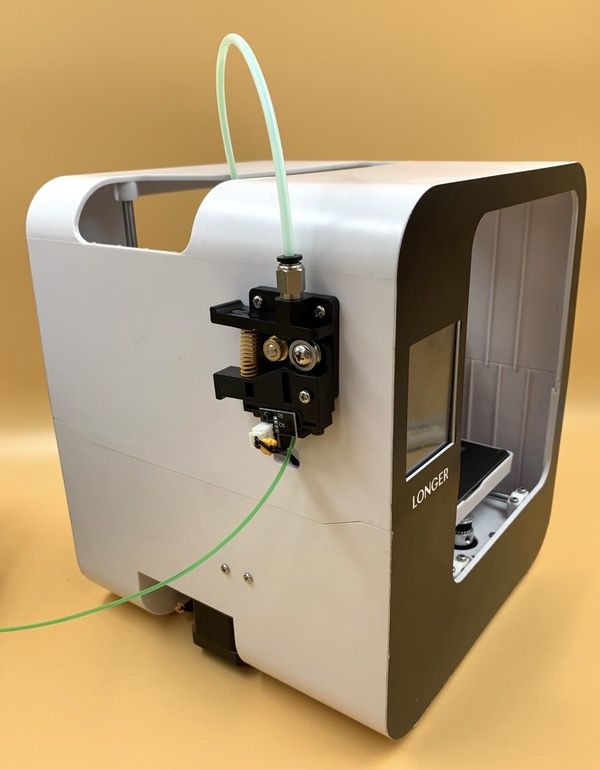
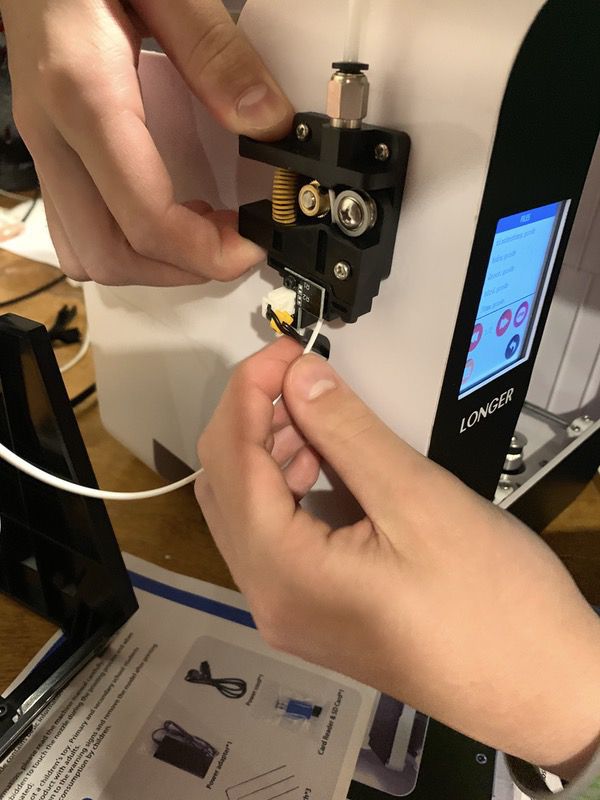
The left side of the unit is where you’ll find the filament feeder:

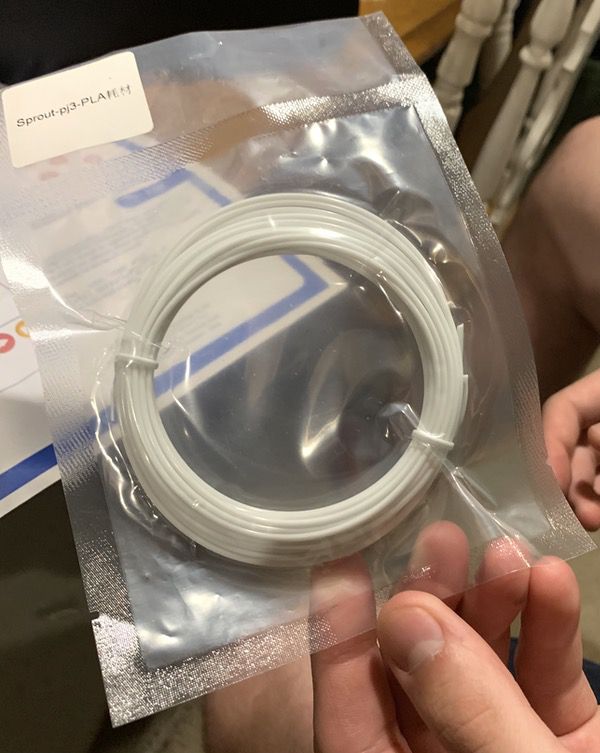
Longer also does a nice job of supplying everything you need to get going on your first printing projects. You need filament to print, and they give you a small sample roll to get going.

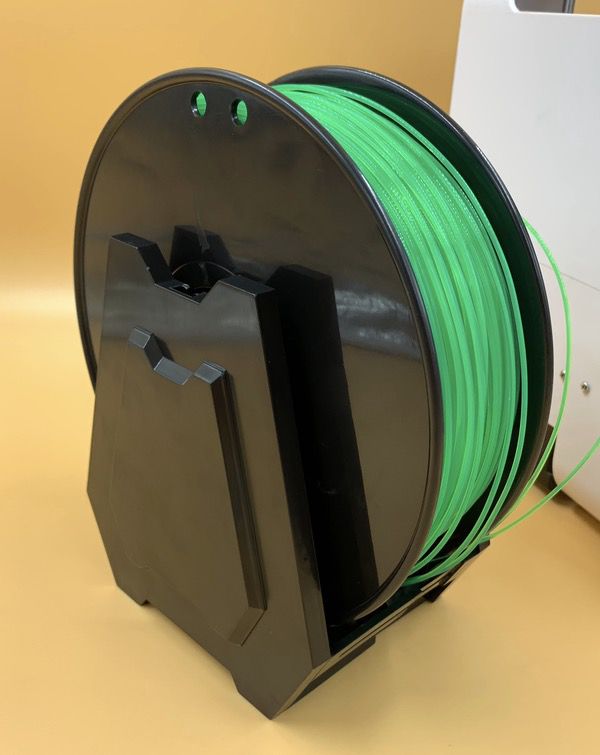
One of the things that you’ll find out quickly when doing 3D printing is that you’ll need lots of filament. You can buy all kinds of colors and types in larger spools, and Longer provides a spool stand that ensures your filament wont get tangled while the printer is doing its work. It takes big rolls too, as shown with the roll my son provided for some of our tests:

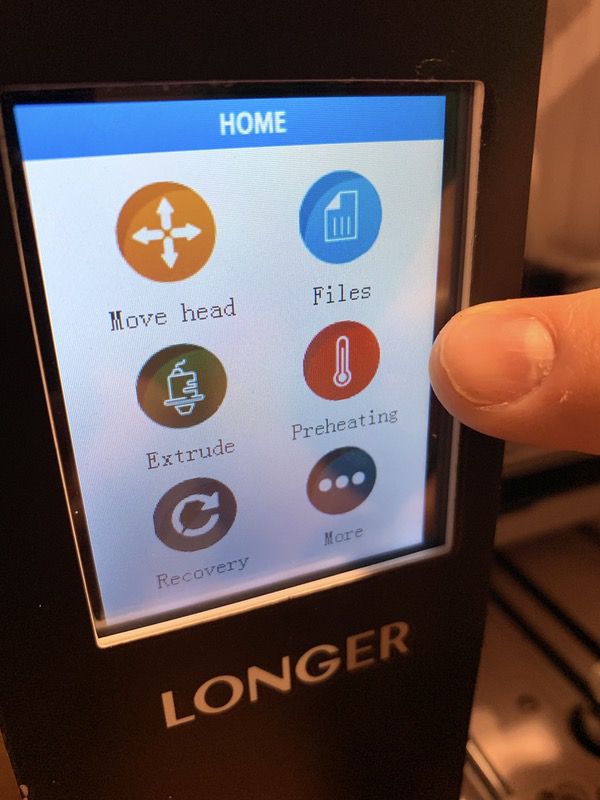
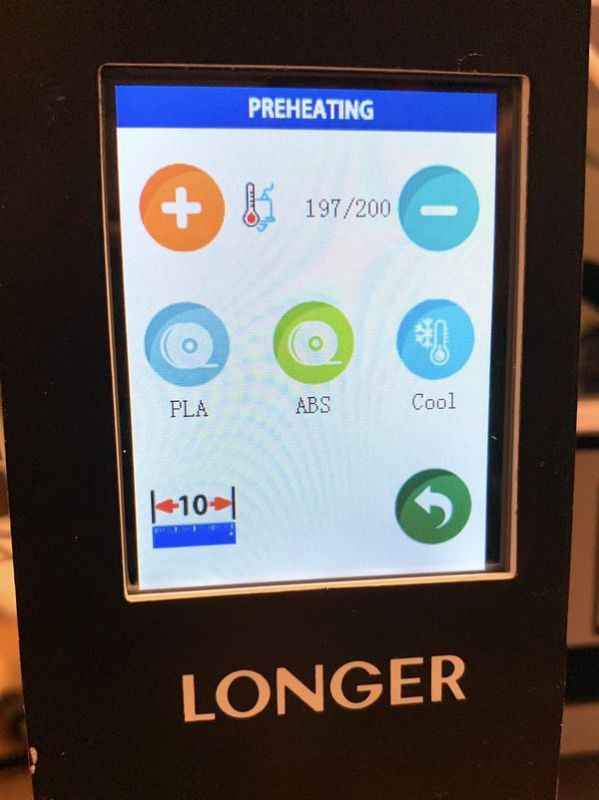
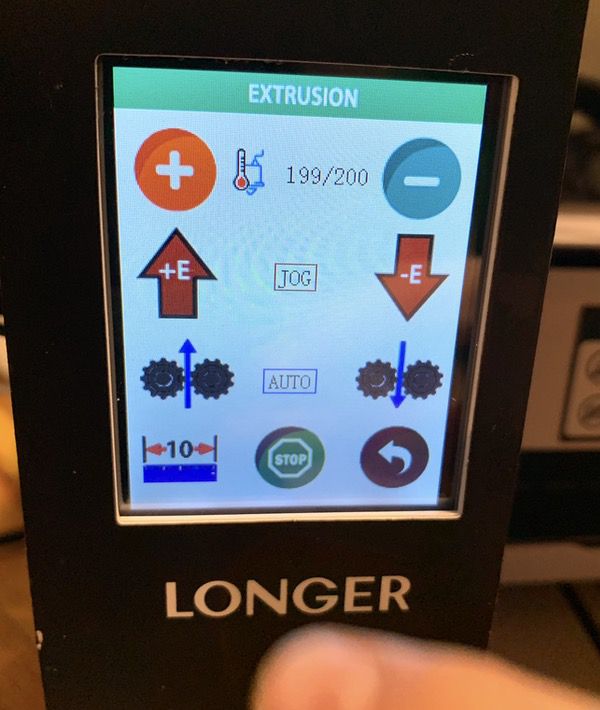
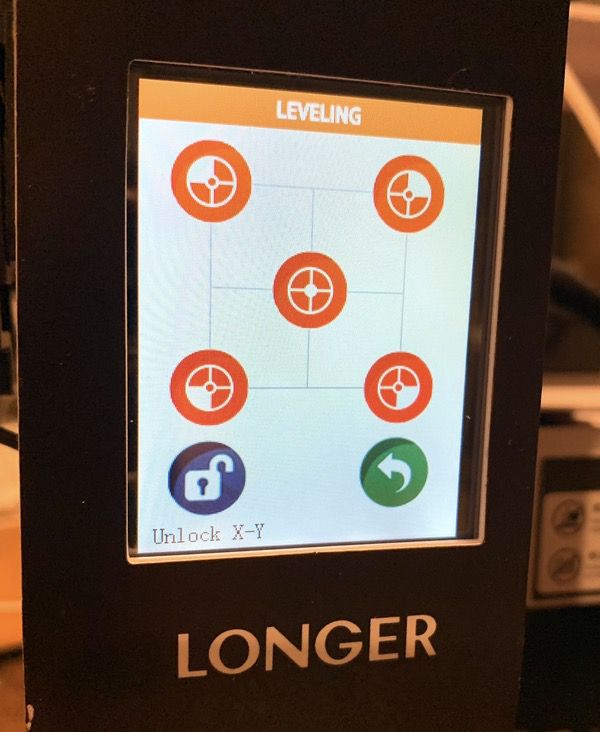
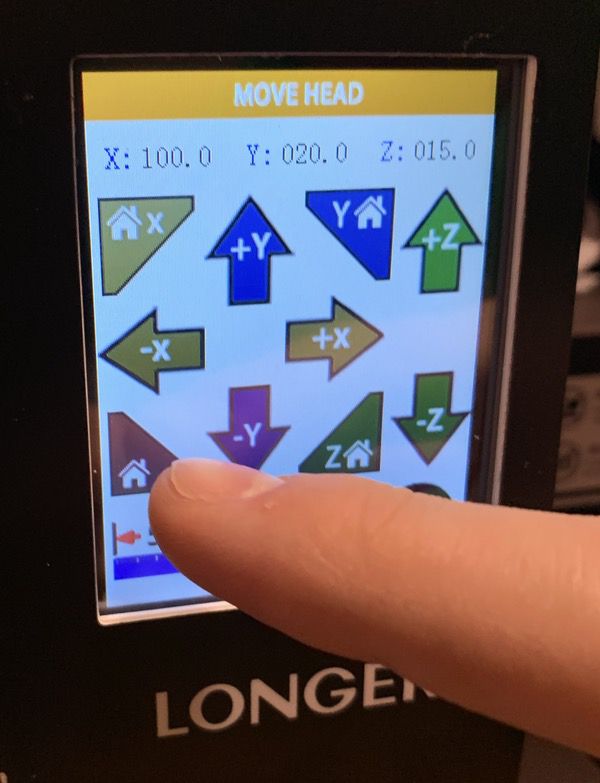
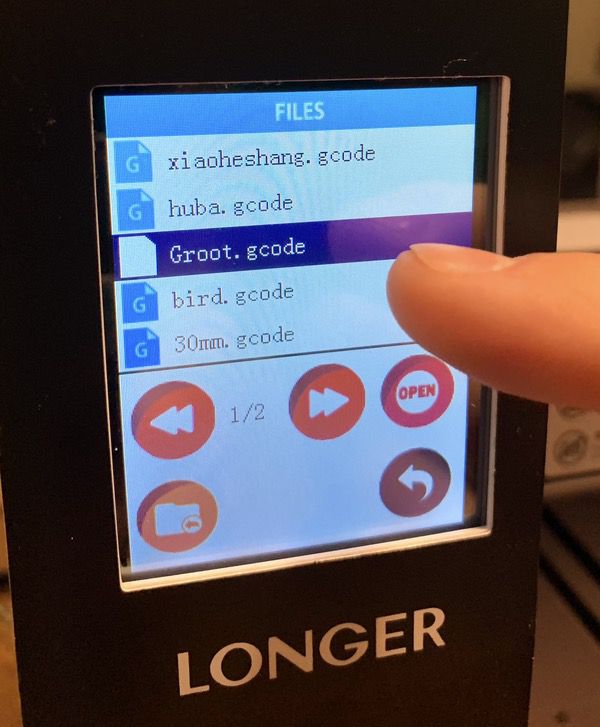
A bright color touch screen display is used for all functions. The interface is friendly and easy to follow for beginners and experts, and the touch screen interface responds well to even the clumsiest of fingers. Some sample shots follow:


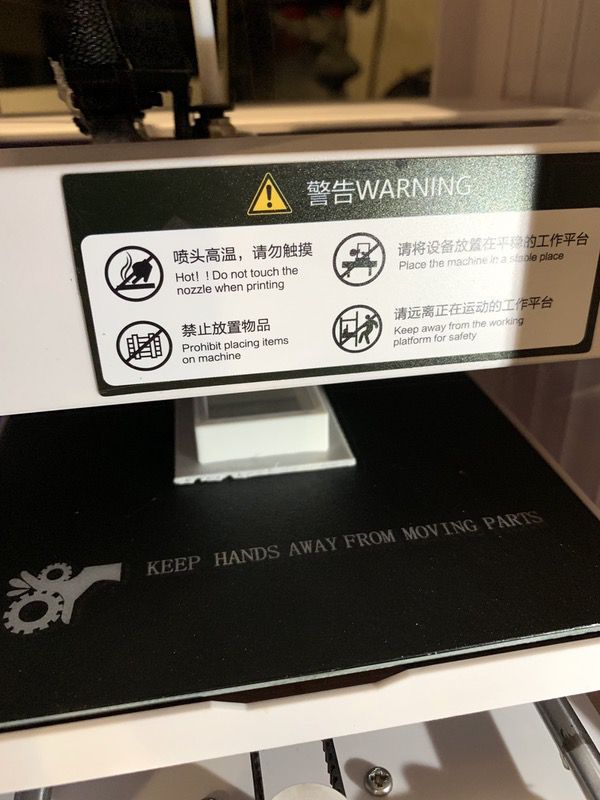
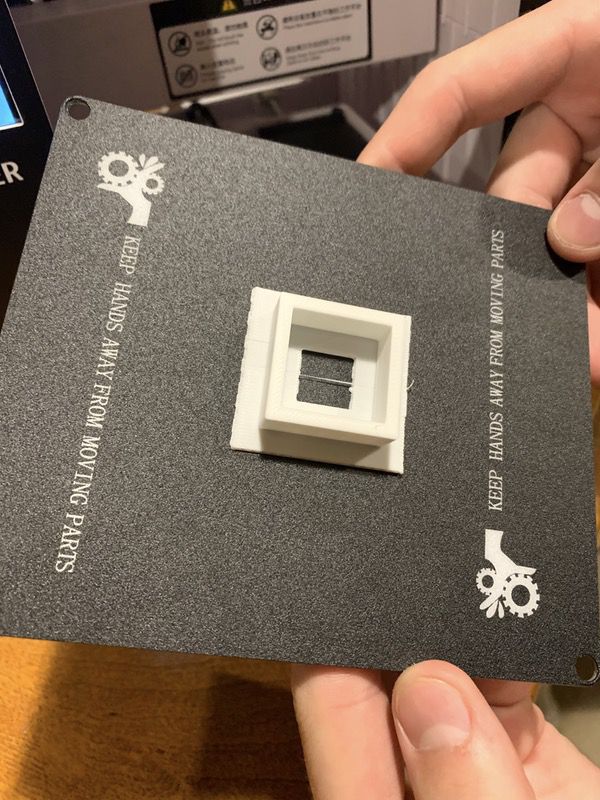
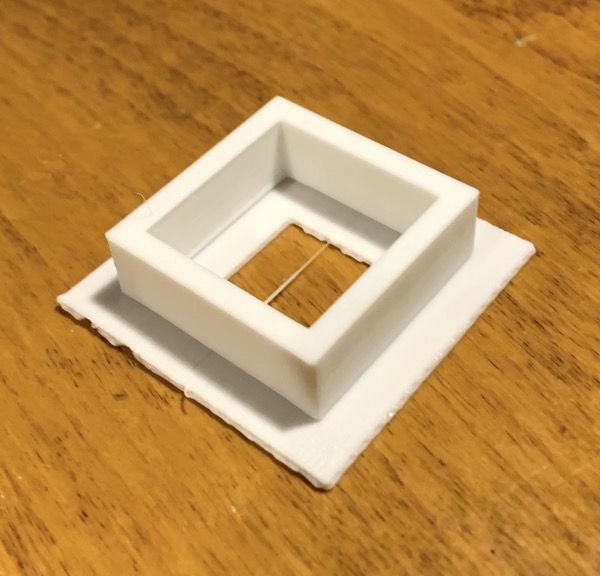
The printing surface is magnetic, flexible, and removable. This is a very good thing for a 3D printer, as you typically have to separate the finished product from the print surface. Here you can just pop off the plate, and remove your finished product. Here’s a geometric test sample we printed on the unit in progress:

When it was completed, we popped the printing surface out so that we could easily remove the finished piece. Simple and convenient.

You’ve also got a SD thumb drive that includes modeling software, the full documentation, and some sample models that you can start with.

From a basic configuration standpoint, my in-house expert is impressed. You’ll often find 3D printer kids that require some modification or upgraded parts to be reasonably functional. This unit comes with quality components right out of the box. Let’s have a look at getting ready for your first print job.

Setup & Operation

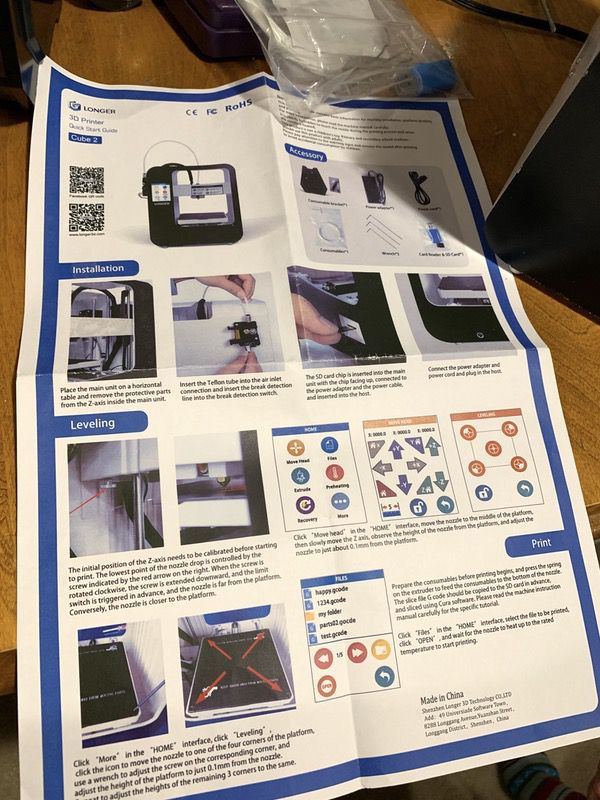
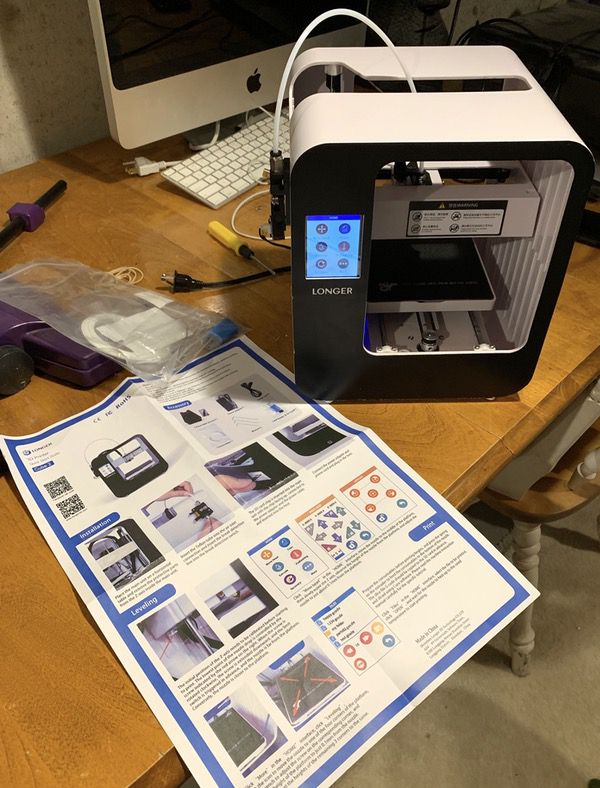
The first thing we found out when we started the setup was that the instruction sheet isn’t great. It covers all the bases, but the English translation of the instructions is a bit unclear. The full docs are on the SD card and are excellent, however. I’d suggest orienting yourself to the setup process with the card, but go to the digital docs for the details.

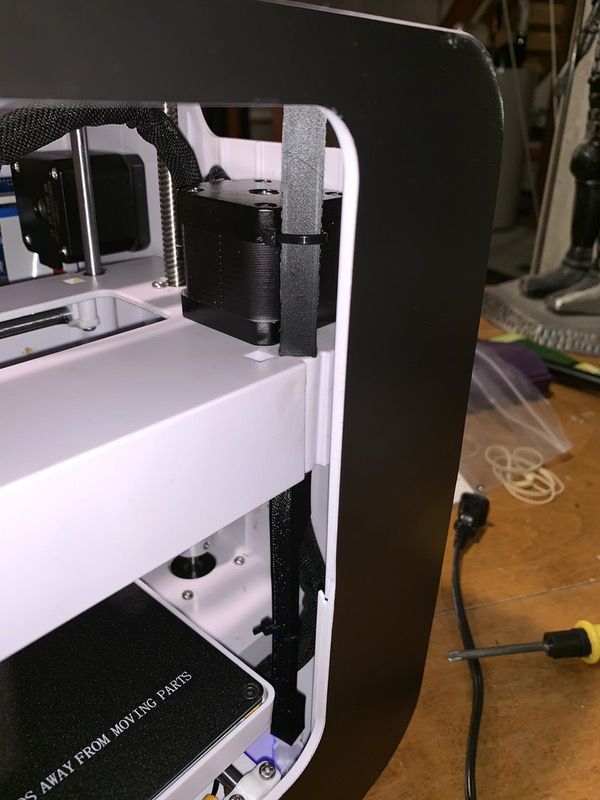
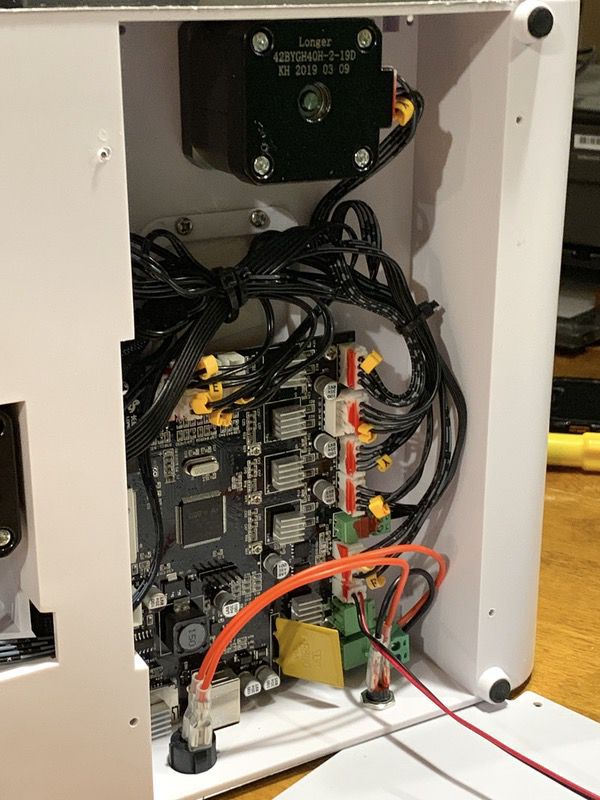
You’ll start by removing the packing material that stabilizes the unit for shipping. You can see them in this pic in the middle of frame, connected to the rods by zip ties. The pop off with a few quick snips.

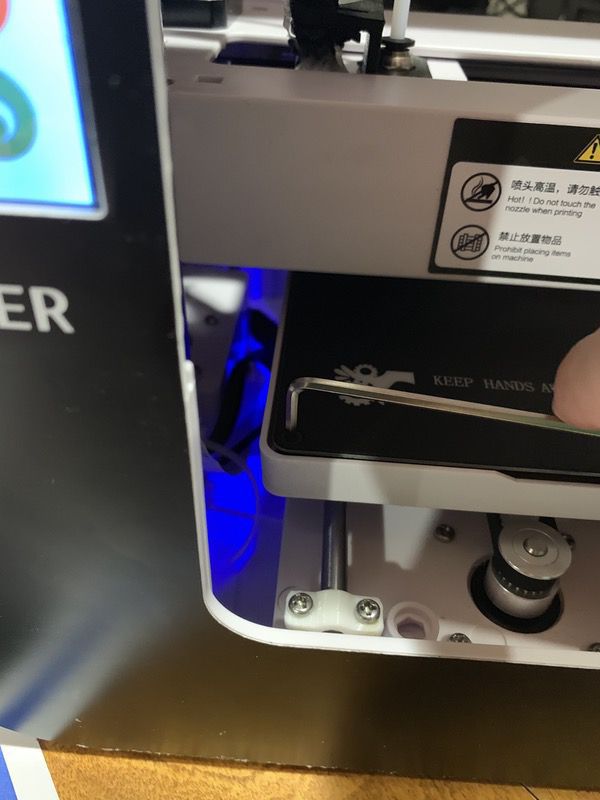
Next up is leveling the base. You’ll use the Alan wrenches included in the kit along with the leveling screen on the device to lock your settings. The instructions walk you through the process.

You’ll also need to orient the printing head to the the four corners of the printing pad. Again, the instructions get you there pretty efficiently.

The next step is to insert the filament into the feeder on the side of the device. Follow the instructions to load it and run some test material, and you’re good to go.

The printing process is all about uploading the desired model. The included software on the SD card allows you to convert 3D computer models you’ve made or acquired into the GCode format for printing. It also has some preloaded models to play with. You select the model from the card with the settings desired (such as printing speed; see the instructions for details), and off it goes!

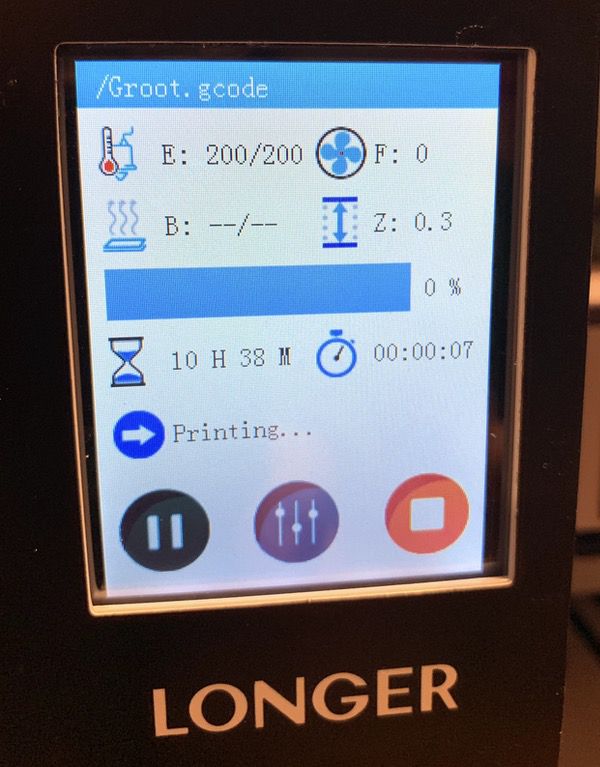
A status screen keeps you up-to-date on the printing process, time remaining, and all of that good stuff. It’s got some nice features like the ability to resume printing if you run out of filament or lose power. But once it gets going, you’ll pretty much let it do its thing until the job is done.

Note that there is no modeling software included in the package; the software converts other 3D models to the GCode format. The included software is PC-only, but you could get your own software to create/convert models to the GCode format on Mac or PC. Note that the version of the software included is outdated, but an update is available online for download once you install it.

Performance

My son is a 3D printing veteran, having built his own printer and modded it a number of times. He’s been very impressed with the overall quality of the unit. For a beginners model, the printing space is quite generous. The removable base plate is a nice feature for removing models after printing. The color touch screen controls are also a nice plus from what you’ll find in many inexpensive printers, with full control over all aspects of the printing process like filament flow rates, temperature control, etc.

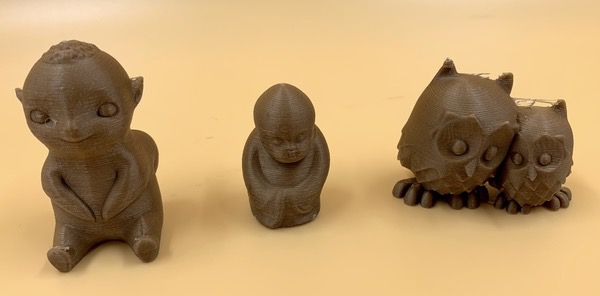
Printing quality is outstanding for a beginner’s model. You’ll find some cute little models to play with on the SD card to warm up:

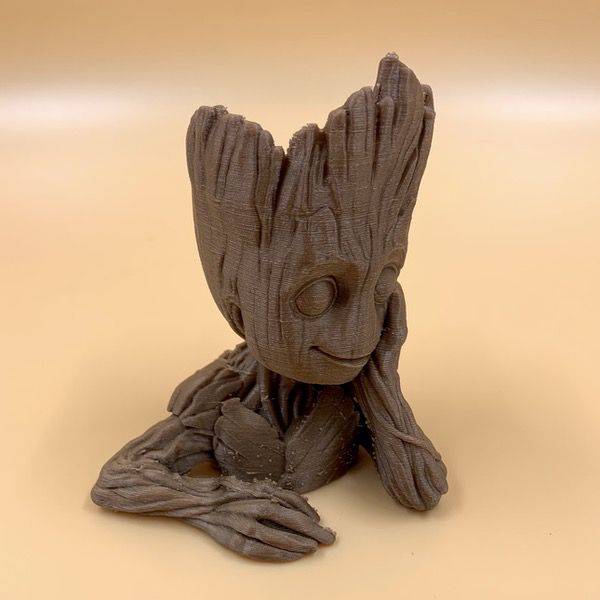
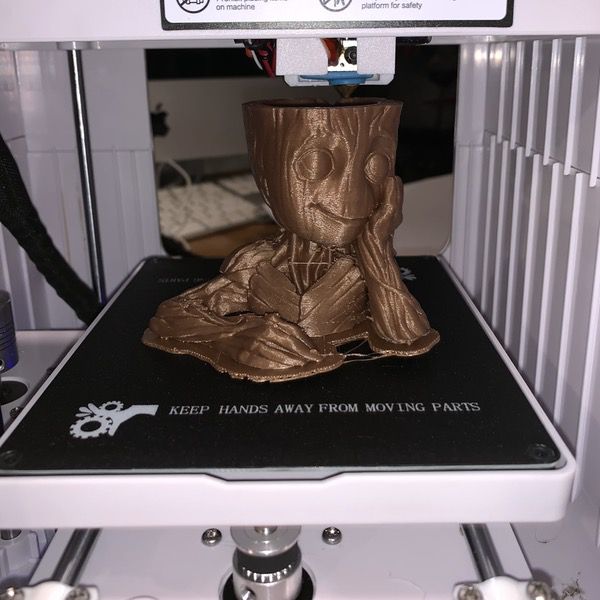
Bu the real ability of the printer to handle detail work starts to shine with more complex models. Check out our little tree-friend from a galaxy far away. The detail in the wood & facial features is excellent.

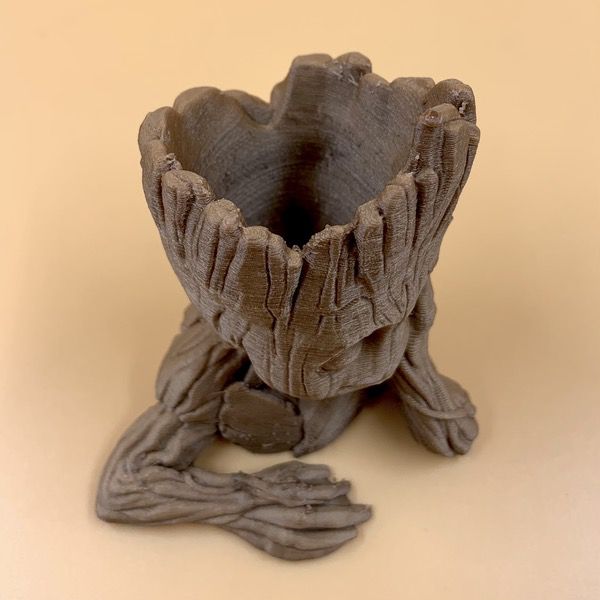
And have a look at this close up on the top of his head. All those little nooks and crannies come out super clean with very little residue:

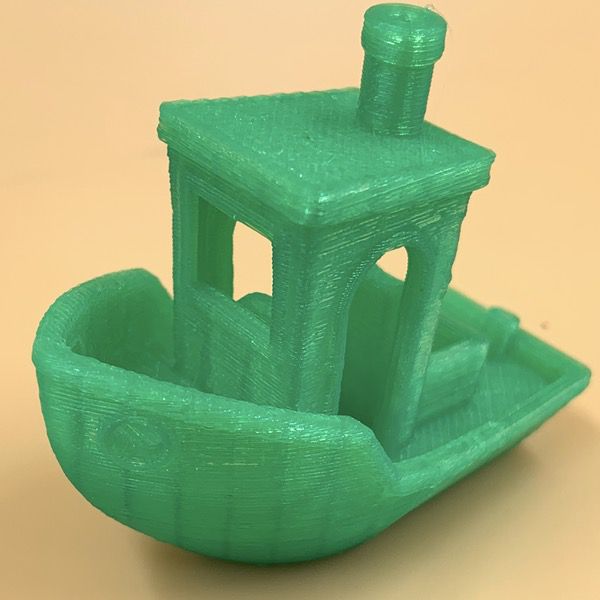
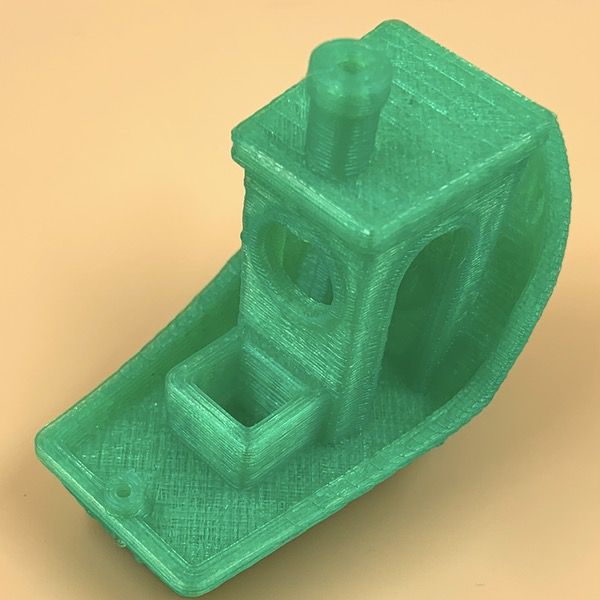
After the initial tests, my son queued up a few models specifically designed to test the printer’s ability to handle fine detail like textures, overhangs, and layer/edge transitions. This boat is one common model used for testing. Have a look at the edging detail around the windows, the side arch, and the rails!

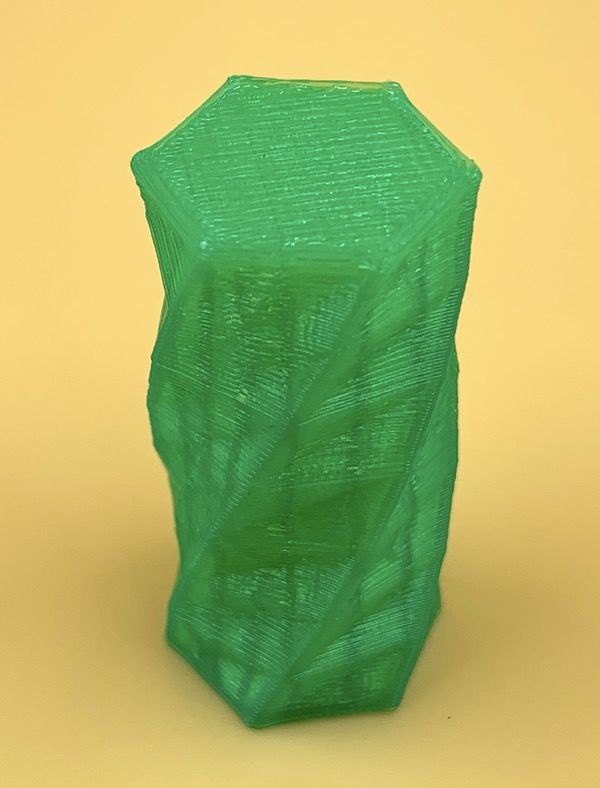
Next up was a texture test that shows how the printer handles gentle curves and detail. Again, I’m told this is a really good demonstration of rendering those little elements that can show up as clumsy on lower quality printing units.

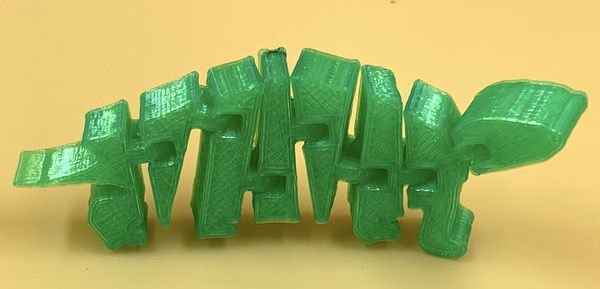
Finally, we have this articulated dinosaur model. The initial print is one solid piece. The rods and holes that allow the pieces to swivel are all printed together with the pieces as a single unit, with little strands of plastic between the pieces that allow the printer to run the whole thing in one job. If the detail capability of the printer is good, you should just be able to twist and crack those little tabs and end up with a model that allows free movement of each piece, so additional assembly required. The Longer Home 3D Printer Cube nailed it:

We did have a few issues we identified during the testing process. We encountered a weird buzzing noise from the cooling fan during setup & testing. It looks like an adhesive bit that keeps the wires from sitting on the fan had come loose in shipping. The good news is that you just unscrew one panel on the bottom to get to the innards, and everything is neatly organized. It was a one-minute adjustment.

We also noted some dings in the housing that you can see in the pictures. It’s entirely possible that these were the result of our tester being an evaluation unit.

What I like

  • Nice desktop-friendly footprint
  • Very easy to operate out of the box
  • Excellent quality for a starter 3D printer

What needs to be improved

  • Setup could be easier; don’t rely on the printed instructions

Final thoughts

I think that the Longer Home 3D Printer Cube mostly lives up to the promise of being a great starter kit if you and your kids want to get into 3D printing. It’s fairly easy to set up and operate, and is perfectly sized for most desktop surfaces. Just keep in mind that there is a learning curve around the technologies and tricks associated with any 3D printer kit. As far as most options go, however, it’s a good one with high quality components at a very good price for a pre-assembled unit.

Price: Under $200
Where to buy: Amazon.
Source: The sample of this product was provided by Longer.

Filed in categories: Reviews

Tagged:

Longer Home 3D Printer Cube review originally appeared on The Gadgeteer on June 14, 2019 at 8:00 am.

Note: If you are subscribed to this feed through FeedBurner, please switch to our native feed URL http://the-gadgeteer.com/feed/ in order to ensure continuous delivery.
Anet A8 Plus 3D printer review

REVIEW – The Anet A8 3D printer was introduced in 2017 and quickly gained a following because of its affordability, capability, and adaptability to modification. On the downside, however, the printer had poor documentation, a relatively steep learning curve, a shaky frame, and a potential safety issue. The Anet A8 Plus is the successor to this product. Read on to see what I think!

What is it?

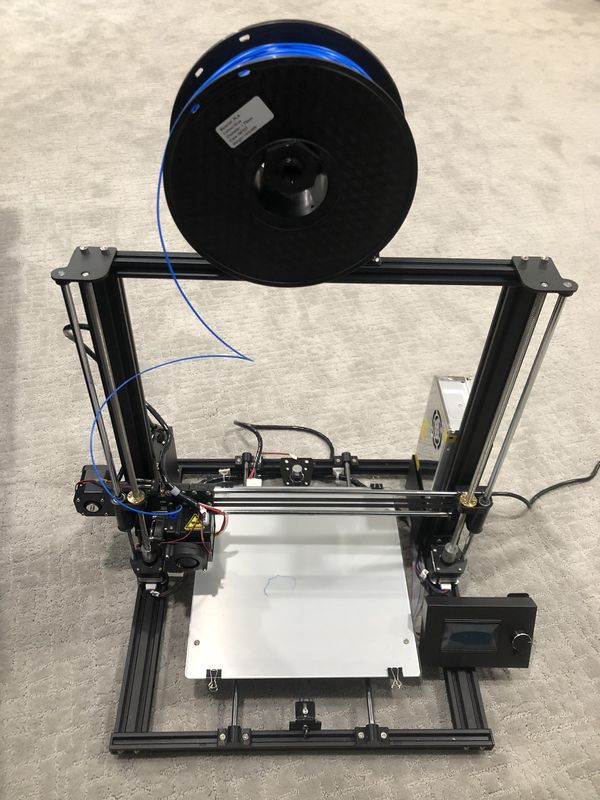
The Anet A8 Plus is a fused deposition modeling (FDM) 3d printer. The printer creates a flat pattern of a material which can be fused to the next layer. The printer then raises the print head the thickness of the material and creates the next layer of the model, fusing it to the previous layer. The material is also cooled as it is extruded so that bridging and overhangs of the material on the previous layer is possible. The printer has a large 300 x 300 x 350mm build area supported by a channel aluminum frame and steel guide rods. This is an improvement over the acrylic frame used on the A8. The bed is a heated glass panel for anchoring the model to the bed while printing. This is an improvement over the bed used on the A8. Most importantly, the motherboard has been redesigned to improve the safety of the circuitry. The components used on the motherboard are now more substantial than on the A8 and are now protected by a glass fuse. The extruder feed design and belt tensioning have also been improved over the previous model. One final feature is that the user interface is now anchored to the unit with magnets, which means that it can be removed or repositioned on the extruded aluminum more easily.

What’s in the box?

Each of the following items is shipped disassembled in the box.

  • Chassis kit
  • Vertical frame kit
  • T nuts, M4 8 screws, M5*20 cylindrical head screw
  • Limit switches
  • Power supply
  • Mainboard
  • Display screen
  • Display screen holder
  • 3D printed Filament holder
  • Line bag (Heating bed line \ X, Y Z1, Z2 motor line X, Y, Z limit switch line)
  • Black winding pipe
  • Extra fuses
  • Rubber finger cot (I guess so that the machine oil doesn’t get on your fingers?)
  • Wind mouth Tool
  • Hexagon wrench bag, transparent ruler, plier, screwdriver
  • A8 Plus application and manual on TF card, USB adapter
  • 10 meters of white PLA filament
  • Power line
  • Instruction manual
  • Warranty Card

Hardware specs

  • Model:A8 PLUS
  • Filament Diameter: 175mm
  • Printing Size: 300x300x350mm
  • Recommended Filament: PLA Extruder
  • Operating software language: English
  • Printing Precision: +/-0.1mm
  • Data Input Format: STL, OBJ, JPG
  • Layer Thickness Precision: adjustable from 0.1 to 0.4mm
  • Data Output Format: Gco, Gcode
  • Printing Method: Online Printing/Offline Printing
  • Machine Net Weight: 10KG
  • Printing Speed: up to 120 mm/s
  • Recommended Printing Speed: 30-60mm/s
  • Power Supply/ Max. Power-consumption: 110 to 220V, 360W
  • Operating System: Windows MAC
  • Nozzle Diameter: Standard 0.4mm
  • Supported Printing Materials ABS, PLA, HIPS WOOD TPU, etc

Design and features

As indicated above, the design of the Anet A8 Plus is significantly advanced over the Anet A8. The design is still consistent with a “maker” aesthetic – the finished product still has exposed electronics, wiring, and mechanical components. Compare this with the Monoprice MP Select Mini 3D Printer V2 and you can see that the Anet looks much more functional. For what its worth, even though the Monoprice unit is more refined looking, I prefer the gantry extruder of the Anet over the cantilevered design of the Monoprice.

From the ground up this is a well-built printer. There are four large rubber feet to absorb momentum and vibration while printing. The aluminum frame is a quality design and much more resilient than an acrylic substitute. The printing platform is glass for smooth results that are designed to stay put while hot but are easy to separate later and is easy to clean. The platform rides on two guideposts and the belts for the Y-axis motor, which moves the platform can be tensioned with a wingnut. I wish that the platform could be leveled by adjusting a screw on top of the platform and not a thumb screw below. I did have a bit of a challenge getting this true to the print head, and I suggest that you do this and recheck it while it is warm to hot. The thumb screws are likely to move as time goes on I may try to set it up again with some Loctite purple threadlocker.

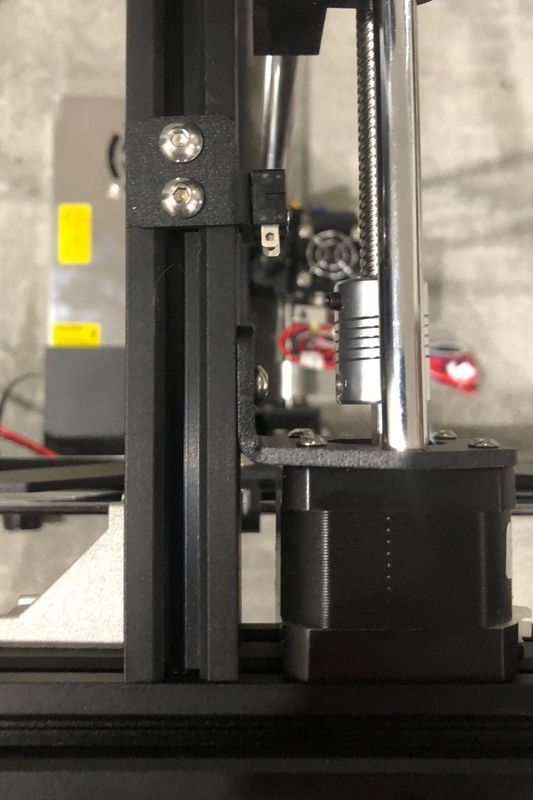
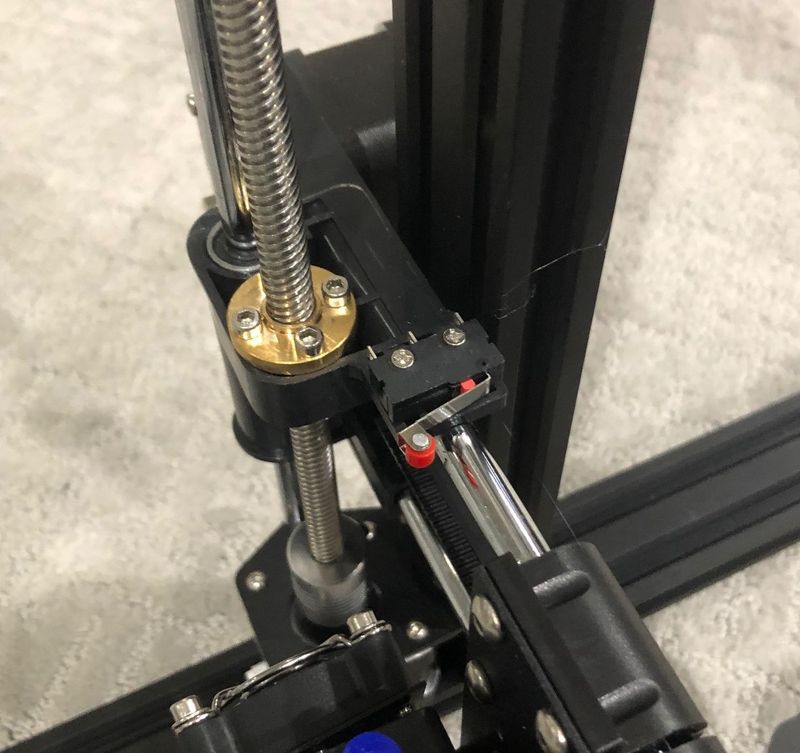
The vertical frame is secured with corner braces to ensure that it stays true and upright. the X-axis chassis is securely mounted to the threaded rod. There is not observable play in the mechanism which helps to provide the 0.1 mm layer thickness precision. I did have to readjust the location of the Z-axis limit switch and it would be helpful if this could be screw adjustable from the factory. There is a modification to create this on Thingiverse however and I suppose that the most enduring quality of this system is the modifications that may be made to it and the community that supports them. 

Getting the extruder loaded was also a bit challenging. The PLA they provided tends to feed entirely around the capstan and shoot out to the rear of the extruder head. Removing the spring arm and pivot screw that tensions the PLA in the head is easy enough, and once this is out it is simple enough to manually feed the PLA, but it is not a perfect scenario. I didn’t notice any operational problems with the feed system once the printer was operational. That is, the feeding and retracting of the printing material worked without a hitch.

Setup

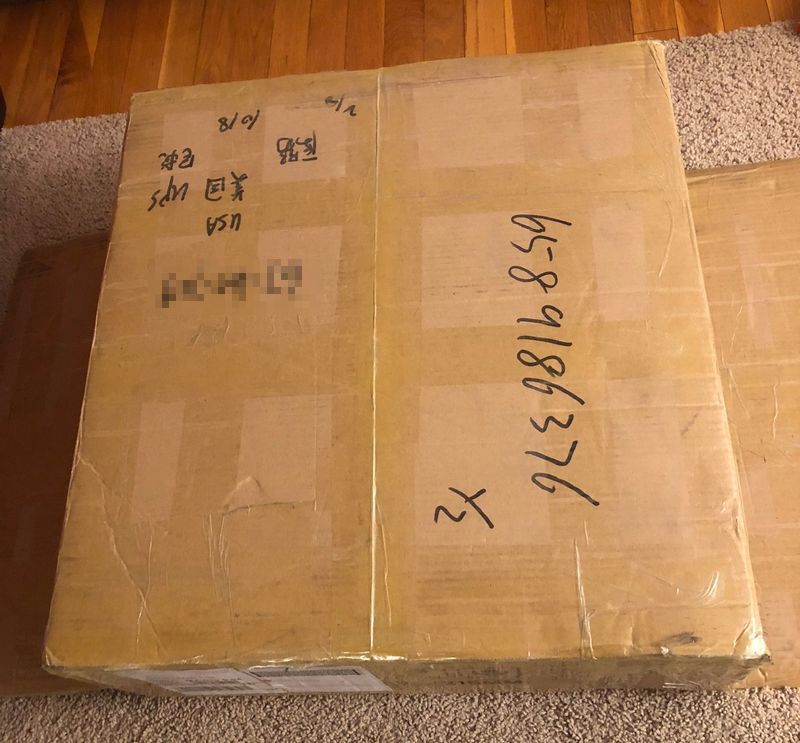
One of the first things you will notice is that this unit comes in a big box.

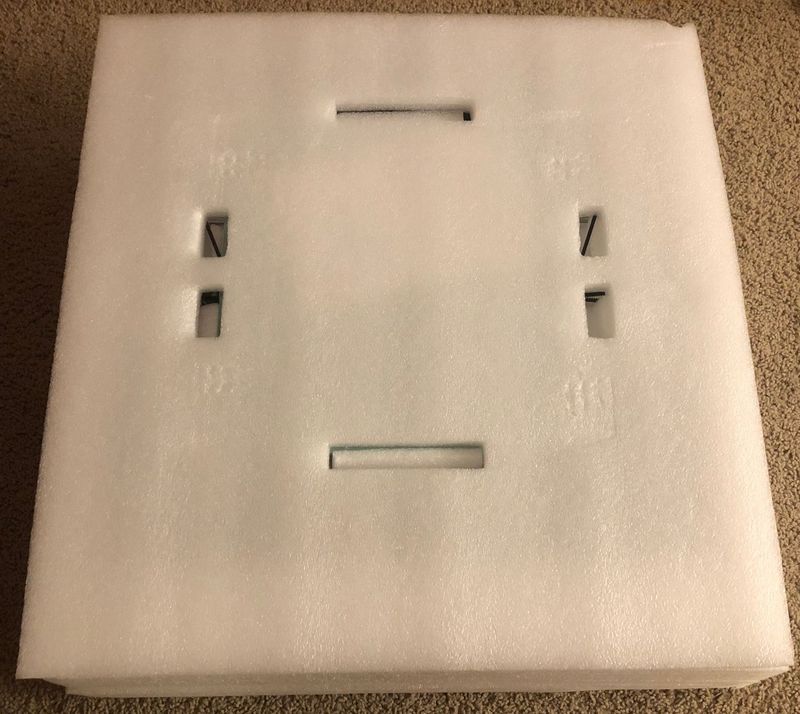
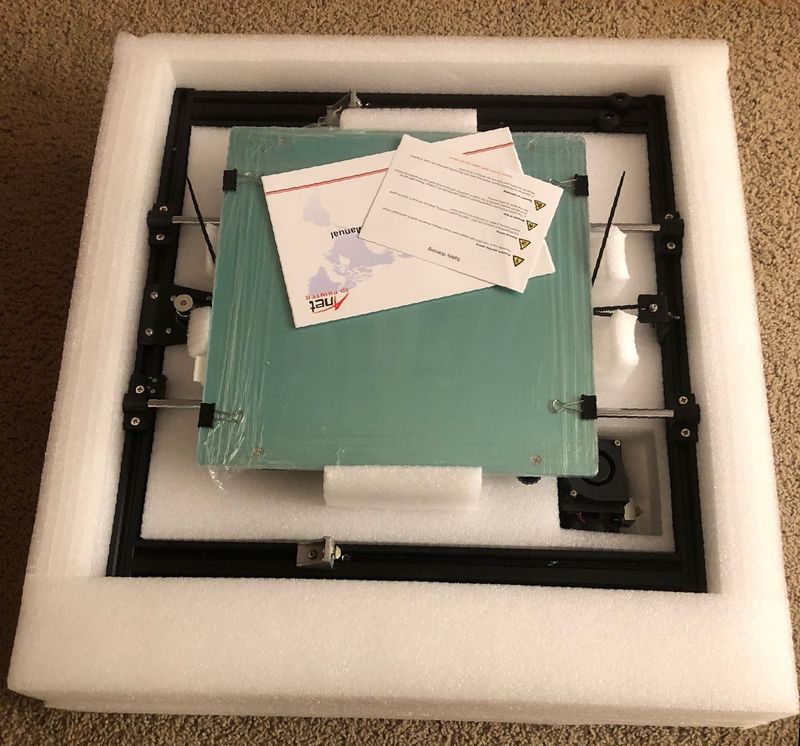
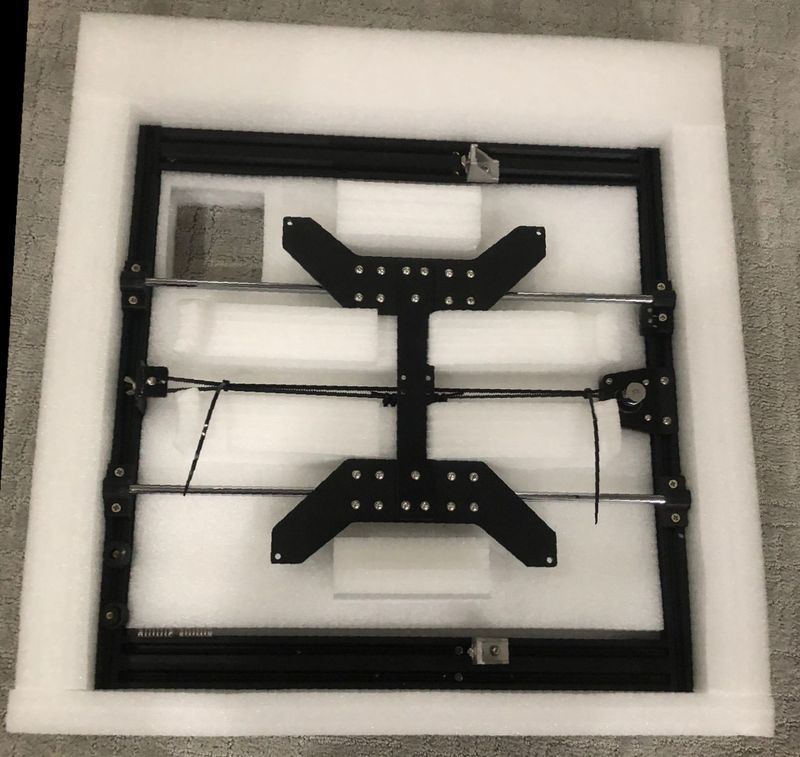
It is nicely packed with styrofoam to ensure that after the journey from China the items arrive safely.


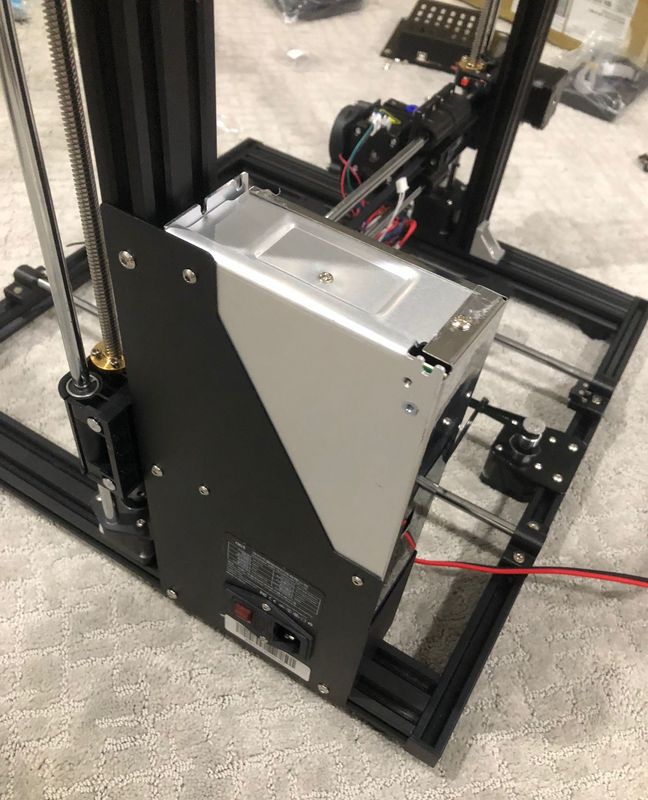
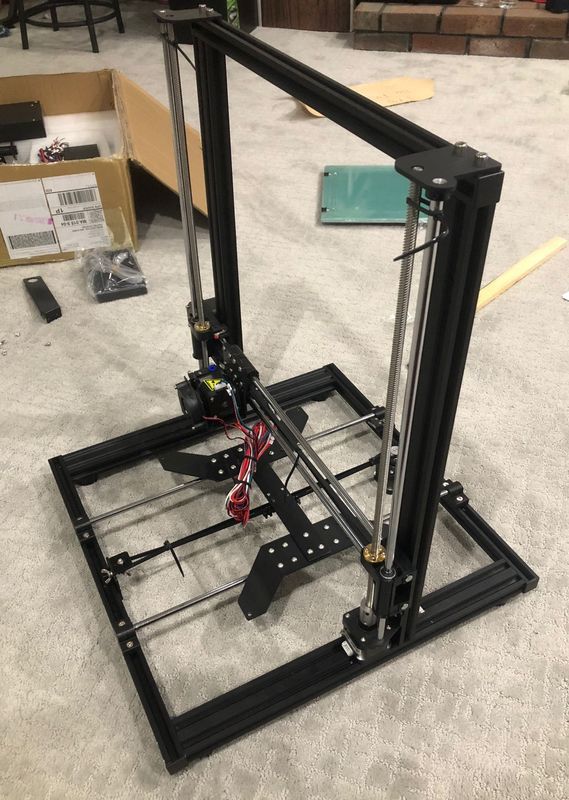
The box contains a long list of parts that must be assembled before an operation begins. Fortunately, Anet has preassembled some of the most complicated parts. The chassis and vertical frame already have the motors,  polished rods, threaded rods, and belts assembled. The extruder is pre-mounted on the vertical frame X axis. The Anet website claims that assembly is easy and only requires 10 minutes, but even their own how to video is 20 minutes long and uses camera cuts and time-lapse recording.  Overall, the assembly took a bit over 2 hours. The breakdown of the assembly process is illustrated below:

  • Assembly of the vertical frame on the chassis is straightforward. The mounting is pre-drilled which means alignment is easy. After assembly, it is important to verify the trueness of the vertical frame to make sure it is not leaning one direction or another, otherwise, the output will look like a bell tower in Pisa, but the directions did not explicitly require this.

  • Installing limit switch on the X-axis (which moves the extruder on the vertical frame) was easy but seemed like this could have also been completed at the factory.
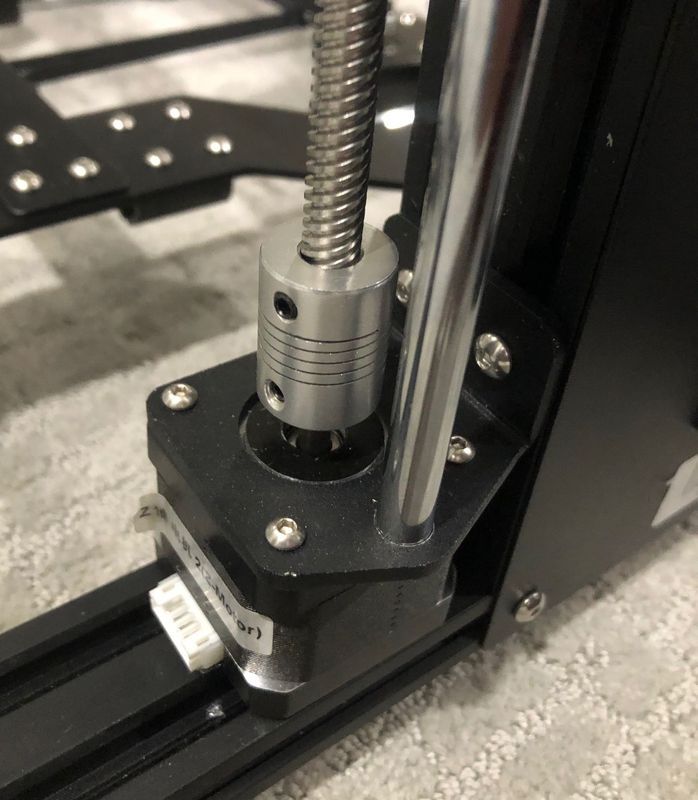
  • Securing the threaded rod only requires tightening the shaft coupling according to the assembly directions, but considering that X-axis (which is moved by the Z-axis) is only positioned by cable ties, I used a cut length of MDF and advanced the Z-axis against it until the Z-axis was completely parallel to the top of the frame. Then the couplings were tightened. This step ensured that both ends of the X-axis were at the same level.
  • Installing the windpipe is straightforward. it is a 3D printed component itself. Many sites online recommend printing a 360-degree diffuser but I haven’t done this yet.
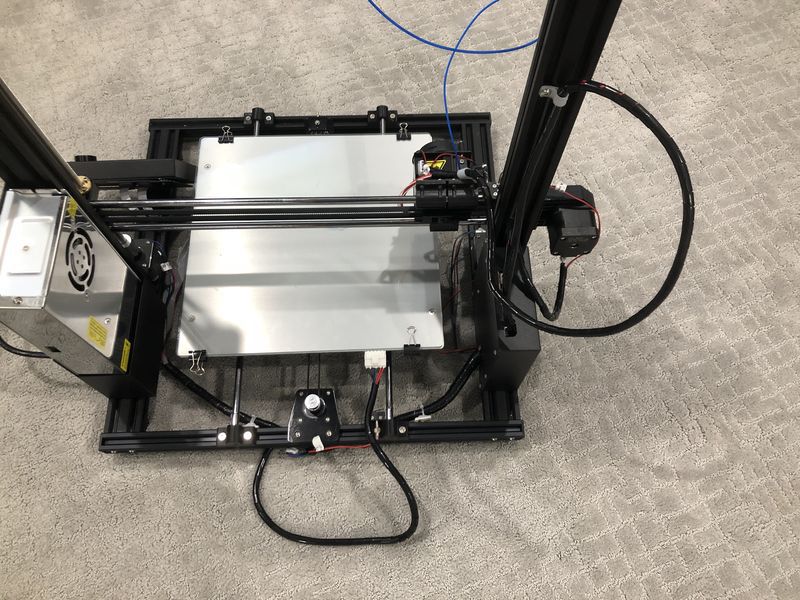
  • The motherboard is shipped in an enclosure. The enclosure must be opened to install all of the wiring. Installing the wiring is the most time-consuming part of the build. The amount of time that is spent on this step can vary considerably based on how neat you want the final product to look. There is also improvement in the robustness of the printer if the neatly organized wiring is less likely to be disconnected or snagged on the moving parts. There are 18 connections to make. the wiring was all well labeled and the connector design took all the guesswork out of the correct wiring. The only item I needed to figure out on my own was that the X-axis limit switch is a normally open/normally closed design and the wiring needs to go to the correct pin.

  • A guide of the optimal wiring layout would be immensely helpful. The manual also failed to emphasize that some wiring needs some slack so that the components can move. One modification I made to the recommended setup was to wire the items on the extruded to the guide rod bushing screw.
  • When testing the motors the extruder needs to be hot before the feed motor will activate.  I didn’t get a positive response that the motor is wired correctly until after I tried heating the extruder block.
  •  The display screen is prewired and enclosed in a metal case. It is mounted on a magnetic frame. I don’t really see the benefit of the removable screen. I have not really moved it at all in my interactions with the printer.
  • Mounting the spool holder is the last step. I mounted it on top of the frame because that way the printer is not as wide. The spool may also be mounted on the side of the chassis, opposite the control panel.

Operation

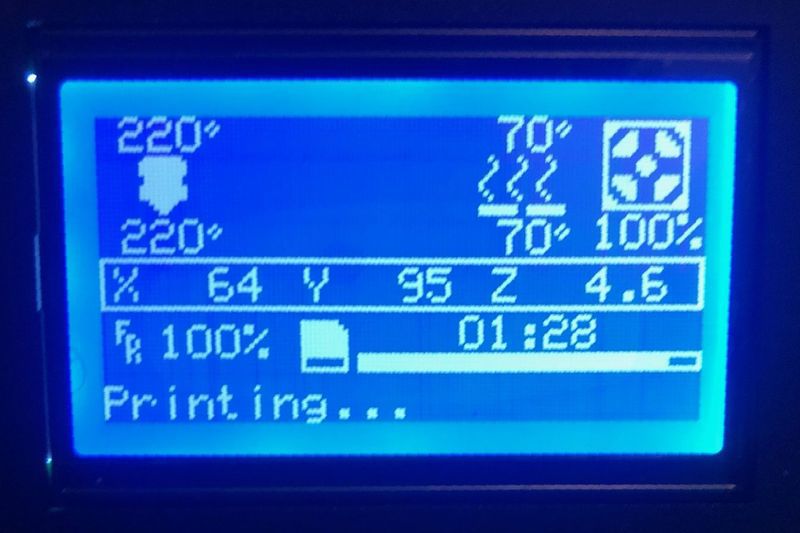
The controls of the machine show the extruder set point and present value, the bed set point and present value, the percent of full speed of the cooling fan, the location of the extruder in x,y,z space, the speed adjustment as a function of percent, the elapsed time and a status bar showing the percent of the model complete (in length of filament, not percent of layers). The control is menu based and is navigated by the control wheel to select menu position or value and pressing the wheel, which indicates selection. The menus are well organized and the operation is straightforward.  One issue I found is that there is a buffer on the knob movement, so caution should be taken when using this to move the extruder to the bed so as not to crash it. The screen also has a reset button mounted on the front. I would prefer that this was located on the motherboard so it is not pressed accidentally.

The unit ships with the Cura version 14.07 slicer, Cura user manual, The user manual for the Anet printer, Repetier Host and the CH340G USB to UART driver. I have done all my printing with the microSD and have not used the USB cable. The card also comes with a bunch of test prints: a giant Baymax figure, a change box, a brush barrel with a bear on the front, a Chinese Chess piece, a figure (a statue of Shia LaBeouf), a decoration of FU (Good Luck Character) and the English word love, and a Mayan Temple.

Cura has a lot of variables that can be adjusted to obtain the model or printer’s best output. I have not investigated all of the parameters or come up with any guidance on what settings are best. This is another area where having a strong user base is very useful for debugging and incremental improvement.

Performance

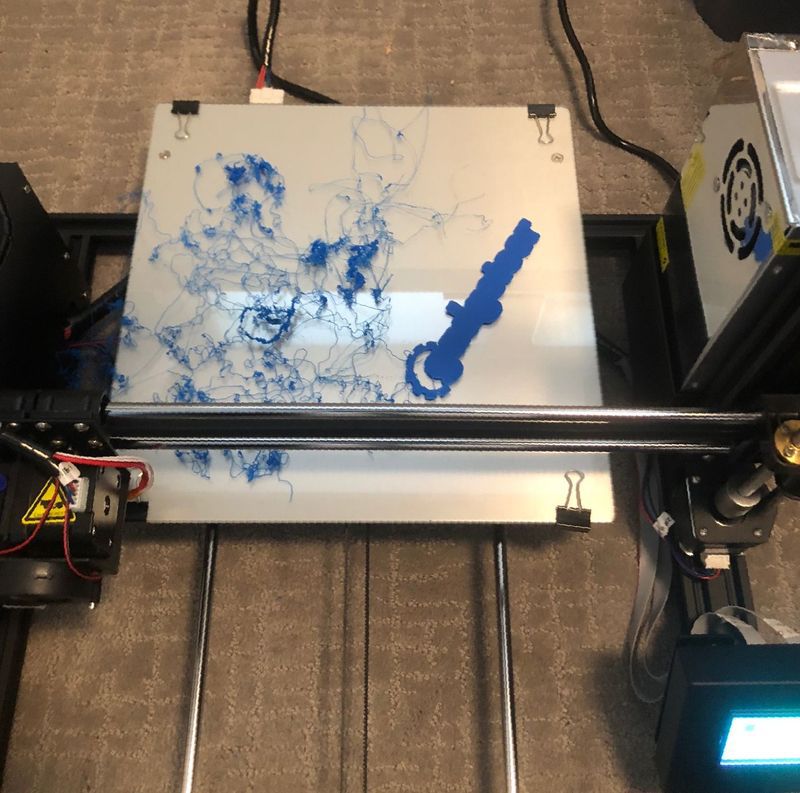
I did not run any popular benchmarks of this printer because as a project 3D printer, the results that I achieve may not be representative of other people’s build, but I did run a couple of models to test the operation. The first model I attempted, one of the bed nuts fell off and tilted the model. The extruder hit the model and I ended up with a bird’s nest.

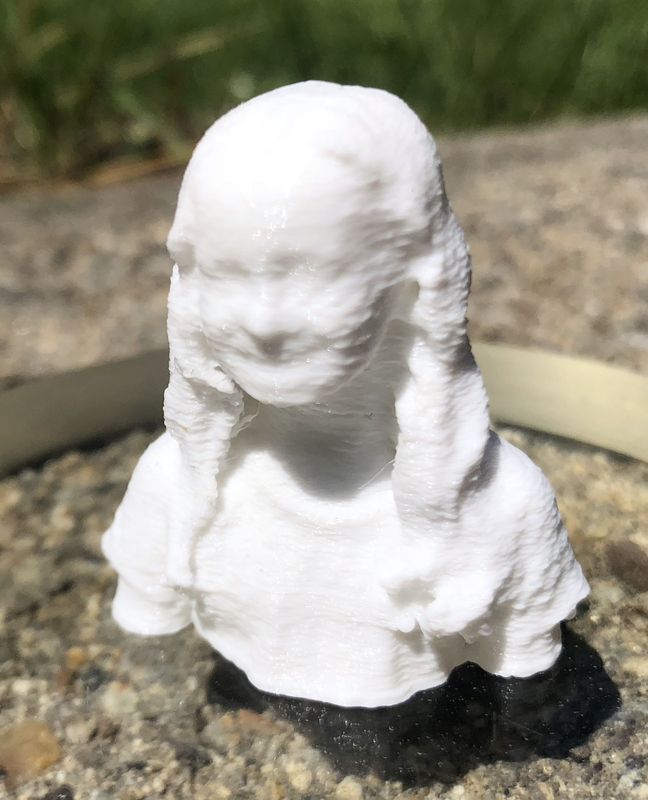
I wanted to see if I could print the images I captured with the Structure Scanner a couple of years ago. I dropped the OBJ into Cura and a full-scale model was displayed. I scaled it to 10% and it generated a gcode model. About 90 minutes later I had a scale model of my daughter. The test turned out to be a good demonstration of the intricacy that the printer is capable of.

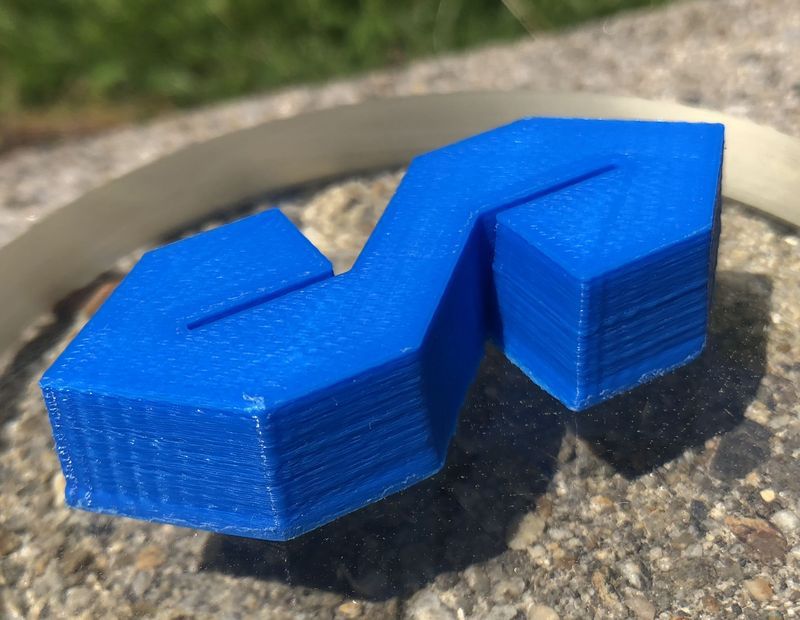
I printed a stylized ‘S’ on the x,y axis to see what the 45-degree sides would look like. I did have an issue on the bed leveling heigh and ended up with a bit of an elephant’s foot on the model, but the sides look ok. There is some waviness to the side of the ‘S’ and that is when the x and y motors are each operating at the same speed.  Maybe some print speed modification is needed but overall there is not that much noise for a prototype build.

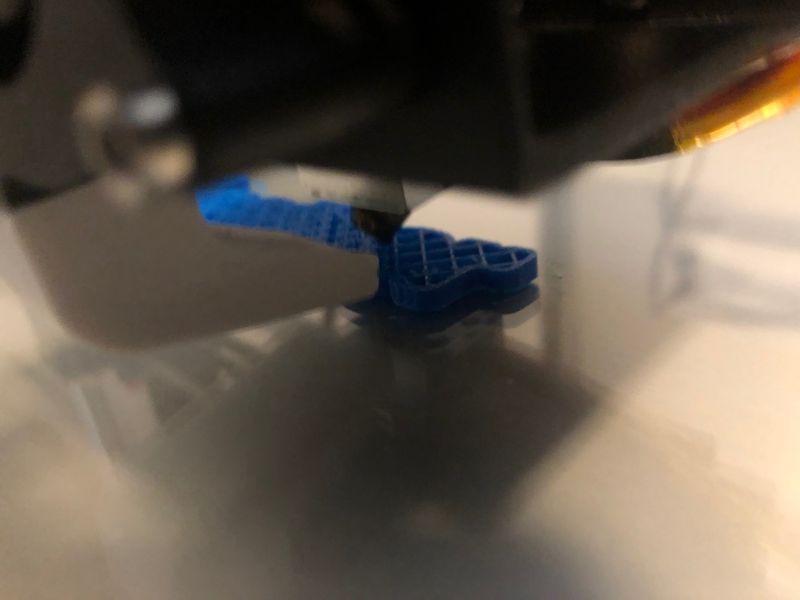
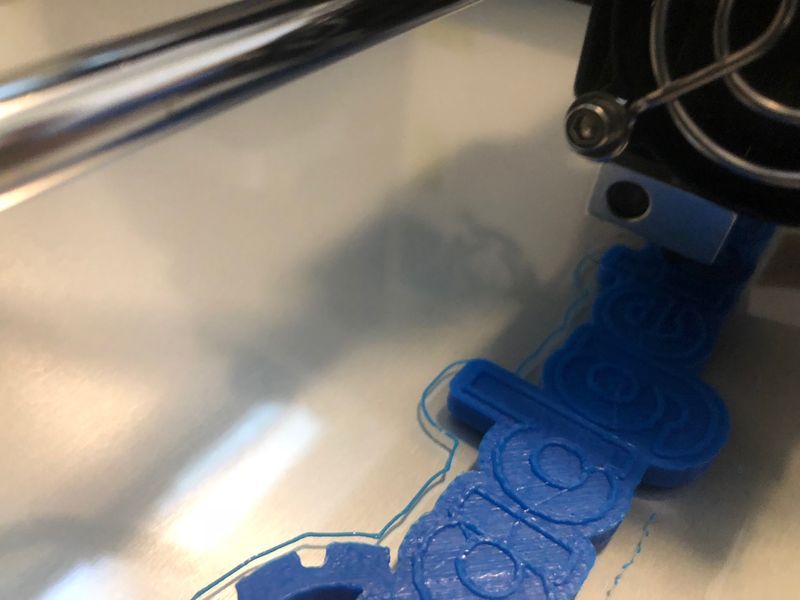
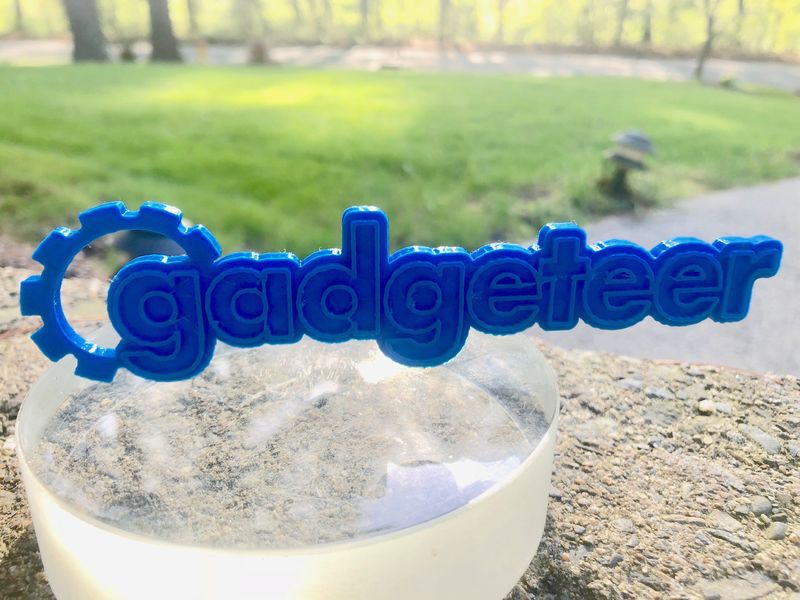
I also wanted to see how easy it is to print my own design. I printed a 3D version of the gadgeteer logo. I uploaded the logo into Tinkercad and created the Z-axis extrusion in the Tinkercad UI on the web.

It is very interesting to be able to design and print something without expensive custom 3D software. Of course, my first attempt didn’t go as planned.

But trying again

and a little patience during the 1:33 printing time –

results in a great 3D model.

What I like

  • Solid build
  • Good quality model output
  • a strong user support base
  • modifiable

What needs to be improved

  • wiring guide
  • bed leveling nuts

Final thoughts

The Anet A8 Plus offers many enhancements over the Anet A8 but still maintains the low price point, do-it-yourself kit feel, and decent part output that made the Anet A8 so popular. If you’re a professional, novice, or completely inexperienced and you are looking for an affordable 3D printer kit, the Anet A8 Plus may be a great starting point for modification, experiment or learning about FDM 3D printing.

Price: $288.00
Where to buy: Anet, Amazon, or AliExpress
Source: The sample of this product was provided by Anet.

Filed in categories: Reviews

Tagged:

Anet A8 Plus 3D printer review originally appeared on The Gadgeteer on June 10, 2019 at 10:00 am.

Note: If you are subscribed to this feed through FeedBurner, please switch to our native feed URL http://the-gadgeteer.com/feed/ in order to ensure continuous delivery.
The coolest advancements that happened in 3D printing in 2018

ARTICLE – As an innovation, 3D printing continues to amaze and impress technology enthusiasts with the extent of its possibilities. Here are five accomplishments that highlight how quickly 3D printing has improved and evolved.

1. We Can Make Lithium-Ion Batteries in Almost Any Shape

Lithium-ion batteries power many electronic gadgets, ranging from mobile phones to laptops. However, designing new devices with the same power source was often tricky since designers had to keep the shape of existing batteries — typically cylindrical or rectangular — in mind when making their prototypes.

Product makers wouldn’t have to conform to such constraints for much longer. In October 2018, researchers announced a way to 3D-print batteries in virtually any shape required. While the capacity of those batteries is about two orders of magnitude lower than commercially available batteries, researchers have several ideas for making improvements.

2. Severely Broken Bones Can Heal Using 3D-Printed Advancements

Even the most skilled orthopedic experts can’t guarantee that broken bones will set adequately and eventually be good as new. In particular, when accidents cause half of a long bone to shatter, no surgical interventions that ensure proper healing are currently available. That problem is especially debilitating for soldiers who may get such injuries due to explosions and other combat injuries.

With the help of a $2 million research grant from the U.S. Department of Defense, scientists at the University of Arizona hope to use 3D printing and adult stem cells to help those kinds of bone issues heal. The team used 3D printing in the lab to create bone-shaped frames, or “scaffolds.” They then filled those with stem cells and calcium particles, which speed the healing process.

The scaffolds serve as a template for the growth of the bone. So far, the researchers have completely formed a new bone in about three months. They want to continue testing to see if exercise could heal the area more rapidly. Further research will include these 3D scaffolds equipped with sensors that transmit exercise data and compare the progress of an active group of participants versus an inactive one.

3. Classic Car Production Can Get a Jump-Start

People have discovered more ways to print metal with 3D printing in 2018. For example, in March 2018, Dutch engineers completed the first 3D-printed steel bridge, and Russian scientists recently announced they’ve come up with a new metal powder composition that doubles the strength of 3D-printed aluminum.

These advancements are significant because they may allow companies to compensate for the steel and aluminum tariffs imposed by President Trump in 2017. They affect multiple countries besides the U.S., and, according to one poll, half of Americans opposed the tariffs.

3D printing of metal parts could allow some automobile manufacturers to make more components in-house, thereby getting fewer imported parts that are subject to the tariffs. Mercedes-Benz started remaking its classic cars with help from 3D printing, building parts that are otherwise obsolete. Porsche does the same by manufacturing steel and alloy parts for its classic cars with 3D printing, allowing the company to produce them on an as-needed basis.

Besides giving automotive brands more control over parts production and avoiding potential tariffs, these improvements could assist classic car owners in getting parts directly from the manufacturer. They can then keep their prized possessions on the road and working well while giving manufacturers another profit stream.

4. 3D-Printed Mouthguards Can Fight Oral Diseases

Oral diseases can be extremely painful, especially when it’s difficult for dentists to target the cause with the necessary medications. However, scientists believe they have opened up the possibilities for oral medication delivery methods with a 3D-printed wearable that gives a customized fit based on the patient’s tooth impressions. It’s similar to a mouthguard used to prevent nighttime teeth grinding or sports injuries.

In two tests — including one on humans — researchers found the device reliably released an oral anti-inflammatory drug over two weeks. The process of making the mouthguard took only a couple of hours, substantially faster than the technique for making traditional mouthguards.

Researchers also believe it’s possible to apply their fabrication methods to other devices, which could lead to other advancements for the patients who need them.

5. Robots Can Work Together to Print a Concrete Structure

3D printing lends itself to other technologies, and when used together, the associated advancements may be even more impressive. Scientists in Singapore proved that when they developed a way for robots to 3D-print parts of a concrete structure in sync, thereby finishing the task rapidly.

The team also says their method — which benefits from swarm printing — allows for unique concrete shapes not possible with conventional casting. This method combats the problem that traditional 3D printing methods faced when printing concrete — the printers were often larger than the structures produced, making them unfeasible for construction sites with limited free space.

During a test, two mobile robots teamed up to make a concrete structure in eight minutes, although the material required two days to harden and a week to reach its full strength. The project’s team wants to explore using more robots to work on these concrete projects to determine the most efficient way to cure the concrete.

The researchers envision a future where people could bring mobile robots to a work site, program them to print the parts and then transport them elsewhere. They’re currently working to coordinate the robots’ movements so the machines won’t collide and are excited about what they’ve already achieved.

What Will 2019 Bring?

This list emphasizes the diversity of potential for 3D printing, especially in the problems it could solve. It should inspire people to wonder what’s ahead for 2019 and feel enthusiastic about the possible advancements.

Image by Rawpixel

Filed in categories: Articles

Tagged:

The coolest advancements that happened in 3D printing in 2018 originally appeared on The Gadgeteer on December 12, 2018 at 10:00 am.

Note: If you are subscribed to this feed through FeedBurner, please switch to our native feed URL http://the-gadgeteer.com/feed/ in order to ensure continuous delivery.
SparkMaker Mini Desktop SLA 3D printer review

I know nothing about 3D printing, except for little models my son has brought home from summer “tech” camps. This tiny desktop 3D printer caught my eye, and only required an SD card for printing. Pretty slick, right? Let’s take a look.

What is it?

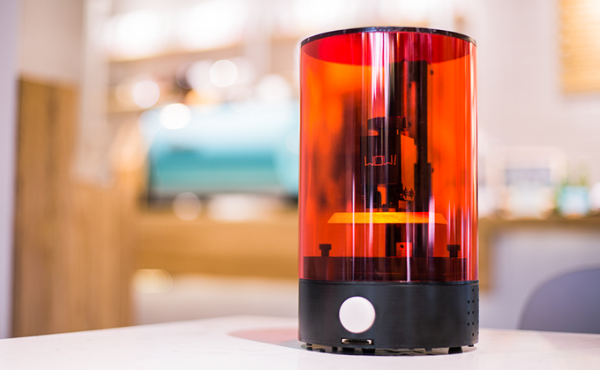
The SparkMaker is billed as a compact, user-friendly desktop 3D printer that doesn’t use the usual filament to “build” models. Instead, it uses a liquid resin to build “up”, and UV lights under the vat harden the model slice by slice. A motorized platform raises the model up from the goo, sort of like the T-1000 Terminator from the second movie.

Hardware specs

  • Height:  10 inches
  • Width: 6.7 inches diameter
  • Print size: 4 x 2.2 x 5 inches

What’s in the box?

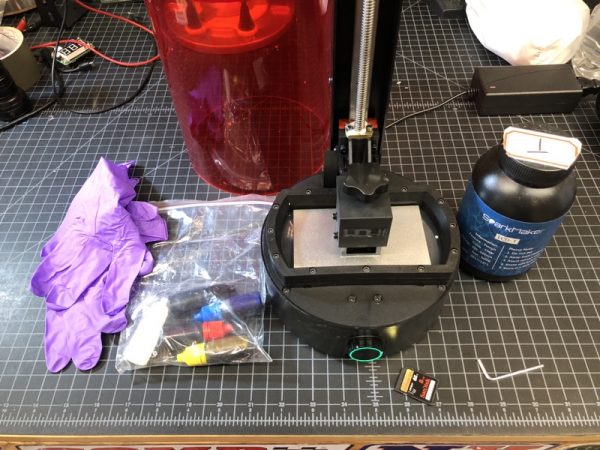
My sample came with just the power supply, hex wrench, and red cover. The resin (LCD-T) and some dyes were shipped separately.

Design and features

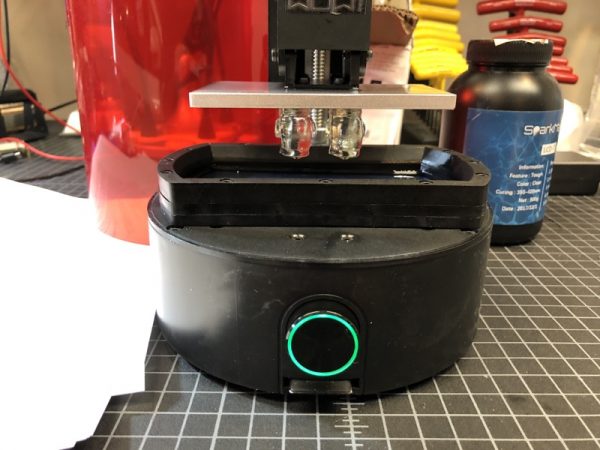
There is no screen on the printer. The only user interface is a single round knob on the front with an LED ring. There’s not even a power on/off switch.

A very long screw extends from the base of the printer. This moves the silver metal platform up and down. The metal platform has no “smarts”. Its only holds the model upside down.

Setup

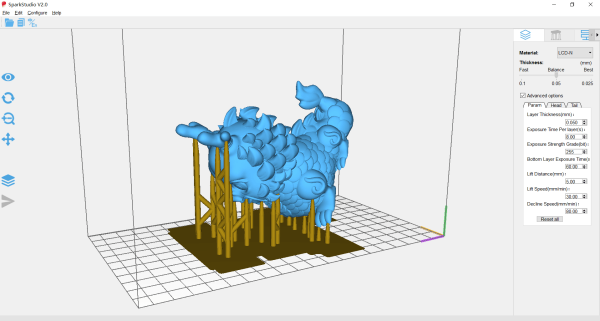
There is a Windows program called SparkStudio where your’e supposedly able to edit files, but I was unable to get it to work. Fortunately, there were several sample 3D files to download. They’re all in “print.wow” file format, which you simply drag and drop to an SD card. The printer recognizes nothing else.

Next, you pour the resin into the vat. Don’t spill any. This is nasty, sticky stuff. I wasn’t exactly sure how much to pour in so I just guessed.

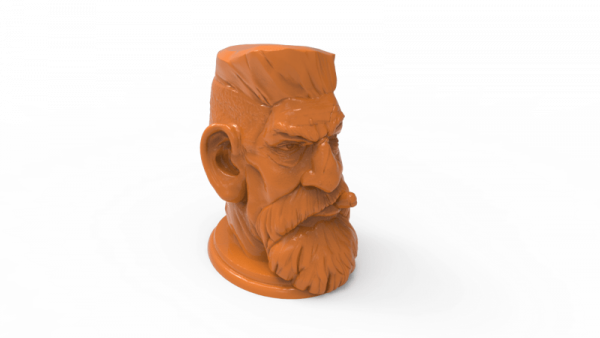
For my print sample, I chose this stout little head. What could go wrong?
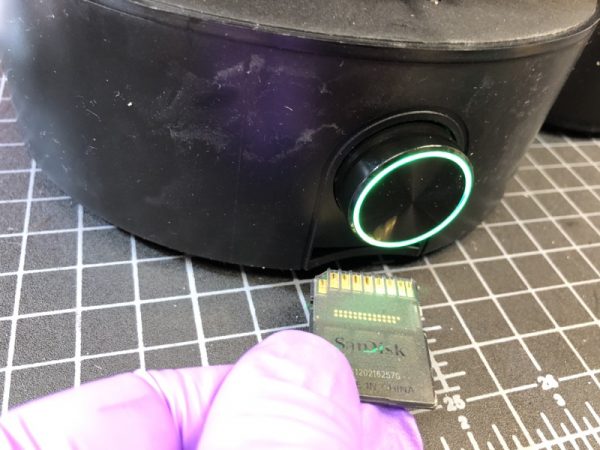
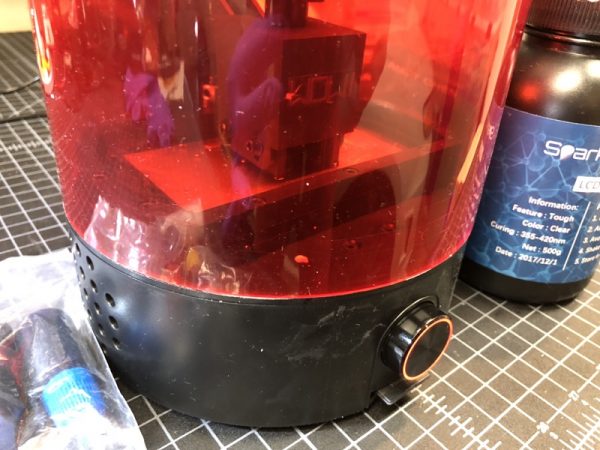
The SD card inserts under the button (upside down, mind you).

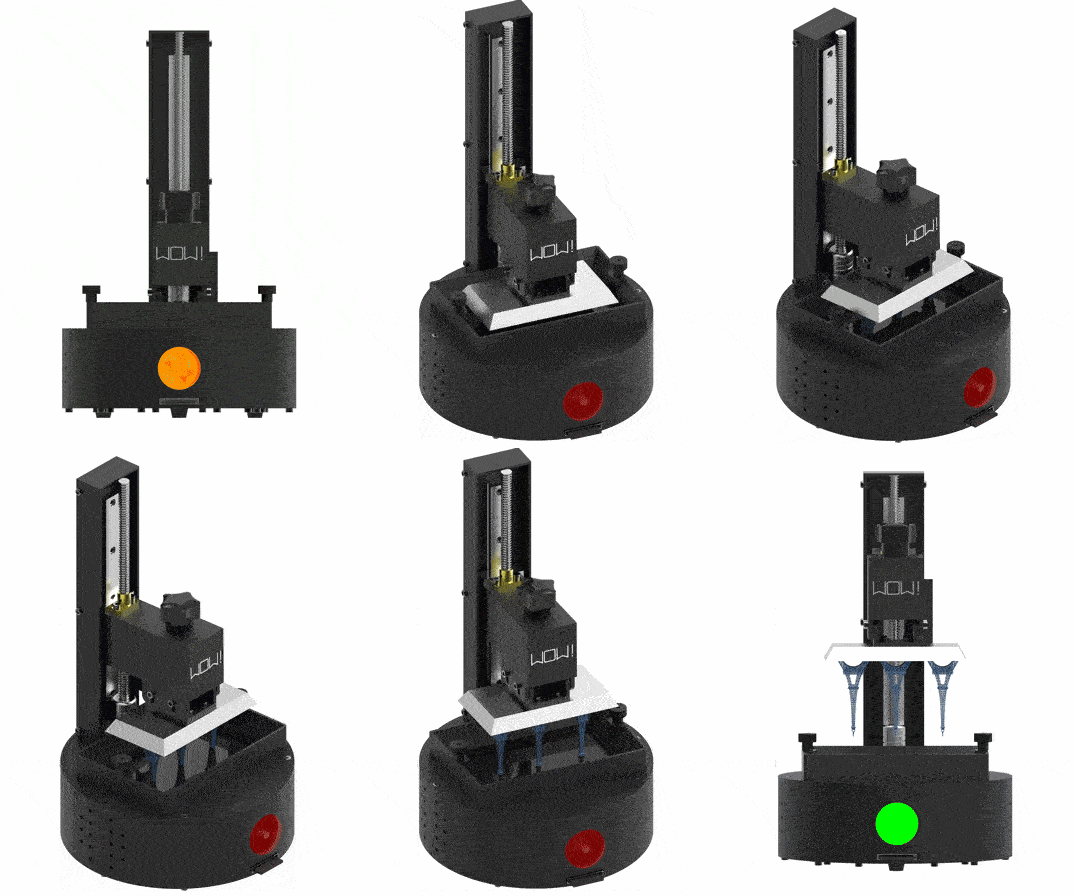
Is it working? The flashing red circle says it’s working. That’s it!

Performance

If you’re looking for Star Trek replicator speed, forget it. At first, I thought the printer was dead, as the light blinked red. However, the platform did move ever so slowly, as the cooling fan hummed away at the base of the printer.

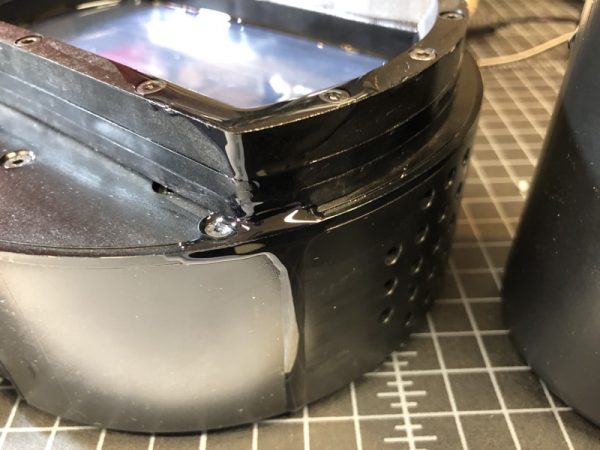
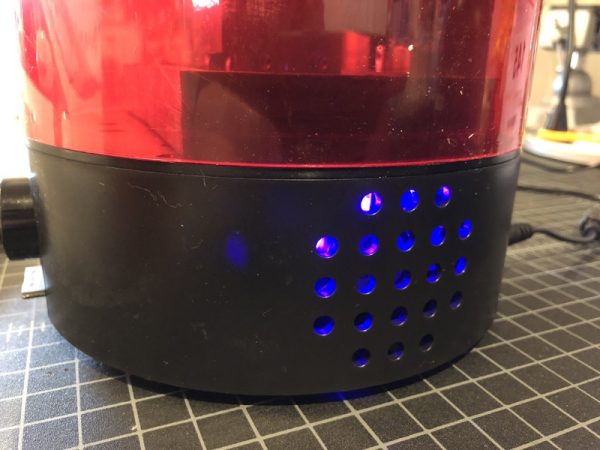
The fan noise isn’t too unpleasant. It’s similar to a noisy laptop at full load. Here you’ll see the UV lights blasting away through the ventilation holes.

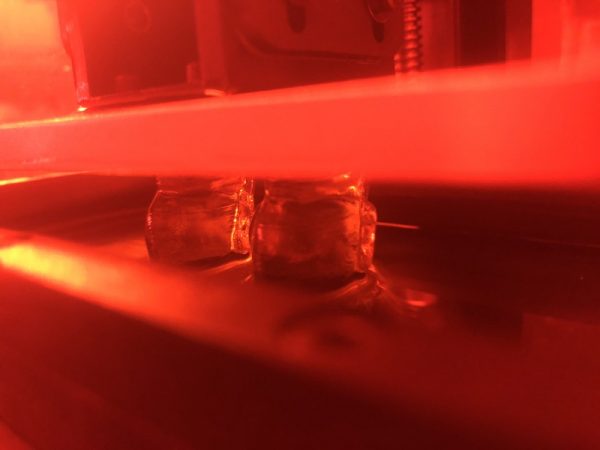
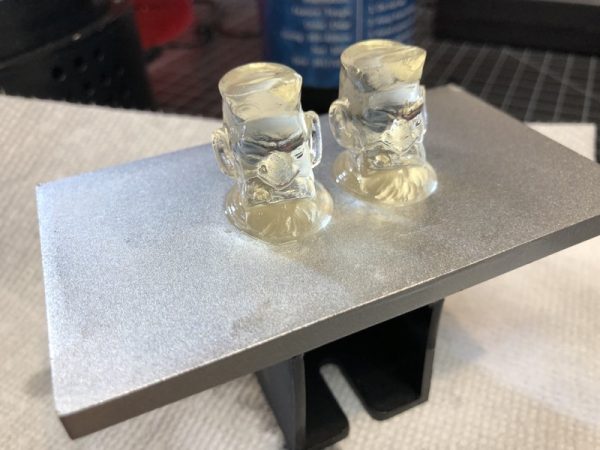
A few hours later, I could see the printed objects “rising” from the primordial goo.

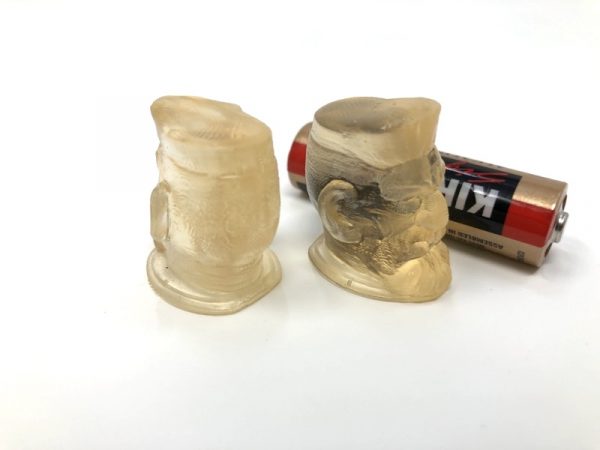
About 4-5 hours later I had two tiny little heads. Two? Apparently, the file was set for two, and I had no way to change that as far as I could figure out.

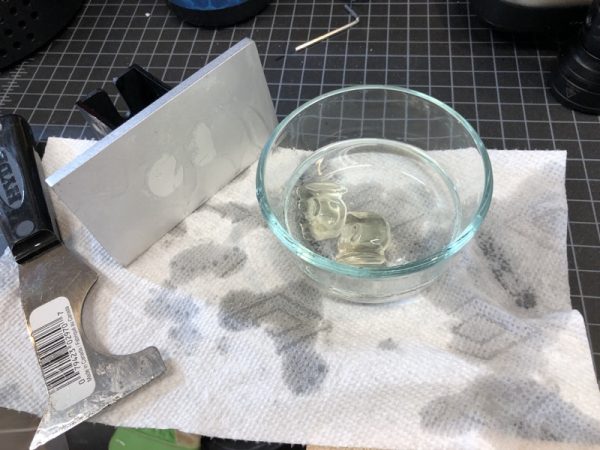
Next, I scraped off the heads from the metal platform and gave them an alcohol bath…

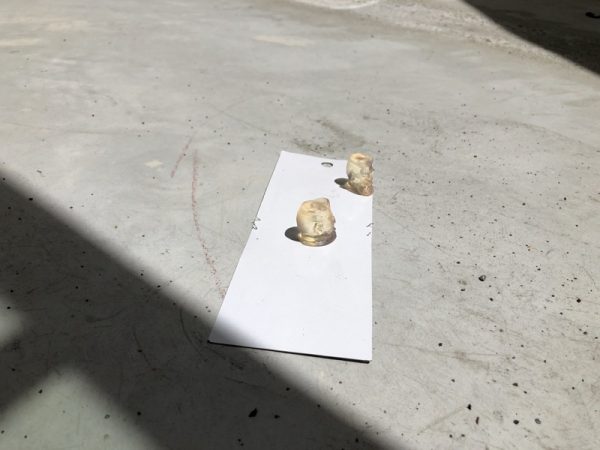
…And let the bask in the California sun to cure under some UV light.

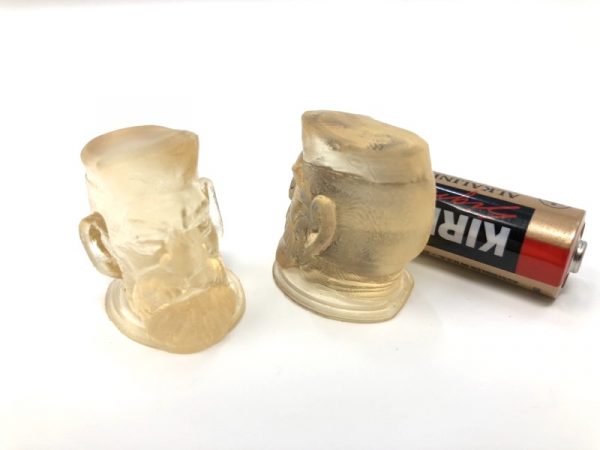
And here are my two heads. Two heads are better than one, right? They sure turned out smaller than I expected. That’s an AA battery for size comparison. They remind me of novelty guitar knobs.

What I like

Very small and compact. Zero computer skills necessary with the SD card interface.

What needs to be improved

This product is not for first timers. I could not figure out how to edit, find, or upload any other 3D models. This is probably due to my lack of experience in 3D modeling, but the printed documentation is poor which does not impart confidence. Also, liquid resin is just nasty to handle.

Final thoughts

From what I understand, this type of 3D printing provides a higher degree of precision and the SparkMaker is quite a price breakthrough for this medium. Some of the filament-printed things I’ve seen look completely rough-hewn compared to the twin heads I printed for the first time. If you’re a hobbyist in this field and you’re not afraid to dig deeper, the SparkMaker SLA 3D Printer might just whip something up good for you.

Price: $289
Where to buy: OGadget or Amazon
Source: The sample of this product was provided by Ogadget.

The post SparkMaker Mini Desktop SLA 3D printer review appeared first on The Gadgeteer.

Filed in categories: Reviews

Tagged:

SparkMaker Mini Desktop SLA 3D printer review originally appeared on The Gadgeteer on May 15, 2018 at 10:00 am.

Note: If you are subscribed to this feed through FeedBurner, please switch to our native feed URL http://the-gadgeteer.com/feed/ in order to ensure continuous delivery.