Wireless Emergency Alerts (WEA) explained: AMBER alerts and what the heck is a Severe Alert vs. an Extreme Alert and how do I turn them off?!?


Here’s the scenario: I’m at home in the middle of the night sleeping, dreaming of eating doughnuts without guilt when suddenly I’m jolted out of my blissful reverie by my phone’s blaring emergency broadcast alert. I fumble around frantically to find my phone to determine the type of impending doom that’s about to befall me and mine only to find that it’s a flash flood warning which is not a threat to me where I live. Uuuugh! Sometimes this happens when I’m in a meeting or in a class or watching a recital and I’ve diligently silenced my phone except for the Wireless Emergency Alerts (WEA) that get through in mortifying fashion. Most of my alerts have been flash flood warnings, so how do I turn those off?

In all seriousness, these alerts were implemented to warn us of highly dangerous situations and I’m thankful that they exist. They save lives. But before I get into how to alter the emergency alert settings I want to explain a little about the alerts.

About Wireless Emergency Alerts (WEA)

Who issues emergency alerts: They are issued by government alerting authorities like the National Weather Service (NWS), Department of Homeland Security, and state and local public safety agencies according to Weather warnings to go!, a publication issued by the National Weather Service (NWS).

How are the alerts sent?: “Federal, state, local and tribal public safety agencies must apply to FEMA to become alert-originating authorities. Once the alert-originators are authorized, FEMA authenticates the sender and the alert. FEMA transmits the WEA to the more than 100 participating wireless providers who may have customers in that designated alerting area. Only those customers in that target area receive the alert.” (from ctia.org – the Cellular Telecommunications Industry Association – an international nonprofit organization that represents all sectors of wireless communications).

They are not text messages: Some of these alerts might look like text messages but they are not and are thus not affected by network congestion that may affect mobile voice or text messaging services. According to ctia.org, the emergency alerts will be no more than 90 characters, contain the type of alert it is and the time, who is affected and what action to take and the agency issuing the alert.

Types of alerts/examples of alerts: There are only three types of alerts that you will receive according to the Federal Communications Commission FCC:

  1. Alerts issued by the President
  2. Alerts involving imminent threats to safety or life
  3. AMBER alerts (named after “9-year-old Amber Hagerman, who was kidnaped while riding her bicycle in Arlington, TX, and then brutally murdered” according to amberalert.gov; also stands for America’s Missing: Broadcasting Emergency Response)

So, in addition to severe weather and AMBER alerts, you may receive evacuation orders, terrorist threat alerts, chemical spill alerts, etc. according to the FCC.

Wireless carrier/device limitations: It is important to know that some phones may not be WEA compatible. If that is the case for you, you may still receive alerts via mobile apps. Also, your wireless carrier must participate in the WEA program for you to receive the alerts; however, more than 100 mobile carriers, including all of the largest carriers, participate in the WEA program according to ctia.org.

Alerts are location dependent: Alerts are issued according to your current location. Thus, if you are traveling, you will receive alerts according to the location you are visiting. In other words, if you are using a cell tower in the alert zone, you will receive that alert according to the FCC. Since the alerts are dependent on the cell tower you are currently using, you and a friend can be in the same location but if you are using different cell towers, you may not receive the same alerts (FCC).

Altering your alert settings

Can the alerts be turned off?: Depending on your wireless carrier and type of phone that you use, you can turn off some of these alerts but you CANNOT block alerts issued by the President. And, since these alerts are so important, they will ignore your Do Not Disturb settings. For my own purposes, I’m focusing on altering the settings of the weather alerts that I receive. Since I spend most of my time at home as a homeschool teacher where flash floods are not a threat, I do not want to receive those unnecessary warnings. So I dug into my phone’s settings to investigate how to turn this alert off.

Location of alert settings on phones: Where in the world are the WEA (or Emergency broadcasts) settings? It’s fairly straightforward to find those settings on an iPhone. They are located in Settings > Notifications > (scroll to the bottom) Government Alerts. Under Government Alerts there are only two settings to turn on or off: AMBER Alerts and Emergency Alerts.

However, if you use an Android phone, it turns out the alert settings could be anywhere (well almost anywhere it seems), depending on the phone (the following list of steps is based on the Android phones I have at home and steps I have googled for some other phones):

  • Android 7: Phone Settings > Sound > Emergency broadcasts
  • Android 5 and 6: Phone Settings > More > Emergency broadcasts
  • Older Android versions: Phone Settings > More > Wireless & Networks > Cell Broadcast settings  (from phonetipz.com)
  • Samsung Galaxy S7: Phone Settings > Privacy and Emergency > Emergency Alerts > More button > Settings (from tomsguide.com)
  • HTC One M9 and LG G6: Emergency Alerts app > Menu icon (vertical ellipsis) > Settings (from tomsguide.com)

You can also alter the alert settings via your messaging app on your Android 7.0 phone:

  • Messenger > Menu icon (vertical ellipsis) > Settings > Advanced > Wireless Alerts > Menu icon (vertical ellipsis) > Settings


Android emergency alert settings: These are broken down into more detail than iPhone users have access to. The above screenshots show the various alerts and alert settings that you can disable or enable on your Android phone. They are:

  1. Show extreme threats
  2. Show severe threats
  3. Show AMBER alerts

You also have the option to enable the following: display notifications, select the duration of the alert sound, set an alert reminder, vibrate on alert, speak alert messages, display test broadcasts for the Earthquake Tsunami Warning System (ETWS), display test broadcasts for Commercial Mobile Alert System (CMAS – this is an older name for what is now known as Wireless Emergency Alerts), and show an opt-out dialog after displaying the first CMAS alert (other than Presidential Alert).

By default, all of my alerts were enabled. You might be saying to yourself just as I did, “I want to receive tornado alerts but not flash flood alerts. So, is a flash flood a severe threat or an extreme threat? And what exactly is the difference between the two?” *scratching head*

It turns out that severe threats and extreme threats include the following (the table above and the following information come from the NWS):

Severe threats (see the table above for warning details):

  • storm surge warnings
  • flash flood warnings
  • dust storm warnings

Extreme threats (see the table above for warning details):

  • tsunami warnings
  • tornado warnings
  • severe wind warnings
  • hurricane warnings
  • typhoon warnings

Now, knowing the difference between Severe threats and Extreme threats, I unselected the Show severe threats so that I could avoid getting flash flood warnings. So, there you have it. All about Wireless Emergency Alerts. Whew! That was a lot of work just to figure out how to turn off Flash Flood warnings!

Filed in categories: Articles

Tagged:

Wireless Emergency Alerts (WEA) explained: AMBER alerts and what the heck is a Severe Alert vs. an Extreme Alert and how do I turn them off?!? originally appeared on on June 30, 2017 at 8:00 am.

Note: If you are subscribed to this feed through FeedBurner, please switch to our native feed URL http://the-gadgeteer.com/feed/ in order to ensure continuous delivery.
Flares Pro earphones produce sound quality that feels live


It takes a lot of confidence to name an earphone a “Pro” model. That simple three-letter word sets up all kinds of expectations. Flare doesn’t make many products—one model of consumer speakers, ear plugs for noise protection, a line of pro speakers and now the Flares Pro wireless earphones. As Flare states, “New wireless earphones that produce sound quality so high every recording feels live.” One look at the box and it’s clearly apparent that Flare is serious.

The Flares Pro earphones are made of aerospace grade 5 titanium which makes them both light and strong. They are also open-backed—a rarity in earphones. The shells contain speakers are 5.5 mm beryllium connected by removable oxygen-free reinforced cables. Flare utilizes what they call Dual Jet technology—a complicated process that uses opposing pressure to achieve a balance in all frequencies thereby reducing distortion.

The Flares Pro earphones connect through a small DAC which can play hi-res music files up to 16BIT 48/96kHz. Battery life is rated at 10 hours from a 2 hour charge. aptX 4.1 Bluetooth has a range of 50 ft. Both the DAC and earphones are designed to work together in perfect balance. “In order to move forward we have gone back to the very beginning to understand how sound interacts on a molecular level” says Flare’s inventor Davies Roberts.

The large selection of included ear tips is divided for audiophile, everyday and universal listening with each having its advantages and disadvantages, which Flare plainly explains.

The Flares Pro earphones sell for $454.00 US. Visit Flare Audio for more information.

Filed in categories: News

Tagged:

Flares Pro earphones produce sound quality that feels live originally appeared on on June 30, 2017 at 7:00 am.

Note: If you are subscribed to this feed through FeedBurner, please switch to our native feed URL http://the-gadgeteer.com/feed/ in order to ensure continuous delivery.

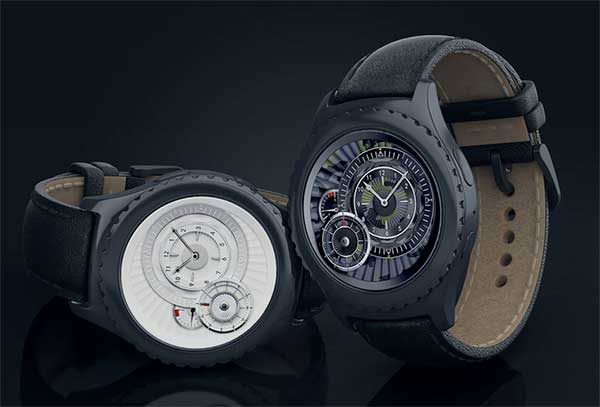
Ghost Studio’s Android Wear watch faces are incredible


Wow. That’s the only word that popped into my head when I clicked a link in an email to the Ghost Studio website. I wasn’t expecting much because I get so many emails asking to look at apps, products, etc, that end up being disappointing when I take the time to check them out. That wasn’t the case when I visited the Ghost Studio site and saw their Android Wear and Samsung Galaxy S3/S2 smart watch faces.

My name is Lazar Ilic and I’m a designer and co-owner of Ghost Studio. I think you might be interested in checking us out. We develop realistic watch faces for Android Wear and Samsung Gear S3/S2 smart watches, and we are trying to bring the look of luxurious mechanical watches to their smart counterparts thus making smart watches appear more stylish and luxurious and be perceived more as fashion accessories than just tech gadgets. We are led by the motto “Tech meets fashion” and we believe that our apps contribute to reducing the gap between high-end analog watches and smart watches in terms of visual experience.

At the moment, I counted 11 watch faces in their store. Each one is available for Android Wear watches and Samsung Galaxy Gear S2/S3 watches for $1.50 each.

The faces feature animated second hands and different color schemes. There are even feminine styles.

Ghost Studio even has a YouTube channel where you can see the watch faces in action like the video above.

If you’re an Android Wear or Galaxy Gear fan, you’ll want to check out ghostfaces.net. I bet you’ll say wow too.

Filed in categories: News

Tagged:

Ghost Studio’s Android Wear watch faces are incredible originally appeared on on June 29, 2017 at 5:23 pm.

Note: If you are subscribed to this feed through FeedBurner, please switch to our native feed URL http://the-gadgeteer.com/feed/ in order to ensure continuous delivery.
Android 7.0 tips part 2: Open Chrome in two separate windows using split-screen and enable Night Mode


Last month I wrote an article entitled Android 7.0 tips: Notifications and power notification controls which seemed to interest some of you, so this month I thought that I would share some additional Android 7.0 tips. Did you know that you can open two Chrome windows using the split-screen feature? And did you know that Nougat has a hidden Night Mode feature that you can enable without rooting your phone?

Before I detail the steps on how to open two Chrome windows using split-screen, I will cover how to use the split-screen feature with two different apps.

Split-screen for two different apps


First, you will need to open an app that works with the split-screen feature (not all apps do; you will not be able to enter split-screen mode if the app does not work with it). Next, long press on the Recent Apps button which is the square soft key located at the bottom of your phone. After doing so, you will notice that the square soft key becomes two stacked horizontal rectangles and the app will be placed in the upper portion of your phone’s screen. At that time, if you have other apps that are open, you may scroll through the Recent Apps area in the lower part of the screen and tap on the one you want to fill the lower half of your screen. If you do not have any other apps open, you can tap on your phone’s Home button and then select an app to open. If the second app you launch does not work with split-screen, you may have to start over with the split-screen process. You can adjust the size of the two windows by long pressing and dragging up or down on the small dash located within the center of the bar that separates the apps.

If you would like to switch the app in the lower window to another app, use a short single tap on the Recent Apps button then either select another app from the Recent Apps area or tap on the Home button of your phone to open another app. To exit split-screen mode, you’ll need to long press on the Recent Apps button again. That’s it.

Open two Chrome windows using split-screen


To open two Chrome windows in split-screen, you need to open your Chrome app then open two tabs in Chrome that you are interested in as shown in the left screenshot above (the square containing the number 2 located at the top of the Chrome app to the right of the web address indicates the number of tabs you have open). Make sure that the tab that you want to move to the LOWER part of your phone’s screen is the active window (the tab that you are viewing), then long press on the Recent Apps button.


Next, you will need to tap on the vertical ellipsis (or More Options) icon located in the upper-right corner of the Chrome app to access the Chrome app menu as shown in the left screenshot above. Now you’ll need to tap on “Move to other window” after which, the Chrome tab that you are viewing will be moved to the lower part of the split-screen, leaving the other tab to fill the upper part of your phone’s screen. When you want to exit the split-screen mode, you’ll need to long press on the Recent Apps button again.

Enabling Night Mode

The next tip I have for you is enabling Night Mode. Night Mode is a blue-canceling mode for your phone to help reduce interference with your sleep patterns. I learned how to activate this feature thanks to android.gadgethacks.com and found that this feature is somewhat twitchy to use, but it is possible to get it to work.


Even though this feature did not visibly make it to the final version of Android 7.0, the code is apparently still there and can be accessed (without root) by downloading the app called Night Mode Enabler by Mike Evans.

NOTE: Before being able to use the Night Mode Enabler app you must first enable the System UI Tuner. If you haven’t already done this, please visit the Android 7.0 tips: Notifications and power notification controls article that I wrote last month (the steps to enable it are located in the middle of the article). HTC phones users and others that cannot enable AND access the System UI Tuner from your phone’s settings will not be able to enable Night Mode. Remember, all of the System UI Tuner settings are experimental and may not work.

When you open the Night Mode Enabler app, you’ll need to tap on the Enable Night Mode button as shown in the right screenshot above.


Just after tapping on the button, you will be brought to the Night Mode settings located in the System UI Tuner. The Night Mode settings consist of turning the mode on, turning it on automatically, adjusting the tint and adjusting the brightness.

When you fully expand your phone’s Quick Settings (by pulling down on the Notification Shade twice) you will then notice that the Night Mode toggle was added to your list (it was added automatically for me). If it was not, you can tap on the Edit button located in the lower right corner of the Quick Settings area then, from the list of additional toggles, long press on the Night Mode toggle and drag it to your desired location in Quick Settings (you can reorder any of your toggles using this process). If you have trouble adding it, according to android.gadgethacks.com, you can “reset your Quick Settings toggles, then add the Night Mode switch again. To do that, just head to the ‘Edit’ menu in Quick Settings, then tap the three-dot menu button in the top-right corner and choose ‘Reset.’” Now you can manually toggle Night Mode on or off if you wish. When this feature is active, the screen on your phone takes on an orange hue which I could not capture with screenshots.

NOTE: the ONLY way to access and alter these Night Mode settings is by long pressing on the Night Mode toggle in your phone’s Quick Settings or by launching the Night Mode Enabler app – you WILL NOT see it by going into the System UI Tuner settings directly.

It was my experience that leaving the Night Mode settings in their default positions allowed me to manually turn Night Mode on or off from my phone’s Quick Settings. Turning off the Adjust Tint setting seemed to prevent my phone’s screen color from changing, so I left this in the “On” position. I have not tested turning on Night Mode automatically, I’ve only used the manual toggle in Quick Settings. I realize that there are night mode apps available that perform this function well, but this method is free (no ads to deal with) and I do like having a Night Mode toggle available in my phone’s Quick Settings.

I hope you find these features useful and fun to use like I did!

Filed in categories: Articles

Tagged:

Android 7.0 tips part 2: Open Chrome in two separate windows using split-screen and enable Night Mode originally appeared on on June 29, 2017 at 1:12 pm.

Note: If you are subscribed to this feed through FeedBurner, please switch to our native feed URL http://the-gadgeteer.com/feed/ in order to ensure continuous delivery.

Mychanic Pod Light Review


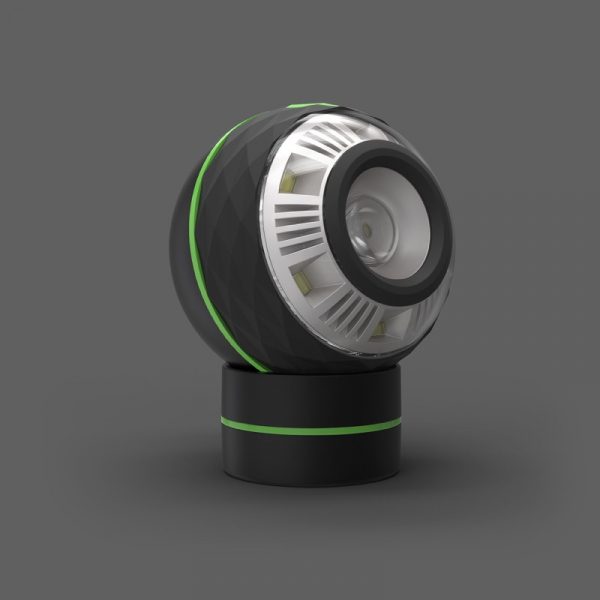
“Oh cool” was my son’s reaction when he saw this… thing.  What is this thing?  It’s called the Pod Light from Mychanic, a unique take on the work light that goes almost anywhere.


  • Sphere is 3.5” in diameter
  • Base is 2.25” in diameter
  • Sphere + Base is 4.5” tall
  • 250 lumens
  • Weight: .6 lbs
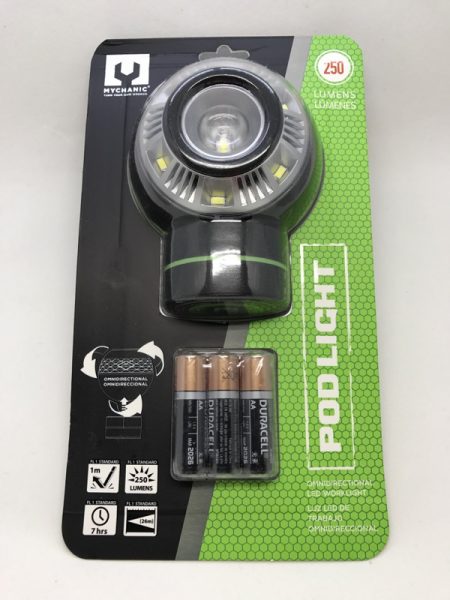
  • Includes 3 AA Duracell(R) batteries
  • Durable ABS housing
  • Patent pending

The first thing I noticed:  Batteries included!  It also meant it wasn’t USB rechargeable, something I’ve been looking for in lights recently.

Let’s take a look at that base.  It’s magnetized on both the concave side (to hold the pod) and the flat side, for mounting on a metallic work surface.

Feeding time!  The Pod Light takes three AA batteries.

There’s a single diamond-shaped button on the top of the softball-sized light.  You get a low (6 surround LEDs) and a high (all LEDs) setting.  There’s no setting for just the central LED.

Here’s the Pod Light, mounted on a metal part under my hood.

How long does the Pod Light stay lit? To try this, I installed a set of regular rechargeable Eneloop AA batteries and let it sit on the brightest setting.  After a few hours, the LED intensity dropped.  I’d say the listed 7 hours is pretty accurate.

By the next morning, it was more like a dim night light. The Pod Light kept putting out a faint glow of light (not very useful) for nearly 36 hours before going completely dark. I’m not sure how alkaline AA batteries would fare, but the discharge curve is probably a little different.

Mychanic states that “you won’t be able to put it down” and I think they’re right.  The sphere shape just feels fun, and I ended up going around the house to see where I could stick the magnetic base (appliances, shelves, car door).  I still wish the Pod Light was USB rechargeable, but at least they were good enough to include AA batteries.

Source: The sample for this review was provided by Mychanic. Please visit their site for more info.


Product Information

Price: $19.99
Manufacturer: Mychanic
Requirements:
  • 3 AA batteries (included)
Pros:
  • Two brightness modes. Base sticks to any magnetic surface
Cons:
  • USB rechargeable would have been nice.

Filed in categories: Reviews

Tagged:

Mychanic Pod Light Review originally appeared on on June 29, 2017 at 9:00 am.

Note: If you are subscribed to this feed through FeedBurner, please switch to our native feed URL http://the-gadgeteer.com/feed/ in order to ensure continuous delivery.