REVIEW – Fried okra? Yes, please! Chicken-fried steak? Of course! Fried chicken? You betcha! When it comes to home cooking, it seems that I’m a bit of Southern boy. But while I love fried foods, I don’t like cleaning up the mess that frying makes, and I really shouldn’t be consuming all that oil. What I need is a way to fry foods without frying them in oil, and so I’m hoping that Cosori’s air fryer is just the gadget to make this happen.
What is it?
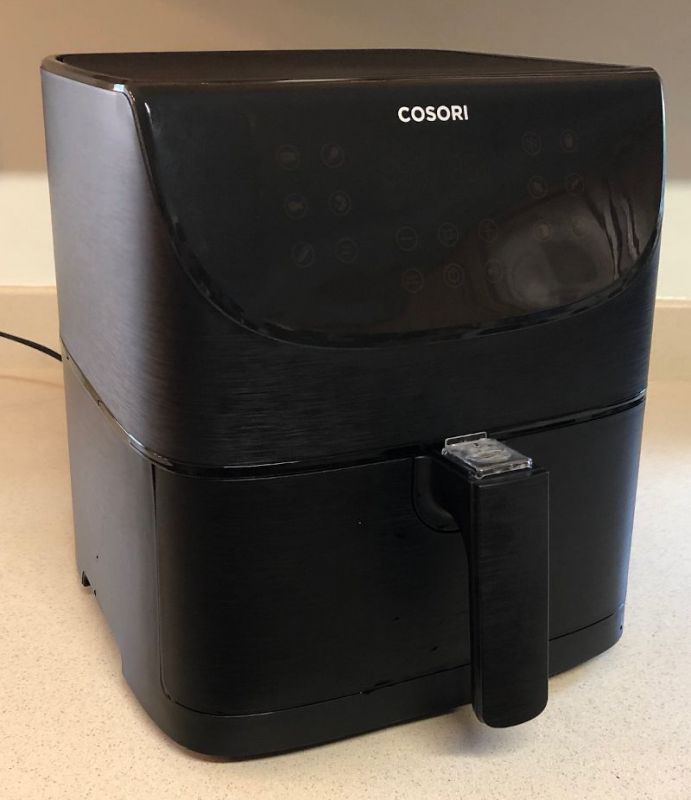
Cosori’s Air Fryer (model number CP158-AF) is a kitchen appliance that “fries” by rapidly circulating hot air around food. This air fryer is not actually a fryer, at least not in the traditional sense of the word; rather, it’s a smaller version of a convection oven. Convection technology is what allows it to cook food faster than a conventional oven while using a lot less heat, and though it sometimes uses oil, it uses far less than a deep-fryer. According to Cosori’s manual, their air fryer “uses rapid 360° air circulation technology to cook with little to no oil for quick, crispy, delicious food with 75% few calories than deep fryers.”
What’s in the box?
- The air fryer
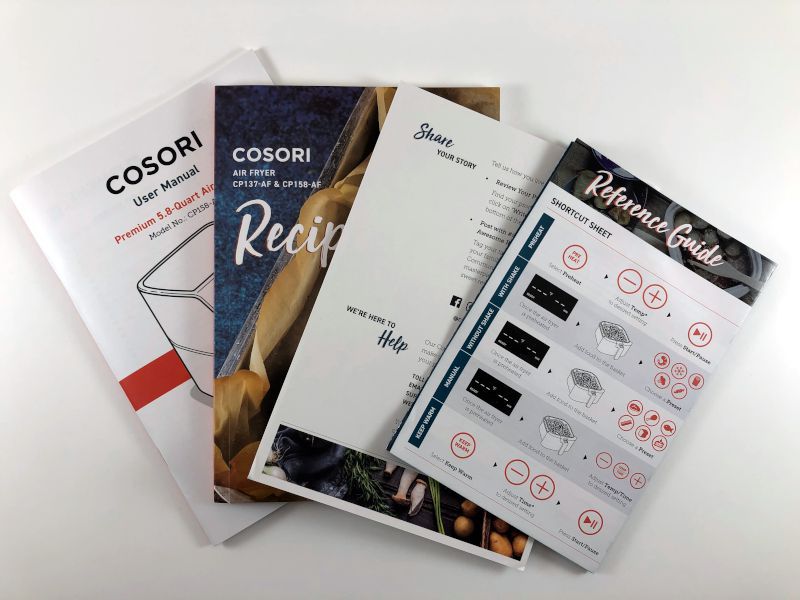
- A user manual with 18 pages of instructions in English
- A recipe book with over 100 recipes for the air fryer, including breakfast, entrees, appetizers, sides, and desserts
- A reference guide with handy shortcuts
- A thank you card that includes contact information for Cosori’s Support Team
Hardware specs
- Temp Range: 170-400°F (77-205°C)
- Time Range: 1–60 minutes
- Power: 1700W
- Capacity: 5.8 qt
- Dimensions: 13 in tall, 11 in wide, 11 in deep (+3 in for the handle)
Design and features
The Cosori Air Fryer is a fairly typical size for a kitchen appliance; it’s about the same as our Instant Pot and our Gourmia ice cream maker. It’s made of black plastic—white and red colors are also available—except for the baskets, which are metal. It’s surprisingly light weight, yet it doesn’t seem cheap or flimsy.
Installation and setup
To set up the fryer, I removed the warning stickers from the outside and the various packing materials from the inside. As I skimmed through the manual, I noted even more warnings, so I decided to read the entire manual slowly and carefully. It is very well written, and the instructions are quite clear. One thing that stood out to me is the plethora of warnings about getting burned or starting fires. Here are a few examples:
- Do not touch hot surfaces.
- Do not block any ventilation openings. Hot steam is released through air outlets.
- Do not place your air fryer near gas burners.
- Never fill the baskets with oil or fat.
- Do not place cardboard into your air fryer.
- Keep your air fryer away from flammable materials.
While some of these are mildly humorous, they are a good reminder that this gadget gets very hot, and if I’m not careful, I could get burned or cause a fire. If you have little kids at home, you’re going to want to spend extra time training them to leave this appliance alone and put it a location where they can’t touch it or pull on the power cord. We put ours on a counter facing away from the wall and placed a large, ceramic hot pad in front of it.
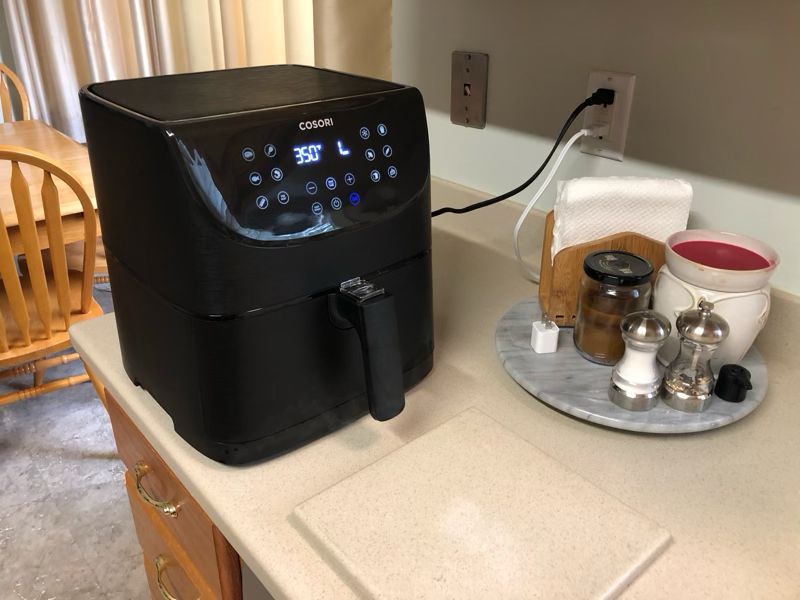
Many of the instructions were about the unique basket-in-a-basket system that is used to hold the foods while frying. The inner basket is where the food goes, and it has a lot of holes, like a colander. It sits in and just above the outer basket, which is used to catch any oil or grease that drops from the food. This is nice, as it prevents the food from cooking in and soaking up extra oil or grease.
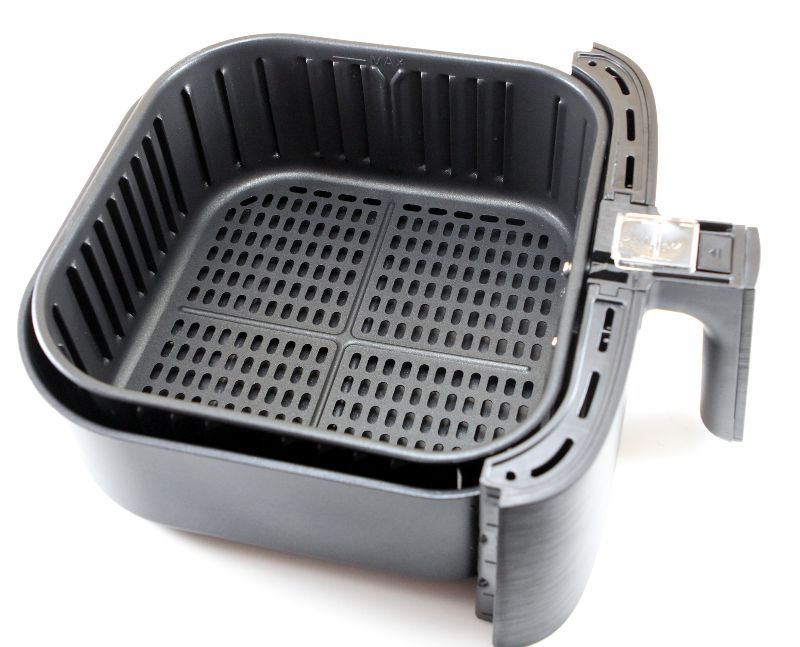
These baskets are connected, and when you pull the handle, they both come out of the fryer together. When you slide the button guard, you can then press a button that detaches the inner basket from the outer.
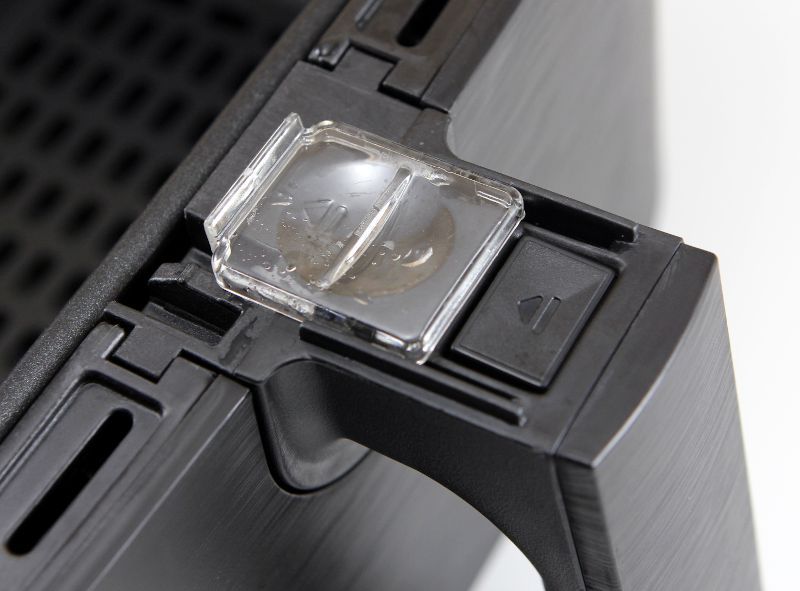
When you do this, you need to make sure the outer basket is resting safely upon a heat-resistant surface, hence our ceramic hot pad, else you risk dropping it and splattering hot oil, which could be dangerous. Once inner basket pops free from the outer basket, you can dump the food into a serving bowl or use a spatula to serve it onto a plate.
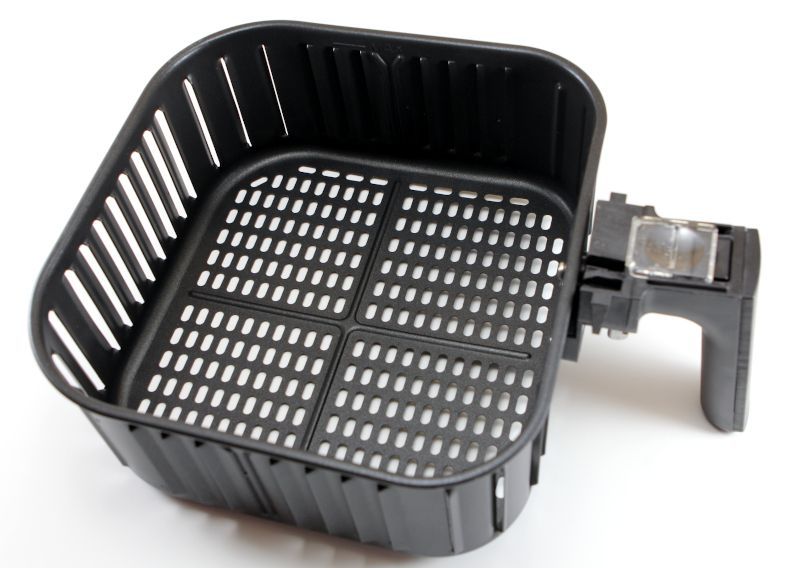
Once the basket was removed, I looked inside to see how the food was heated. There was a heating coil, reminiscent of the coils on old stoves, and a fan, pretty much what is expected of a convection oven.
Chicken Nuggets
In order to test the fryer, we decided to start simple, so my wife bought a package of frozen chicken nuggets, Kirkwood’s “Fully Cooked Waffle Flavored Chicken Bites.” First, we used the default Preheat setting to preheat the fryer. The default value is 400°F for 5 minutes, but both the time and temperature are adjustable if desired. Second, we put the nuggets, still frozen, into the basket and inserted it into the fryer. Third, we selected the Frozen preset. This setting is 350°F for 10 minutes, and half way through it gave a reminder to remove the basket and shake the contents up, which allows the food to heat more evenly. Many if not most of the foods that we fried needed to be shaken at the half way point to ensure even cooking. The result was a wonderful bowl of chicken nuggets. They were crispy and lightly-browned on the outside and heated all the way through on the inside. After seeing how convenient this is, I’m thinking that anyone with a toddler at home should probably be putting this air fryer on their Christmas list.

Tater Tots
Our second test was also a simple test. For breakfast, we decided to test the fryer on some Season’s Choice Potato Puffs, more commonly known as tater tots. We preheated the fryer and chose the Frozen preset, but as these values are also adjustable, my wife lowered the time to cook from 10 minutes to 8 minutes, just to see what would happen. The results were much the same as the nuggets, although we agreed that they probably should have been fried the entire 10 minutes, as some were still a wee bit undercooked.

Grilled-Cheese Sandwiches
For our third test, we slightly increased the difficulty. Looking through the recipe book, we found a recipe for grilled-cheese sandwiches. It was simply bread buttered on both sides with cheese in the middle. We used the Bread preset, which is 320°F for 8 minutes. The results were mixed. On the one hand, the bread was toasted and the cheese was melted, making for a delicious sandwich; on the other hand, the bread was a bit too toasted for our preferences, and one side was quite a bit crispier than the other. I think we can fix these issues by reducing the cook time to 6 minutes and by rotating the bread half way through. My wife observed that rotating the bread was a bit harder in the fryer basket than in the omelet pan we normally use for this recipe, simply because the sides of the basket are much taller. We agreed that while the fryer did a good job, this is a recipe that would probably be easier to do in an omelet pan or a cast iron skillet.

Quick Doughnuts
For our fourth test, my wife found an online recipe for quick air-fried doughnuts. We started with a roll of Grand’s refrigerated biscuits, cut them into doughnut shapes, and then basted them with butter. We dipped them in a cinnamon-and-sugar mixture and put them in the air fryer. We tried the recommended settings from the recipe (350°F for 5 minutes), but the first batch of doughnuts were overdone. Next, we tried it with the Bread preset (320°F for 5 minutes), and they turned out perfectly. We also made a sugar glaze and drizzled it on top after frying. The doughnuts were a crispy brown on the outside and light and flakey on the inside; they were so good!

Fried Chicken
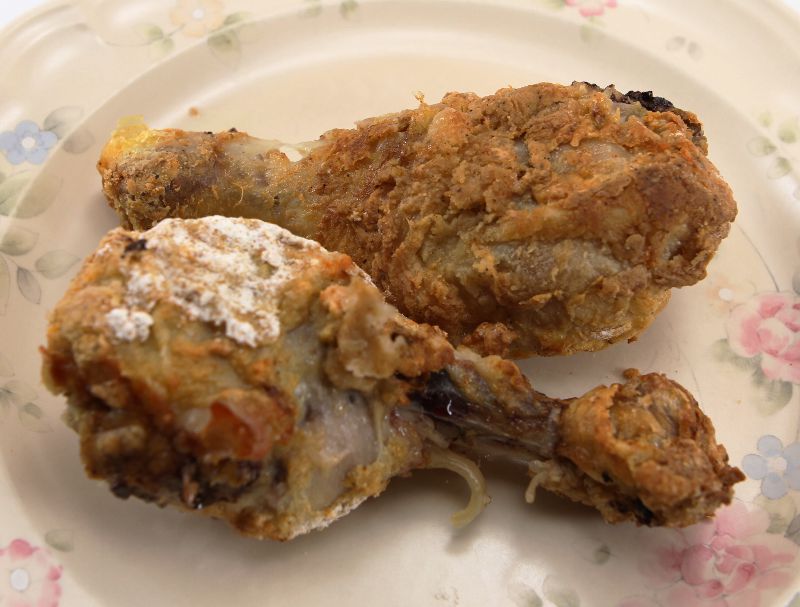
For the next test, we used another online recipe, this time for fried chicken. My wife made breading from flour, salt, and Old Bay and then dipped chicken legs and breasts in the breading, in eggs, and then in the breading again. She put the legs in the basket and used the Chicken preset (380°F for 25 minutes). After 10 minutes, she turned the legs over and added the breasts. The result was crispy, golden brown chicken on the outside that was tender and juicy on the inside. It tasted delicious. If you look in the picture below, you can see that some of the flour from the breading wasn’t cooked all the way, something that doesn’t normally happen with traditional frying. We’re not sure if we added too much flour and failed to shake the excess off, or if there’s something about the air fryer that didn’t quite fry everything evenly. In any case, it certainly didn’t stop us from enjoying some very yummy fried chicken.
Pork Tenderloin with Peppers and Onions
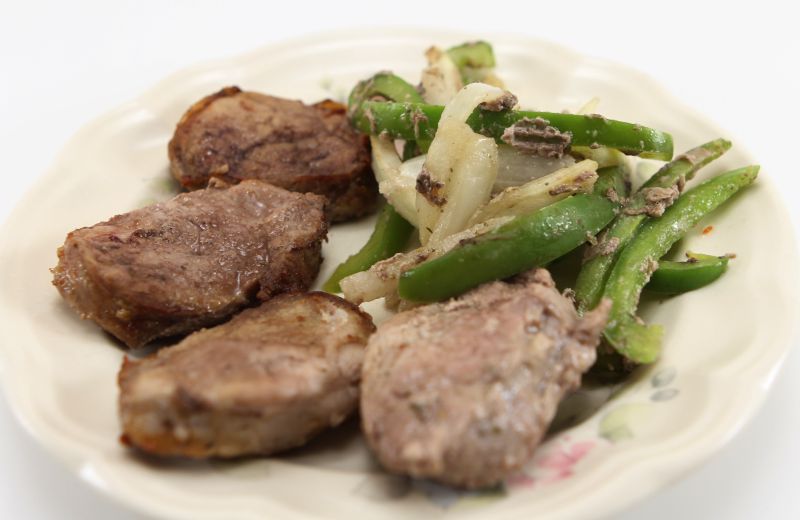
For our final test, my wife found a recipe for an entrée. I thinly sliced peppers and onions, seasoned them, and put them in the middle of a small, round baker. I cut a pork tenderloin into slices, rubbed them with powdered mustard, salt, and pepper, and then put them over the vegetables. I put the baker into the basket, and cooked the whole thing for 15 minutes on 350°F, pausing halfway through to mix them up. The result was super yummy, though very different from the other tests. The meat was tender and juicy, and the peppers and onions were soft yet slightly crunchy. The big difference between this and the other tests was the baker, which trapped the juices and reduced the crispiness of the tenderloin slices. This recipe really shows the flexibility of the air fryer: It can cook foods that are typically fried, like chicken and French fries, yet it can also cook like a traditional oven (in half the time). If you were concerned that an air fryer can only fry less-than-healthy foods, then rest assured that you can cook a whole variety of meats, vegetables, and other foods and eat as healthy as you want.
We also made a variety of other dishes that I haven’t cataloged here, including smores, bacon and eggs, cinnamon rolls, and potato chips.
Cleanup
Cleanup is pretty simple. The two baskets have to be washed, either by putting them in the dishwater—they do take up a lot of space—or by washing them by hand. If you do the later, don’t use anything abrasive, like steel wool, as this could damage the non-stick surface of the baskets. Using a washcloth that is damp with hot water, wipe down the inside of the fryer, just in case any oil splashed around. That’s it.
Safety Features
The air fryer has several safety features that are designed to make sure accidents don’t happen. I appreciate Cosori’s attention to detail when it comes to safety.
- There’s a button guard over the button that releases the inner basket.
- When the baskets are withdrawn from the fryer, it automatically stops frying.
- If the fryer is inactive for 3 minutes, it will automatically shut down.
- If the fryer overheats, it will automatically shut down.
Other Features
The baskets on this fryer are 5.8 quarts in size, which is pretty big. It’s easily big enough to serve a dish for 2 people, and for most things it’s probably big enough to serve 4. If you don’t need such a large fryer, Cosori also makes one that is only 3.7 quarts. For our family, we are super happy with the larger size.
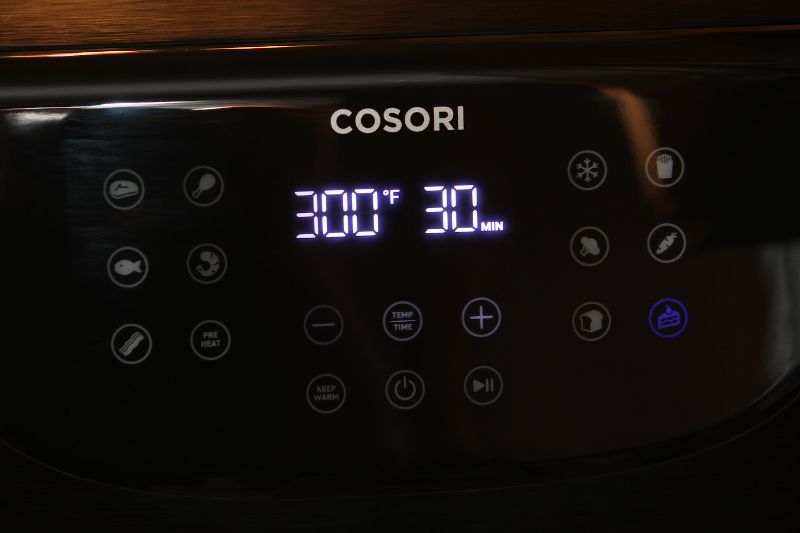
The interface is a digital display along with a set of touch controls. The display is primarily used to show the temperature and the time remaining. Most of the controls are the presets, and each has an icon that makes it easy to remember what it’s for. The remaining controls turn the fryer on, change the temperature and the time, pause it, and so on. Cosori has done a nice job with this interface, as it’s really easy to use.
As mentioned previously, the air fryer works by blowing air. There’s a sizable fan inside, and I can definitely tell when it’s on. It’s nowhere near as loud as a handheld vacuum cleaner, though louder than our ice cream maker. Probably it’s just softer than our microwave oven.
What I like
- It cooks fast and uses less heat than the stove or oven, which is especially nice during summer.
- It fries food without using lots of oil.
- It’s easy to use, easy to cleanup, and machine washable.
- Lots of recipes to try that use an air fryer, both in the included cookbook and online.
- Everything we tried was delicious!
What I’d change
- I can’t think of anything.
Final thoughts
Our family is very glad that we got this chance to test out Cosori’s Air Fryer. It’s quick to cook, easy to use, and easy to clean. If you enjoy fried foods as much as we do, or you’re looking for a simple way to cook without heating up your kitchen with the stove, you should consider purchasing Cosori’s fryer. Our family plans on enjoying this one for years to come!
Price: $119.99
Where to buy: Cosori’s Online Store and Amazon
Source: The sample for this review was provided by Cosori.
Filed in categories: Reviews
Tagged: Cooking, Food, Home and Kitchen
Cosori Premium 5.8-Quart Air Fryer review originally appeared on The Gadgeteer on July 21, 2019 at 11:00 am.
Note: If you are subscribed to this feed through FeedBurner, please switch to our native feed URL http://the-gadgeteer.com/feed/ in order to ensure continuous delivery.


