Record your travels in this leather, antique-map journal

These leather journals from Tactile Craftworks start with supple leather hides sourced from a Milwaukee tannery.  The hides are then hand-cut and etched with antique map designs of old American cities, which makes these Etched Leather Map Journals perfect as a travel journal.

The maps are all of the 1890-1920s eras from the collections of the American Geographical Society.  The covers are all made of high-quality, full-grain leather with brass button closures.  They measure 6″ x 9″ x 1″ and have a 240-page Moleskine notebook with lined paper inside.  The Moleskine can be replaced, making this journal useable for a life-time.

You can choose from 16 city designs or from a cover with a simple pine tree design.  The Etched Leather Map Journal is $118.00 and available from The Grommet.

The post Record your travels in this leather, antique-map journal appeared first on The Gadgeteer.

Filed in categories: News

Tagged:

Record your travels in this leather, antique-map journal originally appeared on The Gadgeteer on April 25, 2018 at 8:08 pm.

Note: If you are subscribed to this feed through FeedBurner, please switch to our native feed URL http://the-gadgeteer.com/feed/ in order to ensure continuous delivery.

The Benro 75mm Hi-Hat tripod keeps your camera as low as it can go


When I am in the studio “messing around” with macro photography trying to use various objects to produce an amazing photo, I often use a tabletop as my platform. The object would be on the tabletop, and I use my DSLR mounted to a full-size tripod. This can be a pain sometimes when I have to drag the large tripod out and then pack it away again. I think the answer to my dilemma would be a strong and sturdy tabletop tripod.

Enter the Benro 75mm Hi-Hat. This tripod is perfect for working with low angles and capturing photos from angles that would be very difficult if not impossible, using a large tripod. Even when I leave the tabletop environment and head outdoors to get those shots close to the ground, this Benro would work.

It is made of aluminum with a 75mm bowl made of magnesium. The combination of these metals allow it to weigh in at only 2.8 pounds, but still have a load capacity of 165 pounds, which is quite incredible. The legs are made up of two sections, and allow the tripod to get as low as 3.1 inches. With 3 adjustable and independent positions for each leg, and included spiked feet, tackling uneven ground is par for the course. While its maximum height is only 11 inches, when you add a tripod head and the camera, it gains additional versatility which would work great for both photography and videography.

The Benro 75mm Hi-Hat is available for purchase at Amazon and B&H Photo Video for the bargain price of $149.

The post The Benro 75mm Hi-Hat tripod keeps your camera as low as it can go appeared first on The Gadgeteer.

Filed in categories: News

Tagged: ,

The Benro 75mm Hi-Hat tripod keeps your camera as low as it can go originally appeared on The Gadgeteer on April 25, 2018 at 4:59 pm.

Note: If you are subscribed to this feed through FeedBurner, please switch to our native feed URL http://the-gadgeteer.com/feed/ in order to ensure continuous delivery.

Neo smartpen M1 review

Do you keep a journal in a paper notebook but wish it had some of the features of a digital journalling app such as search and archiving? There are lots of apps out there for your phone or tablet that will let you keep a journal and write with a stylus, but I have been on a quest to find a hybrid system where I can use an old-school paper notebook with a pen. I recently discovered the Neo Smartpen M1. Let’s check it out.

What is it?

The Neo Smartpen M1 is an ink pen with a built-in camera that digitizes your writing and works with an app on your iOS or Android device to record what you’re writing as you write it in a special paper notepad.

What’s in the box?

  • Neo Pen M1 smartpen
  • 2 D1 size ink refills
  • micro USB charging cable

Design and features

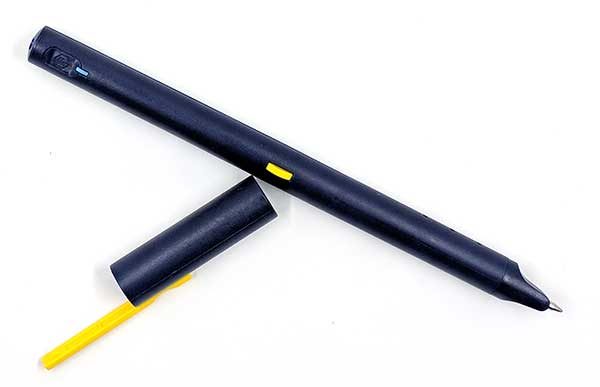
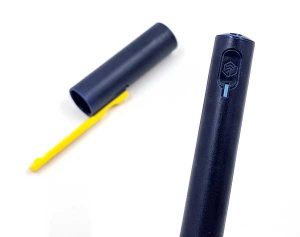
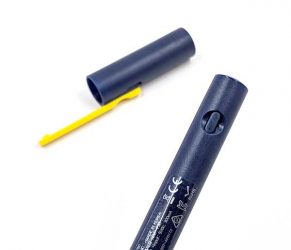
Neo is a company who has been offering smartpens for a while now. Their latest pen is the M1 and it’s a newer version of the pen that Moleskine is using with their Smart Writing Set. The M1 looks like a regular pen, with a cap and pocket clip and is available in 3 colors including the one you see above.

When you remove the cap, you will see a real pen that writes in ink on paper.

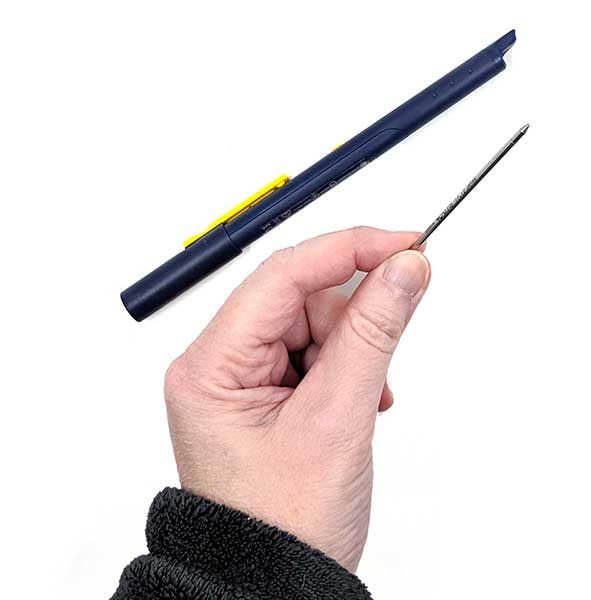
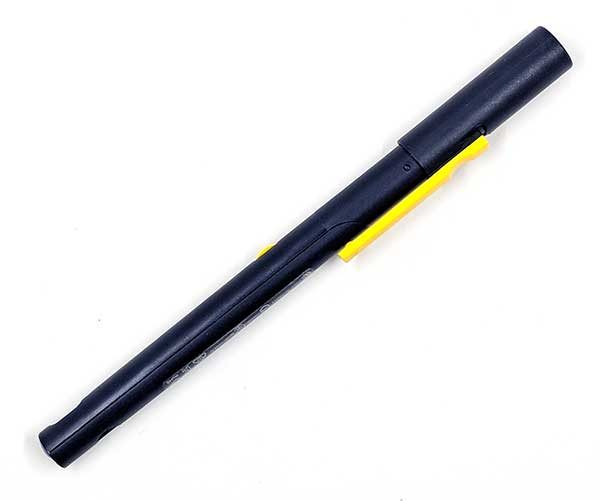
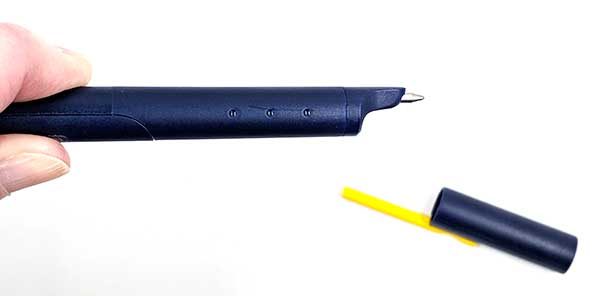
The M1 comes with 2 D1 sized refills that you can buy on Amazon and other retail sites in different colors and point widths. The refills are easy to remove and install. Basically, all you do is grab the tip and pull it out.

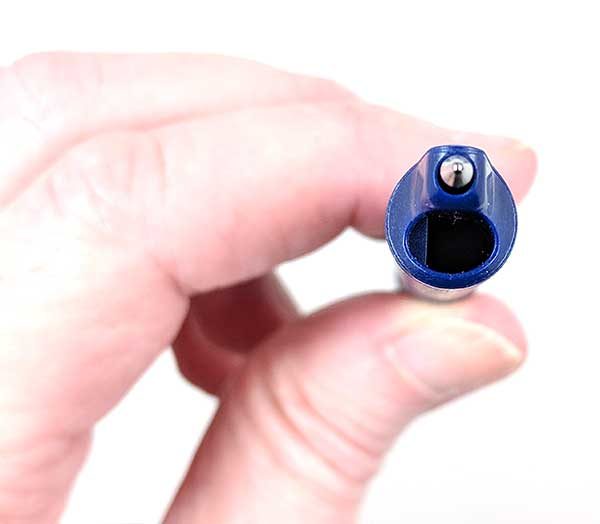
The Neo smartpen M1 has a built-in optical digitizer that is located above the ink tip. That means that you have to write so that this “camera” is pointing down toward the paper instead of turned upward.

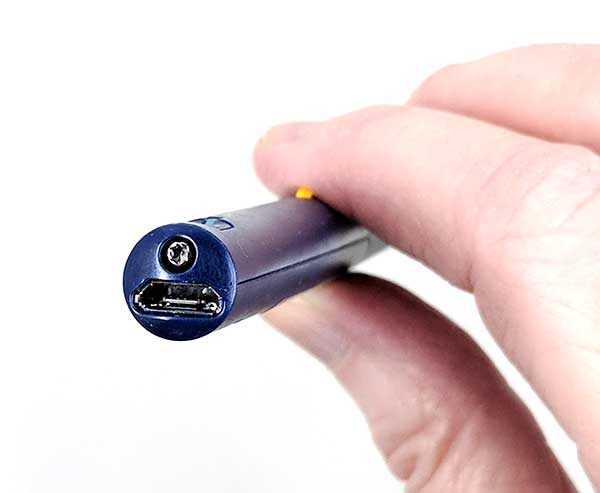
Before you can begin using the M1 smartpen, you have to charge it. There’s a standard micro USB connector on the end of the pen.


A status LED on the barrel glows red while the pen is charging, green when fully charged, and white while the pen is in use.

There’s a small power button on the barrel as well. Once you turn on the pen, you don’t need to press the power button again as the pen will turn off on its own after inactivity and will automatically power back on when you remove the cap or start writing again.

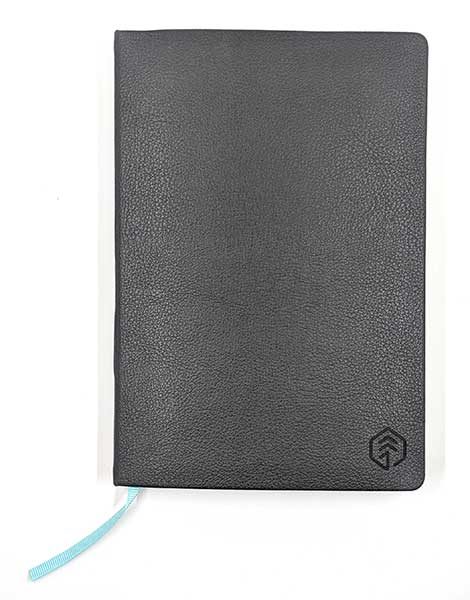
Neo smartpens have to be used with special notebooks if you want your writing digitized. At first glance, these notebooks may look no different than other paper journals. They come in different styles with hard or soft covers, spiral or hardbound, with a bookmark. Neo also offers PDFs that you can use to print your own pages for free. You can see all the pages here.

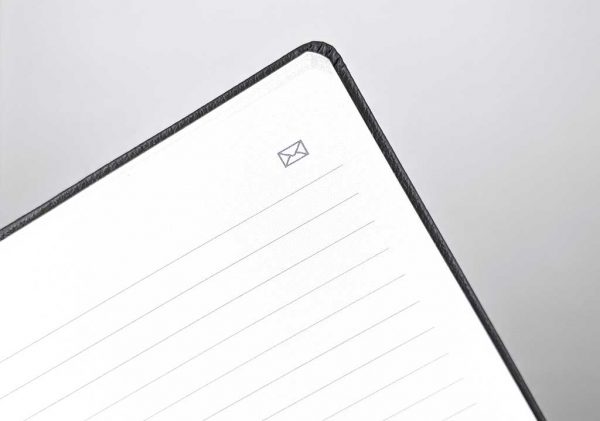
But if you look very closely at the page, you’ll see tiny grey dots which allow the pen’s digitizer to record your writing and drawings. Click the image above to see the dots.

When I bought the M1 smartpen, I also bought one of the Neo N professional notebooks. These notebooks are pretty expensive ($24.95 from Amazon), but I like hardbound books so I splurged. The N Professional reminds me a lot of my favorite notebook the Leuchtturm1917.

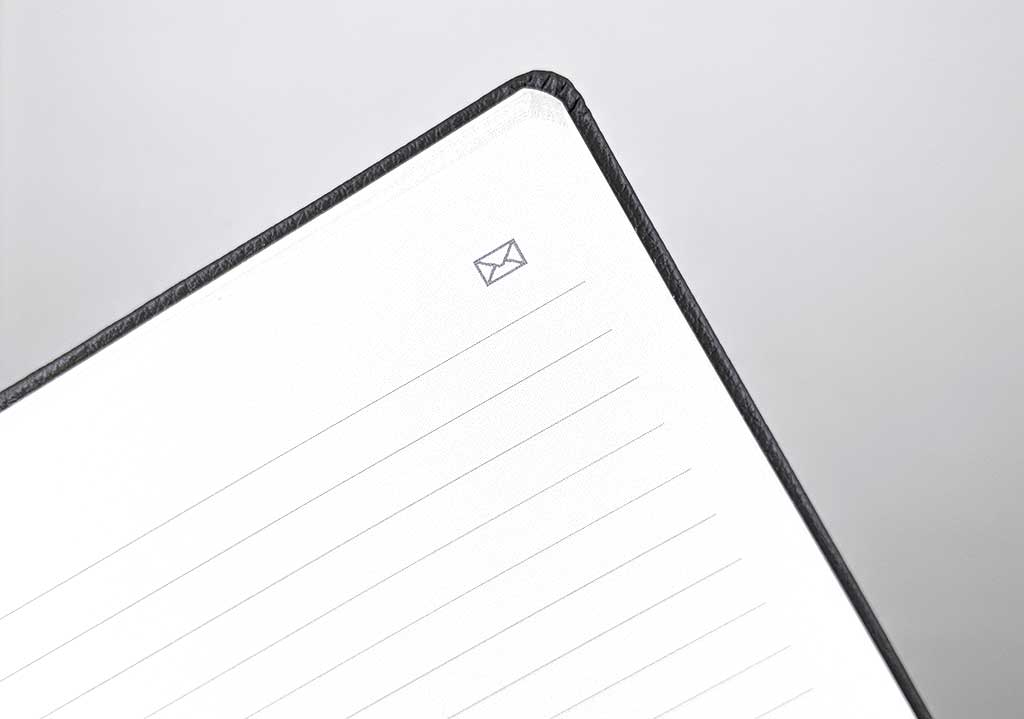
The Neo N Professional notebooks have numbered pages and an envelope icon in the upper corner of each page that instructs the Neo app to email the page.

Neo Notes app

The smartpen can record your text without any extra hardware or software, but without using the Neo app you really can’t do anything with it. The pen syncs to the app so you can view, edit, and search your pages.


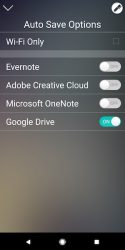
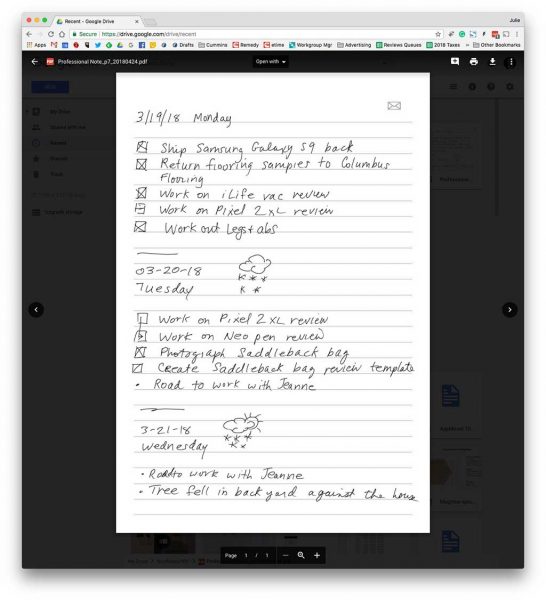
The app allows you to use multiple notebooks if you have them and gives you the option of automatically syncing pages to Evernote, Adobe, OneNote, or Google Drive.


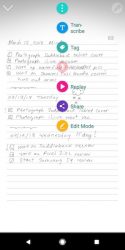
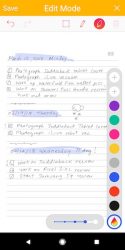
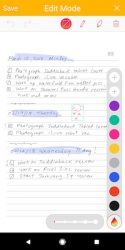
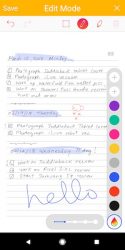
Once a page has been imported into the app, you can edit it with some basic tools that allow you to highlight text, change the color of text, and add more notes to the text with your finger or a stylus.

You can also watch a video replay of what you wrote and when you initiate a recording, it will attach that to the page as well. Just be aware that you have to start the recording from the app AND it’s the phone that records the audio, NOT the pen.


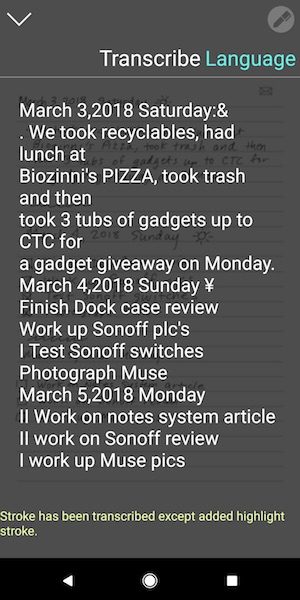
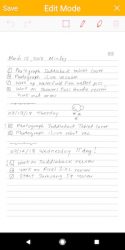
The app will also allow you to transcribe the pages into text but it doesn’t automatically share the transcribed text to Evernote, OneNote, etc.

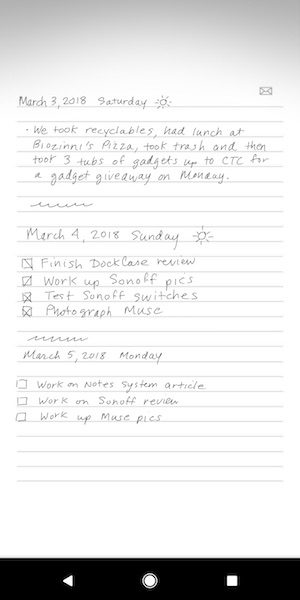
As you can see, the transcription doesn’t do a perfect job. If you like to doodle or add check boxes, it will try to recognize them as letters and the results might not be what you would expect.


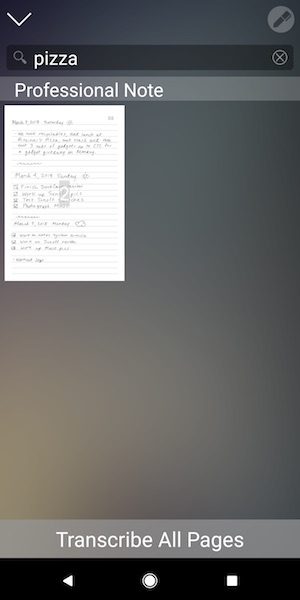
The Neo Notes app allows you to search the text for words is useful and you can also tag pages with keywords for organization/filing purposes. This works pretty well as long as your writing is clear and legible.

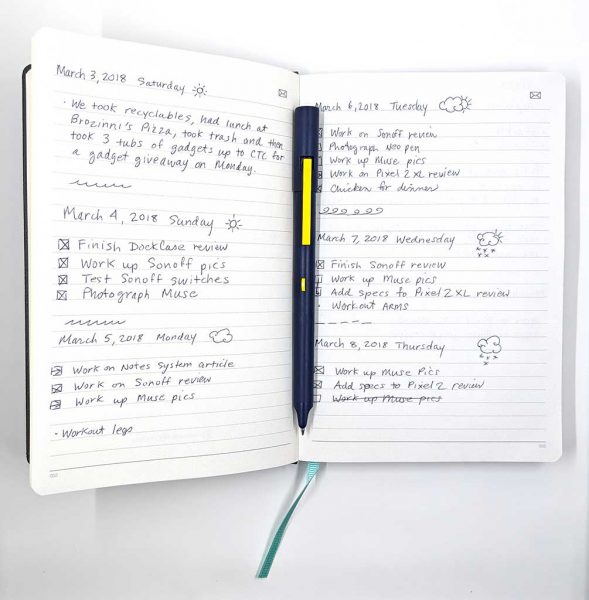
Writing with theNeo smartpen M1 is ok, but it’s not nearly as enjoyable as my favorite pens which have a Pilot G2 refill. I’m just spoiled 🙂 That said, the pen does an impressive job of recording your pen strokes. As long as you don’t start writing until you hear the beep after you take off the cap or press the pen to the page, you’ll be fine. If you immediately start writing, the pen might not catch 100% of that first stroke.

What I like

  • Not any larger than a regular pen
  • Easily replaceable ink refills
  • Easy to use app
  • Can automatically sync with Evernote, Google Drive, OneNote,

What needs to be improved

  • Voice recordings use the phone’s microphone and have to be initiated through the app
  • Need a setting to autosave transcribed page text to outside sites like Evernote

Final thoughts

I was excited to try the Neo smartpen M1 after it was suggested to me in the comments for a post I did about switching from analog to digital note-taking. That’s why I purchased the Neo pen. I thought it might be the perfect combo of analog and digital. So how has it worked out for me? The pen is nice. So don’t get me wrong. But, the excitement faded pretty quickly because I am not a fan of the way it feels to write with the pen. It writes fine, but it’s just not as smooth as my favorite pens. I tried a couple different ink refills without any noticeable improvement.

I also found that my weird hybrid print and cursive writing style with doodles and checkboxes doesn’t lend itself that well to transcription or text searches for words.

In the end, I found that although my notes were backing up to the cloud that I wasn’t looking at them after the fact.  I’ve finally come to the conclusion that the best note taking and task system for me is a paper notebook, my favorite pen, and my own version of the Bullet Journal system. At the end of the day or week, if I need to remember something I’ve written, I quickly type it into a note on Google Drive where it will be backed up and is searchable since it’s straight text.

While the Neo smartpen M1 didn’t quite work for me, it’s still a nice pen and I can see that it would be useful for meetings and school.

Price: $129.00
Where to buy: Neo or Amazon
Source: The sample for this review was purchased with my own funds.

The post Neo smartpen M1 review appeared first on The Gadgeteer.

Filed in categories: Reviews

Tagged: , ,

Neo smartpen M1 review originally appeared on The Gadgeteer on April 25, 2018 at 12:00 pm.

Note: If you are subscribed to this feed through FeedBurner, please switch to our native feed URL http://the-gadgeteer.com/feed/ in order to ensure continuous delivery.

Packages delivered directly into the trunk of your car: what will Amazon think of next?!

Last year Amazon introduced Key In-Home delivery which allowed Prime deliveries directly into your home. On Tuesday they launched Key In-Car, a new service that allows couriers to deliver packages directly into the trunk of your vehicle.

The new service is free for Prime members in 37 cities in the US driving a 2015 or newer Chevrolet, Buick, GMC, Cadillac, or Volvo with OnStar or Volvo On Call.

How it works 

To get started download the free Amazon Key app from the App Store or Google Play. Then select the in-car delivery option on your next Amazon order.

After that it’s pretty simple, just park your car in a publicly accessible parking space within two blocks of your delivery address. You’ll get a notification when the package has been dropped off and your car is relocked. Viola, package delivered!

Amazon stresses that it will authorize the delivery driver before your car is unlocked. And no special access or keys are given to the driver.

So you shouldn’t have to worry about a random driver just taking off with your car.

Key In-Car delivery is a great idea especially if you spend a lot of time away from home. It also means you don’t have to go home to get your package. And it’s certainly less invasive than the Key in-home delivery option.

To learn more about Amazon’s Key In-Car delivery service head over to their info page.

The post Packages delivered directly into the trunk of your car: what will Amazon think of next?! appeared first on The Gadgeteer.

Filed in categories: News

Tagged:

Packages delivered directly into the trunk of your car: what will Amazon think of next?! originally appeared on The Gadgeteer on April 25, 2018 at 11:00 am.

Note: If you are subscribed to this feed through FeedBurner, please switch to our native feed URL http://the-gadgeteer.com/feed/ in order to ensure continuous delivery.

Elgato Eve Energy Switch & Power Meter and Eve Button review

I’m particularly fond of home automation and have enjoyed making things light, whirr and spin with a poke at my phone or voice command. Adding the ability to monitor mower is icing on the cake so I was eager to give Elgato’s Eve Energy Switch & Power Meter and Eve Button a try.

What is it?

Eva Power Switch & Power Meter devices allow the control of a single socket via a smartphone app or Siri. Equipped with power monitoring functions, the app allows activation/ deactivation and power draw analysis for the connected appliance.

Adding the Eve Button allows remote control of Eve Power Switches without the need of a smartphone…

Hardware Specs

        Eve Wireless Switch & Power Meter

  • Plastic housing
  • Dimensions: 2.6 x 1.9 x 2.6 inches
  • Weight: 3.04oz
  • Power Rating: 120VAC, 15 Amps/1800 Watts maximum load
  • AC Frequency: 50/60Hz
  • Interior use only

Eve Button

  • Plastic and aluminum housing
  • Dimensions: 2.1 x 2.1 x 0.5 inches
  • Weight: 1.28 oz.
  • Power Rating: 3.0VDC, CR2032 lithium coin cell battery included

What’s in the box?

        Eve Wireless Switch & Power Meter

  • Eve Switch
  • Instruction manual
  • Quick-start manual

Eve Button

  • Eve Button
  • Instruction manual
  • Quick-start manual
  • Several sets of device icon stickers

Design and features

The Eve Switch and Eve Button cardboard packaging are full-color and attractive looking. There is ample support to keep the contents from being damaged in transit. The quick-start manuals have easily understood graphics. The instruction manual is very tiny.

Because of the case design, it’s not possible to plug in two Eve Switches into a single two-outlet socket. However, it is possible for another 3-prong grounded plug to fit in the second socket with the Eve switch plugged into the first. This has been a shortcoming of other manufacturers that Elgato has addressed nicely, although a case design that allows two Eve Switches in a single duplex outlet would be advantageous.

Connecting the sockets to Apple Home was super simple – just plug in, open Apple Home on your iPhone, click the + to add a new piece of hardware, Select “Add Accessory,” Allow the camera to scan the device code, Click the new device “icon,” wait for the confirmation and done and works without installing the Eve app. After successfully adding the switch, Apple Home allows the user to specify the room and give the new switch a name that can be used to verbally turn the connected device on or off. It’s very cool to be able to issue a voice command like,”Hey Siri, turn on the coffee maker.”

Here’s where the Elgato Eve is different: Once connected and functional, the Eve app shows the status,  power consumption, projected cost, total consumption, total cost (based in my energy rate taken from my electric bill), Current (Amps) and voltage. For someone looking to reduce energy costs, this is a valuable tool to find out what’s sucking the energy out of your home. I connected a small 3-cup rice cooker to the Eve Switch and turned it on. Over the next, I watched the power consumption while cooking and warming modes. The Eve app gave me an overview of my little rice cooker’s usage.

I can see this being a great tool for determining where my home appliances are wasting energy. It will be interesting to use the Eve Switches to monitor parasitic drain devices and reduce electrical costs.

The app also provides a mechanism to create scenes, turning any Apple Home devices on and off dependent on environmental issues. It’s not as comprehensive a list of trigger conditions I’ve seen in other products, but in testing everything works well.

Next, I linked the Eve Button to my Apple Home account. The switch is small and sleek and has three button modes – single press, double-press, and long-press. Each mode can be configured to perform tasks on any Apple Home device but requires an Apple TV hub to configure and use. I don’t have one at the time of this writing, but it’s on my wish list. I envision using the Eve Button to turn an entire house of lights on or off at the end of a busy day without the need to go from room to room. Elgato includes stick-on rubber feet and several sheets of appliance icons that can be applied to the Eve switch as a reminder of what it’s configured to control. A nice touch.


What I like

  • Snazzy looking
  • Easy configuration
  • Only one can be used per duplex socket
  • Capable app with energy usage feedback

What needs to be improved?

  • It would be nice if an Apple TV hub were not needed.

Final thoughts

I found the Elgato Eve Switches and buttons cost-effective, well-constructed and reliable. The switches work similarly to other manufacturers, but the energy collection data is top-notch.  I am looking forward to fully implementing the system and getting the Eve Button working.

Price: Eve Energy Switches $49.95. Eve Button $49.93
Where to buy: Amazon
Source: The sample for this review was provided by Elgato.

The post Elgato Eve Energy Switch & Power Meter and Eve Button review appeared first on The Gadgeteer.

Filed in categories: Reviews

Tagged: ,

Elgato Eve Energy Switch & Power Meter and Eve Button review originally appeared on The Gadgeteer on April 25, 2018 at 10:00 am.

Note: If you are subscribed to this feed through FeedBurner, please switch to our native feed URL http://the-gadgeteer.com/feed/ in order to ensure continuous delivery.