I’ve been using the same 29-inch monitor from LG that I reviewed four years ago but about a month ago I started thinking about upgrading. The universe must have been listening to my thoughts because BenQ contacted me to ask if I would like to review one of their monitors. Truth be told, BenQ had not been on my radar when I was dreaming about a new monitor. But when they offered the 27-inch PD2710QC DesignView Designer Monitor I decided to take a chance but wondered if I would regret losing 2-inches of screen real estate. Let’s find out.
What is it?
The BenQ PD2710QC monitor is a 27-inch monitor that has extra features including a built-in USB-C docking station for your laptop that includes a variety of connections.
Hardware specs
Screen Size: 27 inches
Resolution (max.): 2560×1440
Panel Type: IPS
Backlight Technology: LED backlight
Brightness: 350 cd/㎡
Native Contrast(typ.): 1000:1
Viewing Angle (L/R;U/D) (CR>=10): 178/178
Response Time: 5ms (GtG)
Refresh Rate: 60Hz
Aspect Ratio: 16:9
Display Colors: 16.7 million colors
Color Gamut: 100% sRGB/Rec. 709
Display Area(mm): 596.7(H) x 335.7(V)
Pixel Pitch (mm): 0.2331
PPI: 109
For the full specs listing, visit the spec page for this monitor on BenQ’s site.
What’s in the box?
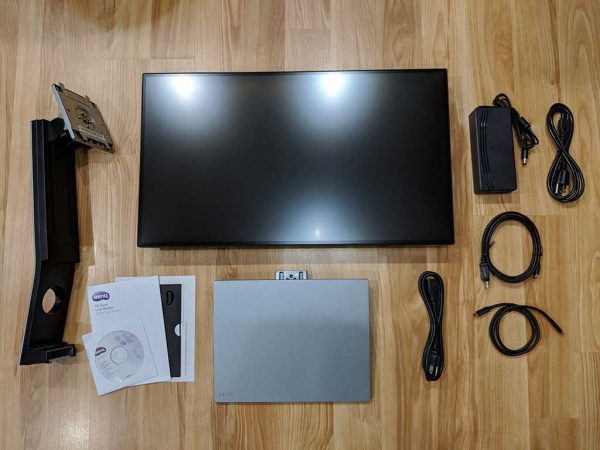
- PD2710QC monitor
- Power supply
- USB-C cable
- DP to mini DP cable
- Quick start guide
- CDrom with drivers
Design and features
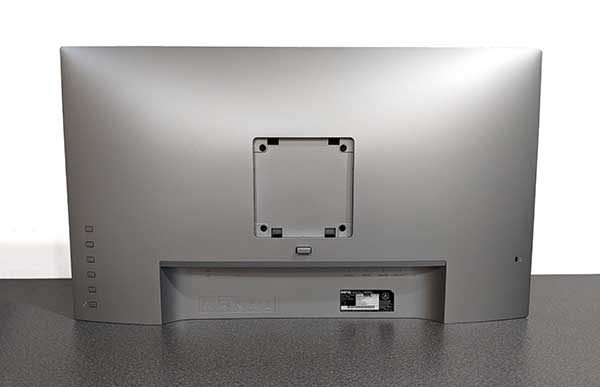
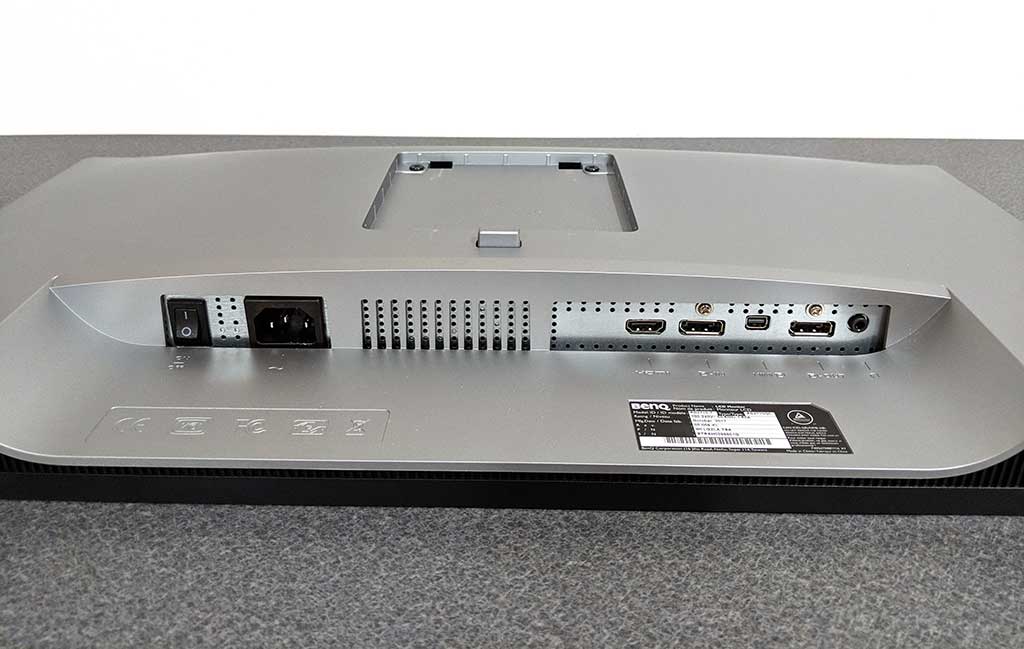
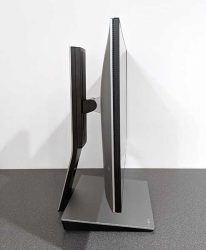
The BenQ PD2710QC monitor has a grey and black plastic shell. The front of the monitor is completely flat, but the back is curved with the support connection in the center, control buttons on one side, a 12. Kensington lock slot on the opposite side, and video and power connections in a recessed area.

The connection panel has a power switch, power connector, HDMI socket, DisplayPort socket, Mini DisplayPort socket, DisplayPort output socket (for Multi-Stream Transport, MST), and a Headphone jack. The bottom of the monitor also has downward firing speakers built into it.
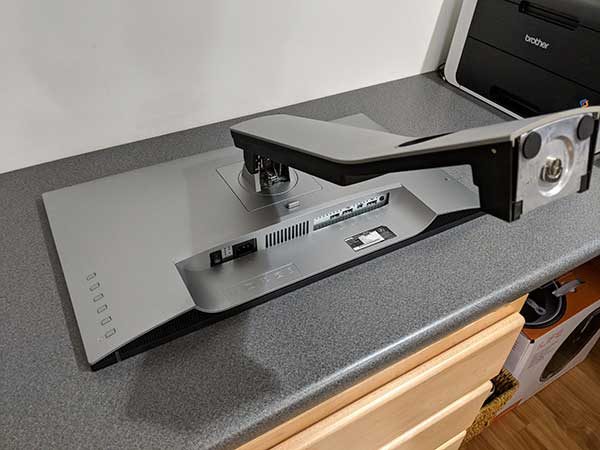
The monitor comes has three main parts. The main monitor, the base/docking station, and the monitor support.
Assembling the parts is easy and does not require any tools at all other than your hands. First, you need to do is place the monitor face down on a flat clean surface.
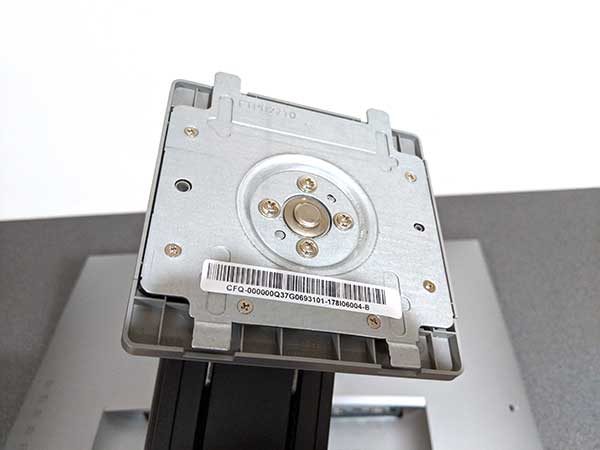
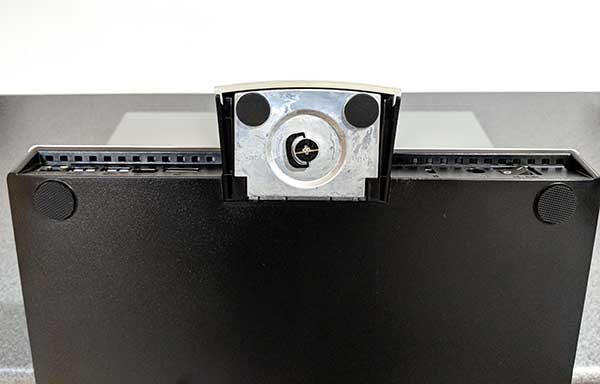
Then you take the monitor support which has a metal plate on the piece that snaps into the back of the monitor.
Attaching the two pieces is very easy because the support clicks and locks in place with minimal effort.
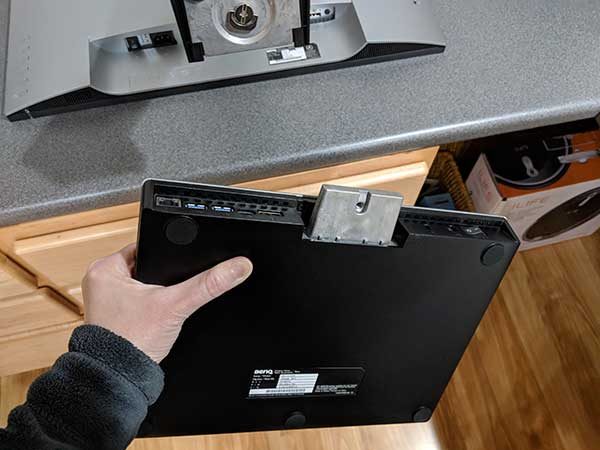
Next, you take the base/docking station which has metal arm protruding from the back, and you slide it into the bottom of the support arm.
A metal thumbscrew on the bottom tightens to secure the base to the support.
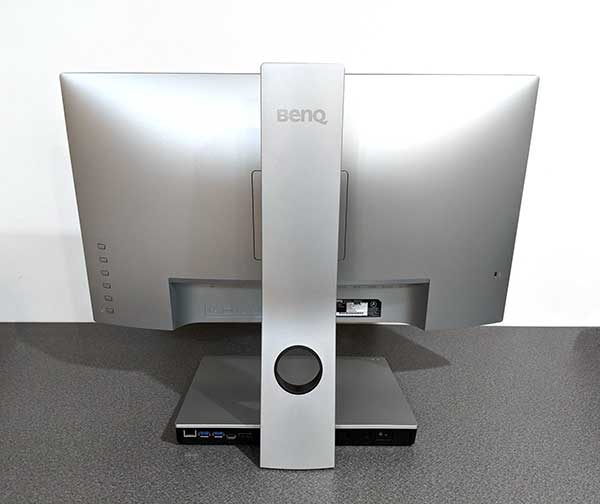
Here we can see the back of the assembled BenQ PD2710QC monitor. You’ll notice a circular cutout in the support arm. That cutout is a pass-through for the cables. Unfortunately, that’s the only built-in cable organization feature for this monitor. And since you have to connect 2 cables from the monitor and 2 additional cables from the base, it really needs better cord management.
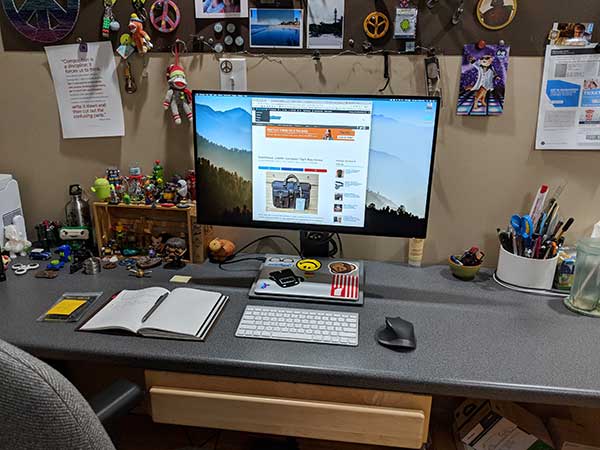
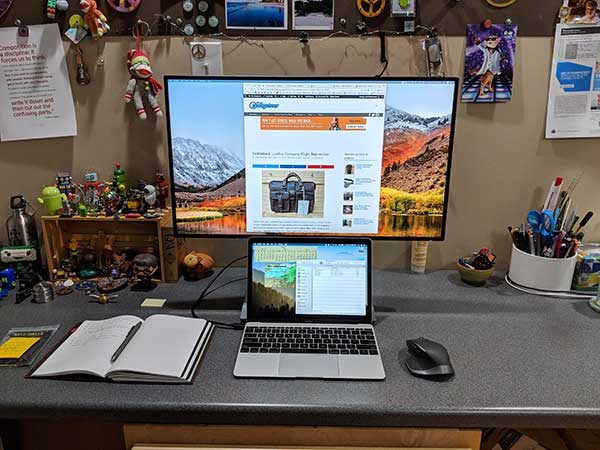
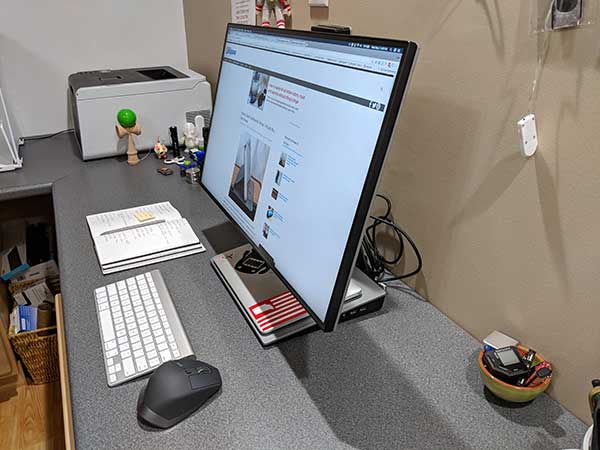
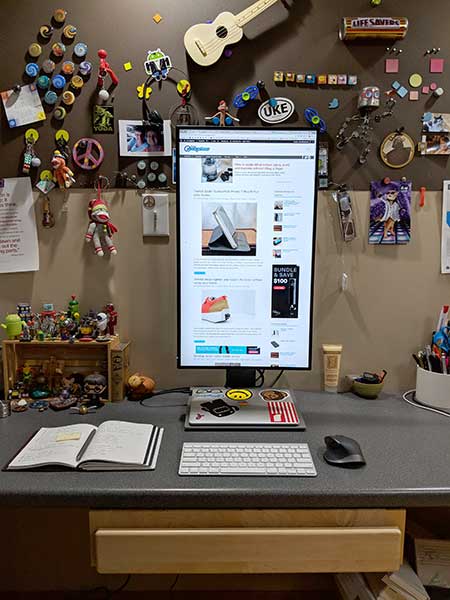
The BenQ PD2710QC’s base is 12 inches wide and 9.5 inches deep and provides a perfect home for my 12-inch MacBook.
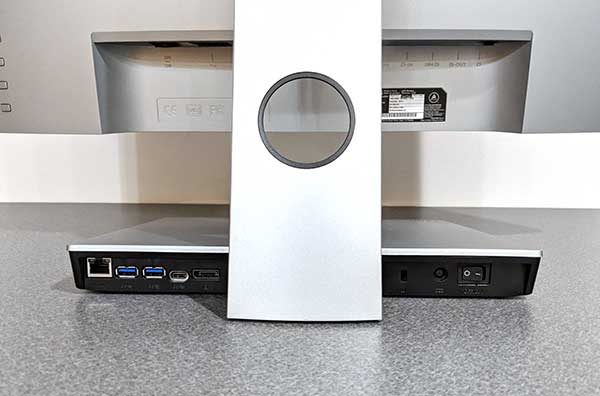
The base of the monitor not only a convenient shelf to place your laptop, but it’s also a USB-C docking station. On the back of the base, there’s an Ethernet (Local Area Network) port (RJ-45 connector), 2 USB 3.0 ports, USB Type-C port, DisplayPort socket, and a power switch for the base.
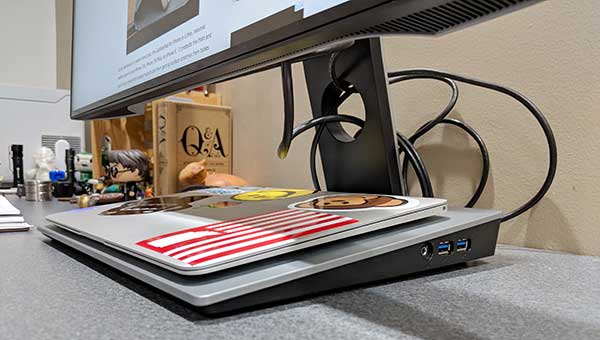
You’ll also notice that there are more ports on the side of the base/docking station. I didn’t even notice the additional 2 USB ports and headphone jack until about 2 weeks after I’d been using the monitor. The location of these ports provides easier access than the back of the docking station and is useful for flash drives and headphones.
Some people might think that the monitor’s large base is not attractive and dare I say clunky looking. I’m not one of those people. I like it a lot. But, I also have a large desk. So desk size is something to consider before buying the PD2710QC.
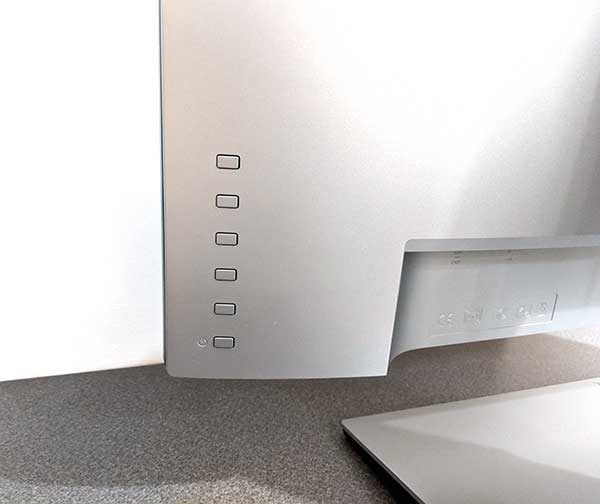
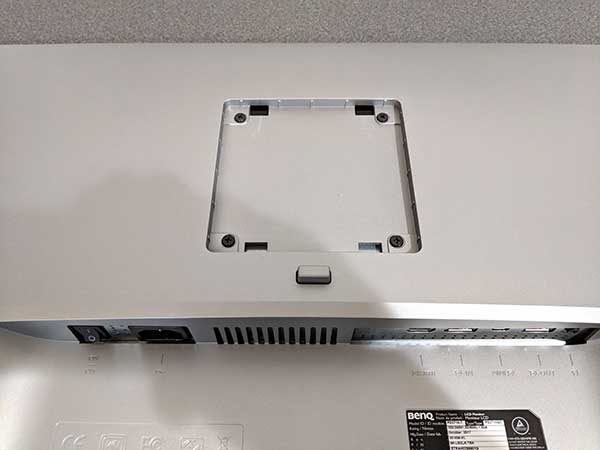
Let’s take a closer look at the control buttons. Guess what? The buttons do not have any labels except for the bottom button which is the power button for the display. How do you know how to change the monitor’s settings if the buttons aren’t labeled?
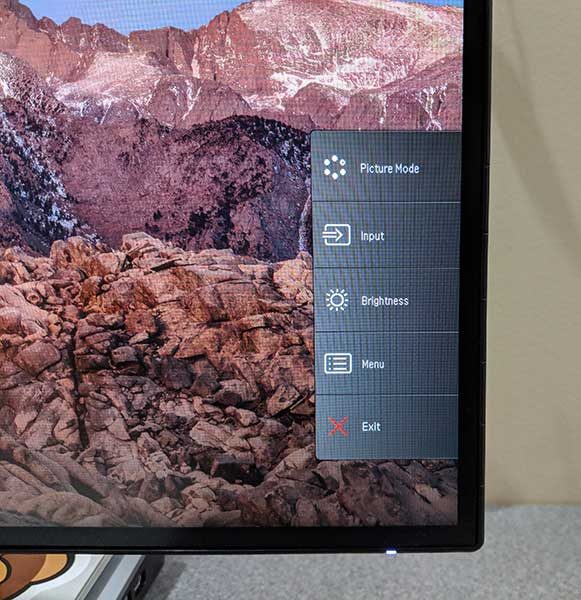
Pressing any button (other than the power button at the bottom) will cause a menu to pop up on the display. Then you can press the corresponding physical button on the back of the monitor to show that menu and navigate the settings.
It takes a little practice, but this method of going through the menus works fine as long as you don’t accidentally press the bottom button which will turn off the display and you’ll have to start over to find the setting you want to customize.
There are a LOT of display settings you can change on this PD2710QC monitor. From basic settings like brightness, contrast, sharpness and input choice, to individual RGB color levels and to choosing different display modes.
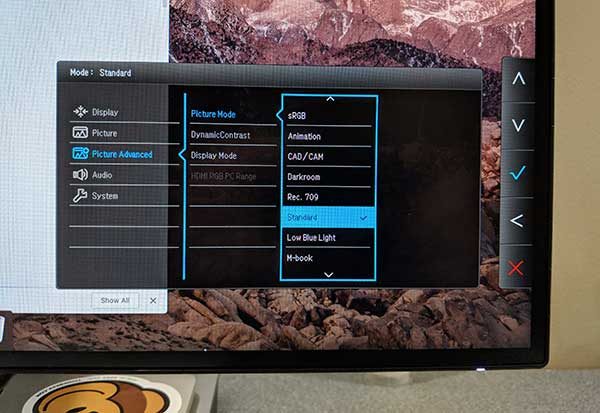
Display modes
The BenQ PD2710QC is a monitor that has modes for several different use cases. I’ve listed the modes with a brief description taken directly from the monitor’s manual.
sRGB
For better color matching representation with the peripheral devices, such as printers, digital cameras, etc.
Animation
Enhances the contrast of the dark shades so you could work on the details easily when making an animation.
CAD/CAM
Enhances the contrast if a CAD / CAM software is used.
Darkroom
For image editing and viewing in a post-processing environment with a dim light. This mode enhances the sharpness and clarity of shades and shows more details.
Rec. 709
For better color matching representation with Standard Rec. 709.
Low Blue Light
Decreases the blue light emitted from the display to reduce the risk of blue light exposure to your eyes.
M-book
Minimizes the visual differences between the monitor and the connected MacBook series product.
Standard
This is the default setting which basic PC application.
User
Applies a combination of picture settings defined by users.
I used the Standard display mode for weeks and then switched over to the M-book mode since I did all my testing with my 12-inch MacBook. I immediately noticed that the M-book mode is a lot brighter than the Standard mode but I’ve left it set to M-book and I think I prefer it.
As already mentioned I tested the PD2710QC monitor with my 12-inch MacBook connected via the supplied USB-C cable to the monitor’s base/docking station.
I have to say that I’ve fallen in love with the docking station which provides 4 additional USB connections, a headphone jack, Ethernet port, as well as a connection directly to the monitor.
I’ve used 3 different adapters and docks with my MacBook since buying it and the BenQ dock and I like this one the best yet just because it’s all one unit. That said, the base does not have a card reader for SD or micro SD cards and it only provides 61W of power delivery, so it might not be suitable for other laptops which use USB-C for power like the 15-inch MacBook Pro. Again, that’s something consider before purchasing this monitor.
Something else that should be mentioned is that you can use the USB ports on the dock to charge other devices, BUT, charging is only active when your laptop is connected to the dock. When I disconnect the USB-C cable from my MacBook, my Pixel 2 XL stopped charging when connected to one of the other ports on the dock.
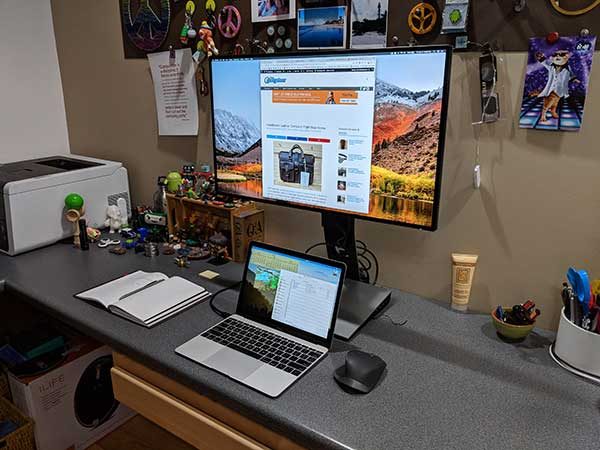
When I use my MB with the monitor, I use it a couple different ways. Sometimes I raise the monitor and use the MB’s display below it like you see above. The monitor can be raised up a maximum of 11 inches from the bottom of the display to the top of the desk. You can tip back the screen and get a box to rest your keyboard and you have a standing desk! At the lowest level, the bottom of the screen is about 4 inches to the desk.
I will also place the monitor on the base and use it all by itself. Note that the monitor can tilt back as much as 20 degrees, and forward as much as 5 degrees.
You can also rotate it a full 90 degrees like you see here. This is great for web designers who want to check out the layout of their sites.
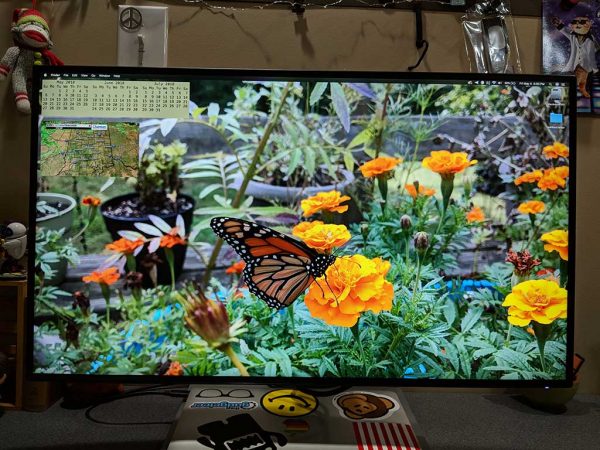
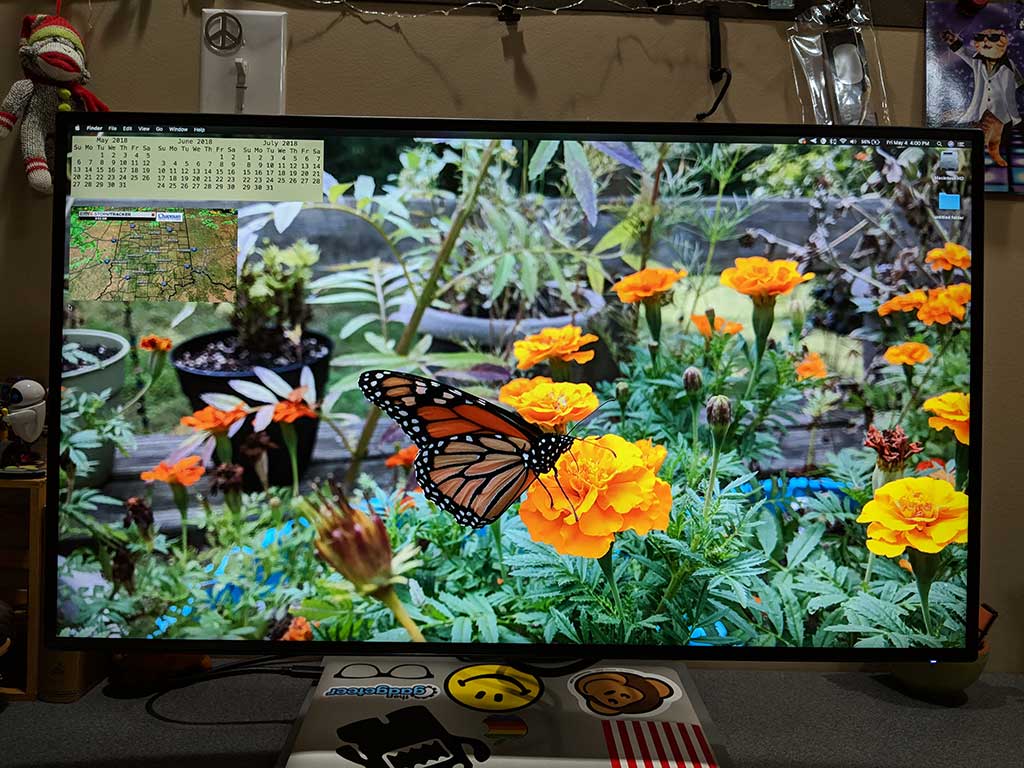
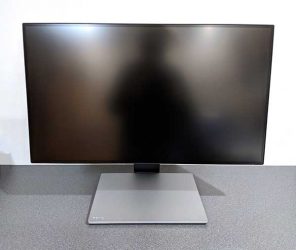
The BenQ PD2710QC’s display is gorgeous. I know it’s not 4K, but it’s sharp as a tack and everything I look at on it looks beautiful, vibrant, and crystal clear. I’ve used the monitor for everything you typically use a monitor for. I’ve surfed the web, watched movies, played a few games, edited images in Photoshop, read documents, typed out documents and more.
Like other BenQ monitors, the PD2710QC has been Technicolor Color Certified and individually factory calibrated and validated against industry color standards.
I’ve found that the monitor’s viewing angle is excellent and the non-glare coating makes it easy on my eyes and I enjoyed using it no matter what task I was doing.
Extra features that I didn’t test
If you’re a Windows user, can also install the BenQ Display Pilot software which will allow you to partition the screen. I’m a Mac user, so I didn’t test this.
I also didn’t test the display daisy chain feature that will allow you to connect up to 4 monitors using MST (multi-stream transport technology) to span your laptop’s screen across the monitors.
What I like
- Clear, crisp and vibrant colors
- The built-in USB-C docking station
- 3-year warranty
What needs to be improved
- Needs better cable management
- Needs an SD or microSD card reader in the base
- The base may not be able to charge the battery on some laptops
- Power delivery on dock’s USB ports deactivates when the laptop is disconnected
- Built-in speakers are only ok
- Requires two power cords. One for the monitor and one for the base. I wish it only needed one.
Final thoughts
I’ve been using the BenQ PD2710QC monitor for the last month and I’ve been more than happy with it for all the tasks I do on a daily basis. The display provides my 12-inch MacBook with a place to sit and a selection of ports. But it’s also easy on my eyes and gives me great color and crispness for everything I look at. I may not have had BenQ on my radar for monitors before, but now I’m impressed and will make sure to check out their monitors the next time I need to upgrade.
Price: $599.99
Where to buy: Amazon
Source: The sample for this review was provided by BenQ.
The post BenQ PD2710QC DesignView 27-inch Designer Monitor review appeared first on The Gadgeteer.
Filed in categories: Reviews
Tagged: monitor
BenQ PD2710QC DesignView 27-inch Designer Monitor review originally appeared on The Gadgeteer on May 6, 2018 at 4:50 pm.
Note: If you are subscribed to this feed through FeedBurner, please switch to our native feed URL http://the-gadgeteer.com/feed/ in order to ensure continuous delivery.