In 2016, Julie reviewed the AmpliFi WiFi router with mesh system. AmpliFi recently came out with a Teleport device that works with the AmpliFi router allowing you to securely connect to your home WiFi from anywhere in the world. I was sent the AmpliFi Teleport Kit for review. While testing it, I found that setting up the Teleport device is not easy. In addition, once I got it set up, it didn’t work every time. When it did work, I could successfully access my home network and devices.
What is it?
AmpliFi Teleport provides a secure and convenient way to access resources at home, even when you are not. Utilizing any Wi-Fi hotspot or wired Ethernet connection, Teleport is able to create an encrypted connection to your home network, expanding it wherever you go.
AmpliFi Teleport Kit works in two parts – an AmpliFi HD Router runs your home network and Wi-Fi while AmpliFi Teleport, which is a portable hardware extension to the router, makes the home network and its internet connection available from a different location. (AmpliFi website)
Hardware specs
AFi-T Specifcations (Teleport)
Dimensions: 43.00 x 75.85 x 38.85 mm (1.69 x 2.95 x 1.53″)
Weight: 80 g (2.82 oz)
Max. TX Power: 19 dBm
Speed: 2.4 GHz – 300 Mbps, 5 GHz – 300 Mbps
ESD/EMP Protection: ± 24kV Air/Contact
Buttons: Reset
Antennas: (2) Dual-Band Antennas
Wi-Fi Standard: 802.11b/g/a/n
Power Save: Supported
Wireless Security WPA2-PSK AES/TKIP
Operating Temperature: 14 to 131° F (-10 to 55° C)
Operating Humidity: 5 to 95% Noncondensing
Certifcations: FCC / CE / IC
Supported Data Rates
802.11n: 6.5 Mbps to 300 Mbps (MCS0 – MCS15, HT 20/40)
802.11a: 6, 9, 12, 18, 24, 36, 48, 54 Mbps
802.11b: 1, 2, 5.5, 11 Mbps
802.11g: 6, 9, 12, 18, 24, 36, 48, 54 Mbps
AFi-R Specifcations (Router)
Dimensions: 99.5 x 97.8 x 99.6 mm (3.91 x 3.85 x 3.92″)
Weight: 410 g (14.46 oz)
Max. TX Power: 26 dBm
Radios: 2
MIMO Chains: 6
Speed: 1750 Mbps
ESD/EMP Protection: ± 24kV Air/Contact
Buttons: Reset
Antennas: (1) Dual-Band Antenna, Tri-Polarity
Display: 1.6″ (40.6 mm) Diagonal, 240 x 240, 212 ppi, G+F Touch, Full Color
Wi-Fi Standard: 802.11ac
Power Save: Supported
Wireless Security: WPA2-PSK AES/TKIP
Operating Temperature: 14 to 131° F (-10 to 55° C)
Operating Humidity: 5 to 95% Noncondensing
Certifcations: FCC / CE / IC
Supported Data Rates
802.11ac: 13 Mbps to 1300 Mbps (MCS0 – MCS9, VHT 20/40/80)
802.11n: 6.5 Mbps to 450 Mbps (MCS0 – MCS23, HT 20/40)
802.11a: 6, 9, 12, 18, 24, 36, 48, 54 Mbps
802.11b: 1, 2, 5.5, 11 Mbps
802.11g: 6, 9, 12, 18, 24, 36, 48, 54 Mbps
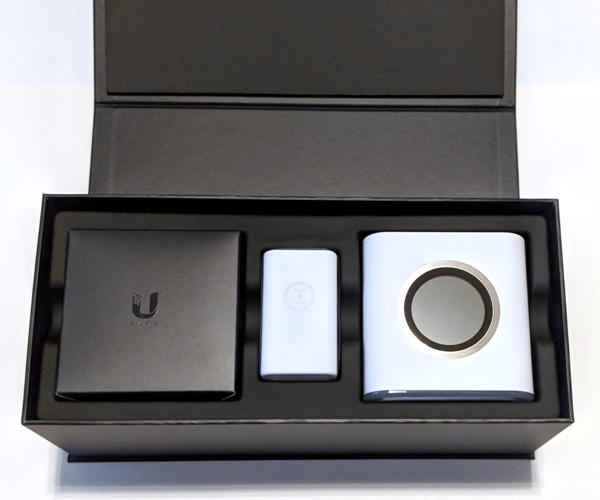
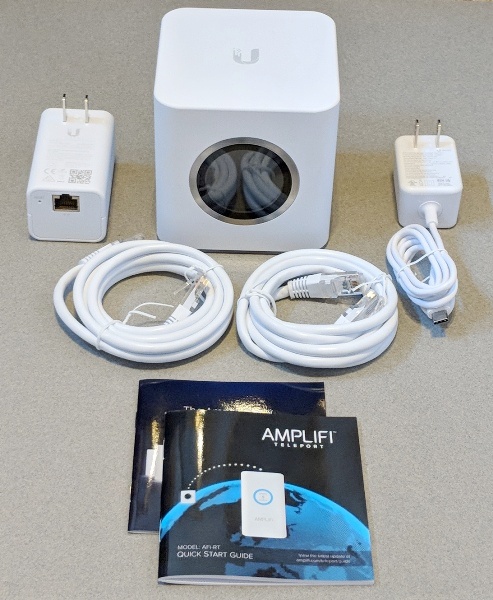
What’s in the box?
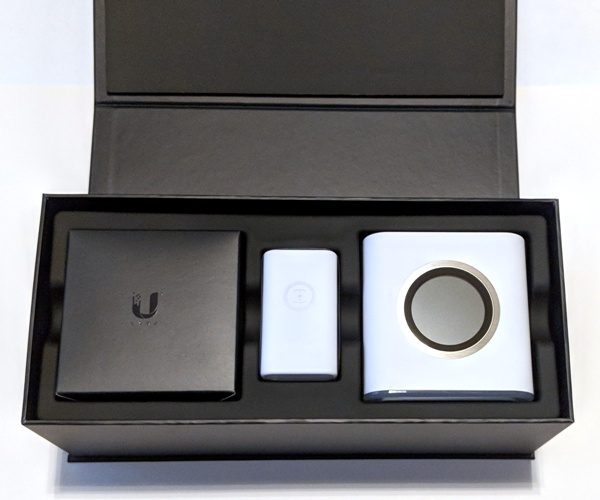
 AmpliFi Teleport
AmpliFi HD Router
Power adapter for the router
Two Ethernet cables
Quick start guide
The AmpliFi Story
Design and features
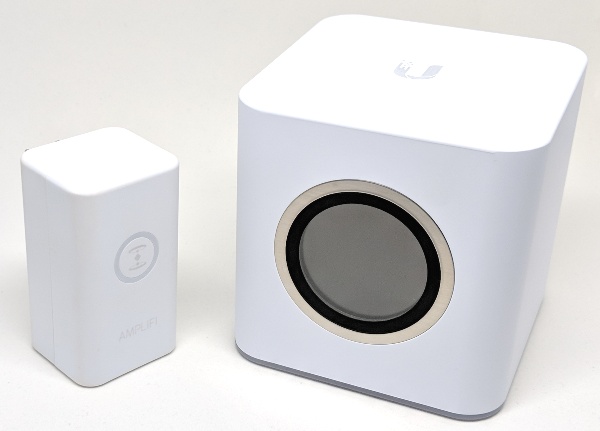
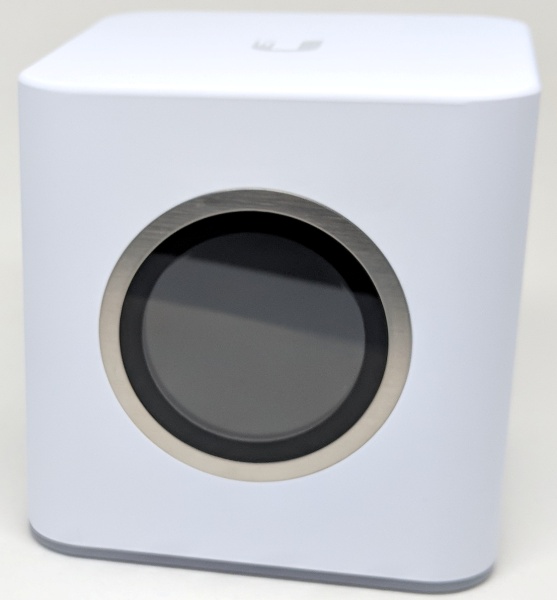
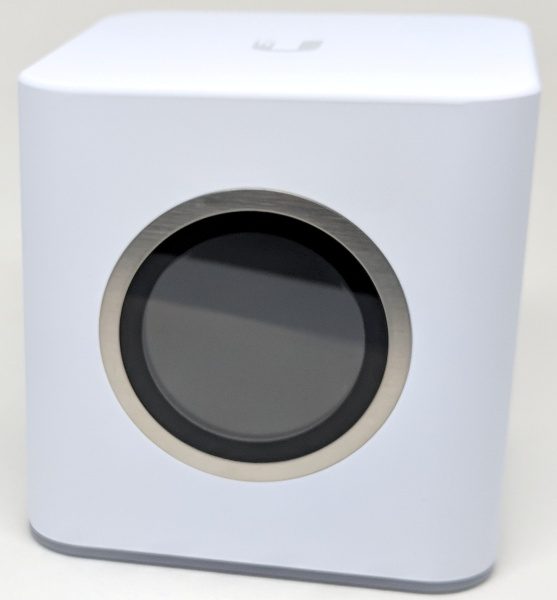 The AmpliFi Teleport (AFi-RT) kit came with their beautifully designed AmpliFi HD Router. It is a cube-shaped router, has a full-color LDC touchscreen display, and measures 3.91″ x 3.85″ x 3.92″.
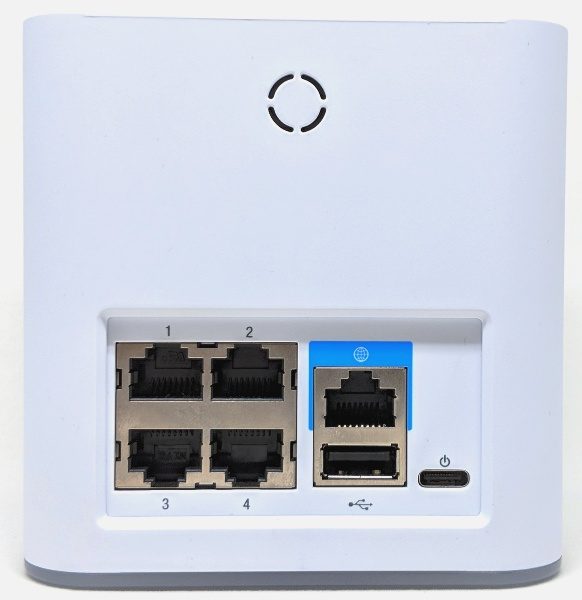 The back of the router has the following ports:
- Four Gigabit Ethernet ports to connect 10/100/1000 Mbps wired network devices to the internet
- Ethernet port (with a blue box around it) that connects to the broadband modem provided by your ISP (Internet Service Provider)
- USB port that is reserved for future use
- USB-C port for the power adapter
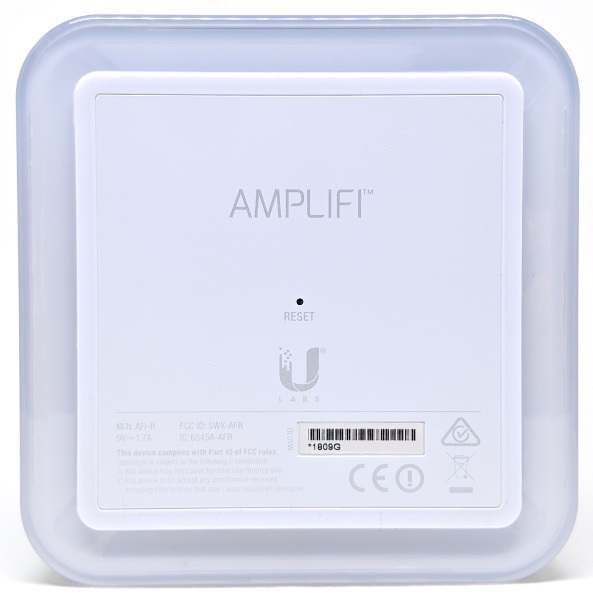
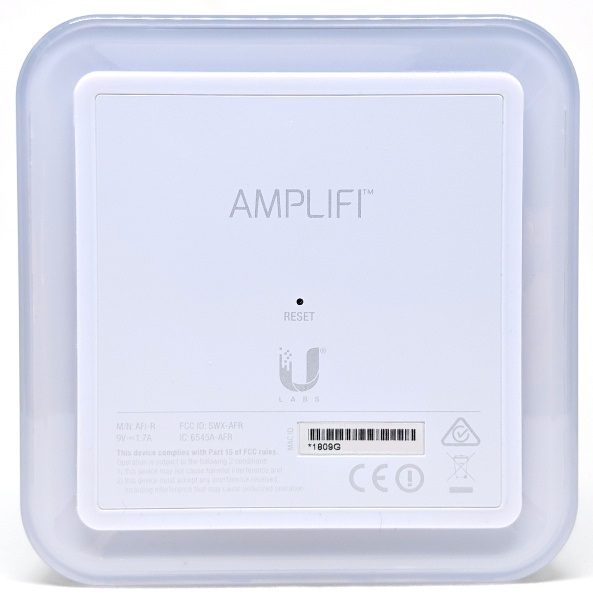 The bottom of the router has an LED ring around the bottom perimeter of the device and a rubber ring around the perimeter of the center plastic panel containing the product details. There is also a Reset button located here.
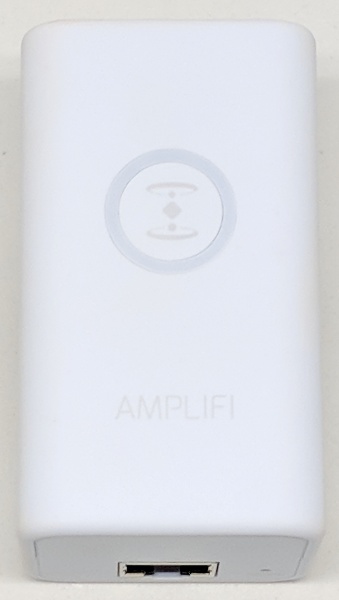
 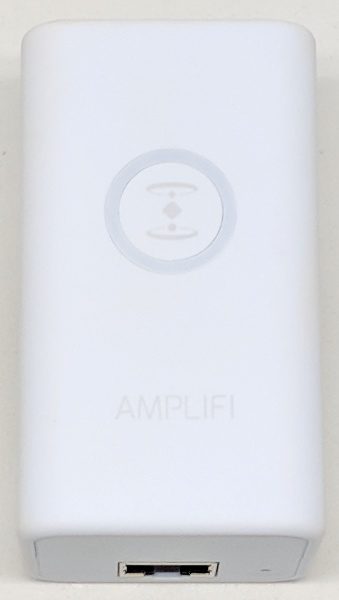 The AmpliFi Teleport kit also came with the Teleport device. The Teleport has an LED ring on the face of it and the device measures 1.69″ x 2.95″ x 1.53″.
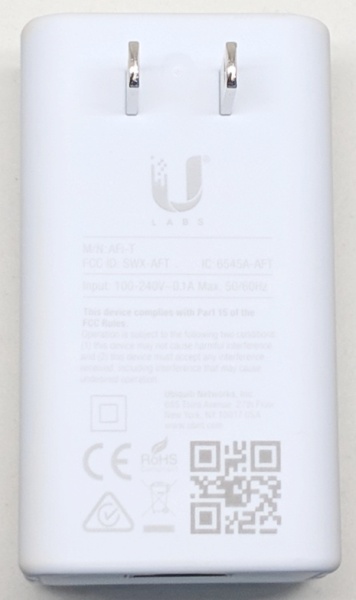
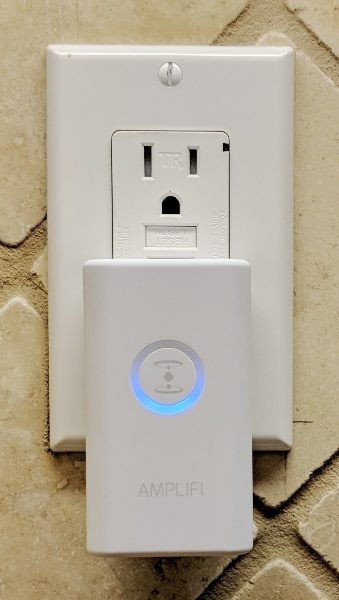
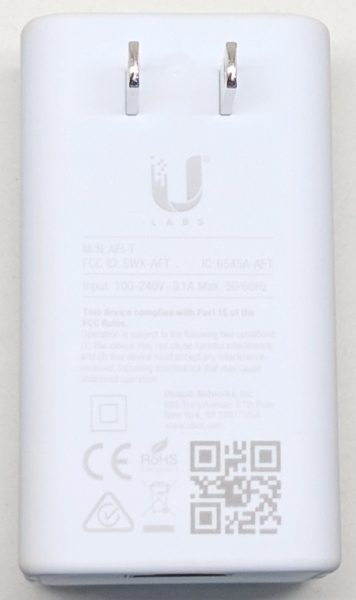 The back of the Teleport has outlet prongs.
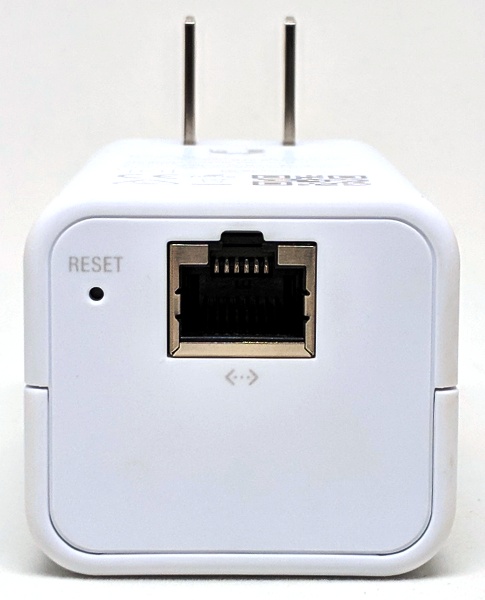
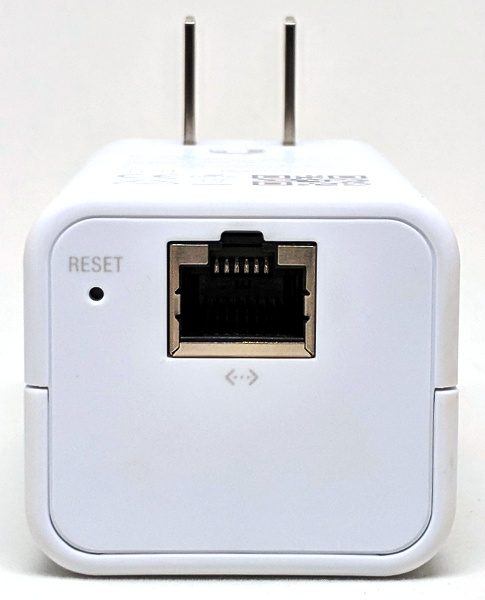 The bottom of the Teleport has a Reset button and an Ethernet port to connect it to an outside wired network (if desired).
Setup
AmpliFi HD Router setup
The Teleport device only works with the AmpliFi router, so I needed to set up the router first. There are a couple of ways to set up the router. You can set it up using the AmpliFi app (iOS or Android) or a web browser. I chose to set it up using the Android app. (Please see the AmpliFi Teleport guide to set up the router up using a web browser.)
To set up the AmpliFi router, I installed the AmpliFi app on my Pixel 2 XL phone. NOTE: If you are using an iOS device, you need to make sure that Bluetooth is turned on, or if you are using an Android device, you must make sure that WiFi is turned on.
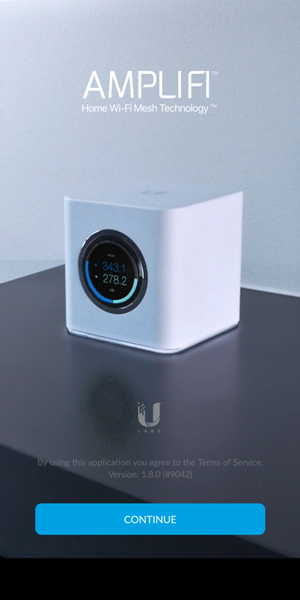
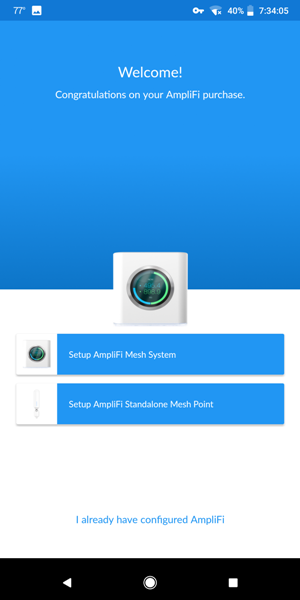
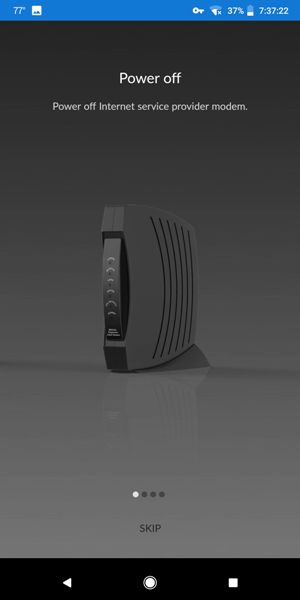
After launching the app, I tapped on the “Continue” button (left screenshot above) then on the “Setup AmpliFi Mesh System” button (center screenshot above). Next, I powered off my internet service provider’s (ISP) broadband modem.

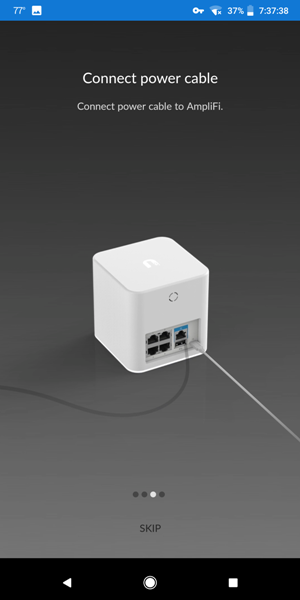
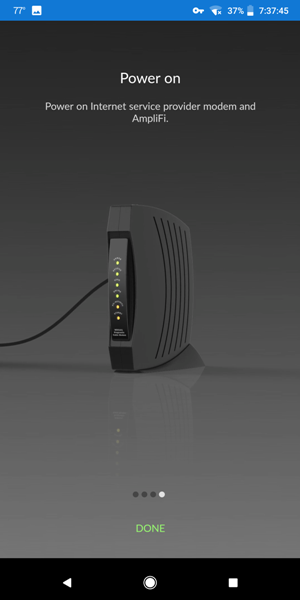
Using one of the provided Ethernet cables, I connected my AT&T modem to the Ethernet port (the one with a blue box around it) on my AmpliFi router as shown in the left screenshot above. Next, I connected the power adapter to the router’s USB-C port and plugged the other end into an outlet (as shown in the middle screenshot above). Then, I powered up my ISP’s modem.
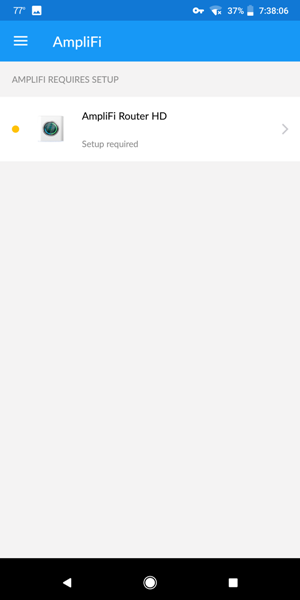
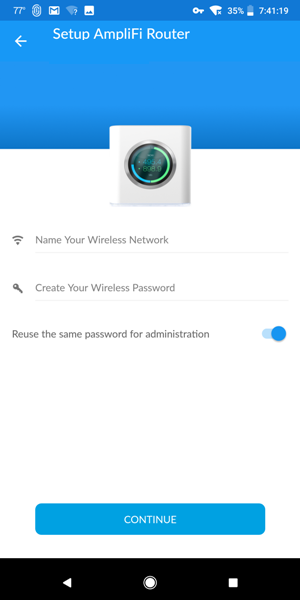
To finish setting up the router, I needed to tap on the generic name of my router within the app (left screenshot above). Then I needed to name the router (its SSID) and create its password. And finally, I clicked on “Continue” as shown in the center screenshot above.
Now you can configure the router by tapping on the router icon in the center of the app home screen. Some of the router configurations include LCD and LED brightness, AmpliFi screen night mode settings, port forwarding, setting up a guest network, band steering which allows you to connect to the optimal band (2.4 or 5 GHz), router steering which would connect you to the main router, selecting 2.4 and 5 GHz channels and width of channels, as well as enabling hardware NAT, UPnP, clone MAC address, VLAN ID, IPv6, Bridge mode, etc.
AmpliFi Teleport setup
Preparations for Teleport setup
Step 1. Enabling AmpliFi Router Remote Access: The Teleport device needed to be paired with my router and to do so, I first needed to make sure that “Remote Access” was enabled on my router.
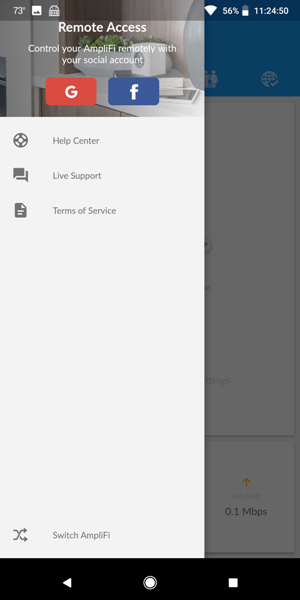
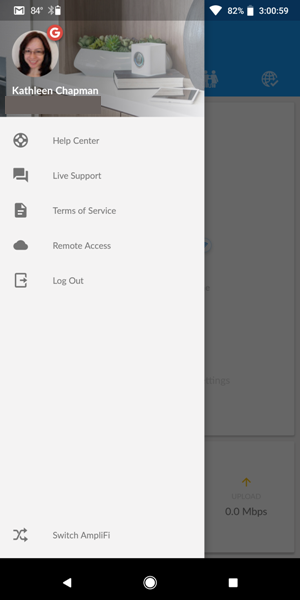
To enable “Remote Access” I needed to tap on the Menu icon in the upper left corner of the AmpliFi app (shown in the left screenshot above) and connect to either my Google or Facebook account. I chose to connect to my Google account. And that’s all I needed to do to set up “Remote Access”.
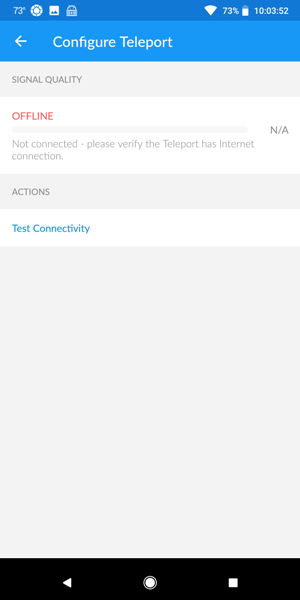
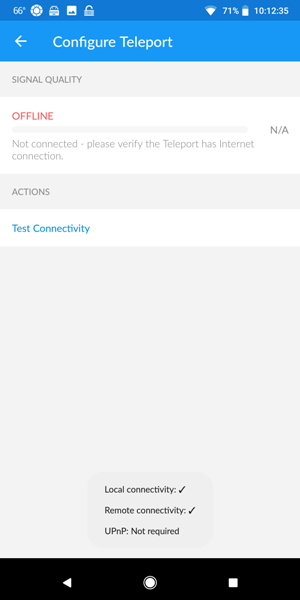
Step 2. Test Teleport connectivity: The second step in preparation for setting up the Teleport required me to test its connectivity. In the AmpliFi app, I tapped on the Teleport icon located in the center of the app home screen. I then tapped on “Test Connectivity” as shown in the right screenshot above. After doing so, it reported that the test failed and that I needed to enable UPnP on my ISP’s modem. However, AT&T (my ISP) does not allow UPnP for security reasons. I contacted Ubiquiti about this and they informed me that I could use port forwarding instead.
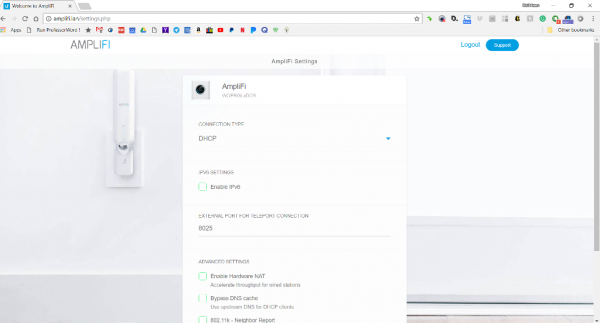
Step 3. Specify the port number in the AmpliFi router settings that the Teleport will use: Before setting up port forwarding on my AT&T modem, I needed to specify a port number in the AmpliFi router settings that the Teleport was going to use. To do this, I needed to log into my router using a web browser (http://amplifi.lan). Once I was logged in, under the setting “External port for Teleport Connection”, I entered the port number that I intended on using as shown in the screenshot above. You may click on the image to view a larger size.
Step 4. Set up port forwarding on AT&T modem: Now I was ready to set up port forwarding on my AT&T modem. I followed the steps outlined here.
NOTE: The port forwarding steps appear to be identical across AT&T modems. And, once you’ve created a new “user-defined application”, don’t forget to select it in the “Applications List” and add it to the “Hosted Applications” list in the setup.
Teleport setup
Now it’s time to setup the Teleport. First, you’ll need to plug the Teleport into an outlet and wait for the LED ring to start flashing indicating it is ready to be configured.
LED status: The LED ring on the face of the Teleport reveals its status:
- Flashing blue full circle – it is ready to be configured
- Circulating blue circle – it is connecting to the router
- Steady blue full circle – it is configured and connected to the router
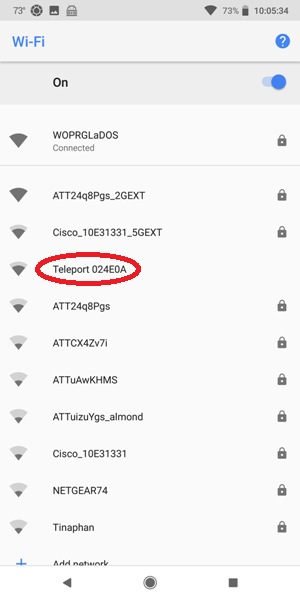
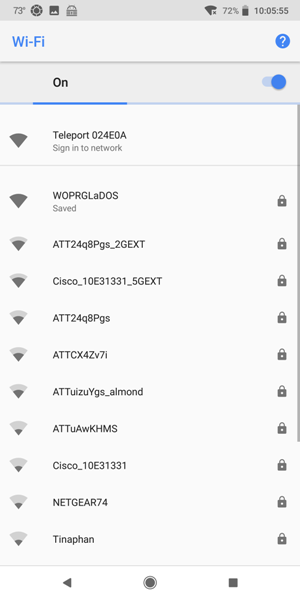
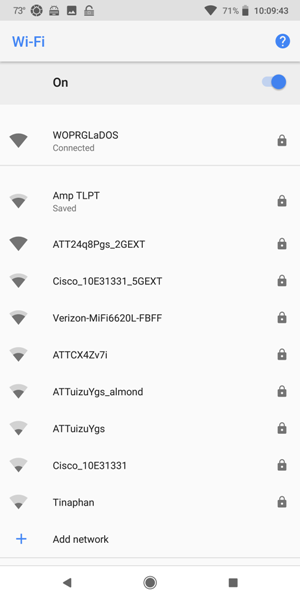
Next, I needed to find the Teleport listed in my phone’s WiFi settings as shown above. I then tapped on it.
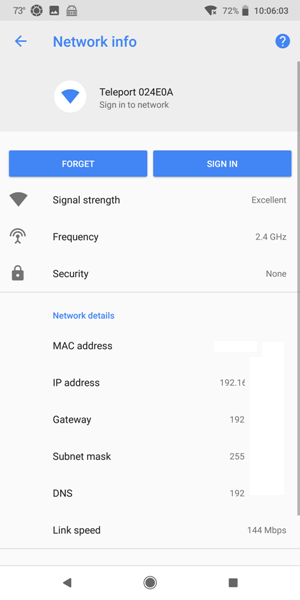
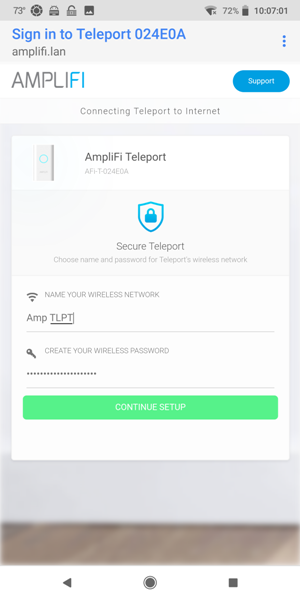
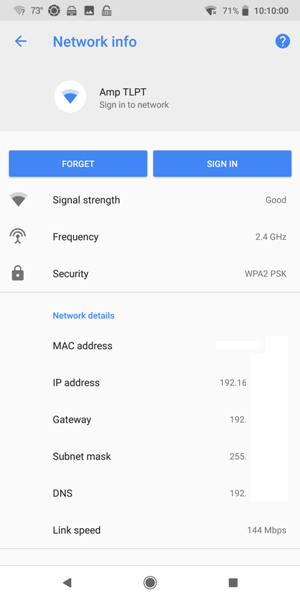
Then I needed to tap on the Teleport again to sign into it (left screenshot above). On the next screen, I tapped on the “Sign In” button. I then gave my Teleport a network name (SSID) and password to log into in the future (right screenshot above).
Afterward, I needed to log into a hotspot to test the Teleport at home. NOTE: you’ll need to log in to a different WiFi other than your home WiFi when testing the Teleport at home which is why I used a hotspot device as shown in the left screenshot above.
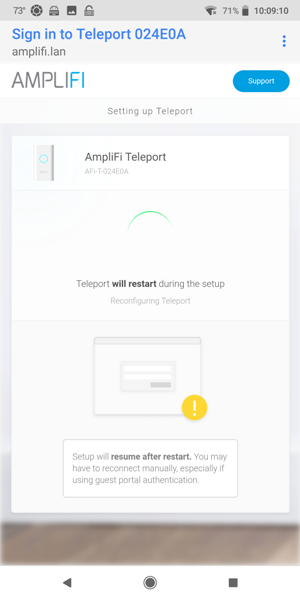
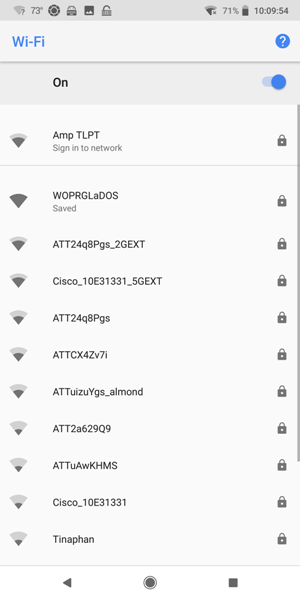
After logging into my hotspot, the Teleport rebooted as shown in the middle screenshot above. Once it was up and running again, I had to find it in the list of available WiFi devices on my phone and tap on it (as shown in the right screenshot above – the Amp TLPT).
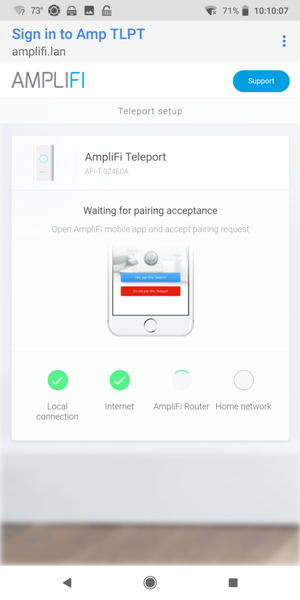
I then tapped on it again and tapped on the “Sign In” button to sign in. When the next screen popped up as shown in the right screenshot above, I needed to switch over to my AmpliFi app to pair it with my AmpliFi router.
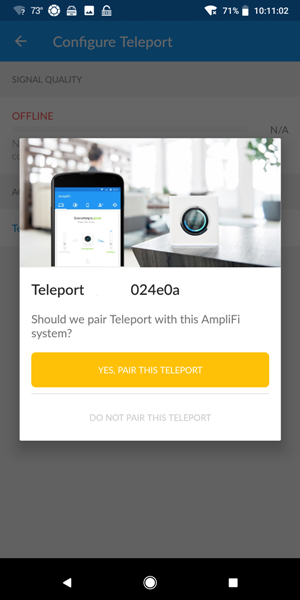
Within the AmpliFi app, a screen popped up asking if I wanted to pair the Teleport to the AmpliFi router. I tapped on “Yes, Pair this Teleport”.
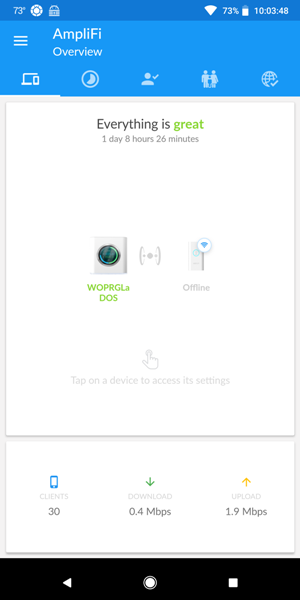
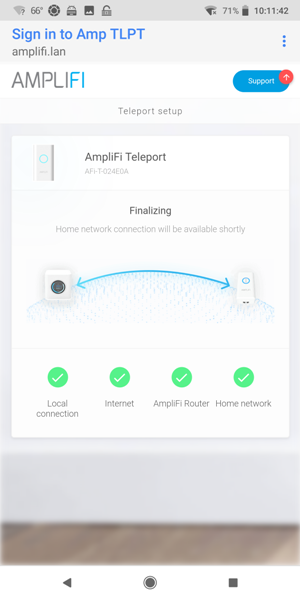
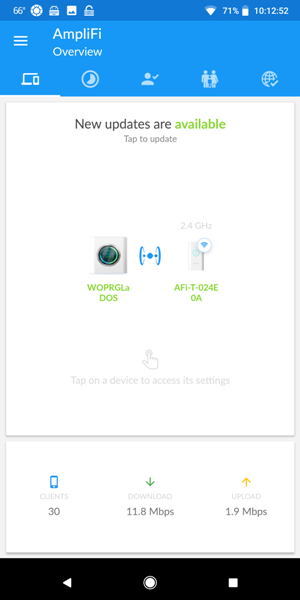
I then went back to the WiFi settings on my phone and saw the center screenshot above. The center screenshot shows that my phone was connected to the Teleport device which was connected to the internet through an outside WiFi network (my hotspot). It also showed that the Teleport was paired with my AmpliFi router and thus connected to my home WiFi network.
After running the “Test Connectivity” again, I found no problems.

Now I could configure the Teleport within the AmpliFi app. To do so, I tapped on the Teleport icon located in the center of the app home screen. I could then change the Teleport settings listed (as shown in the right screenshot above) which include turning on/off the LED, pausing the Teleport, or rebooting it.
Wow, the setup process was surprisingly laborious!
Use
Using the Teleport to log into an outside network for the first time:
- Plug the Teleport into an outlet and let it boot up
- Connect your phone to the Teleport by selecting it from your phone’s list of available WiFi networks (left screenshot above)
- Tap on the “Sign in” button to sign the Teleport into the available outside network (right screenshot above)
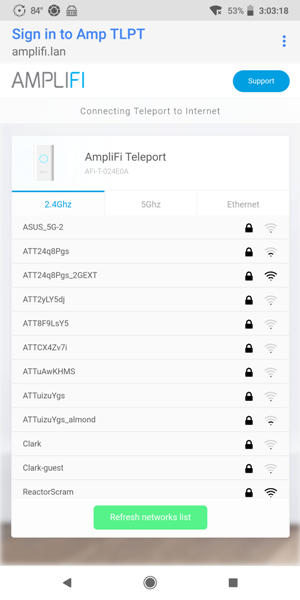
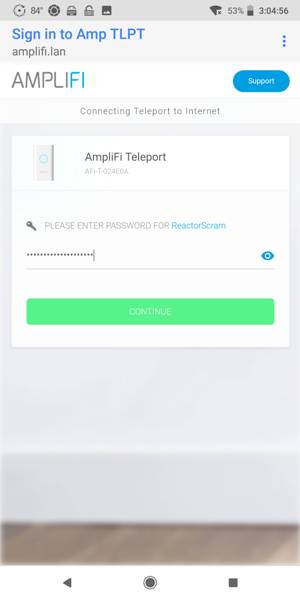

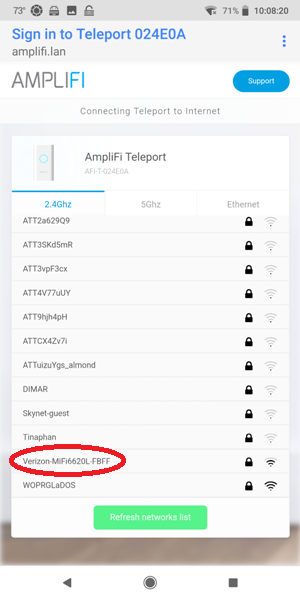
- Select the available outside WiFi (or wired) network you wish Teleport to log into (left screenshot above), enter its password (middle screenshot above), and tap on “Continue”
- The Teleport will reboot (right screenshot above)
- After rebooting, you’ll connect your phone to the Teleport again by selecting it from your phone’s list of available WiFi networks
- Now you have a secure connection to your home WiFi network
Using the Teleport to log into the same outside network that was logged into the last time you used it:
- Plug the Teleport into an outlet and let it boot up
- Connect your phone to the Teleport by selecting it from your phone’s list of available WiFi networks
- Now you have a secure connection to your home WiFi network
Performance
The AmpliFi WiFi router was easy to set up and worked well for me. However, it was already reviewed by Julie. So, if you want to find out more about it, please read her review here. The purpose of this review was to test the AmpliFi Teleport device (which requires the AmpliFi router to work and is the reason why I received both items).
While I was out around town trying out the Teleport device, I found that I was hampered by the limited number of available outlets. Once I found an outlet to plug the Teleport into, I then had trouble with the Teleport logging into an available outside WiFi network. It sometimes reported that the password was incorrect. This was a false error. I know this because I was able to successfully log into the WiFi network directly (without the Teleport) using the same password. Furthermore, the same problem occurred a couple of times when trying to log into different WiFi hotspots at home while testing the Teleport device.
Some of the benefits of having secure access to your home network are that you have access to your network files, local streaming content, and access to your network devices. When I did finally get the Teleport to log into an outside WiFi network, it allowed me to successfully access my home network and devices. I was able to do things like use my Fing app to do some home network maintenance and stream Netflix and Amazon videos without issues. One of the things that I wanted to do was stream TV content from my WatchAir Smart WiFi antenna which was connected to my home WiFi network. However, the streaming was very choppy and unwatchable.
What I like
- You can access your home network and devices
What needs to be improved
- The setup process was tedious
- Teleport sometimes had problems logging into an available outside WiFi network (it reported that the password was incorrect when it was not)
Final thoughts
The AmpliFi Teleport is a device that creates a secure network connection to your home network from anywhere around the world thus giving you access to your home network and devices. It works only with the AmpliFi router. While the AmpliFi router is easy to setup and works well, the setup of the Teleport was tedious.
After I was able to finally complete the setup, I found that I was limited by the number of available outlets. Also, when trying to log into an outside WiFi network using the Teleport, it sometimes reported that the password was incorrect even though I know it was not.
When the Teleport did work, I was able to do things on my home network like watch Netflix and Amazon videos without issues. However, the streaming quality of TV content through my WatchAir Wifi antenna at home was horrible. Thus, I have mixed emotions about using the Teleport. Sometimes it was just too frustrating to use, but other times it worked well and I could see its usefulness especially when you are traveling far from home.
Price: $208.05
Where to buy: Amazon
Source: The product used in this review was provided by AmpliFi.
The post AmpliFi Teleport (AFi-RT) review appeared first on The Gadgeteer.
Filed in categories: Reviews
Tagged: Network
AmpliFi Teleport (AFi-RT) review originally appeared on The Gadgeteer on May 11, 2018 at 2:16 pm.
Note: If you are subscribed to this feed through FeedBurner, please switch to our native feed URL http://the-gadgeteer.com/feed/ in order to ensure continuous delivery.