The Tascam DR-40 4-Track Handheld Digital Audio Recorder puts the right sound in the palm of your hand


By now, I am sure that most of the Gadgeteer readers that have been following my reviews and news stories know that I really like the Zoom audio recorders. However, before I ever tried a Zoom audio recorder, I owned a couple of Tascam devices. Just recently, I stumbled across a Tascam audio recorder that seems by specifications to be a “decent” portable audio recorder.

The Tascam DR-40 4-Track Handheld Digital Audio Recorder offers many professional level features comparable to other professional field recorders. It can record WAV/BWF files at up to 24-bit/96 kHz, or MP3 files at up to 320 kbps, on SD or SDHC memory cards up to 32GB in capacity. There are also built-in adjustable condenser microphones with the choice of A/B or X/Y patterns, a built-in limiter and low-cut filter, built-in preamps that also provide phantom power for external condenser microphones, and a built-in speaker. The available ports include locking Neutrik combo jack inputs that accept XLR and 1/4″ connections, a 3.5mm headphone/line output, and a high-speed USB 2.0 port. It can be powered by either an optional AC adapter or 3 AA batteries that last up to 15 hours. Wired handheld or footswitch remote controls are also available as an optional purchase.

If you would like to purchase the Tascam DR-40 4-Track Handheld Digital Audio Recorder, you can head over to Amazon or B&H Photo Video and pick one up for $179.99

The post The Tascam DR-40 4-Track Handheld Digital Audio Recorder puts the right sound in the palm of your hand appeared first on The Gadgeteer.

Filed in categories: News

Tagged:

The Tascam DR-40 4-Track Handheld Digital Audio Recorder puts the right sound in the palm of your hand originally appeared on The Gadgeteer on May 26, 2018 at 9:00 am.

Note: If you are subscribed to this feed through FeedBurner, please switch to our native feed URL http://the-gadgeteer.com/feed/ in order to ensure continuous delivery.

How do you store your bicycle? On a shelf, of course!

If you don’t have a garage or a covered storage area outdoors where you live, you probably have to drag your bike into your house/apartment/condo for storage.  Once it’s in your living space, where do you store it to keep it out of the way?  Well, with the Knife & Saw Bike Shelf, you could hang it on the wall.  The Bike Shelf is made of wood and designed to easily install into wall studs for maximum strength, leaving only screw holes when removed.  And as the name suggests, there’s shelf space where you could store your helmet, books, or decorative items.

The Shelf is available in solid Eastern black walnut with a hard-wax oil finish or in solid white oak with the hard-wax oil finish.  Before placing your order, you’ll need to use Knife & Saw’s fitting guide to determine if you need the standard or small size for your bike.

Regardless of the size needed or the wood type, the Bike Shelf is $325.00.  Place your order at The Knife & Saw website.

The post How do you store your bicycle? On a shelf, of course! appeared first on The Gadgeteer.

Filed in categories: News

Tagged:

How do you store your bicycle? On a shelf, of course! originally appeared on The Gadgeteer on May 26, 2018 at 8:00 am.

Note: If you are subscribed to this feed through FeedBurner, please switch to our native feed URL http://the-gadgeteer.com/feed/ in order to ensure continuous delivery.

Fuse Side Winder Apple MacBook Charging Adaptor Holder review

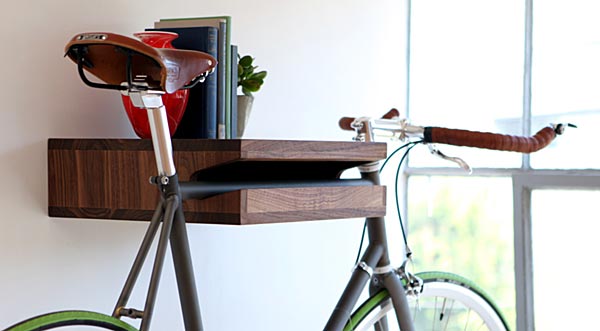
I love simple solutions for annoying problems. Take the Fuse Side Winder, for example. It’s like a hose reel, but it’s made for your MacBook charger. Let’s go wrangle those pesky cables!

What is it?

It’s a reel designed to manage the cables for your MacBook MagSafe charger. A model is also available for your USB-C charger.

What’s in the box?

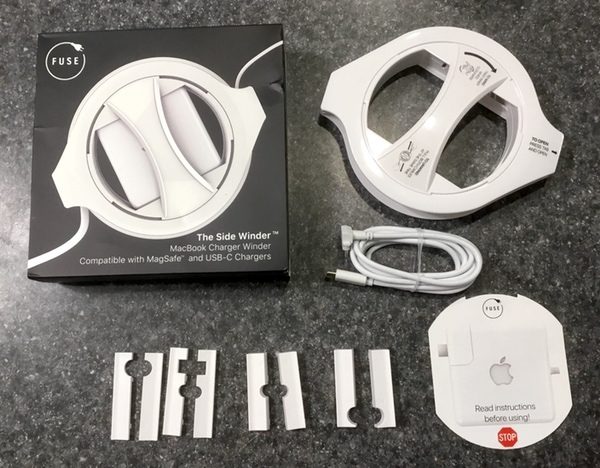
The Side Winder comes with the reel and adaptor tabs for a 45W MacBook Air charger, 60W/61W MacBook Pro charger, or 85W/87W MacBook Pro charger. It also comes with a USB-C cable (this requires the power adaptor & extension cable, which are not included in the package).

Design and features

The Fuse sidewinder is a pretty straightforward affair. Your power brick sits in the “hub” of the gadget, which rotates in the housing that reels in your cables. Construction is tight and solid, nicely protecting your cable from drops and bangs as you use it. It’s a nice build.

I appreciate the clear, easy to use instructions. Big type. Simple step-by-step instructions. No going to the Internet. It’s a nice touch:

You start by opening the case, and picking the adaptor slots based on your charger type. I’m using an older MacBook air adaptor, so it’s pre-set with those slots out of the box:

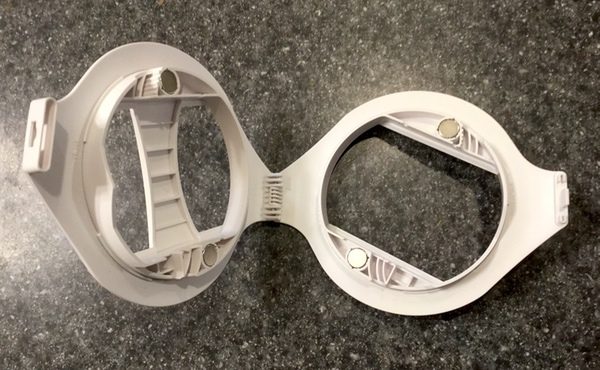
You’ll insert the brick in the hub, and feed the cables through the appropriate slots. The slots are machined perfectly so that there’s no waggle that could cause fraying in use:

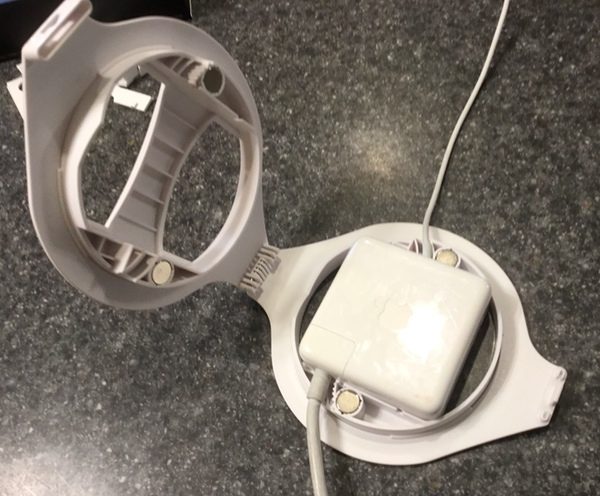
The chamber snaps closed the help of a pair of magnets and a locking tab, and you’re good to go:

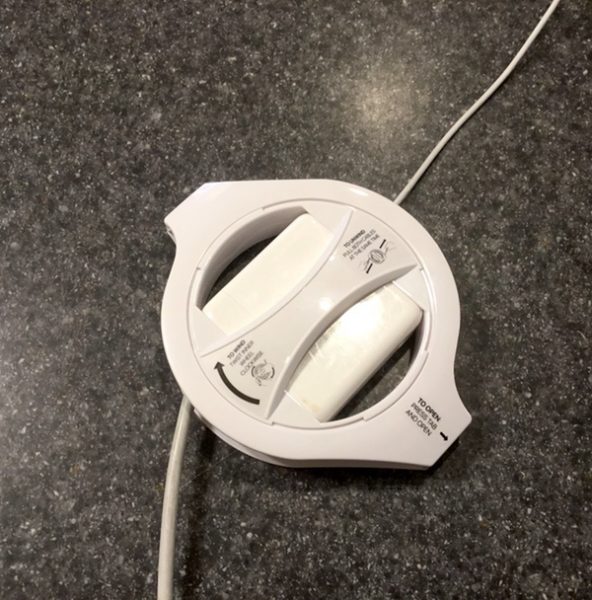
Winding is simple. You hold the outside of the case with one hand, and crank the handle in the middle to wind the cables. There’s a little housing on each side that catches the plug ends so that you don’t overwind:

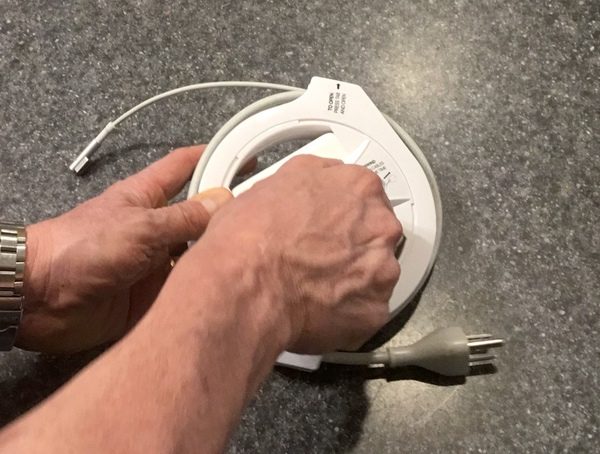
When you’re ready to pull the cables out, you just grab each and pull:

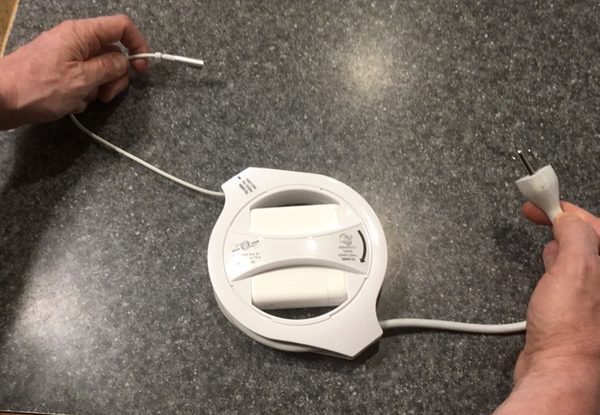
It’s a very simple, straightforward design that I like quite a bit. There are no springs, coils, or elaborate mechanisms that could fail with repeated use. Just wind and pull. Lovely.

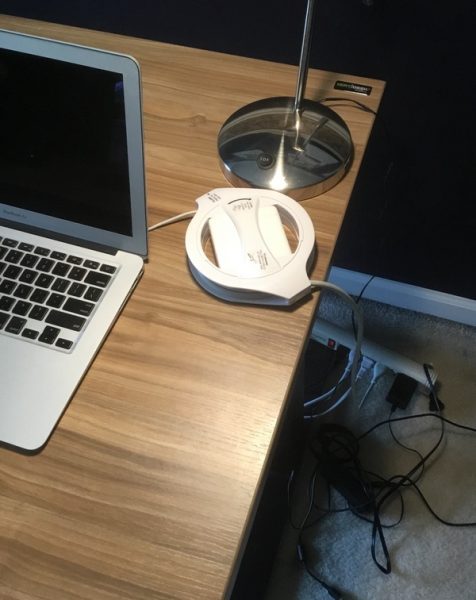
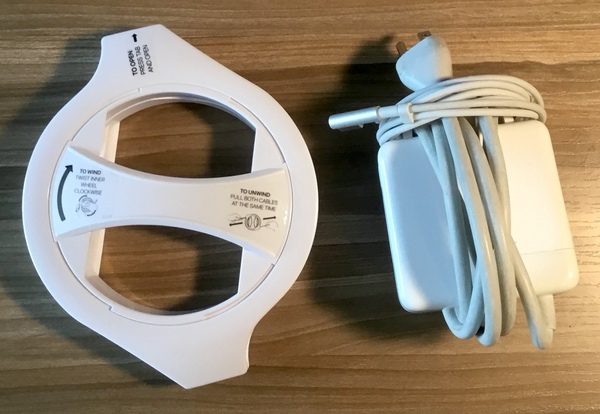
If there’s one thing to keep in mind about the design, it’s that it does add some size to your charger. Here’s a size-by-side pic of my charger coiled up next two the Fuse Side Winder for reference. You’ll notice that the Fuse Side Winder is a bit bigger, but not as thick as wrapping the cables around the charger in the traditional manner:

This may or may not be an issue for you, depending on how you carry your gear. I dropped some comparison pics here in one of my briefcases for reference.

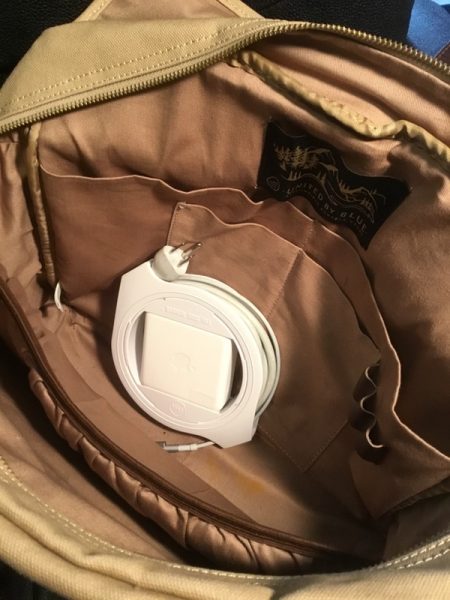
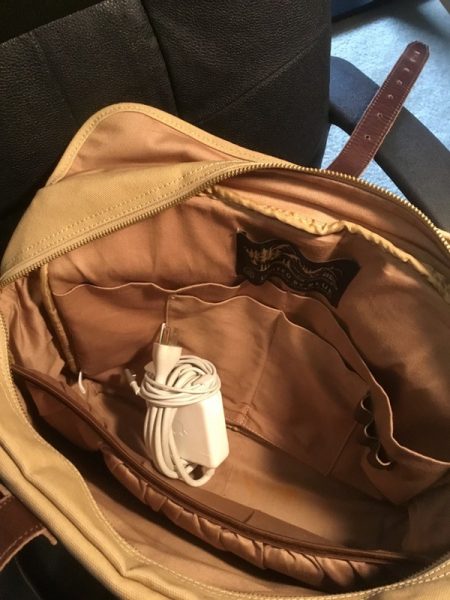
See the difference? I actually think that it’s easier to manage with the Side Winder, as it’s slides easily in and out of my bag. This is especially handy if you have a narrower bag (like a briefcase) since there is less chunky depth from wrapping up those cables. Some bags have those smaller charger “garage” pockets, however which may not fit the extra length and width. You’ll want to check your bag type and packing style if this might be an issue for you.

One last note on compatibility: the Fuse Side Winder is sold in two models. There’s one for Magsafe chargers, and another for newer USB-C chargers. Most variations are covered. Check the Fuse web site for a guide to what fits (and which one you need) before you buy!

What I like

  • Well designed with solid construction
  • Easy to install
  • Easy to operate

What needs to be improved

  • Adds some extra bulk to your charger

Final thoughts

A simple solution for a common problem, the Fuse Side Winder is a winner in my book. I’ve been using it for a month, and it does a great job removing the hassle of wrestling with another set of cables. It’s a well-designed piece of gear. Just check the specs to make sure it’s compatible with your charger.

Price: $29.99
Where to buy: Get it at the Fuse web site or Amazon.
Source: The sample of this product was provided by Fuse.

The post Fuse Side Winder Apple MacBook Charging Adaptor Holder review appeared first on The Gadgeteer.

Filed in categories: Reviews

Tagged:

Fuse Side Winder Apple MacBook Charging Adaptor Holder review originally appeared on The Gadgeteer on May 25, 2018 at 1:00 pm.

Note: If you are subscribed to this feed through FeedBurner, please switch to our native feed URL http://the-gadgeteer.com/feed/ in order to ensure continuous delivery.

The Papago Airfresh S10D Air Purifier will help you to fight your allergies while on the go


As allergy season continues to take hold of its victims by storm, many of us allergy sufferers have spent a fortune on in-home devices to help us to make it through the season. But what about the hours upon hours that some of us spend in our cars, sneezing and wiping away the tearing from our eyes as we try to make it through rush hour traffic to get to where we are going.

PAPAGO AIRFRESH S10D Air Purifier seems to be just the right solution for combating allergies when on the go. According to the manufacturer, this air purifier “Continuously releases positive & negative ions to generate a plasma reaction to release energy”. It automatically purifies small and harmful PM2.5 fine particles (“PM2.5 refers to atmospheric particulate matter (PM) that have a diameter of less than 2.5 micrometers”), and it does not require a filter to do so. It also monitors the temperature and humidity and allows the use of hand gestures so that it can be safely controlled during the operation of a motor vehicle.

If you are an allergy sufferer like me, you can head over to Amazon and read much more about the PAPAGO! AIRFRESH S10D Air Purifier, or just go ahead and pick one up to fight your allergy symptoms while on the go. It can be purchased for $149.99

The post The Papago Airfresh S10D Air Purifier will help you to fight your allergies while on the go appeared first on The Gadgeteer.

Filed in categories: News

Tagged: ,

The Papago Airfresh S10D Air Purifier will help you to fight your allergies while on the go originally appeared on The Gadgeteer on May 25, 2018 at 12:00 pm.

Note: If you are subscribed to this feed through FeedBurner, please switch to our native feed URL http://the-gadgeteer.com/feed/ in order to ensure continuous delivery.

The Cat Solarium lets your cat enjoy the outdoors without leaving the house

Indoor cats always like to look outdoors, but sometimes there isn’t a window with a good perch where they can sit to enjoy the view.  With the Cat Solarium, they can enjoy the view and the fresh air from the safety of a window.  The Solarium fits into a window a bit like how a window air conditioner fits.  It has bars to keep the cat from jumping out.  The top is made of Plexiglass so the cat can enjoy sitting in the sun.

The basic structure is made of ¾” cabinet-grade plywood and painted with marine-grade paint. These are very durable, sun- and water-resistant structures – strong enough to hold a 50+ lb cat.  You can add a a Plexiglass back panel with a cat door insert to keep the outdoor air outside.  Other options include a Solarium pillow, cat perch/landing to help the cat easily enter the Solarium, mesh screen to keep insects out, and a Plexiglass weather enclosure.  To use the Solarium, your window opening must be 24.5″ wide and raise up 14.5″.  The manufacturer includes heavy gauge vinyl with industrial strength Velcro for a temporary cover for gaps surrounding the installed Solarium.

The Solarium is available in a variety of packages, from the Sun Room with a Plexiglass back panel with a cat door and the mesh screen for $299.99 to the Conservatory package with Plexi back panel with cat door, custom pillow, cat perch, weather enclosure, and mesh screen for $379.99.

Each kit comes with an Allen wrench for assembling the Solarium.  The wrench and 20 minutes are all you need for building the kit.  Illustrated instructions are available on the website.

The Cat Solarium can be purchased at their website.

The post The Cat Solarium lets your cat enjoy the outdoors without leaving the house appeared first on The Gadgeteer.

Filed in categories: News

Tagged:

The Cat Solarium lets your cat enjoy the outdoors without leaving the house originally appeared on The Gadgeteer on May 25, 2018 at 11:00 am.

Note: If you are subscribed to this feed through FeedBurner, please switch to our native feed URL http://the-gadgeteer.com/feed/ in order to ensure continuous delivery.