I enjoyed using the Huawei Mate 10 Pro when I reviewed it a few months ago and now I’ve had the chance to use the newer and smaller Huawei P20 for a few weeks. Do I love it? Like it? Or is it just meh? Let’s find out.
What is it?
The Huawei P20 is one of Huawei’s latest Android smartphones that runs the most current version of Oreo (Android version 8.1). The P20 is a smaller and lower cost version of the P20 Pro which also from Huawei. Both phones feature a thin bezel display with an iconic notch at the top and both phones feature Leica lenses. The P2o Pro sports 3 lenses on the back while the P20 only has 2 lenses. The P20 also has a smaller 5.8-inch display while the P20 Pro’s display is 6.1 inches. The P20 only has 4GB of RAM while the P20 Pro has 6GB and of course, the P20 Pro has a larger battery. But enough comparison, let’s focus on the P20.
Hardware specs
Processor: HUAWEI Kirin 970 CPU, octa-core, 4 x Cortex A73 2.36 GHz + 4 x Cortex A53 1.8 GHz
Operating System: Android 8.1
Memory: 4 GB RAM+128 GB ROM
Display: 5.8in FHD 1080 x 2244, 428 PPI IPS Display
Network: LTE TDD / LTE FDD / WCDMA / EDGE / GPRS
Camera (rear): Dual-lens camera: 12 MP (RGB, f/1.8 aperture) + 20 MP (Monochrome, f/1.6 aperture), supports autofocus (laser focus, deep focus, phase focus, contrast focus)
Camera (front): 24 MP, f/2.0 aperture, supports fixed focal length
Connectivity:
Bluetooth: BT4.2, support BLE
WiFi: Wi-Fi 2.4 G/5 G, 802.11a/b/g/n/ac with Wi-Fi Direct support
NFC: yes
Positioning: GPS / AGPS / Glonass / BeiDou Navigation Satellite System
Battery: 3400 mAh
Dimensions: 149mm X 70.8mm X 7.65mm
Weight: 165 grams
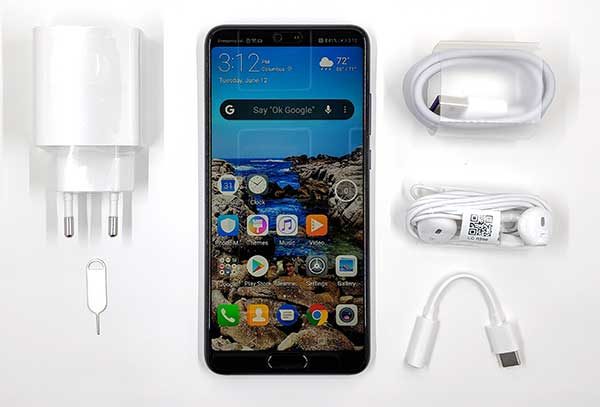
Whats in the box?
- Huawei P20
- USB-C Earphones
- Charger
- USB-C Cable
- USB-C to 3.5 mm Headphone Jack Adapter
- Flexible Clear Case
- Quick Start Guide
- Eject tool
- Warranty card
Design and features
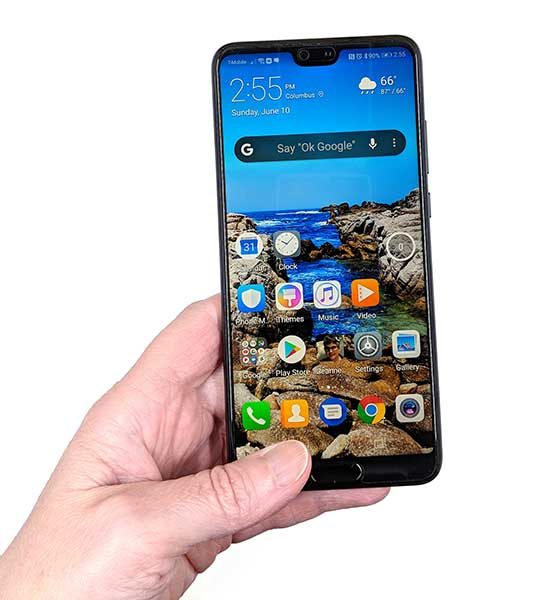
The P20 is available in 5 colors that include Black, Pink Gold, Champagne Gold, Midnight Blue, and Twilight. As you can probably guess, I was sent the Black version of the phone. The phone has a smoothly rounded metal frame with rounded corners. The face of the P20 is all screen except for a smallish notch at the top where the front camera lens, speaker, and status LED are located. At the bottom is a medium sized chin where the combination home and fingerprint scanner capacitive button is located.
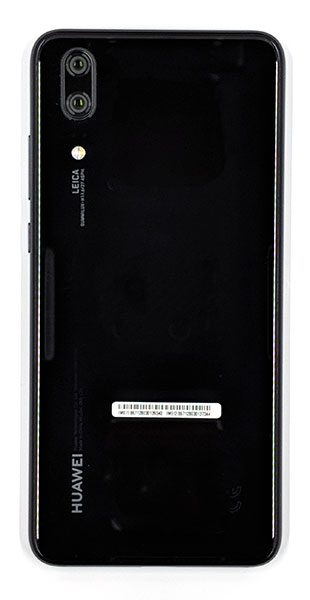
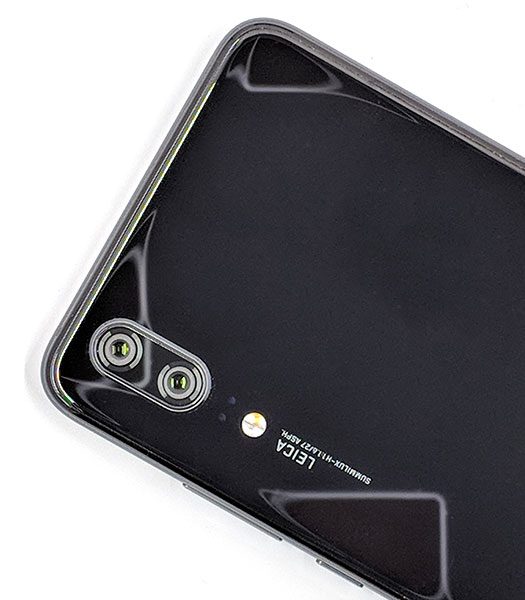
The back of the phone is made of glass with the dual Leica lens camera in the top left corner with the 20MP monochrome camera on top and the 12MP RGB lens below it. There’s also an LED flash below the lenses.
The dual lenses are covered in glass and protrude from the back of the phone so you might want to keep the phone in a case that will help protect the lenses from dirt and finger smudges. This is definitely something you should consider because the P20 doubles as a great camera so you will want to keep your images clear and sharp by keeping the lenses clean.
The rest of the phone’s back is blank except for the Huawei brand in the bottom left corner. As I mentioned, the back of the phone is made of glass which has perfectly smooth curved edges that make the phone feel very comfortable in hand. However, even though the back of the phone is made of glass, the P20 surprisingly and unfortunately does not have wireless charging.
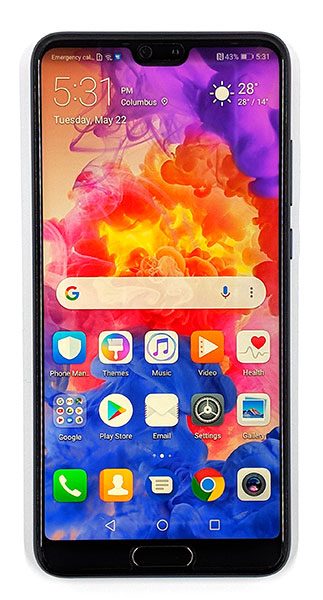
Like the Huawei Mate 10 Pro, the P20 comes with a glass screen protector already installed over the display. The phone also ships with a clear case although my review unit didn’t have the case in the box. I think Huawei is the only phone manufacturer that I’ve seen that includes a preinstalled screen protector and a basic case. I like that!
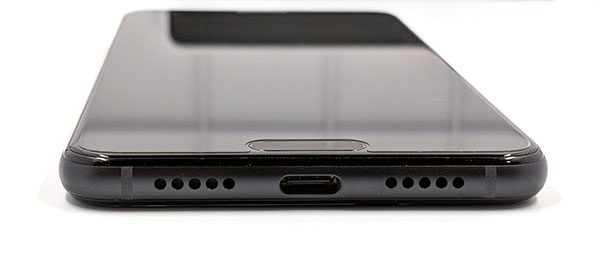
The bottom edge of the P20 has a downward firing speaker and a USB-C port for charging and connection to an HDMI, VGA, or DVI adapter or dock for connection to a monitor or projector. More about that feature later.
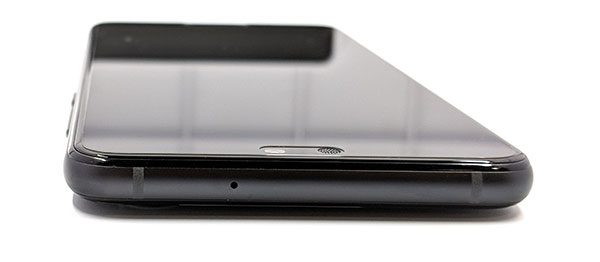
On the top edge of the phone is a microphone.
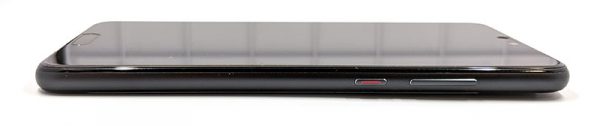
On the right side of the P20, you’ll find the up and down one-piece volume button with the power button below it. The power button has a red stripe inside it which I suppose is just for decoration. Both buttons stick out from the side so that they are easy to find with your fingers and they have excellent tactile feedback.
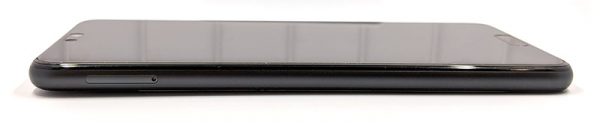
The left side of the phone has a dual SIM card tray and the phone has software that will allow you to easily switch between SIMs. I only had one active SIM, so I didn’t test the dual SIM capability of the phone.
IP53 dust and water resistance, which means the phone is protected from dust and a light spray of water but is not submersion in water.
In hand, the Huawei P20 feels great. It’s small and solid. The rounded sides make it comfy to hold with no sharp edges when you grip it. Speaking of gripping the phone, I’m happy to report that the P20 passed my 20 years and counting Gadgeteer squeeze test without flexing or creaking.
Display
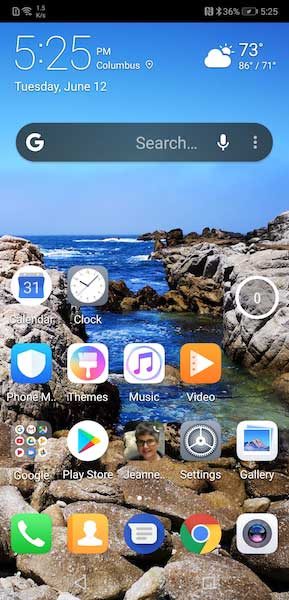
Love it or hate it, the notch is here to stay. At least that’s what we’re seeing with the current generation of smartphones as it seems to be the latest fad. I personally don’t have any strong feelings one way or another about it, but I know some people who absolutely hate them.
If you’re a notch hater, you can use a software setting to turn off the notch. I will say that with the notch hidden, it’s much easier to see the notification icons. They kind of blend in with the screen’s wallpaper when the notch is present. That said, the Huawei P20 has one of the smallest notches to date. It doesn’t come close to being as small as the one on the Essential Phone, but it’s only about twice as wide as that one. Inside the notch is the front facing 24MP camera, a tiny status LED, a speaker, and an ambient light sensor.
The Huawei P20 has an IPS LCD display instead of an OLED display like its big brother the P20 Pro. Is that a big deal? I don’t think so. The P20’s screen is vibrant, crisp, and clear but to my eyes, the P20’s display is not quite as bright or as easy to read as my Pixel 2 XL when both are set to max brightness, but my Pixel’s display is larger which makes a big difference – at least for my eyes. I’m not complaining about the P20’s display though and find it to be perfectly fine and enjoyable to view.
If you dive into the display settings, you’ll find options to turn on a blue light filter, manual adjustments for the color mode (vivid or normal) and color temperature, or automatic color temperature adjustments based on the ambient light. You can also manually choose between the screen resolution of HD+ which is 1496 x 720 or FHD+ which is 2244 x 1080. Or you can toggle Smart resolution which will automatically lower the resolution to save power.
Fingerprint reader
After using the Huawei Mate 10 Pro’s fingerprint reader, I expected to be equally impressed with the P20’s reader. Unfortunately, that hasn’t been the case. First of all, I’m so spoiled by having a reader on the back of my phone that I can’t stand having one below the screen on the front. Even after getting used to the location, I still find that the P20’s reader doesn’t work for me 100% of the time and I’ve had to reprogram my prints at least 2 times in the last few weeks. If you’ve been reading my smartphone reviews for any length of time, you’ll already know that I have a less than stellar history with fingerprint readers… at least until I started using a Pixel 2 XL which has the best fingerprint reader in the galaxy (at least for me).
Even though the fingerprint reader on the P20 doesn’t work that well for me, that’s ok because the P20 can use face recognition too and that does work well for me. Between the two unlock methods, I’ve had few instances where I’ve had to use a pattern swipe to unlock the phone.
Camera
I was very impressed with the Mate 10 Pro’s camera, so I was expecting the same performance from the P20. Although I was really looking forward to checking out the P20 Pro’s 3 cameras, the P20’s 2 cameras didn’t disappoint me. Like the Mate 10 Pro, the P20’s lenses are LEICA lenses and like the Mate 10 Pro, I’ve been impressed with the images I’ve been able to capture with the P20.
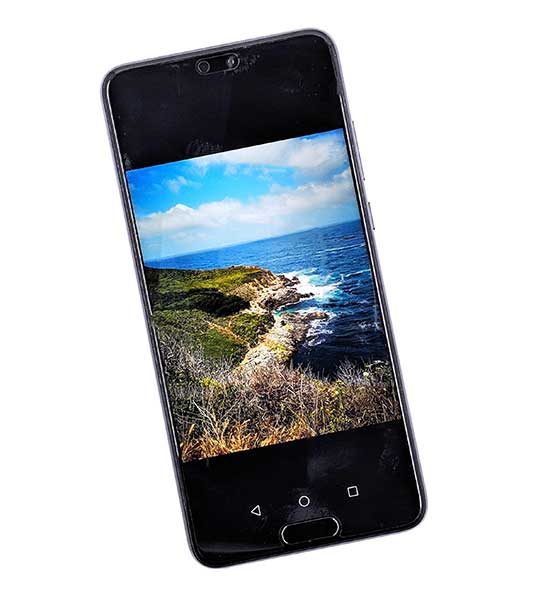
I usually don’t have very exciting images to show as samples in my reviews, but as luck would have it, I received the P20 as I was preparing for a vacation to California to the Carmel and Monterey area. Check out some of my sample shots which are straight out of the camera with no edits. Click to see the full-sized image.


The cool thing about the P20’s stock camera app is that it will detect what you’re shooting and adjust the image to make it look as good as possible. When I was shooting beach scenes it would show BEACH at the bottom of the screen and it would also sometimes put a level on the screen so that I could easily see if I had the horizon straight. I will admit that the water in some of those images was not quite as dazzling blue as it looked in real life, but I just love how the images turned out. If you hate the hyped colors, you can turn off the P20’s AI in the camera settings. As for me, I think the images look like they came out of a magazine if I do say so myself. Well, all of them except for the selfie… 
Just to compare, here are two of the same shots taken with the P20 and my Pixel 2 XL within seconds of each other so you can compare.

Which one do you like best? The picture taken with the P20 is on the left and the picture from the Pixel 2 XL is on the right. I’m going with the one on the left.


The P20 also surprised me when I began taking a picture of a sign. The stock camera app recognized it as a document and scanned it to fill the image and made it perfectly square.
Also, like the Mate 10 Pro, a double-tap of the volume-down key will take a snapshot in as little as 0.3 seconds from standby mode (locked with the screen off).
The camera is my favorite feature of the Huawei P20. It inspires me to want to travel more just so I can capture some more insanely great pics.
Oh, and it does a good job with video too… Check out this huawei-p20-47. It’s a 54MB video.
The P20 earned top marks on DxOMark the trusted industry standard for independent image quality measurements and ratings of digital cameras, lens, and smartphones. Test results are available on www.dxomark.com.
Audio quality
Although the P20 has what looks like two downward firing speakers on the bottom edge of the phone, there’s really only one speaker on the right. If you can get past the fact that it has a mono speaker, the P20’s speaker is clear and sounds decent and at full volume, it’s loud.
I rarely listen to music through a phone’s speaker, so using the included USB-C to 3.5mm adapter with earbuds, I found the P20’s audio to sound very good while listening to music through Google Play and Spotify.
According to the Huawei website the HUAWEI P20 incorporates a Dolby Atmos® sound system that breaks new ground for smartphone audio. Premier 990 Kbps HWA* supports Hi-res audio files so you can enjoy true Hi-Fi audio quality wirelessly via Bluetooth audio devices that support HWA. The open HWA ecosystem invites industry advancement in smartphone audio, keeping your audio experience best-in-class.
Using the Huawei P20 for phone calls
During my 3 weeks using the Huawei P20, I’ve had no issues making and receiving calls with this phone on the T-mobile network and have felt that the volume level on both sides of the conversation has been just fine.
Software and user interface
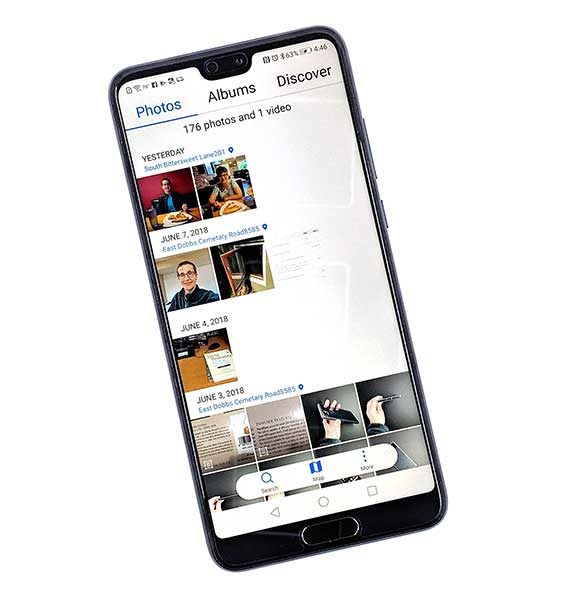
Like the Mate 10 Pro that I reviewed, the P20 ships with Huawei’s own skin over stock Android that’s called EMUI. EMUI doesn’t make Android look that much different from stock, but it does include Huawei’s versions of the stock apps like the calendar, clock, calculator, etc. and it adds extra features like the ability to take screenshots by knocking twice on the screen with your knuckle. You can also knock once and then draw an S to take a scrolling screenshot for really long pages. There’s even a built-in tool to record a screencast.


Other EMUI gestures include HiTouch where you put two fingers on the screen when you’re viewing a product image and it is supposed to pull up product info on Amazon. Sometimes it worked and sometimes it came up with completely weird results.
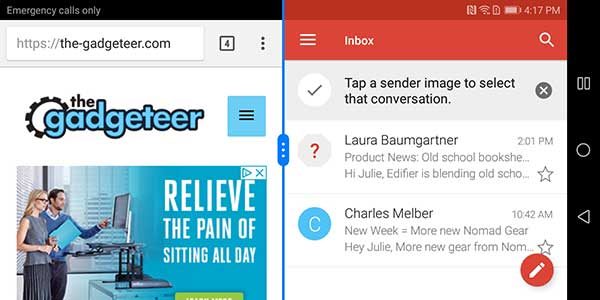
You can also show two apps in a split-screen view and you can launch apps by drawing a letter with your knuckle.
The P20 even has its own very basic built-in assistant called Emy that you can use to make and answer calls using your voice.
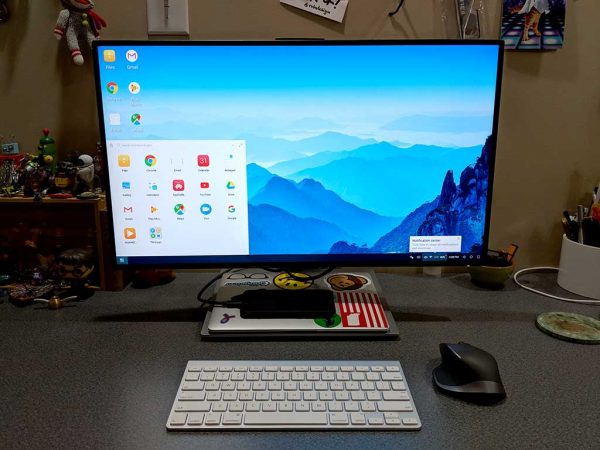
Another cool feature allows the P20 to easily connect to a monitor or projector if you have a USB-C HDMI, VGA, or DVI dock or adapter. Just plug it in and it will display a full-screen user interface on the larger screen. It’s like the Samsung DEX Station without paying for the extra hardware. It worked great with my BenQ PD2710QC DesignView 27-inch Designer Monitor.
The interface is simple and easy to use and makes me know that the day is coming soon where my phone will be able to function as my one and only computer.
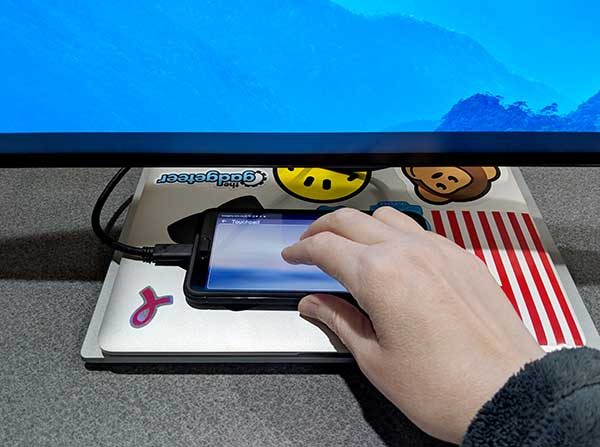
As an added feature, when the P20 is connected to a monitor or projector, the phone’s screen will turn into a touchpad that you can use to move the cursor around on the screen.
Overall performance and battery life using the Huawei P20 for day to day tasks
The P20 performs well and I haven’t noticed any problems launching multiple apps and switching between them. It also scrolls smoothly when viewing long web pages. The phone has a 3400mAh battery that kept it running for a full day of medium usage, with some juice to spare. I never saw a low battery warning while reviewing the phone and when I did recharge, it was topped off very quickly due to Huawei’s SuperCharge technology which gives you almost a full day of power with a quick 20-30-minute charge.
What I like
- The camera shoots great pics
- Comfortable in hand and pocket
- Can connect the phone to a larger monitor or projector
- Fast charging
What needs to be improved
- The fingerprint reader is underwhelming
- No wireless charging
- No micro SD card slot
- Mono speaker
Final thoughts
I had originally wanted to review the Huawei P20 Pro because after all, it’s the top of the line pro version… but I was sent the P20 and I’m happy to say that I haven’t been disappointed in the least. Except for a couple missing features like wireless charging and a micro SD card slot, the Huawei P20 is a pint-sized powerhouse with a great camera that I love. I think this phone is a viable alternative to other flagship phones and has a better price.
Price: $567.00
Where to buy: Amazon
Source: The sample for this review was provided by Huawei.
The post Huawei P20 smartphone review appeared first on The Gadgeteer.
Filed in categories: Featured Items, Reviews
Tagged: Android, Smartphone
Huawei P20 smartphone review originally appeared on The Gadgeteer on June 13, 2018 at 11:00 am.
Note: If you are subscribed to this feed through FeedBurner, please switch to our native feed URL http://the-gadgeteer.com/feed/ in order to ensure continuous delivery.