Facetime is a very popular voice calling app for iPhone users, but since they don’t provide an Android version, what other apps could you use for video calling? Here are five apps that may meet your needs. 1. Google Duo Duo is a voice calling app from Google that is designed to run smoothly on both Android and iOS. It can be used when the two participants have different devices, unlike Facetime. There are rumors that there will soon be a version coming for use on the Web. Each person in the conversation has to be using the Duo app. It’s only for person-to-person… Read more
GameSir G6 Mobile Gaming iPhone Touchroller review
REVIEW – Love mobile gaming but hate the virtual controls? GameSir might have just the solution for you with their G6 iPhone Touchroller (an amalgam of Touchscreen and Controller). Does it score a victory royale or an epic fail? Read on!
What is it?
The GameSir G6 Touchroller is a hybrid game controller developed specifically for mobile games. It combines the advantages of an actual analog controller and touch screen control, so you can use the left controller to move or jump while focusing on the precise aiming on the right touch screen. It is only compatible with iPhone.
What’s in the box?
- GameSir G6 Mobile Gaming Touchroller
- Micro-USB Cable
- User Manual
Hardware specs
- Wireless Technology: Bluetooth 5.0
- Working Platforms: iOS 9.0 or later only
- Compatible Mobile Phone Size: length less than 6.57 in.
- Battery Capacity: built-in 240mAh rechargeable Lithium battery
- Working Time: 7080 hours
- Charging Time: 23 hours
- Charging Voltage: 3.7V5V
- Connectivity: Micro-USB (for charging)
- Up to 3 million keystroke trigger lifespan
Design and features
The GameSir G6 Touchroller is a bit of an odd cookie.
Mobile game controllers aren’t a new concept and have been around for a few years in many iterations and sizes. I have a SteelSeries Nimbus that I break out to use with my iPhone every once in a while, offering a wireless control solution very similar to a PlayStation controller. GameSir’s G6 Touchroller tries to make the best of both worlds: external controllers and smart on-screen control schemes.
I’ll elaborate. If you’ve played Fortnite or PUBG or any good modern mobile game, chances are you’ve used the default touchscreen control interface. You know. All those little semi-transparent virtual buttons on the top, bottom and sides of the screen.
A lot of the major iOS game releases that rely on virtual controls are smartly positioned so your thumbs, while also holding on to your phone, can easily reach all the buttons necessary to play the game. It’s not a perfect setup, but it works in a pinch because it’s a mobile device, and the developer is doing the best they can.
Now, most games are controlled in the same way, with the left thumb moving your character and the right thumb performing actions like aiming, jumping and firing. So for most virtual controls, the on-screen movement is handled with a virtual joystick. This remains one of the most obnoxious methods of controlling your character… it’s just plain hard to get it right, since there are no physical borders for your thumb sliding around on the screen. It’s easy to move your thumb right off the edge of that virtual space, bringing your character to a halt.
The right thumb doesn’t have much of a problem, though, once it gains the muscle memory of knowing where to tap on the screen to perform an action. In most cases, it’s quite good.
This is exactly the problem the Touchroller attempts to fix. It gives your left thumb the more traditional control setup of a console gaming system, while keeping your right thumb free to use the touch controls that are inherently good in many iOS games.
Getting the phone mounted in place is simple. The right side of the Touchroller extends to accommodate even the largest iPhone, the Max model. Just extend the side and slide your phone. There is a strong spring and grippy pads that keep the phone firmly in place.
I tested several games with the Touchroller… Fortnite (which I probably don’t have to explain), Grimvalor, a side-scrolling platformer, and Death Road to Canada, which controls sort of like an old-school isometric beat-em-up. All of these games feature virtual joysticks and buttons.
Each of these games recognized the controller immediately upon launch, although it took a lot of trial and error to see what buttons on the controller did what, but once I got used to the layout, I was up and running with much tighter control.
The joystick, probably the best feature, is smooth, and comparable to a gaming console. The buttons have a nice clickiness to them, especially the shoulder buttons, which feel more triggery, having a bit more travel than the face buttons. And there are plenty, provided you can figure out what they all do. They are programmable, as well, but that’s something I’ll address in the Weird Issue section.
Overall, the Touchroller feels good in my hands. I like that my hands don’t cover up as much of the screen, too. It’s more comfortable to hold for long stretches, and the phone never felt like it was going to pop out.
Let’s get to the oddities…
Some Weird Issues
One problem I ran into was with the initial setup. Pairing the Touchroller via Bluetooth was easy, but there’s an extra step detailed in the tiny instruction booklet that states “Press Y+power buttons simultaneously, the LED mode indicator light will flash pink and then remain lit.” You need to do this after pairing, so it’s almost like it needs to pair twice. Fortunately, you only have to do this once, but it’s a strange very important extra step.
This isn’t quite GameSir’s fault, but since the surface that the phone rests on is flat, the obnoxious camera bump on my XR made it sit a little off. Since the grips on the right side have such a low profile, using the Touchroller works better without a case on your phone.
Another oddity with this Touchroller is in the proprietary software. Using the G-Crux app, you are able to download control settings for specific games, or, if one does not exist, you can upload a screenshot into the app and map the controller buttons on top of the virtual controls, programming the physical buttons to correspond with the game’s controls. It’s pretty in-depth, and I imagine that once you get through mapping those buttons, it’ll work fine from that point, but I did not have the patience to try that.
Fortunately, you can search for what I’m assuming are user-made game controls and download them in the app. It’s a lot of setup. The games that I tested just sort of “worked.” I say sort of because even though they controlled well, there were buttons that went unused that could have been mapped to other virtual buttons. I didn’t feel the need to try to mess with that.
One last big caveat. With the launch iOS 13 literally a little over a month away, which promises compatibility with Xbox and PS4 controllers (I know right?!), it’s tough to recommend picking up an iPhone-specific controller if you’ve got a spare game system controller laying around. I’d wait to see how that pans out. Personally, I can’t wait to give that a try, because to me the PS4 controller is bonkers good.
What I like
- makes controlling most games much easier
- easier to hold the phone for long stretches
What I’d change
- Initial setup and customization for specific games can be confusing
- I found myself missing the right joystick in some FPS games
- PS4 and Xbox controllers will soon be supported (sorry MFi manufacturers)
Final thoughts
Overall, I do like the G6 Touchroller, mostly because the games that I tested it with seem well-suited for it. Most modern games that use touch controls have the buttons smartly mapped onto the screen, and the addition of a physical stick and shoulder buttons to these touch controls enhances the controls a lot more than I would have thought.
Price: $42.99
Where to buy: GameSir’s website and Amazon
Source: The sample of this product was provided by GameSir.
Filed in categories: Reviews
Tagged: Gaming Gear, iPhone accessory
GameSir G6 Mobile Gaming iPhone Touchroller review originally appeared on The Gadgeteer on August 17, 2019 at 11:00 am.
Note: If you are subscribed to this feed through FeedBurner, please switch to our native feed URL http://the-gadgeteer.com/feed/ in order to ensure continuous delivery.
The Dairy Custom Phone Case review
REVIEW – Looking for something unique in your next phone case? The Dairy may have you covered. They offer a whole range of unique case designs from artists around the world. And if you want to bring your own design like I did here, they’ll print it for you with a proprietary 3D printing process that embeds the design in the shell. It’s pretty neat. To the review!
What is it?
It’s a snap-on phone case that can be purchased with different unique designs, or you can bring your own.
Hardware specs
The Dairy has two styles of case, called Snap and Armored. The Snap case is a simple polycarbonate shell. Mine is the Armored case, which adds a TPU sleeve beneath the shell for extra protection.
Whether you choose a design from the site or bring your own, The Dairy uses a patented 3D printing technology to embed the design in the layers of polycarbonate for high resolution image quality and long-lasting endurance.
Design and features
I’m an artist and designer, so the products from The Dairy intrigued me right off the bat. They contract with artists and graphic designers around the world to create all kinds of interesting designs that you just don’t see on the street. Browse their web site and you’ll find everything from unique floral prints to graphic patterns and statement pieces.
Now if you prefer to create your own design, they offer a customization option that allows you to do your own thing. A set of pre-designed colors and backgrounds are available, to which you can add customized text. A preview mode and easy-to-use interface allows you to quickly tweak the design to your specifications.
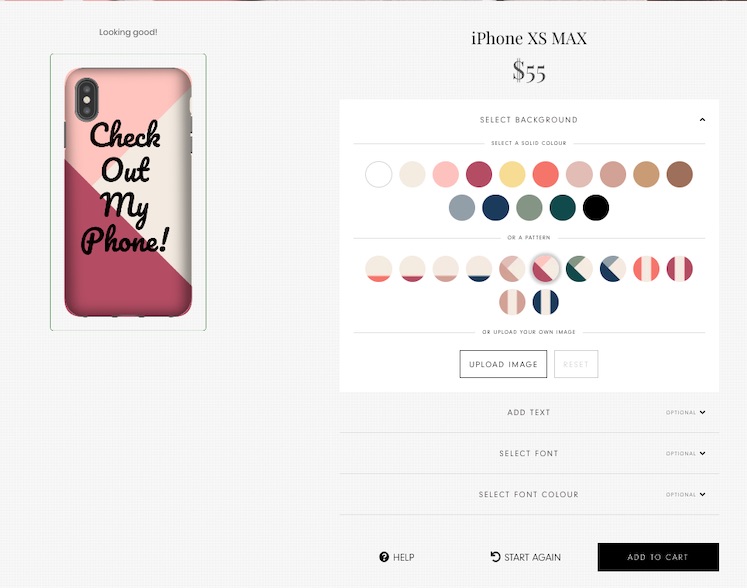
But the thing that really intrigued me here was I could take one of my own designs and have it printed. So I uploaded one of my illustrations for testing using that “upload image” option to make it the background on the phone. I could have added text if I wanted, but I did the design to stand on it’s own. Check it out:
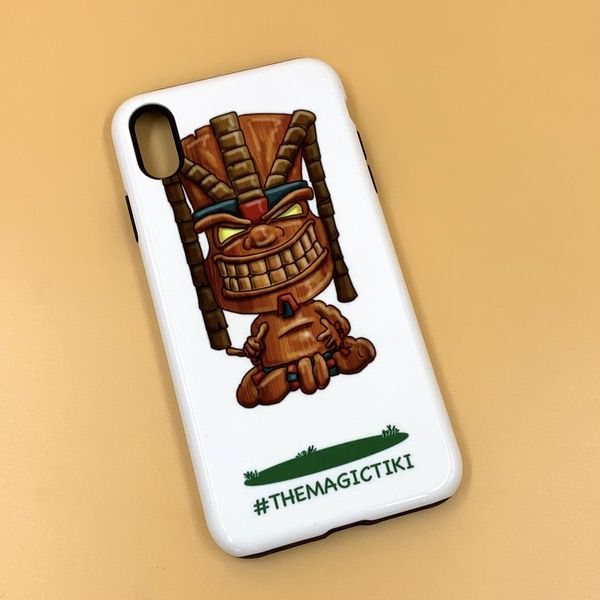
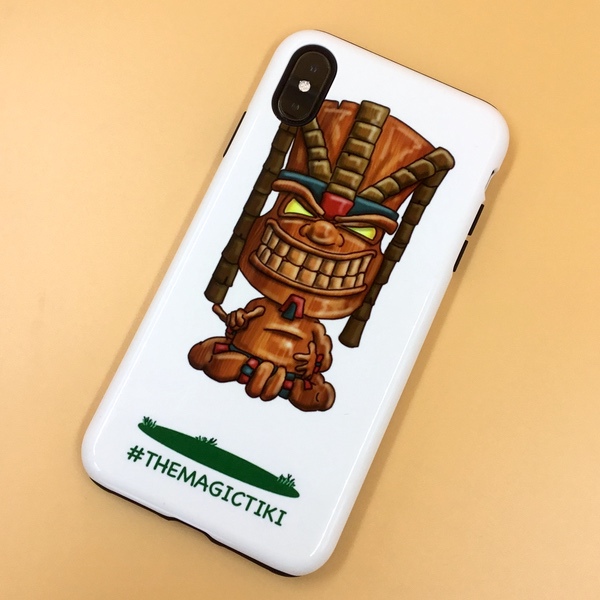
Here’s the really interesting thing about their printing process: this isn’t a sticker, or some sort of laser-printed top layer. It’s printed with a proprietary photo-quality 3D technology that embeds the artwork in the polycarbonate case. That means it won’t fade or scratch away over time. The result was truly stunning. You’ll see in the pictures below how the process captured every nuance and detail of my original illustration.
Now, all of this artsy goodness wouldn’t do without a phone case that actually works well, and The Dairy delivers here. Mine is the Armored case, which incorporates a TPU jacket with the polycarbonate sleeve for extra impact protection. Here’s a shot of that internal jacket:
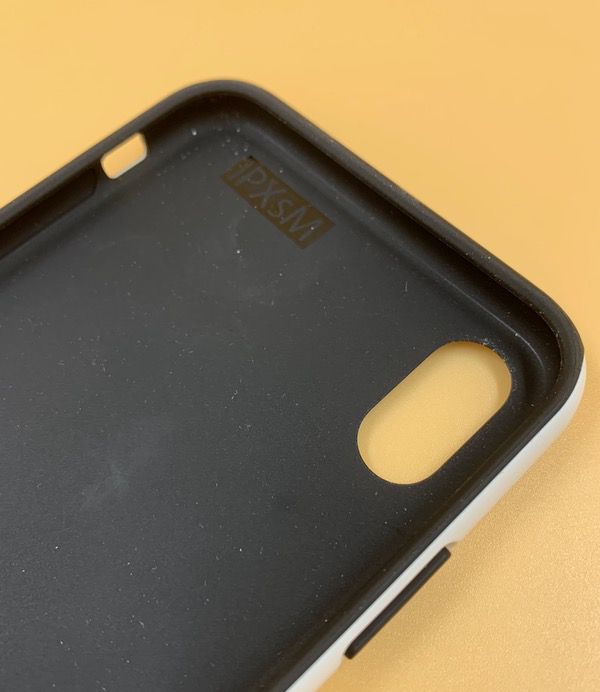
The finished case is machined precisely for my iPhone XS Max. Here’s a shot showing the bottom ports:
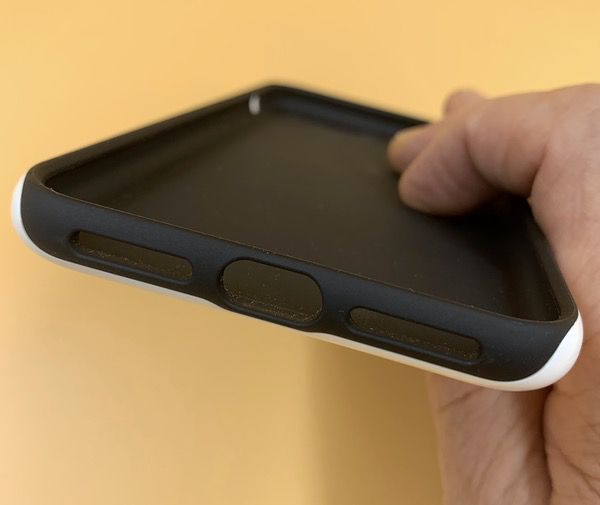
The phone itself snaps snugly into place with a bit of an edge to protect the phone’s perimeter.
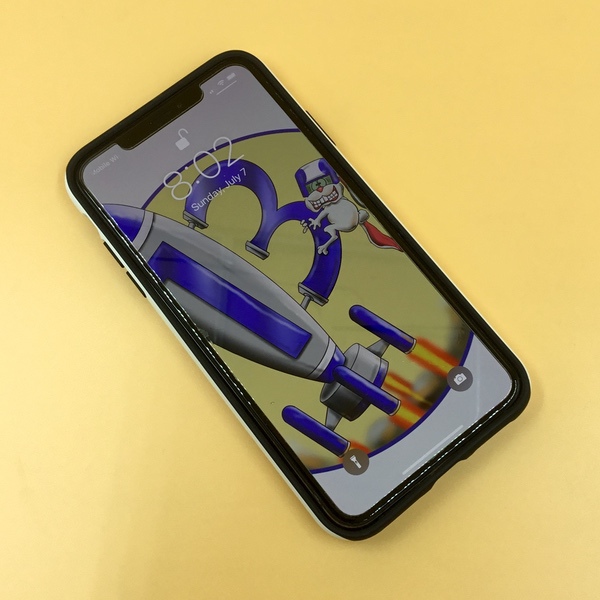
You’ll see that every port has that extra TPU jacketing too. Here’s the camera port:
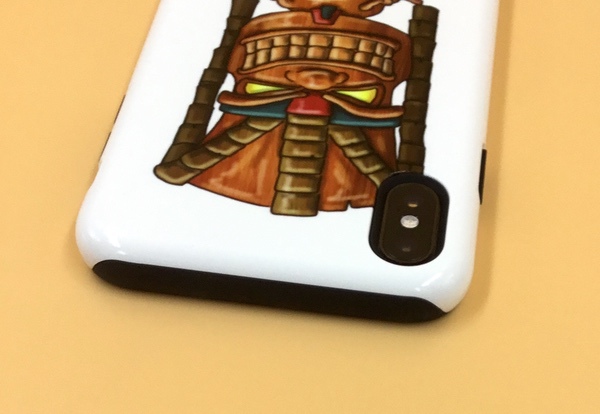
The volume buttons are accommodated with TPU overlays that are integrated into the case, while the sound on/off switch is exposed. Functionality is crisp and precise right out of the box.
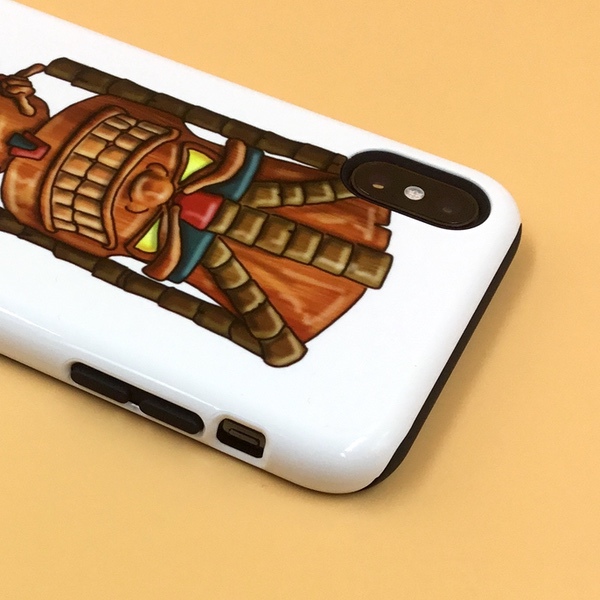
Here’s a super close-up of the printed work. I do my stuff in Procreate with a lot of digital painting & airbrushing effects. Check out how every shade and brush stroke is captured! You’ll get the same quality from the pre made designs or custom pieces. It’s really well finished.
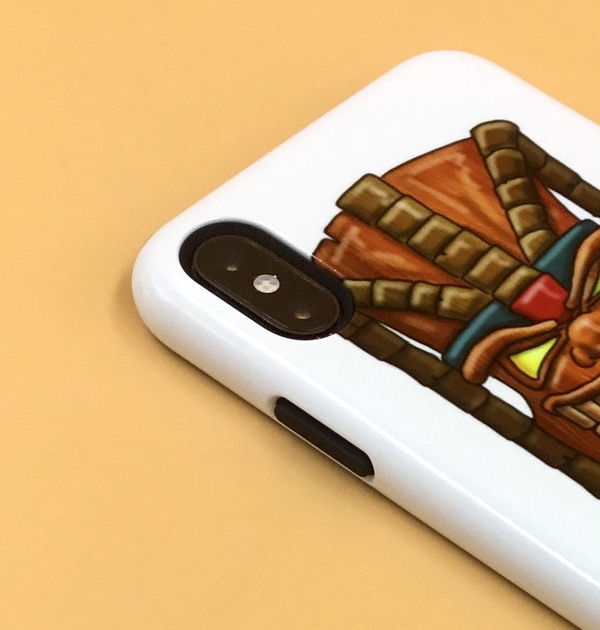
Here’s the other cool bit: my finished custom phone case came in at a final price of $55. That’s pretty crazy given the quality of the finished piece!
What I like
- Excellent quality and finishing.
- Great selection of designs by artists worldwide.
- Ability to customize with a simple online interface, including your own images or artwork.
What I’d change
- Nothing that I see so far.
Final thoughts
I’ve been beating this case mercilessly for a month now, and I’m not seeing any obvious mars or scars. There are some scratches here and there (I did take it to the beach for a week), but nothing has negatively impacted the glossy finish. It’s really impressive for a simple iPhone case, especially one that you can rock with a unique design that represents your personal style. Highly recommended.
Price: Prices start at about $30 USD depending on phone style. My iPhone XS Max Armored case retails for about $55 USD.
Where to buy: Visit The Dairy Web Site.
Source: The sample of this product was provided by The Dairy.
Filed in categories: Reviews
Tagged: Cases and Covers
The Dairy Custom Phone Case review originally appeared on The Gadgeteer on August 17, 2019 at 10:00 am.
Note: If you are subscribed to this feed through FeedBurner, please switch to our native feed URL http://the-gadgeteer.com/feed/ in order to ensure continuous delivery.
Kanex Docking Station for iPad Pro review
REVIEW – Over the years as the iPad has evolved, it has become a competent tool for many professionals in various industries. As a photographer and videographer, I now use my iPad for much of my editing. I also use it for daily routine tasks. The ability to add ports and thus additional functionality is very necessary. Recently, several companies have introduced docking stations for the iPad. the Kanex Docking Station for the iPad Pro is one of the newest additions. Let’s see how it works!!
What is it?
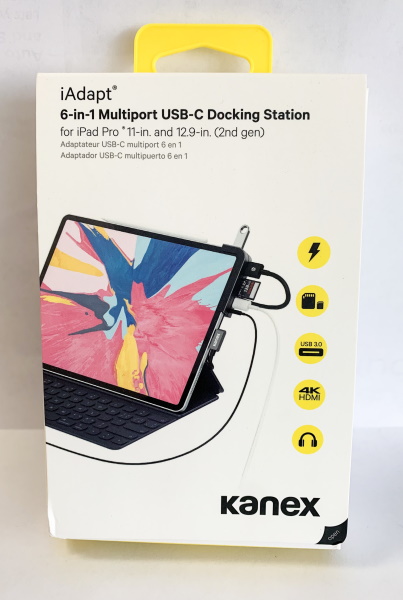
The Kanex Docking Station for the iPad Pro is a USB-C plug and play docking station that adds external ports to the iPad Pro for additional functionality and connectivity.
What’s in the box
1 x Kanex Docking Station 6-in-1 Multiport USB-C Docking Station for iPad Pro® 11-in. and 12.9-in. (3rd gen)
Design and features
Specifications
Ports:
USB-C Female: USB-C 3.1 (Gen 1) – 3.0 data and PD 3.0 charging (60W)
USB 3.0: Type-A port delivers up to 5Gbps transfer speeds
SD/MicroSD: Supports up to 2TB SD and MicroSD cards
HDMI: 2K/60Hz on iPad Pro; 4K/30Hz on MacBooks
Supported Systems: Windows 10, Google Chrome OS, macOS Mohave, and above, IOS
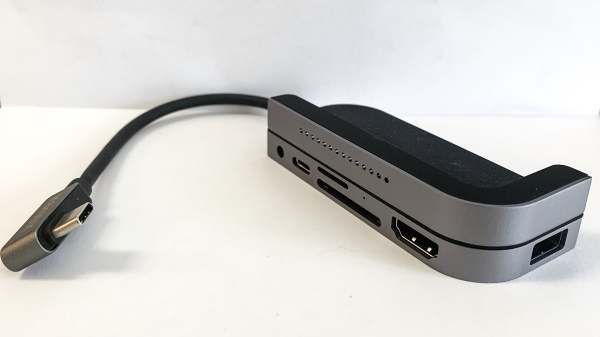
As shown in the photo below, the device has several ports. From left to right they are the headphone jack, the USB-C charging port, the micro SD and SD slots, the HDMI port and above the ports, there is a speaker grille.
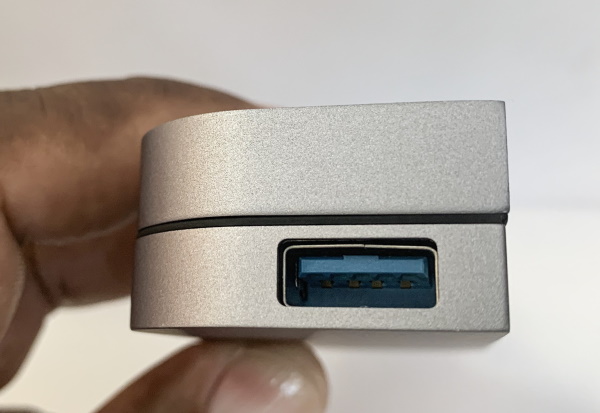
On the side of the device, there is a USB 3.0 port.
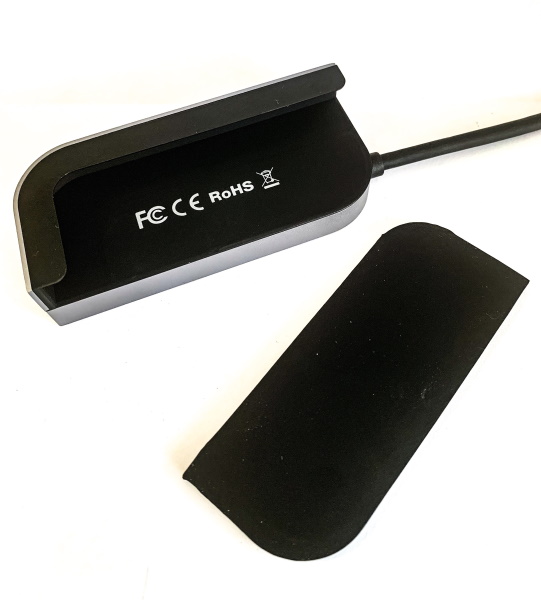
The Docking Station also comes with a magnetic insert that can be removed to fit some of the thicker cases.
Performance
Using the dock is very simple. It is plug and play. Since it is primarily designed for the iPad Pro, I spent most of my time testing it on my 3rd Gen iPad Pro 12.9″ (2018). I first tested it with my iPad without any case on it. In terms of function, the photo app sees the media as expected and the HDMI option to an external monitor works as expected. The USB-C Power Delivery port also allows you to connect your power supply to keep charging the iPad.
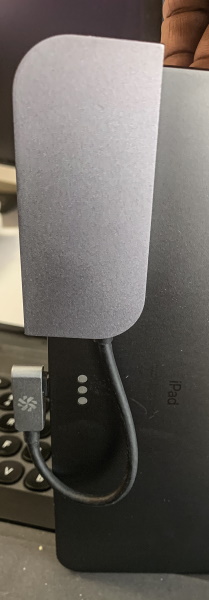
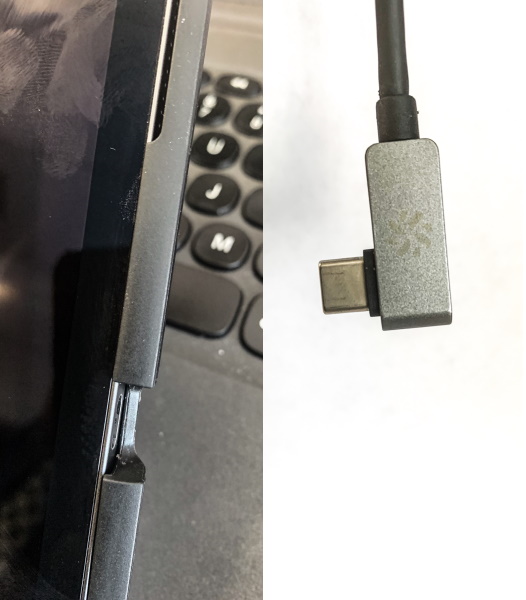
Here are some pictures of the dock on my bare iPad:
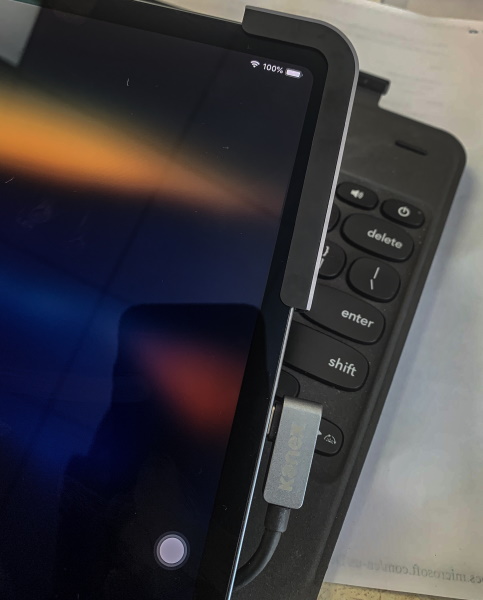
The major issue for me was that once my iPad was installed into my Zagg Slim Book Keyboard Case, the Kanex Dock did not fit even with the insert removed. And, because of the right angle USB-C connector on the dock, it was also unable to be plugged in with my case installed.
Windows 10:
This dock works very well with my Windows 10 Asus Zendesk Laptop. It is immediately recognized and all 0f the ports work including the HDMI port for a second display. Note: The USB-C port works for connectivity but not for power delivery since the USB-C port on my laptop is not a PD port.
MAC OS:
This dock also works very well with my MacBook Pro. It is immediately recognized and all 0f the ports work including the HDMI port for a second display and the USB-C PD port.
What I like
- The build quality
- The included ports
- The USB-C Power Delivery port
- It also works with Windows 10 and MAC
What I’d change
- The clip-on capability so that it can expand to accommodate a larger variety of iPad cases
- Better design of the USB-C connector to accommodate larger cases. (Maybe include an extension?)
Final thoughts
The Kanex Docking Station for the iPad Pro is a small and compact device that fits the Ipad pro perfectly if it is being used without a case, and I do suspect that it will also fit some of the thinner cases. It works well as a dock for multiple Operating Systems much like many of the USB-C standard docks that I have tested. I say standard because some docks are built with 2 USB-C ports side by side and are specifically designed for the MacBook Pro. This dock is light and easy to travel with as a part of your daily gear, but its inability to clamp on to a larger variety of cases and the right-angle USB-C plug limit how it can be used. This is another device that I think is going to require some additional thought prior to purchasing it and the decision should include considerations of versatility versus cost.
Price: $99.95
Where to buy: The Kanex website
Source: The sample for this review was provided by Kanex.
Filed in categories: Reviews
Kanex Docking Station for iPad Pro review originally appeared on The Gadgeteer on August 17, 2019 at 9:06 am.
Note: If you are subscribed to this feed through FeedBurner, please switch to our native feed URL http://the-gadgeteer.com/feed/ in order to ensure continuous delivery.
How to View iPhone Emojis on Android
Even if you’re not an iPhone user, you might desire its beautiful emojis because you know they will be appreciated by your text recipients. The emojis come in rich, vibrant colors and include clever themes that can fit many abstract ideas. In the past, Android users faced problems trying to view iPhone emojis on their handsets. They had to root their phones and use tools like Magisk to import the Apple emojis. This is because many Android apps did not offer native support for iPhone font schemes and colors. It made the keyboard appear lousy and completely failed in its mission to impress anyone. However,… Read more