REVIEW – I have a soft spot for gadgets that are multi-functional. Any gadget that can perform multiple tasks helps me cut down on the number of EDC items I need to carry. That’s what piqued my interest about the Dapper Design KLIP. Let’s have a look!
What is it?
Made from lightweight Titanium, KLIP is a combination knife + pocket clip that is designed to suspend your keys or other items from your pocket while also giving you quick access to a small knife. In fact, its very name, “KLIP,” is derived from a combination of the words “knife” and “clip.”
What’s in the box?
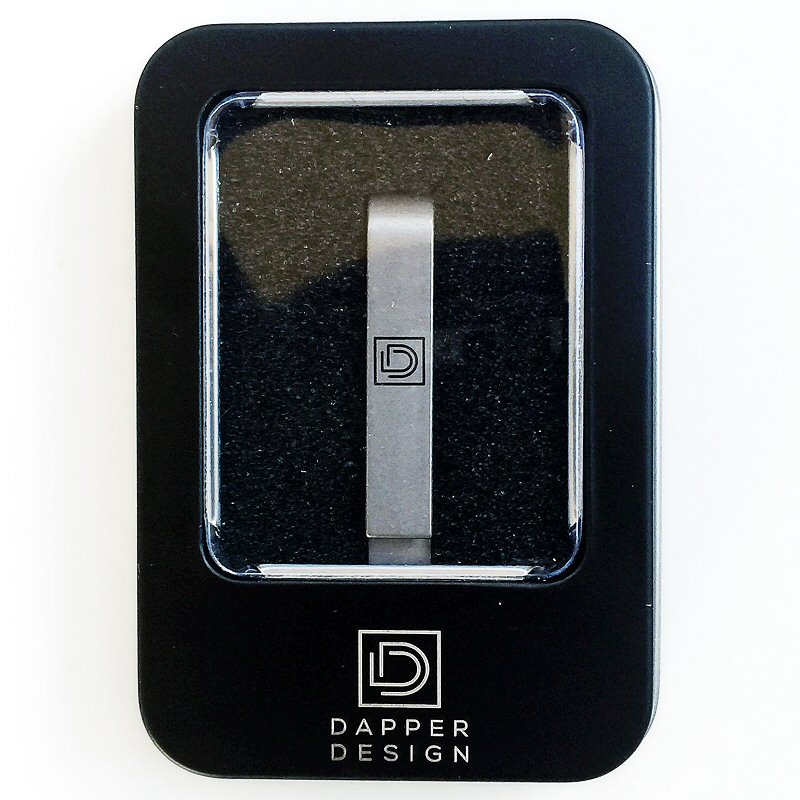
The KLIP comes in some very classy-looking packaging: a tin with top and bottom halves, and a clear window in the top half that allows the actual product to be seen, at least partially. I always appreciate when companies provide packing like this that.
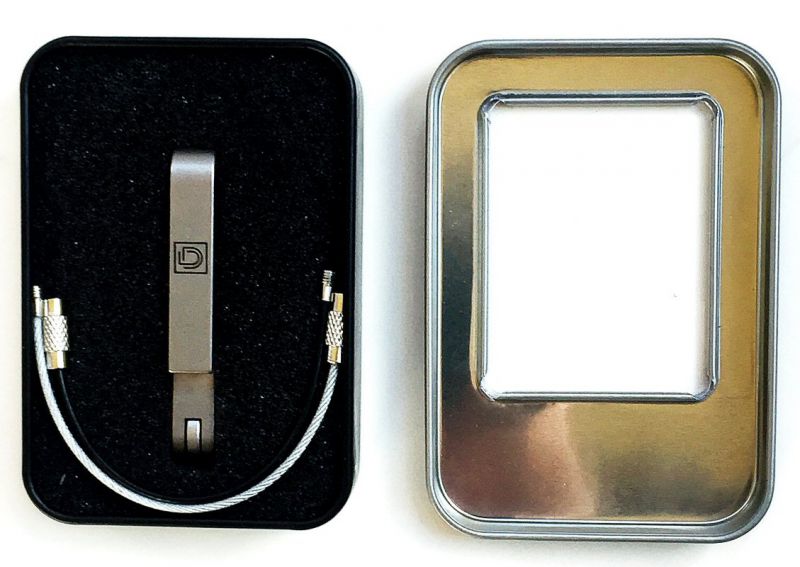
Inside the package itself are the following items:
- KLIP
- Silver twist-lock flexible steel cable ring
- Black coated twist-lock flexible steel cable ring
Hardware specs
- Main body: Stonewashed Grade 5 titanium
- Blade: 440C steel blade
- Smooth spring-loaded detent ball mechanism (provides satisfying “click” on blade open/close)
- Adjustable pivot screw
- Opened length: 85mm / 3.34″
- Closed length: 60mm / 2.36″
- Blade length: 27mm / 1.06″
- Height: 16.25mm / 0.63″
- Thickness: 8.15mm / 0.32″
- Weight: 16 grams / 0.56 ounces
Design and features
I love combo items—items that can serve multiple functions. The KLIP can be your key holder and you can hang them down into your pocket, or from your belt, or even from backpack webbing. Plus, there’s a little knife hidden in there, in case you need to open a box, etc. The KLIP is machined from durable, lightweight, stonewashed Grade 5 Titanium and it sports a super-sharp 440C steel blade which locks into position with a “click.” Its deployment mechanism also features a ball detent and adjustable pivot screw. KLIP has a lot packed into a small, functional package.
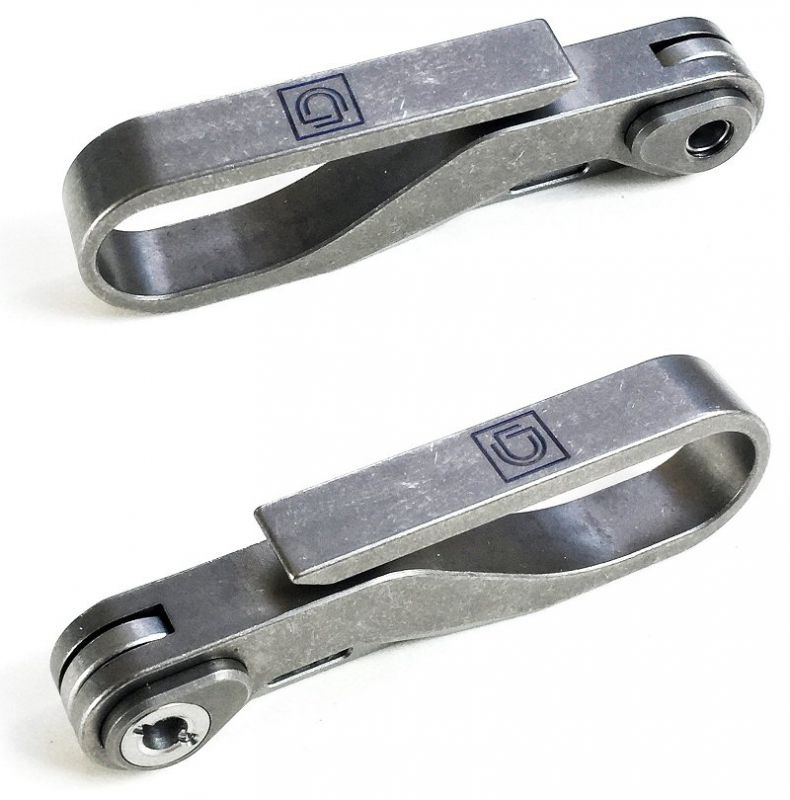
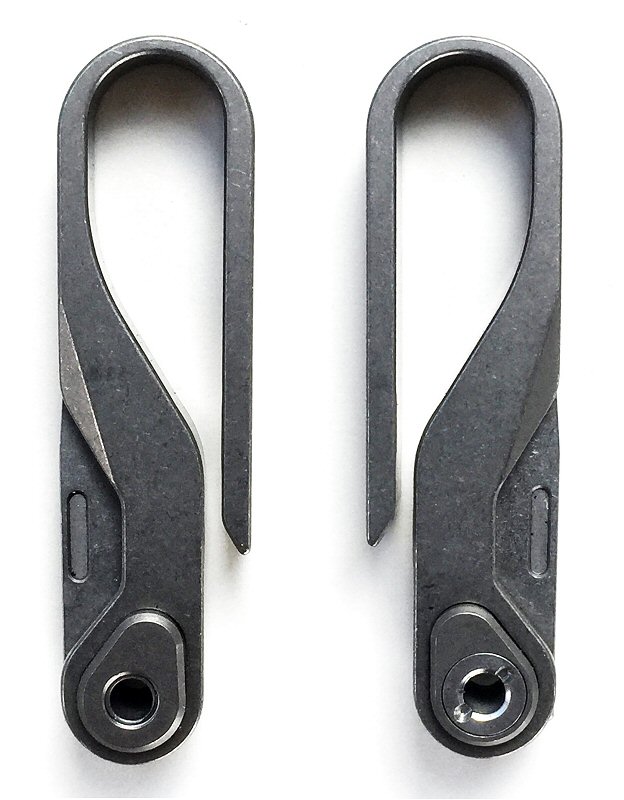
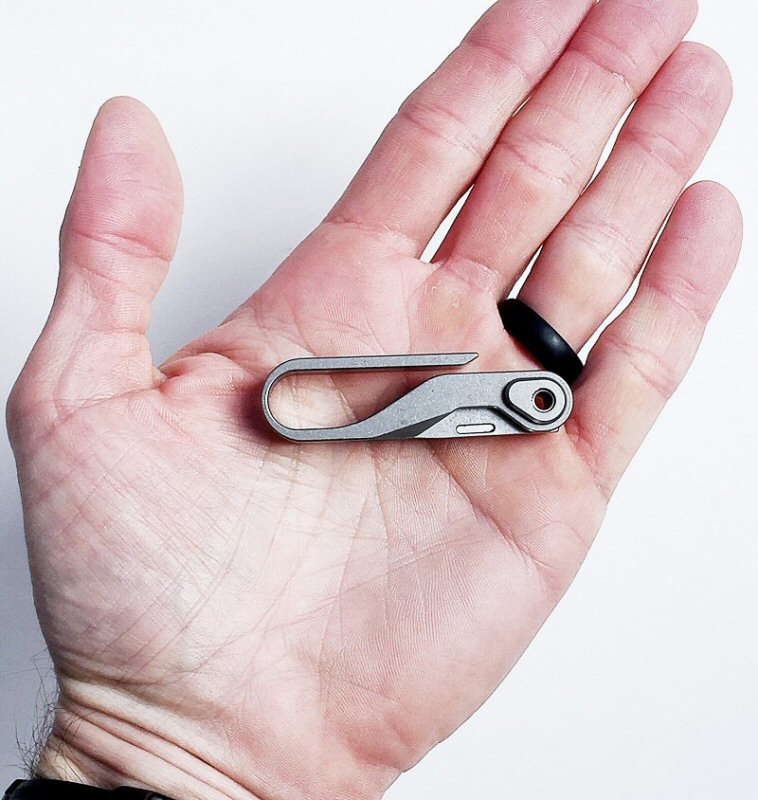
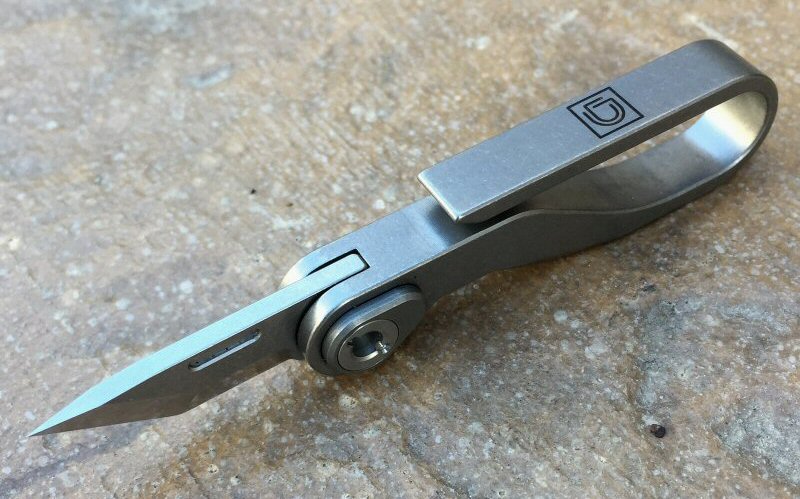
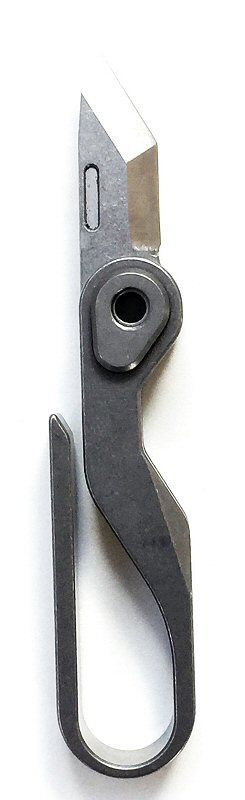
My initial impression of KLIP was that it was small, lightweight, and unobtrusive-looking. In essence, it’s a relatively minimalistic-looking metal hook with a mechanism at the end. Its body is made from “Grade 5” Titanium, so it is in fact very lightweight and very durable and should last a long time. I also think the surface treatment, a light “stonewash” that results in a matte, slightly irregular appearance, is quite attractive.
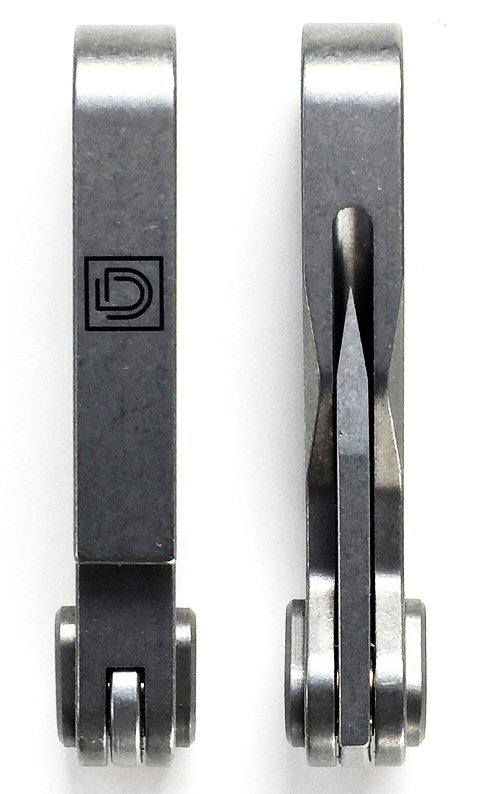
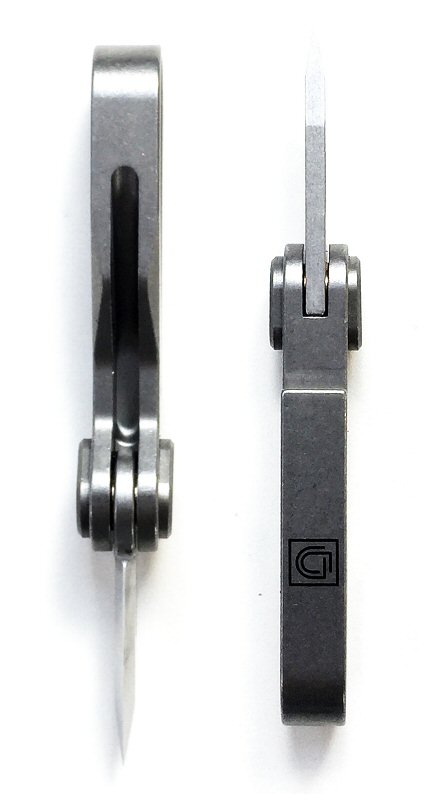
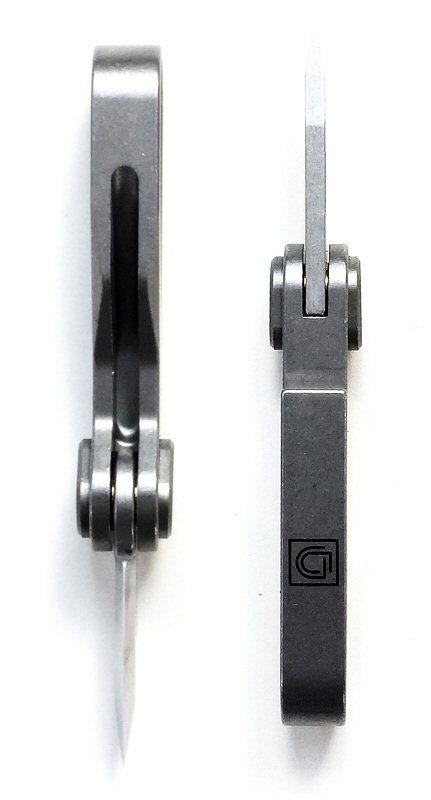
KLIP has a slim profile, as seen in the above pics, which helps it stay small and easily carried.
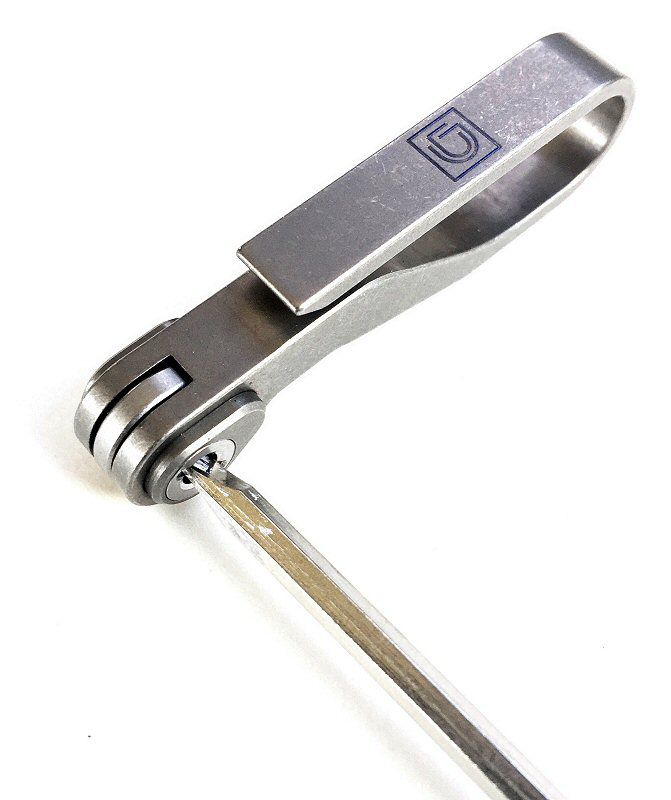
Further, in the photo above, you can see the hook, which is an open end that is about 4mm wide. Overall, the hook has a sort of a “goose neck” shape.
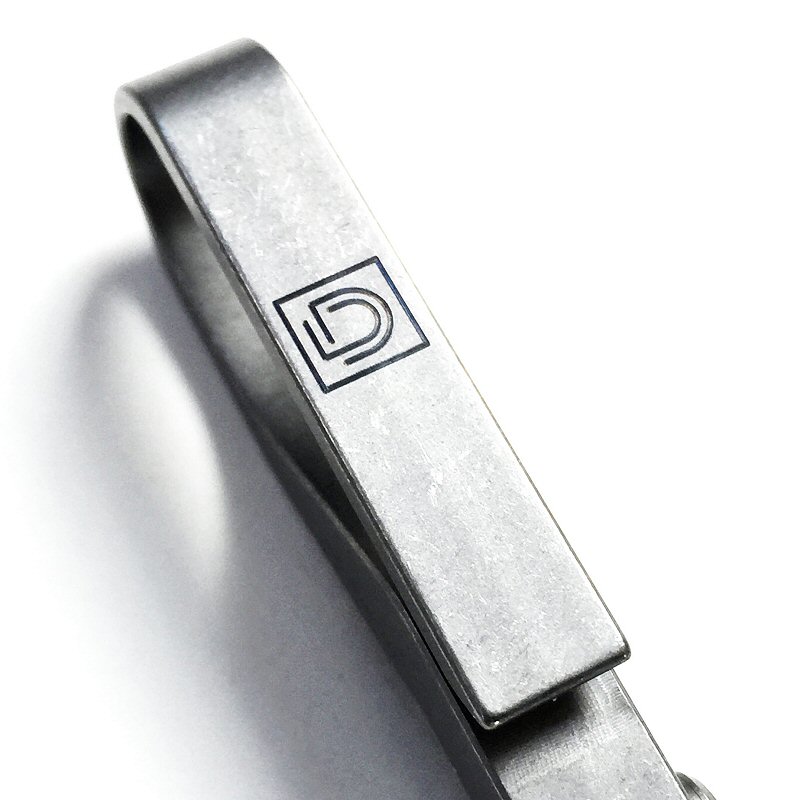
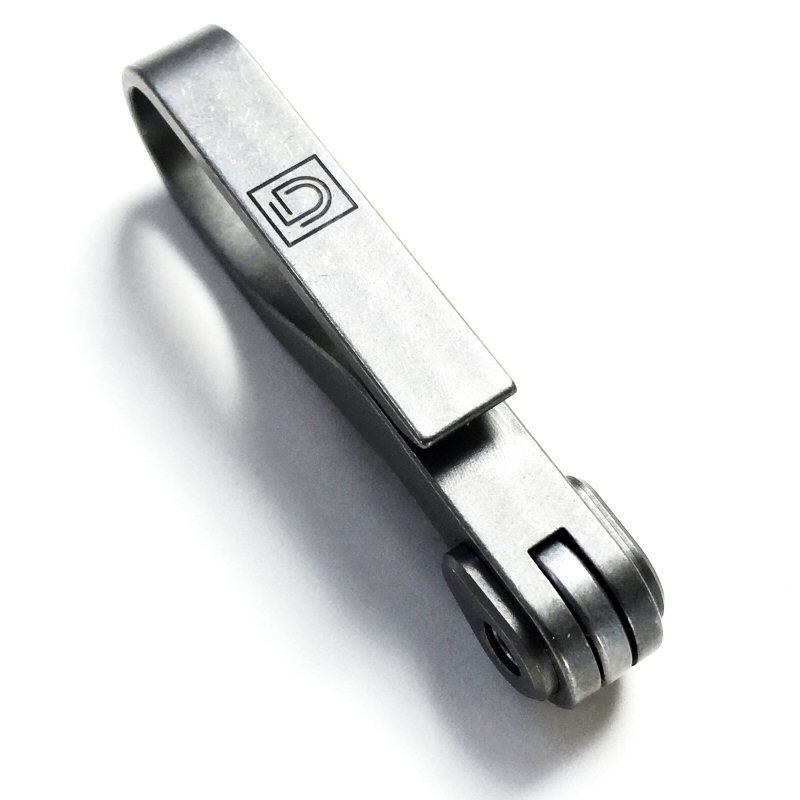
One of the aspects that I very much appreciate in product design is logo minimalism. Dapper Design has done well with this—their simple, overlapping “D” logo is imprinted into the surface of KLIP, in what appears to be a laser-etching process, and if that is the case, then this logo should never wear off.

KLIP is small, as you can see from the photo above, which makes it quite easy to have on hand just about any time, should the need arise for a small knife.
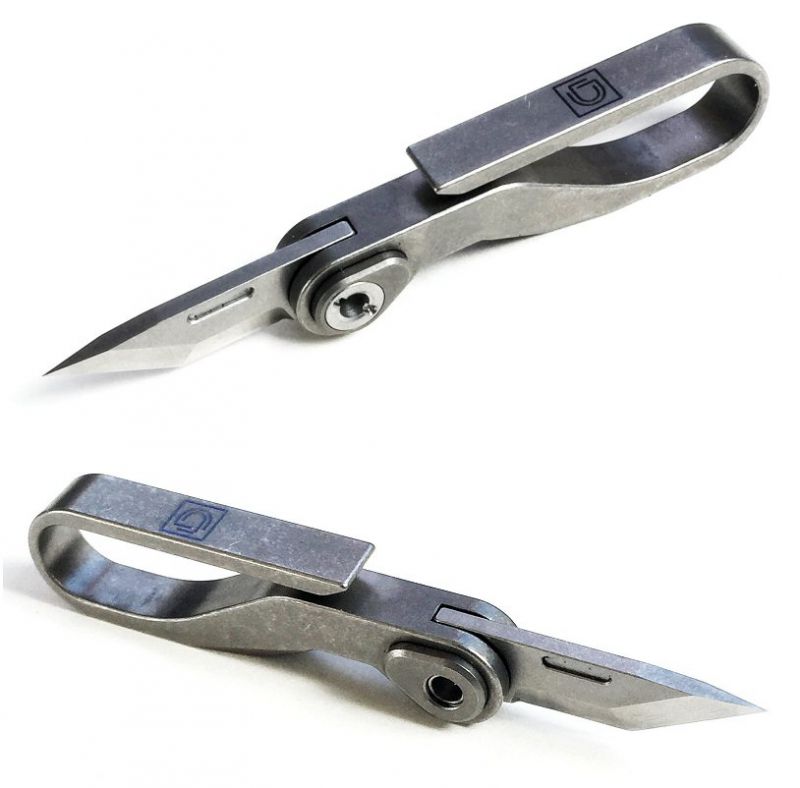
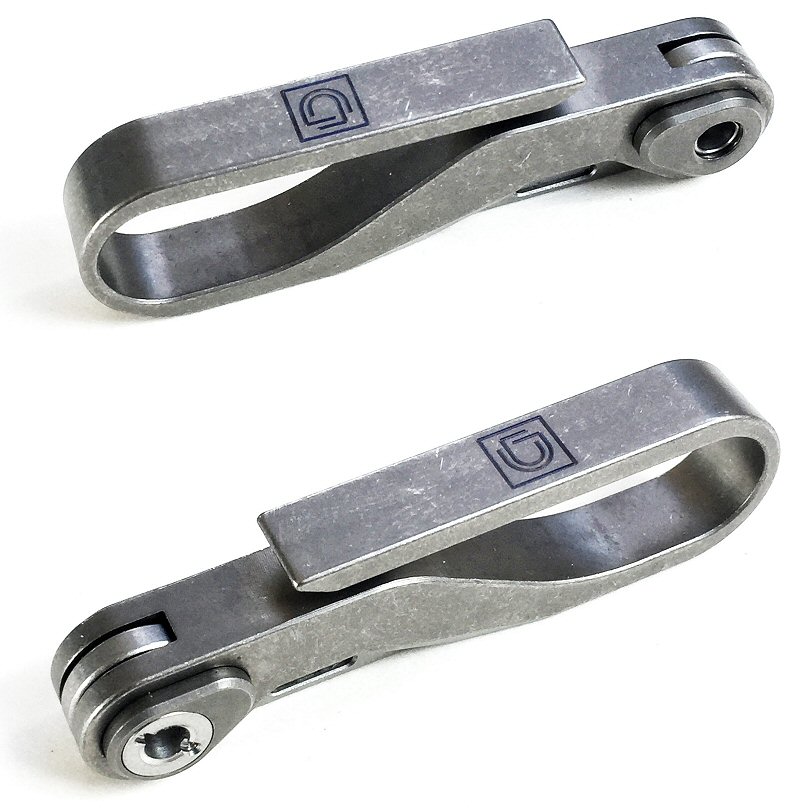
Besides the hook, which forms the main body of KLIP, its other main feature is the small knife concealed in its body, as seen in the images above.
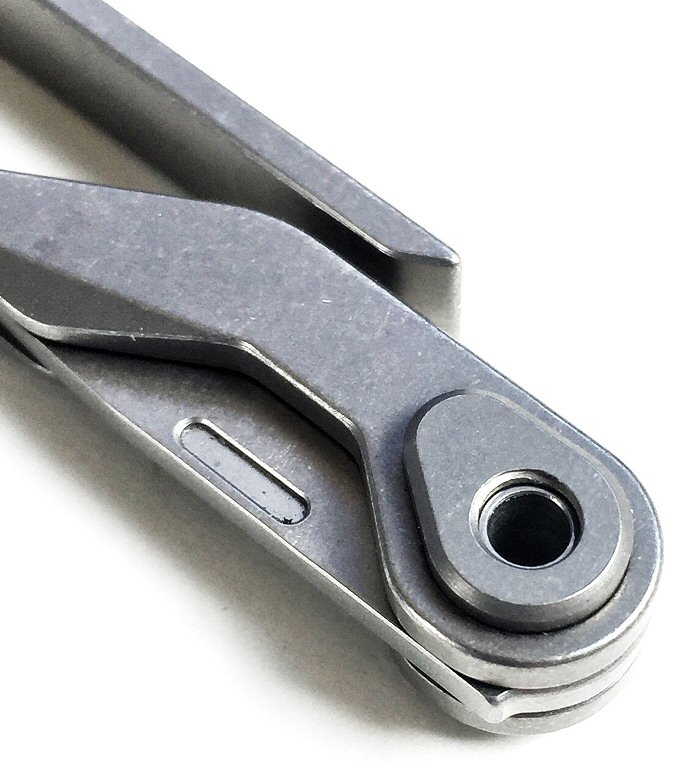
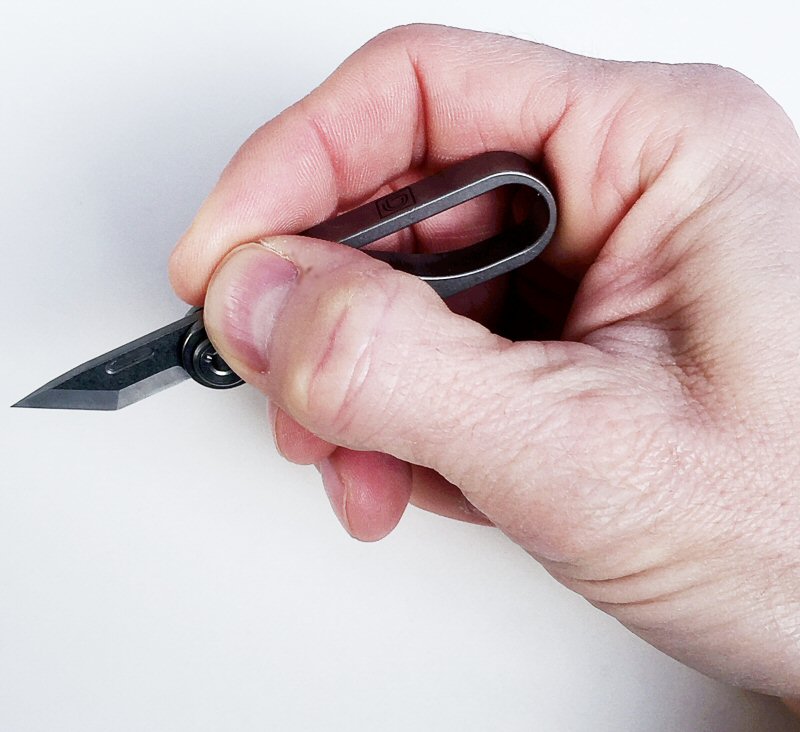
KLIP utilizes a cam-shaped component that secures a spring-actuated ball detent mechanism that helps secure (but not lock) the blade in both its folded and extended positions. It essentially provides a satisfying “click” sound and feel upon blade opening or closing. Also, note that the blade has a small channel cut into either side the allows the user to get a fingernail into it to help open the blade.
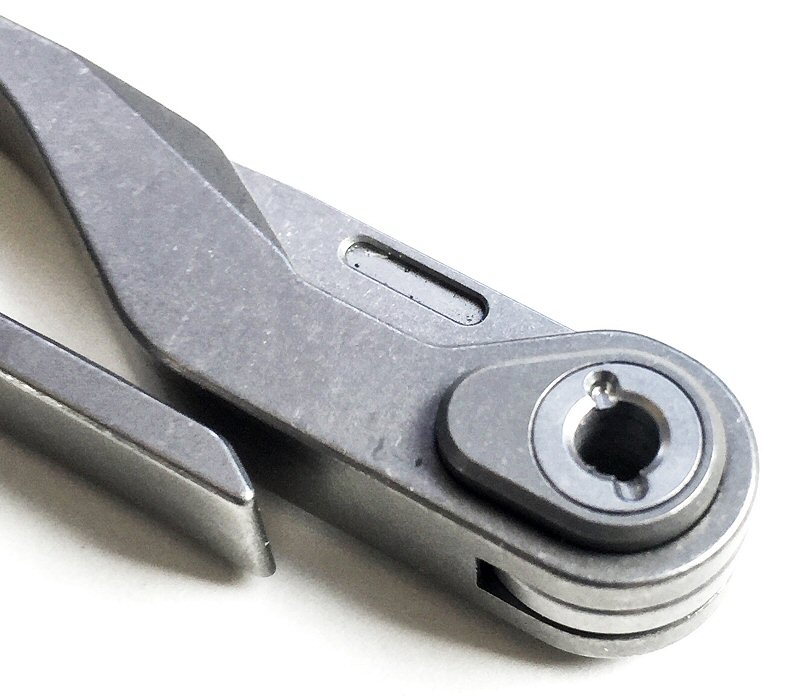
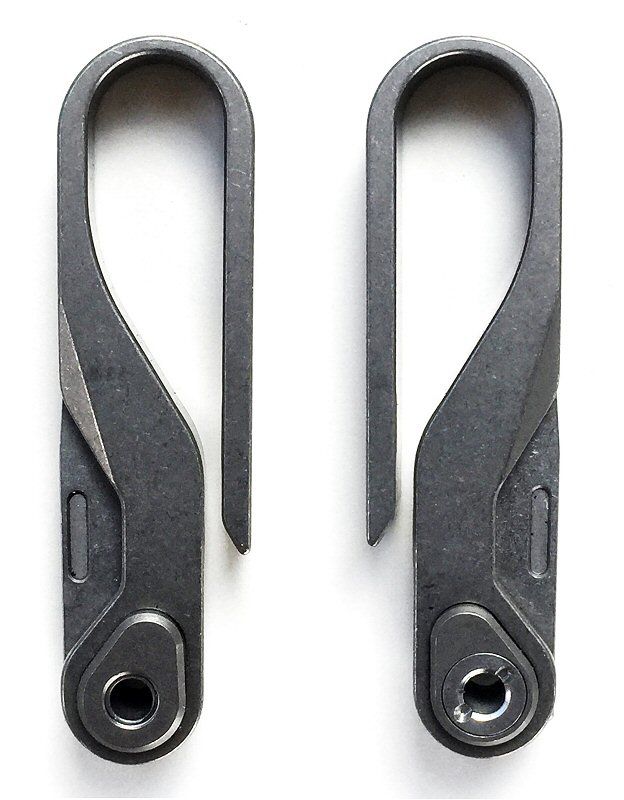
KLIP utilizes a cam-shaped component that secures a spring-actuated ball detent mechanism that helps secure (but not lock) the blade in both its folded and extended positions. It essentially provides a satisfying “click” sound and feel on blade open/close. In the photo above, you can see that there is a small screw with a tiny slot on one side of the cam-shaped component. What is its purpose? Read on to find out.
A small, flat head screwdriver (not included with KLIP) will fit into the slot and this allows KLIP’s detent mechanism to be loosened or tightened, which determines the amount of force required to snap the blade into an extended or folded position. In fact, out the box, this small screw it tightened down such that the blade cannot be opened without the screw being loosened to some degree, which effectively “unlocks” the detent mechanics.
In the photo above, you can see the pocket into which KLIP’s blade fits when folded.

The blade itself is relatively small—you aren’t going to field dress an antelope with it, but it is a perfect size for cutting open boxes, cutting a loose thread, slicing open an envelope, or any number of light-duty, everyday tasks for which you might need a small knife blade.

The base of the blade is quite thick relative to the tip of the blade, which tapers to a sharp point in two planes, as seen in the views above. This makes it excellent for piercing into things if necessary, and, though I didn’t have an opportunity to test this, it seems that a tip as pointed and sharp as this would be very useful for digging out splinters.
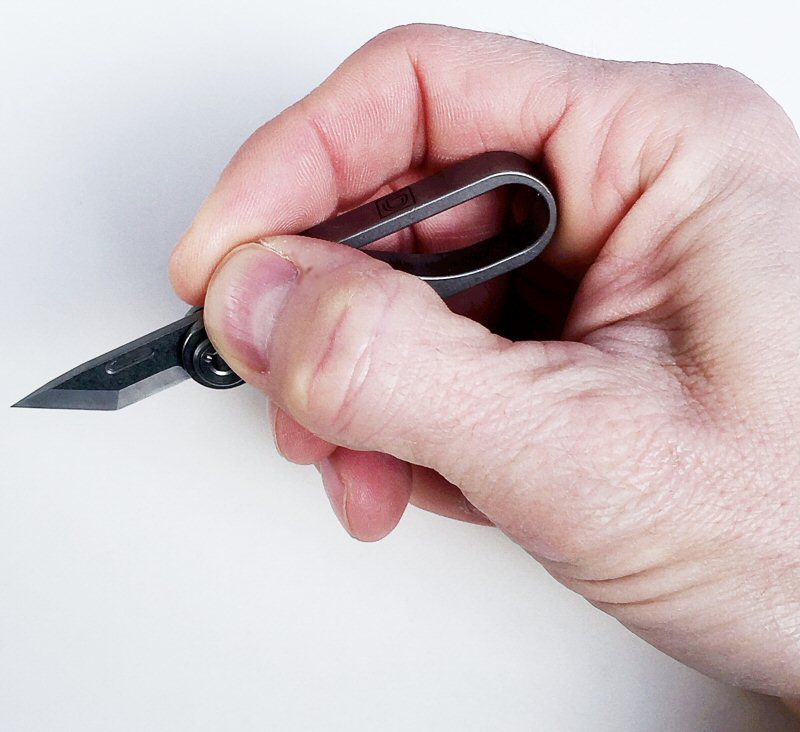
In the first week along that I carried KLIP as part of my EDC gear, I found myself using it daily. I used it to cut through the tape on several boxes and also break down several others at work and to open mail envelopes at home. KLIP’s blade opens easily and snaps in place thanks to the detent mechanism, and it is just the right length to hold for most quick jobs.
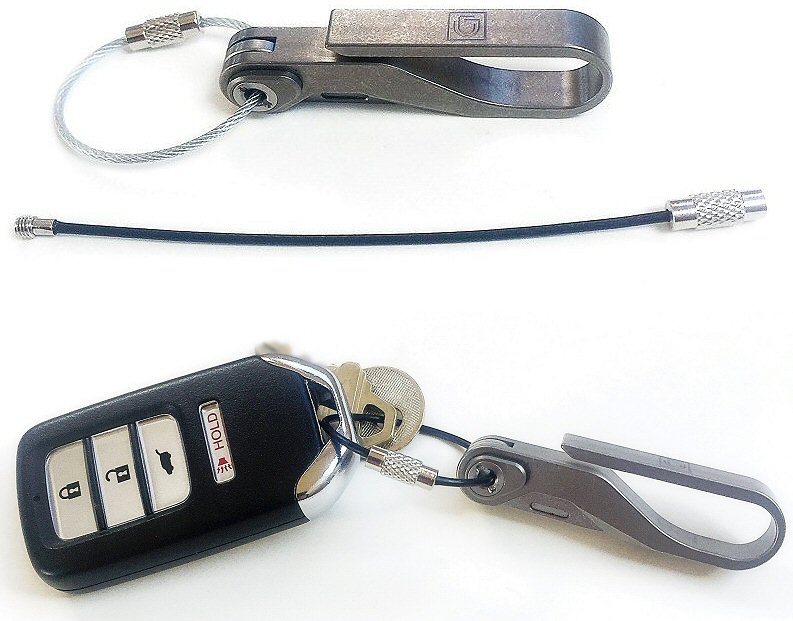
The only accessories that were included with KLIP were a pair of twist-lock flexible steel cable rings, one with a black coating, the other uncoated. While KLIP could certainly be attached to a standard keyring, these cables are a quick and easy way to attach KLIP to a set of keys, as seen above.
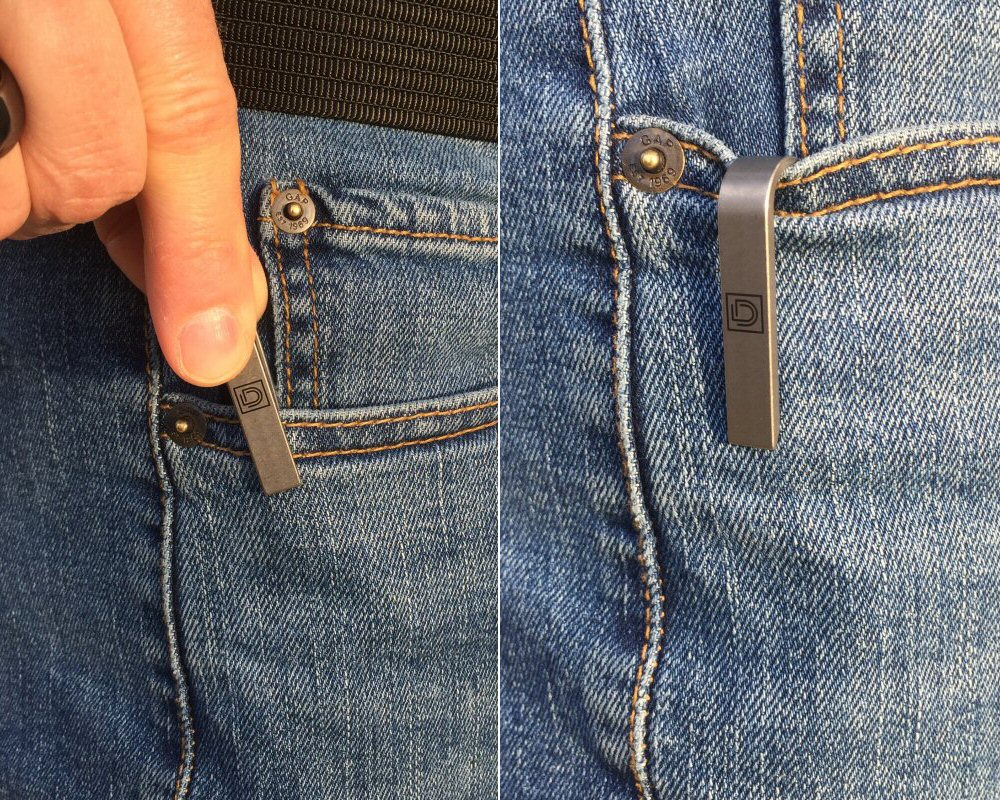
I evaluated a few different methods of carrying KLIP. It excels when it is attached to a set of keys and carried such that it “hangs” inside your pocket, with KLIP hooked over the edge of your pocket and the keys hanging down inside your pocket, as shown in the phots above.
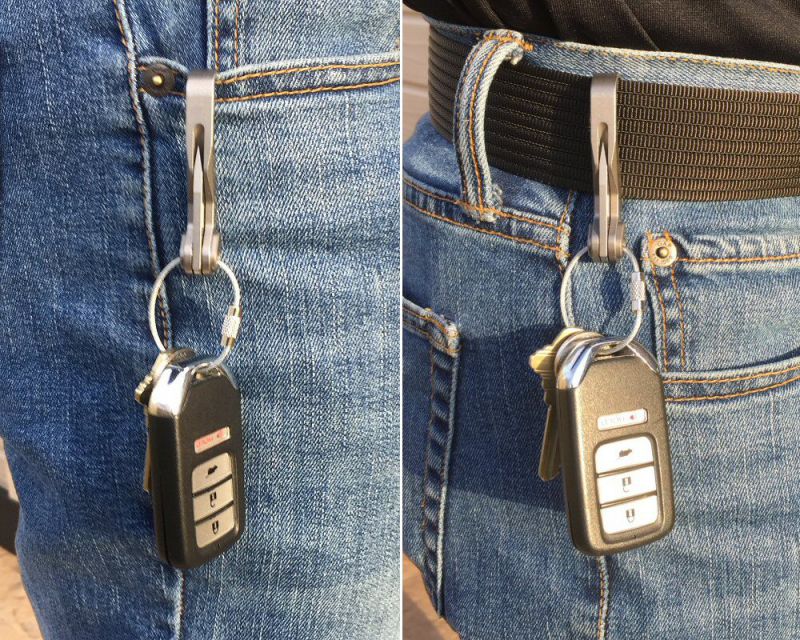
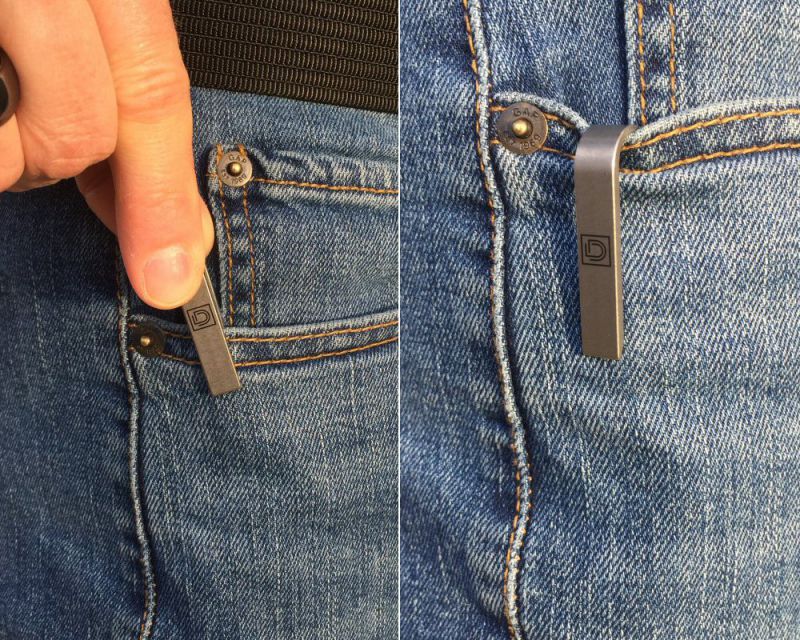
Alternatively, I tried hanging KLIP on the outside of my pocket, see above left, which was not nearly as secure as allowing the keys to hang inside the pocket. And finally, I also hung KLIP’s hook over my belt, as see in the photo in the above right. This is slightly more secure than the method shown in the photo in the above left, but still made me a bit nervous that KLIP—and my keys—-were going to get knocked off by something.

One last thought on KLIP: I am very tempted to put it on my keyring with the idea to leave it there indefinitely because it is just that unobtrusive and I think I would find uses for it nearly every day. The only thing stopping me is that I suspect that KLIP is so unobtrusive that I myself would forget that it is on my keyring, and I’d forget to remove the next time I took an airline flight, and it would be confiscated by TSA. Which would be a major bummer.
What I like
- Small, compact, lightweight
- Looks nice with matte Titanium finish
- Includes two twist-lock flexible steel cable ring
What needs to be improved
- The blade does not technically lock in either the extended or folded positions
Final thoughts
I really like KLIP. Elegantly machined from Titanium alloy and with an attractive style and finish, it is durable, and its design is both aesthetically pleasing as well as useful: it combines a suspension/keychain hook and a small knife, which makes it a perfect item to add to your EDC gear for when you need quick access to a small knife for small tasks. While KLIP had it’s very successful debut as a crowdfunded Kickstarter campaign (see here for more info), it is now available for pre-order from Dapper Design (see links below).
Price: $49.00
Where to buy: dapperdesign.com
Source: The sample of this product was provided by Dapper Design.
Filed in categories: Reviews
Tagged: EDC, Knives
KLIP: Titanium Pocket Knife + EDC Suspension Hook review originally appeared on The Gadgeteer on April 21, 2019 at 9:30 am.
Note: If you are subscribed to this feed through FeedBurner, please switch to our native feed URL http://the-gadgeteer.com/feed/ in order to ensure continuous delivery.