VIZIO M-Series (M65-F0) 4K HDR Smart TV review

REVIEW – I’m not ashamed to admit that I’m a couch potato and next to my smartphone and MacBook, my wall-mounted TV is my most used “gadget”. Jeanne and I enjoy keeping up with our favorite TV shows and every weekend it’s our habit to make popcorn and watch several movies. Since we spend a lot of time in front of a TV, we both appreciate picture quality and special features that make TV time as enjoyable as possible. Today I want to share my review of the VIZIO M65-F0 4K HDR Smart TV which was provided by VIZIO for free in exchange for posting this review. Let’s get started.

What is it?

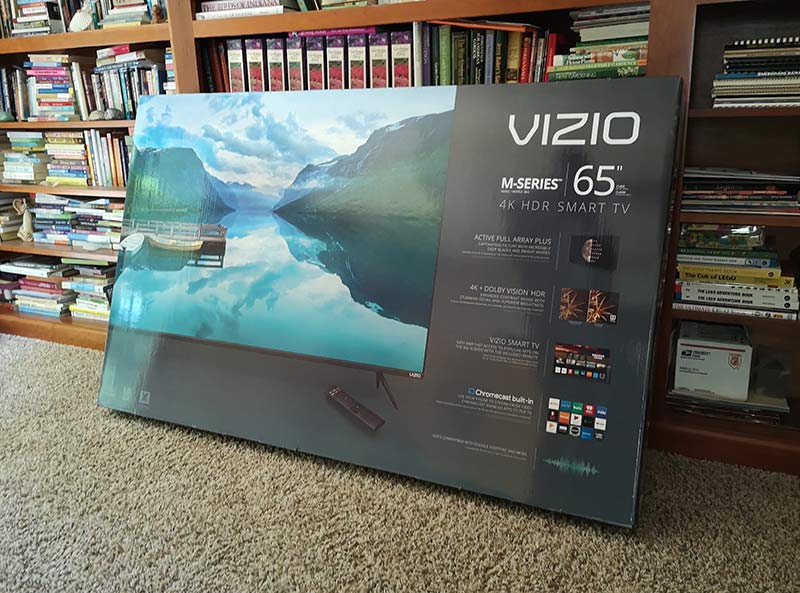
The VIZIO M65-F0 4K HDR Smart TV is a 65 inch TV that has smart features like a built-in Chromecast and various streaming apps like Netflix, Hulu, and more.

What’s in the box

VIZIO M65-F0 4K HDR Smart TV
Set of feet for table mounting the TV
Power cable
Remote control

Hardware specs

Class Size: 65″
Screen Size (Diag.): 64.50″ / 1638.30 mm
Panel Type: VA
Smart Platform: VIZIO SmartCast™ with Chromecast built-in
High Dynamic Range: Dolby Vision, HDR10, HLG
Resolution: Ultra HD – 3840 x 2160
UHD Upscale Engine: Spacial Scaling Engine™
Display Processor: V8 Octa-Core Processor
Backlight Type: Full Array LED
Local Dimming Zones: 40
Clear Action™: 360
Effective Refresh Rate: 120Hz
Active Pixel Tuning™: Yes
Dynamic Contrast Ratio: 20M:1
Aspect Ratio: 16:9
Viewable Angle (H/V): 178° /178°
Number of Colors: 1.07Billion
Built-in Wi-Fi: 802.11ac Dual Band
UHD Codec Support: VP9 and HEVC (H.265)
HDMI Ports: 4 (1 side / 3 bottom)
Component: 1 (side/shared with Composite)
Ethernet: 1 (bottom)
USB Ports: 1 (side)
TV Tuner: Yes
ARC: Yes
Speakers/Power Output: 15W x 2
Analog Audio Out: 1 (bottom)
Digital Audio Out (SPDIF): 1 (bottom)

Design and features
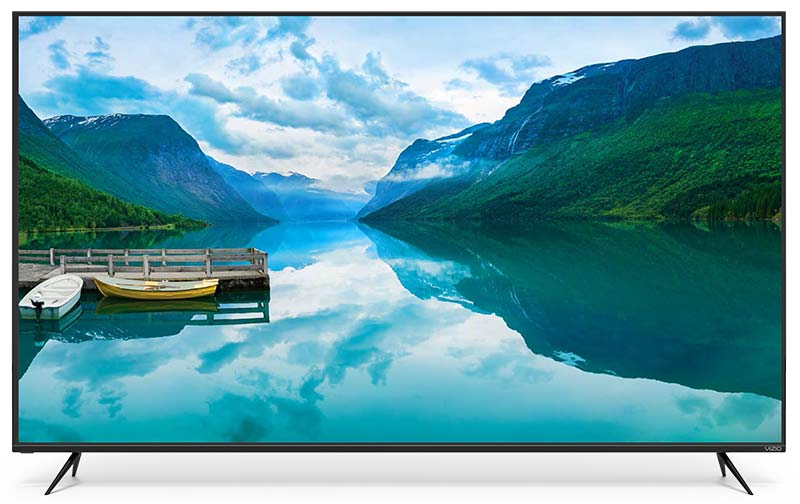
When it comes to the way the VIZIO M65-F0 looks, it is pretty much perfect in my opinion because it’s all screen. No gaudy chrome accents or huge bezels, just a big gorgeous display with thin bezels that you barely notice and a tiny status LED in the lower left corner.
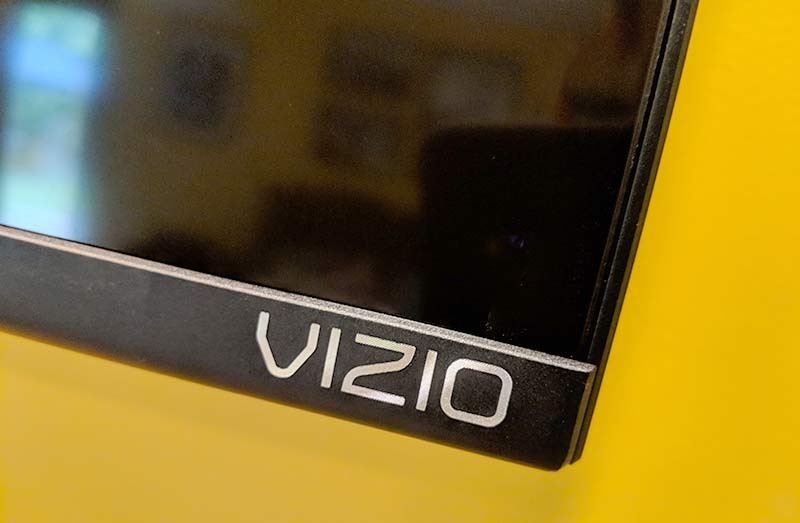
I said that the VIZIO has thin bezels and I meant it. The sides and top bezels are only about a 1/8 of an inch wide and the bottom bezel with the VIZIO logo in the bottom right corner is only about half an inch wide. This TV has the thinnest bezels I’ve ever seen. They are almost non-existent.
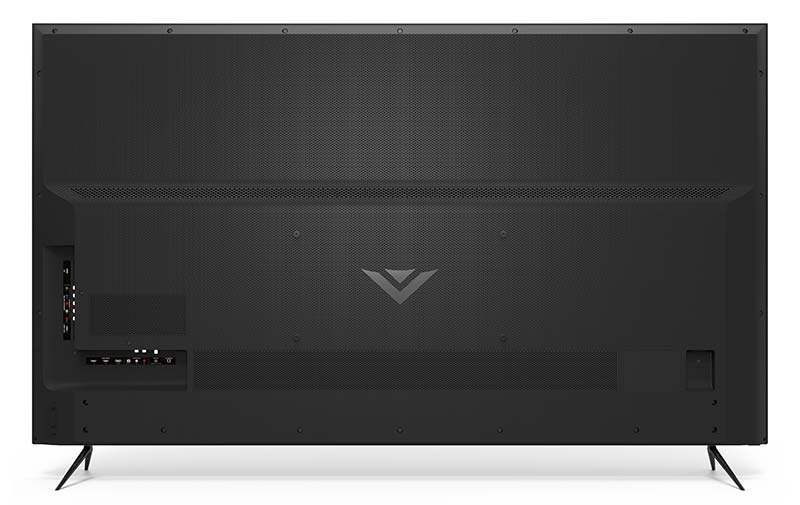
The back of the Vizio M65-F0 TV has a black plastic panel with the AV inputs arranged in a recessed L shaped layout on the left bottom edge and a physical power button and volume buttons on the same side.
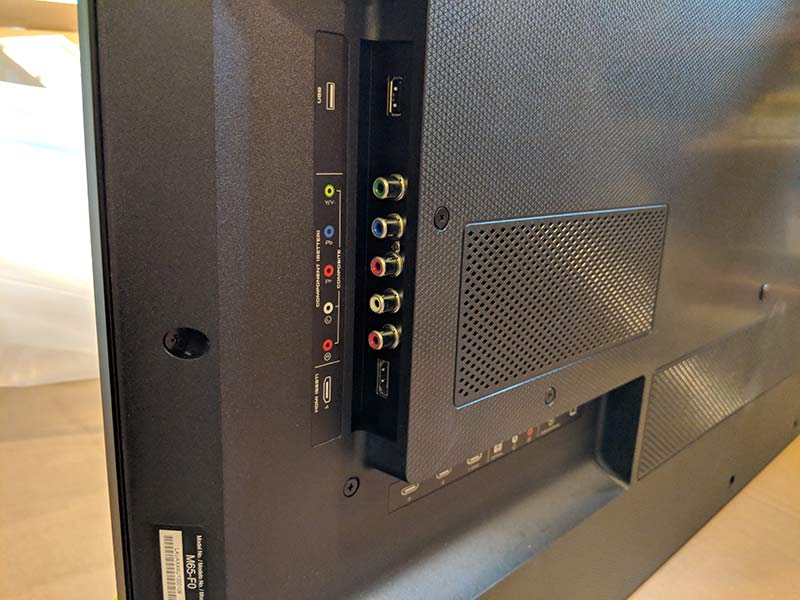
The side of the input panel has a USB port, component connections, and an HDMI port.
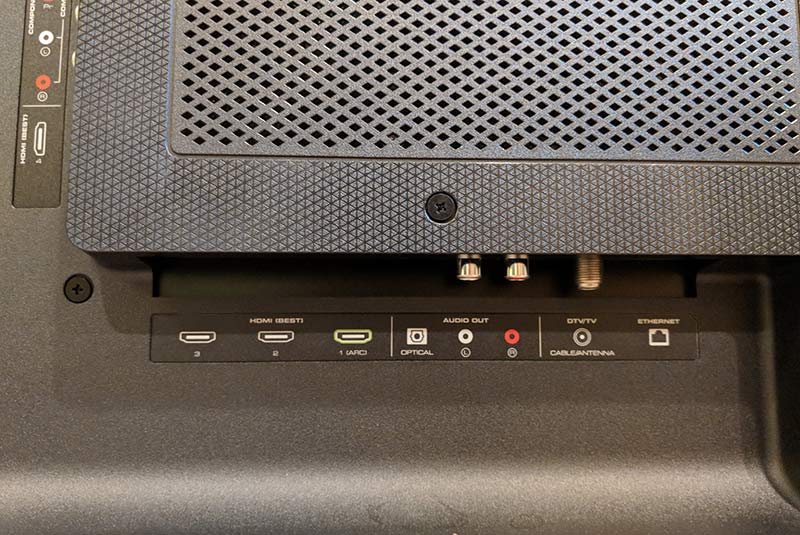
The bottom part of the input panel has 3 more HDMI ports (one with ARC), an optical audio out, audio out Left & Right, and an Ethernet port. But don’t worry, the set also has built-in WiFi so there’s no need to hardwire it into your network. The VIZIO M65-F0 also has a coax connector for an antenna and it has a built-in tuner. So you can cut the cord, hook up an OTA antenna and enjoy free content.
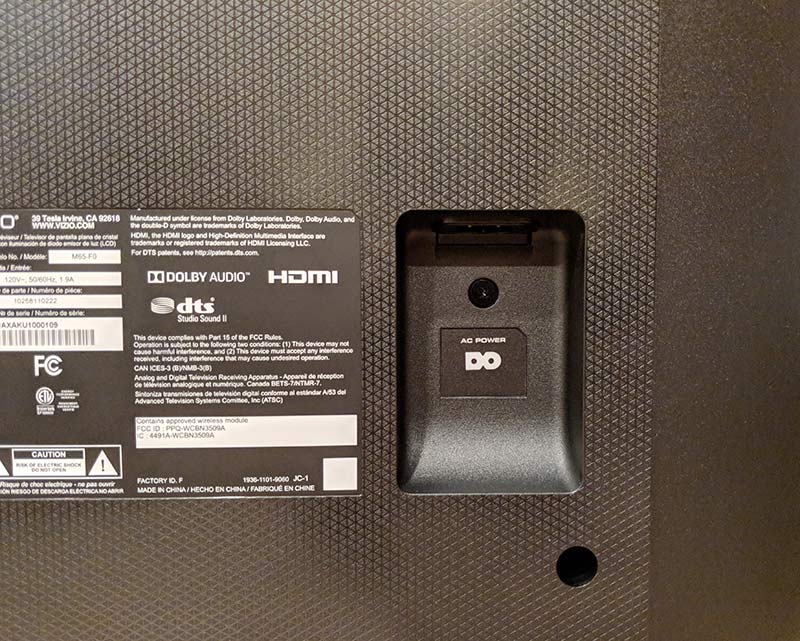
On the right side of the TV is the power port.
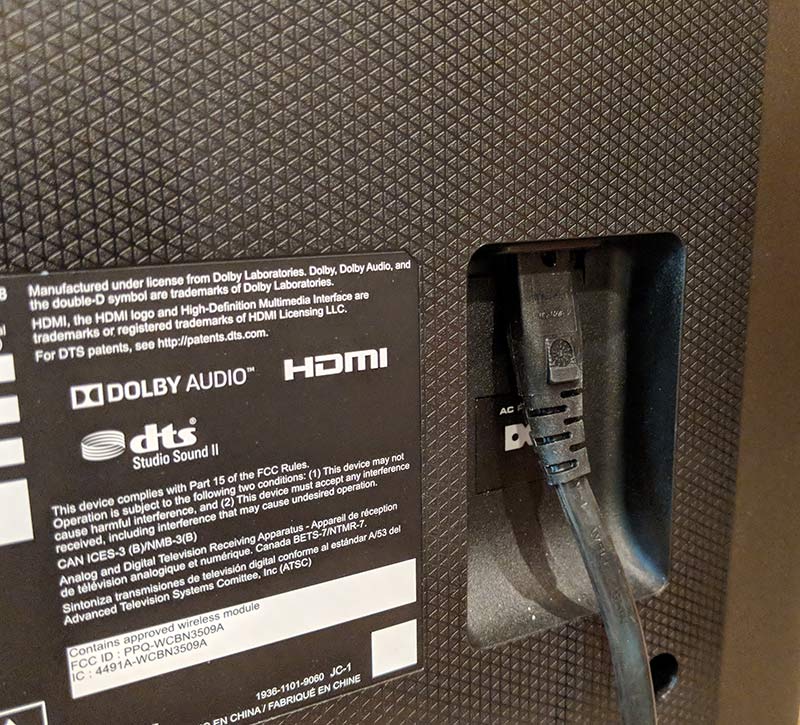
The port is recessed which is helpful if you plan to mount your TV on a wall like I do.
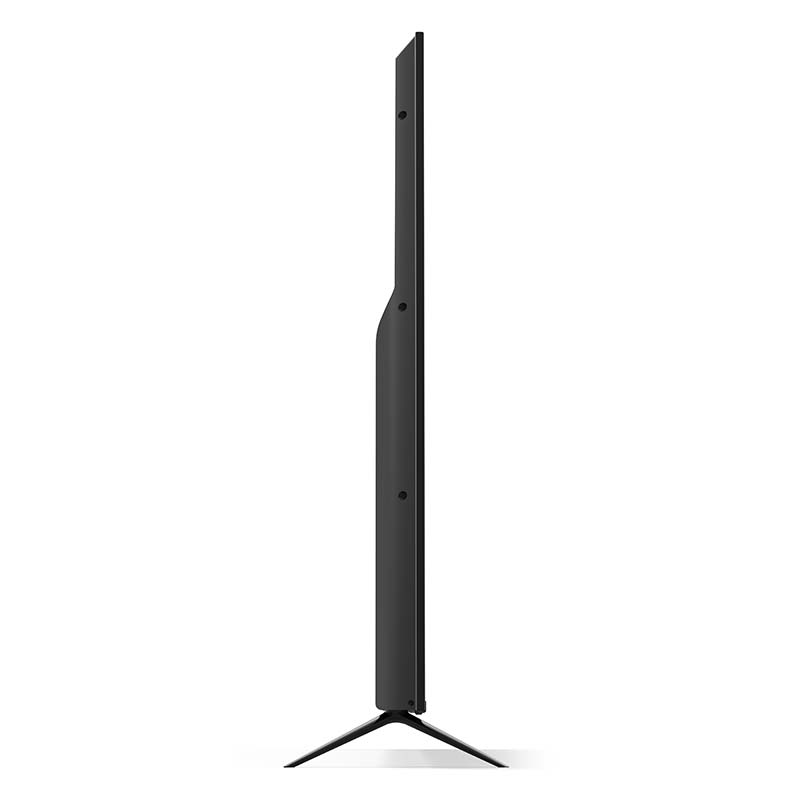
The VIZIO comes with a set of legs/feet if you want to use it on a table, but I don’t have a separate cabinet or entertainment system. I mount my TVs on the wall to get that home theater look and feel.

Installation
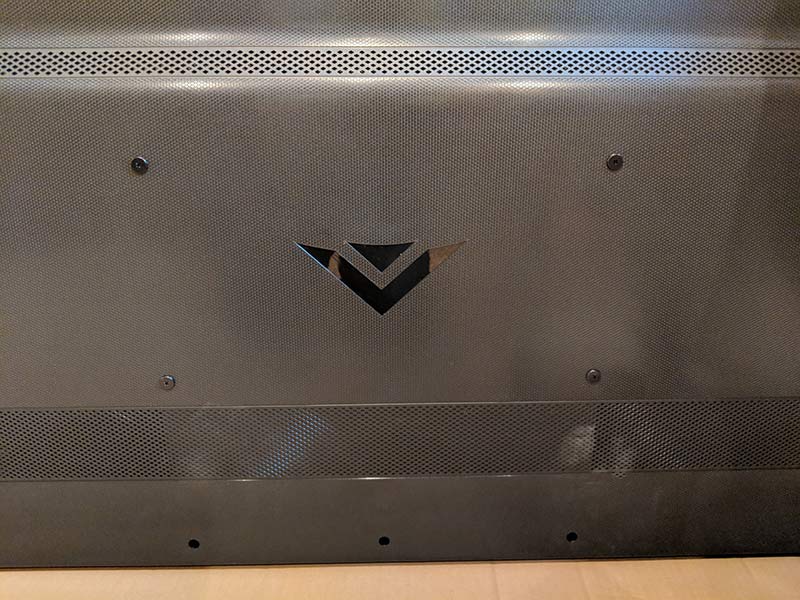
I was pretty excited when I first saw the back of the VIZIO with the VESA mount screws. Yes, I know that this it’s not unusual for TVs to have a VESA mount on the back. But upon first glance, I thought the screws in the back of the TV were the mounting screws.

I started to give kudos to VIZIO because I thought that they were nice enough to include screws for wall mounting. That’s until I removed them and realized they were just useless short place holder screws. Bummer! I was lucky that the screws in my previous TV were the same size/length needed for the Vizio but why can’t TV makers include the screws? I doubt that it would add more than a $1 to the price.
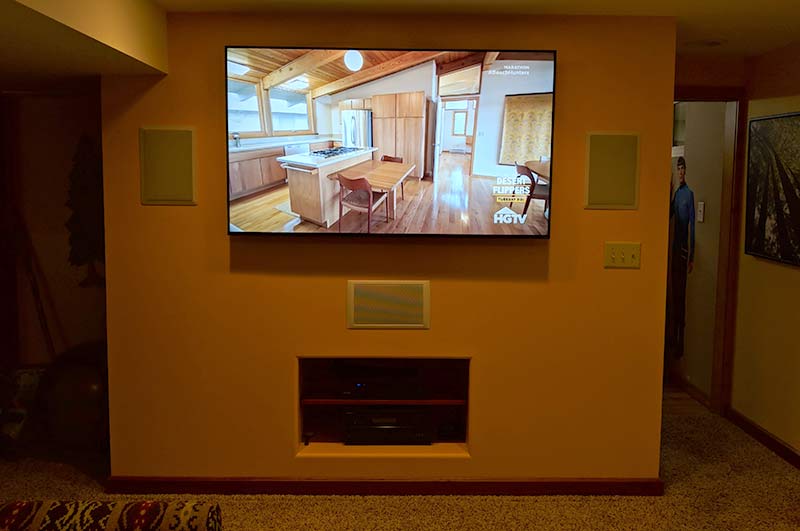
Here we see the M65-F0 mounted on the wall and ready for movie night!

Setting up the VIZIO M65-F0
It took only a few minutes to set up the VIZIO once it was mounted on my wall and connected to my Onkyo TX-SR608 AV receiver via an HDMI cable connected to the HDMI/ARC port on the back of the Vizio and a DirecTV receiver connected to the Onkyo.

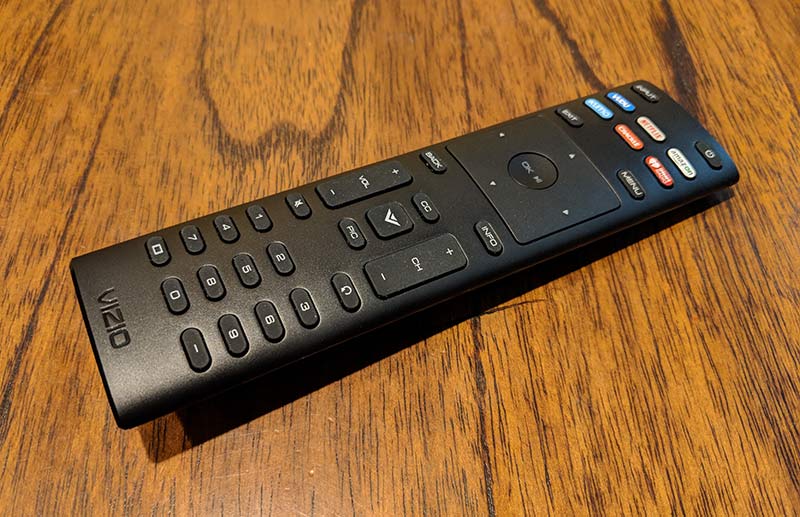
The included remote has a good layout and includes dedicated buttons to launch the SmartCast menu and for the built-in SmartCast apps for VUDU, Netflix, Amazon, XUMO, Crackle, and iHeart Radio.

One cool thing about the VIZIO is that you can control it using your voice control from Google Assistant and Amazon Alexa-enabled devices. I don’t currently have an Amazon Echo or a Google Home to test it but according to what I’ve read you can use your voice to power the set on or off, adjust volume, and other basic commands. I can see this as a useful feature if you are a true couch potato and are eating in front of the TV and don’t want to use your greasy fingers to change the volume using the remote when you can just use your voice.
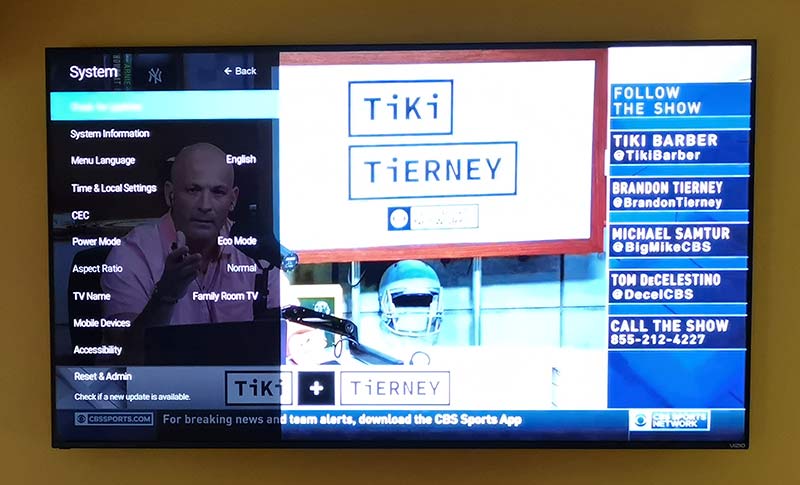
During setup, you’re prompted connect the TV to your wireless network so it can install any needed firmware updates. From there you can explore the menus that will let you customize the settings which you will definitely want to do because the default picture color settings out of the box didn’t impress me.

The M65-F0 has 6 picture modes to choose from: Standard, Calibrated, Calibrated Dark, Vivid, Game, and Computer. All of the modes except for Vivid looked washed and blah to me while the Vivid mode made people’s faces look too red or orange. I was a little worried by this during the beginning stages of my testing, but after some tweaks to the color settings, I got everything dialed in and looking great to my eyes. The TV has 6 custom memories to use for your own adjustments and you can save them with your own custom name like “Julie’s Daytime Settings; etc…”.
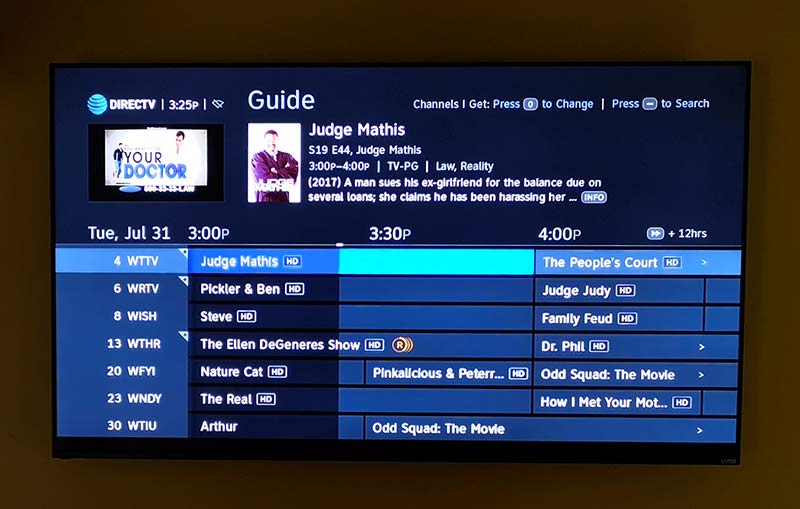
Blacks and whites on this set are deeper with more levels and the whites are brighter than my previous TVs which is a good thing but sometimes the whites are almost too bright which is where the Calibrated Dark mode is useful. Especially if you like to watch TV in the dark.
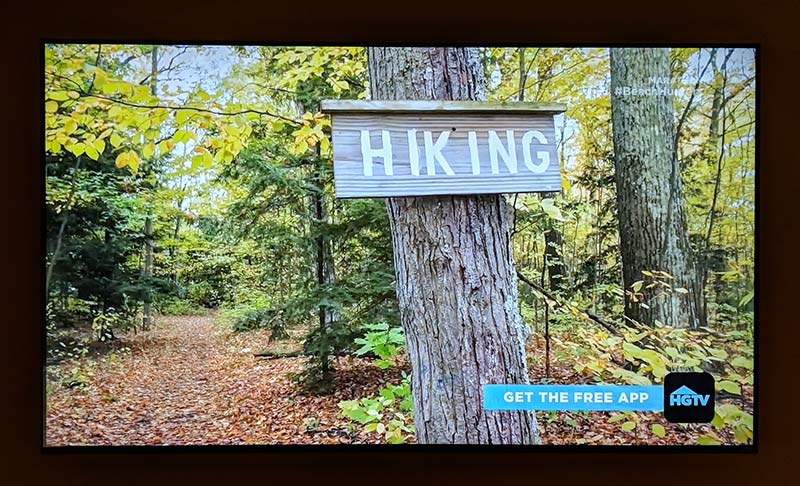
I do most of my TV watching through DirecTV, which isn’t exactly a great source of UHD programming to highlight the strengths of this set.

That said, DirecTV HD content looks sharp and the colors are vibrant. The M65-F0 has pretty good viewing angles too. You’re going to want to be directly in front of the screen for optimal sharpness and color, but off angle isn’t too bad.
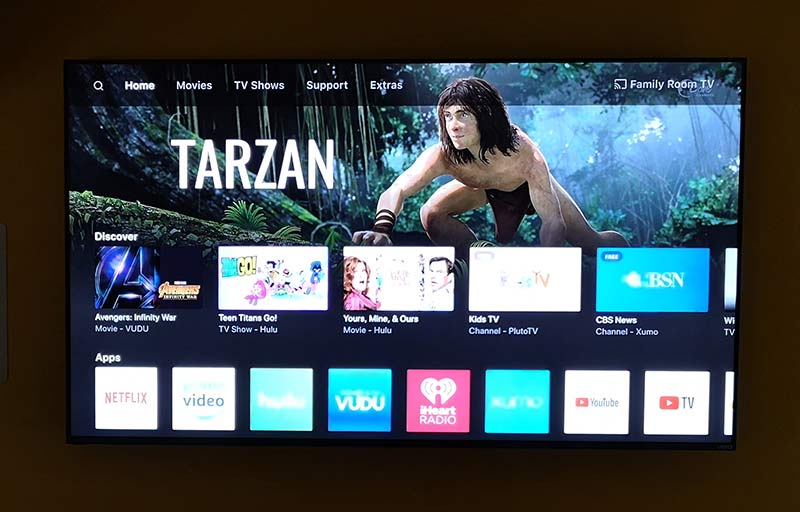
If you’re a cord cutter, you’ll love the VIZIO M65-F0’s SmartCast features. You might remember that I reviewed the Vizio M50-D1 back in 2016. That set came with a 6-inch Android tablet that could be used as the TV remote and a SmartCast app device. This 2018 VIZIO set doesn’t come with a tablet, but you don’t need one because it has the apps right on the TV or you can use your smartphone with the SmartCast app.
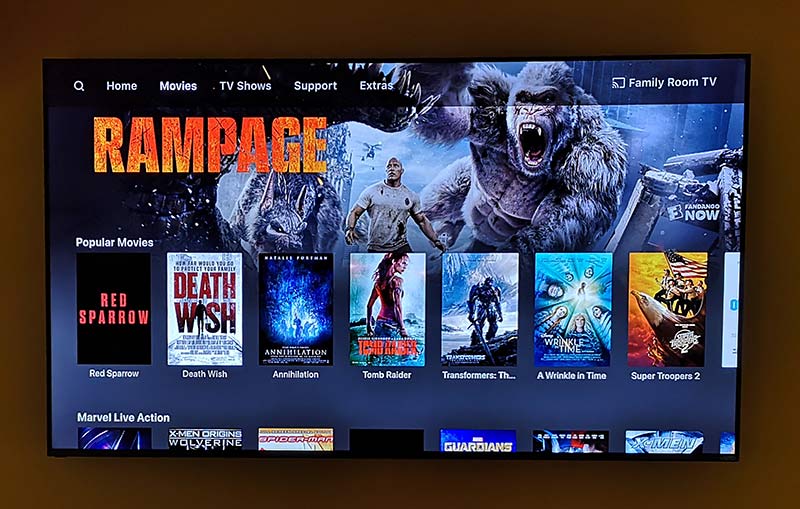
The SmartCast apps on the TV allow you to connect to your Hulu, Netflix, Amazon, VUDU, YouTube, and other streaming services including VIZIO’s own WatchFree free content app that makes cord cutting a breeze. But the built-in apps don’t include some big names like HBO, DirecTV Now, ESPN, etc and from what I can tell, there’s no way to add them at this time. But, firmware updates might change that at some point. But it’s not a big deal since you can use the SmartCast app on your phone or tablet with any Chromecast-enabled app like HBO Go, DirecTV Now, and many more.

VIZIO’s SmartCast app is cool because it offers a bunch of apps all in one place, provides content recommendations and will let you search across apps so that you don’t have to search from them individually. But you can still go to other apps like Netflix, or HBO Go, or Vudu directly to find content.
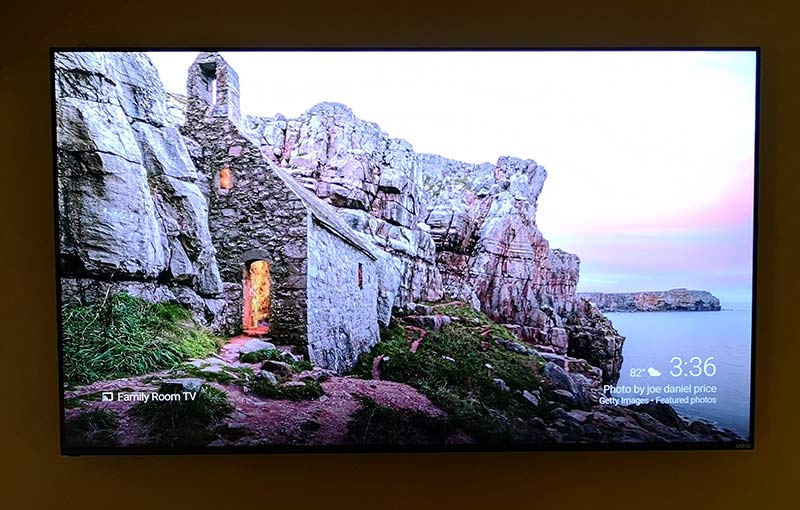
One of my favorite features of this VIZIO TV is the built-in Chromecast which allows me to unplug the 2nd generation Chromecast that has been hanging off my AV receiver for the past year.
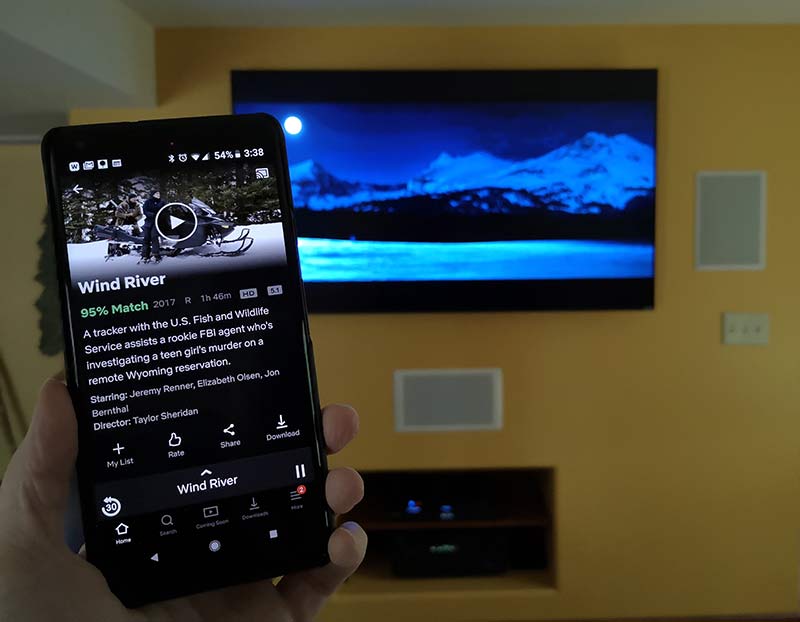
I love Chromecast and do a lot of content casting mainly from the Netflix app from my Pixel 2 XL. Using the VIZIO’s built-in Chromecast works exactly like the regular Chromecast I was using, so there was no learning curve. It just works. Actually, it works BETTER than the Chromecast that I was using before because the VIZIO’s built-in Chromecast is like a Chromecast Ultra which can stream UHD with HDR content from apps that support it.

During my testing of this TV, I’ve used it to watch content from DirecTV, BluRay DVDs, Netflix, Hulu, and VUDU through the built-in SmartCast apps and from my phone. The UHD content looks fantastic to my eyes even though my Onkyo AV receiver is around 8 years old and doesn’t support 4K or UHD. It does have a passthrough feature which is what I used.

I do plan to upgrade my AV receiver in the next couple of weeks and will update this review if I notice any big changes to the picture quality. I am looking forward to updating the receiver because the VIZIO was unable to use HDMI CEC feature to automatically power on/off the AV receiver and switch inputs as needed for audio. So until I update, I’m back to using 2 remotes. One for the TV/DirecTV and one for the AV receiver. This is a little annoying but it’s obviously not a deal breaker because this TV is a nice improvement over the one I was using.

What I like

  • Gorgeous picture
  • Almost no bezels
  • Built-in Chromcast
  • Built-in tuner
  • Voice controllable via Alexia or Google assistant

What needs to be improved

  • Screws included in the VESA mounts are useless
  • HDMI CEC wouldn’t work with my Onkyo AV receiver

Final thoughts

If you’re shopping for a new 4K UHD TV, the VIZIO M-Series (M65-F0) 4K HDR Smart TV will not disappoint with its rich blacks, bright whites, vibrant color, and sharp picture. It’s enjoyable to watch all my favorite shows and movies on this set and it’s earned a well-deserved place on my wall.

Price: $999.99
Where to buy: Best Buy, Amazon
Source: The sample for this review was provided by VIZIO.

Filed in categories: Reviews

Tagged: ,

VIZIO M-Series (M65-F0) 4K HDR Smart TV review originally appeared on The Gadgeteer on August 8, 2018 at 9:00 am.

Note: If you are subscribed to this feed through FeedBurner, please switch to our native feed URL http://the-gadgeteer.com/feed/ in order to ensure continuous delivery.

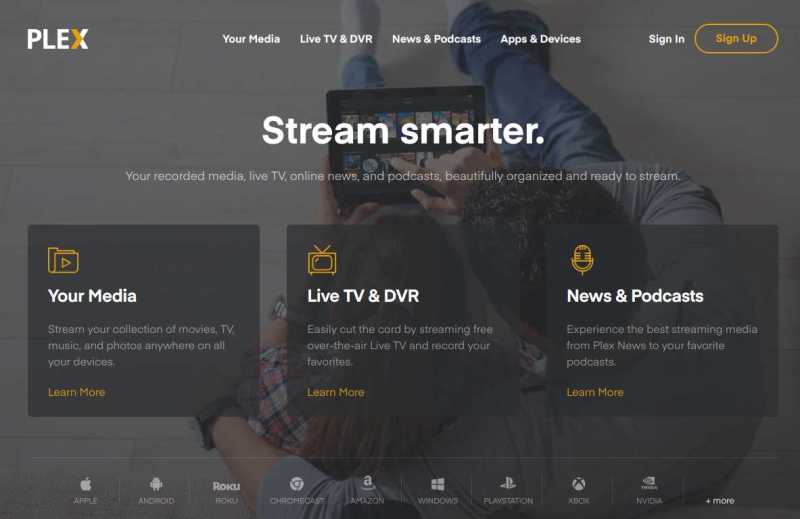
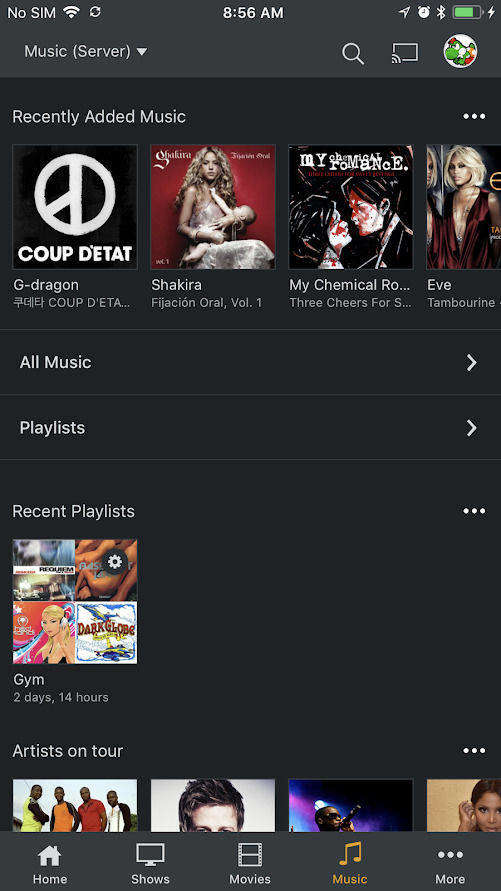
Plex Pass review

REVIEW – With all the internet streaming available online, it’s nice to be able to have a place to aggregate all of your favorite media that you might still own. This can include home videos taken by your parents or grandparents, old DVDs, or those CDs you’ve been wanting to rip for ages. Plex Media Server is the perfect way to keep all of your old media in one central location and allow it to be seen on any digital device. The Plex Pass gives you even more options, so let’s take a look to see what it has to offer!

What is it?

The Plex Pass is video streaming, DVR, and podcast software.

Hardware specs

This is a tricky question since the answer will be what you’re streaming and what you’ll be doing with your Plex server.  From Plex’s support article it states that at minimum, if you’re not doing any transcoding, you will need an: Intel “Atom” 1.2GHz or higher. For reference, I’ve set up a small Ubuntu 16.04 server with an ASRock AM1B-ITX with AMD Athlon 5350 AM1 CPU and 8GB of RAM and am able to run all of my videos just fine.

Design and features

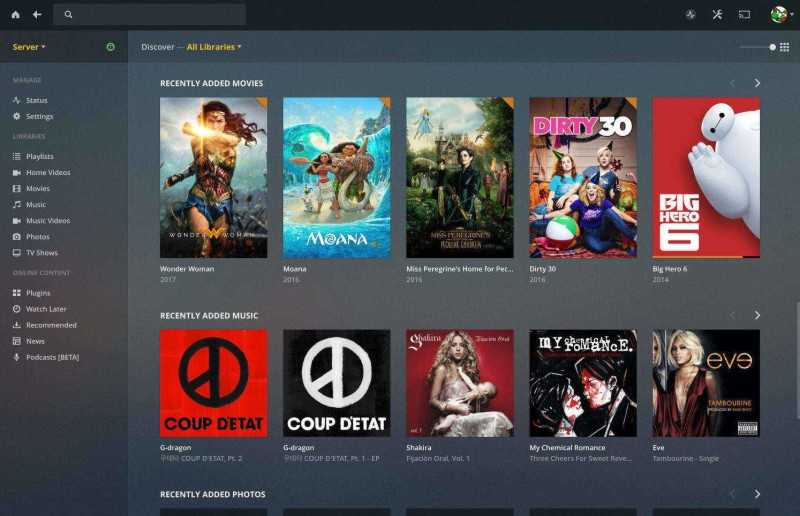
The free version of Plex offers a ton of features as-is. If you need basic video streaming for within your home, you can get started on that already. This includes casting from a smartphone, tablet, or computer to any Chromecast. You can organize your media into various libraries such as movies, photos, music or create your own. I created a custom “Home Videos” library for all of our old VHS home videos from when I was a kid. You can also create playlists much like any other media service.

You can view almost any video format in Plex, which gives you lots of flexibility. It also included 4K support if you happen to own a 4K tv or create your own 4K content.

As for the premium version of Plex – called Plex pass – you can take advantage of tons of nice features:

There are premium photos, which lets you get auto-tagging and places to sort photos and albums, similar to Google Photos. You can do automatic backup of photos to your media library. This is awesome for me since I do that with and Google Photos, but it’s really nice to have another option and upload it straight to a personal media server. I already do this with my own install of Nextcloud, but can eliminate the need for another bit of software since I can do it with Plex Pass!

You can use cloud sync, which lets you save a copy of your media to the Plex mobile app, so you can view or listen offline.

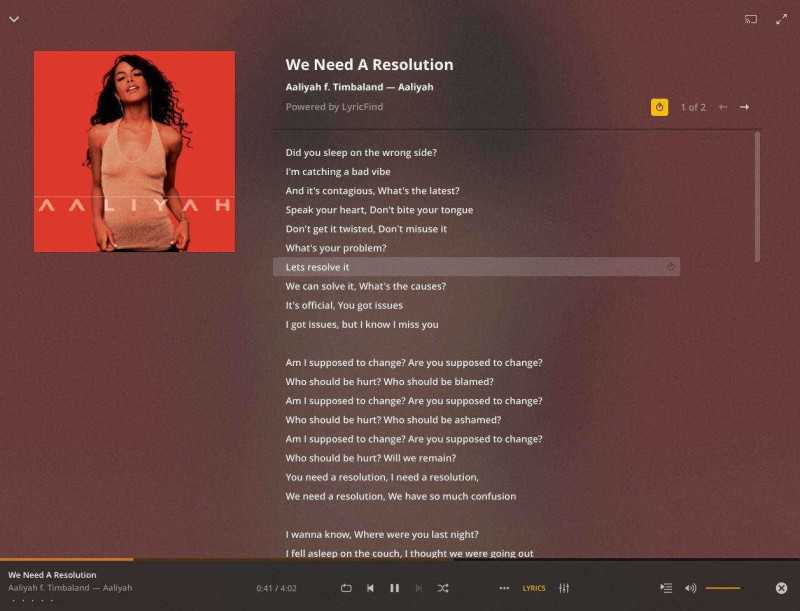
A nifty feature I like is premium music, where you can create playlists, mix songs by mood and display song lyrics. It reminds me of what Spotify premium does, but you can do it with your own music library instead.

With Plex Pass perks, you can get access to promos and discounts on partner products such as digital tuners and other hardware to use with Plex Pass.

For the parents out there, (or for those of you who have snoopy roommates) you can enable parental controls for your Plex media library, as well as create multiple users to keep everyone separate. I use this feature and love it.

You can also watch live broadcast TV directly on your device or mobile app with Plex Pass. You will need an antenna and compatible tuner. If I get a chance to get my hands on a digital tuner, I will update this review. You can also record free HD broadcast channels right to your library and watch them on any device, anywhere.

Setup

To set up a Plex media server, all you need is a relatively modern computer (at least an Intel Atom processor equivalent and higher), with 2GB or RAM or more. You can view more options here, as well as via the Plex Forums. You can install Plex on Windows, Mac and Linux. There are multiple NAS manufacturers that support Plex as well.

Performance

As mentioned before, I run Plex on a very inexpensive AsRock/AMD motherboard combo running Ubuntu 16.04 and I’ve had no problems running Plex locally or remotely from anywhere. All my video plays well with no buffering.

What I like

I really enjoy everything about Plex. I’ve used the free version of Plex for years with a basic server, just to hold my home movies and music, but with Plex Pass it makes the deal even sweeter by enabling auto upload of my photos, lyrics and mixing for my music, and allowing everything that I use streaming services for already and enabling it for me at home. I love that I can keep everything private as well. If you’re a digital tuner user, I can imagine it being even more awesome.

What needs to be improved

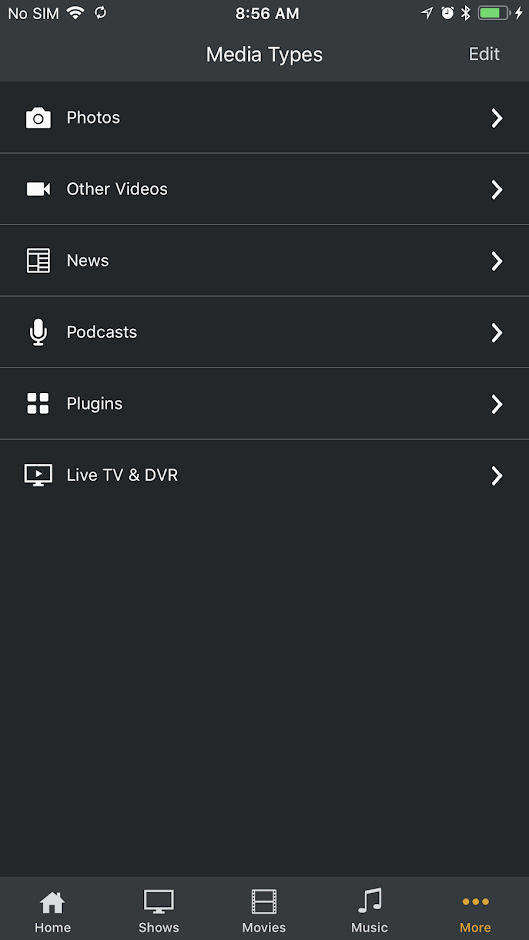
The one thing I did try about Plex Pass but wasn’t af an of was the news and podcast features. News for me was not the best quality, although it did pull from various sources online. I’d rather jump into Youtube or read the web to get news video. As for the Podcasts Beta feature, it was nice to be able to sync the podcasts to my phone, but I already have a bunch of podcast apps to do this. Sync did work well however.

Final thoughts

I really enjoy using Plex Pass for the extra bells and whistles it has to offer. If you are a person who still likes to keep your own personal copy of music, movies, photos, and all various media to your own server, I’d definitely recommend getting the Plex Pass for extra nifty features.

Price: The costs for Plex Pass are monthly ($4.99/month) and yearly ($39.99/year) options, but the lifetime price ($119.99) is well worth it for constant updates and new features.
Where to buy: The Plex Pass is available to purchase via their website.
Source: The Plex Pass for this review was provided by Plex. For more information, visit Plex.

Filed in categories: Reviews

Tagged: ,

Plex Pass review originally appeared on The Gadgeteer on July 30, 2018 at 9:00 am.

Note: If you are subscribed to this feed through FeedBurner, please switch to our native feed URL http://the-gadgeteer.com/feed/ in order to ensure continuous delivery.
AirTV review


REVIEW – There seems to be a big movement across the United States by many folks that want to cut the cord and get the programming they need for an affordable cost. I am one of those folks, especially since in recent times, my cable bill has ballooned to a cost that I can only define as ridiculous. Whenever I get a chance to try a new alternative to cable TV, I “jump” at the opportunity. This device is just such a chance, so here we go.

What’s in the box


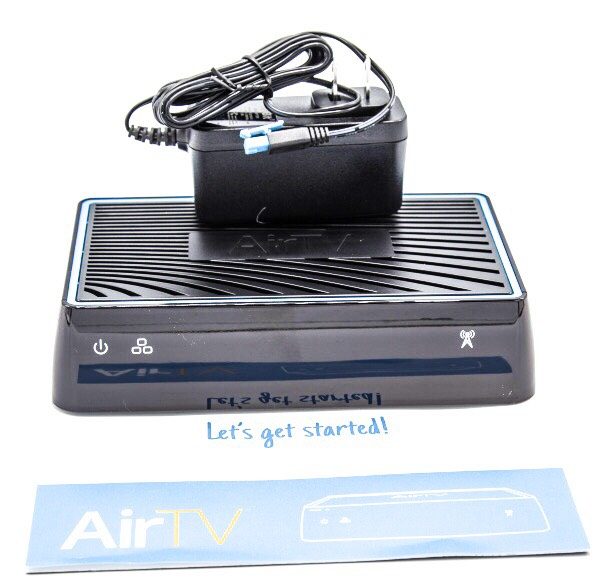
1 x AirTV Streaming Box
1 x AC Adapter
1 x Instruction Booklet

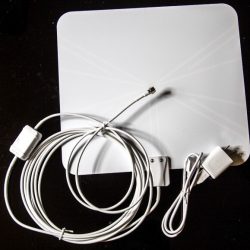
The company was kind enough to also provide the FlatWire OTA antenna for me to be able to test and review all of the functions for the AirTV box.


Design and features

The AirTV streaming box is designed to work with the Sling TV service with an option to add an Over-The-Air antenna to have access to local TV channels as well. The concept here is to offer a good option for you to be able to cut the cable TV cord. Viewing is controlled via the Sling TV app that works on both IOS and Android mobile devices as well as several available streaming boxes such as Roku, Amazon FireTV, XBOX ONE, Chromecast, Apple TV, etc. The Sling TV streaming service (Sling.com) offers 3 streaming packages: Sling Orange – $25 monthly, Sling Blue – $25 monthly, and Sling Orange + Blue – $40 monthly. These options represent different channel options or a combination of channels. They also offer various add-on packages at $5 each per month that include the following:

Categories:

Comedy
Kids
Sports
News
Lifestyle
Premium
Hollywood
Heartland
International
Espanol
In addition, you can get 50 Hours of cloud DVR storage for $5 monthly.

Design

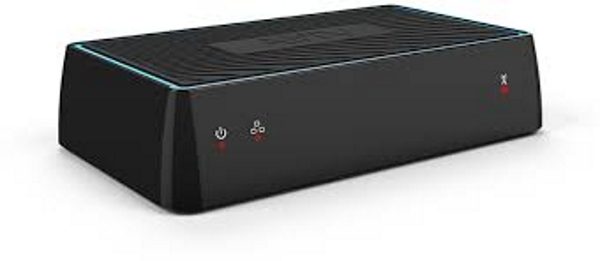
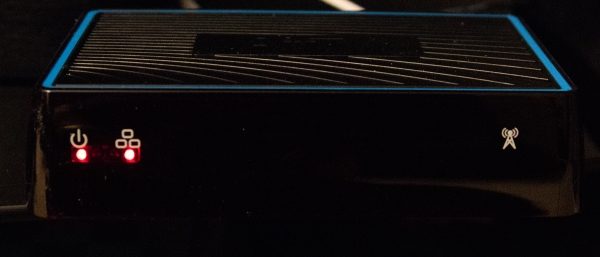
On the front of the box, there are a couple of red LEDs that show the power and connection status. There is also a logo to the extreme right.

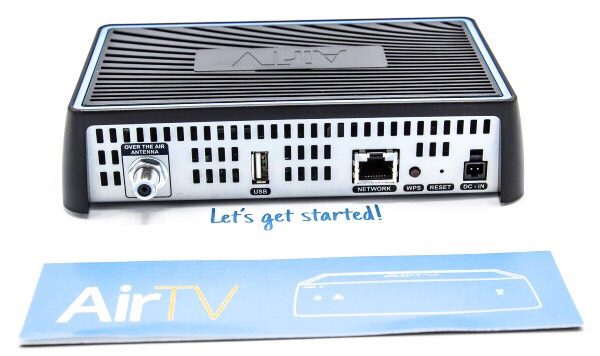
On the back of the AirTv box, there is a coaxial connection for connecting the Over-The-Air antenna a USB port for adding an external drive for additional content of your own, an Ethernet jack for a wired connection, albeit that it can also be connected wirelessly, a “WPS” button for wireless connection, a reset button and the DC in power port.

App

The AirTV works with the Sling Tv app, that allows you to stream both free and paid content to your tablet/mobile device or on to your TV using streaming devices like Roku, Apple TV, etc.

For the pictures below, I used my iPad Pro 12.9 to show the screen examples.
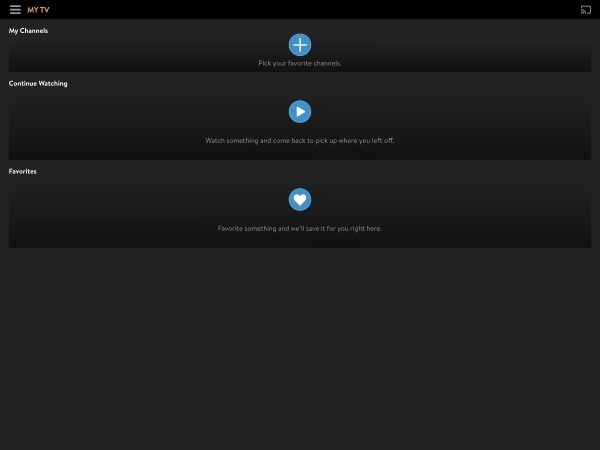
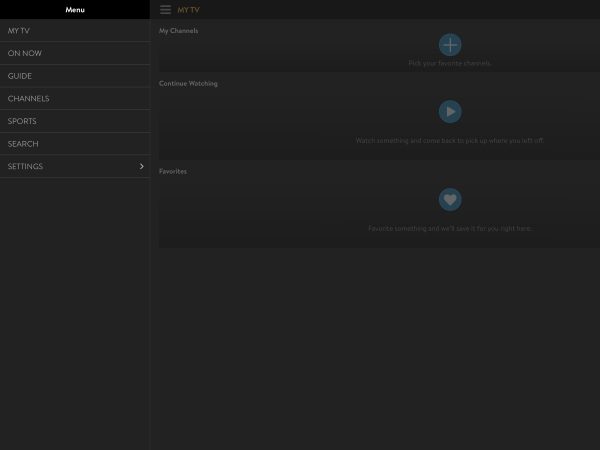
When you first select the app, this is the screen you see. If you have added any favorite channels/content they will show here, or you have the option to add them here if you have not. This is the “My TV” screen.

In the upper left-hand corner, there is a menu icon for selecting the options. Once you select the icon, you get the menu and the options for each screen:

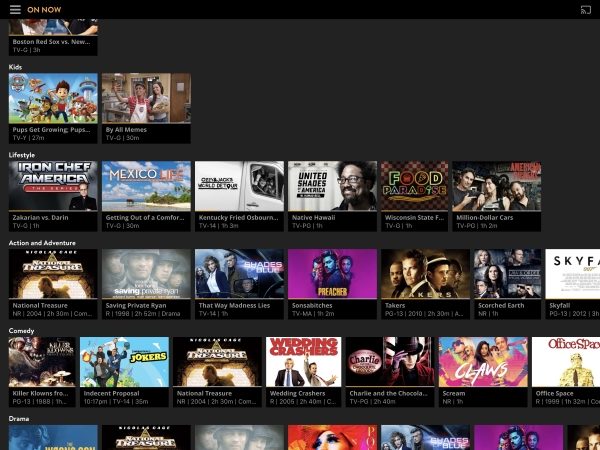
The first option is the My TV option that displays what shows are “On Now”. You can scroll up/down and sideways through this screen to see thumbnails for what is currently showing on each channel.

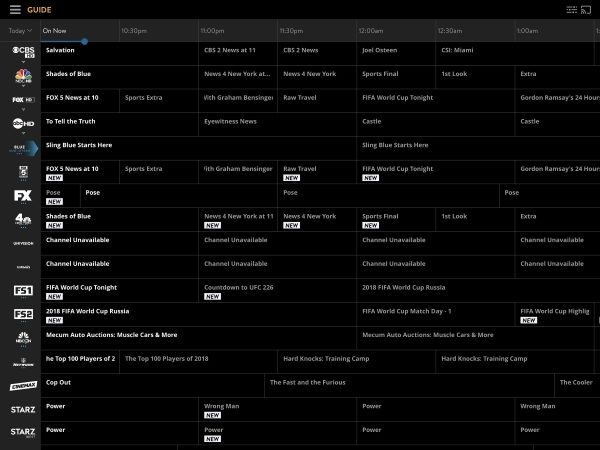
The next option is the TV guide and it looks much like a normal cable TV guide, or at least it looks just like my Spectrum Cable TV guide. You can also scroll up/down and side to side on this screen.

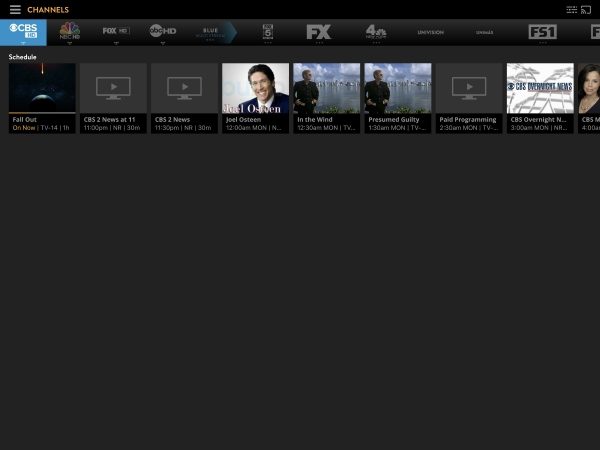
The Channels option shows the channels that you have access to across the top of the screen, and you can scroll across to see the specific channel guide for each channel with a thumbnail view of the shows below. The channel selection is made up of the Over-The-Air channels that you receive and the channels from the Sling TV package that you have subscribed to.

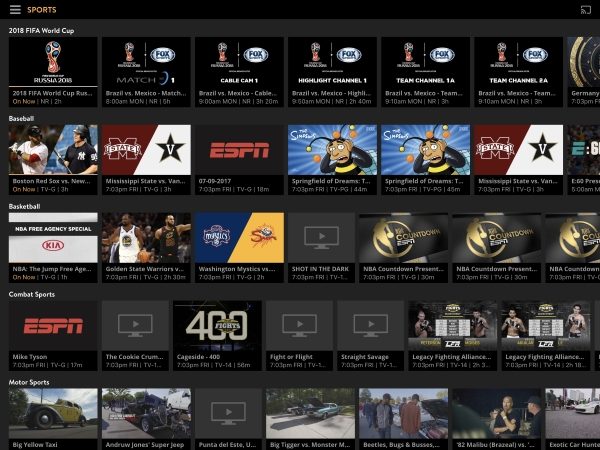
The Sports option shows all of the sports events available according to your subscription channels and OTA channels.

The last two options are the Search option and the Settings option.


The layout for the Sling TV app on the Roku streaming box is very similar and I suspect this would be the same for other devices.

What I like

I really like how well this box works and the layout of the options. The fact that it combines both the Sling TV streaming and the Over-The-Air channels is fantastic and eliminates the need for a separate OTA set up. I have a 300Mbps downstream connection, and this box performs as well as the cable TV box. I also like that it offers several options for the devices that can be used to stream. While the OTA antenna is not a part of this review, it performs very well and brings in over 40 channels in HD quality. I have tried other OTA antennas, and for “MY” scenario, and I must stress the “MY”, it brings in the most channels thus far, albeit that a couple of my local channels do not show up.

What can be improved

Packages that offer a better deal of more channels for the existing costs to better compete with most cable TV services. I would also like the ability to choose the channels for my package (minus premium channels of course).

Final thoughts

I really like the AirTV streaming box and its design. The combination of an OTA antenna along with the streaming package is a great option to cable TV if you are ok with the channels that are included with the packages being offered. On several occasions when my cable TV service went down, I was able to use the AirTV with the Sling TV app to continue to watch TV. However, in order to compete with my cable TV service and get me to cut the cord, the total cost has to be cheaper. Since I still have to rely on my cable TV provider for internet access, cutting the cord would only make sense if Sling offers more channels as a part of the flat rate packages. In order to compete with my current cable Tv subscription and my favorite channels, I would have to subscribe to several Sling TV add-ons as well as the Orange and Blue combination package. The cost of that Sling subscription, along with the cost of internet service, would be more than I currently pay. However, it is important to note that I have quite an upgraded internet package. If I was willing to live with a 60Mbps download speed, which is enough to stream, then I would be able to save some money using Sling TV.

Price: $119
Where to buy: AirTV and Amazon
Source: The sample for this review was provided by AirTV.

The post AirTV review appeared first on The Gadgeteer.

Filed in categories: Reviews

Tagged: ,

AirTV review originally appeared on The Gadgeteer on July 10, 2018 at 9:00 am.

Note: If you are subscribed to this feed through FeedBurner, please switch to our native feed URL http://the-gadgeteer.com/feed/ in order to ensure continuous delivery.
AirTame HDMI display enabler review

Given that we’re all probably carrying around more video and photo data than graced the entire planet 20 years ago, I’m sure we’ve all been somewhere and wanted to show a group of more than 2 people a great shot. Perhaps you’ve wanted to actually present to a group, and you only had a phone with a pdf and a TV, and no cable to connect them. The folks at AirTame have seen your plight and have concocted a solution, in the form of an HDMI dongle that needs no setup other than with your phone or another device. It fits in the space of your earbuds, but it has a lot more hidden superpowers than this….

Note: Photos may be tapped or clicked for a larger image.

What is it?

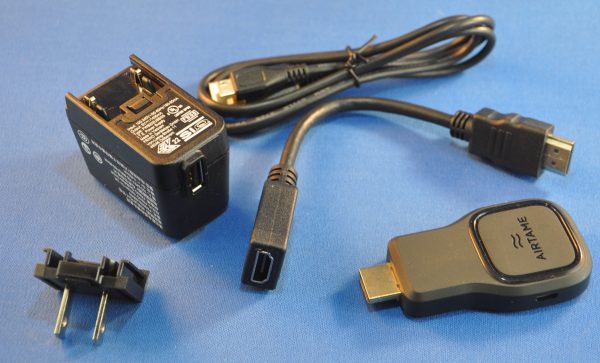
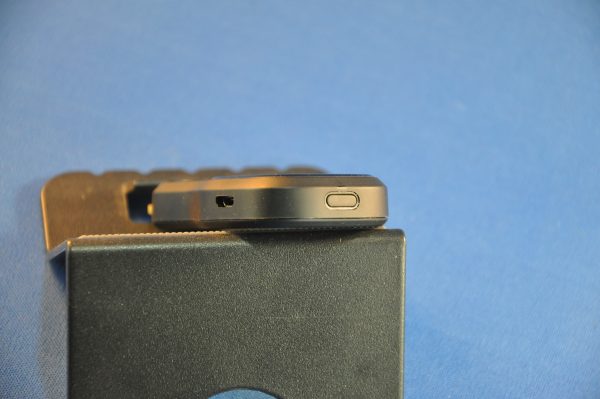
The AirTame is a black dongle 3”x1.5”x.5” with an HDMI plug on one end. It looks like an HDMI thumb drive. On one of the sides, there is a microUSB port for power, and opposite the plug, there is a small button to power it on. When it’s connected and powered on, your device’s images show up on your HDMI display. Once it’s on your wireless or Ethernet network, however, it is also available to be seen by full computers (Mac, Windows, Linux) or ChromeOS. These devices can share full screen live screens.

What’s in the box?

AirTame device
USB-A< ->microUSB power cable (1m)
USB power brick with plugs for US, UK, and EU (US only is shown above.)
7.5” HDMI extension cable

Design and features

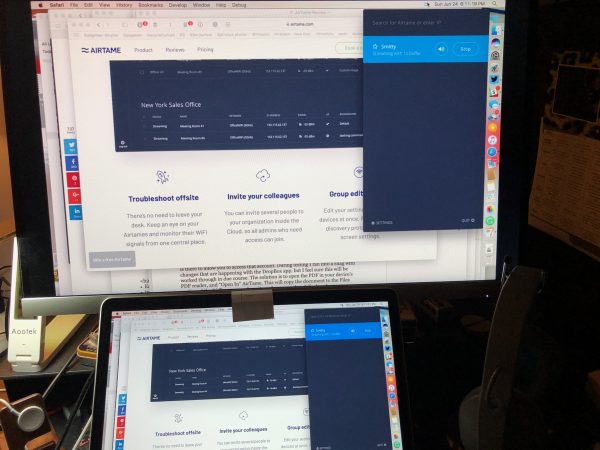
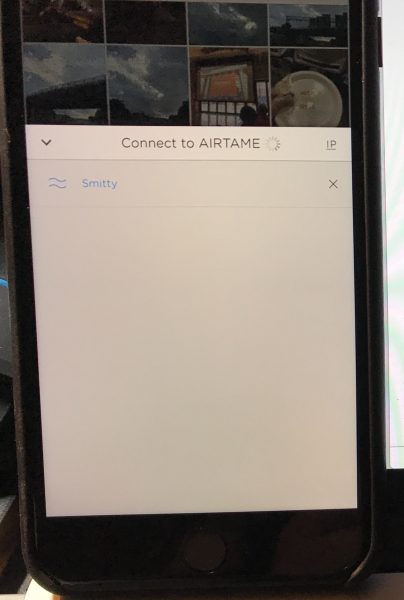
The AirTame is easy to set up, easy to carry along, and easy to use. I’ll cover the setup below. Once it’s set up, there’s little to do. As long as you are connected to the same network, you can send PDF and JPG files to any HDMI source from your iOS or Android device, using their app. If the files are on your device, you give the AirTame app permission to read them, and you’re off to the races. If you want to store them in a DropBox account, the design is there to allow you to access that account. (During testing, I ran into a snag with changes that are happening with the DropBox app, but I feel sure this will be worked through in due course. The solution is to open the PDF in your device’s PDF reader, and “Open In” AirTame. This will copy the document to the Files section of the AirTame app, where it can be accessed and displayed.)
For computers and ChromeBooks, the dongle is much more powerful. You can do full-screen sharing. You can use the app to find any AirTame on your network, and send your video to it. This is fantastic for tech support, training, or viewing remote computers (servers, network monitors, etc.).

Setup

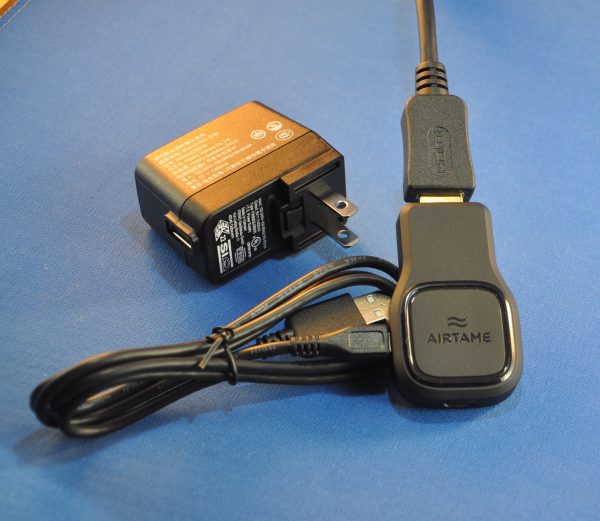
Setup is simple. Connect to an HDMI port on your display of choice and connect the AirTame to power using a microUSB cable. These things can be problematic, however, due to the placement of the display, or other cables that are already in place. There is an extension cord in case the HDMI of your display won’t allow the wide and long AirTame to attach directly. In many conference rooms and boardrooms, you may need to invest in a gender changer, since the only option available may be an HDMI plug, rather than a port. Other than private displays, I can’t remember the last time I had access to the port itself.
AirTame’s idea, however, is to have organizations put one of these devices on every HDMI screen in an organization. The pricing model changes rapidly from 1-3 to 4-9 and more than 10. Being able to remotely log in to any display in your company or campus and show your screen can make for quick resolution of issues where groups need to be shown something. (Audio can be turned on or off.)

Performance

I found the performance to be acceptable. Since video files are not supported with iOS/Android devices, the display rate isn’t going to be a problem. Bringing up a multi-page PDF document allows a PowerPoint / Keynote-like screen on your device where you see the current and next thumbnails, rather than the full screen being the current image. If you export your slide deck to PDF, you’ll only lose the animations and sound/video links, but those have lost favor of late. (Clicking the green button in the multi-page PDF document below leads to a screen-by-screen slide deck presentation.)


For computers, there is a bit of a lag over Wifi. (The company offers ethernet adapters that will allow direct connection to a router, which will speed up screen motion and video display. I was not sent this to test.) It’s not really that bad unless you’re trying to show video or any other high-frame-rate media.

What I Like

  • Very easy setup and installation
  • Fast, clear display
  • Supports virtually all platforms

What needs to be improved

  • Device gets hot after 30 minutes or so
  • Limited file formats supported on iOS/Android
  • Would benefit from a battery that lasted 15-20 minutes for traveling users

Final thoughts

Presenting to a large screen seems to be the modern curse, and I see no end to it in our current businesses. Presenting from something other than a full computer, however, is quite nice, and this device covers the basics of getting an image before a group with little to no roadblocks. If you need sound, animations, active video display (for training or visualization of content), this device paired with any modern computer will most likely fill the bill. If you can be happy with images and PDFs from your handheld, this is a worthy consideration.

Price: $299.00 (quantity discounts available)
Where to buy: Manufacturer website and Amazon
Source: The sample of this product was provided by AirTame.

The post AirTame HDMI display enabler review appeared first on The Gadgeteer.

Filed in categories: Reviews

Tagged: , , ,

AirTame HDMI display enabler review originally appeared on The Gadgeteer on June 29, 2018 at 9:00 am.

Note: If you are subscribed to this feed through FeedBurner, please switch to our native feed URL http://the-gadgeteer.com/feed/ in order to ensure continuous delivery.
The Tablo – DUAL LITE OTA DVR with WiFi makes it easier to cut the cord to cable service


A few days ago, I wrote a couple of news stories and a review of the Mohu Blade Over-the-Air HD antenna, which is used by folks like me when regular cable service fails, or by some folks who decide to cut the cable cord completely. My experience with the channels I received was quite good, and there can be a great cost savings if you choose to cut the cord to cable. While I do sometimes contemplate what it would be like without a cable TV service, I am deterred by the loss of simple functions like my DVR capabilities.

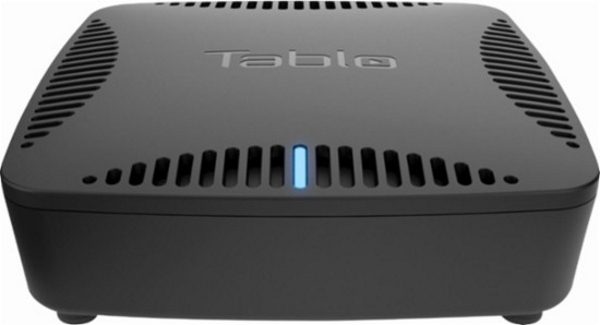
Today, while browsing the internet, I saw an advertisement for the Tablo – DUAL LITE OTA DVR with WiFi. This DVR takes the coaxial input from your OTA HD antenna, and streams the content via your home network to your streaming boxes and devices, such as Roku, Apple TV, Amazon Fire TV, IOS and Android Smartphones and tablets, PC or MAC, and more, utilizing the Tablo app. It has 2 built-in Over-the-Air ATSC Tuners, and has both wireless and wired network capability. Add a USB hard drive of your choice, and a storage capability that is incredible, since it supports up to an 8TB hard drive. Tablo also offers an optional TV guide subscription service that organizes the content, and provides cover art. The subscription also offers a cloud DVR service if you choose not to use a USB hard drive.

If the Tablo – DUAL LITE OTA DVR with WiFi sounds interesting to you, head over to BestBuy and purchase one starting at $139.99. You can also purchase the version with 64GB of storage built-in from Amazon for $179.99.

The post The Tablo – DUAL LITE OTA DVR with WiFi makes it easier to cut the cord to cable service appeared first on The Gadgeteer.

Filed in categories: News

Tagged: ,

The Tablo – DUAL LITE OTA DVR with WiFi makes it easier to cut the cord to cable service originally appeared on The Gadgeteer on May 10, 2018 at 12:03 pm.

Note: If you are subscribed to this feed through FeedBurner, please switch to our native feed URL http://the-gadgeteer.com/feed/ in order to ensure continuous delivery.