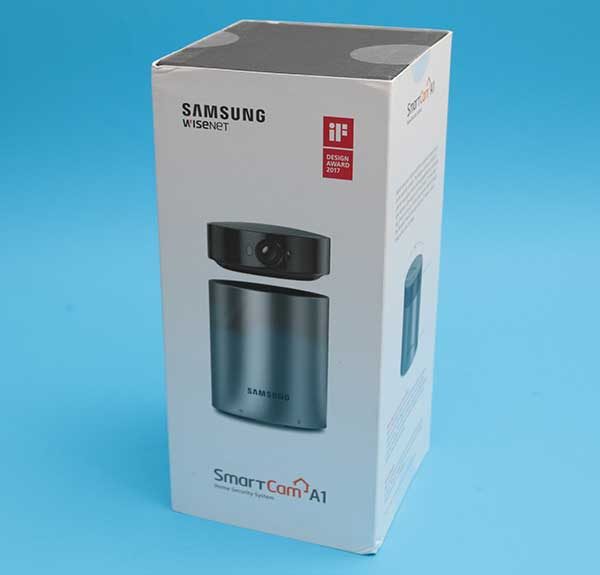
Samsung Wisenet SmartCam A1 home security system review

There are several considerations to keep in mind when shopping for a home security camera. Do you want a cloud-based camera or a camera that saves footage locally? Do you want to be able to live stream via a mobile device? Do you need an expandable system? Do you need a camera that can pan and tilt? Is pricing a major factor in your choice? These are all factors that I keep in mind when shopping and reviewing security cameras like the latest camera that I’ve been testing – the Samsung Wisenet SmartCam A1.

What is it?

The Wisenet SmartCam A1 from Samsung is a low to mid-range priced home security camera that has basic and advanced features.

What’s in the box?
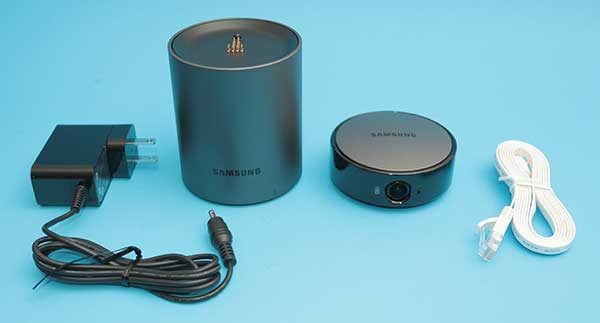
Station Hub
SmartCam A1 camera
Power adapter
Ethernet cable
Quick start guide

Design and features
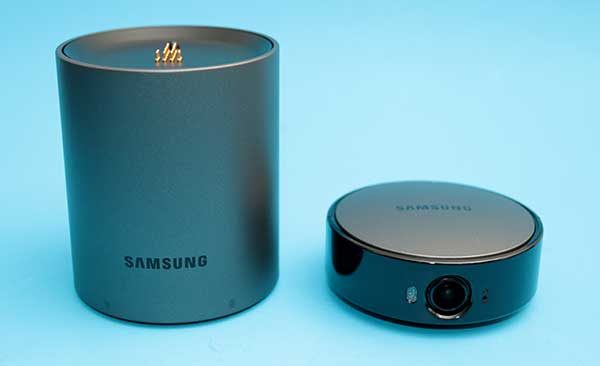
The SmartCam A1 has a unique design that includes the Station Hub unit with a removable 350° panning wireless camera that contains its own rechargeable battery.
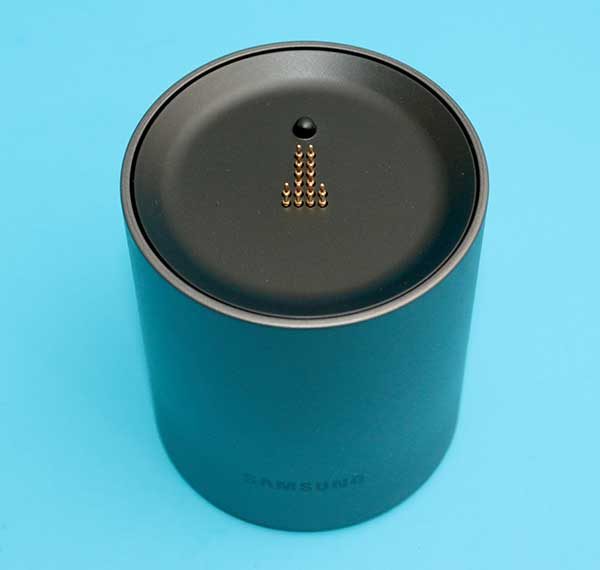
A set of spring loaded pins on the top of the hub provide power and connectivity to the camera when it is docked on top of the hub.
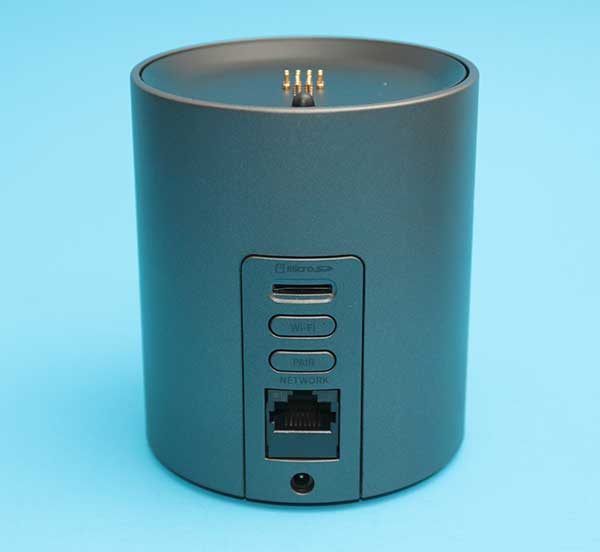
On the back of the Station Hub, you’ll find a microSD card slot which is used to save continuous camera footage. Below the card slot is a WiFi direct button, a pairing button, an Ethernet port and a power port.
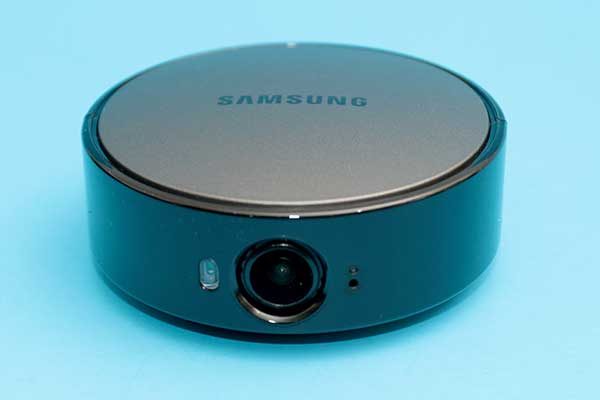
The camera is shaped like a hockey puck. It has a 130° Ultra-Wide Angle lens with a status LED and microphone on the right side and a motion sensor on the left side. 

On the bottom of the camera is a pairing button, on / off switch, a set of electrical contacts for the Station Hub, and a threaded tripod socket.
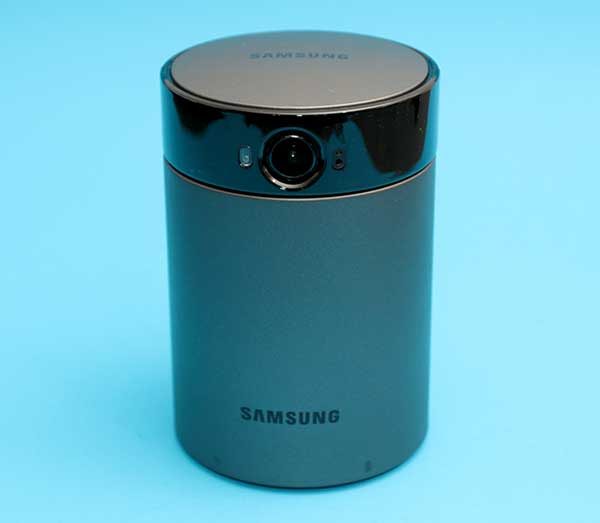
The bottom front edge of the Station Hub has two status LEDs. The LED on the left provides booting status and the LED on the right provides WiFi connectivity status.

The camera attaches to the top of the Station Hub with magnets but can be removed and placed anywhere inside your home for up to 3 hours of wireless surveillance.

The top of the hub can rotate which gives the SmartCam A1 the ability to pan 350 degrees. You can do this manually, or the app can automatically track subjects when it detects motion.

Setup

Setting up and configuring the SmartCam A1 using the iOS and Android SmartCam app is an easy step-by-step process.

After installing the app and creating an account, you have to power on the Station Hub and the connected camera by making sure the power switch on the bottom of the camera is in the on position. You can then connect the Station Hub to your wireless router using the included Ethernet cable, or you can finish the setup using WiFi.


After the camera is working, you can customise the settings for motion, audio detection, and auto tracking. You can create a schedule for the times and days when you want the camera to automatically monitor for motion.
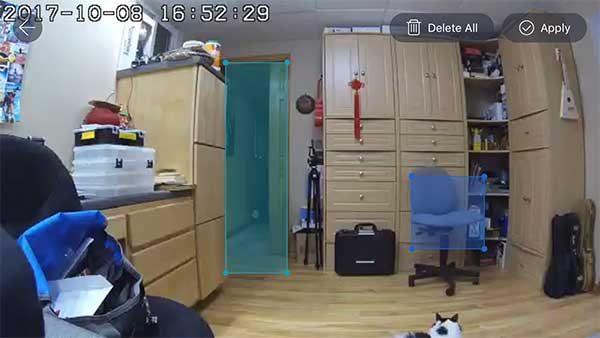
You can also set specific trigger areas to monitor for motion only in those areas. For example, in the image above, you can see that I have set trigger zones for the doorway and the chair.


Buttons in the app will allow you to arm and disarm all or individual cameras.

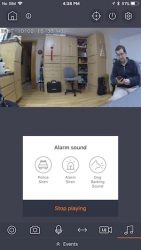
Other features include two-way audio and playing alarm sounds through the camera. You can also use the app to view past events and any past point in time that has been recorded on a microSD card (not included).
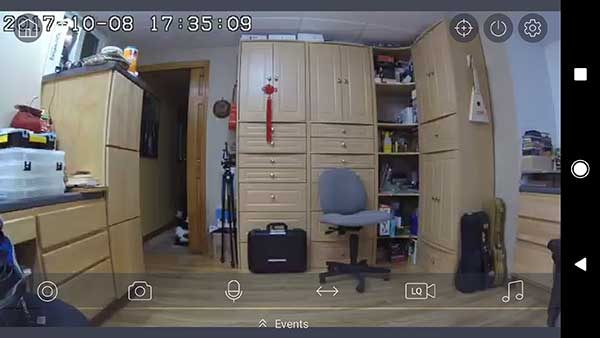
The picture quality of this home security camera is clear and sharp, but there is some fisheye warp on the edges as you can see from the image above.
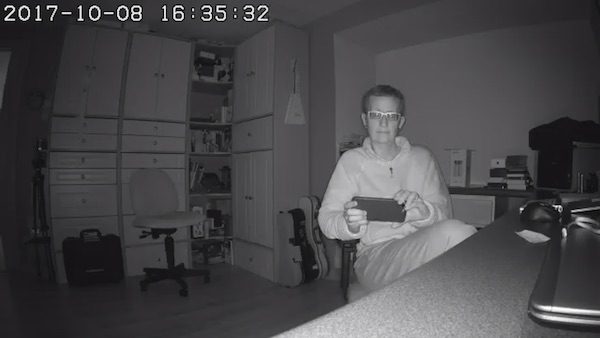
The SmartCam A1 also has decent night vision.

When the SmartCam A1 detects motion or audio, it will send a notification to your mobile device or an email if you have configured that option. Be aware that the SmartCam A1 is almost too sensitive when it comes to detecting motion. Even when set to the lowest sensitivity setting, it will detect the smallest movement which caused my phone to constantly ping with a new notification. It got so annoying that I disarmed the camera.
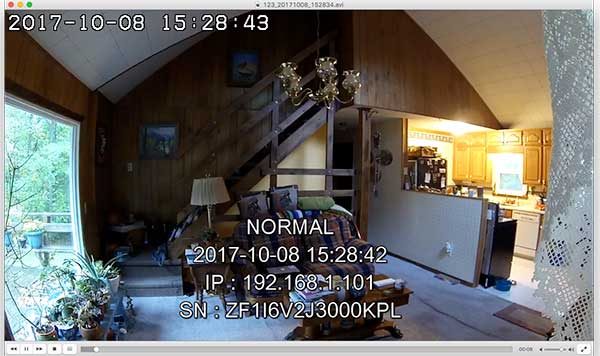
As mentioned above, the SmartCam A1 records continuous video footage to a microSD card. You can view that footage through the SmartCam app or you can remove the microSD card and view the footage on your Mac or PC.

I did run into a problem trying to view the footage on my MacBook. The video files are saved as .AVI files on the microSD card. These files should be viewable using QuickTime, but I received an error each time I tried to view them so I tried VLC media player. The videos play using that app, but they have informational text that is overlayed over the video for the entire clip. Note that you don’t see this textual overlay when you view the same footage through the SmartCam mobile app.

I think the best feature of the SmartCam is the auto tracking feature which will follow the subject in the viewable area when motion is detected. See an example below.

It is a little creepy when you notice that the camera is following you around the room, but it’s a pretty handy feature.

Final thoughts

I’ve been using the Samsung Wisenet SmartCam A1 Home Security camera system for several weeks. I really like the auto tracking feature and the ability to pan the camera manually. I also like that there are no cloud storage fees involved because the footage is stored locally. If (hopefully when) Samsung can fix the motion detection sensitivity issue, the SmartCam A1 security camera system could easily become my new favorite.

Source: The sample for this review was provided by Samsung. Please visit their site for more info and Amazon to order.


Product Information

Price: $179.00
Manufacturer: Samsung
Retailer: Amazon
Pros:
  • Local storage of video footage
  • 350° auto tracking and panning
  • Expandable with more cameras
  • Wireless camera
  • No monthly or yearly cloud storage fees
Cons:
  • Motion detection is too sensitive even at the lowest sensitivity level

Filed in categories: Reviews

Tagged:

Samsung Wisenet SmartCam A1 home security system review originally appeared on The Gadgeteer on October 9, 2017 at 10:00 am.

Note: If you are subscribed to this feed through FeedBurner, please switch to our native feed URL http://the-gadgeteer.com/feed/ in order to ensure continuous delivery.

EZVIZ Mini Trooper wireless indoor / outdoor security camera system review

Choosing from the vast selection of WiFi security cameras that are on the market can be daunting. We’re here to make your job harder by telling you about a brand that you may not be familiar with. The EZVIZ Mini Trooper is an affordable camera system that includes a completely wire-free camera. Let’s take a look.

What is it?

The EZVIZ Mini Trooper is a WiFi security camera that runs on batteries so it can be placed anywhere in or outside your home and does not need to be tethered to a power cable and does not require a cloud-based subscription service.

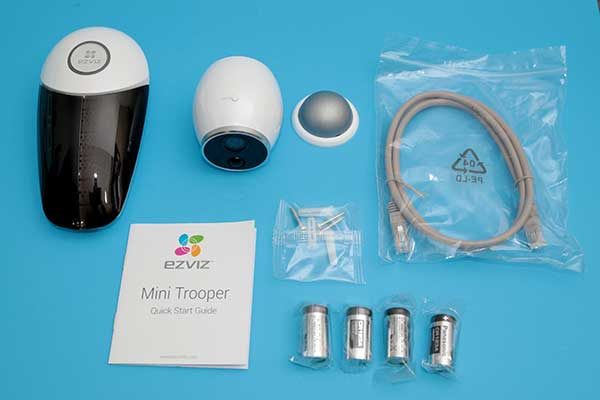
What’s in the box?

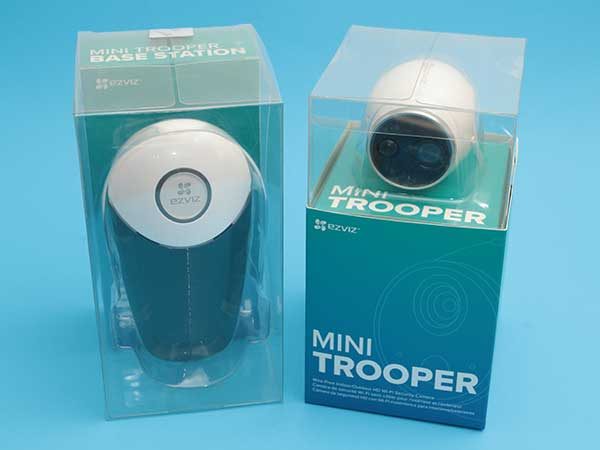
Mini Trooper Base Station
Mini Trooper Wire-Free indoor / outdoor camera
Magnetic base
Hardware
Ethernet cable
4 CR123A Batteries
Quick start guide

Design and features

Mini Trooper camera

The EZVIZ Mini Trooper setup requires both a camera and the base station. Let’s check out the camera first.

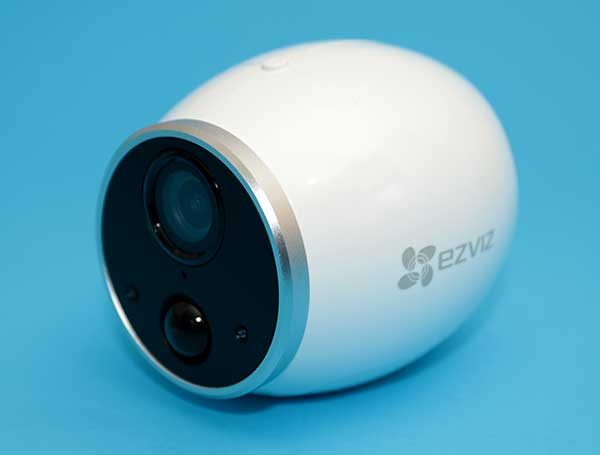
The 720P camera reminds me of an egg in both shape and color. This camera can be used indoors or outdoors as it has an IP65 rating and can stand temps from as low as 14° F to as high as 131° F.

The front of the camera has the lens, a microphone, a photoresistor, LED indicator, and a PIR sensor which measures infrared light radiating from objects.

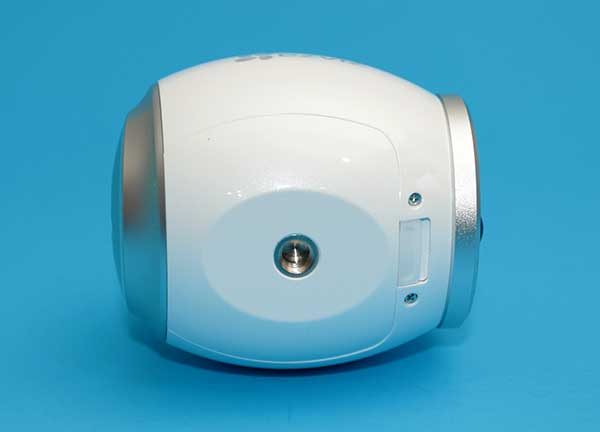
The bottom of the camera has a threaded socket in the battery cover which can be used to connect it to a tripod.

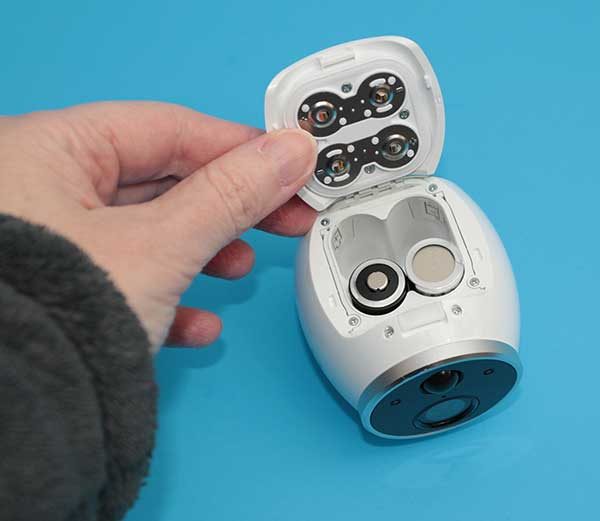
The cover opens to reveal the battery compartment which can hold 4 CR123A batteries. Interestingly enough, the camera can be used with just 2 batteries like you see above. Using all 4 batteries will result in the longest runtime of up to 9 months.

The Mini Trooper camera can sit on a flat surface or you can attach the included magnetic plate to mount it on a wall.

The Base Station

The Base Station is a hub that provides a dedicated connection for up to 6 EZVIZ cameras.

If the EZVIZ Mini Trooper camera looks like an egg, I think the Mini Trooper Base Station looks like a bug.

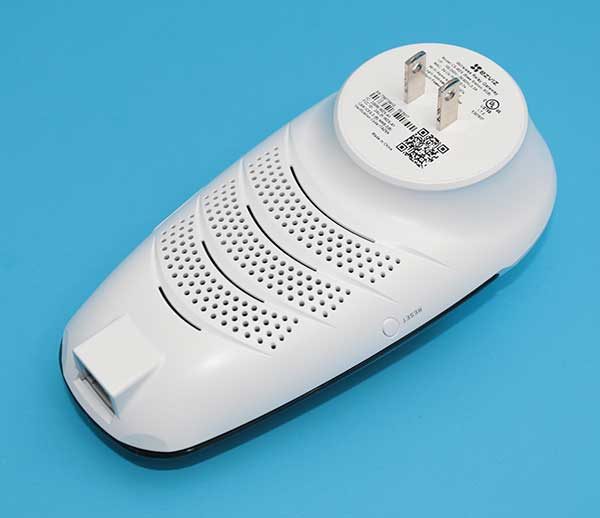
The Base Station has built-in prongs so it can be plugged directly into an outlet. It also has an Ethernet port at the bottom and a reset switch on the side.

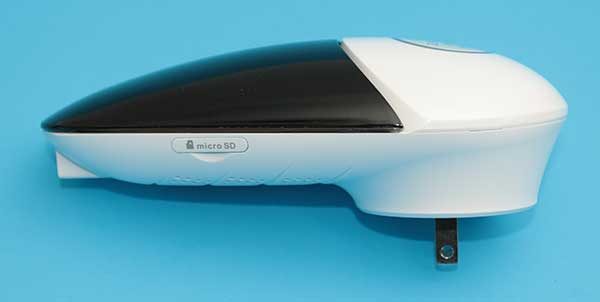
On the opposite side of the base station is a micro SD card slot which can be used to store video clips.

The Base Station’s “wings” are antennas that unfold to enhance the wireless signal between the cameras and the base station.

Setup

Setting up the EZVIZ system is pretty easy if you opt to plug the Base Station into your existing network router using the included Ethernet cable. You can also set up the system wirelessly, but it requires a little extra effort isn’t as straightforward.

All you really need to do is install the EZVIZ app on your iOS or Android device and follow the prompts that will tell you to plug the Base Station into the wall, load at least 2 batteries into the Mini Trooper camera, and place the camera within 300ft of the Base Station.

EZVIZ application


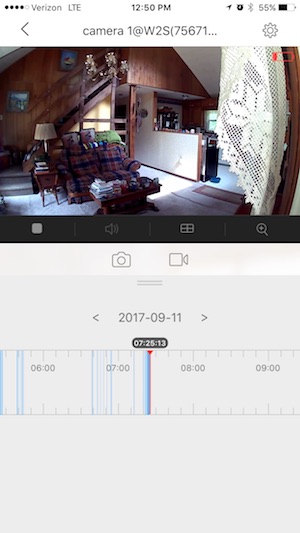
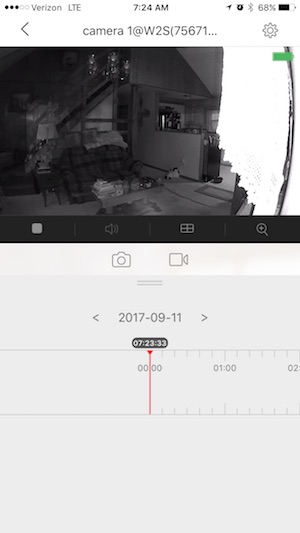
The EZVIZ application has a simple user interface that shows a live view of the camera with a battery indicator at the top and a timeline of detected activity at the bottom.

A messages screen shows thumbnails of events that were captured by the PIR sensor. Clicking a thumbnail will show the motion detection video if a micro SD card has been inserted into the slot in the Base Station.

Picture and video quality are decent given that the camera has 720P resolution with a 116 ° wide-angle lens and up to 25’ of night vision.


The EZVIZ Mini Trooper security camera system is really easy to use because it has a basic set of features. And that’s the problem with this system, it’s a bit too basic. It is missing some key features like the ability to manually turn off night vision, two-way audio communication, and the ability to set motion trigger areas.

At first, I noticed that the motion detection feature was very hit and miss. I could walk right past the camera waving my arms and it would not notify me of detecting motion. I finally realized it was because I was pointing the camera through a window and the camera’s PIR sensor will not work through glass. Placing the camera outside fixed that issue.

Final thoughts

There are quite a few things to like about the EZVIZ Mini Trooper security camera system:

  • Wireless camera that can be used indoors OR outdoors
  • Does not require a cloud storage subscription
  • Relatively easy to setup

But then there are things missing or lacking like:

  • Motion trigger areas
  • 24/7 recording to microSD card
  • Night vision toggle
  • Night vision is pretty weak
  • Can’t detect motion through glass

If you’ve already used other security camera systems that have some of the features missing from the Mini Trooper, this system will leave you wanting more. However, the EZVIZ Mini Trooper security camera system does make a decent first-time security camera system because it’s relatively inexpensive, doesn’t require monthly payments, and is pretty easy to set up.

Source: The sample for this review was provided by EZVIZ. Please visit their site for more info and Amazon to order.


Product Information

Price: $149.99
Manufacturer: EZVIZ
Retailer: Amazon
Pros:
  • Easy to setup
  • Completely wireless camera
  • Does not require a cloud storage subscription
Cons:
  • Have to use a base station
  • No motion trigger areas
  • Can't toggle night vision manually
  • PIR sensor doesn't detect motion through glass

Filed in categories: Reviews

Tagged:

EZVIZ Mini Trooper wireless indoor / outdoor security camera system review originally appeared on The Gadgeteer on September 29, 2017 at 9:00 am.

Note: If you are subscribed to this feed through FeedBurner, please switch to our native feed URL http://the-gadgeteer.com/feed/ in order to ensure continuous delivery.
iseeBell Video Doorbell Security Cam review

In all of my reviews, I try to be as fair as I can. Every product has its good and bad points and I try to point them out. No product—no matter how good it is—is perfect. At first glance, my review of the iseeBell Video Doorbell Security Cam may not seem fair—and maybe it isn’t. But that doesn’t mean I don’t like it. Let me explain.

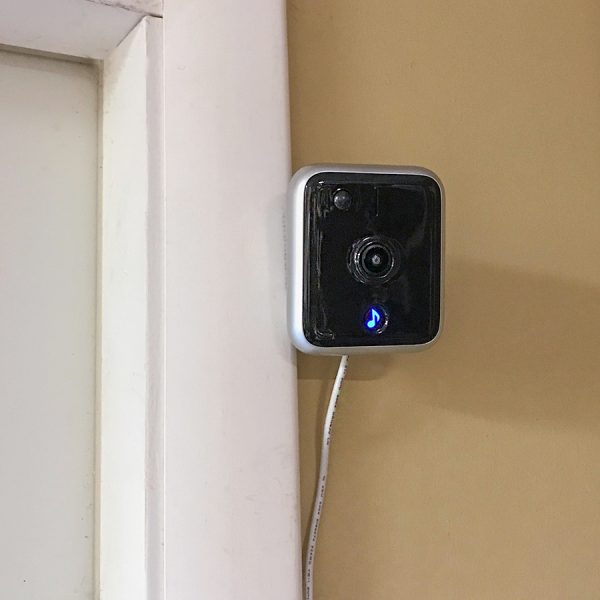
My intended use for the iseeBell video doorbell was just that—a video doorbell. The setup is advertised as super easy: You remove your original doorbell and then use its existing wiring to connect. All you need are some minor drilling and mounting skills (iseeBell even supplies the proper tools and instructions). But I had forgotten one (not so) minor detail: About 6 years ago, we switched to a wireless battery doorbell. After removing the previous (wired) doorbell, I shoved all the wiring inside the wall and then stuccoed over the hole. It seemed like a smart idea at the time! As a result, I could not use and review the iseeBell as it was intended. However …

Even though I no longer could give the iseeBell a fair review as a video doorbell, they also advertise it as an indoor/outdoor security camera. After considering this, I realized that I still had a great use for it as a security camera. That’s fair, right?

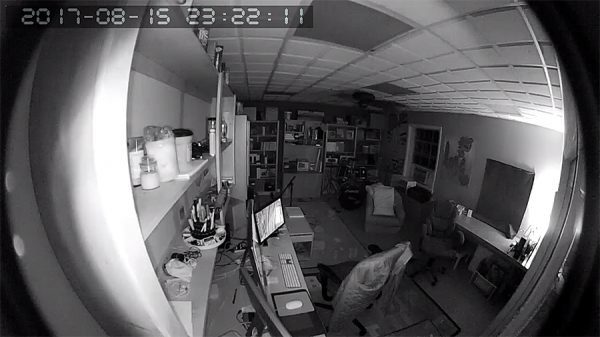
I live on 2 acres in Florida and my large backyard has a separate studio building where I do freelance graphic design and also write about and photograph the products I review. Needless to say, I have some expensive stuff in the studio. Up until now, the studio has never had any security monitoring. We have large and very protective dogs in our house, but I worried about the studio because it’s 100 feet away and out of reach of the dogs. With the iseeBell, I now have a chance to monitor the building 24/7. So how does it work? Let’s see.

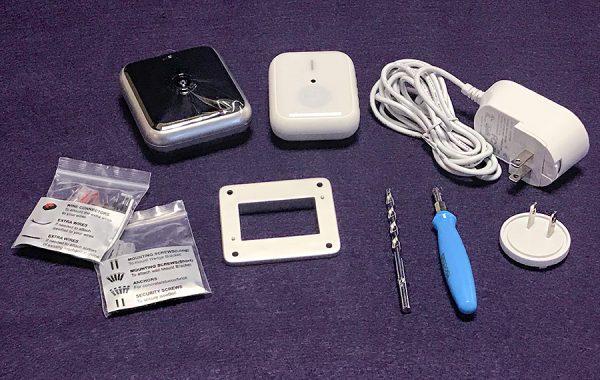
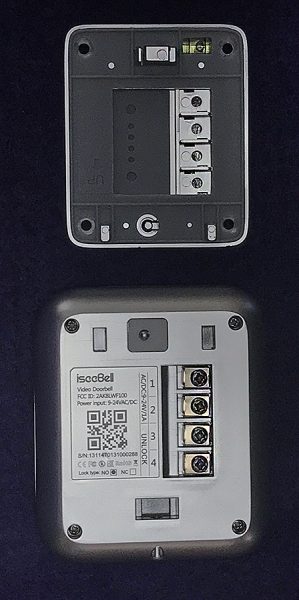
When you open the box of the iseeBell, you are presented with a lot of stuff which can seem overwhelming. However, you generally won’t need all of it. iseeBell has done a good job of accounting for different installation setups you may have. The setup & installation guide is straightforward and easy to follow with clear directions and illustrations. Granted, if you have no experience with home repair tools, you may be better off asking for help. The Guide lists everything included in the box and what kind of wifi you need. A 2.4Ghz network is required, but since I have an Apple dual-band router, I was good to go. One caveat is that your wifi router must either be strong enough or physically close enough to the iseeBell to work properly.

As I said earlier, the iseeBell will run on existing doorbell wires (if you have them). The guide uses step-by-step instructions. Yeah, I know, I didn’t actually install it as a doorbell—and that’s the unfair part of this review. But trust me, I’ve installed enough stuff to know that these are easy instructions to follow.

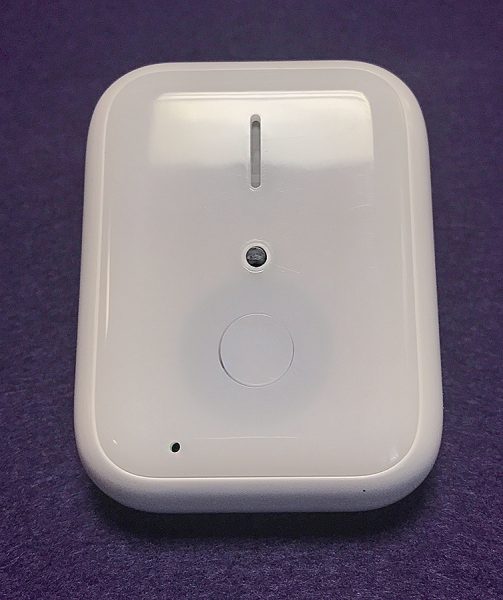
Also included in the box is a separate indoor wireless door chime (must be plugged in), which I haven’t decided if I’m going to use or not. Why? Because the iseeBell comes with a downloadable app (iOS and Android) that works just as well for my use.

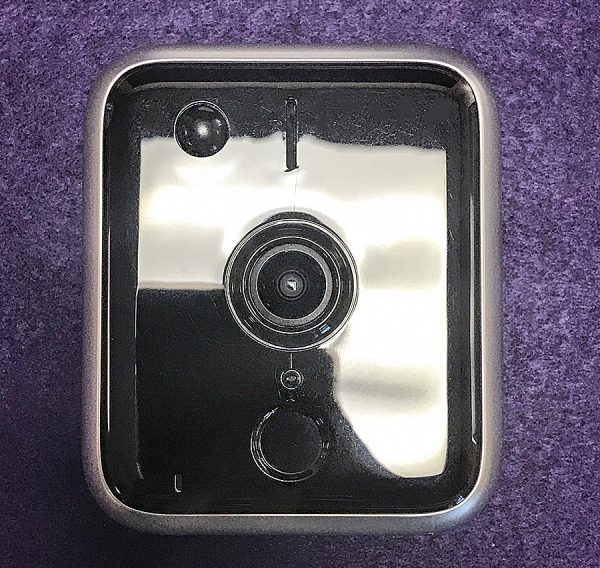
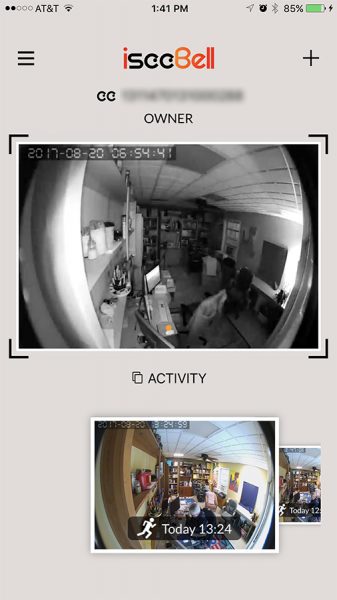
The iseeBell unit itself has a 720p HD camera that works well in low light, although the video loses some detail and becomes monochromatic. The camera is wide-angle which captures a great peripheral view. It does distort in a fish-eye effect around the edges, though. Using the app, you can you see what the iseeBell sees. It also records and stores photos and video on your phone and/or in iseeBell’s cloud. This cloud service is an extra cost option—$2/month or $20/year. While that’s not expensive, it’s worth noting. You get a free month trial with purchase. iseeBell claims your photos and videos are protected by bank-grade security. Strangely, you can only purchase the cloud service through the iseeBell app. There is no mention of it on their web site.

The iseeBell easily connects to a home’s existing wifi via the app. There’s also a motion detector that works a little too well. More on that later. The unit is weatherproof, so rain shouldn’t be a concern.

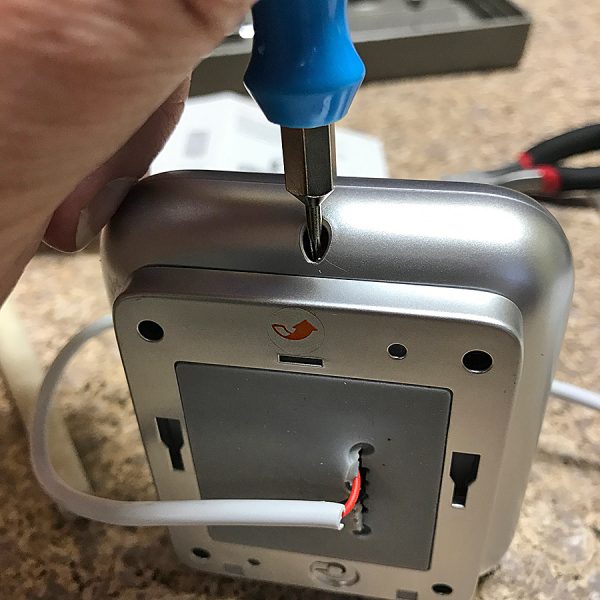
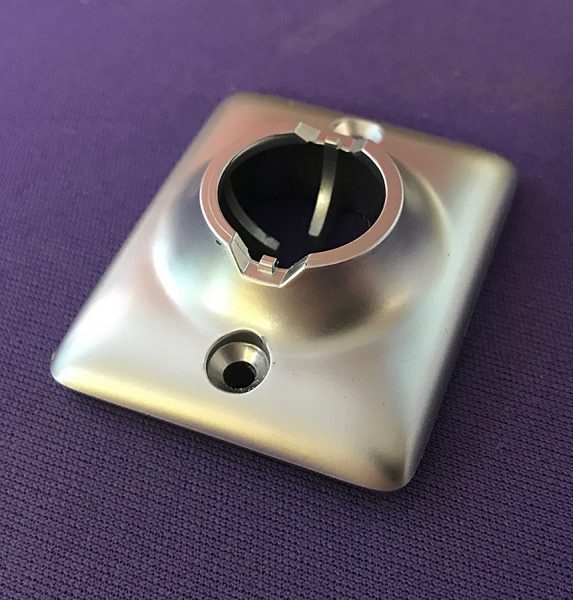
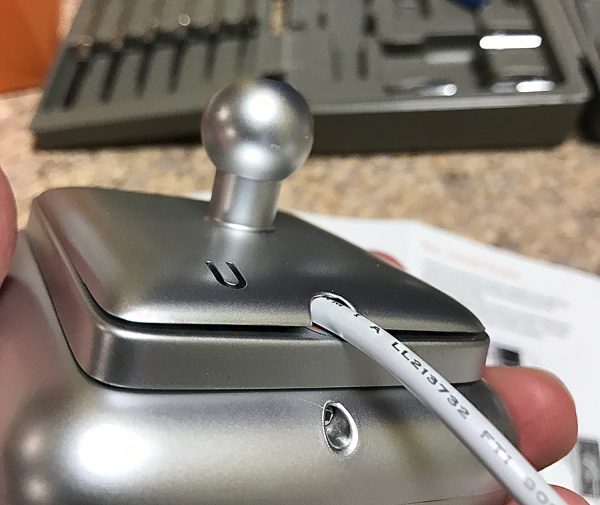
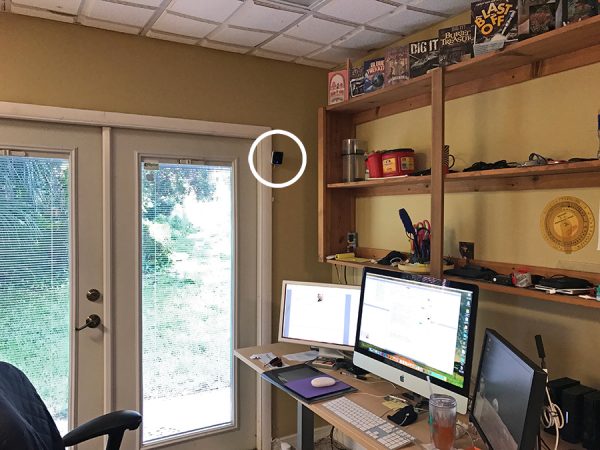
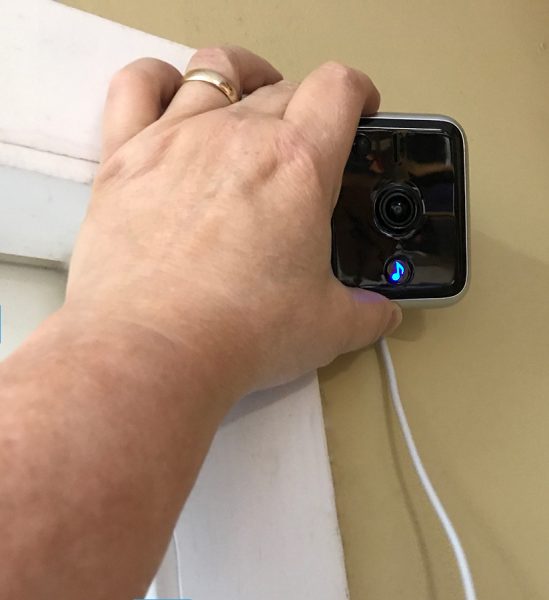
For my use, I mounted the iseeBell just inside the door of my studio a little above eye level. I used some of the supplied screws but did not need the included masonry drill bit as this was an indoor installation. All I had to do was decide where I wanted the camera placed and drill the screws into the wall. iseeBell offers an optional adjustable wall mount that allows the camera to be swiveled at various angles for a better view. I highly recommend this option—it acts as a mounting base and allows you to point the camera practically in any direction.

I ran into two issues with the wiring on the iseeBell. Since I’m using it indoors and not as a doorbell, it needs to be plugged into an outlet for power. I wanted to mount the camera up at ceiling height, but the cord was a few inches too short to do this, so it had to be lower than I preferred.

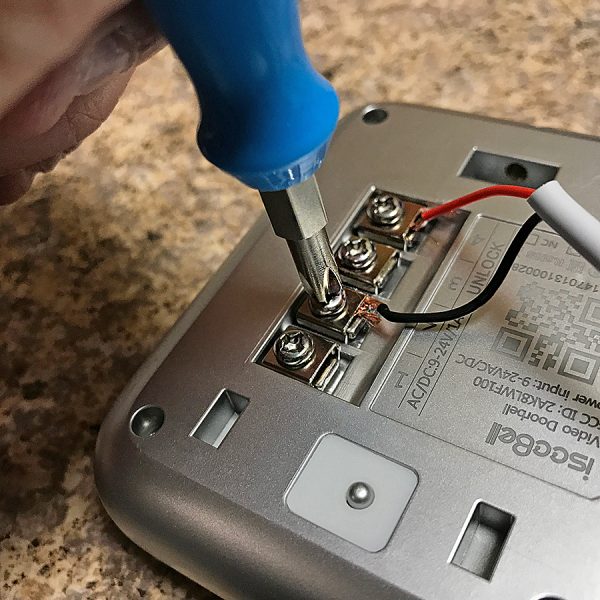
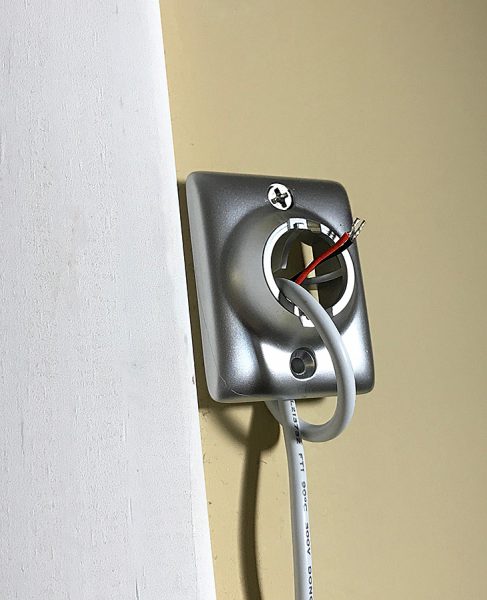
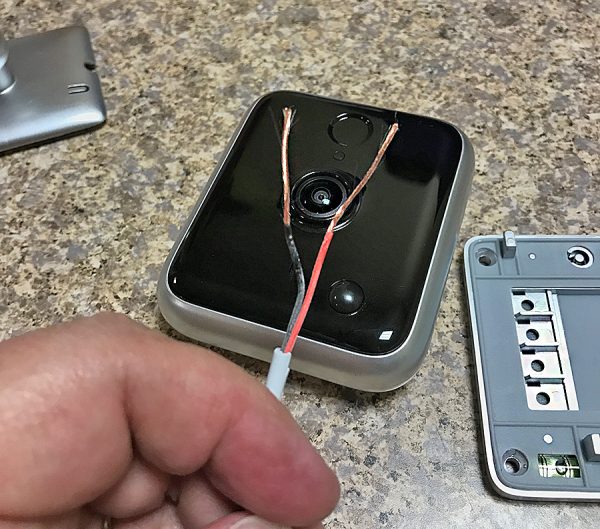
The white cord was a bit too thick to fit into the slot at the rear of the camera, so I had to strip some of the wiring to expose more of the black and red wiring from inside the cord. It was not easy, but I’ve stripped wiring before, so I knew what I was doing. However, I could picture some people pulling their hair out if they ran into a similar problem as I did. Note that doorbell users won’t have this issue since the iseeBell won’t need the power cord.

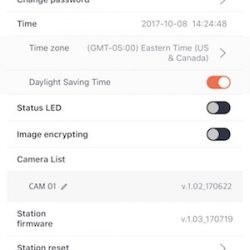
Once I got the wiring taken care of, all went well. I opened the iOS app, set up my account and linked the app to the camera via my wifi network. With that done, I could see a live image of myself in the apps video frame. There’s a bit of a lag, but not enough to matter. As I said earlier, The image is wide angle, and since the camera is above eye level, there is little opportunity for a close-up of a face. But the image can easily be zoomed in even while live.

Audio quality was so-so. it was somewhat distorted and difficult to understand when watching the video. There’s also a built-in speaker allowing you to talk to the person/intruder if necessary. The speaker volume was a bit weak and should have been louder.

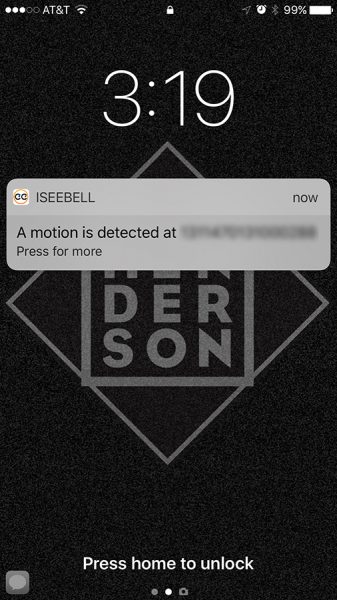
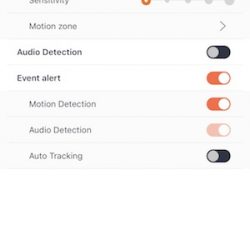
After setting up the motion detector in the app, I noticed that it works really well … as in really well. Whenever I stretch or get up from my chair I get an audible beep and a motion warning shows up on my iPhone. It’s becoming a bit comical, but at least it works! And since I’m only concerned when there should be no one in the studio, I appreciate its sensitivity. Incidentally, the warnings can be controlled through the iPhone’s Notifications or Android’s Sound and Notification settings.

All in all, I like the iseeBell Video Doorbell Security Cam, even though I’m not using it as it was intended. It does what it’s advertised to do and does it well. I now have added peace-of-mind if anyone should enter my studio (invited or not) and I will instantly know about it.

I’m now wondering if it’s time to get my doorbell rewired?

The iseeBell Video Doorbell Security Cam sells for $149.95 US.

Source: The sample for this review was provided by iseeBell. Please visit www.iseebell.com for more information and Amazon to order.


Product Information

Price: $149.95 US
Manufacturer: iseeBell
Retailer: Amazon
Pros:
  • Easy to install and setup
  • Good camera and video quality
  • Sensitive motion detector
  • Smartphone notifications
  • Cloud service available
Cons:
  • Wiring can be tricky if using supplied power cord with optional wall mount
  • Audio quality could be better

Filed in categories: Reviews

Tagged: ,

iseeBell Video Doorbell Security Cam review originally appeared on The Gadgeteer on August 22, 2017 at 10:00 am.

Note: If you are subscribed to this feed through FeedBurner, please switch to our native feed URL http://the-gadgeteer.com/feed/ in order to ensure continuous delivery.
ANNKE 1080P lite security system DVR review

I think I’ve indicated before that I’m a bit paranoid when it comes to home security. I have several cameras in and outside my house, and I’m always considering adding more. Not only are the cameras great for deterring burglars, but they often help find toys my children lost.

Recently I volunteered to review a DVR security system by Annke. It’s a four camera indoor/outdoor system with a multitude of features.

In the box

  • Annke DVR
  • 4 x 720P indoor/outdoor cameras – wired
  • 4 x video cables (60 ft)
  • 2 x power adapters
  • Power adapter “splitter” for cameras
  • USB mouse
  • 4 x anchors for mounting cameras
  • Quick user manual
  • Software CD
  • 2 x door/window stickers

Specifications

  • Analog video input – 8-ch;BNC interface (1.0Vp-p, 75 Ω)
  • HD TVI input – 720P, 1080P
  • AHD input – Support
  • CVBS input – Support
  • IP video input – 2-ch;Up to 960p resolution
  • Audio input/Two-way audio input – 1-ch;RCA (2.0 Vp-p, 1 KΩ)
  • HDMI/VGA output – 1-ch, 1920 × 1080/60Hz,1280 × 1024/60Hz, 1280 × 720/60Hz, 1024 × 768/60Hz
  • Audio output – 1-ch, RCA (Linear, 1 KΩ)
  • Video compression standard – H.264+/H.264
  • Encoding resolution & Frame rate – 1080p lite/720p: 12 fps;960H:25fps(P)/30fps(N)
  • Video bitrate – 32 Kbps to 4 Mbps
  • Stream type – Video & Audio/Video
  • Dual-stream – Support
  • Audio compression standard – G.711u
  • Audio bitrate – 64 Kbps
  • Synchronous playback – 2-ch
  • Remote connections – 128
  • Network protocols – TCP/IP, PPPoE, DHCP, Hik-connect Cloud P2P, DNS, DDNS, NTP, SADP, SMTP, NFS, iSCSI, UPnP™, HTTPS
  • SATA – 1 SATA interface
  • Capacity – Up to 6 TB capacity for each disk
  • Network interface – 1; RJ-45 10 M/100 Mbps self-adaptive Ethernet interface
  • USB interface – Rear panel: 2 × USB 2.0
  • Power supply – 12 VDC
  • Consumption(without hard disks) – ≤ 12W
  • Working temperature – 14ºF to 131ºF
  • Working humidity – 5V DC±10%
  • Power Consumption – 10% to 90%
  • Chassis – 1U chassis
  • Dimensions(W × D × H) – 10.2 × 8.7 × 1.8 inch
  • Weight(without hard disks) – ≤ 2.2 lb

Design

The DVR looks a bit like a cable set-top box without an LCD display.


The front of the DVR has LED indicators for power status, hard drive activity, and network activity. The rear of the DVR contains all of its ports. The top of the DVR is plain while the bottom contains the model number, serial number, and external access code.

The system also includes four 720p cameras.


Each camera is equipped with infrared LEDs, providing 66 feet of night vision.

Additionally, the cameras have an IP66 ingress rating, meaning they are rain and dustproof.

The remainder of the system is primarily composed of cables and power adapters.


I can’t imagine any DVR system being completely inconspicuous; however, this system does a fine job blending into the background. The DVR would blend in with any entertainment center containing your everyday media devices, and the cameras could be tucked away into just about any corner.

Setup

The system isn’t particularly difficult to set up; however, the included user manual is of no help. The manual immediately skips from describing the LEDs and ports on the DVR, to explaining how to install a hard drive; there is absolutely no mention of how to connect the cameras or power adapters. Fortunately, if you’re somewhat tech-literate, the process is pretty easy to figure out.


First you attach the plugs from “cable end A” into the plugs at the end of the camera. You then plug the blue end of “cable end B” into one of the video ports on the rear of the DVR. Next you plug the red end of “cable end B” into one of the power adapter splitters. You then plug the splitter into one of the power adapters.

Once you’ve installed the cameras you can plug the DVR into a HDTV or computer monitor. You then attach the system to your router, plug in the remaining power adapter, and plug the mouse into the USB port.

Once all the hardware is set up, you can begin the on-screen setup; this is a pretty simple process.


The first time you turn on the system you will be asked to activate it. This requires nothing more than choosing an administrative password for the system. You next choose an unlock pattern in order to avoid having to reenter a password repeatedly. Finally, you go through the setup wizard.

Once you’ve completed the wizard, the DVR system is ready to operate. For the most basic use, this is all you need to do. I’ll discuss more advanced use later.

Performance

Although I’ve never had a DVR system for my home, I’ve utilized and interacted with them countless times at work. I was very pleased with how well the Annke system worked compared to others I’ve seen.

The system was easy to use and the picture quality was generally very good; although, in low light situations the image was a bit darker than I would like.

Truthfully, the basic use of the DVR system is so simple there isn’t a lot to write about. You install it, go through the setup wizard, and it immediately starts streaming a live view of things.

It works wonderfully, and that’s really all there is to say.

Annke App

Not only can the system be viewed through your TV or computer monitor, but you can also access it through Annke’s app.

The app is available for Android and iOS.


After you download and install the app, you’ll go through an easy setup wizard where you’ll choose your location, set up your mobile account, and connect your system.

After you’ve completed the wizard, you should have access to your live view.


As with the basic use of the DVR, the mobile app is wonderfully simple to use.

Advanced Use

So here’s the thing, this DVR would be great for a basic home surveillance system, but it also has a ton of features that would make it great for protecting a business or any other institution. In fact, it has so many features that I couldn’t have possibly gotten around to trying them all.

In order to take advantage of all the extra features, you’re going to want to install a hard drive in the DVR. (according to its Amazon listing, the system does not include a hard drive; however, the sample they sent me included a 1 TB hard drive.)

Once a hard drive is installed you can choose from several different recording features.

You can set the DVR to record continuously or only record during specific hours on specific days.

You can choose to have it record when motion is detected or when specific types of motion, AKA “events”, occur.

Examples of events are as follows: face detection/face capture, line crossing detection, people gathering detection, fast moving detection, parking detection, unattended baggage detection, etc.

Admittedly, I didn’t come close to testing all the different triggers; however, I did set a motion alarm and it appeared to work well, consistently.

As with recording, there are a handful of different ways to playback events.

You can choose to playback an event by time period, by event type, by user created tags, by using smart search to analyze video footage, and by going through system logs.

If the DVR is connected to a network there are another dozen options to consider, including connecting to a Network Time Protocol sever, configuring email settings for email alerts, monitoring network traffic, etc.

This is just scratching the surface; you can set on-screen labels, place a black privacy box over certain areas, run hard drive diagnostics, and create backup files.

The amount of features available is borderline overwhelming, but in a good way.

My only issue with all the features was the lack of instruction in the included user manual. While some features were covered, most didn’t appear to be. I was able to locate a 110 page advanced user manual on Annke’s website; however, based on the diagrams inside, it wasn’t the manual for the exact model I was reviewing.

Conclusion

I’m impressed with the Annke DVR; it can function as a basic home surveillance system or work as a full featured security DVR.

The system provides good video quality and an abundance of features.

Everything is fairly easy to use and set up, but you have to do some digging on Annke’s website to get the correct information.

All in all, for $109.99, I’m not sure you’re going to find a better deal.

Source: The sample for this review was provided by Annke. Please visit their site for more information and Amazon to order.


Product Information

Price: $109.99
Manufacturer: Annke
Retailer: Amazon
Requirements:
  • An extra computer monitor or TV with HDMI to display video footage
  • Android, iOS, or Windows device for certain features
Pros:
  • Simple set up despite lack of directions
  • Good video quality
  • Tons of features
Cons:
  • Included user manual not always useful
  • Footage can be dark in low light

Filed in categories: Reviews

Tagged: ,

ANNKE 1080P lite security system DVR review originally appeared on The Gadgeteer on July 17, 2017 at 3:20 pm.

Note: If you are subscribed to this feed through FeedBurner, please switch to our native feed URL http://the-gadgeteer.com/feed/ in order to ensure continuous delivery.

Foscam FI9961EP IP security camera review

Over the past year or so, I’ve gradually been adding to my home automation and security system. Being a Gadgeteer, I’ve enjoyed implementing different cameras into my system and jumped at the chance to review Foscam’s FI996EP Security Camera. 

The camera arrived in its own nest of closed-cell foam, accompanied by an Ethernet cable and power adapter. The power adapter is somewhat redundant because this camera can be powered by PoE, or Power over Ethernet if your switch is so equipped. Power supply current is 1 Amp.  I used the power supply to configure the camera but set it aside, preferring the streamlined convenience of PoE.

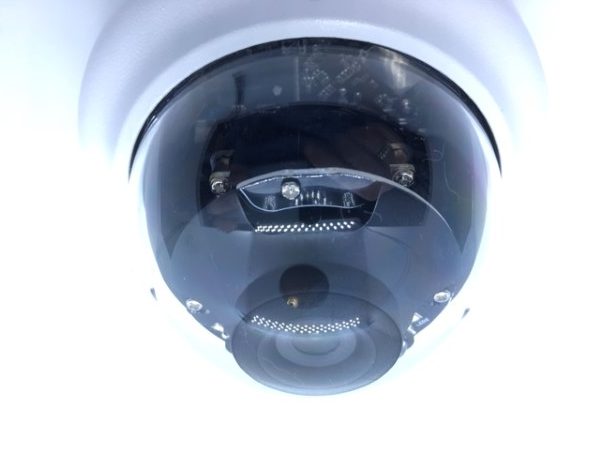
Foscam has a reputation for making sturdy, reliable cameras. The FI996EP is no exception. The housing on this camera is virtually bulletproof. It’s quite heavy, and entirely metal, with a clear plastic dome to protect the camera, SD card, and infrared electronics from the elements. I’m not exaggerating when I say this camera is built like a tank.

Triple hex-head screws hold the cover in place. It’s not included, so you may have to rummage around your tool box to crack open this egg. Once opened, the camera can be pivoted from straight down to about 70° inclination. Clearly, designed to be mounted on a ceiling and aimed in the direction of naughtiness, um… interest.

I downloaded the Foscam App using the instructions from the installation manual, applied for an account, plugged the camera into an Ethernet port, applied power, and scanned the QR code on the camera base to add the camera to the app. All took less than five minutes. With very little lag, the first images popped onto my screen. Images were clear and crisp. Switching from full color to black-and-white infrared “night vision” was virtually instantaneous.  The FI996EP sports an SD card slot to capture images, or you can opt for paid cloud storage. The camera can also be accessed through web browsers using Foscam’s “Equipment Browser” software, but I will primarily use the iOS app.

A five-headed cord sprouts from the camera’s base allowing access to the Ethernet port, reset switch, power jack, and composite video, should there be a need to connect to an existing security system or DVR.

I found this camera to be a capable addition to my home security system and I had no trouble with setup or use, but it should be noted, this camera does not have wireless capabilities and requires wired Ethernet for IP connectivity.  This may be a deal-breaker for some, but the ruggedness, ease of use and image quality shouldn’t be overlooked.
Source: The sample for this review was provided by Foscam. Please visit their site for more info and Amazon to order.


Product Information

Price: $119.99
Manufacturer: Foscam
Retailer: Amazon
Pros:
  • Sturdy, Sturdy, Sturdy
  • SD card slot
  • Automatic infrared "night vision"
Cons:
  • Expensive
  • Requires wired Ethernet for IP connectivity

Filed in categories: Reviews

Tagged:

Foscam FI9961EP IP security camera review originally appeared on on July 7, 2017 at 8:44 am.

Note: If you are subscribed to this feed through FeedBurner, please switch to our native feed URL http://the-gadgeteer.com/feed/ in order to ensure continuous delivery.