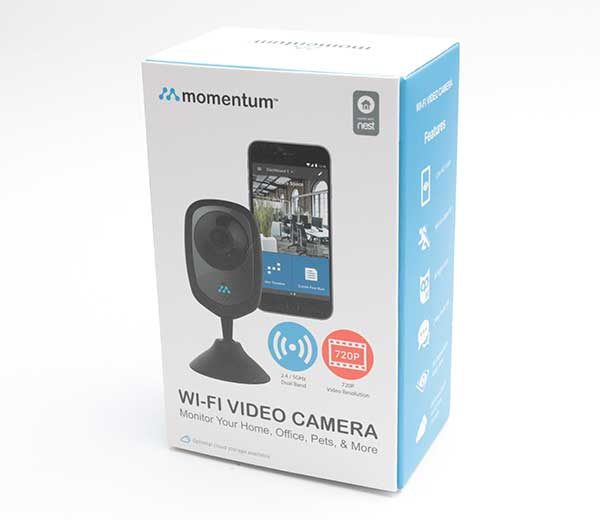
Momentum Wi-Fi Video Camera review

There are so many home security cameras on the market, that it can be frustrating to figure out which one to choose. Do you go with a tried and true brand like Nest or DLink, or do you try a less expensive brand like the Momentum Wi-Fi Video Camera which I’m going to tell you about today? Let’s find out.

What is it?

Momentum is a WiFi home security camera with the following features:

Two-way talk through the mobile app
720p HD resolution (720×1280)
110-degree viewing angle
Built-in night vision
Dual band Wi-Fi support (2.4GHz and 5.0GHz)
Integration with NEST and future home security products from Momentum *

*This is according to the Momentum site. At this time I can’t find any way to implement this integration.

What’s in the box?

Momentum 720P wireless camera
AC adapter
micro USB charging cable
Mounting hardware
Manual
Quick start guide

Design and features

The Momentum WiFi Video Camera has a black and brushed silver plastic case.

On the front is the 720P camera lens, a status LED, and a microphone for two-way communication.
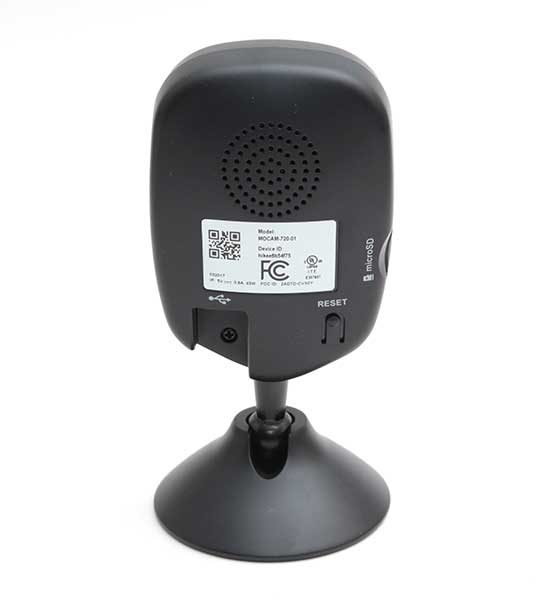
On the back of the camera is a speaker, a micro USB connection for the included power cable, and a reset button.

On one side of the camera is a micro SD card slot. A memory card is not included with the camera, but it will work with cards that have up to 128GB capacity.

The camera’s base is magnetic. It will stick to any flat steel surface or you can use the included steel plate to attach the camera to a wall or ceiling.

The angle of the camera can be adjusted by pivoting it in the base.

Setup

To setup the Momentum camera, you install the iOS or Android app on your mobile device. I did my testing with an LG G6 and an iPhone 7 Plus.

The application then guides you step by step to add the camera. Basically, you just plug in the camera, point the phone’s camera at the QR code on the back and it detects your WiFi network. Then you just wait for it to complete the setup.

I had a few glitches during the initial setup where the app detected the camera but never finished setting it up. Note that I was setting up the Momentum camera within 3.5 feet from my wireless rounder and phone. After a couple of reboots, it finally worked.

Usage


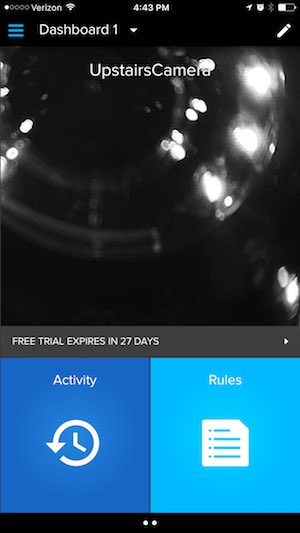
The user interface for the Momentum app has a tiled layout that is easy enough to navigate. There’s a large tile for the camera (it’s not a live view though), a tile/button to go into the activity list and a tile/button to go into the rules setup.

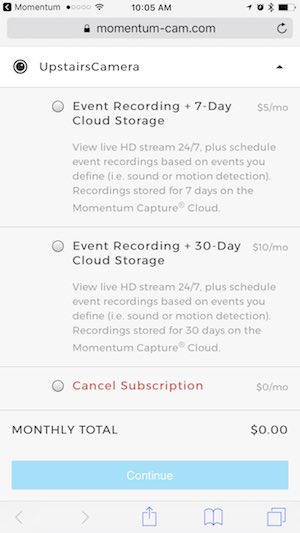
Note that the camera comes with a 30 day free trial of the Momentum cloud service, but the service is not mandatory. Without the service, the camera can save photos and manually captured videos to the micro SD card. The camera will not (as far as I can tell) record ALL footage to the micro SD card.

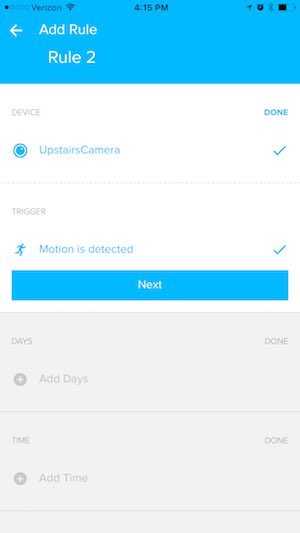
The rules setup is very basic. All you can do is set it to trigger on motion and set the days/times when the triggers will be active. There isn’t a way to set zones or other advanced features that some home security cameras offer.


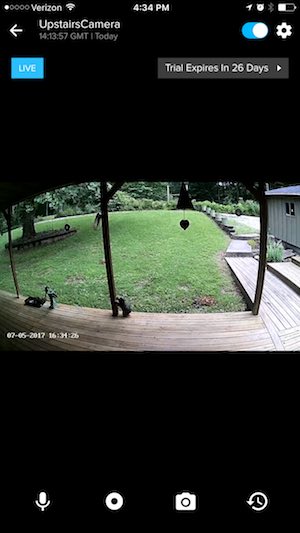
Tapping the camera tile on the app’s dashboard will take you into the live view of the camera which you see above on the left. Below the live view are icons for two-way communication, video recording, camera snapshot, and the activity list. The slider switch at the top of the screen turns the camera on/off.

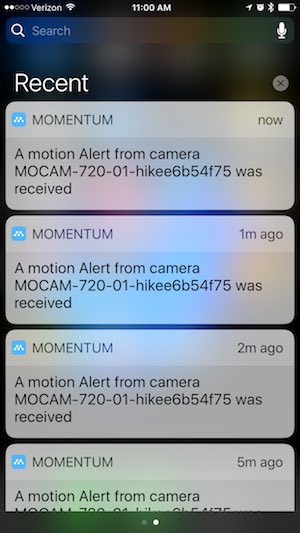
When motion is triggered, you’ll receive a notice on your phone like you see in the image in the middle. This notification does not include a thumbnail of the motion. To see what triggered the notification, you have to go to the activities page which shows a list of all the triggered events (above on the right).

The activities screen is not accurate or updated correctly. It will list some events that happened yesterday under the heading for today. And as you can see, each entry does not always show a thumbnail.

But even worse is the fact that very often, I’ll click on one of the notifications in the list and it will act like it’s going to play the recorded video clip but it’s completely blank. This is one of the most frustrating problems with the Momentum camera, but it’s not the only problem.

Another problem is with the night vision IR. See the image above? That was taken around 8 AM in the morning. It’s a little gloomy outside, but it’s not that dark right?

During the same time, the live view through the Momentum app looks like this. As far as I can tell, there’s no way to deactivate the IR feature or schedule it for only certain times of the day.

Final thoughts

For $49.99 I was hoping that the Momentum Wi-Fi Video Camera would be a good deal, but it turned out to be a dud. It’s fine if all you want to use it for is a live viewer, but if you want to depend on it for motion alerts, you’ll be very disappointed. My advice is to skip this one.

Source: The sample for this review was provided by Momentum. Please visit their site for more info.


Product Information

Price: $49.99
Manufacturer: Momentum
Pros:
  • Inexpensive
  • Built-in micro SD card slot for local video storage
  • Magnetic base
Cons:
  • Notification video is sometimes blank
  • Can't turn of IR night vision
  • Manual image and video capture doesn't show up in the app
  • Activity screen does not show current info

Filed in categories: Reviews

Tagged:

Momentum Wi-Fi Video Camera review originally appeared on on July 6, 2017 at 9:48 am.

Note: If you are subscribed to this feed through FeedBurner, please switch to our native feed URL http://the-gadgeteer.com/feed/ in order to ensure continuous delivery.

Tend’s Minion Cam is a home security camera designed to do your bidding


Home security cameras are a gadget category that has exploded in the last year or two. Everything week a new one is released with more features, better optics, and lower prices. But the Minion Cam HD Wi-Fi Camera from Tend is the first security camera that I’ve seen that’s been designed to look like a popular movie character.

Now you can have your very own Minion from Despicable Me 3 literally keep an eye on your home and loved ones. See what I did there? 😉

The WiFi camera features 1280×720 (720P) resolution video streaming with night vision, and two-way audio.

Special features include motion sensor triggers that send a notification to your mobile device when movement is detected, a personalized pet highlight reel of customized music videos of their pets, and the ability to talk like a Minion via its two-way audio feature.

Children will love the Minion Cam and parents will like the price. At only $49.99, it won’t break the bank, and each camera comes with 24 hours of free secure cloud storage on the Tend servers that allow users to review recorded footage from any mobile device.

For more info visit tendinsights.com and order one from Amazon.

Filed in categories: News

Tagged:

Tend’s Minion Cam is a home security camera designed to do your bidding originally appeared on on June 25, 2017 at 8:00 am.

Note: If you are subscribed to this feed through FeedBurner, please switch to our native feed URL http://the-gadgeteer.com/feed/ in order to ensure continuous delivery.
D-Link OMNA 180 security camera review


Security cameras and nanny cams have become a huge market. Even baby monitors have added night vision capabilities, so you can just grab your phone from your pocket, desk, or nightstand and check on anything you’ve decided to secure at a moment’s notice. D-Link, a longtime maker of routers and wireless equipment, recently sent The Gadgeteer one of their OMNA 180 CAM HD’s for review. I’ve been working with it for a few weeks now.

Note: Photos may be tapped or clicked for a larger image.

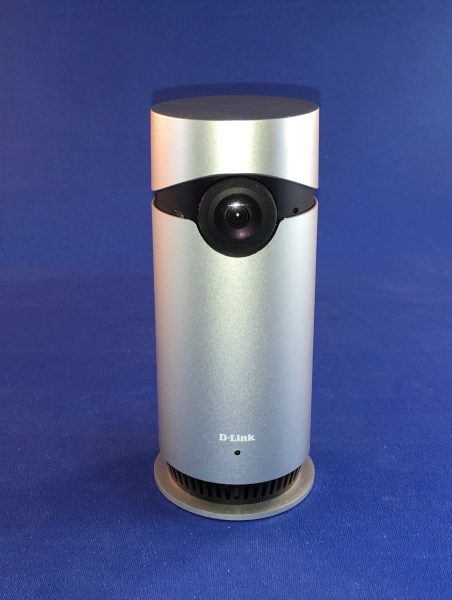
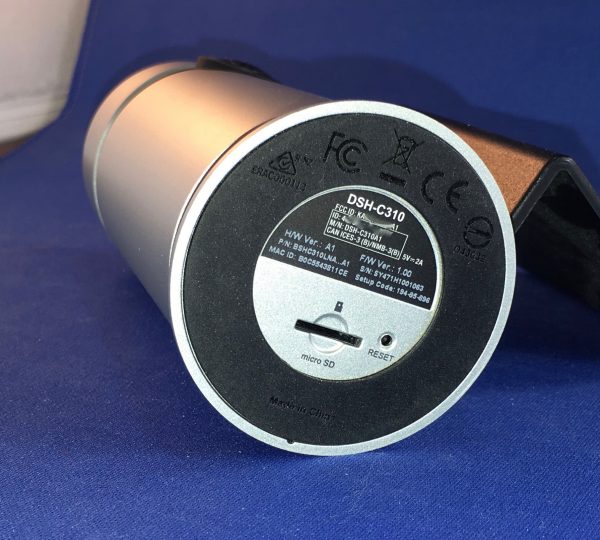
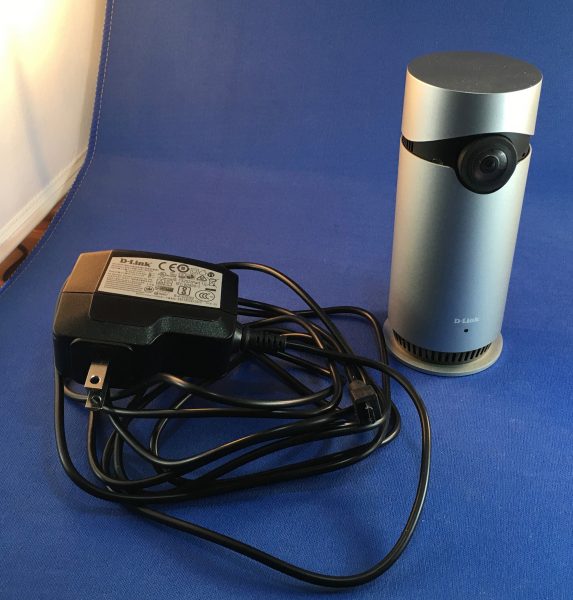
The unit itself is a smooth column 5.125″ high and just over 2″ in diameter. It weighs 8.1 oz (230 g). There is a lens near the top and a microphone opening just to the side of that. Around the bottom, there are openings for the speaker. The single port is a fitted microUSB connection. On the bottom, there is a micro SD card slot and a reset button. At a half-pound, the whole unit feels hefty and doesn’t slide on the table, due to a rubberized gasket around the bottom.

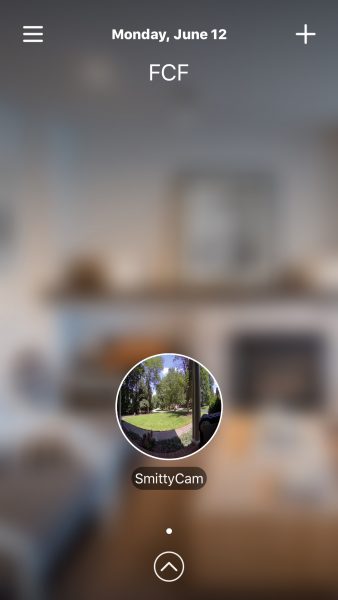
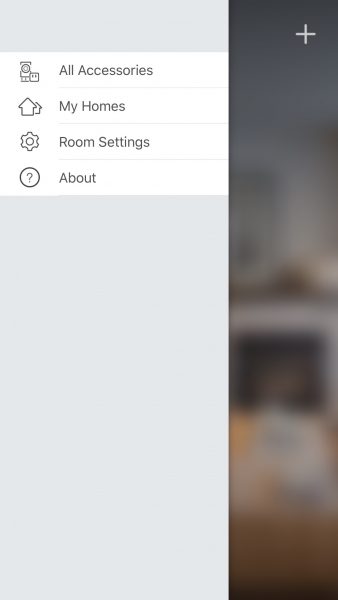
Setup was pretty straightforward. I downloaded the Omna app, created a “Home” (you can have multiple) by connecting to my wifi network.

Once you have a home, you add an accessory by plugging the device in and waiting for the blinking orange LED. When you click “Next”, you’ll see your device’s ID number, which is also printed on a sticker on the back of the device. (Sorry, didn’t capture this screen.) Save the settings, and you’re done.

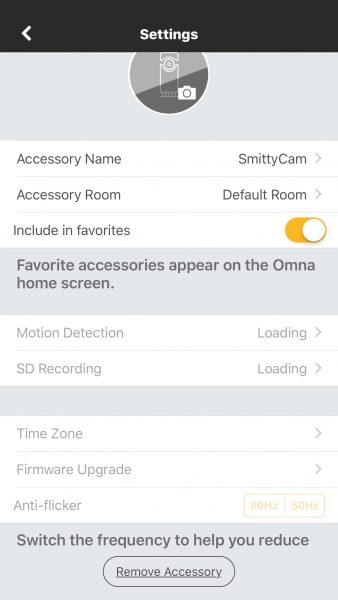
You can easily go back and edit any names you’d like to. As long as you keep power to the camera, it will save video and stills to a micro SD card. Through the app, you can get a live view of the camera, set up motion activation, and the frequency of micro SD card writes. You can also change the time zone and update the camera’s firmware (which I had to do soon after receiving it.)

You can activate the mic on the camera and listen in through the app, too. This worked quite well. This, of course, adds to the size of the files being sent to your storage card. You can also speak to the camera, which is a great way to absolutely freak your dog out. (Sorry, Jack!)

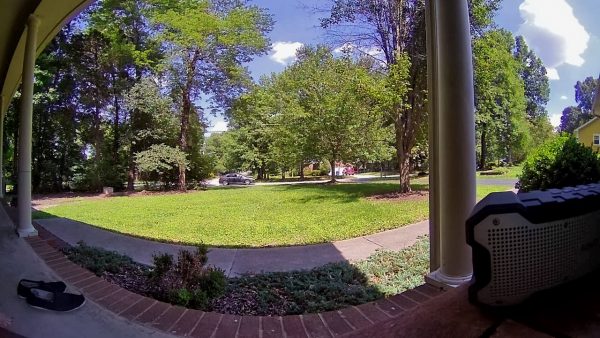
Given enough light, the images that you get from this camera are fairly clear, but the 180º fisheye effect takes some getting used to. I was able to run it easily off of a power bank, out on the porch, which was pretty nice. It would be nice if they added an internal battery, in the case of power outage.

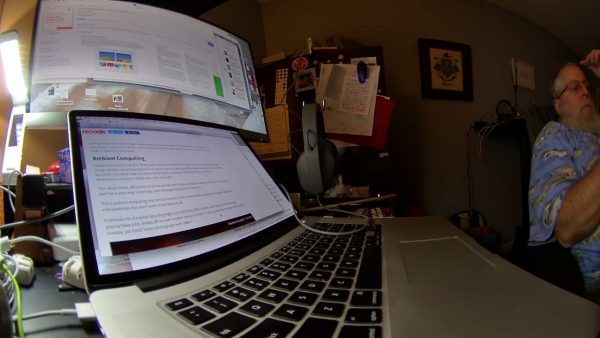
When I first was setting it up, I took a few shots in my office, with nothing but a desk lamp and my computer screens on. The results, while usable, look more like something from an earlier episode of a police procedural than a cutting edge HomeKit device.

I did notice that the device ran pretty warm during testing. I rarely ran it longer than an hour or so, and it was always very warm to the touch afterward. Not sure what a 24/7 session would do.

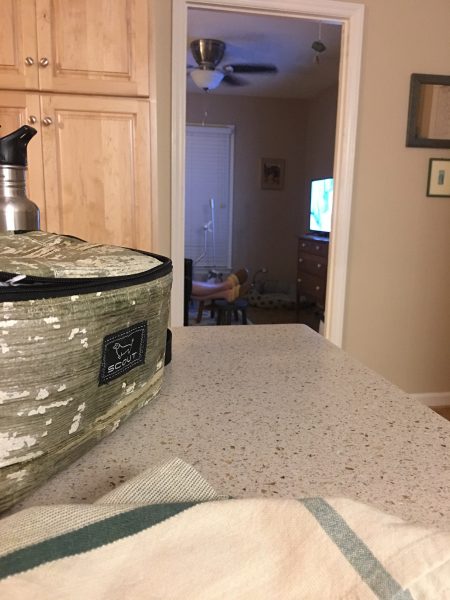
The three kitchen shots I included because 1) they are being shot with just the LED over the sink and another light on the other end of the family room, and 2) they show the quality of photos you get with decent lighting. The last one, sitting on the island, shows my Lovely Bride’s fuzzy slippers as she watches yet another British Crime Drama. There is no other light in that room except the TV screen. Not too shabby!

I was sent a first unit that got bricked almost out of the box. Took a bit of time to get it replaced since it was a review unit, but the help desk folks were very friendly and helpful, as far as they could go. There is no “replacement” for a defective unit through the Dlink site – it’s done through the place of purchase. Right now, that’s Apple. From my time in Apple Retail, I know that 2 weeks after purchase, you had to contact the manufacturer, even if the product was in warranty. (All Apple-branded products have a one-year warranty that is honored in-store. Almost all third-party products sold there have at least a one-year warranty, but that’s handled through the manufacturer.) I called support several times and was consistently told there is no way to swap it out except at the place of purchase.

There isn’t a way that I found to get the camera connected to a network or service for archival storage. It’s the onboard micro SD or nothing. This may limit recording in some locations, where it may be difficult to replace the card. (Think: your vacation home three states away.) But for a daily nanny cam or pet sitter, it is nothing to swap it out or slip it into a computer to copy files, then erase and reinsert.

I am not a fan of the photos in this format. Everything is warped – my front porch and walk are perfectly straight in reality, but you can’t prove it by those photos above! If there was a way to easily force the camera (or the software) to post-process the image into something that looks less like a 1960’s movie LSD scene, I’d probably be more of a fan. But at this stage, I’m not.

Source: The sample for this review was provided by D-Link. Please visit D-link for more info, or Apple to purchase.


Product Information

Price: $199.95
Manufacturer: D-Link
Retailer: Apple
Requirements:
  • Wireless network, Apple device with HomeKit, microSD (TFT) card
Pros:
  • Sleek look.
  • Easy setup.
  • Good software.
Cons:
  • Odd photo output.
  • No online storage.
  • Unable to have camera replaced by customer service.

Filed in categories: Reviews

Tagged:

D-Link OMNA 180 security camera review originally appeared on on June 21, 2017 at 9:00 am.

Note: If you are subscribed to this feed through FeedBurner, please switch to our native feed URL http://the-gadgeteer.com/feed/ in order to ensure continuous delivery.
Julie’s gadget diary – I caught this bird interaction with my Nest cam today


I love my Nest cameras because they record everything they see 24/7 and not just a few seconds after motion has been detected.

You never know what kind of interesting things that serurity cameras might capture. A few years ago I wrote a story about a mystery that was solved with the help of my Nest cam and today I have another video clip for you. Click through to check out the crazy bird battle that was captured with one of my Nest cameras this morning.

Fast forward to the 1:30 mark and keep watching till about the 2:00 mark and beyond.

The big bird is a pileated woodpecker, which is the largest woodpecker in North America. Unfortunately, the lighting in this video doesn’t show his bright red head. This a big bird. He’s about the size of a small crow.

The little board is an eastern phoebe. She has a nest with babies in the eaves of the roof above those posts on my front porch and she’s NOT happy that Mr. Woodpecker is there.

I was really surprised and impressed how she keeps flying at a bird so much bigger than she is. She does finally give up though. And thankfully so does the woodpecker. I’m worried about what I’m going to find when I get home tonight to inspect the posts. We’ve never had problems before with woodpeckers pecking on the house, so I hope this one doesn’t decide to stick around.

Filed in categories: Articles

Tagged: ,

Julie’s gadget diary – I caught this bird interaction with my Nest cam today originally appeared on on June 8, 2017 at 12:31 pm.

Note: If you are subscribed to this feed through FeedBurner, please switch to our native feed URL http://the-gadgeteer.com/feed/ in order to ensure continuous delivery.
Nexia HD Wi-Fi home security cameras review


There is no shortage of home security devices out there, and I have even reviewed an indoor camera here at the Gadgeteer that I liked a lot. But I needed an outdoor camera as well for an area outside my home that is somewhat hidden from view and could easily be used to break into my home. So I decided to give Nexia and their Wi-Fi HD home security cameras a try. I got their indoor camera (model WCP200NX) and outdoor camera (model WCO200NX) to see if they were worth protecting my home. So let me share with you what I found out.

First the specs from the manufacturer:

Outdoor camera (model WCO200NX):

Weight:               1.4 lbs
Dimensions:      1.4 x 3.3 x 4.8 inches
Batteries:           None, power connection required
Included:            Camera, Mounting Stand, 12v 1.5A Power Supply, Anchor Screws, USB to Ethernet Adapter
Warranty:          Limited, one-year
Resolution:        1080P (1920×1080, 16:9), 720P (1280×720, 16:9), High (640×480, 4:3)
Lens:                   Wide-angle 110 degrees
Price:                   $189

Indoor camera (model WCP200NX):

Weight:               12.8 oz
Dimensions:      2.8 x 3.3 x 4.2 inches
Batteries:           None, power connection required
Included:            Camera, 12v 0.5A Power Supply, USB to Ethernet Adapter
Warranty:          Limited, one-year
Resolution:        720P (1280×720, 16:9), High (640×480, 4:3), Low (320×240, 4:3)
Lens:                   Wide-angle 140 degrees
Price:                   $183

Setup and installation

This was pretty simple. You follow the directions that come in the box to download the free Nexia app and connect the camera to the www.mynexia.com website. After you are done with the initial setup, you can use either the Nexia app or the website to change the settings for the camera. I found the process simple and easy to follow.  You can also set them up to reverse the image if you mount the camera upside down, for example, from the eave on your house.

I got both an indoor and outdoor camera. The outdoor camera came with a mounting bracket that I didn’t use. I have a piece of furniture outside on the patio where I use it so I didn’t need to mount it. Keep in mind that the camera requires the included power supply, so if you want to mount it somewhere on your house you will need access to power from somewhere. The cable is only about 10 feet long, so that may be an issue in some situations.

outdoor camera

The indoor camera was easier for me because there were many places inside my house where I could put the camera on a piece of furniture next to a power outlet. In both cases, these cameras are not small enough to be hidden and are easily seen in any environment.

indoor camera

Smartphone app

The Nexia app is easy to use and intuitive. I have included a couple of screenshots here so you can see what it looks like. You can pin-protect the app so no one can see your cameras without entering the pin code, and all the settings for each camera can be altered here just like on the website. The Nexia line of products includes many home-automation products so this app is used for all of those if you decide to buy any.

Performance

In my experience, the performance of both cameras has been spotty.  My internet connection is about 12 MB/sec upload which may have something to do with the regular ‘buffering’ that I see when trying to view live video from my smartphone. Both cameras are within 25 ft of my wireless router and yet I still have buffering issues when trying to view the highest quality image. So in both cases, I had to switch the settings to a lower quality image to avoid the buffering. There are no guidelines included with the camera that state what the ideal network speed is, so I can’t speak to that.

One thing I really like is the night view, which uses the infrared lights on the camera to show you a great picture of the house at night.  That is definitely a plus with these cameras.

The outdoor camera has a motion detection feature and you can be notified on your phone when it detects something moving in front of the camera. My only problem with it is that in my testing with my family members by the time I loaded the app up to see the live stream from the camera, the person/dog that triggered the camera was already gone.

There is a service that you can purchase to have video stored in the Nexia cloud, but I do not pay for that. And even if I had that service, unlike my other security camera, the Nexia cloud service doesn’t record 24/7 video footage. It only records 4 minutes of video and then waits for another motion event. The cameras that I got had no internal storage, and no SD card slot, so the cloud storage would be my only option for recording video.

The final thing that I don’t like about these cameras is that they do not have a pan/tilt feature. So that means wherever you point them is what you get. The wide-angle lens definitely helps in that regard so I placed my cameras in the corners of rooms to get the wide view of the room. And on both of these cameras, you can pinch to zoom in the app to zoom into something you want a closer view of. That is neat.

Final thoughts

The ease of installation and the solid app that Nexia provides is great. I can see where if I had many of their products that the app would be great to be able to control everything. The price however for both of these cameras is very high. I got more camera with more features in my other security camera, for less price. I think that these cameras would be an option for someone who wants to simply be able to look at something live from their phone. But I don’t think that I am going to use them as a true security camera.

Source: The sample for this review was provided by Nexia. Visit their website for more information or order directly from Amazon.


Product Information

Price: $189
Manufacturer: Nexia
Retailer: Amazon
Requirements:
  • Nearby power outlet
Pros:
  • Ease of installation
  • Intuitive smartphone app
  • wide-angle lens
  • nigh-vision mode
Cons:
  • Expensive
  • Spotty performance
  • No pan/tilt

Filed in categories: Reviews

Tagged:

Nexia HD Wi-Fi home security cameras review originally appeared on on June 4, 2017 at 9:26 am.

Note: If you are subscribed to this feed through FeedBurner, please switch to our native feed URL http://the-gadgeteer.com/feed/ in order to ensure continuous delivery.