ZOMOI 9-in-1 USB C Digital Multiport Adapter review

REVIEW – Many new laptops and tablets are smaller and lighter than models sold in previous years. While this change is great for your back and shoulders it usually comes at the expense of peripheral ports. The ZOMOI 9-in-1 USB C digital multiport adapter provides a large selection of useful ports in a small footprint. Read on to see what I think!

What is it?

The ZOMOI 9-in-1 USB C Digital Multiport Adapter includes the following ports:

  • 2* USB 3.1 ports
  • 1* USB 2.0 port
  • 1* HDMI port
  • 1* Gigabit Ethernet port
  • 1* USB Type-C PD port
  • 1* SD slot
  • 1* TF slot
  • 1* Audio (earphone and microphone) jack.

What’s in the box?

  • Multi-port Hub
  • USB Type-C to USB Type-C 3.1 cable, 8.5″ tip to tip
  • User Manual

Hardware specs

Upstream:

  • USB-C 3.1

Downstream:

  • Display: HDMI up to 4K@30Hz, 1920x1080p@60HZ
  • USB: 2*Type-A USB3.1 Gen1, 1 Type-A USB2.0, 1 Type-C with Charging
  • Ethernet: RJ45 gigabit Ethernet
  • 3.5mm Jack: headphone/speaker; microphone
  • Operation Temperature: 0-40°C
  • Storage Temperature: -20-70°C

Design and features

The adapter comes in a small white flip top box that is not much wider or thicker than at the actual port adapter.

The box has an adhesive label on the back that demonstrates the features and ports available.

The label also identifies that the product comes in black, silver and space gray. This review is of the space gray model. Inside the box, the adapter is packaged with cardboard that keeps the attached USB cable neat.

The adapter is mounted upside down in the box. as discussed below, the labeling of the top and bottom of the device goes against convention.

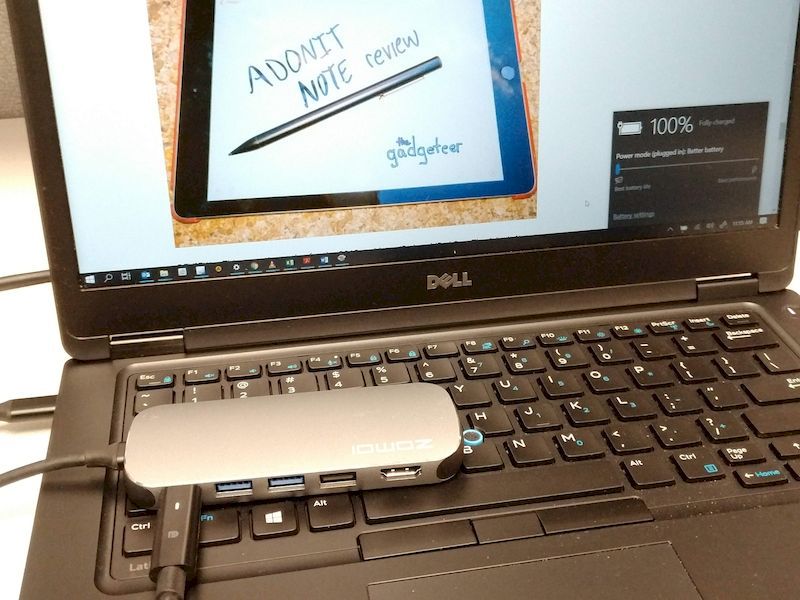
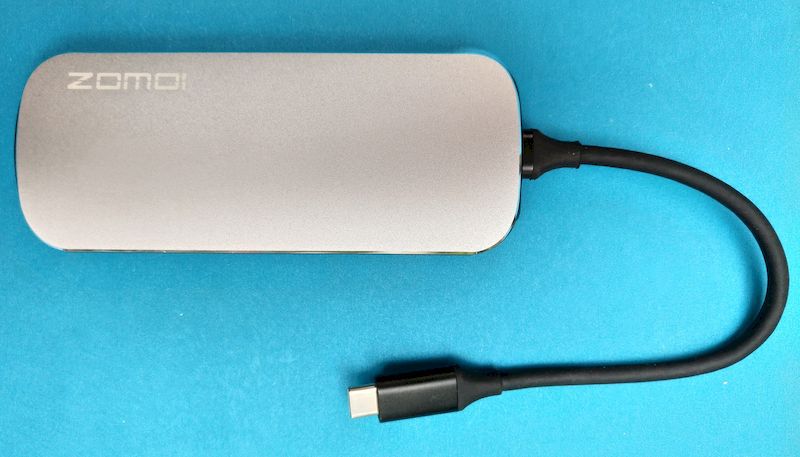
The design of the adapter is very sleek. It is an elongated prism with beveled corners. As such it is the perfect shape to prop up the back of a laptop. I’m not sure that the designers thought of or intended this but it seems a useful shape for enhancing the airflow to underneath my Dell.

The top, bottom, front and back sides are aluminum, which helps with durability and heat dissipation. The left and right sides are plastic. The front side has an SD card and microSD card slot.

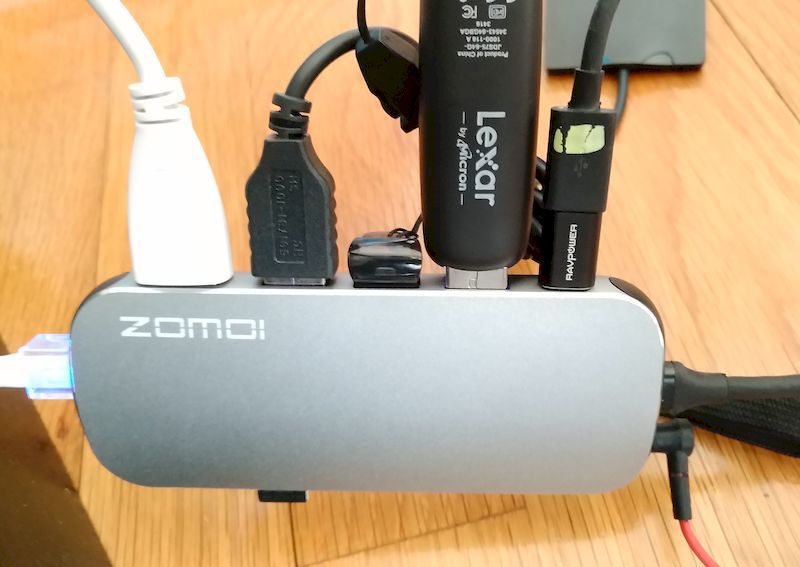
The rear has the HDMI, Three USB type A slots and a USB Type C slot.

It is easy to identify the USB 3.1 and USB 2 ports by their color and by the additional 5 contacts at the front of the USB port.

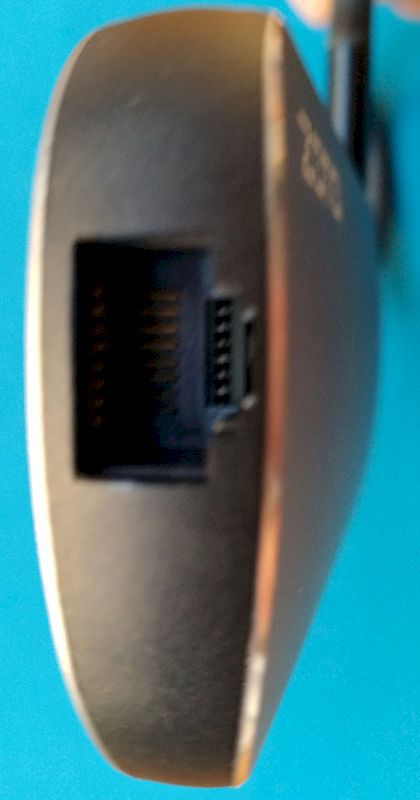
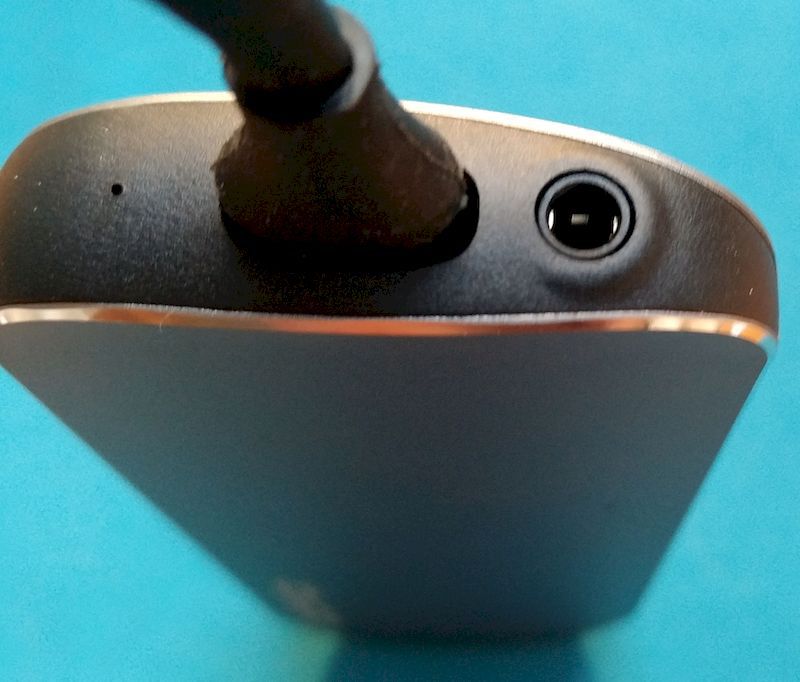
The left side has an Ethernet port and the right side has the audio jack, upstream USB Type C port and a small blue power indicator LED.


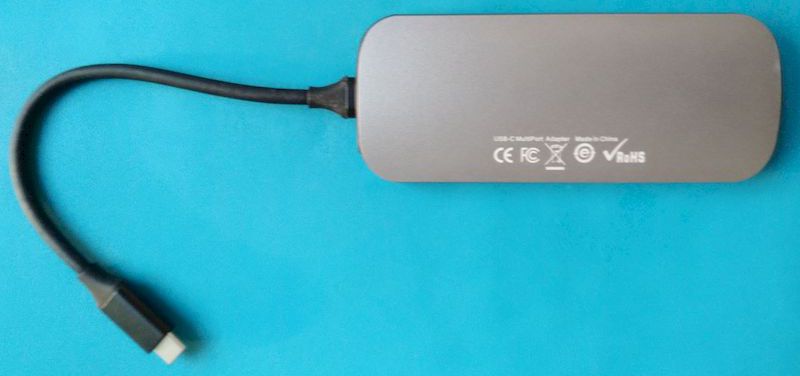
The aluminum on the top side is beveled and printed with the ZOMOI logo. The bottom side has compulsory markings (CE, FCC, WEEE Directive, SAMR logo, RoHS Directive) and a statement that the product is made in China.

I cannot determine how this is put together or how to take it apart, which is a testament to the build quality and apparent durability. However, the device has one peculiarity – the USB, memory card and Ethernet ports are all upside-down with respect to the ZOMOI label. Is this viral cross-promotion with Stranger Things? More likely is that the engineers and the marketing department are not on the best terms. This doesn’t impact the adapter’s normal use, but more often the adapter will be used with the ZOMOI logo facing the table.

The fact that the upstream side USB Type-C cable is removable helps with storage and packing since the removed cable and adapter can be put into a smaller area than both items can be with they are attached. The other benefit is that this port adapter can be used with a Type A to Type C cable to provide audio, memory storage access, and Ethernet access. On an older android phone, the multi-port adapter still provides memory card and audio access.

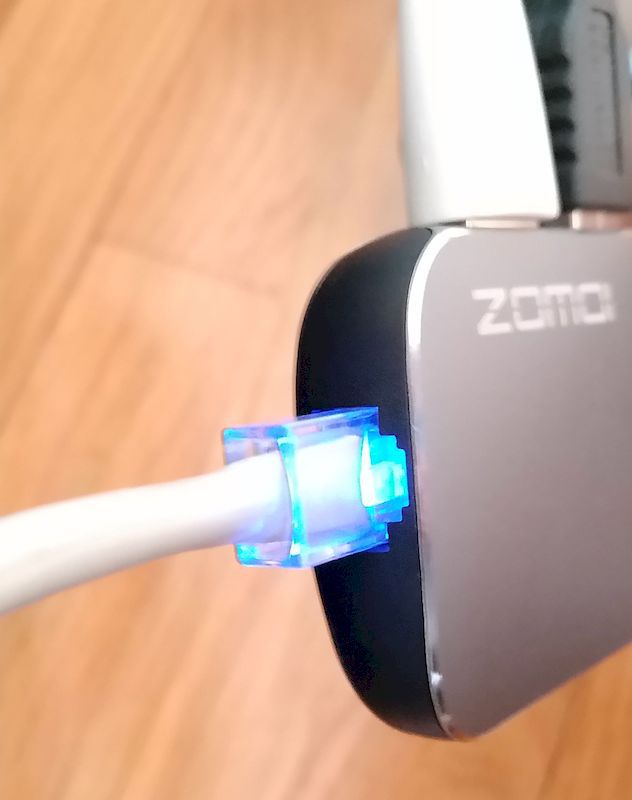
When the Ethernet port is used the activity and connectivity lights are blue, which is much cooler looking than the typical green and amber.

Setup

The port adapter does not come with any drivers. The port is either supported on your device or not!

Performance

I downloaded a 4K MP4 movie and played it with VLC on my laptop attached to a 4K set with the laptops HDMI port and with the ZOMOI port adapter. I compared the number of dropped frames on each playback. While the movie had 32 dropped frames when playing through the local port, the movie only dropped one frame when it was played back using the ZOMOI.

The port is indeed able to display 4K@30Hz. I’ve also had no problem reading and writing to any of the ports or memory card slots on the device. I even used this to copy a file from one device to another with very little lag.

The only type C power adapter I had to power a laptop was itself from a hub, and when I tried using this as a pass-through power source, it provided power. You can see the computer registers “plugged in” when using the power through the power direct port.

What I like

  • Small footprint
  • Many useful ports
  • Inexpensive

What I’d change

  • Reverse the top and bottom of the unit (in terms of printing)

Final thoughts

The ZOMOI multi-port adapter is a great addition to your computer gear, especially for those who have models with fewer number and types of standard ports.

Price: $44.86
Where to buy: Amazon
Source: The sample of this product was provided by ZOMOI.

Filed in categories: Reviews

Tagged: ,

ZOMOI 9-in-1 USB C Digital Multiport Adapter review originally appeared on The Gadgeteer on August 25, 2019 at 9:30 am.

Note: If you are subscribed to this feed through FeedBurner, please switch to our native feed URL http://the-gadgeteer.com/feed/ in order to ensure continuous delivery.

Hedkayse One foldable helmet review

REVIEW – I survived a helmet-less era growing up and began wearing a helmet for my own preservation in action sports. Doing so had the added benefit of instilling that behavior in my kids which I’m tremendously thankful for. It’s pretty easy to grab a helmet with all your other gear as you head out of the house for a specific activity. It’s a different story when it comes to dealing with a helmet after getting to work, or having it handy as you decide to hop on a sharing service bike or electric vehicle to run lunch errands or get to a meeting across town. Hedkayse has introduced a helmet claiming to address these additional needs and more while meeting the standard needs of a cycling helmet. As luck would have it, I’ve got one here for review.

What is it?

Hedkayse One is a one-size-fits-all cycling helmet built to protect against impacts as well as being able to collapse to a compact size so you’re more likely to keep it with you.

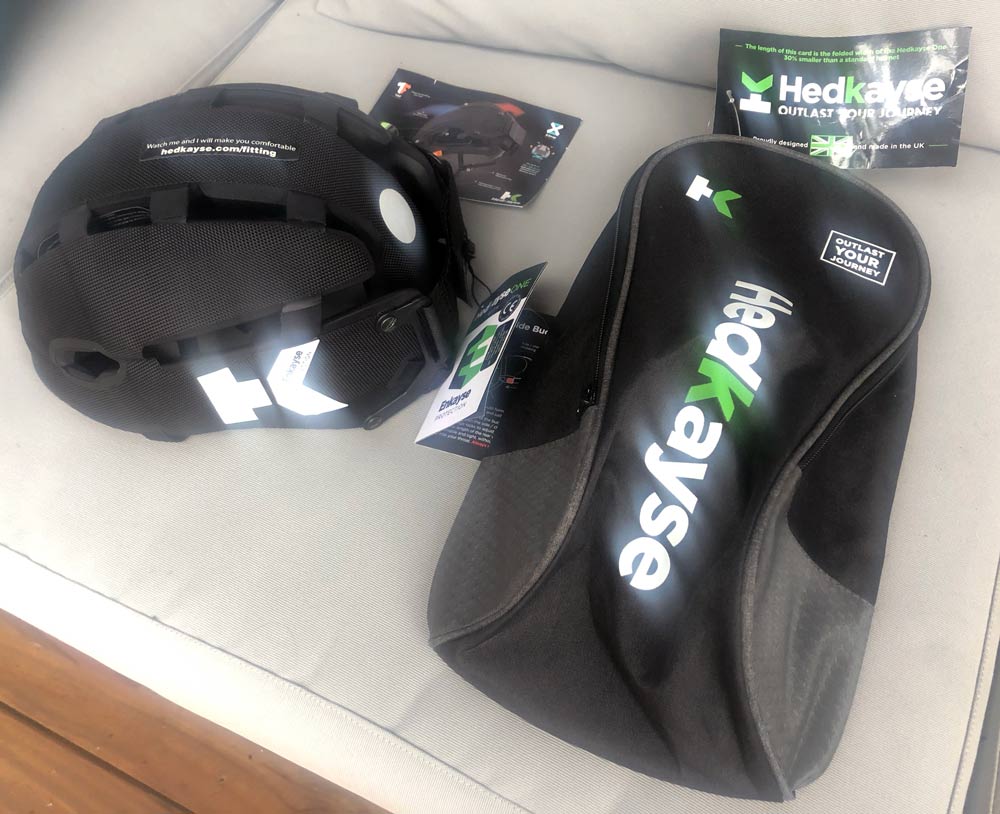
What’s in the box?

  • Hedkayse helmet
  • Helmet bag
  • Compression strap (not pictured above)
  • Info cards

Hardware specs

Weight: 500g
Size range: 49.5-58.5cm
CE certification: EN1078 safety standard

Design and features

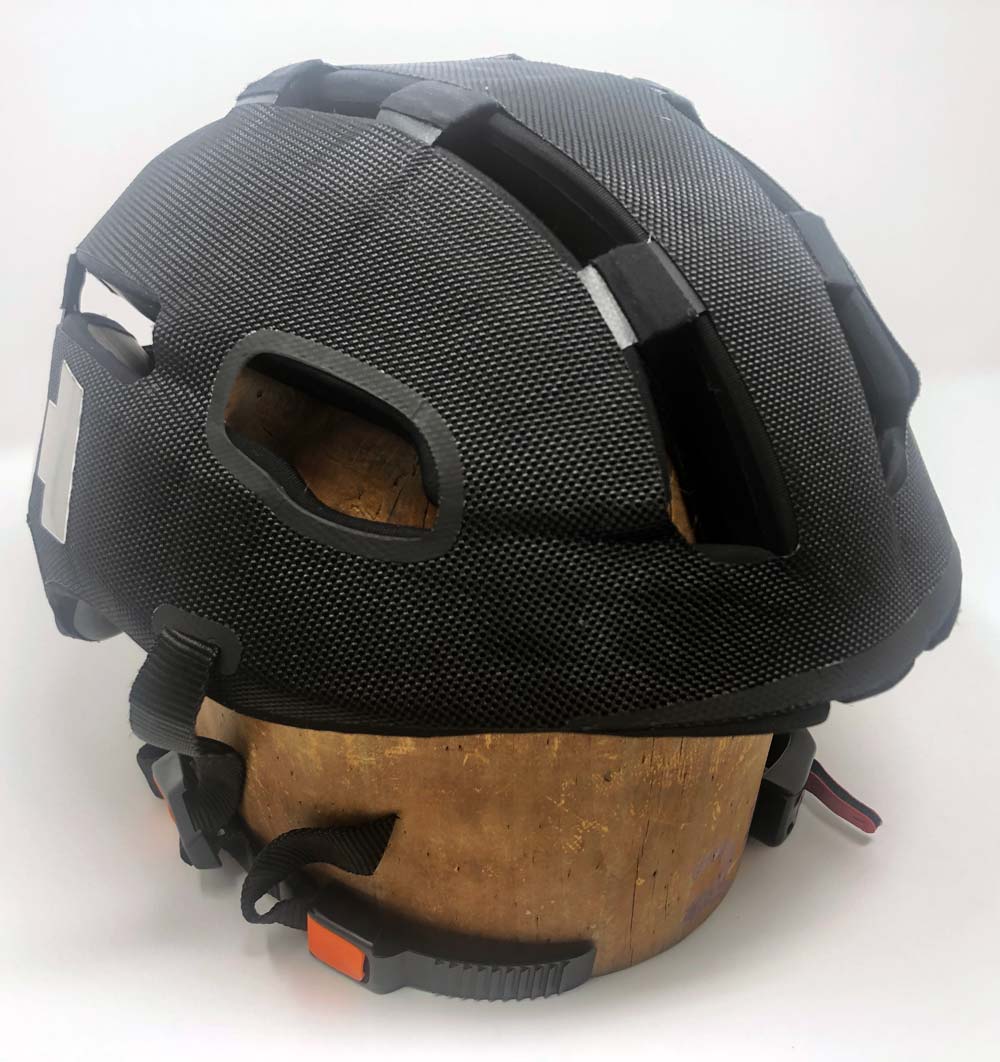
On first look it’s the materials and construction that stand out.

The heavy-weight cordura adds a sturdy but refined texture to the exterior of the helmet. All the materials are expertly cut and welded to flex and fold in the right places.

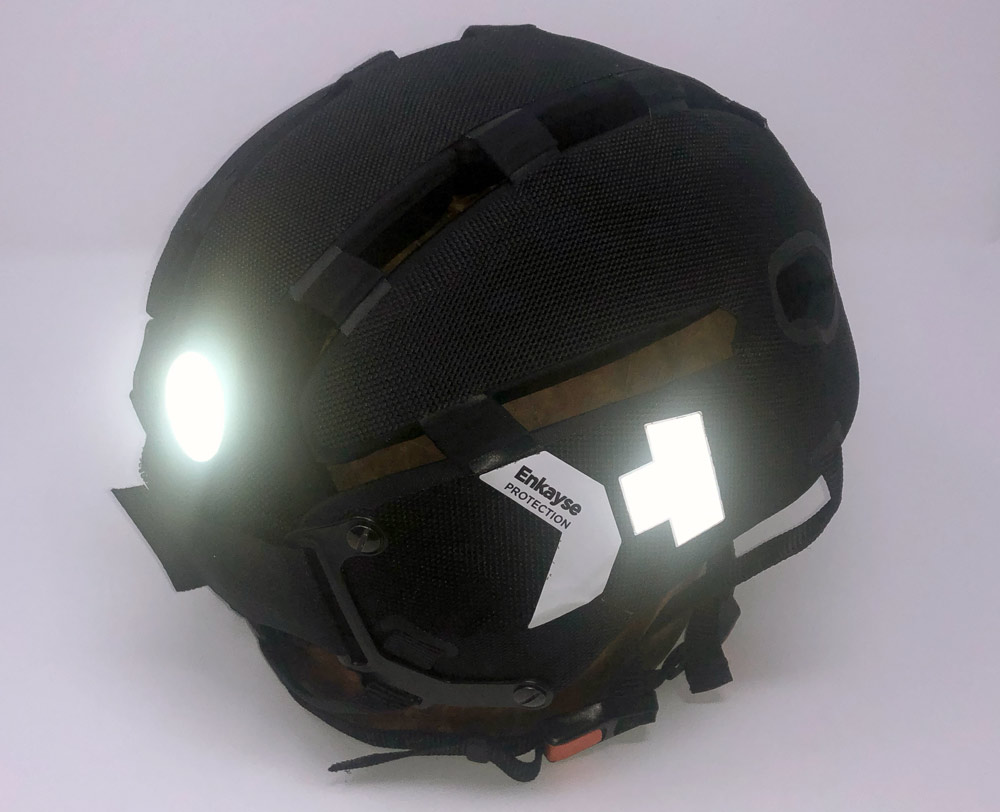
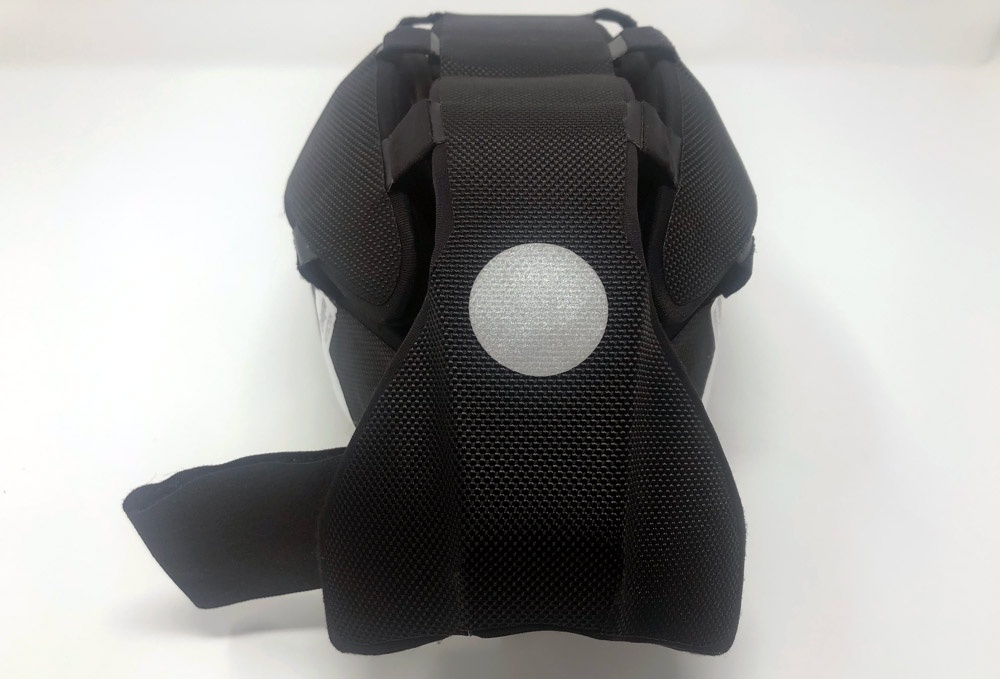
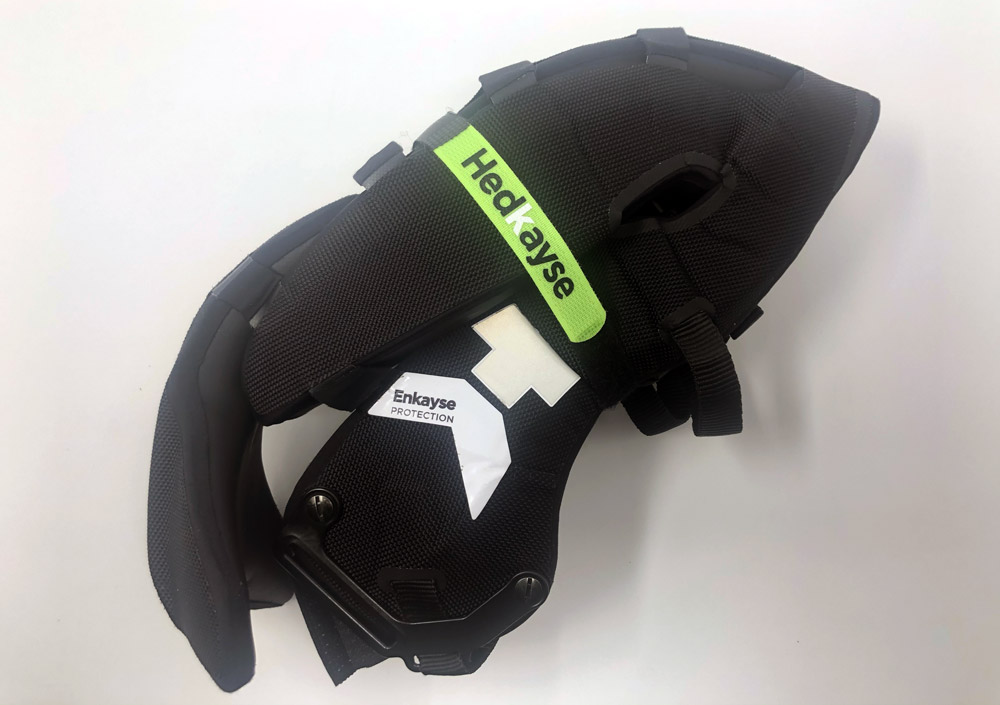
Part of the Hedkayse logos on the sides and all of the large dot on the rear are all retro-reflective for high visibility when hit with oncoming lights.

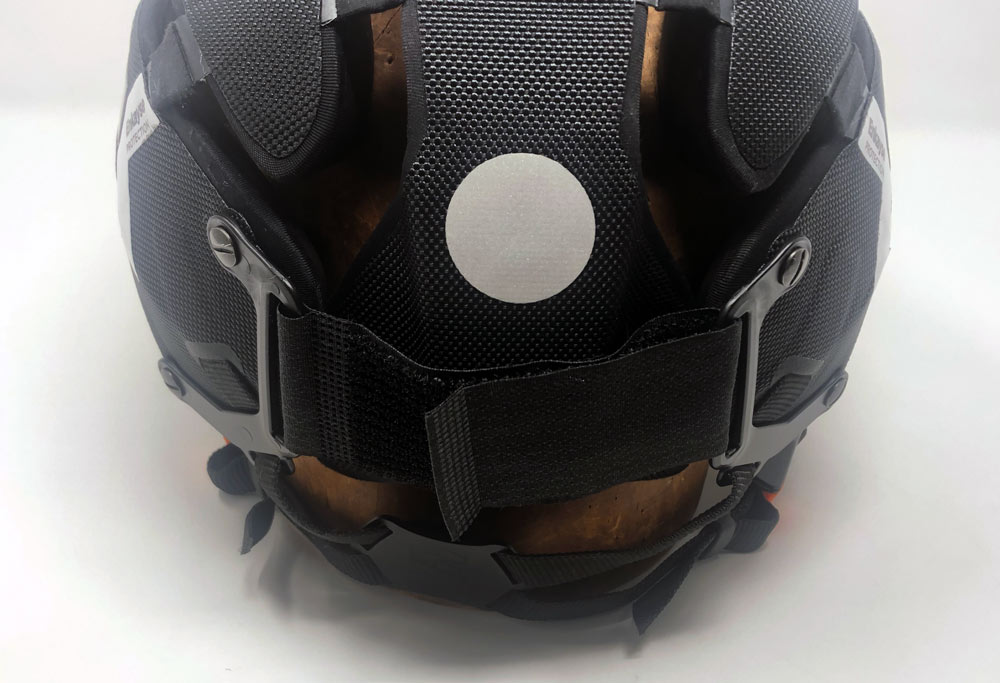
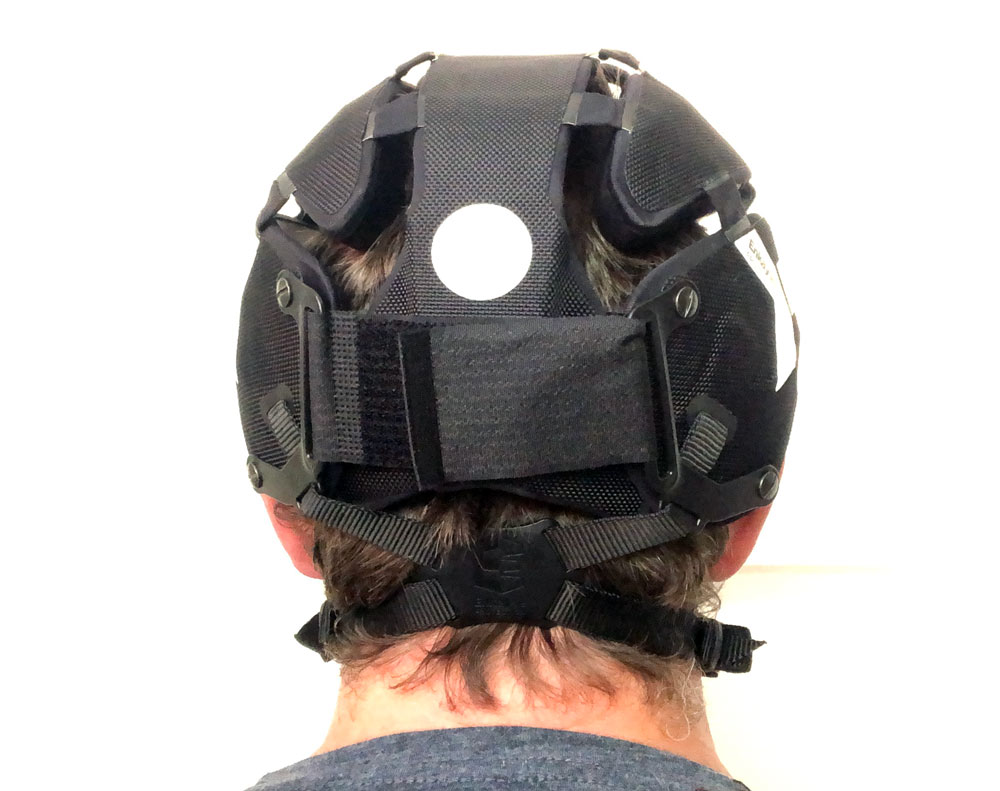
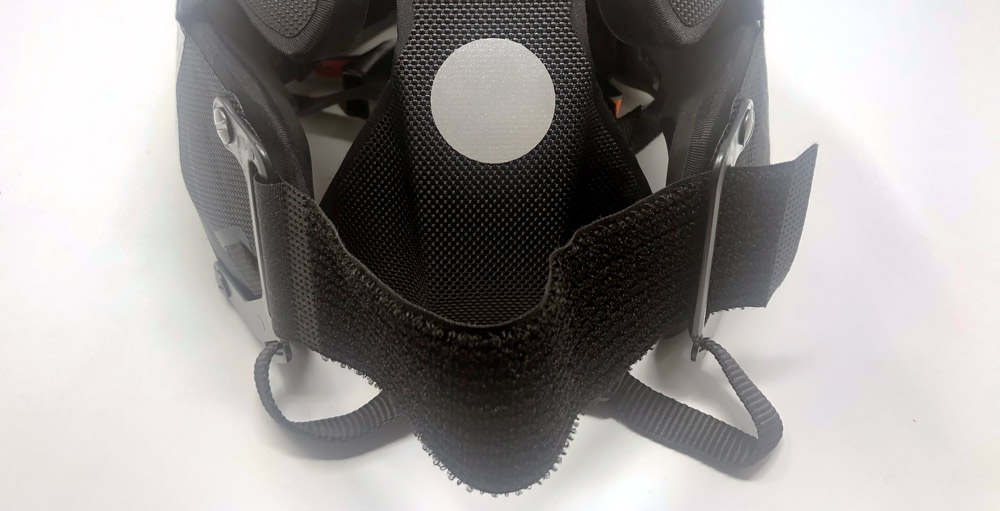
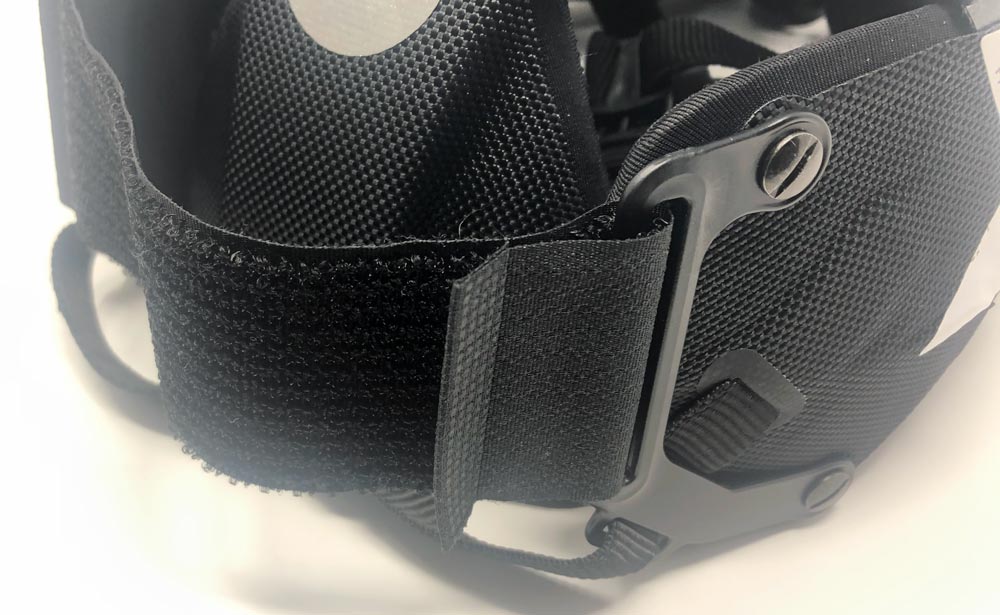
The rear has two plastic brackets that hug close to the shell and allow for the wide velcro to easily adjust the sizing and fit with a single motion.

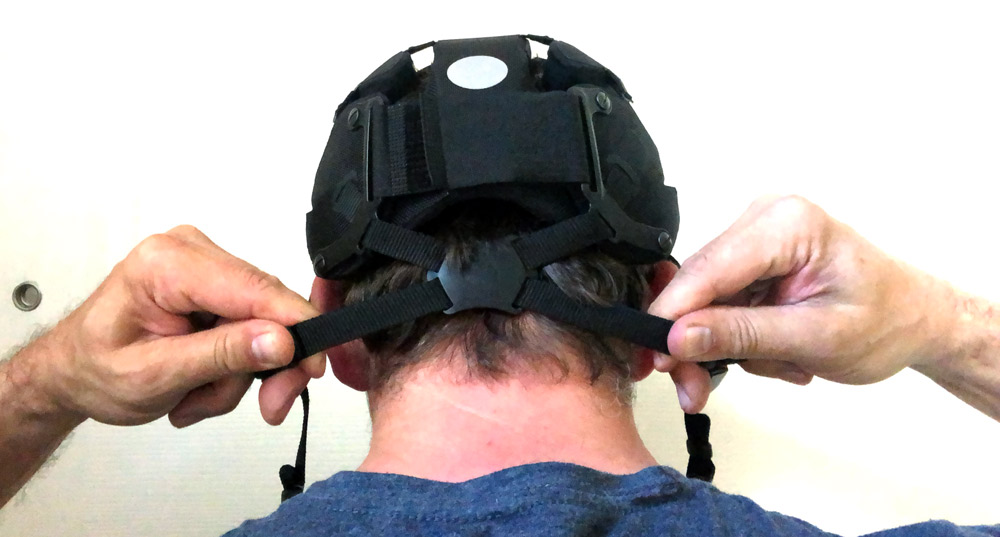
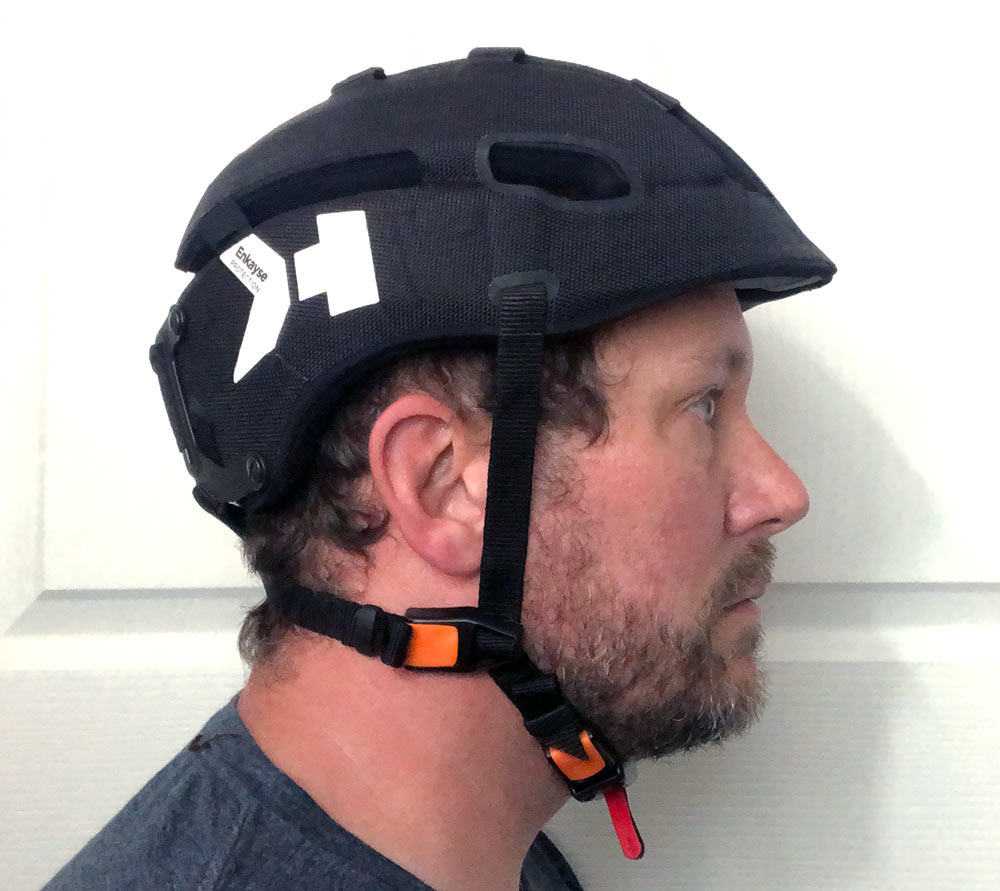
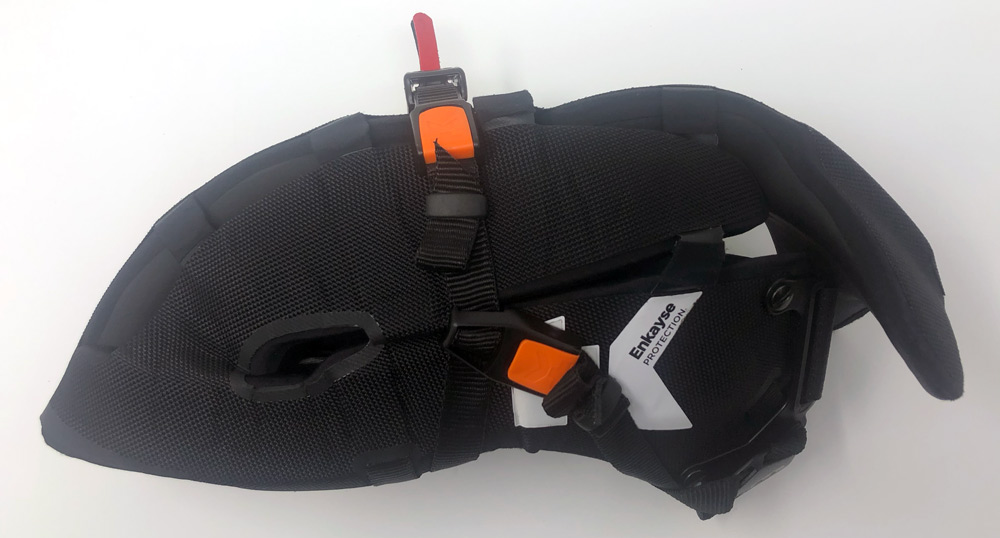
The straps form an X from the rear of the helmet through the plastic clip down to under your chin. This auto adjusts to hug the base of your skull.

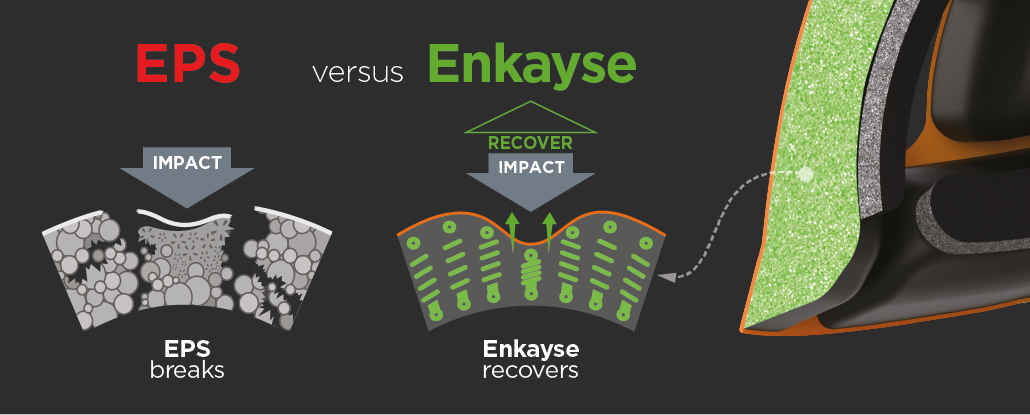
Enkyase is the material that they’ve developed to use as the foundation for the majority of the helmet. Helmets traditionally use a polystyrene (EPS) as a “good-enough” material that deforms to absorb large dangerous impacts while smaller impacts get transferred through to your head. It’s a key reason why you should replace your helmet after any serious crash. Enkayse is able to meet safety requirements and maintain that performance across multiple impacts both large and small. Here’s an image from their site depicting that information.

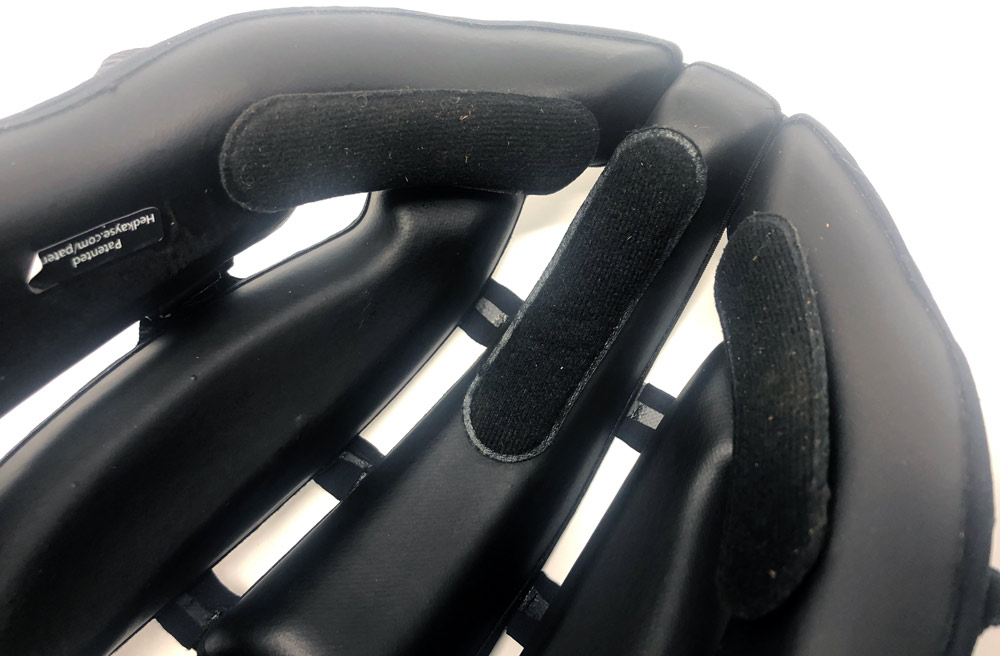
The inside of the helmet is super smooth and appears to be the “skin” of the Enkayse material as molded. It’s both flexible and wipeable. Small, soft pads are adhered in a few places for comfort, fit and to help absorb persperation during use.

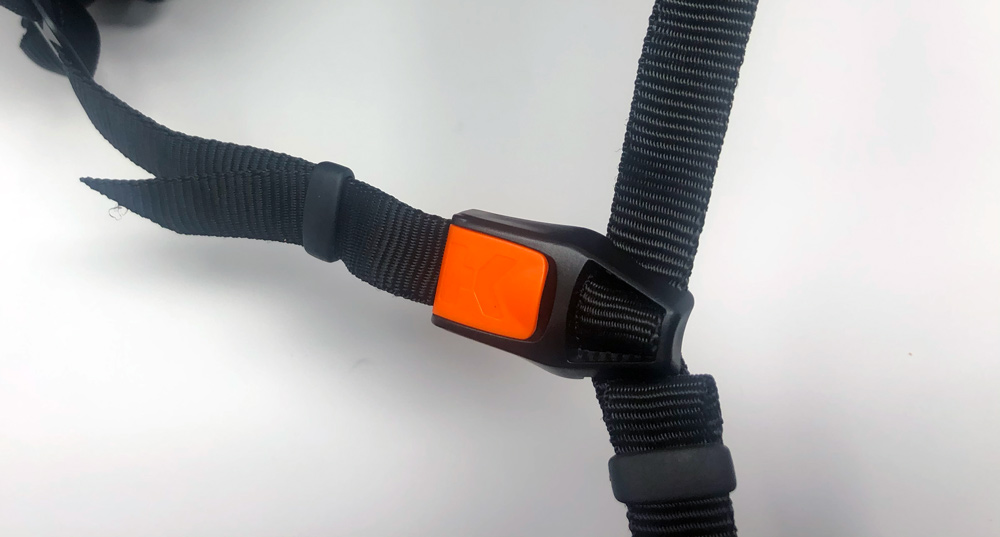
Under the chin, the helmet closes with a ratchet strap that allows for micro adjustment and releases with a small pull tab that’s easy to find.

Folding is one of the key features of the Headkayse One. It’s not hard, but takes a time or two to start to do it quickly. Here’s how that works.

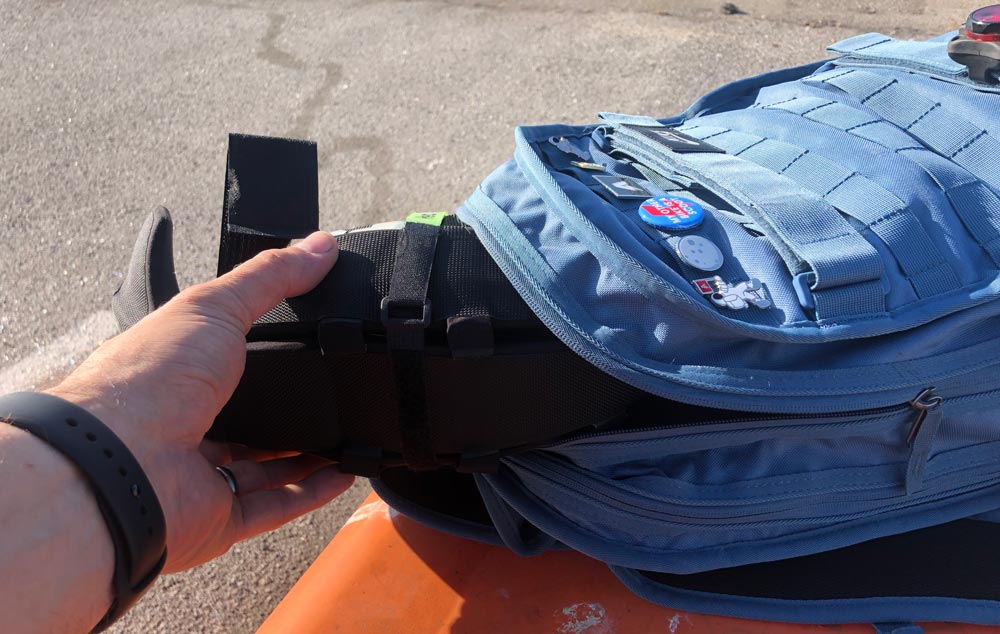
To fold: Undo the velcro on the rear completely and pull the whale tail outside the two velcro brackets. The helmet can now collapse in width and you can use the accessory wrap strap to keep it compressed if needed.

To unfold: Remove the wrap strap if used and repeat the process in reverse. Push the whale tail inside the two side panels and feed the velcro strap back through the receiver side and close the velcro in a loose position.

Setup

Unlike traditional, sized helmets the Headkayse One is designed to fit all users with a single size. Getting it setup for your head is a few adjustments and then some small tweaks for comfort. Let’s walk through it.

Put the helmet on and reach around to the velcro.

Find the loose end, pull until the fit feels comfortably snug then close the velcro. This is an adjustment you’ll need to make everytime you put on the helmet after unfolding.

The remaining adjustments should be a one-time affair unless you’re sharing this helmet with someone else. Reach behind and grab the straps running behind your ears.

Pull across away from your ears and the plastic guide in the back will slide up and automatically center. You should now be able to get a feeling for how much you will need to adjust the positioning clips that should sit under your ears and slightly above your jawline.

These clips adjust fore/aft with a cam-lever and up/down with a tension path through the clip. Play around with these until you get the fit comfortable and out of any annoying ear lobe contact. You may also want to check your fit with any sunglasses you wear in case further adjustment is needed.

Performance

Ok. So here’s the deal. How do you review the crash performance of a helmet without putting yourself in danger? Well, you don’t, or you spend a fair amount to have an independent lab run impact tests. (Fill this out)

What I can review is all the other things that come with wearing and living with a helmet.

How about fit and comfort? I was skeptical that a one-size solution could be a good choice for me. I mean, flex-fit baseball caps hurt my head after a short span of time. The Velcro adjustment here works well and more than that feels very secure. Additionally the helmet feels substantial which is a good thing, like you actually have protection up there.

Actually, the only area where I had a fit concern was at the base of my skull. Hedkayse One provides better coverage than most of the foldable designs that I’ve seen and more than a lot of standard helmets for that matter. Turns out that my regular cycling helmet has a dial that I crank in and provides more pressure. There’s actually the same amount of coverage, just a little less hugging feeling down low.

If you need to adjust the positions of the “sweat” pads, peel them back slowly and hold the adhesive velcro dots against the shell as you remove the pads as they don’t seem to stick to the Enkayse skin very securely until you’ve worn it a bit as now they’re stuck real solidly.

The ratchet mechanism under the chin is easy to close and open and the micro-adjustability is a great feature should you need a little more room to run a thin wind-block beanie under your helmet on a cold day.

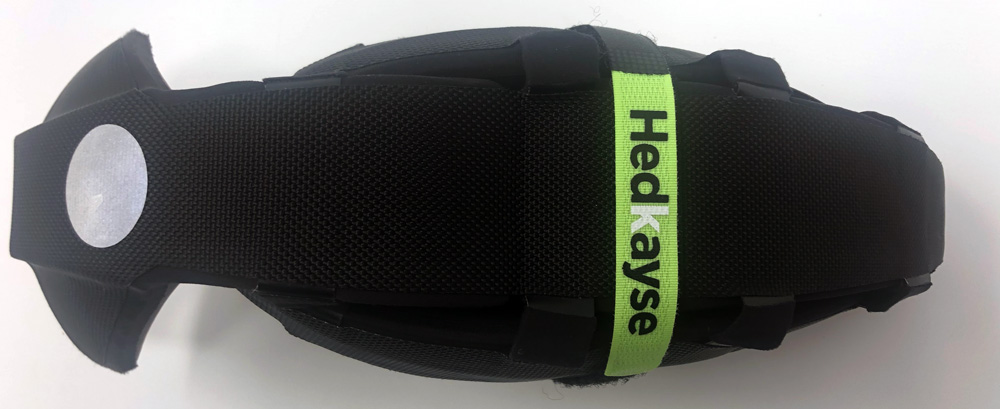
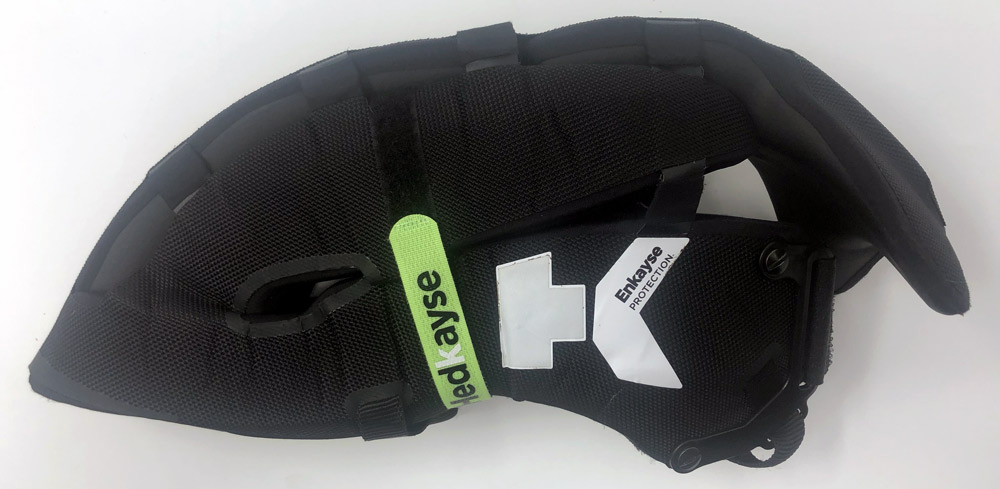
How about folding? There are a number of folding helmets available on the market and they all seem to address it differently, many by possibly compromising protection. I can confidently say that Hedkayse kept protection their top priority. Folding the helmet reduces its width by about a third into a shape that almost resembles a football.

Using the compression strap creatively you can get that even flatter.

Either way it takes up a good deal less room in your bag than a full-size helmet which is super useful if you want to keep a helmet on hand.

There’s really only two small nitpicks that I’ve encountered in a month of using the helmet that I’ll poke at.
One: On unfolding, make sure to close the velcro after feeding it back through the receiver otherwise it’s real easy to have the velcro pull back out when putting the helmet on your head and it’s a real pain to feed it through while wearing it.

I’m not sure there’s a better way to do this as you do need to fully disengage while folding, but if you remember to close on unfold this becomes a non-issue.

Two: The compression strap is definitely helpful for keeping the folded helmet as small as possible, but it’s an additional thing to keep track of.

I got to work one morning and the strap was not in my bag or any of my pockets. At the end of the day I found it on the ground next to my car and was surprised it hadn’t blow away. I did find that with the straps adjusted to my head I was able to loop that strap around and just get one click. If one of the two chin strap sides were easier to slide, this might be a great solution for all.

I didn’t use the storage bag at all as it’s just an extra step. It will come in handy in the rainy season, or for storage for anyone that does have an off season.

What I like

  • The fit, comfort and look
  • Quality construction and hardware
  • Enkayse material and cordura shell

What I’d change

  • A solution for completely unthreading the velcro when folding/unfolding
  • A solution for folded compression that doesn’t require a separate strap that can get lost

Final thoughts

I live in Oakland, work in San Francisco and ride a bicycle almost every day. The number of cyclists I see without helmets scares me. When you look at riders on shared electric vehicles that ratio falls through the floor. I get it that as a cyclist or rider you feel in control of your vehicle, but road conditions can be abysmal and cars… well they’re just large and unforgivingly metal and heavy. Please recommend a helmet (any helmet!) to someone you know that is routinely on a personal vehicle in traffic. Help keep them safe. I’ve said my piece.

Overall I’m really happy with how the Hedkayse One fits me. The composition is reassuringly solid and if you do bump your head (or a friend bonks you on the helmet) it has a diminished feel to it instead of that instant jolt normal helmets tend translate.Hedkayse has an amazing product here. They didn’t set out to just create a foldable helmet, but have instead created a helmet that arguably protects better and collapses to make it easier to keep on your person.

Price: $180
Where to buy: Hedkayse
Source: The sample of this product was provided by Hedkayse.

Filed in categories: Reviews

Tagged: ,

Hedkayse One foldable helmet review originally appeared on The Gadgeteer on August 24, 2019 at 10:30 am.

Note: If you are subscribed to this feed through FeedBurner, please switch to our native feed URL http://the-gadgeteer.com/feed/ in order to ensure continuous delivery.

Creative MUVO Play portable and waterproof Bluetooth speaker review

REVIEW – In my years of reviewing portable Bluetooth speakers, one of my all-time favorites is the Creative iRoar speaker. It’s becoming a cliché, but that little desktop monster sounds way bigger than its size. The iRoar is that rare Bluetooth speaker you can listen to all day without wishing you had something bigger or louder. It’s really good! But what if you just want a small speaker that can be used outdoors where it might be splashed with mud, dropped into a pool or just plain mistreated? Creative makes that too—the Creative MUVO Play portable and waterproof Bluetooth speaker for outdoors. Is the MUVO Play a mini iRoar or is it just a me-too speaker?

What is it?

The Creative MUVO Play is a small and lightweight (12.6 oz.) portable Bluetooth speaker that can be taken almost anywhere. It comes with two micro-speaker drivers with two dual bass passive radiators at each end. It’s available in black, orange or blue. It’s also waterproof. 

Specs

  • Dimensions: 3.14 x 3.14 x 4.33 inches
  • Weight: 12.6 oz
  • Power peak output: 20W
  • Battery type: 2000 mAh lithium-ion
  • Battery Life: Up to 10 hours at moderate volume
  • Charging: USB Type-C

In the box

  • Creative MUVO Play
  • USB Type-C Cable
  • Quick Start Guide

Design and features

Let’s get this out of the way: The Creative Muvo Play is one cheap portable Bluetooth speaker. For 40 bucks, you get a solidly-built and decent sounding speaker that feels like it will last, no matter how it’s treated. 

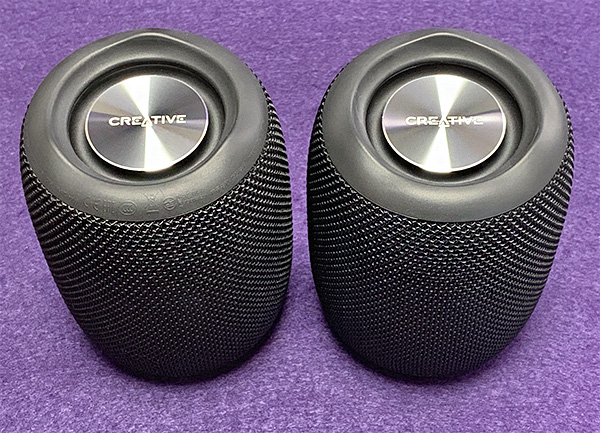
The MUVO Play is a bulbous shape and size similar to the Ultimate Ears Wonderboom speaker—but at half their price. I can’t say if it sounds as good because I don’t have a Wonderboom speaker to compare. However, even if the MUVO Play’s style is derivative, it’s a nicely designed speaker that looks more expensive than it is. It’s round shape and speaker placements provide almost 360° audio.

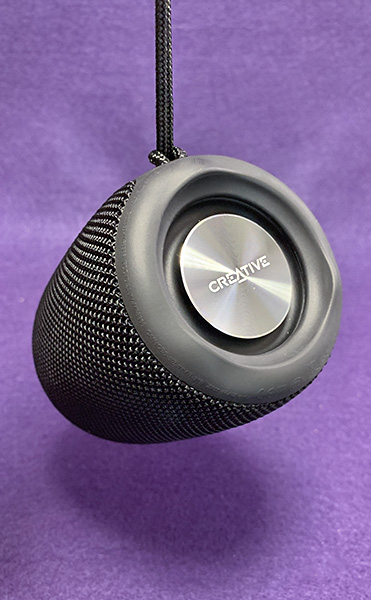
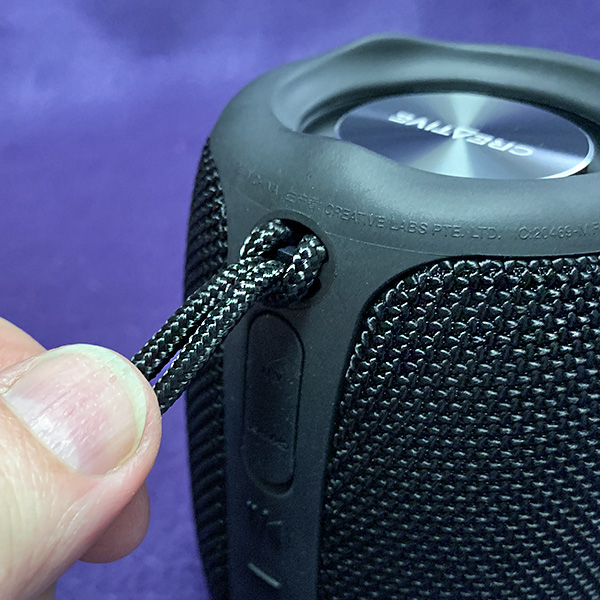
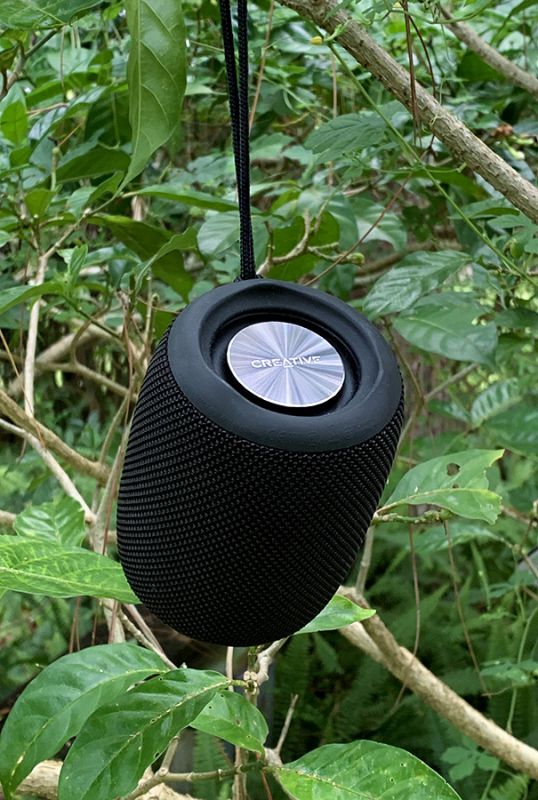
The small size makes the MUVO Play good for carrying to the beach, pool or picnic. Up to10-hour battery life means the music will be available for the entire event. There’s an embedded slot for an included lanyard for easy carrying, hanging from a nail or tree branch or wherever.

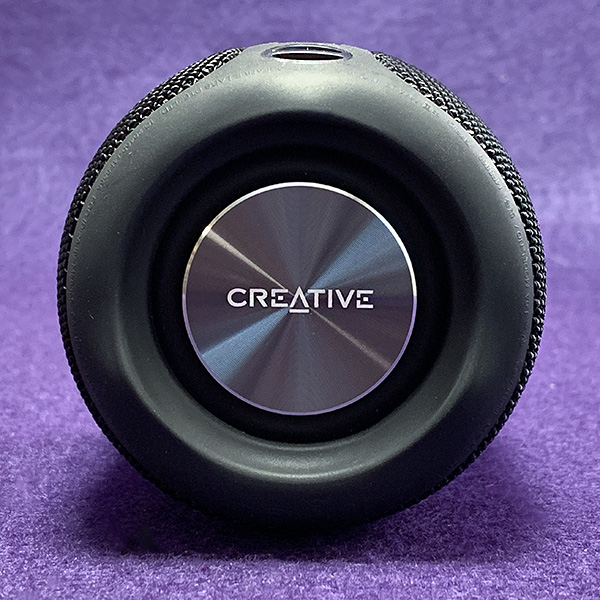
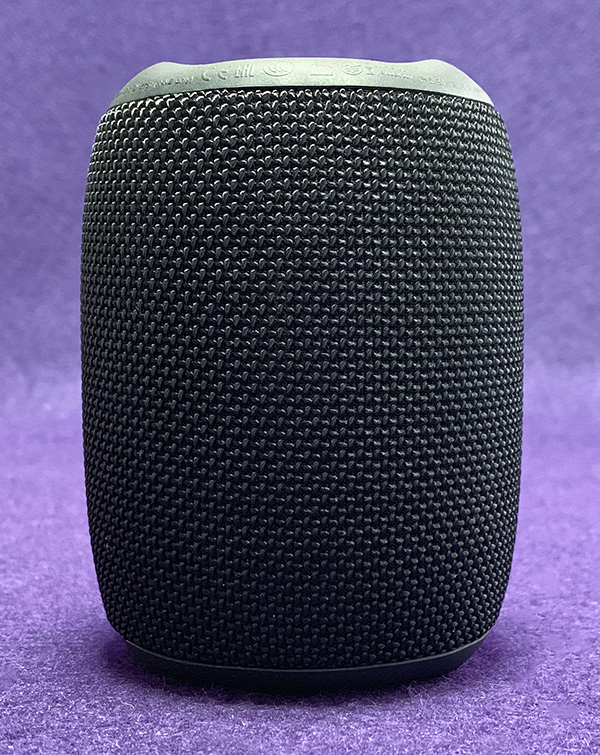
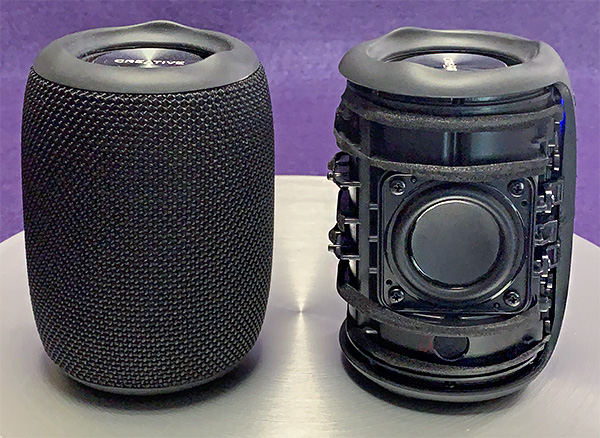
The MUVO Play is covered in a rugged speaker cloth material that’s capped off with rubberized, ridged ends. The ridges serve a necessary purpose of creating open gaps that allow bass to be clearly heard no matter which end is face-down. Rubber seals hold passive aluminum bass radiators that vibrate to the music. This design provides a bigger bass sound than expected with this size speaker. 

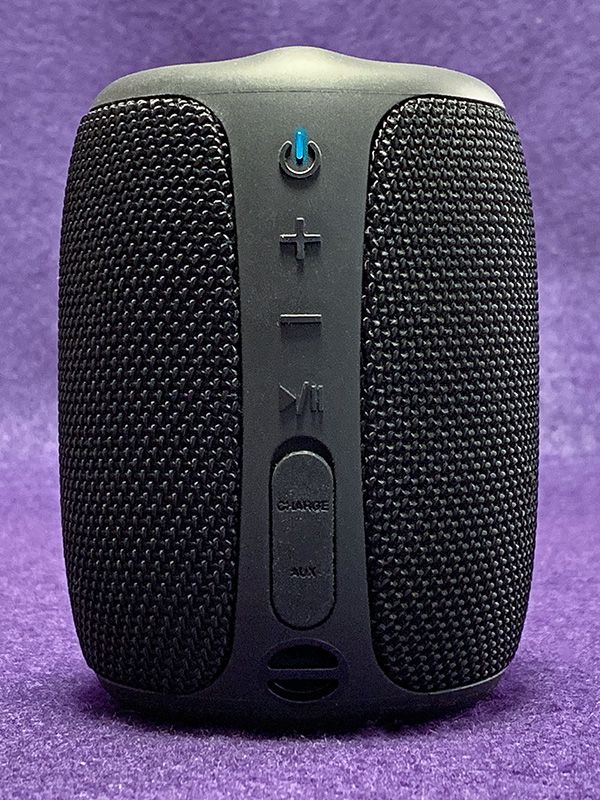
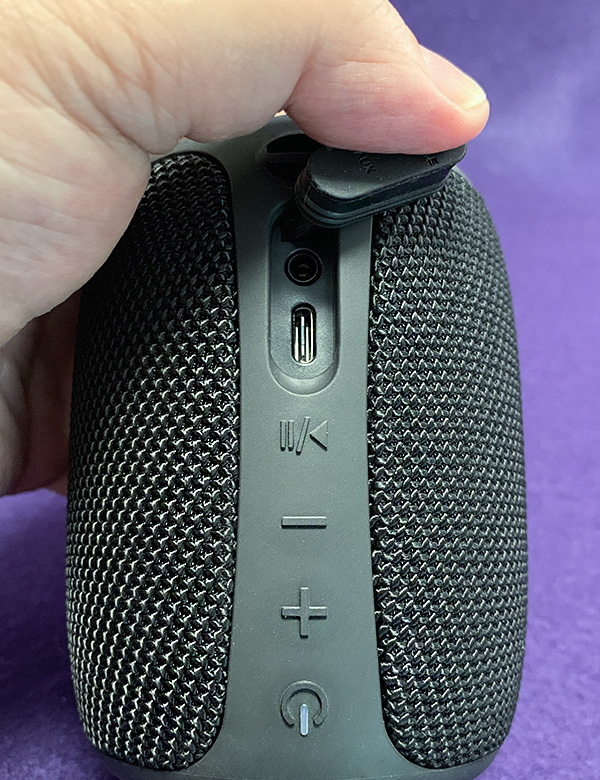
A vertical rubberized strip houses power, volume, and play/pause buttons as well as USB-C and AUX ports. Pressing and holding the power button turns on the speaker and begins the Bluetooth pairing process. Speaking of turning the MUVO Play on—no matter what the volume setting is, a LOUD musical tone plays to let you know the speaker has successfully turned on. This alone prevented me from continually using the speaker in my office because everyone could hear it when it was turned on. After emailing Creative’s speedy tech support about this issue, I was told that the power-on prompt could be disabled, but that this would also disable all prompts. So it’s all or nothing.

The MUVO Play has Bluetooth 5.0. Not bad when you consider some more expensive wireless speakers still use Bluetooth 4. Pairing was easy—my iPhone immediately connected and was ready to play. 


The MUVO Play has a certified waterproof rating of IPX7. This means that the speaker can be submerged in 3.3 ft of water for up to 30 minutes. Not that you have to worry about it being underwater for that long because it floats! 

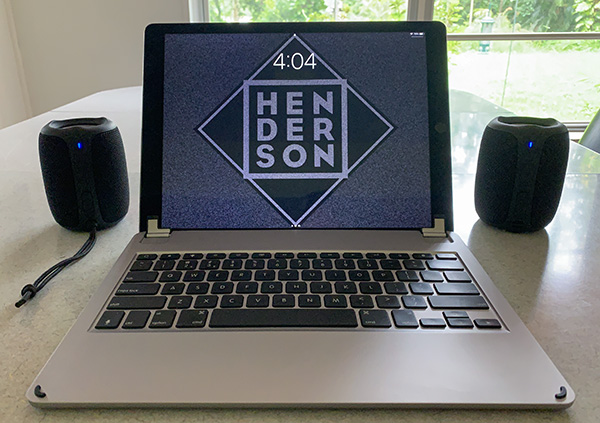
A cool feature with the MUVO Play is that you can pair two of them in true left/right stereo. While this can be done with other Bluetooth speakers, the price can be prohibitive because the cost doubles. Since the MUVO Play speakers are affordable, two can be paired for well under a hundred bucks. Interestingly, two speakers paired in stereo mode sound much better and fuller than two not paired together and playing independently.

I tried stereo mode on a couple of songs that feature extreme stereo; “Welcome to the Machine” by Pink Floyd and “Moving in Stereo” by The Cars. Stereo from both these songs was projected distinctly with good separation. Keep in mind that stereo mode works best if placed near the listener directly in front. You’re not going to get this kind of left/right effect if listening outdoors or walking around in a room. The audio will meld into a single source.

As good as stereo pairing is, it’s not without its quirks. Stereo mode appears to be in a left speaker (master) and right speaker (slave) arrangement. If I turn off the right speaker, the left maintains the Bluetooth connection. Once the right speaker is turned back on, stereo mode kicks back in—neat! However, if the left speaker is turned off, then the right speaker will lose the connection and not regain it unless it’s deleted from Bluetooth settings and then re-connected as a single speaker. So if you wish to take one speaker with you and they are paired in stereo, always take the left speaker and leave the right. 

Another quirk I discovered sis that if paired in stereo, turning off one speaker will turn off the other, But when one speaker is turned back on, the other one will not come on. Weird.

Creative provides an easy-to-follow video on how to pair in stereo mode. That’s a good thing because the icon-driven printed manual is as clear as mud explaining this procedure.

Overall audio quality is darn good for small speakers. Of course, I’ve head better, but that comes at a usually much higher price. But for what the MUVO Play was designed for—its small size, handy lanyard and decent audio should provide a fun and easy way to fit music into your daily routine—whether as a single speaker or paired with a second speaker for stereo.

What I like

  • Convenient size
  • True stereo pairing
  • Quality audio for the size
  • Good looking design
  • USB-C charging
  • Price

What I’d change

  • Ability to retain stereo pairing no matter how speakers are disconnected

Final Thoughts

I asked at the beginning of this review; “Has Creative created a mini-iRoar speaker?” Not really—the MUVO Play didn’t blow my socks off like the iRoar. But it’s not a “me-too” speaker either. The MUVO Play is a rare, affordable speaker that sounds good at a decent volume and pairs with a second MUVO Play speaker for true stereo that won’t bust your budget. That’s saying something.

Price: $39.99 each
Where to buy: Amazon
Source: The sample for this product was provided by Creative.

Filed in categories: Reviews

Tagged:

Creative MUVO Play portable and waterproof Bluetooth speaker review originally appeared on The Gadgeteer on August 24, 2019 at 9:00 am.

Note: If you are subscribed to this feed through FeedBurner, please switch to our native feed URL http://the-gadgeteer.com/feed/ in order to ensure continuous delivery.

LifeProof Squamish 20L Backpack review

REVIEW – Friends, let me introduce you to a LifeProof Squamish 20 Liter backpack. If you’re looking for a bag that has a place to store every little thing, this is absolutely going to be your jam. We’ve got a ton of features to talk about on this one, so be prepared for lots of pictures. To the review!

What is it?

It’s a multipurpose 20 liter daypack designed to bounce between the workplace and the weekend.

Hardware specs

  • 10.6” wide by 17.7” tall by 6.7” deep
  • 20 liter capacity
  • 1.9 pounds
  • Cordura body fabric

Design and features

The LifeProof Squamish is designed as a multitasker. It leans more towards the adventurous side with all of those external pockets and attachment points, but clean geometric shapes and modern texture patterns give it a look that isn’t out of place in the modern office. Pops of color & contrast in the trim elements add a bit of subtle fun to the profile. Here’s a shot of your Humble Reviewer geared up to get on the daily grind.
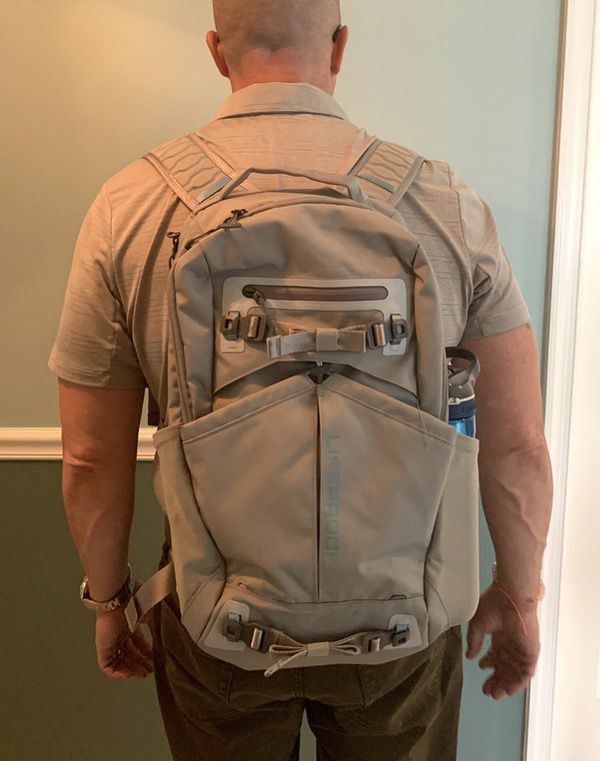
There’s a whole lot to cover in this bag. A whole lot. Let’s start with construction, then we’ll get into all of the features.

Construction and Materials

The construction on the Squamish is very good. You won’t find the heavyweight fabrics or burly hardware that you’ll see in some competitors, but it’s a solid build overall with lots of attention to detail. 

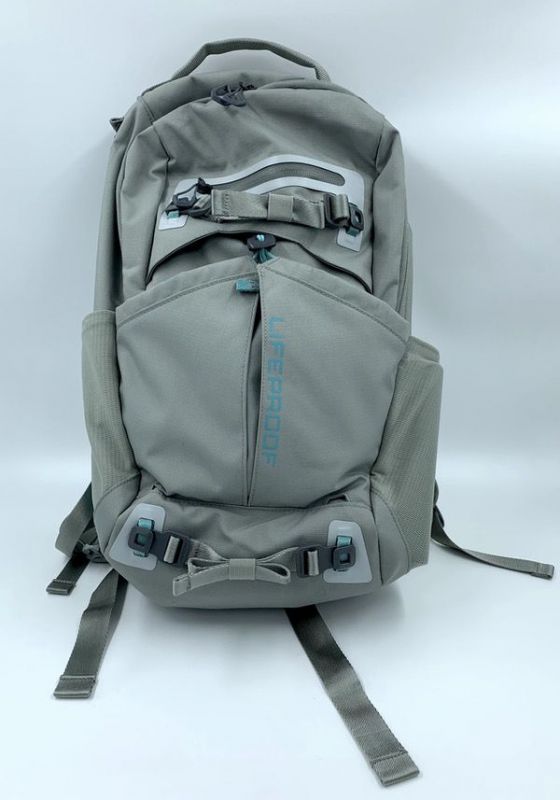
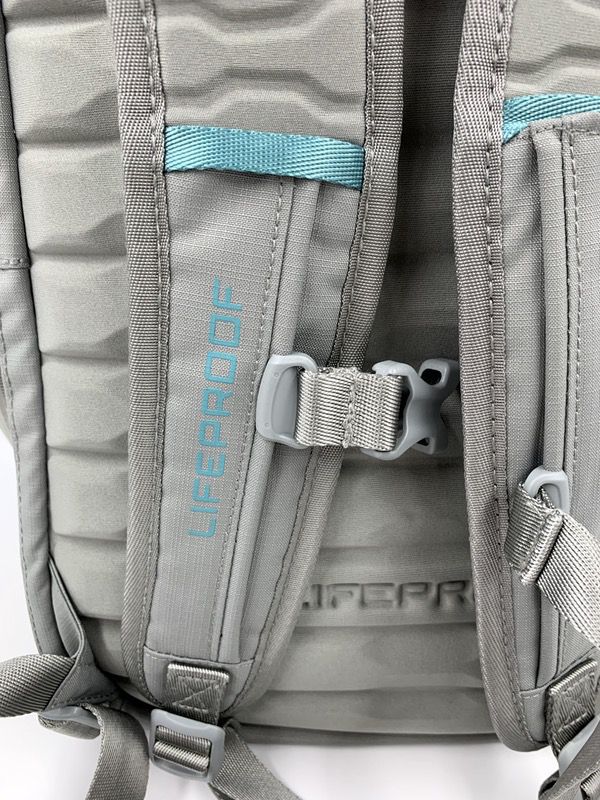
The finishing bits are outstanding. Check out the weave on the Cordura, and the subtle LifeProof logo on the back seam.
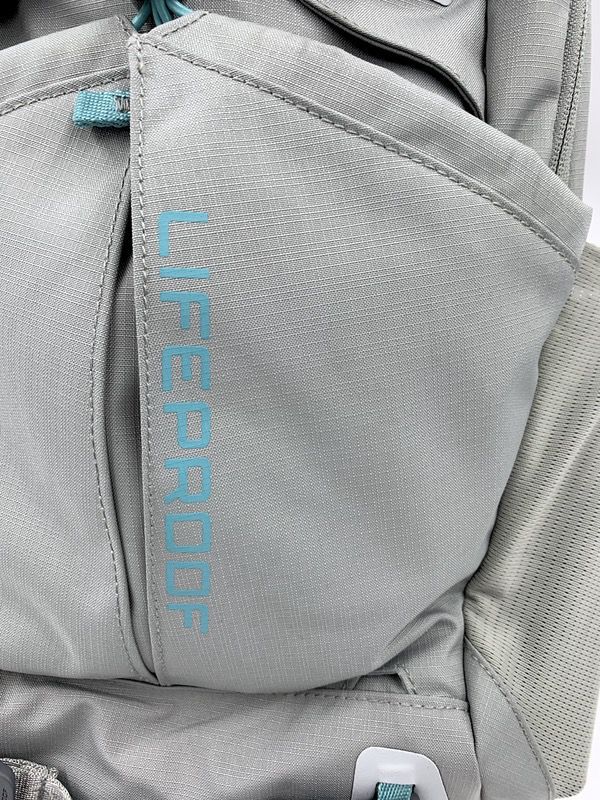
As you wander around the bag, you’ll find more evidence of the finishing elements in just about every corner. Check out the reinforced edges and seams. They didn’t skip an edge anywhere.
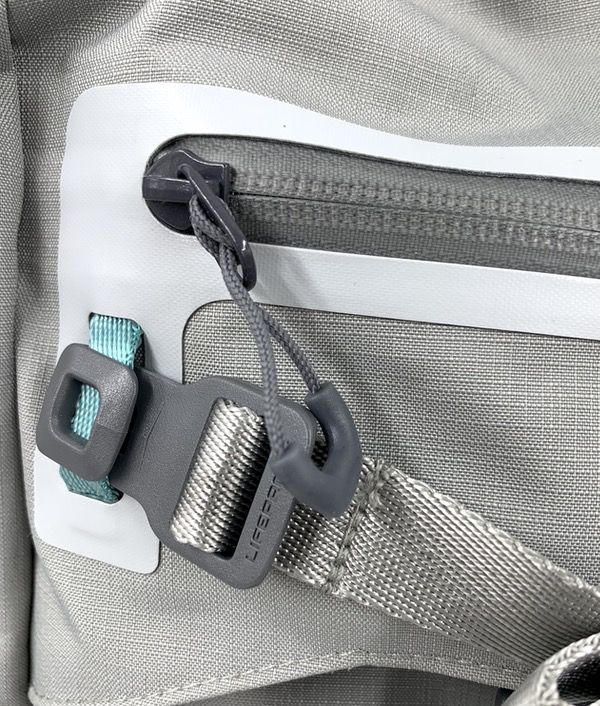
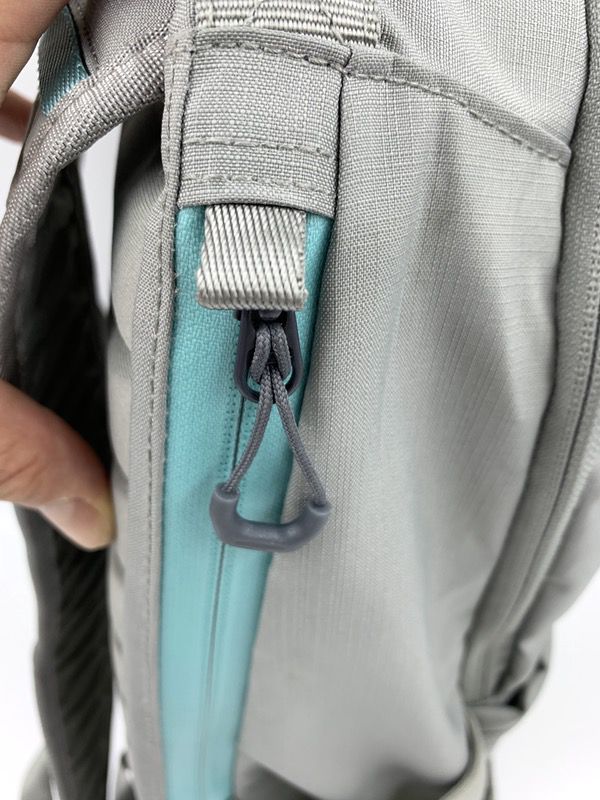
Zips aren’t YKK, but they are sealed for water protection. That’s a good thing. They also include some nice zipper pulls as a finishing touch.
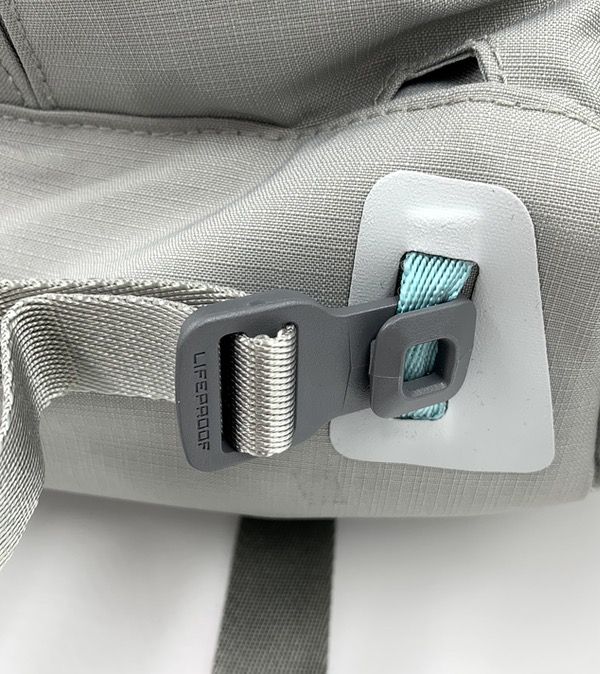
You’ll find extra reinforcements at all the stress points. We’ll see how these heat-bonded pads hold up over time, but I’m not seeing any issues so far.
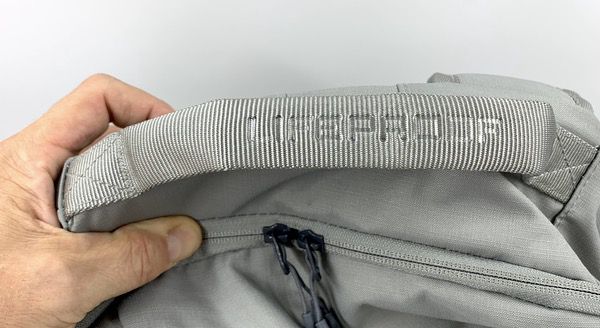
A thick padded grab handle shows extra attention to detail. Check out the cool little LifeProof logo imprinted on the grip.
You’ll also find a zipper garage on top of the sealed zip for your laptop access, to help keep your precious from getting soggy.
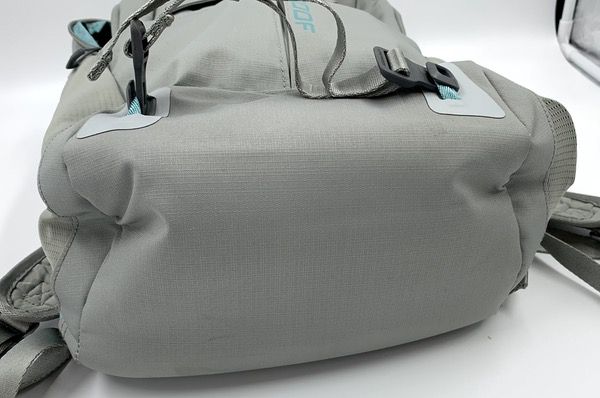
The padding throughout the bag is rather light to help keep the weight at a travel-friendly 1.9 pounds. But the padding is well-positioned in the right places. You’ve got a padded base to protect the goods when you plunk your bag down.
The back panel & shoulder straps use a really interesting material choice. It’s a pressed grid made from a firm foam that minimizes bulk and weight. The shoulder pads are thin but provide firm grip and comfortable wear.
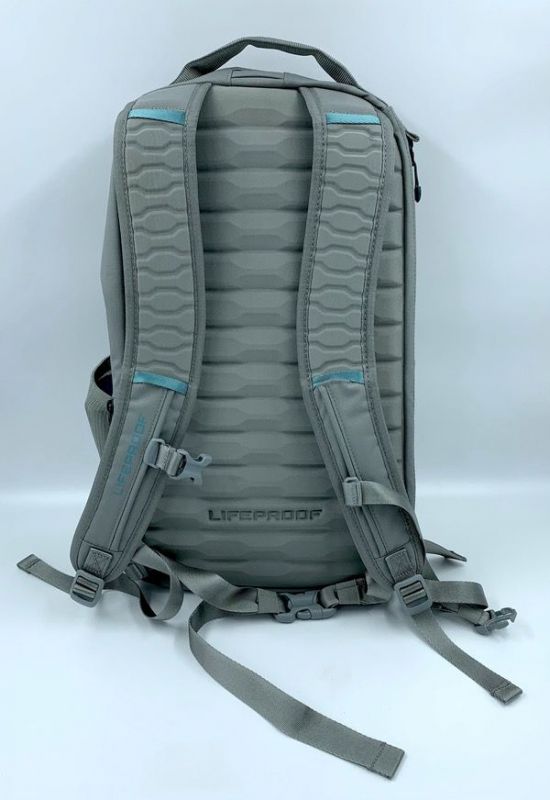
Here’s a closeup of that back pad. It’s thick and uses a different pattern to promote breathability. And while it flexes and rolls to match your back shape, it provides surprisingly effective protection for your laptop. It’s a winner.
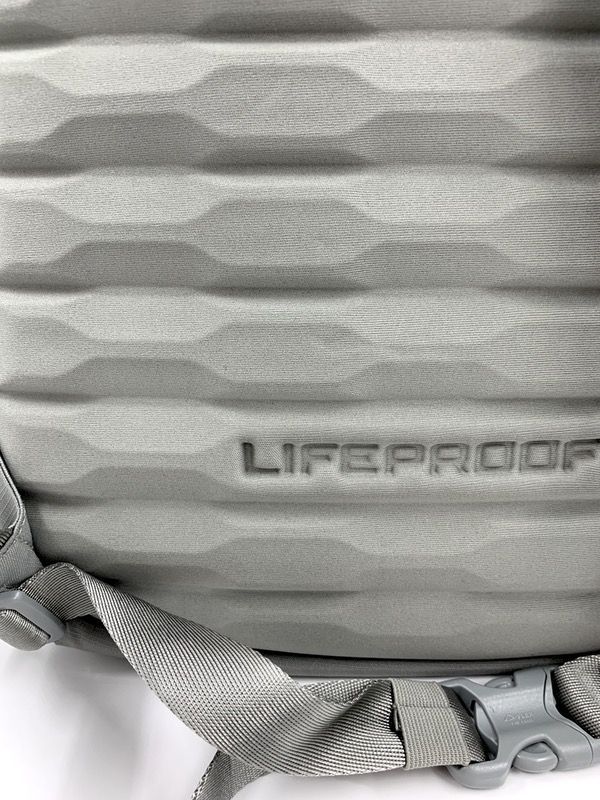
Overall I am really pleased with the construction. It’s not a rolling tank like a Tom Bihn or Mission Workshop bag, but I’m not concerned about long-term durability. I’d put the build quality on par with the likes of Timbuk2 stuff. That’s not a bad thing.

Exterior Layout and Features

The Squamish is a classic box shaped top loader with access to the main compartment from a pair of zips that travel about 1/3 of the way down the front face. We’ll get there eventually, but we have to start with the external organization. This bag is made to keep all of your essential ready for quick access. 

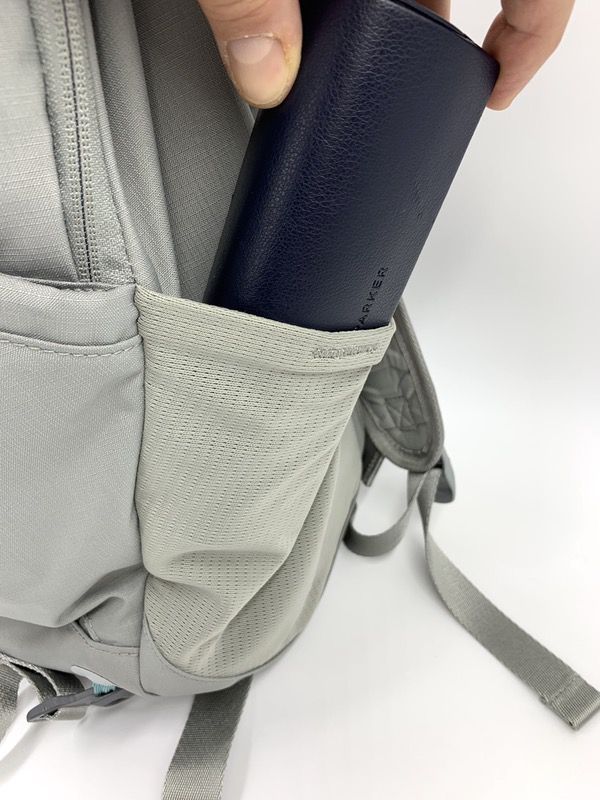
You’ll find a pocket on either side that will flex to take hydration bottles, a small umbrella, and similar tall stuff. The whole pocket is elastic to take large items, and has a reinforced top edge to keep from fraying. I really like having two pockets like this, as I usually run with a 24 ounce Yeti on one side and my sunglass case on the other. 
Your workhorse storage space is a huge open pocket on the front face of the bag. It’s super-convenient for tossing in stuff on the run, and the generous 8″ by 8″ size gives you all kinds of flexibility for using this space.
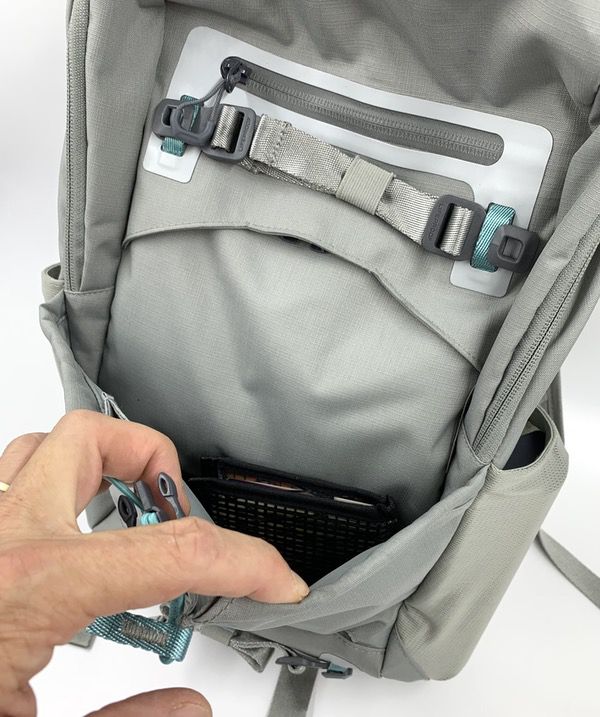
Here’s a shot of me rolling to work with that pocket loaded up with healthy snacks. I think I could get a small football in there. Or maybe a pair of sneakers… definitely a pair of flip-flops for the beach.

Many bags like this present a water problem, but this design cinches with a clip that hides under a hood on the front face to help keep the water out. It also helps to bisect the space if you have a tall item (like a water bottle) to keep it from flopping around. Should the wet get in, the pocket also has a tiny drain hole at the bottom on each side. You can pull that chord to snug things up.
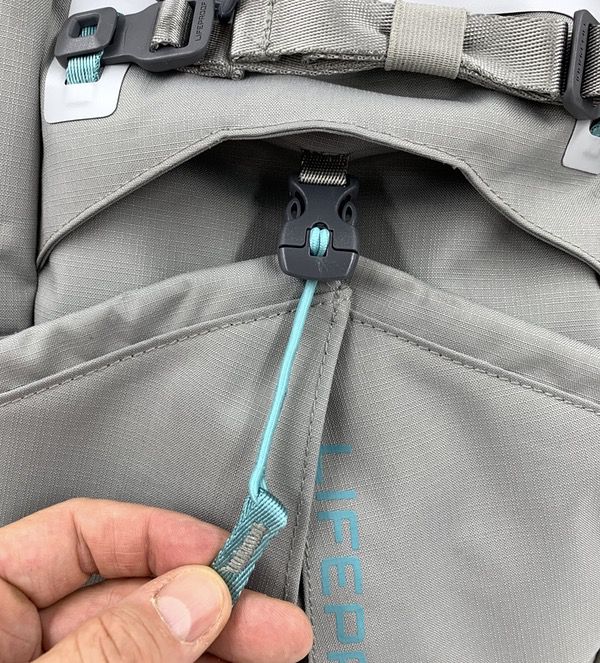
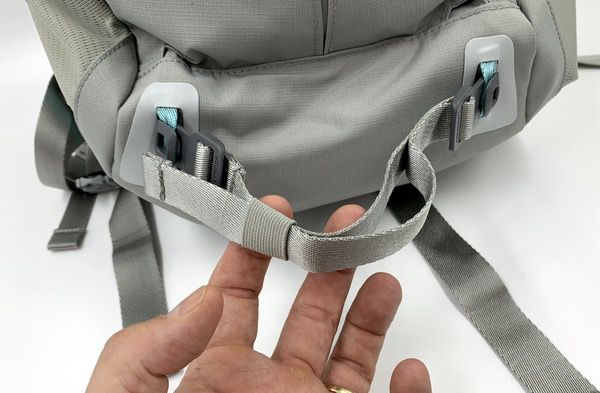
The LifeProof Squamish also provides a pair of anchored tie-down straps mounted on the front face to secure additional gear. These can be removed, or you can use the elastic bands to lock down all that extra strapping so that they stay out of the way when not in use. There’s one at the top and bottom of the front face (bottom shown here) to secure extra-long items like a big umbrella, a rolled blanket, or a tripod.
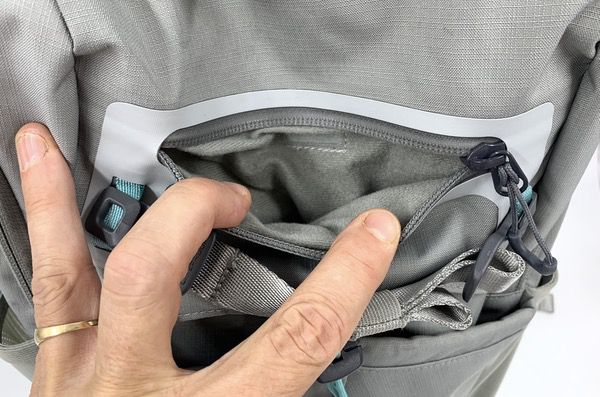
Now that your big stuff is secured, we’ll move on to the stash pockets. At the top of the front face is a soft-lined pocket accessed by a zipper where you can stash your phone or little doodads. It’s generously sized at roughly 8″ by 6″. It’s also got a pass-through port to the inner pocket if you want to rig up a charger for your phone. The zipper is built with a rubberized seal to keep the elements out.
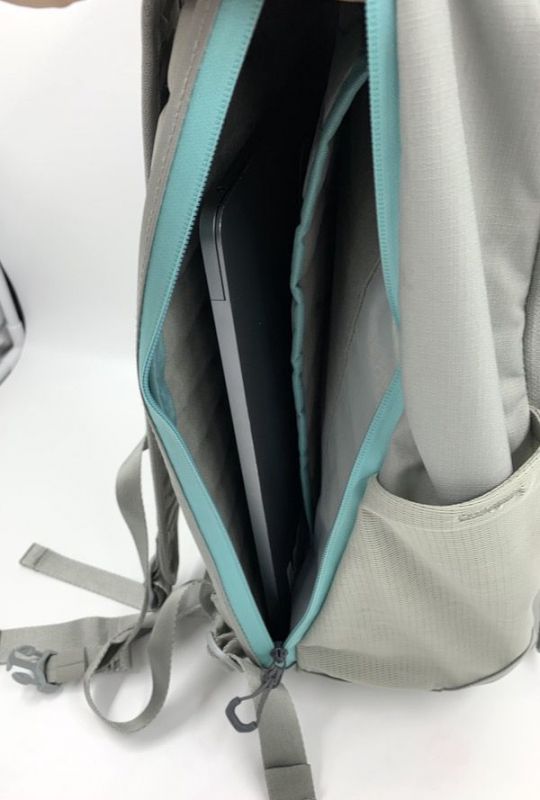
Your laptop rides in a padded space on the back face of the bag, accessed by another sealed zip that runs the height of the bag. You’ll see it here in the side profile shot… that blue strip. That’s the thing.

This is basically an open space, with a separate sleeve for your tablet. The specs recommend a 13” laptop, but it is a huge space (10″ by 17″) that could probably handle a thinner 15″ computer like a MacBook. My 13″ MacBook Pro swims in this space with room to spare for a notebook and more. There is some light padding in the pocket in addition to the back panel and base.
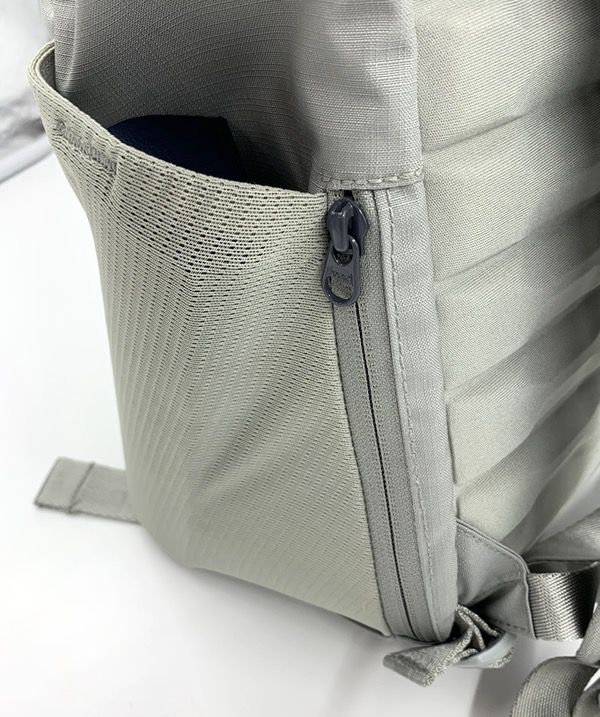
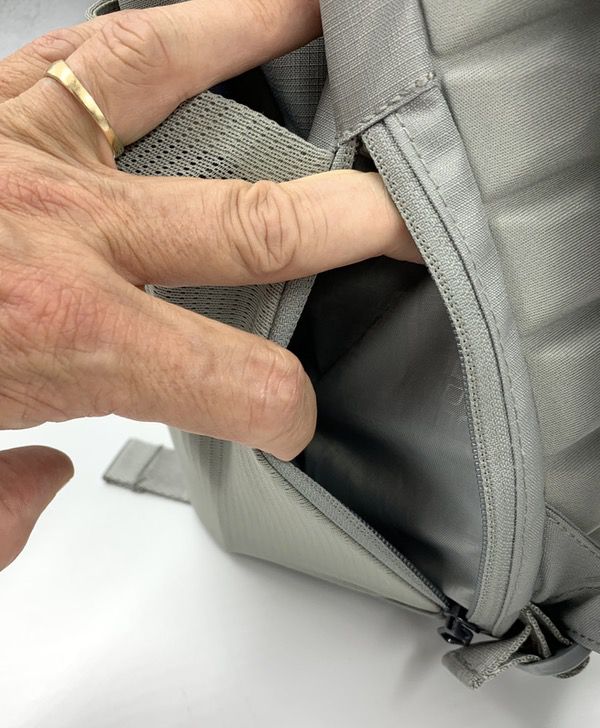
And just when you thought you were done on the exterior, you’ll find a secret stash pocket on the opposite side! This space is sized to fit a wallet or smartphone, which snuggles in behind the water bottle pocket on that side. While the zippers sport stylized pulls throughout the exterior, this one doesn’t to keep it sneaky and unobtrusive for your valuable bits.
Interior Layout and Features

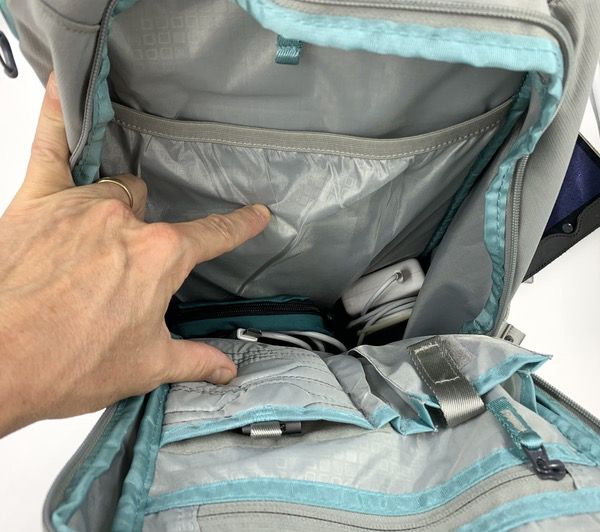
Opening the main compartment, you’ll find an open space that runs the height and width of the bag with about 5″ of depth. There’s plenty of room in there for all the things you don’t need to get to in a hurry.
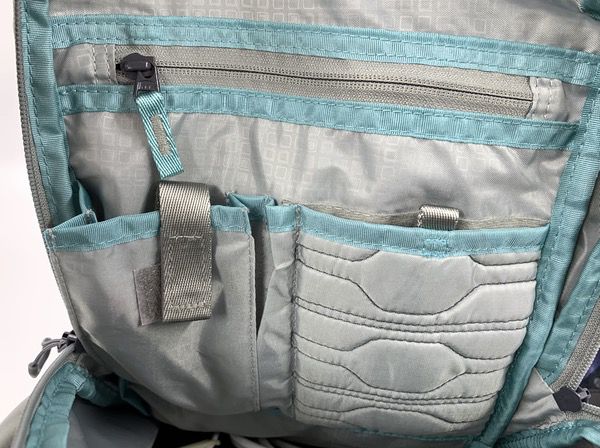
The rear of the front panel sports a three-pocket organizer. There’s a deep (7″ by 7″) zipped pocket with a key leash, a bellowed pocket (3″ by 5.5″) that closes with a velcro strap, and a quilted soft-lined pocket sized for delicate bits (4″ by 5.5″). These pockets do a nice job of staying out of the way when you’re rummaging around for bigger stuff in the main compartment.
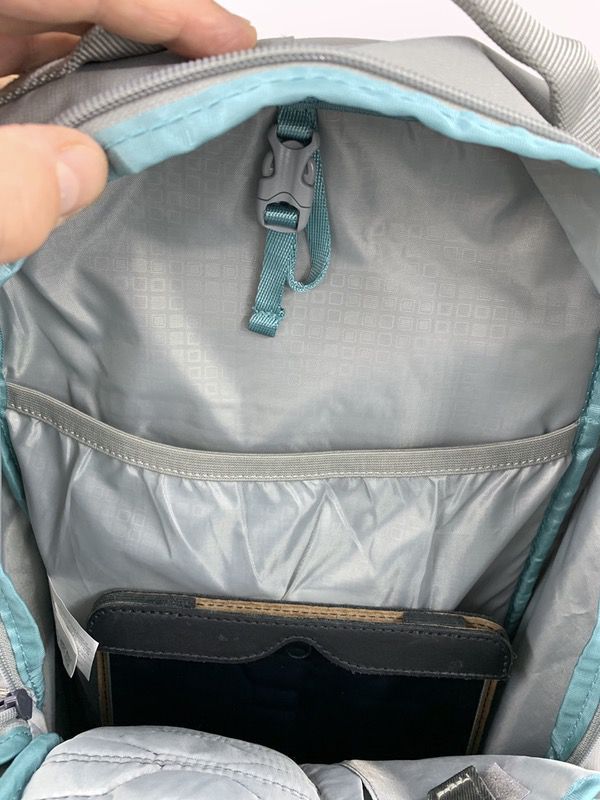
There’s a drop pocket on the back face of the bag with an elastic trim, perfect for documents or a tablet. You can also stash a 3L hydration reservoir in there, and feed the tube up through a port at the top of the bag that tucks into a loop on the shoulder strap (neat!) You’ll also find another clipped leash that you could use to hang accessories inside the bag, or your hydration reservoir.
By my count, that all adds up to 13 different pockets (including the main chamber) and four additional attachment points to organize all of your gear. Even the obsessive organizer will be hard pressed to run out of pockets in this bag.

The Carry Harness

We talked a bit about the back panel and shoulder strap materials. It’s a really good rig that is lightweight, comfortable, and doesn’t fight you with super-bulky strapping. This bag is supremely comfortable for all day carry.

You’ll find a waist strap that’s not removable, but does include those elastic bands to wrangle the extra strappage so that it’s out of your way. You’ll see it at the bottom of the pic below.

A stabilizer strap helps to keep things tight when you are on the run. And see those ribs that it is clipped to? You can adjust to the position of the strap to match your body type by sliding the clips up and down.
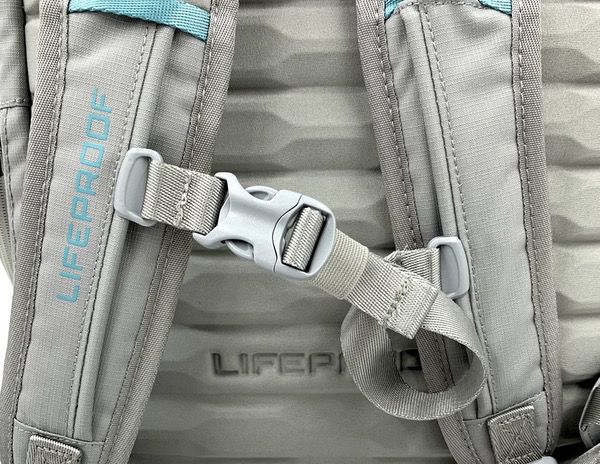
Finally, you get a padded carry handle which is always appreciated. Sometimes you just have to grab your bag and run.

Performance

If you’ve made it this far, you now have a pretty good sense for the breadth and depth of features in the LifeProof Squamish backpack. The good news is that, while we have a ton of stuff going on here, thoughtful design & execution makes all of those features work well together in an extremely usable package.

From a usability perspective, the layout is a treat to work with. Sometimes all those spaces get crowded in feature-rich bags like this, and you find yourself fumbling to retrieve things from one pocket or another. Not here. All the pockets are generously sized and their access points easy to get to. You can find a comfortable place for all of your goods, making the Squamish an easy bag to live with on a daily basis. Commuters will like this bag a lot for all of those quick-access areas.

This bag is great for sightseeing, hiking, and weekend adventures. The back panel design is excellent for breathability and flexibility, and the shoulder straps have just the right amount of grip & padding for comfort without being too bulky. Coupled with the thinner Cordura used throughout the build, you can lug this bag all day long without any noticeable back/shoulder strain. Those extra pockets will come in handy while you’re out and about, and you can strap in a hydration bladder for hiking. The 20 Liter capacity is perfect for a daybag, but there’s also a 30 Liter version that I think would work very well as an overnighter.

There are pros and cons to the laptop space. On one hand, it doesn’t get in your way if you’re packing for a sightseeing trip or a day at the beach. On the flip side, however, I would like to see a little more structured laptop protection. That big ol’ pocket is very lightly padded, and my 13″ MacBook does bounce around in there. The back panel is very good, but I’d like to see some more impact protection on the perimeters to prevent damage in a hard drop. Another note about the laptop area that I found out the hard way: your laptop slides very easily out of that space. I picked up the bag one day last week and forgot to zip the compartment, and my MacBook slid right out on to the floor. Given the size of the compartment, they could shorten that zipper by about 4″ to prevent accidental spills.

What I like

  • Excellent pocketing and organization for all the things.
  • Extremely comfortable for all-day carry.
  • A serious multitasker.
  • Outstanding attention to detail.

What needs to be improved

  • Laptop compartment could be improved for better protection.

Final thoughts

The LifeProof Squamish is a great bag for active pursuits that smoothes out the edges *just* enough to take to the office. It’s an easy bag to like and live with on a daily basis, no matter where you’re going. You can purchase it in a black or red colorway if that better suits your style, and there’s a 30 Liter version if you want to take it as an overnight one-bag solution. If you’re looking for a solid multitasker, this bag is a champ.

Price: $139.99
Where to buy: Buy at the LifeProof Squamish product page.
Source: The sample of this product was provided by LifeProof.

Filed in categories: Reviews

Tagged:

LifeProof Squamish 20L Backpack review originally appeared on The Gadgeteer on August 23, 2019 at 11:00 am.

Note: If you are subscribed to this feed through FeedBurner, please switch to our native feed URL http://the-gadgeteer.com/feed/ in order to ensure continuous delivery.
Awair Glow C air quality monitor and smart plug review


REVIEW – Each day when I walk back and forth to take the railroad to and from work, it seems that there is a new building being constructed in the city. With all of the construction and materials and digging and trucks going back an forth, pollution seems to be at an all-time high. Since just about everyone in my family suffers at some level from allergies, any device that can help me to keep pollutants to a minimum in my home is of interest to me. Lets checkout the Awair Glow C to “C” if it gets an “A” or an “F”.
What is it?

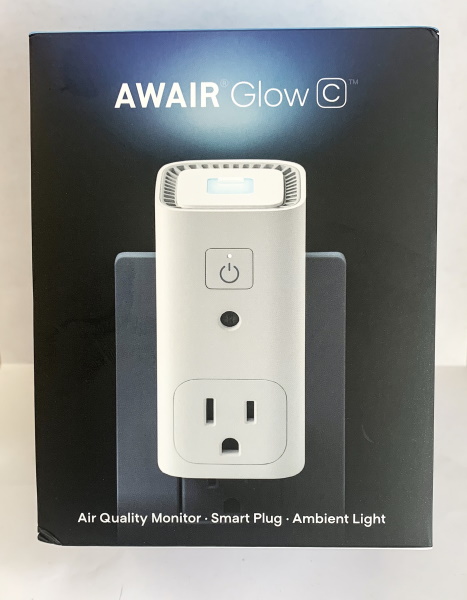
The Awair Glow C monitors chemicals (VOCs), temperature, and humidity levels and provides real-time information on your air quality in the room it is installed in. When you plug in a “non-smart” humidifier or air purifier or fan into its built-in smart plug, it automatically turns the plugged-in device on/off to maintain the air quality in your space.

What’s in the box


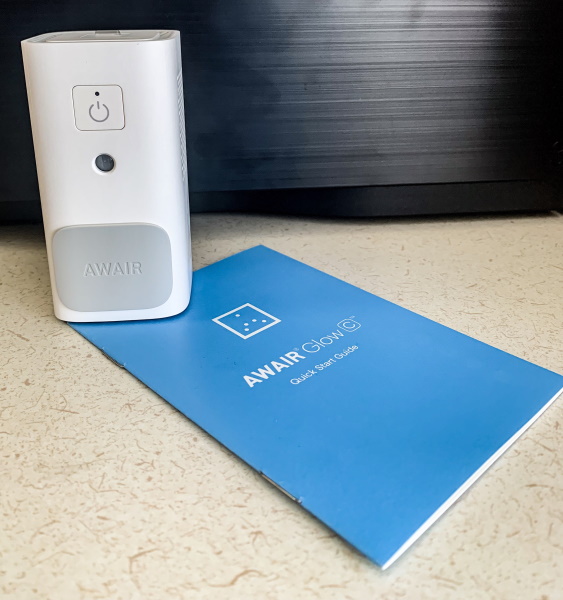
1 x Awair Glow C
1 x Quick Start Guide

Design and features

Features

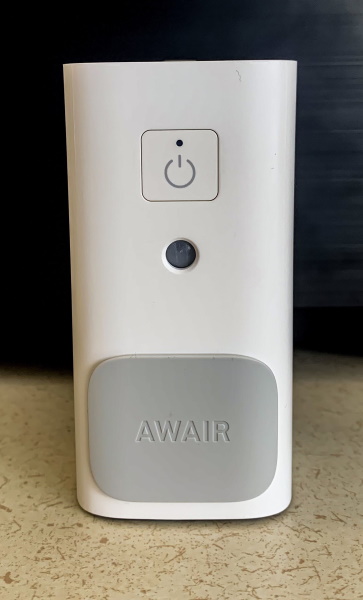
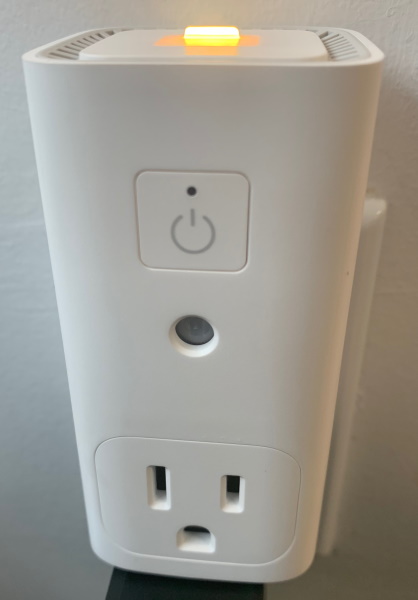
On the front of the Awair Glow C, there is the on/off touch switch, the sensor below the switch and the pass-through AC smart outlet.


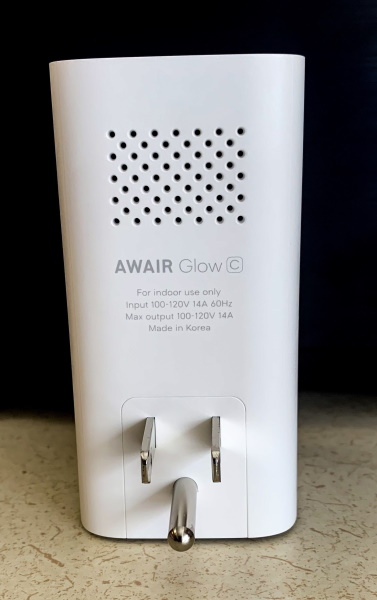
On the back of the Awair, there is a vent and a 3-prong AC plug.

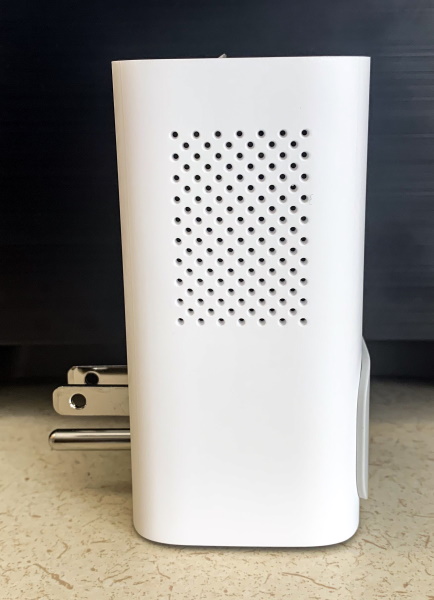
There is a vent on each side of the Awair.

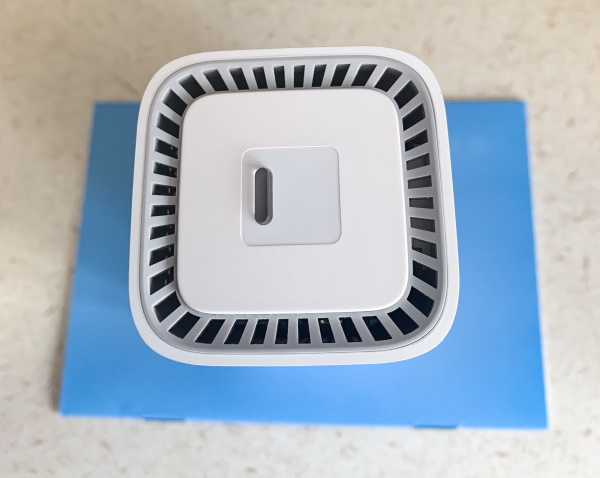
On top of the Awair, there is a vent and the status LED.

Performance

This device is very easy to use. it is plug and play, and it begins to work as soon as you plug it into the AC outlet. It has a LED on top that uses colors to indicate the air quality level. It also can be controlled via smart devices.

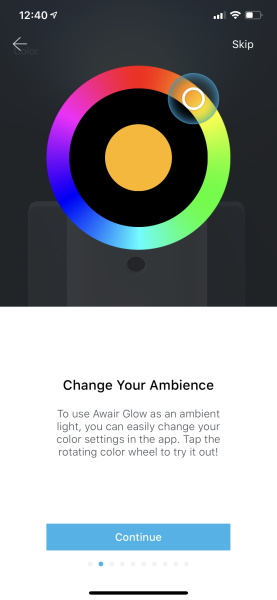
The LED can also be used as a night light and the color can be customized via the app.


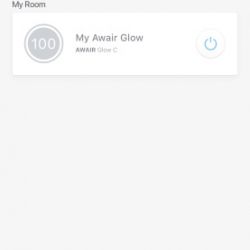
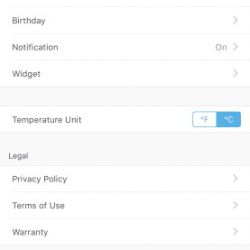
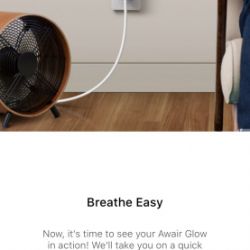
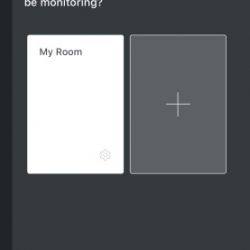
The device has an app that allows you to set up an account and to manage the functionality. It helps you to understand your air quality and track improvements in real-time. You also get notifications and tips via the app that include air quality and temperature updates, etc. One issue I had with the app was the amount and type of personal information it requests. In a time when data security is a big deal, information like date of birth and gender, etc should not be a part of the process regardless of whether it is voluntary or not. Here are some screenshots from the app:


What I like

  • The compact size
  • The build quality
  • The pass-through AC on/off functionality

What I’d change

  • Remove the personal data information collection part of the app

Final thoughts

The Awair Glow C is a nice device that in some cases can be a key component for managing air pollutants especially for folks like me and my family who suffer a lot from allergies. However, it struggles to fit into my specific home environment because all of my humidifiers and air purifiers are smart devices, and my touch fans cannot be controlled just from the presence of AC power. The auto-triggered smart AC through-plug only works with non-smart devices that likely have hardware on/off switches that can be left on, or devices that can be triggered by the presence of AC power. Since it has a manual on/off switch for the AC outlet, it can still serve as a through-plug to extend access to the AC wall outlet that it occupies. I do suspect that for most consumers, the decision to purchase this device will be based on the capabilities of their existing humidifiers/air purifiers/fans. However, I do not want to overshadow the value of the useful information, notifications and alerts that this device provides even when used as a stand alone device. It also works great as a night light. In my opinion, there is enough overall value in it to make it quite useful.

Price: $79
Where to buy: Awair website and Amazon
Source: The sample for this review was provided by Awair.

Filed in categories: Reviews

Tagged: , ,

Awair Glow C air quality monitor and smart plug review originally appeared on The Gadgeteer on August 23, 2019 at 9:00 am.

Note: If you are subscribed to this feed through FeedBurner, please switch to our native feed URL http://the-gadgeteer.com/feed/ in order to ensure continuous delivery.