Yi Home Camera 3 review

REVIEW – If you believe what you see on TV, cameras are everywhere.  The police dramas regularly use surveillance video to get the bad guys.  We have also seen all the fun video on Facebook and Youtube from home cameras, catching the family pets, or the family themselves, doing cute, funny, and even dangerous things.

Yi (pronounced “Yee”) Technologies has a new entry in their line of connected cameras with the Home Camera 3.  Should you get one to capture your own set of internet-worthy videos? Let’s take a look.

What is it?

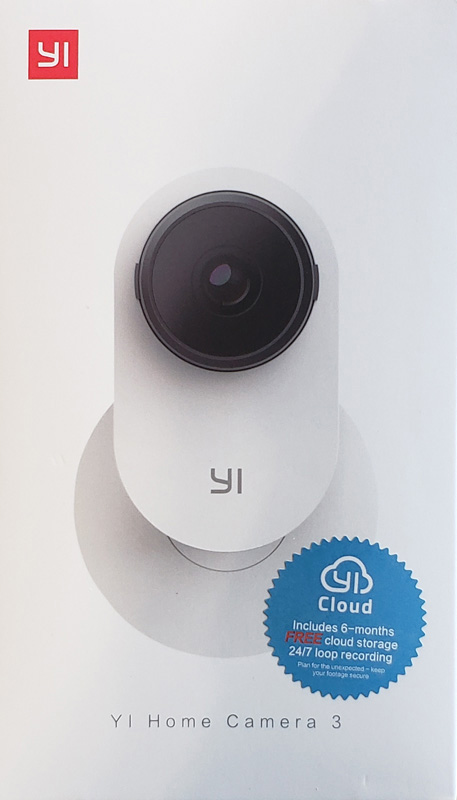
The Home Camera 3 (I will just use “camera” from here on) is a standalone 1080p Wi-Fi camera.  Yi also includes six months of cloud storage with subscription options available after that.

What’s in the box?
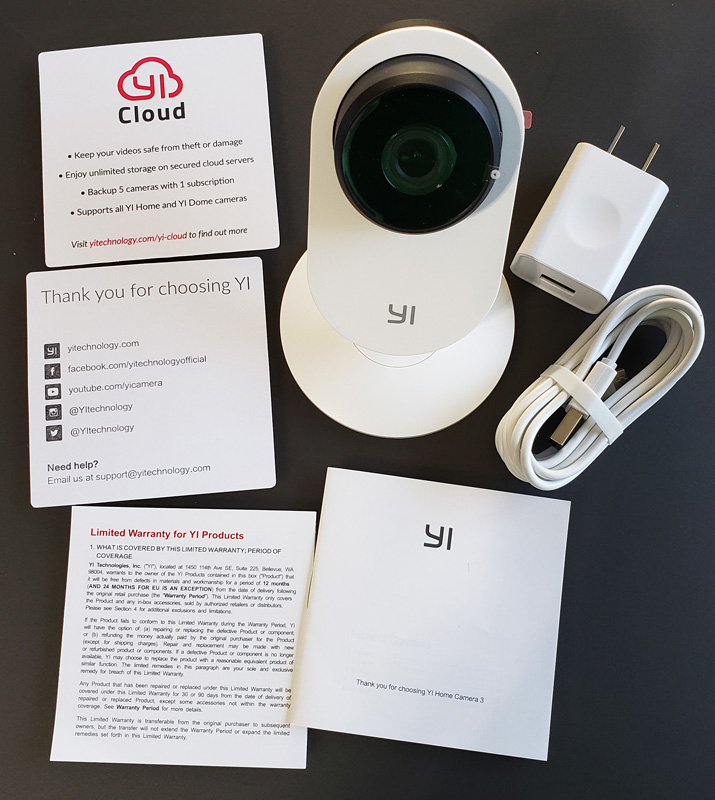
  • Home Camera 3
  • USB-A to micro USB power cable
  • USB power adapter
  • Cloud storage info card
  • Yi Technology contact card
  • Limited warranty
  • Instructions

Hardware specs

  • Dimensions: 4.3 x 5.9 x 4.3 inches
  • Weight: 9.6  oz
  • Resolution: 1080p (1920×1080)
  • Lens view: 107 degrees
  • Audio: mic/speaker full duplex
  • Wi-FI: 802.11 bgn
  • Wireless security: WEP/WPA/WPA2
  • Power: DC 5v/1A Micro USB
  • Video compression: h.264

Design and features

The camera is nicely styled and can blend into most decors.  I opted to put the camera in my garage. Here it is on a shelf by the entry door, pointing toward the garage door.
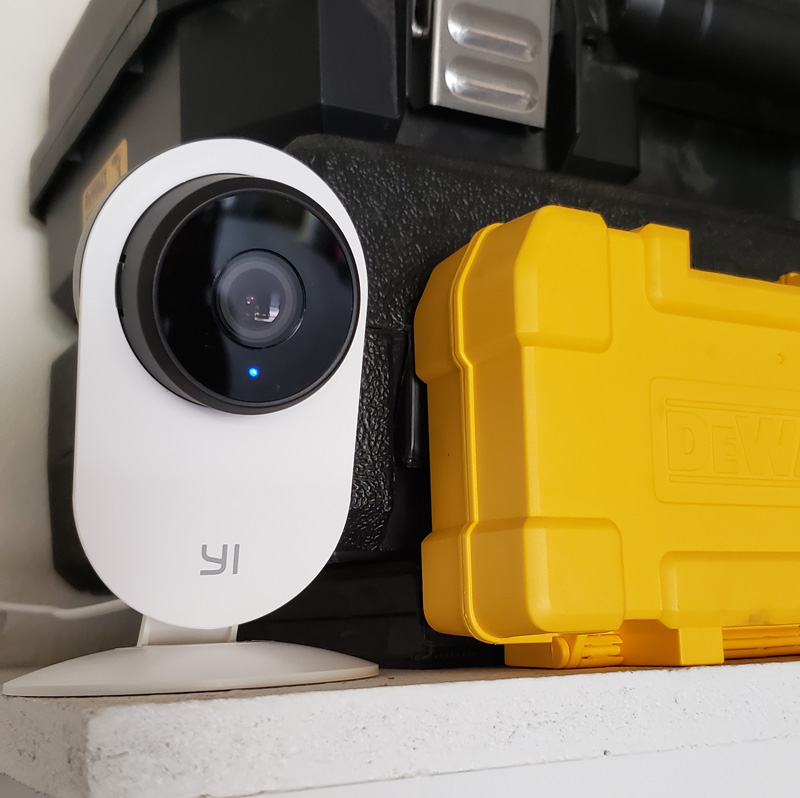
For reference, that yellow case is a set of screwdriver bits. At just over four inches tall, the camera fits almost anywhere. You can also see the small blue LED below the lens, indicating the camera is online.

The camera has a rotating mount, allowing you to rotate the camera a full 180 degrees, from flat, pointing up, to flat, pointing down, relative to the base.
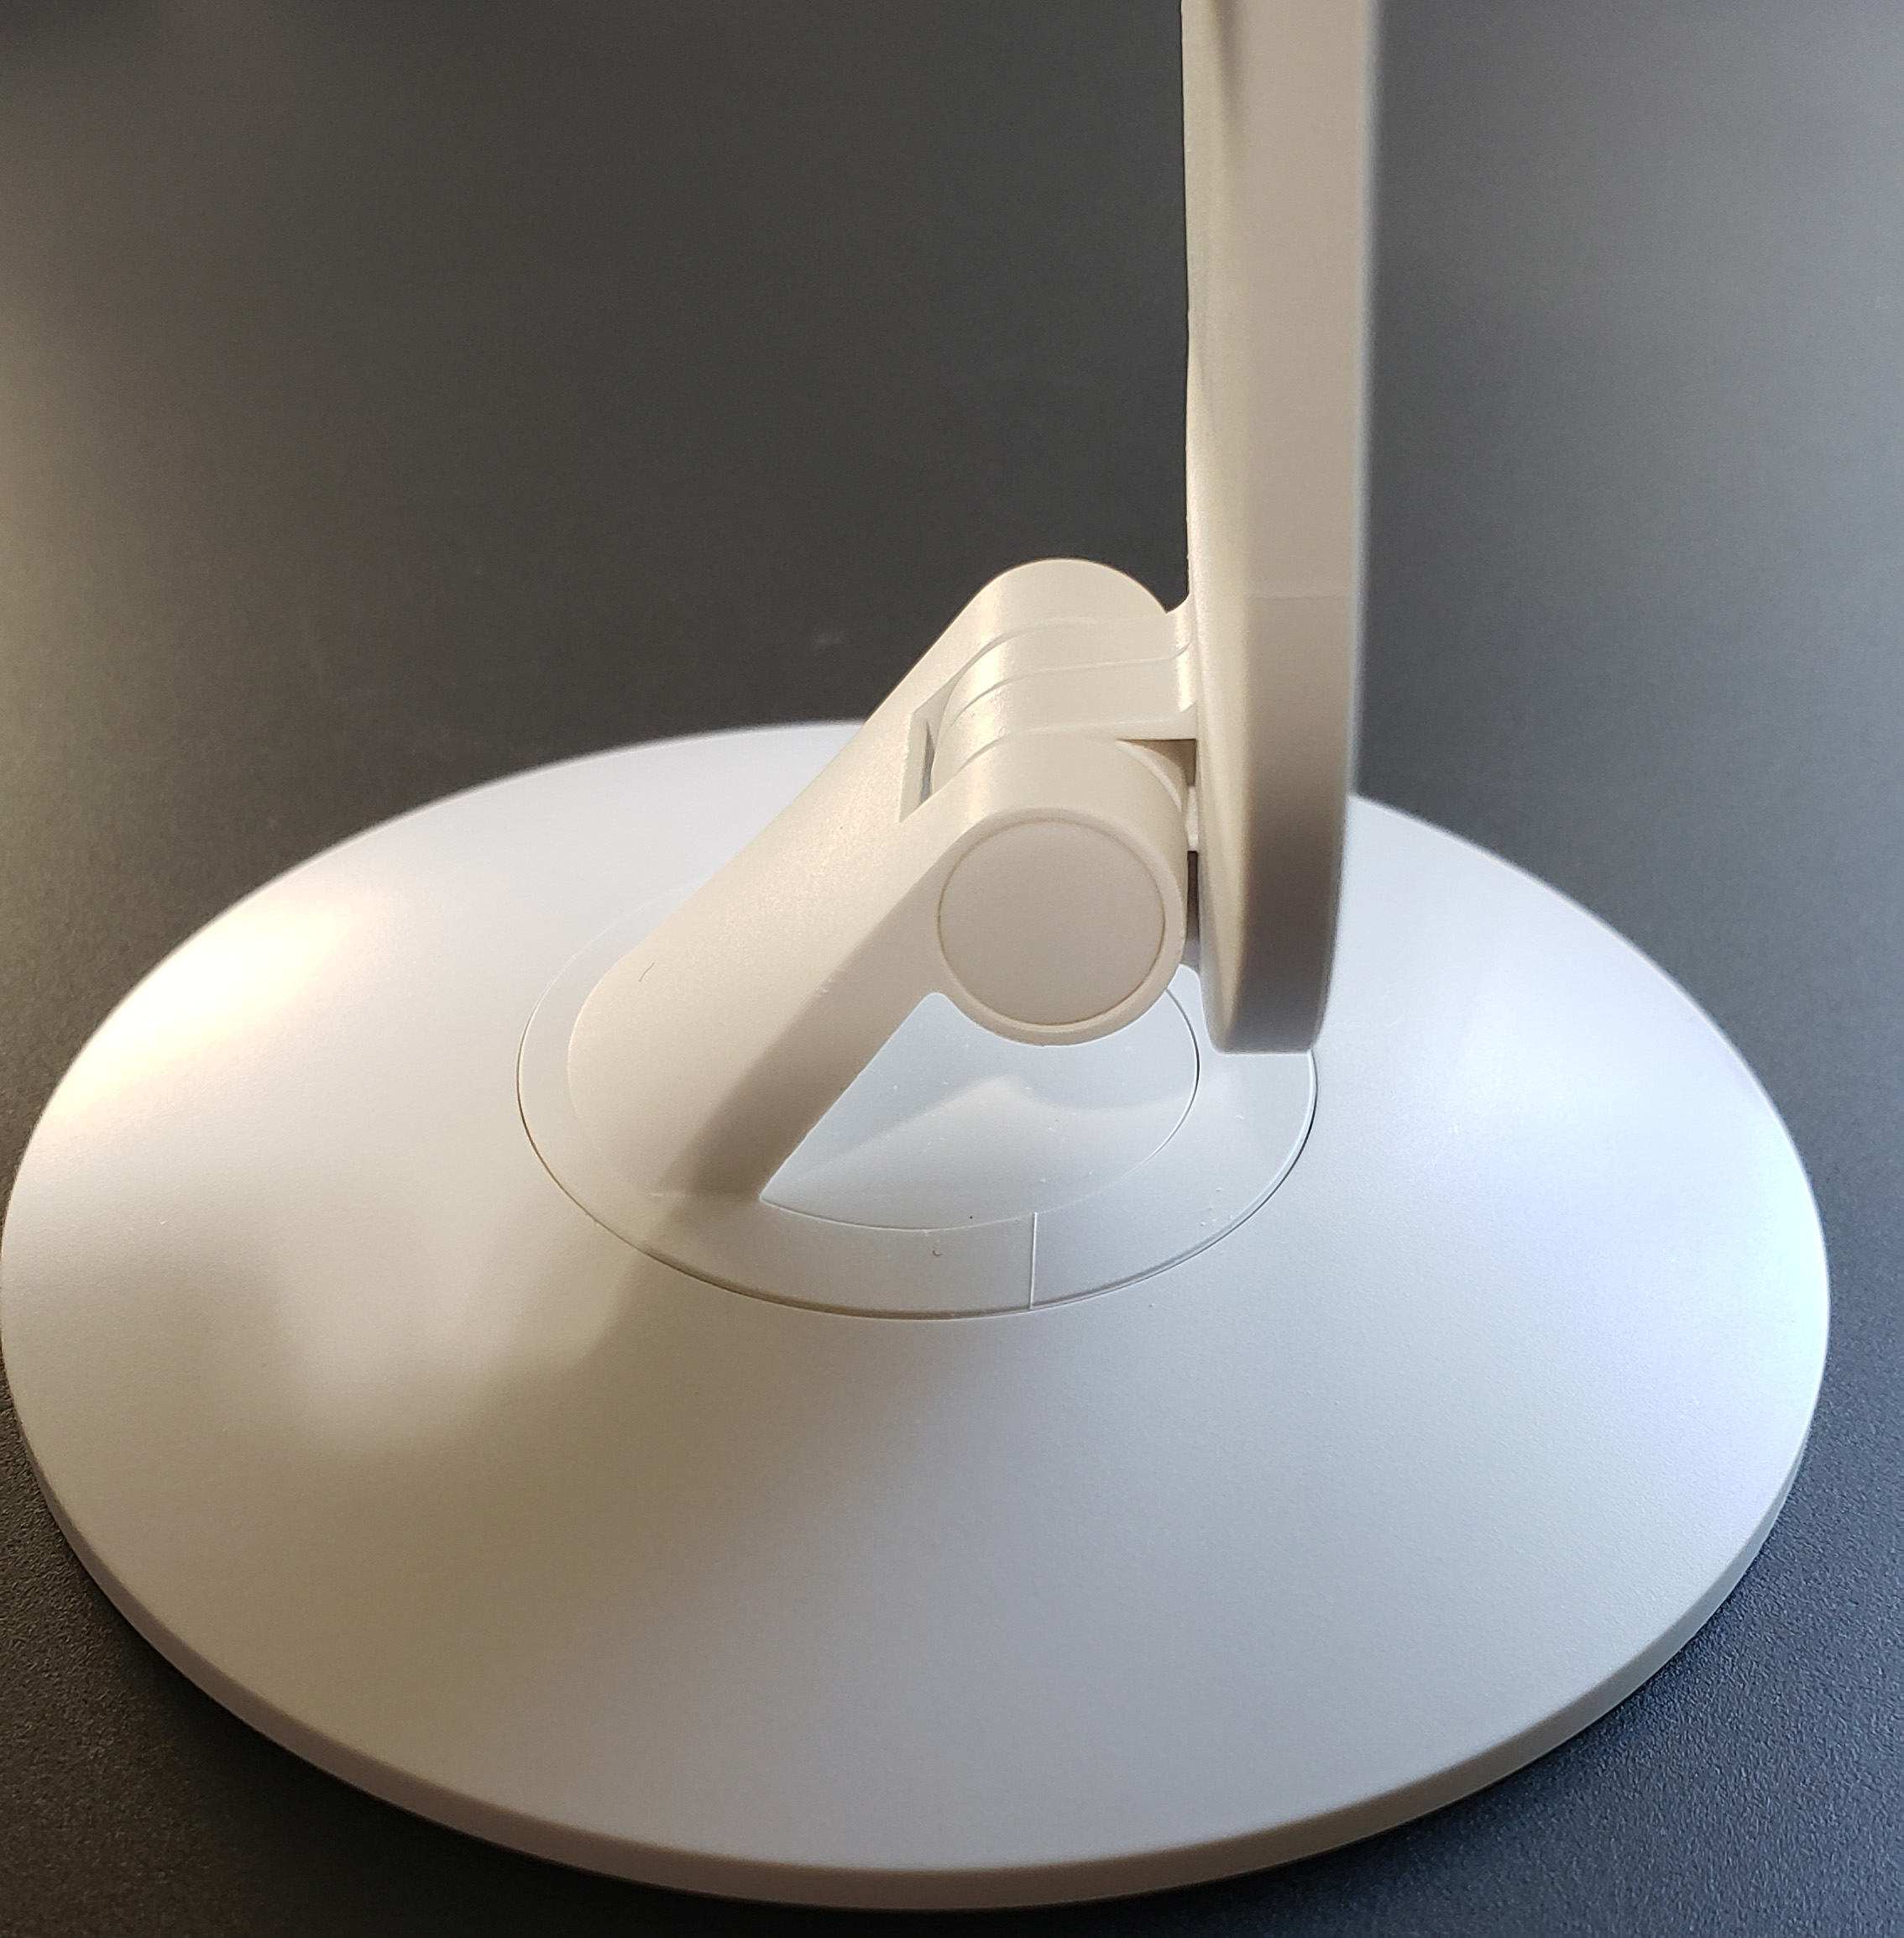
And, that base has a magnet in it, so you can mount it to anything a magnet can stick to.

On the side, we find a microSD slot.
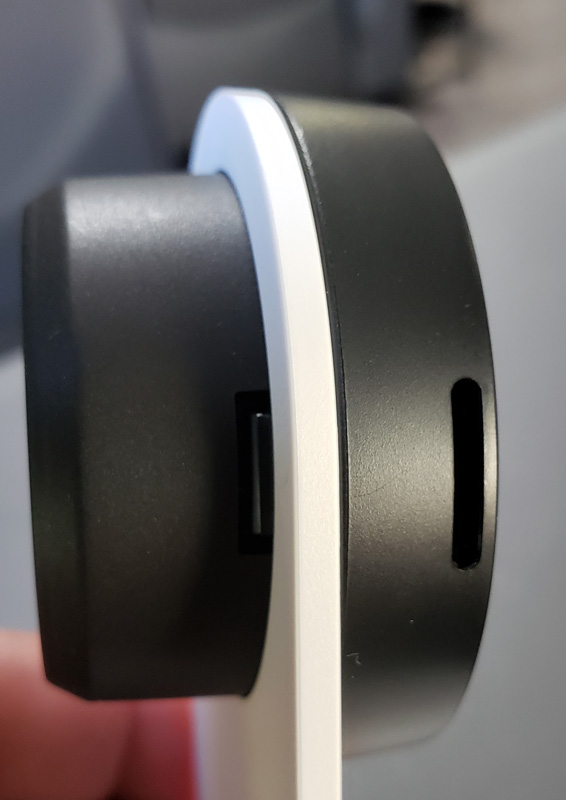
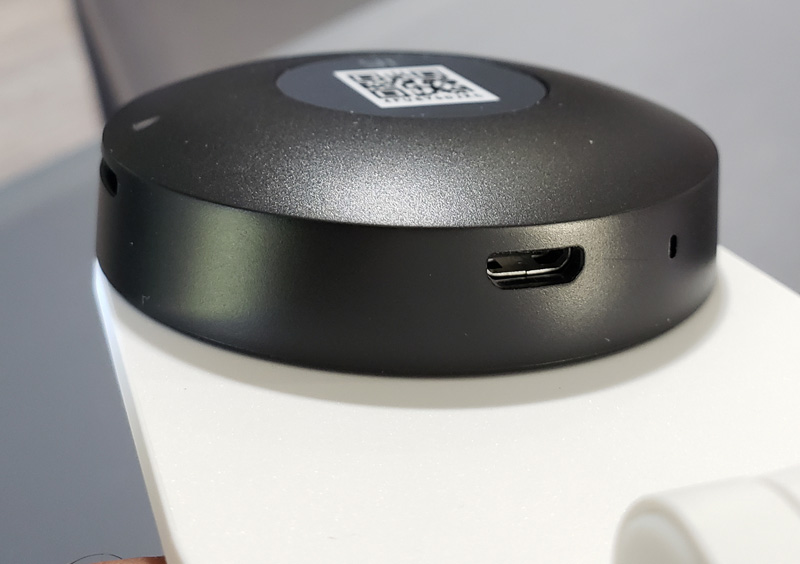
On the bottom of the camera assembly, we find the USB port for power.  This is a powered camera, so you will have to be relatively close to a 110V power plug. It is a little snug, getting the power cord into the port, but with a little patience, I got it connected.
Setup

After the unboxing, I installed the Yi Home app on my Galaxy S9+, and set up an account. I inserted my own microSD card into the slot on the camera and plugged in the camera.

The camera surprised me with a series of verbal updates and commands.  They were quite clear and made the setup very smooth. I didn’t get everything transcribed exactly, as the audio came as a surprise.  I will describe the gist of what the voice prompts conveyed.

As soon as I plugged in the camera, it welcomed me to Yi Home. It then reported that it was waiting to connect. In the app, I chose to add a new camera and provided Wi-Fi connection information. The app presented a QR code and the camera told me to put the QR code in front of the lens.  As soon as I did, it reported that the pairing was successful and that I could begin using the camera. I was impressed with how simple the process was, and how well the camera reported progress.  Nice work, Yi.

Performance

Initially, I installed the camera in my living room.  The 107-degree view allowed me to see from one side of the room all the way to the other. This is a screenshot from my phone.
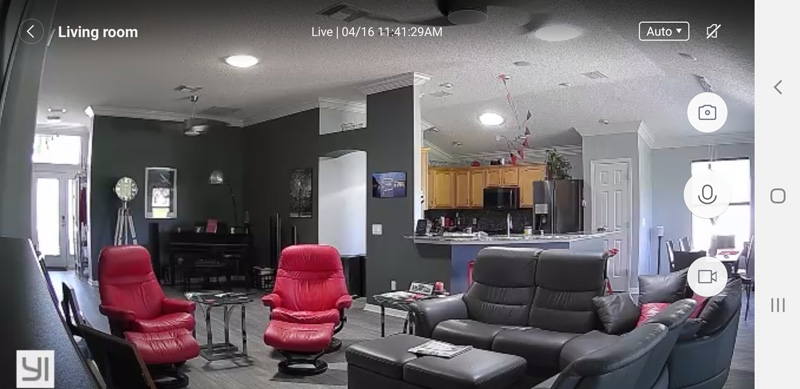
The image quality was pretty impressive with a bright, clear image and accurate colors.

After thinking about it, I decided that I really wanted to be able to monitor my garage, so I relocated the camera to the garage. This is a downloaded snapshot from the camera.
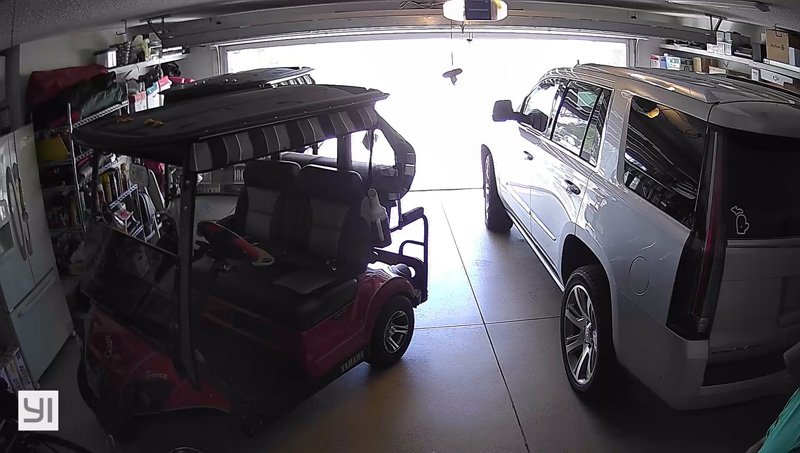
Note that this is really tricky lighting. I have a retractable garage screen, so much of the time, there is strong light coming in, Still, the camera does a good job showing colors and overall detail. That green in the lower right is actually my shirt sleeve.

When you view alerts on your phone, they are segregated by day.
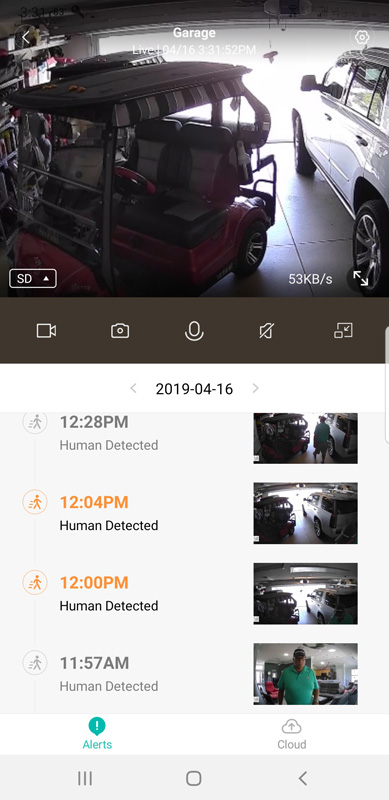
Items that you still need to review are highlighted in orange. You can also live-monitor the camera. When in that mode, you can use the microphone on the camera and on your phone to do full-duplex two-way conversations.

In the app, you can control a wide variety of camera options, like 180-degree image rotation, turning the camera status light on/off, whether to use the IR night vision light, whether you want to use the camera microphone (perhaps as a baby monitor), and if you want the audio to be in push-to-talk mode or full-duplex hands-free. You can also set up camera schedules and whether you want to use cloud storage or just the microSD storage.

Alerts are controlled by another large variety of option settings.  You can choose motion, sound or both to trigger the camera. In addition, they have logic included that detects human movement versus other movements. In my testing, lowering my garage door triggered as human movement, so that can certainly be improved.  Movement and sound both come with sensitivity adjustments so you can fine-tune the alerts to meet your needs.

Video quality is good, especially given my challenging lighting conditions.  Here I am heading out to pickleball in the morning.

Downloading video is a little finicky. The app is pretty specific about where you tap, and trimming the selected video, while available in the app, is pretty hit or miss.

Another issue is that the videos are not accessible in the app unless cloud recording is turned on. Without cloud recording, to view the videos – all mp4 files –  you have to pop out the micro SD card, put it in an adapter and pop it in your PC.  Then, you have to find the right video.  The mp4 files are in a folder called “record” and then subfolders named like <YYYY>Y<MM>M<DD>D<HH>H, so videos from 4/20/2019 at 11am should be named 2019Y04M20D11H, however…they aren’t.  Everything was exactly four hours ahead of my local time. I expect that they are labeled for GMT (Greenwich Mean Time), which is four hours ahead of where I am in EDT. My folder for that time was labeled 2019Y04M20D15H. The files themselves are labeled like <mm>M<ss>S<tt>.mp4, where mm is replaced with the minute within the hour, ss is replaced with the seconds within the minute when the video begins and tt is replaced with the duration of the clip.  It all sounds complicated, but overall it makes sense.  To find a video recorded on 4/21/2019 at 2:33:15 pm that runs 18 seconds, assuming no GMT offset, look in the 2019H04M21D14H folder for 33M15S18.mp4. Just remember to add the GMT offset for your timezone to get to the right folder.

Videos are saved in a rolling fashion, where the oldest recordings are replaced with newer ones as you run out of room on the micro SD card.  The number of days you can save will depend on how often the camera triggers based on our settings and the size of the SD card.  Mine triggers a lot since motion and sound outside the garage screen trigger it based on my sensitivity settings. With a 16GB card, I get about three days worth of recordings.  I should be able to expand that by lowering the sensitivity a bit to eliminate records of essentially nothing.

If you opt for cloud recording, six months of seven-day rolling cloud recording is included. After that, Yi offers six options:

  • 7-day rolling, 24-hour continuous for one camera – $19.99/qtr;$66/year
  • 7-day rolling, motion detection only for up to five cameras – $19.99/qtr;$66/year
  • 15-day rolling, 24-hour continuous for one camera – $9.99/mo;$99/year
  • 15-day rolling, motion detection only for up to five cameras – $9.99/mo;$99/year
  • 30-day rolling, 24-hour continuous for one camera – $19.99/mo;$199/year
  • 30-day rolling, motion detection only for up to five cameras – $14.99/mo;$149/year

One thing that I don’t like is the app’s insatiable demand for power. The first day I installed it, my phone battery was really low in the evening – about 15%. I usually have 30-40% at that point.  When I looked at what was sucking battery, Yi Home was right at the top of the list by a long margin.  Using the Yi Home app means that I can’t get a full day out of my phone without recharging. I opted to change the app management settings and allow Android to put Yi Home to sleep.  That solved the problem, but, I no longer get alerts from the camera until I open the app.  That kind of defeats the purpose.  Even today, when I have the app mostly sleeping but have opened it to write this, Yi Home has consumed 4.3% of my battery over the past hour or so.  Google Play Services is the closest at 1.5%.  This is kind of a deal breaker for me.

What I like

  • Nice design
  • Terrific setup process
  • Really good image and video quality
  • Comprehensive application with lots of customization
  • Free cloud storage, even though for only six months

What needs to be improved

  • Yi Home needs to be modified to stop eating my entire battery
  • Video download interface needs to be improved
  • Human detection needs to be improved
  • The timestamp on the mp4 files should match local time
  • Videos should be viewable in the app directly from the SD card and not require cloud services
  • The instructions should have some explanation about how the SD card and cloud services work – there is absolutely nothing about it

Final thoughts

Overall, the Yi Hime Camera 3 is a nice little camera. It was easy to set up and produces great images and video. But until the app can be modified to stop wiping out my phone battery, I will have to have the app sleep most of the time, eliminating much of the benefit of a monitored camera.

Price: $49.99
Where to buy: Amazon
Source: The sample of this product was provided by Yi Technology.

Filed in categories: Reviews

Tagged:

Yi Home Camera 3 review originally appeared on The Gadgeteer on April 27, 2019 at 9:00 am.

Note: If you are subscribed to this feed through FeedBurner, please switch to our native feed URL http://the-gadgeteer.com/feed/ in order to ensure continuous delivery.

Versadesk Ultra-Thin Office Treadmill review

REVIEW – Raise your hand if you have an office job where you sit all day. For several years we’ve been hearing that sitting is the new smoking. Even if you workout several times a week, if you still sit behind a desk all day, you’re doing damage to your overall health. How do you change that behavior? You can get a standing desk to start and to raise the bar, you can get a treadmill to pair with your standing desk. Let’s take a walk on the Ultra-Thin Office Treadmill from Versadesk.

What is it?

The Ultra-Thin Office Treadmill is obviously a treadmill, but it’s not exactly like a traditional treadmill that use at the gym or that you might already own at home. This treadmill is mini-sized, easy to move, and has no handles to get in the way.

What’s in the box?

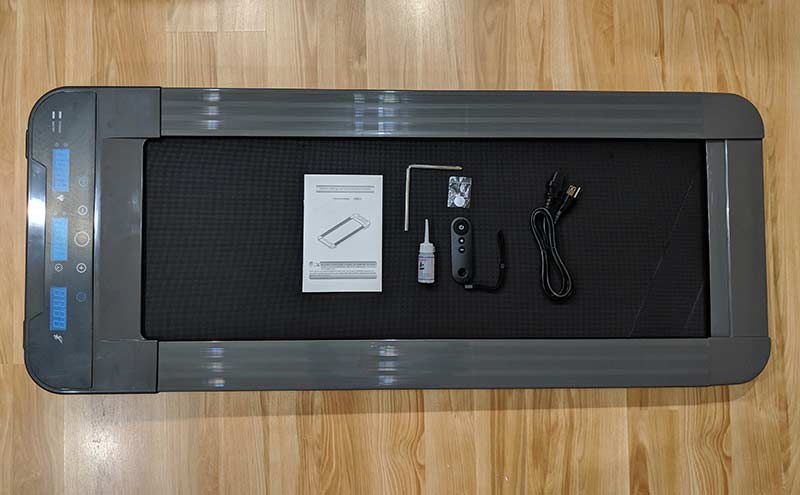
  • Versadesk Ultra-Thin Office Treadmill
  • Remote control
  • Power cord
  • Belt adjustment tool
  • Oil
  • User manual

Design and features

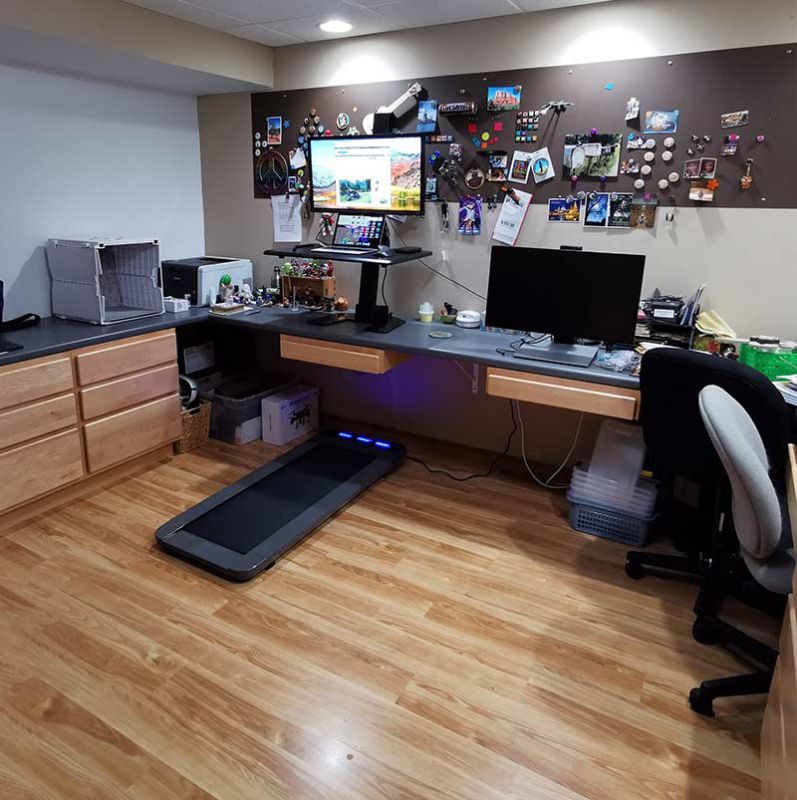
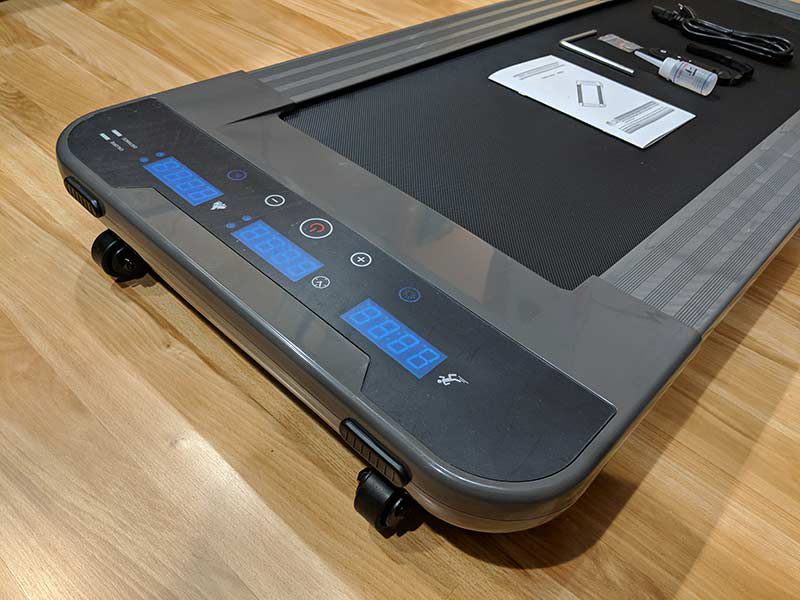
The Versadesk treadmill is 52 inch x 21 inch and has two wheels on the front that allows you to lift the back of the treadmill to roll it into the right position under the desk.

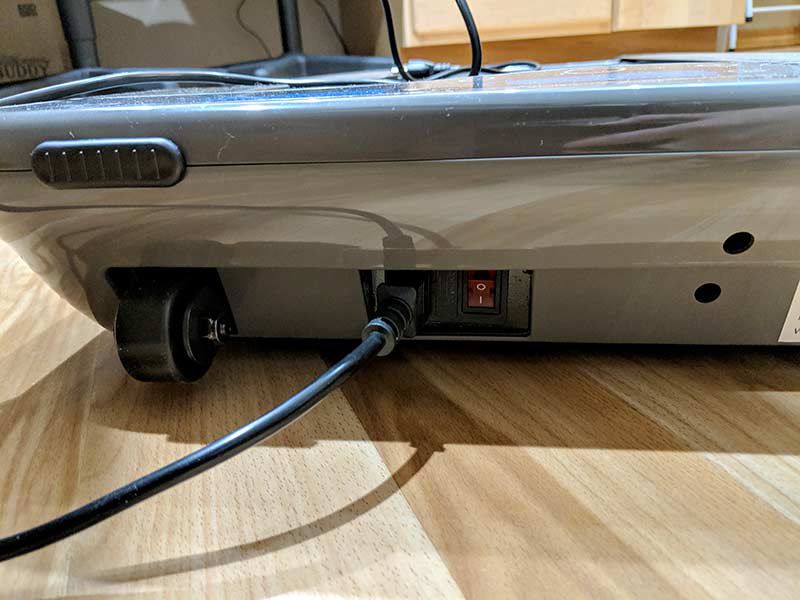
The power cable connects to the front of the treadmill and the power switch is located next to the cord.

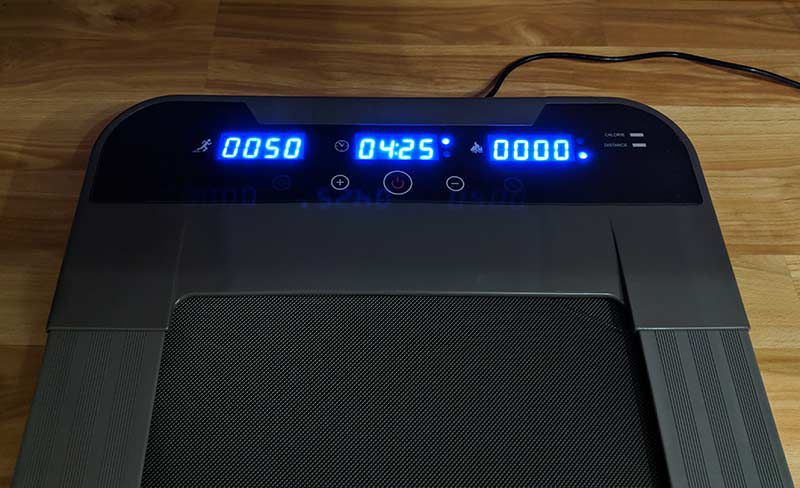
Also on the front edge of the treadmill is a live dashboard that tracks time, steps, speed, calories and distance during the session. This data isn’t saved between sessions and resets when you cycle power on the treadmill.

Below the LEDs is a touch power button with individual + and – speed buttons on either side. In my opinion, the location of these buttons is strange because you can’t tap them with your foot while the treadmill is in motion unless you want to take a tumble. Luckily, a remote control is included with the treadmill.

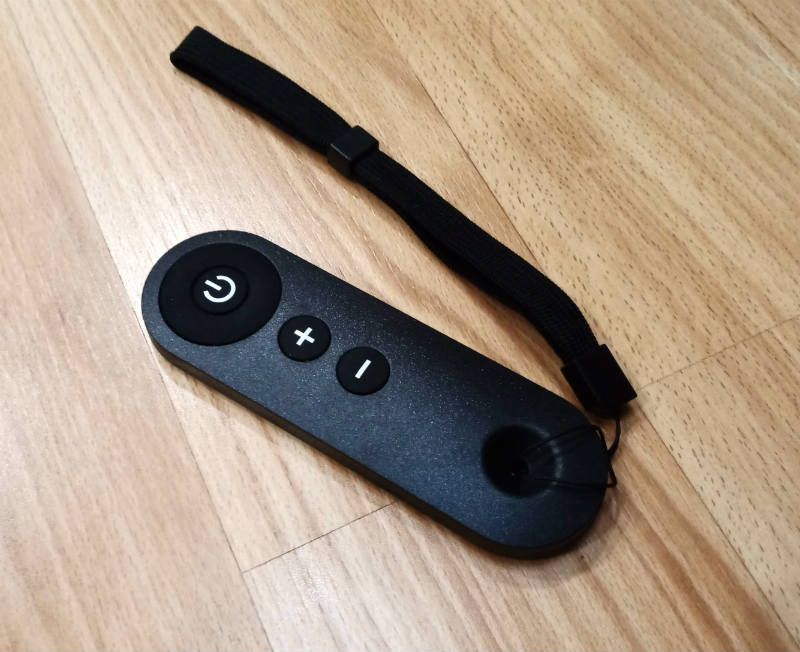
The remote provides a much safer way to control the treadmill while it’s in motion. There’s a power button and buttons to increase and decrease the speed. There’s even a wrist strap.

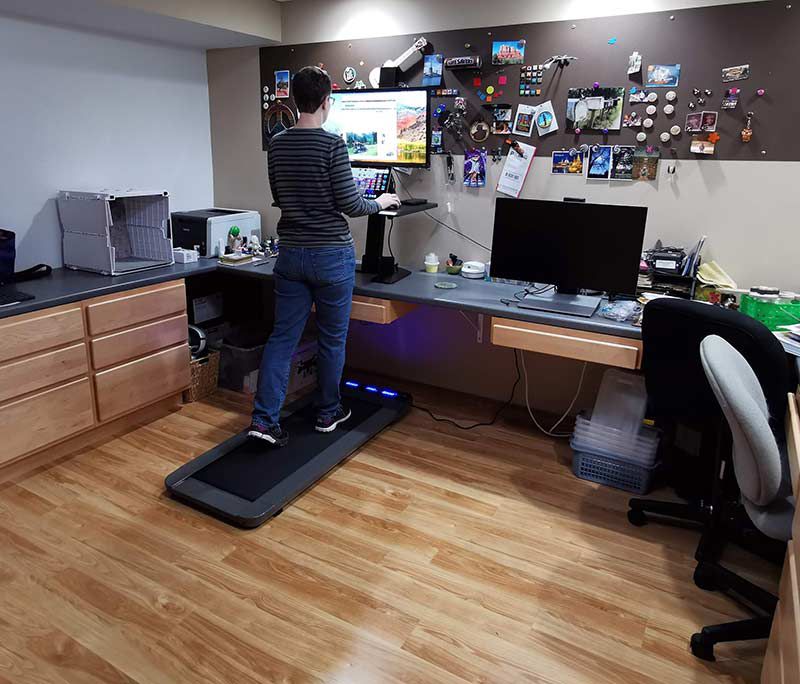
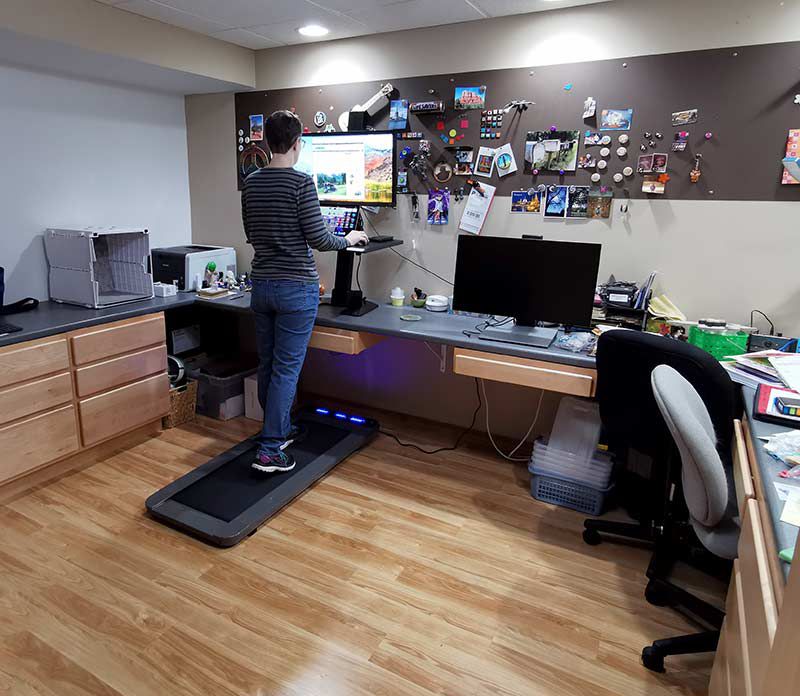
To use the treadmill, you’ll want a standing desk. Versadesk sent me their Sunrise Desk Riser motorized desk so I could better test the treadmill. This is a really nice standing desk that sets on top of your regular desk and has one button that raises the desk platform and one button that lowers the desk platform.

With the treadmill in place, connected to power, and powered on, you’re ready to get more active. Using the remote control, you can press the power button and the treadmill’s anti-slip belt will begin turning at the lowest speed of 0.8mph. Using the speed increase button on the remote, you can crank up the speed to a maximum of 6mph.

The Versadesk Ultra-Thin Office Treadmill can accommodate walkers of up to 200lbs and although it has an anti-slip belt and a sturdy base, I don’t think it’s recommended that you run on it. In my opinion, it’s for walking only. This is mainly because the length of the belt (40 inches) isn’t long enough for running.

For walking, the treadmill is smooth and not unlike many other treadmills that I’ve walked on when it comes to the feel of walking on it. You do have to adjust the way you walk on it because the Versadesk treadmill’s belt is not as wide as traditional treadmills. The Versadesk’s belt is 14.5 inches wide vs. the 20 inch wide belt on my standard treadmill.

What I like

  • Compact
  • Relatively easy to move around as needed
  • Can store vertically if you attach it to a wall

What needs to be improved

  • On deck control buttons should be removed as it’s not safe to use them while walking on the treadmill
  • Handheld remote is IR so it needs to be able to point to the front of the treadmill which can cause potential problems for the walker

Final thoughts

If you’ve been looking for an easy way to get more active without paying for a gym membership and scheduling workouts, adding a standing desk and portable treadmill is an easier way to move more while you’re working on other things. It does take some time to get used to walking and working on a computer, but it’s not too bad of an adjustment.

I like the Versadesk Ultra-Thin Office Treadmill because it’s easy to place where it’s needed, isn’t too loud, and is comfortable to walk on. With a setup like this, you’ll be able to burn more calories than you do while sitting and your body will love you for it.

Price: $479.00 (Use discount code: GADGETVSD to save 15% (expires 5/30/19).
Where to buy: Versadesk
Source: The sample for this review was provided by Versadesk.

Filed in categories: Reviews

Tagged:

Versadesk Ultra-Thin Office Treadmill review originally appeared on The Gadgeteer on April 26, 2019 at 11:00 am.

Note: If you are subscribed to this feed through FeedBurner, please switch to our native feed URL http://the-gadgeteer.com/feed/ in order to ensure continuous delivery.
Quick Shelf Safe review

REVIEW – The Quick Shelf Safe, sold by the Home Security Superstore, is a wooden shelf with an RFID activated locking mechanism which grants access to a small hidden storage area within the shelf useful for hiding valuables, important documents, or firearms. The shelf, priced a bit high at $233.97, is well-built, stealthy, and useful, but it does have a few design shortcomings.

What is it?

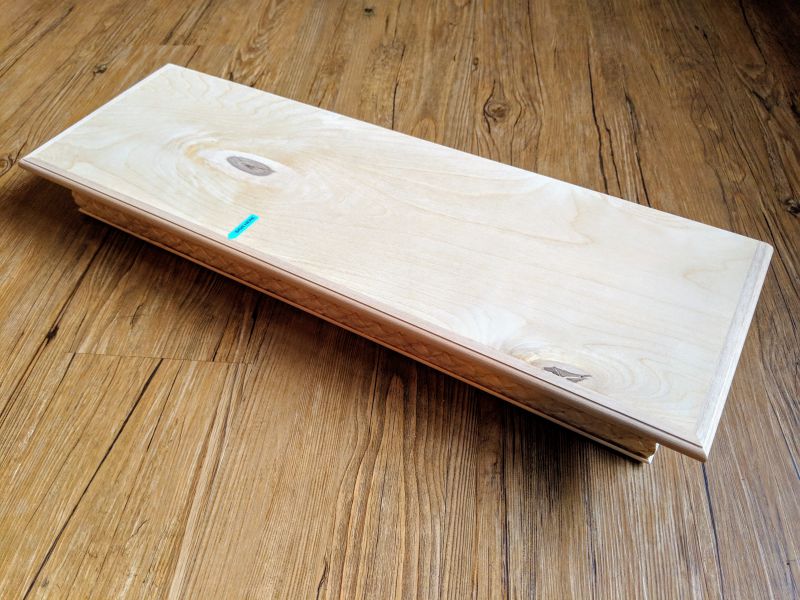
The Quick Safe Shelf is a wooden shelf about 19″ long, 6.5″ wide and 1.75″ deep. To the uninformed, the shelf looks like a normal wall decoration, but with the use of pre-programmed RFID keys and a hidden battery-powered locking mechanism, the shelf opens up to reveal a small storage area. When the shelf is closed, one assumes the bottom portion, which contains the hidden storage area, is made of solid wood.

The Quick Shelf Safe arrives in a sturdy box featuring a picture of a family enjoying a happy moment while comforted by the knowledge that they’re able to safely store their valuables and firearm right out in the open with no one the wiser.

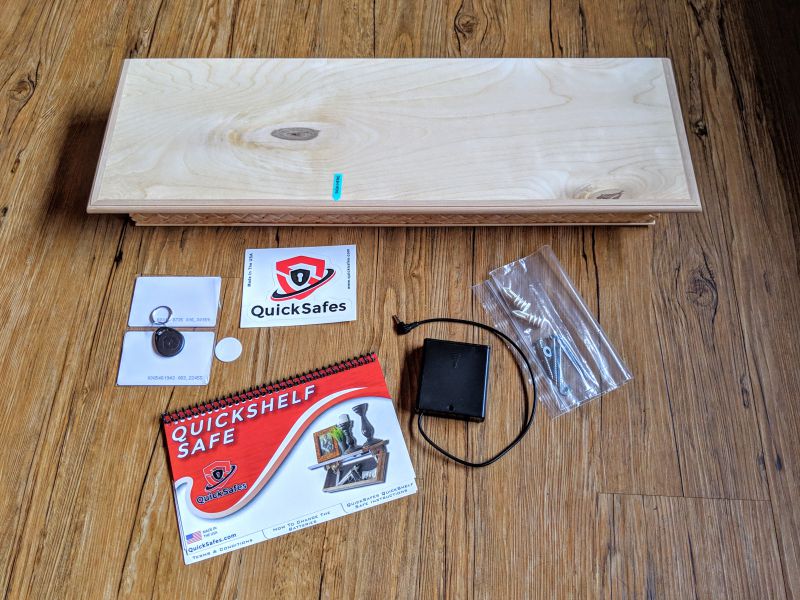
What’s in the box?

  • The Quick Safe Shelf
  •  Four RFID keys
    • One key fob
    • One small round tab
    • Two key cards
  • External battery pack
  • Mounting screws
  • Instruction manual

Design and features

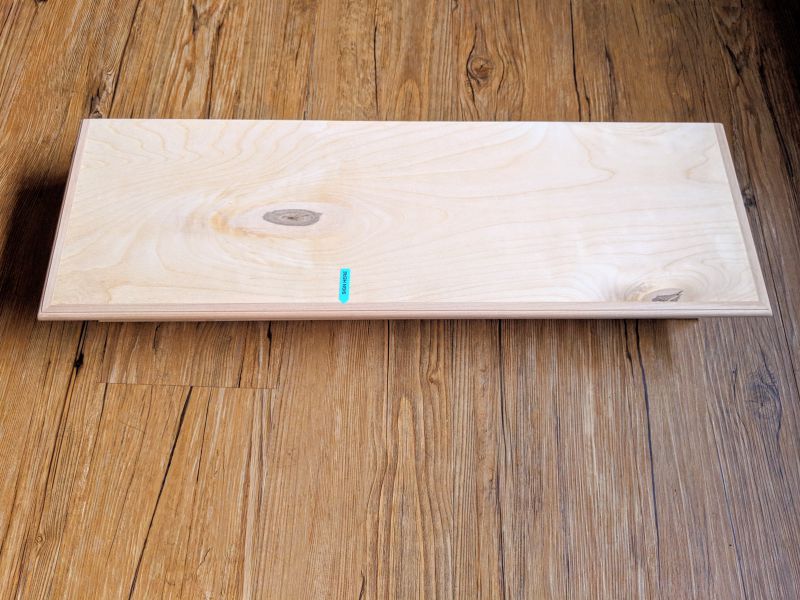
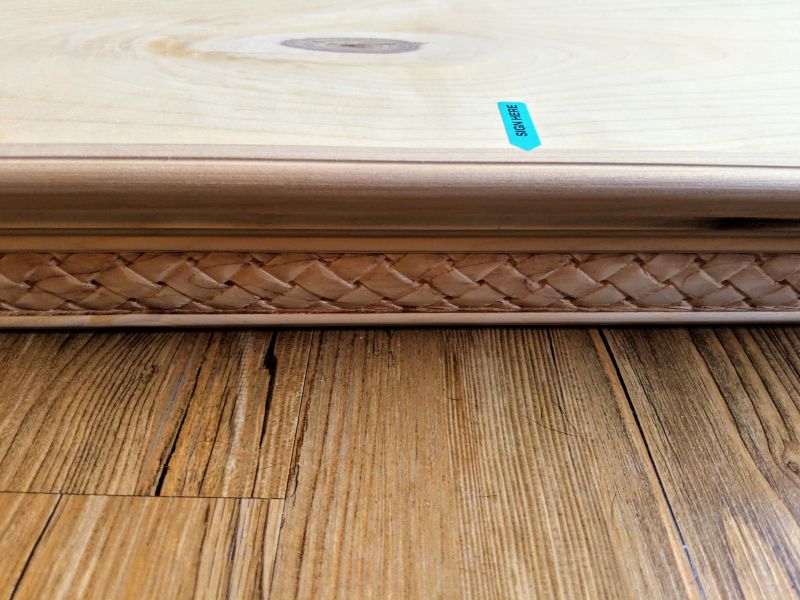
The shelf itself is pretty unassuming. For my review, I chose the unfinished version of the shelf. The shelf is also available in Walnut, Black, and Grey. The seller includes a small removable sticker to indicate where on the shelf the RFID key needs to be placed in order to activate the locking mechanism.

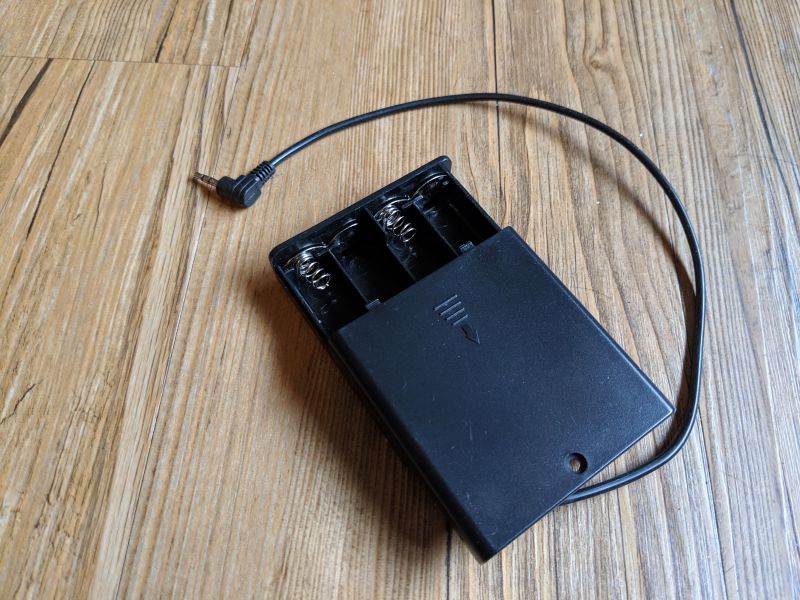
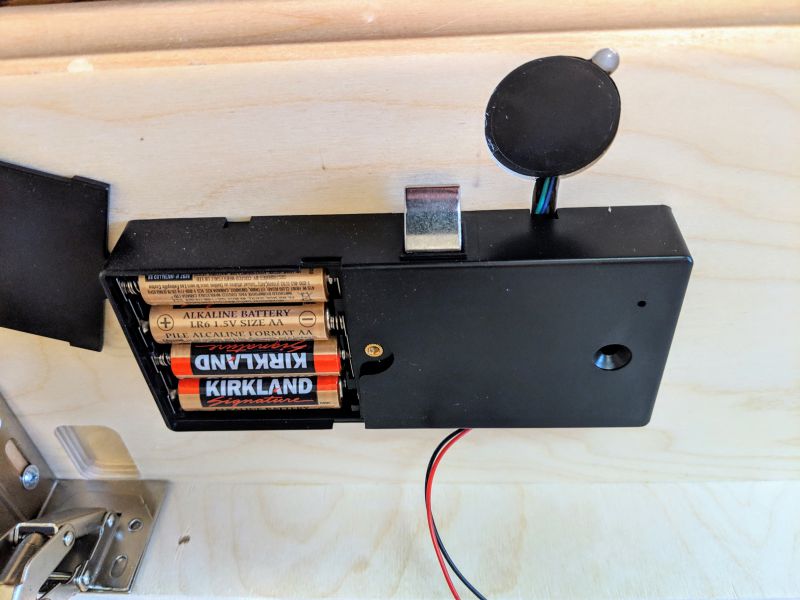
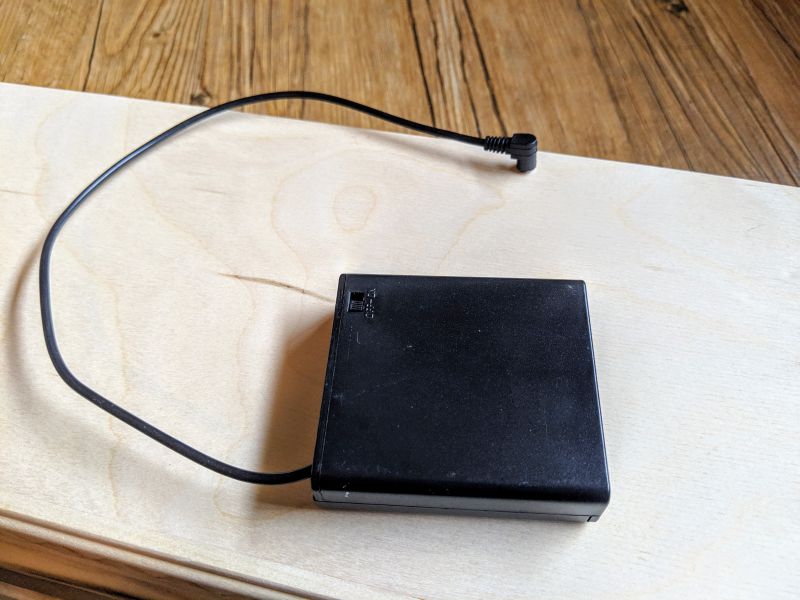
The internal locking mechanism is powered by four AA batteries, which are included. In the eventuality that the internal batteries fail, an external battery pack is included to power the unit and unlock the shelf in order to replace the internal batteries.

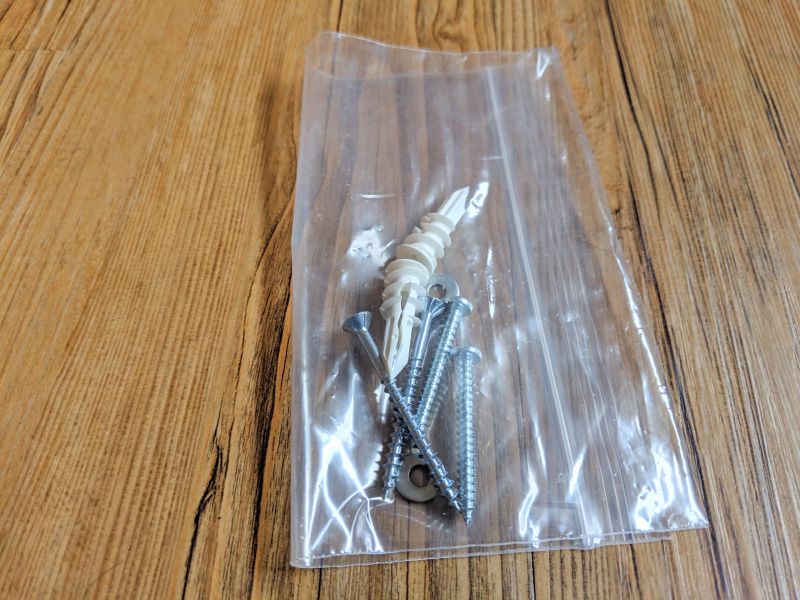
Two plastic anchors and four mounting screws are included for mounting your Quick Shelf to the wall.

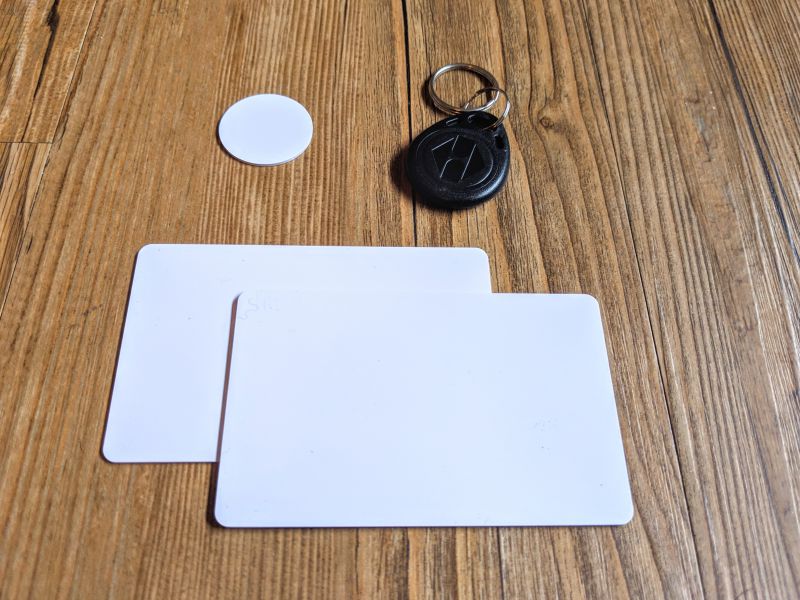
Four RFID keys are supplied to unlock your shelf. There are two credit card sized plastic keys, one small round plastic tab, and one key fob. Any of these keys will open the RFID-enabled lock.

The key fob is the most convenient to use and it looks like a typical car alarm fob.

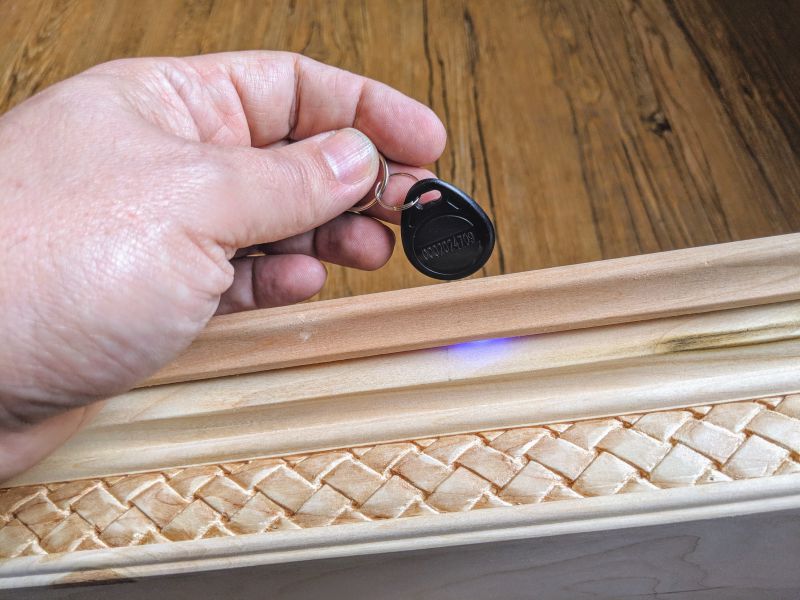
To unlock the shelf, simply pass any of the keys across the top of the shelf near where the internal RFID reader is located, indicated on my shelf by a removable sticker.

A small blue LED will flash and a loud electronic unlocking tone will play. I question the logic of the loud tone unlocking though. If this is being marketed as a stealthy way to store my firearm and if in some scenario I am retrieving my firearm in the middle of the night to, let’s say fend off a home invader, wouldn’t I want my shelf to open as quietly as possible? Unfortunately, there’s no option available to disable the sound.

After the locking mechanism disengages, the shelf opens slightly. I was a bit disappointed here because, again, I’m imagining some scenario where I would need quick access to a hidden firearm, like say zombies are crawling in through my windows and are about to overtake my old blind cat, Chino. In this case, I would want my Quick Shelf Safe to “quickly” pop open and give me access to my firearm so I can dispatch said zombies and rescue my kitty. Unfortunately for Chino, the few extra seconds I will need to open the shelf after it unlocks may spell his doom.

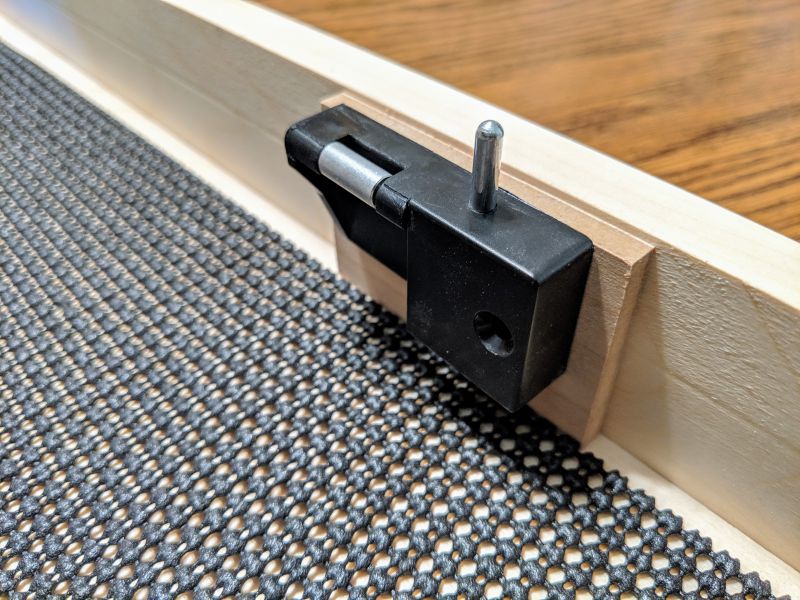
The problem is this little spring-loaded piston. It’s too small and not under enough tension to push the shelf open quickly. A few seconds after unlocking the shelf, the locking mechanism will automatically reengage if you haven’t opened it fully. So the piston serves only to push the shelf open just enough so the locking mechanism doesn’t reengage. The housing for the piston also holds the pin that the locking mechanism latch bolt engages to keep the shelf locked and secure.

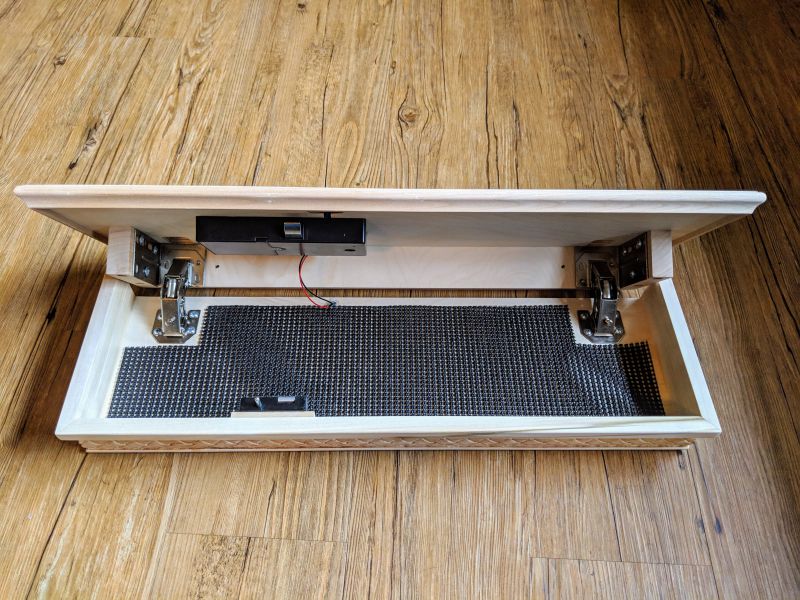
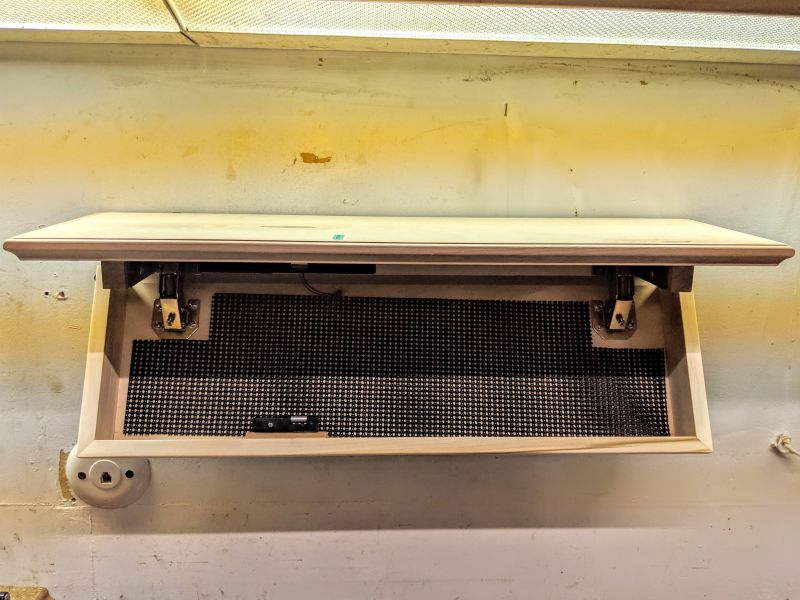
The interior of the shelf is spacious enough to store a moderately sized firearm along with some smaller valuables or cash. The locking mechanism itself takes up a good portion of the storage space, so larger items need to be placed to the right of the mechanism. There’s a patterned rubber mat that lies loose on the inside the shelf.

The mat is spongy rubber and seems to be there to keep your items from sliding around, but it isn’t secured to the bottom of the shelf at all, so the mat itself slides around. A few drops of hot glue on the corners could’ve fixed this easily.

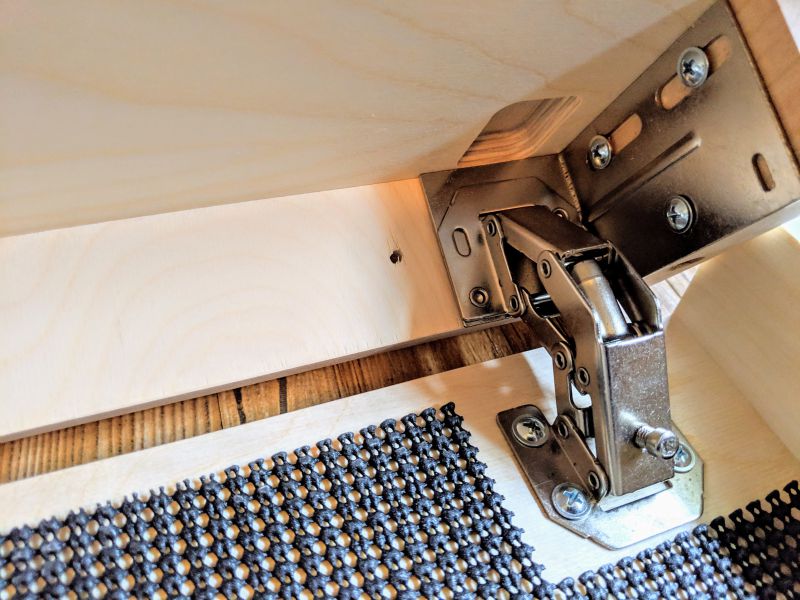
Despite the unsecured mat, craftsmanship of the shelf is impressive and the internal adjustable brackets are firmly attached. Adjusting these brackets allow you to set how far down you want the shelf to open when unlocked. There are two pre-drilled holes in the back of the shelf for mounting.

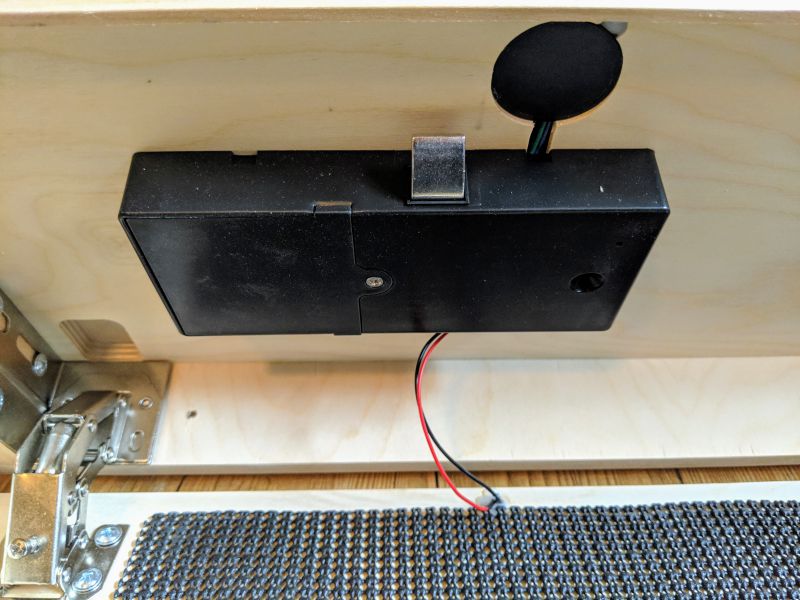
The internal battery pack, locking mechanism, and RFID reader are attached to the inner top of the shelf. When a RFID key is place over the reader, the locking mechanism retracts a small latch bolt away from the holding pin and the shelf unlocks. As I mentioned before, after a few seconds, the latch bolt automatically extends so the shelf can be closed and locked.

The battery compartment is held closed with a small Phillips-head screw. I had to use a very short full-sized Phillips-head screwdriver to open the compartment because of the tight confines of the shelf interior. The included batteries are said to be good for 3000 activations. If the batteries do fail for some reason, the external battery pack will save you from having to take a hatchet to your expensive new shelf.

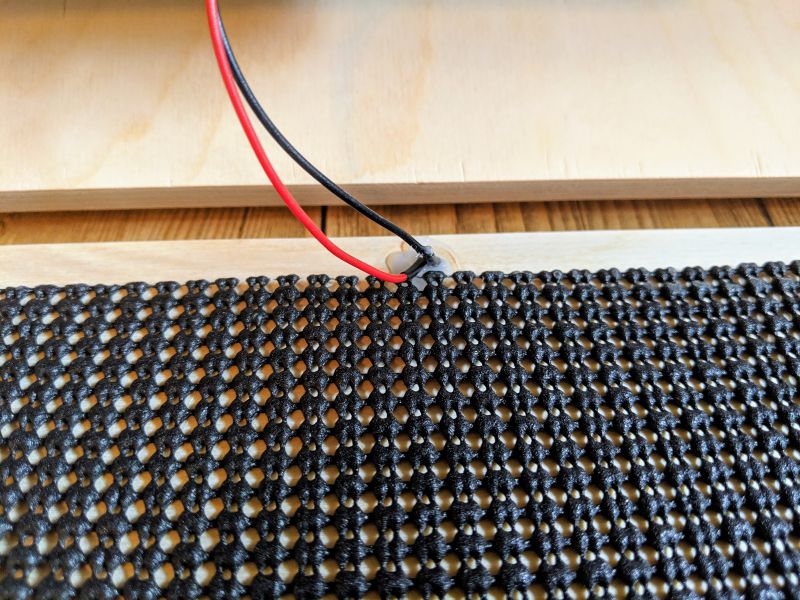
Two red and black power wires extend from the battery compartment to a small hole on the bottom of the shelf.

The wires are hotglued to hole and on the other side of the shelf you can see that they are attached to a small power port. The external battery pack (batteries not included) plugs into this port to provide power to locking mechanism allowing you to open the shelf. I’d advise keeping this battery pack and one of the RFID cards in a safe place, other than the Quick Safe Shelf obviously.

The overall aesthetics of the shelf are pleasing and not so ornate that they would draw attention.

The woodworking craftsmanship is good quality for a mass produced item. All of the gaps, seams, and corners are tight and the hinges work as they should.

Performance

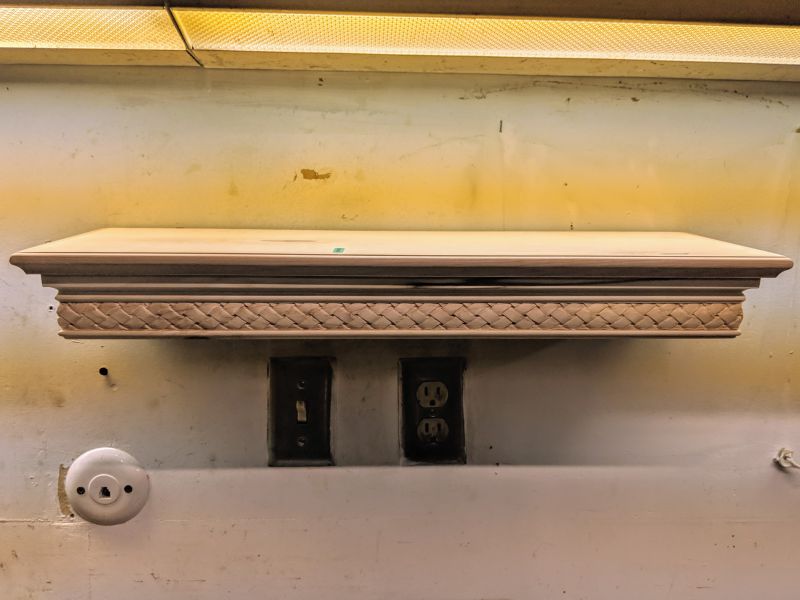
I test mounted the shelf in my garage since I plan on painting it and mounting it in my apartment later on. I used the supplied plastic anchors and four mounting screws. I drove two mounting screws through the pre-drilled holes into the anchors and used the two extra screws to add support by driving them through the back of the shelf as well.

Once mounted, the shelf functioned as advertised, but even with all four screws properly positioned, the shelf did not feel 100% sturdy hanging empty on the wall. When I engaged the lock and pulled the shelf down to open, I could see the bottom edge of the shelf pushing back against the wall as the lower half opened. The more times I opened the shelf, the less sturdy it felt. I worry about the weight bearing capability of this shelf being secured into a wall with four screws on such a narrow plane. If I do install this in my apartment, I plan on adding two L-shaped brackets to the top of the shelf to add support.

Because of the lack of stability after mounting the shelf, I do question the safety of using this shelf to store firearms. It became clear to me that if someone did suspect this shelf contained valuables or a firearm, they could simple rip it off the wall and break it open. Due to this security hole, I take issue with naming this item a “safe” and advertising it primarily as a way to store firearms. Gun safes are usually very secure, and utilize many different means for thwarting access to their contents. If firearms are secured in this shelf, the owner should most definitely employ other means of gun safety and security.

What I like

  • Nice appearance of a normal shelf
  • Shelf hardware and wood craftsmanship are of good quality
  • Cool way to hide valuables

What needs to be improved

  • Shelf does not spring open after unlocking, has to be opened by hand after unlocked
  • Loud electronic sound during unlocking sequence
  • Does not feel sturdy on wall while opening
  • Shouldn’t be referred to as a safe since it isn’t 100% secure

Final thoughts

Quick Shelf Safe, sold by the Home Security Superstore, is an interesting way to secure some valuables and possibly a firearm. The shelf is a bit expensive for what it is, and it shouldn’t be referred to, or thought of, as a safe in the traditional sense since it can easily be pulled off of a wall and broken into. Also, since it isn’t as secure as a true gun safe, any firearms stored in this shelf should have additional trigger locks or other security. It does works well as a place to hide non-lethal items that you wouldn’t want people to find. Additionally, I do have some concerns about the weight-bearing sturdiness of the shelf once mounted on the wall using the included hardware.

Price: $233.97
Where to buy: Home Security Superstore
Source: The sample of this product was provided by Home Security Superstore.

Filed in categories: Reviews

Tagged:

Quick Shelf Safe review originally appeared on The Gadgeteer on April 26, 2019 at 9:00 am.

Note: If you are subscribed to this feed through FeedBurner, please switch to our native feed URL http://the-gadgeteer.com/feed/ in order to ensure continuous delivery.
MX10 Android TV box review

REVIEW – I reviewed my very first Android TV box a week ago and now I’m back with a review of another ATV in my quest to find one with the best picture and features. The one I’m going to talk about today is the MX10 Android TV Box from Gearbest. Let’s take a look.

What is it?

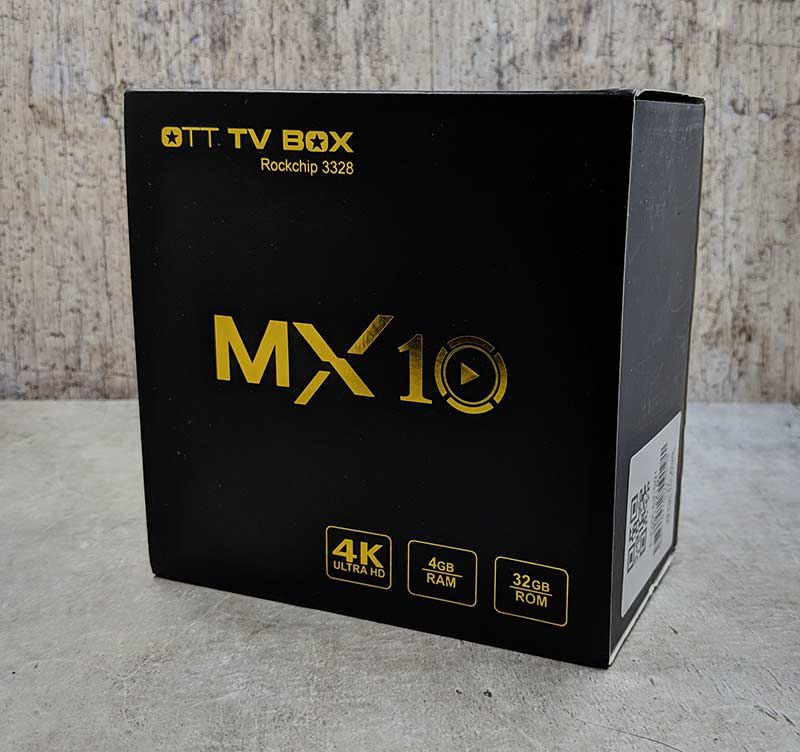
The MX10 is an Android TV Box based on the 3328 Rockchip and connects to your TV with an HDMI cable (included) to stream from services like Netflix, Hulu, and others.

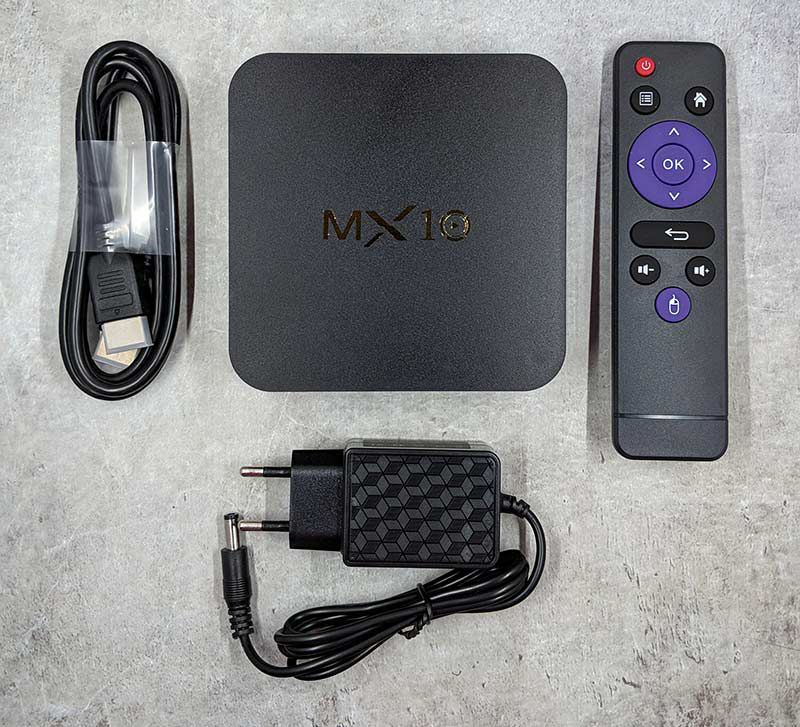
What’s in the box?

  • MX10 Android TV box
  • HDMI cable
  • AC adapter (they didn’t send me the US plug style, but they do offer it)
  • Remote control (2 AAA batteries were not included)
  • User guide

Hardware specs

CPU: RK3328 Quad-Core 64bit Cortex-A53
GPU: Penta-Core Mali-450 Up to 750MHz+
OS Android 9
Memory 4GB DDR4
EMMC 32GB
WiFi 2.4Ghz 802.11 b/g/n

Design and features

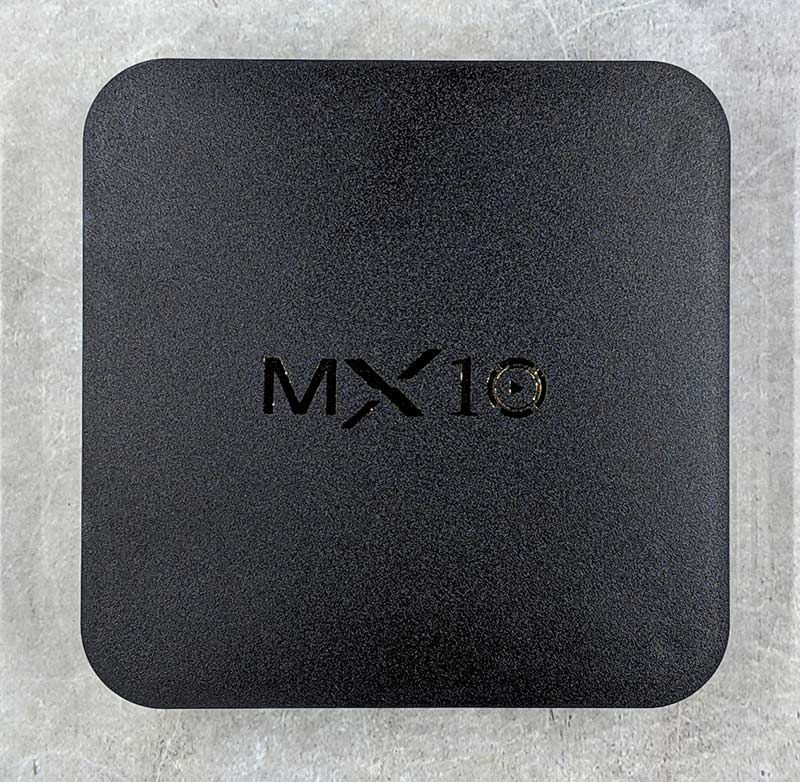
The MX10 is a small black plastic box that does not have a snazzy design or any flashy graphics on the outside of the shell. There’s just the logo on the top and a blue status LED on the front side.

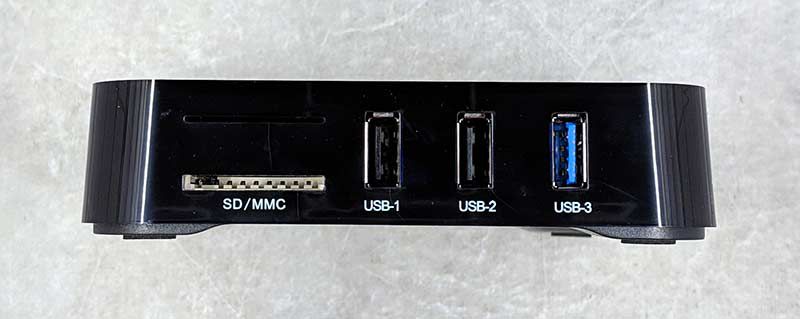
On one side, you’ll find an SD card slot, 2 USB 2.0 ports, and a USB 3.0 port.

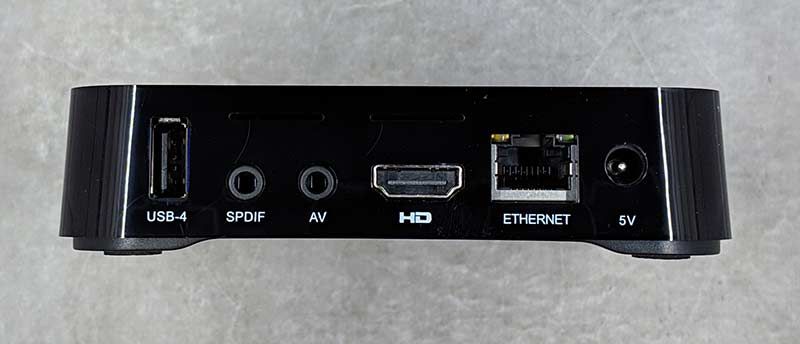
On the back, there’s another USB 2.0 port along with a SPDIF, AV out, HDMI, Ethernet jack, and a power jack.

The addition of 4 USB ports is a nice touch because you’ll need to use them to connect peripherals like keyboards and gaming controllers. Why? Because the MX10 does not have Bluetooth which is a bummer.

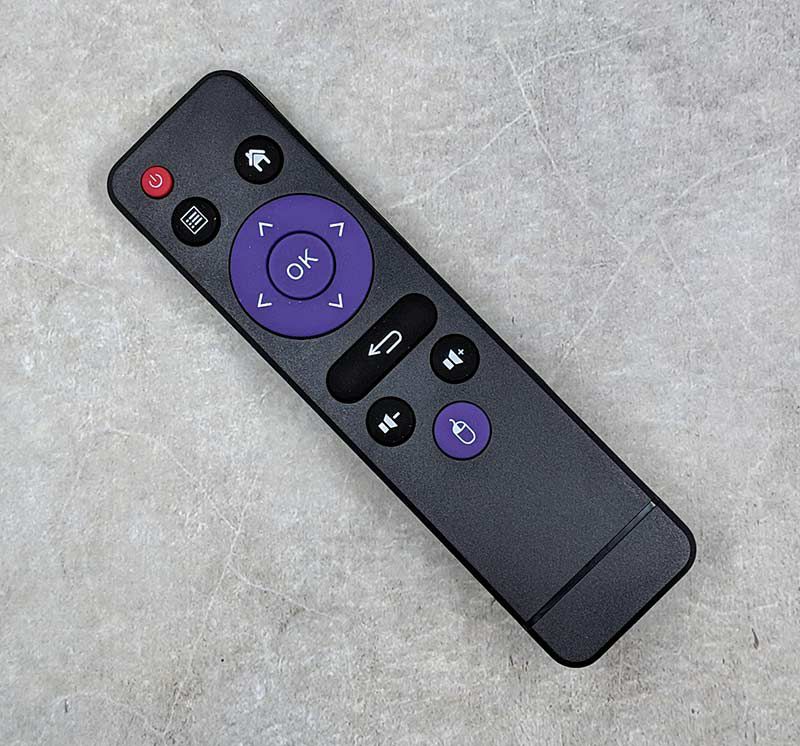
The MX10 does come with a remote control, but the performance of this remote is bad. I had to press various buttons multiple times to move the cursor on the screen. Speaking of which, the remote has a button to switch to mouse mode to let you use the arrow keys to move a virtual mouse.

When the remote decided to completely stop working (no, the batteries weren’t dead), I ended up connecting a small Logitech K400 wireless keyboard with a built-in touchpad. This keyboard uses a USB receiver and it worked pretty well as a replacement for the MX10 controller except when I needed to press enter. For some weird reason, pressing enter showed up as a “q” on the screen. Ugh…

Setting up the MX10 Android TV Box was not difficult. All that’s needed is to connect the box to your TV using the included HDMI cable and connect the included AC adapter for power. Once booted, you’ll have to enter your Google login info and then you’re good to go.

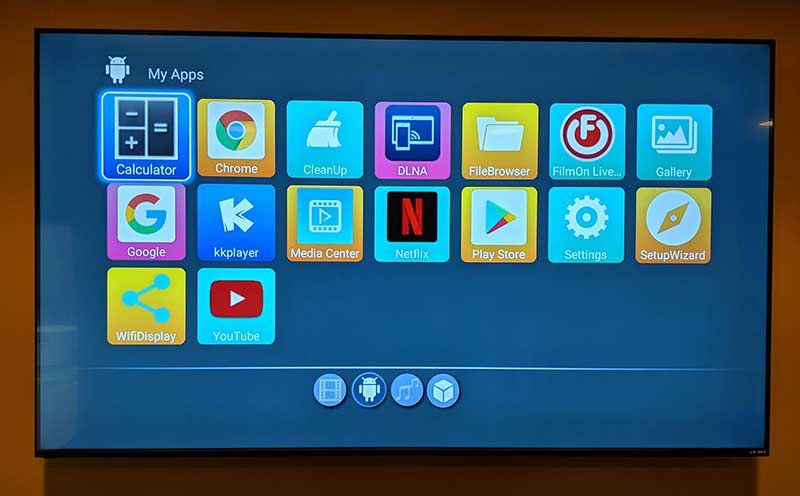
The Android 9 interface is basic with large and small icons for a variety of apps. The bottom row changes automatically to reflect your most used apps.

Out of the box, the MX10 has Netflix installed which is my primary streaming app. I was also able to install Amazon Prime Video and your other favorite apps by using the Google Play app.

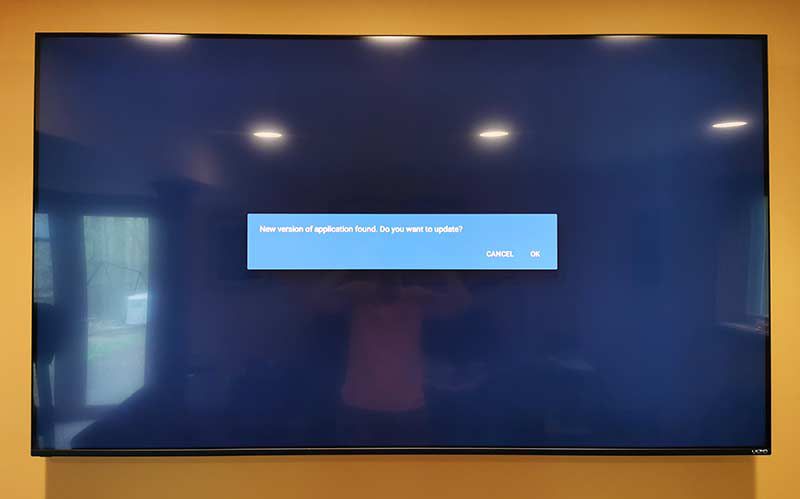
My first test with the MX10 Android TV box was to try Netflix and I was immediately greeted with a message telling me that there was a newer version of the app and did I wish to update. Yes, I did wish…

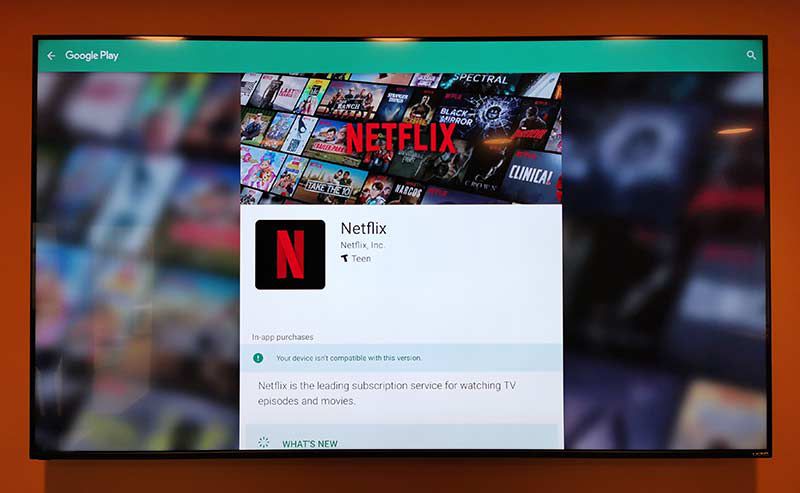
However, I was immediately smacked with a message saying that the device was not compatible with the new version. Ugh #2.

So I backed out and disregarded the question to update and Netflix launched, allowed me to sign in and I picked a show to watch.

The quality was bad. The video was blurry and even after a few seconds of buffering, it continued to play like the frame rate was 20FPS. I rebooted the box, tried other videos and was met with the same results. But I went ahead and watched an entire movie to see if the quality would ever improve. It did not. Ugh #3 (are you seeing a pattern here?)

Next up was a test with YouTube and the results were similarly disappointing. As was Amazon Prime Video. I even loaded up some movies on a micro flash drive and plugged it into one of the USB ports and the playback quality was just as dismal.

At this point, I was ready to just say that the MX10 was a complete dud. But the thought struck me to do a full reset of the box and try again, which I did. Surprisingly, a full reset caused the remote control to start working again and the video quality to improve considerably. However, even though the playback quality did improve, it did not improve enough for me to change my opinion of this Android TV box.

What I like

  • Price
  • Multiple USB ports

What needs to be improved

  • Video quality
  • Remote control performance

Final thoughts

If you’ve gotten this far, you can already guess that my final thoughts on the MX10 Android TV Box are not going to be favorable. It’s only the second device that I’ve reviewed in this category, but I can tell you that it’s not one that I would recommend. If you’re looking for a budget ATV, this isn’t the one to choose.

Price: $52.94
Where to buy: Gearbest
Source: The sample for this review was provided by Gearbest.

Filed in categories: Reviews

Tagged:

MX10 Android TV box review originally appeared on The Gadgeteer on April 25, 2019 at 12:00 pm.

Note: If you are subscribed to this feed through FeedBurner, please switch to our native feed URL http://the-gadgeteer.com/feed/ in order to ensure continuous delivery.
Mousetrapper keyboard, Huawei P30 Pro, and more – Review updates

REVIEW – Have you wondered what happens after we review a product? Do we immediately stop using the product because it breaks? Do we continue to use the product for years and even decades after we post the review? To answer those questions, we post long-term review update posts, so we can take a look back at past reviews and comment on how well the product has stood the test of time. Check out these latest review updates by clicking on the review links below and then scrolling to the bottom of the page to read the latest dated updates.
Mousetrapper 2.0 alternative mouse review By Julian Perry

moshi Symbus Q USB-C docking station with wireless charger review By Julie Strietelmeier

Julie’s gadget diary – I ordered the Huawei P30 Pro By Julie Strietelmeier

ClipDifferent Pro automatic fingernail clipper review By Julie Strietelmeier

Filed in categories: Reviews

Tagged:

Mousetrapper keyboard, Huawei P30 Pro, and more – Review updates originally appeared on The Gadgeteer on April 25, 2019 at 10:01 am.

Note: If you are subscribed to this feed through FeedBurner, please switch to our native feed URL http://the-gadgeteer.com/feed/ in order to ensure continuous delivery.