Coddle Gjemeni Couch review

REVIEW – Is a couch a gadget? Normally the answer would be no. But the couch I’m going to show you today is different. The Gjemeni Couch from Coddle is the transformer of couches. Let’s check it out.

What is it?

The Gjemeni Couch from Coddle is a couch, it’s a bed, and more.

What’s in the box?

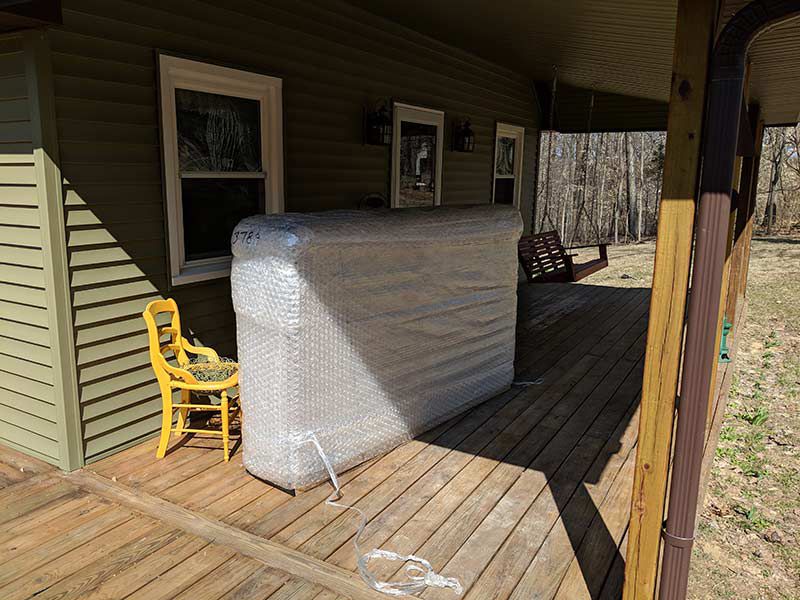
When I agreed to review the Gjemeni Couch, I was told that it would be delivered by a special delivery service and not UPS or FedEx. So I took the day off to wait for it. A large truck showed up and deposited the giant bubble wrapped package on my front porch that you see above. They asked if I wanted them to take it in the house but I figured it would be easier for me to open, and assemble and take it in side myself. Note to anyone who is thinking of buying this couch – let them take it inside for you. Trust me.

Unboxing

I waited for Jeanne to get home from work so she could help me. I’m lucky to have someone who rarely questions me when I have something new that needs to be set up.

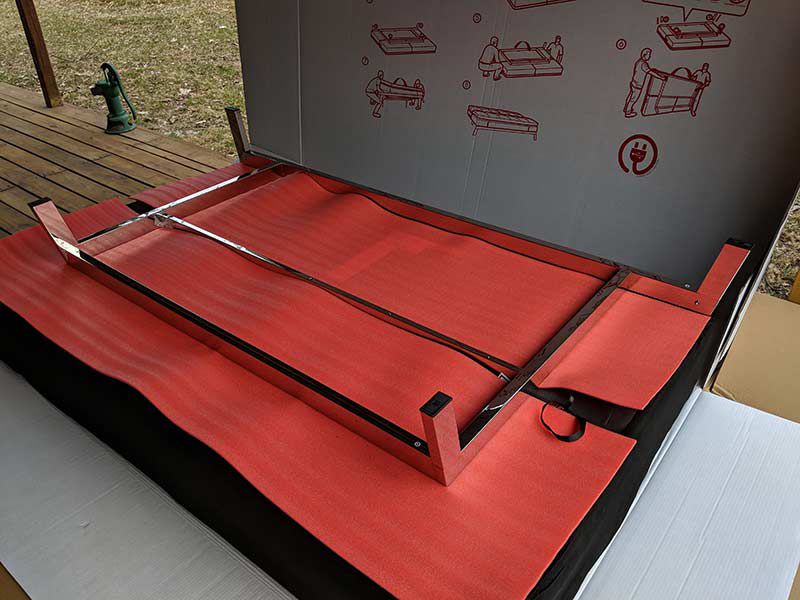
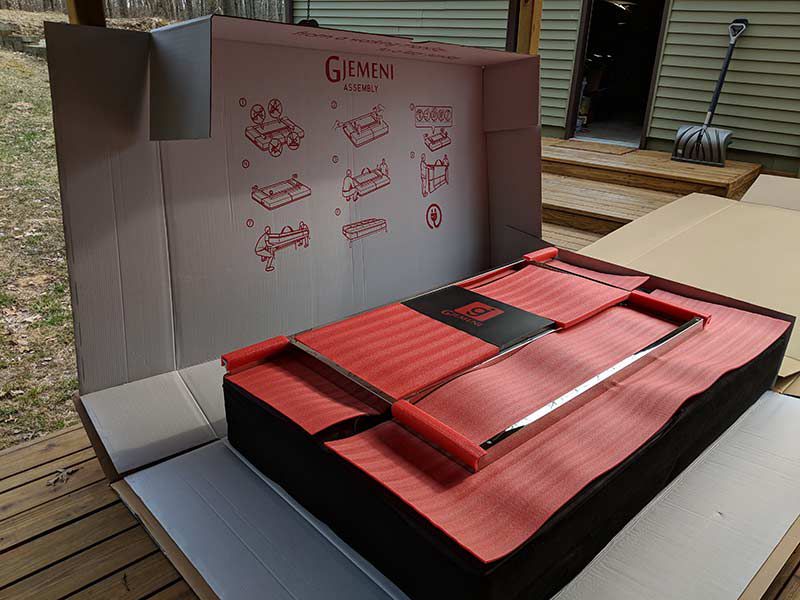
After removing the bubble wrap on the outside of the box, we opened it to see what you see above, a very large flat piece of furniture that required no assembly other than attaching 4 legs.

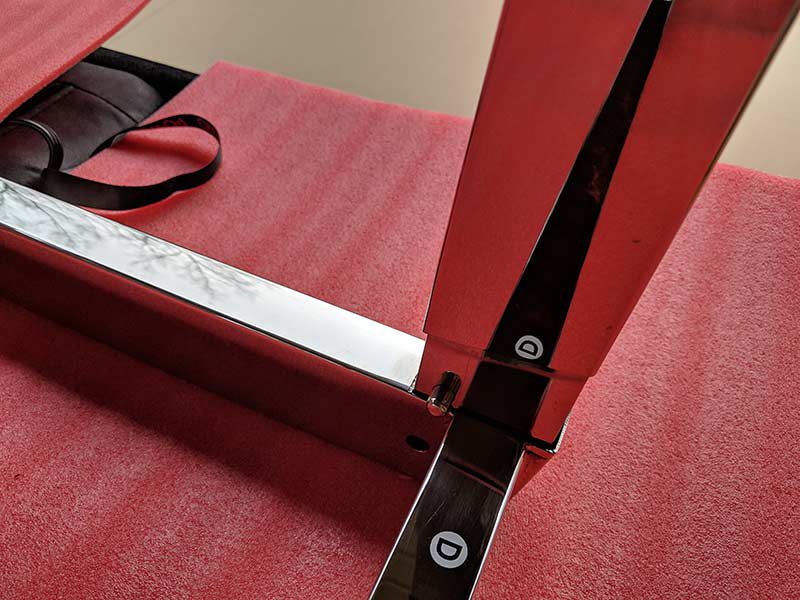
The chromed legs were contained in a small box with instructions and two strange pieces of leather.

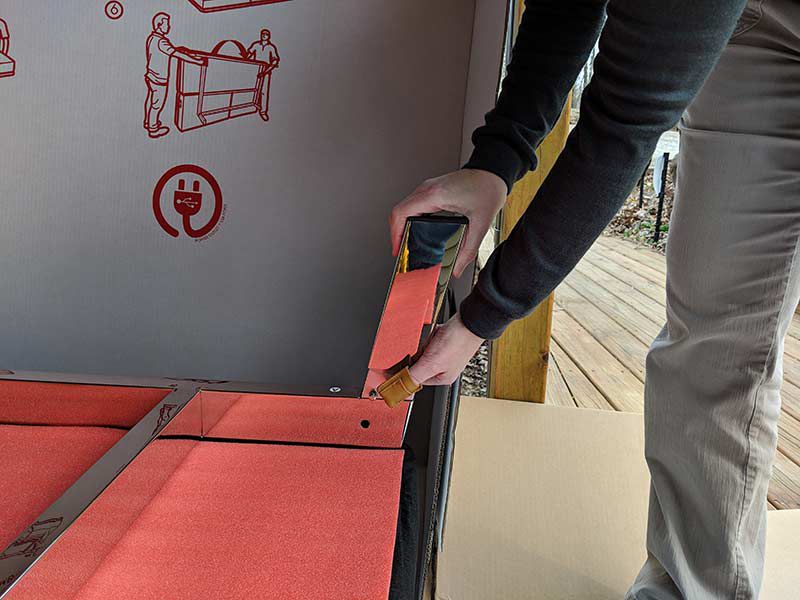
The assembly of the Gjemeni Couch was quick and easy given that the legs were marked and no tools were required. Just slip the leg over the post and then press the spring loaded button with your thumb while pressing the leg in place.

Hey, that’s what those little leather pieces were for. Thumb protectors. They were a nice touch and are important to use if you don’t want to pinch your fingers.

With the 4 legs attached and the protective red foam sheets removed, the next step was to get the whole unit into the house. Let me just say that this was the hardest part of the whole review. Luckily the couch was protected with a black canvas cover because we had to slide/push it across the deck. It was not easy because we are wimps and the couch was heavy (~140lbs) and there weren’t any easy ways to grab it.

Design and features

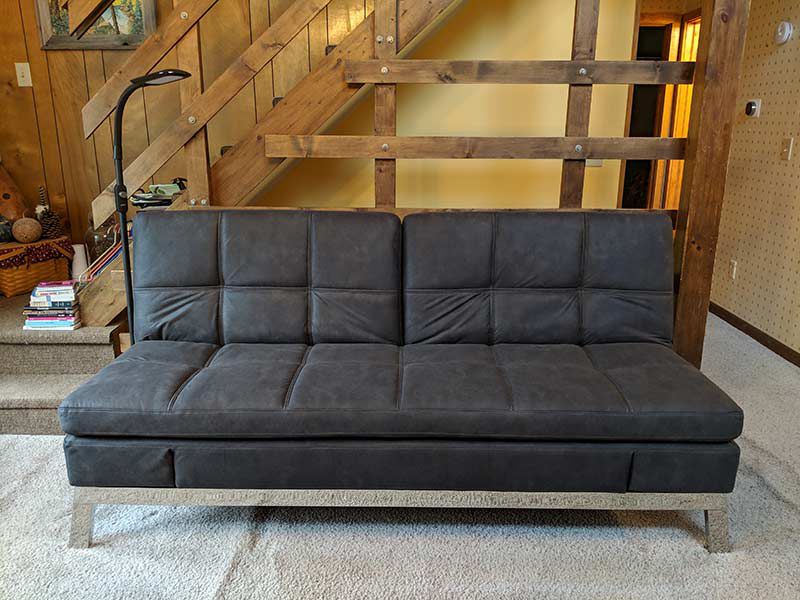
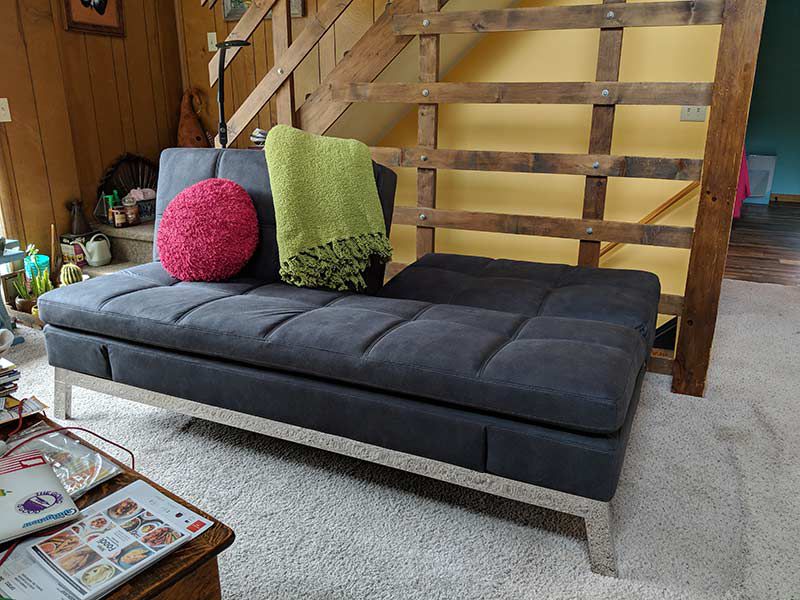
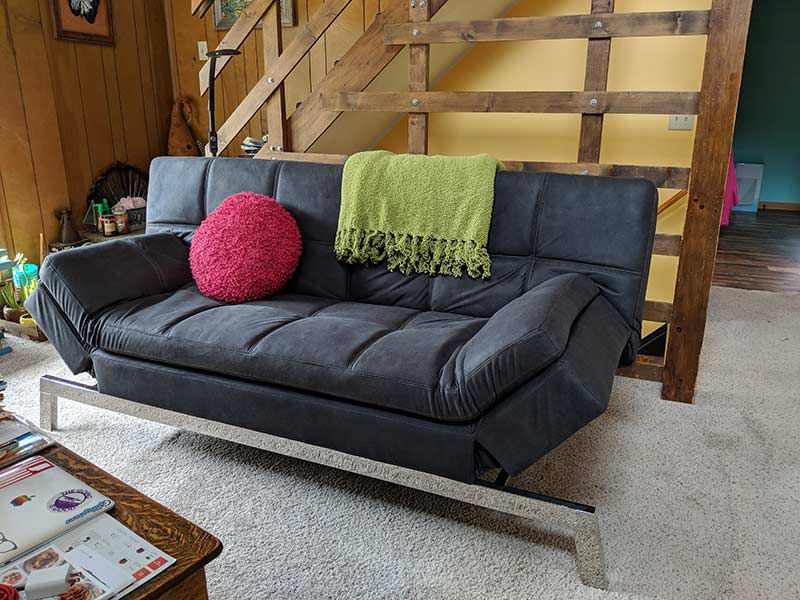
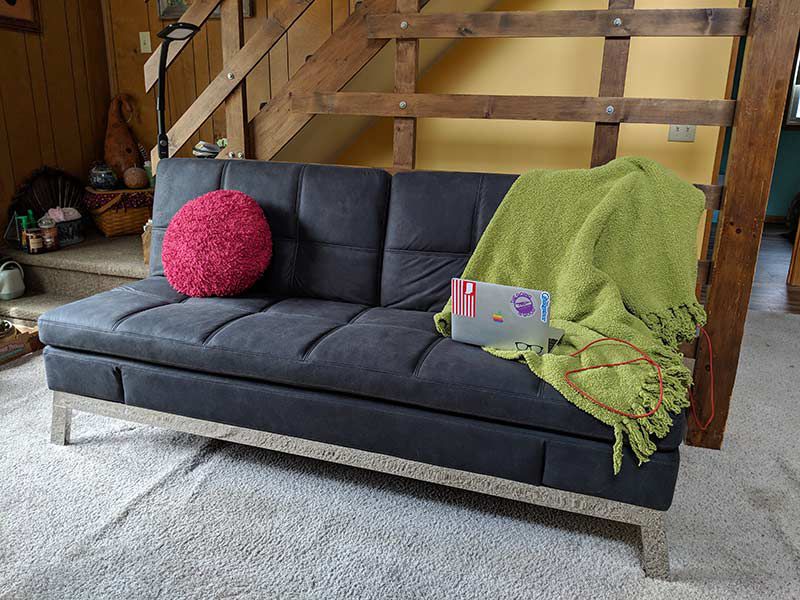
It took some effort, but we got it in the house and from there it was easy to fold up the 2 back pieces to create the couch that you see above. I was sent the grey microfiber version of the couch, but it’s also available in brown, black, white, and red leather. Unfortunately, the base/legs are only available in chromed stainless steel which might not be everyone’s style

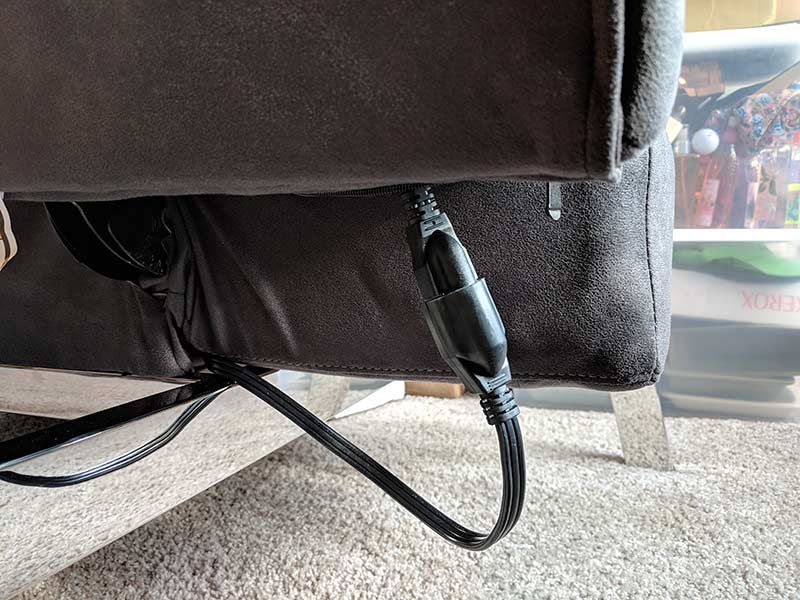
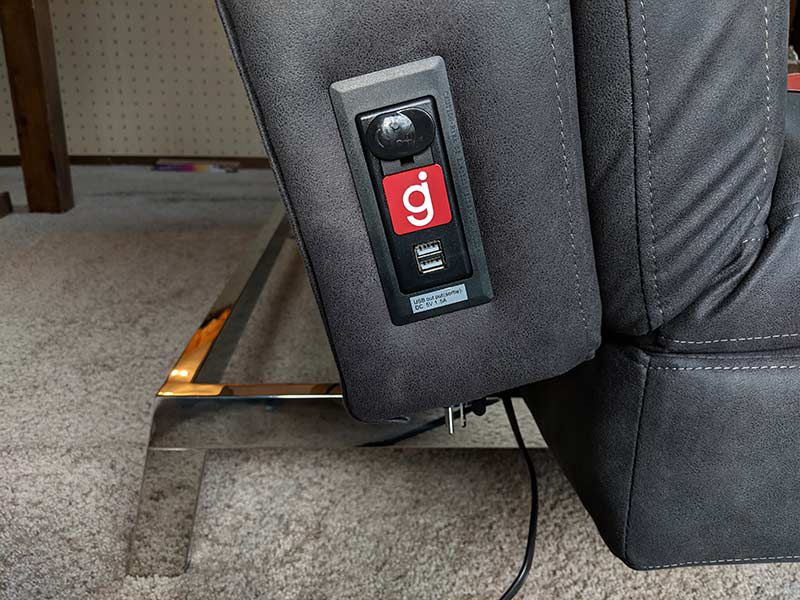
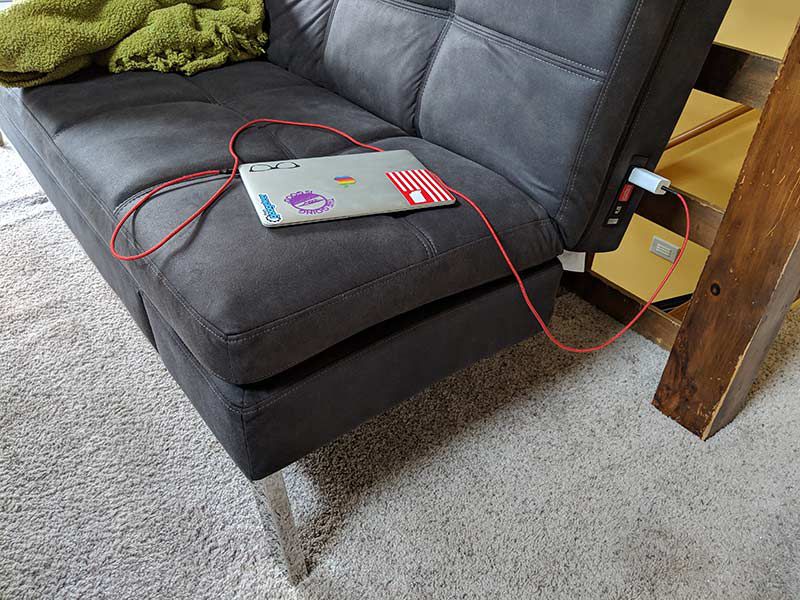
One of the cool features of the Gjemeni Couch is that each side has its own power outlet and 2 USB ports. You just have to plug the couch into power (wow, I never thought I’d ever need to type that sentence!) with the built-in power cord. If you don’t want to use this feature, the cord stores inside the couch in a zippered pocket.

The outlet on each side comes with a protective plug cover that is easily removed.

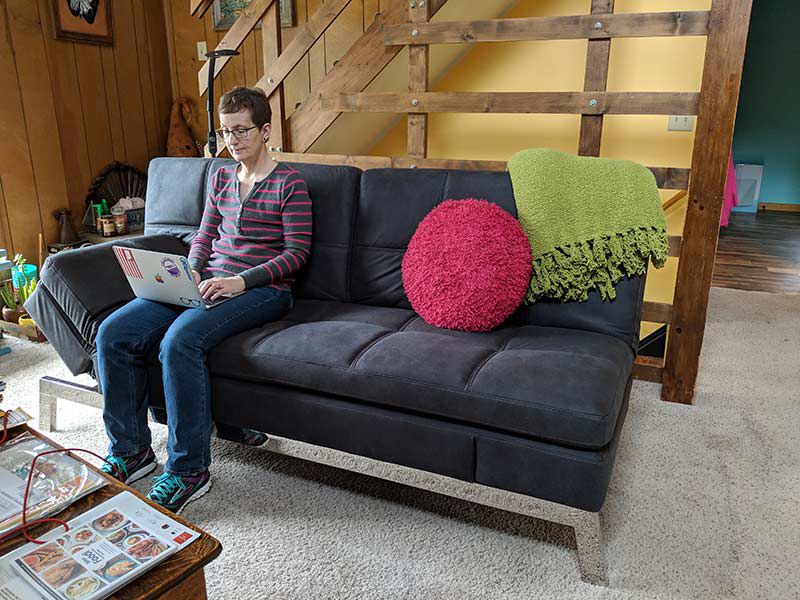
Being able to charge my gadgets from the couch is convenient as I’ve had many times when my MacBook or phone was low on juice while relaxing on the couch.

Comfort and functionality

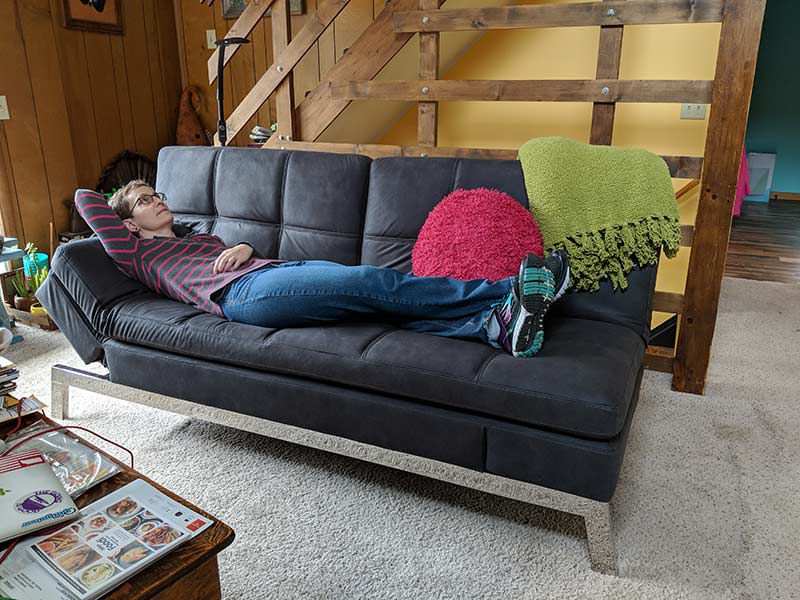
The Coddle Gjemeni Couch is a great size. It’s long enough to accommodate 3 or even 4 people. The couch is made of 4 layers of foam but it is important to understand that this couch is really firm. I wish it was a little more comfy cozy, and hope it will “break” in with time.

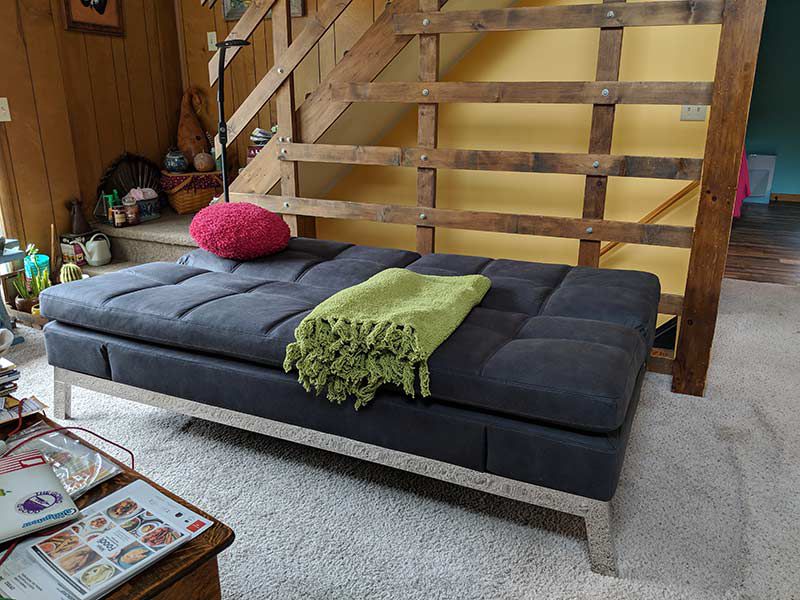
What it might lack in coziness, it more than makes up for in versatility. Each back piece can be positioned up or down.

With both pieces down, the couch converts into a bed. You can even buy an optional 3-inch padded couch topper for added comfort.

I like a firm bed, so lying on the couch feels comfortable to me and I love the idea that we now have a way for a guest to stay over if needed. Note that I’m 5’6″ tall, so you get an idea of the length of this couch/bed.

The sides can also fold up to create a shorter (looking) couch.

Or just put up one side to create a lounger.

Check out the quick video that I made showing how to convert the couch into the different forms.

What I like

  • Easy to convert from couch to a bed
  • Built-in power and USB ports on each side

What needs to be improved

  • Expensive
  • Might be considered too firm
  • Offer other finishes for the base

Final thoughts

If you don’t have a guest room in your home or any way to accommodate overnight guests, a sleeper sofa is a great option. The Coddle Gjemeni Couch is a couch that can convert into more than just a bed and even keeps your gadgets charged while you’re relaxing. If the price fits your budget (they do offer a 60-day return policy) and you don’t mind a firm cushion, this couch it is a winner.

Price: $999.00 (includes free shipping)
Where to buy: Coddleme.com
Source: The sample for this review was provided by Coddle.

Filed in categories: Reviews

Tagged:

Coddle Gjemeni Couch review originally appeared on The Gadgeteer on May 1, 2019 at 9:00 am.

Note: If you are subscribed to this feed through FeedBurner, please switch to our native feed URL http://the-gadgeteer.com/feed/ in order to ensure continuous delivery.

Wilson Pro 70 Cellular Signal Booster review

REVIEW – A few years ago, my brother fell while in a rural forest in upstate New York. He totally shattered one of his vertebrae and spent nine months in a full-body cast recovering. When he fell, it was snowy, dark and cold. By some miracle, he located his cell phone, got a tiny signal and called for help. If he hadn’t located his phone, things could have ended much differently. Equipped with this realization, I wanted to see what Wilson’s Pro-series Cellular Boosters could do to alleviate my brother’s weak cell signal woes in his sparsely covered valley farm home.

What is it?

Wilson’s Pro-70 is a cellular signal booster and antenna pair which acts as a transceiver, amplifying signals in an area with weak coverage.

What’s in the box?

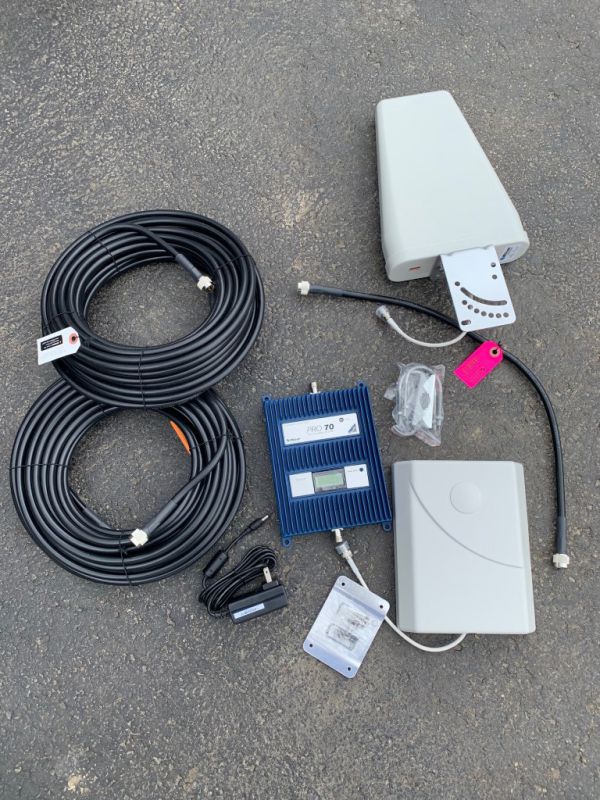
List contents – you can remove this heading and section if it doesn’t apply to your review.

  • Wilson Pro 70 Amplifier with LCD Display
  • Wilson Yagi Directional Outside Antenna
  • Wilson Panel Inside Antenna
  • 75′ Black Ultra Low Loss Cable (952375)
  • 60′ Black Ultra Low Loss Cable (952360)
  • Lightning Protector
  • 2′ Black Ultra Low Loss Cable
  • AC Power Supply
  • Installation Guide

Hardware specs

  • Band 4,5,12,13W (700, 850, 1700 and 2100MHz)
  • Max Gain 70dB
  • 50 Ohm Impedance
  • 12 volt, 3 Amp DC power
  • 15 x 6 x 8.75” booster dimensions
  • 2.78 lbs booster weight

Design and features

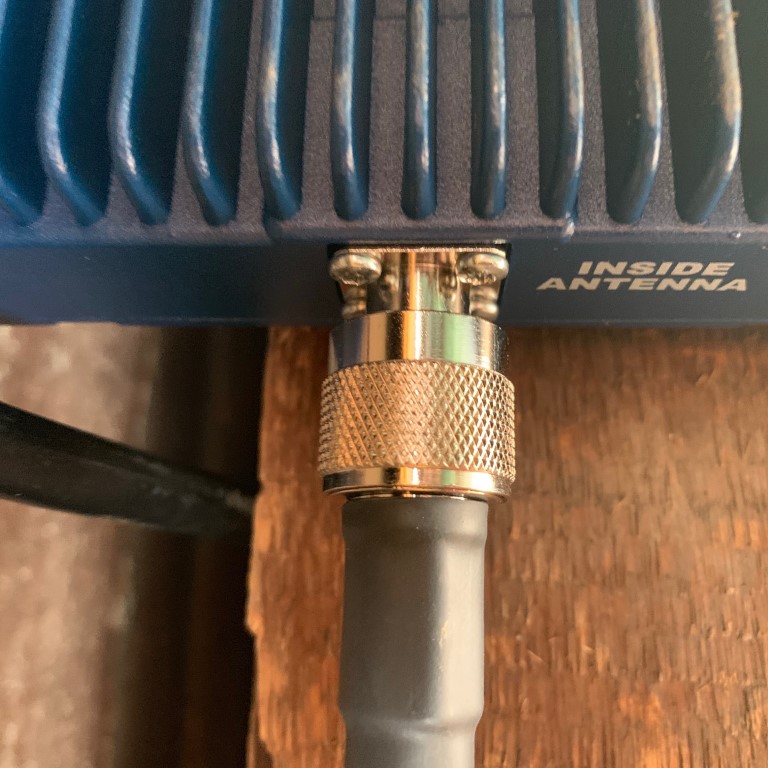
The kit arrived in multiple boxes inside a larger box. Everything needed (almost) for installation was included. The booster has only three connectors, one for power, one the receiving antenna and one for the home antenna.

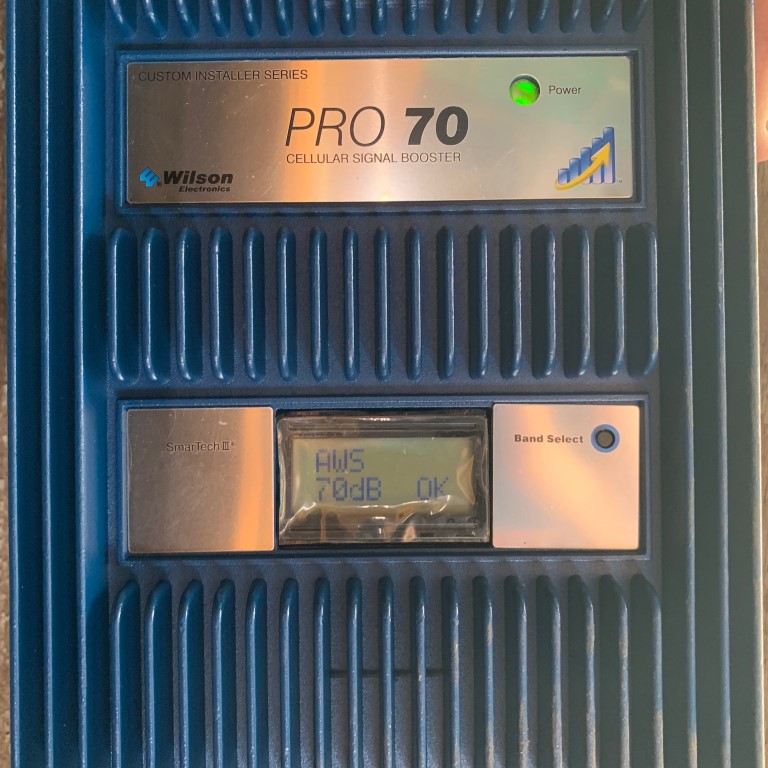
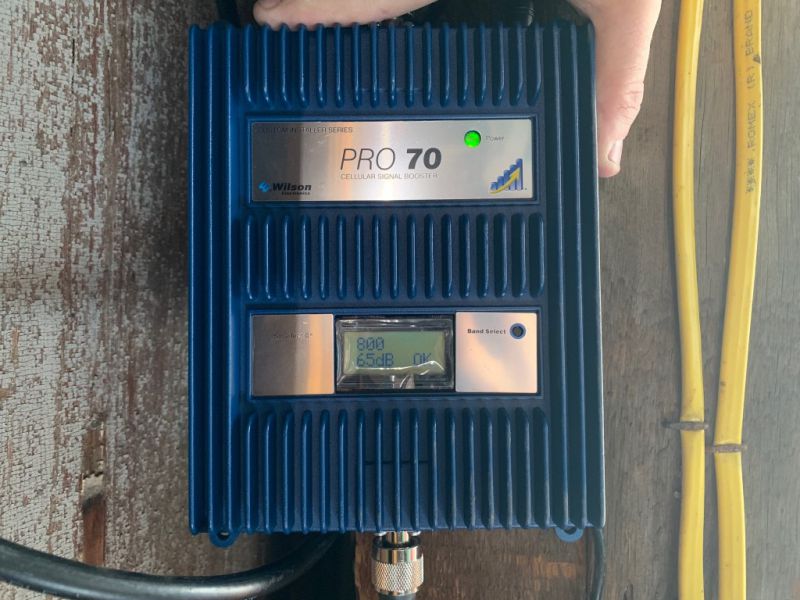
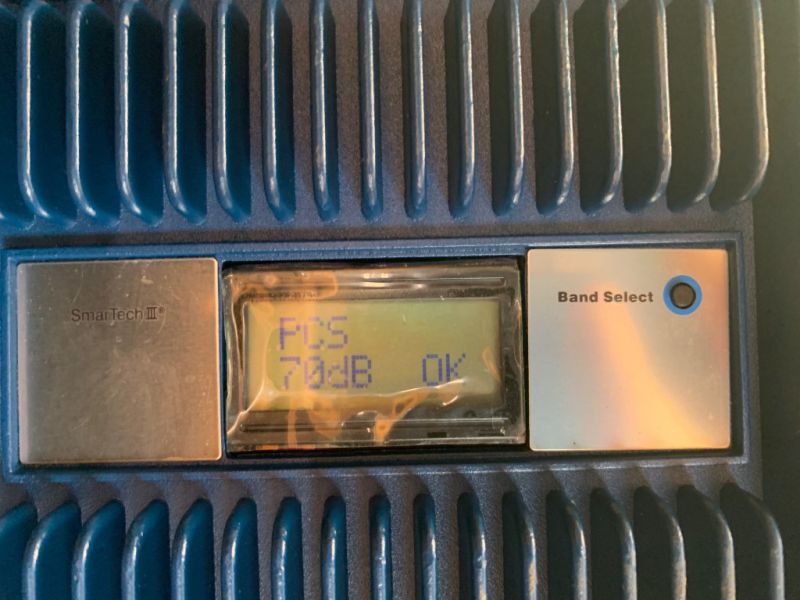
The booster is equipped with an LCD screen and single button to toggle between cellular frequencies, checking signal strength and for issues. A single LED indicates if there are any issues or if everything is working properly.

Setup

We pulled all of the parts from their cardboard wombs and connected everything together for testing. Because my brother’s farm has several buildings, we elected to initially put the equipment in a small tractor barn. We plugged in all of the parts, plugged in the booster and waited a few seconds. Using the built-in strength meter’ we were able to get an average of 69dB of the signal across all bands. The antennas needed to be separated to keep from talking to each other, but plenty of cable is included.

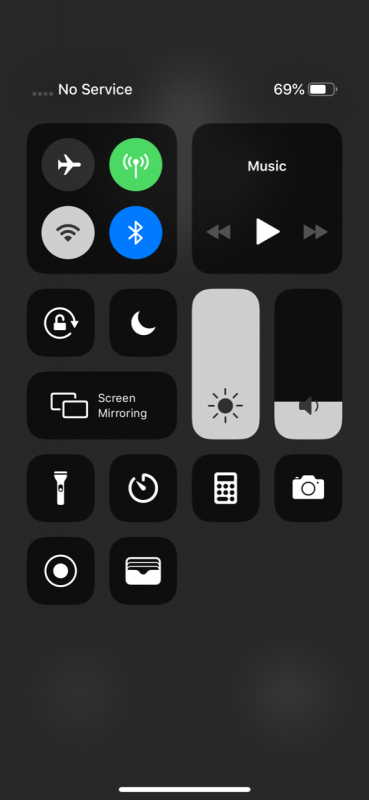
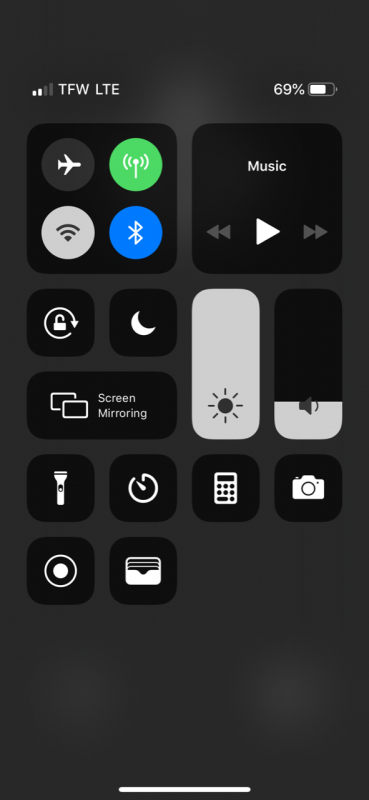
Instantly, I went from no signal (no bars) to a very usable and stable signal. I was amazed because the transceiver required no tweaking, no adjustments, and no customization. It just worked – magic!

I made a few calls and visited a few web sites to verify I had gone from signal-nada, to full-speed LTE signal.

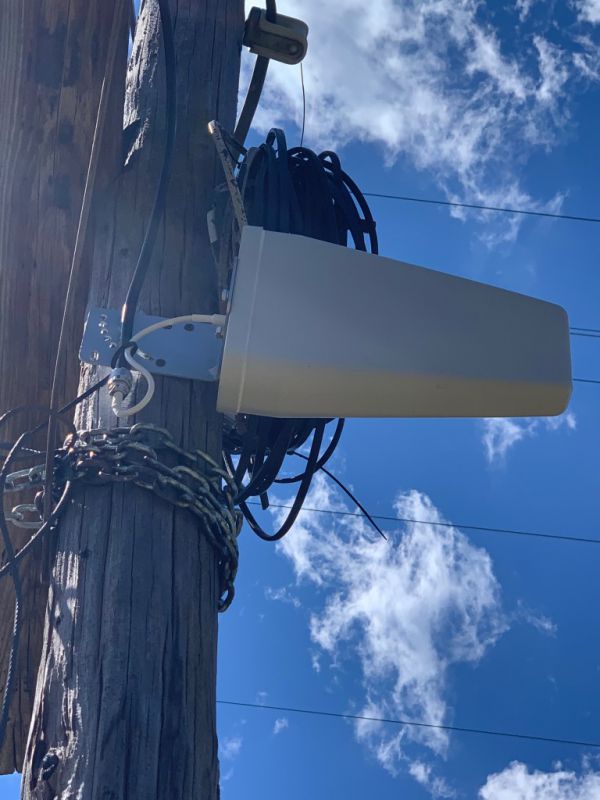
Since everything tested ok, we uncoiled the cables and mounted the antenna on a pole between the house and barn, attached the lightning protection adapter, routed the equipment and were finished.  We needed to provide a few zip-ties to secure the cables and a ground wire to connect the lightning suppressor to an existing ground rod, but other than that, everything needed is in the box. It should be noted that the sending and receiving antennas can’t be pointed at each other or the system can experience problems.

Performance

Playing the “can you hear me now” game, I walked around the property and was shocked at the area of coverage I had. Of course, there was significantly less signal inside structures, but still, enough to maintain a connection except in the furthest reaches of the house. Mind you, the equipment was placed in a building about 50 feet from the main structure. My brother and I have different carriers and both received a dramatic increase in cellular reception. Again, prior to installing, I had zero cellular signal in or near my brother’s home.

What I like

  • Almost everything needed for installation is included
  • Virtually no set-up needed other than pointing the antennas
  • Solid performance

What needs to be improved

  • Nothing

Final thoughts

In my brother’s case, a cell phone may have saved his life. I’ll never underestimate the value of a solid cellular connection. The Wilson Pro 70 Cellular Booster is a solid, easy to install remedy for weak signal areas. While it’s not a magical solution to rebroadcast LTE to your “back 40” acres of your property, when properly sized (Wilson sells many different sizes) and installed, it will alleviate many issues in home (or in my case, farm) cellular reception.

Price: $899.99
Where to buy: Wilson Amplifier Pro 70
Source: The sample of this product was provided by Wilson Amplifiers

Filed in categories: Reviews

Tagged:

Wilson Pro 70 Cellular Signal Booster review originally appeared on The Gadgeteer on April 30, 2019 at 2:03 pm.

Note: If you are subscribed to this feed through FeedBurner, please switch to our native feed URL http://the-gadgeteer.com/feed/ in order to ensure continuous delivery.
Elechomes UC3101 air purifier review

REVIEW – I take the air that I breathe for granted because I live in an area where the air is pretty clean. At least that’s what I thought. Can the air that you breathe seem clean but in reality, it’s not? Yes. Is there a product that can purify the air and make it better to breathe? You bet! Let’s take a look at the UC3101 air purifier from Elechomes.

What is it?

The UC3101 is an air purifier from Elechomes which features:

  • 1 Pre-Filter and a 3-Layer composite HEPA filter that helps trap and eliminate up to 99% of airborne pollutants
  • A dust sensor and an odor sensor work together to monitor air quality and identify harmful pathogens
  • Smart Mode & Sleep Mode
  • Intelligent Timer & Child Lock: 1-8 hours for automatic working and shutdown purification
  • Up to 350 square feet coverage
  • Remote Control: allows controlling the air purifier from up to 16.4 ft. (5M) away

What’s in the box?

  • Air Purifier with filters
  • Remote control
  • User manual

Design and features

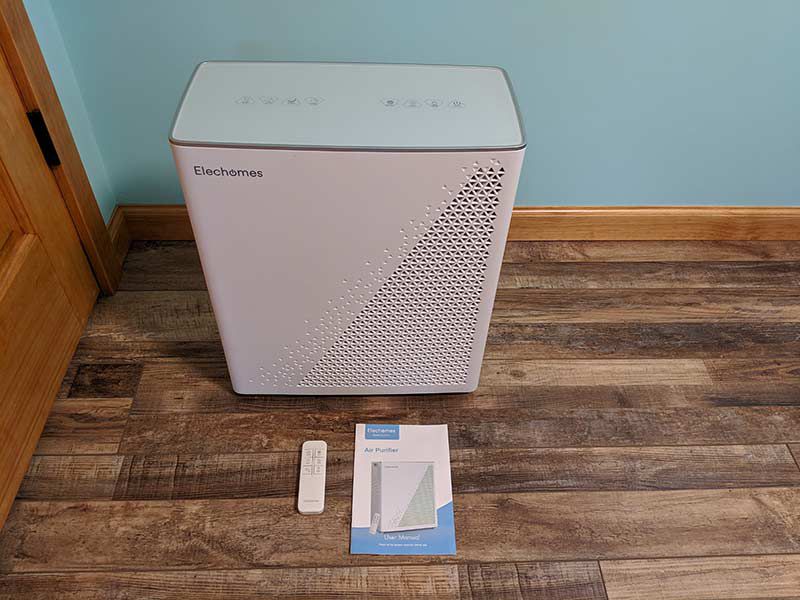
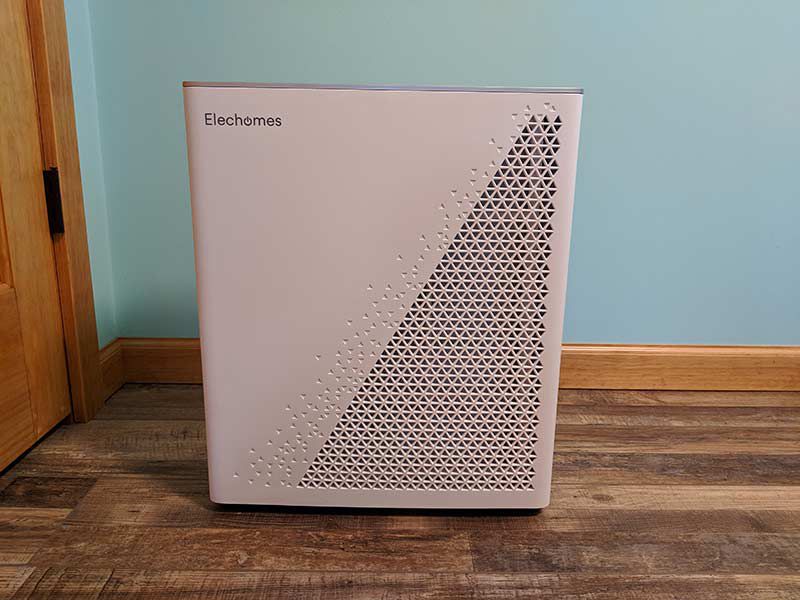
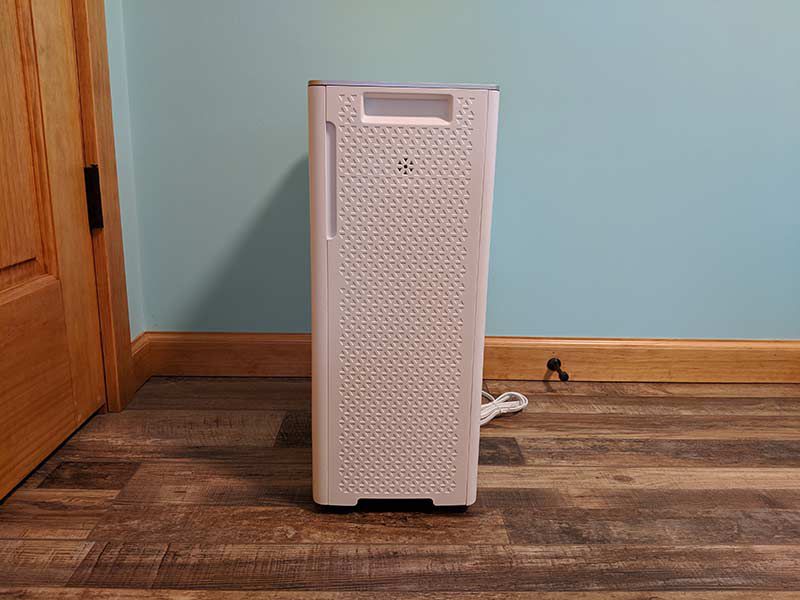
The Elechomes UC3101 air purifier is 16.5 x 8.3 x 19.3 inches and has a white plastic case with decorative vent cutouts on the front.

The sides have built-in handles that allow for easy relocation of the 18.74 pound unit.

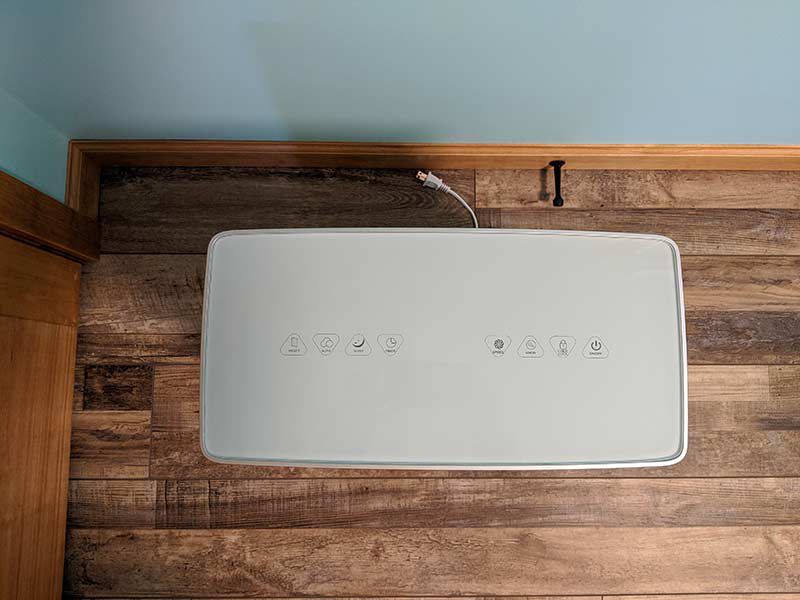
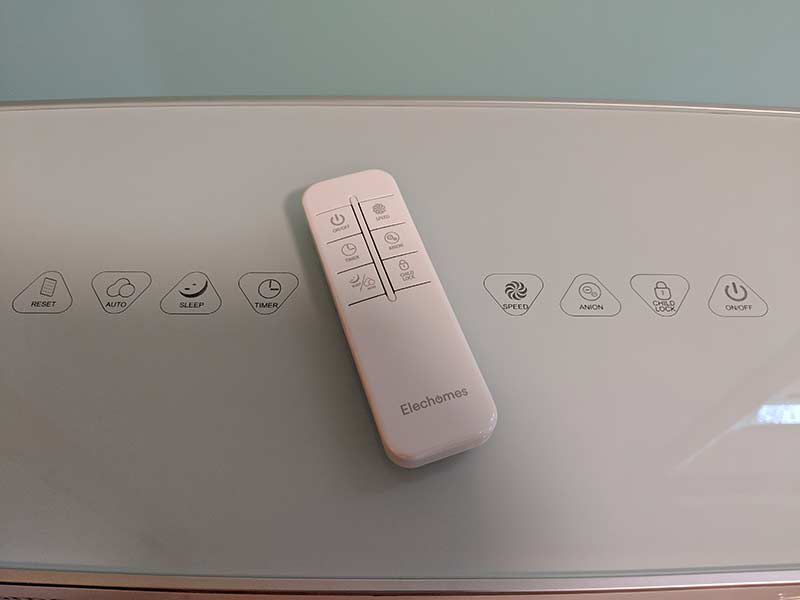
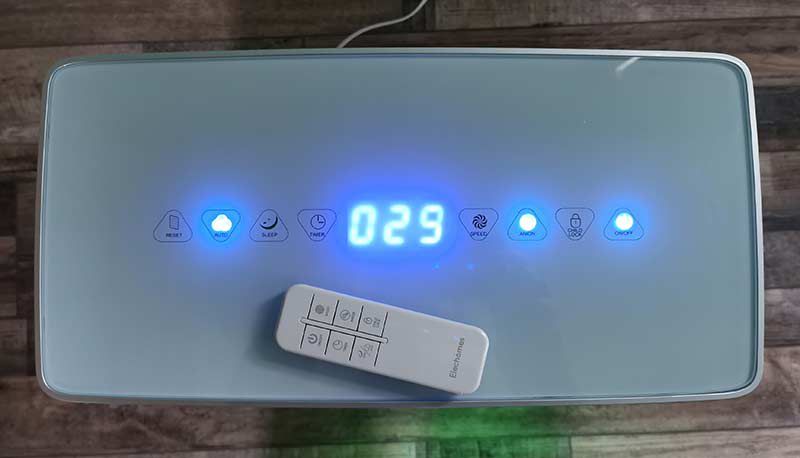
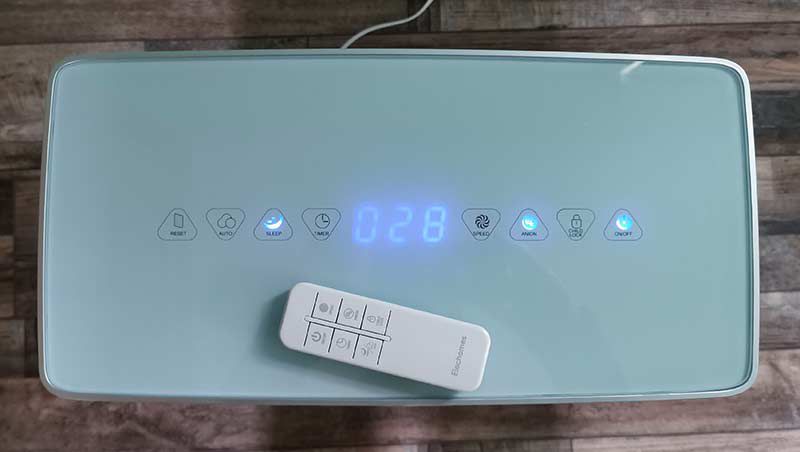
The top surface of the UC3101 air purifier has a touch panel with 8 buttons with the following functions from left to right: Filter change notification and reset, auto mode, sleep mode, timer, particulate matter display, fan speed, negative ion function, child lock, and power toggle.

The UC3101 air purifier comes with a handheld battery-powered remote control that has the same functions so that the unit can be controlled from up to 16 feet away.

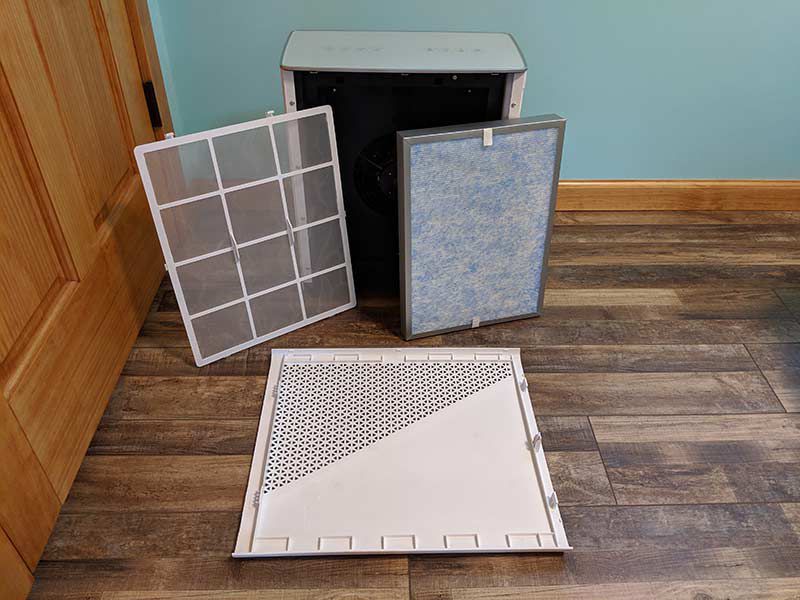
The unit comes with a pre-filter which is washable and the main HEPA filter which should be replaced once a year or after 3000 hours of use.  Currently, Amazon does not sell the replacement filters, but that’s supposed to change soon.

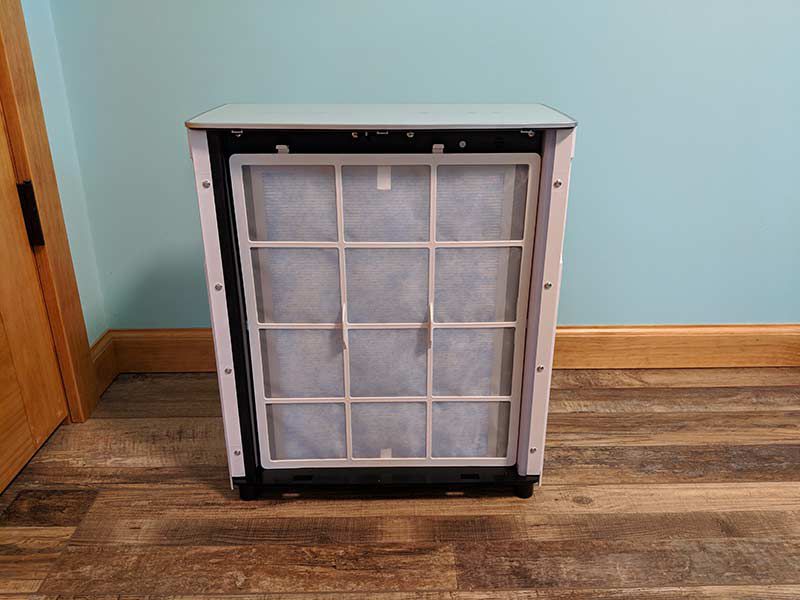
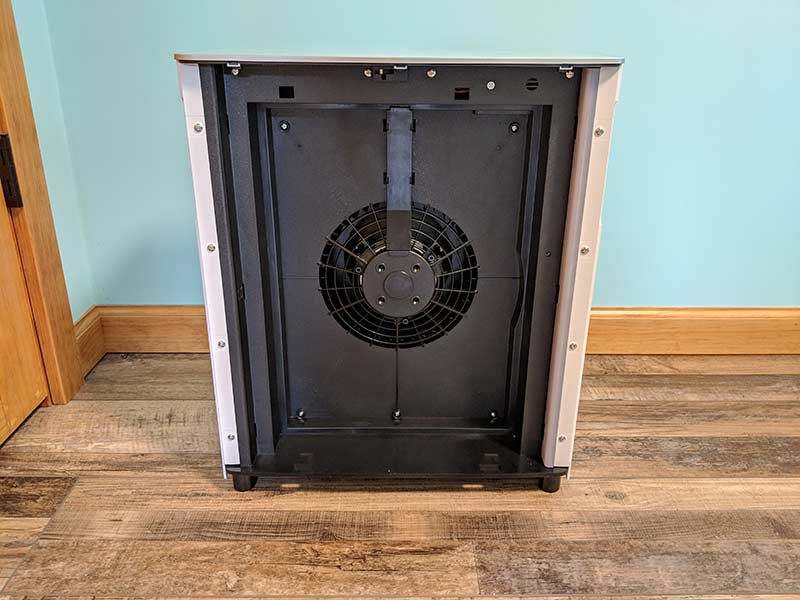
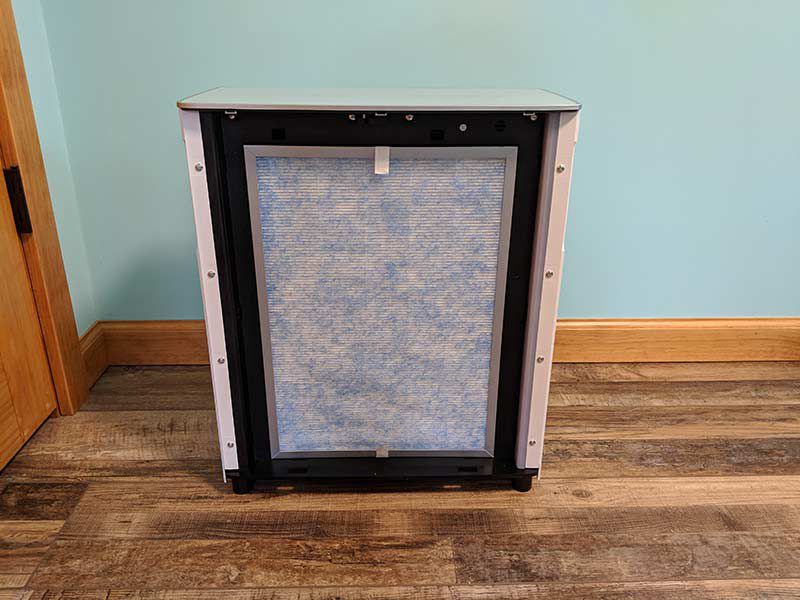
Installing and replacing the filters is not difficult. The front panel of the air purifier unsnaps to reveal the interior of the device.


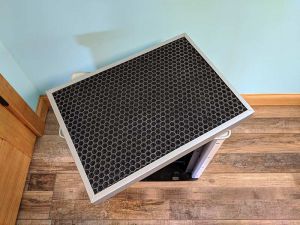
The HEPA filter has activated carbon which reduces benzene, formaldehyde, and more and it also has an antibacterial cloth that kills most bacteria and viruses.

It fits in place with the honeycomb side of the filter facing in towards the fan.

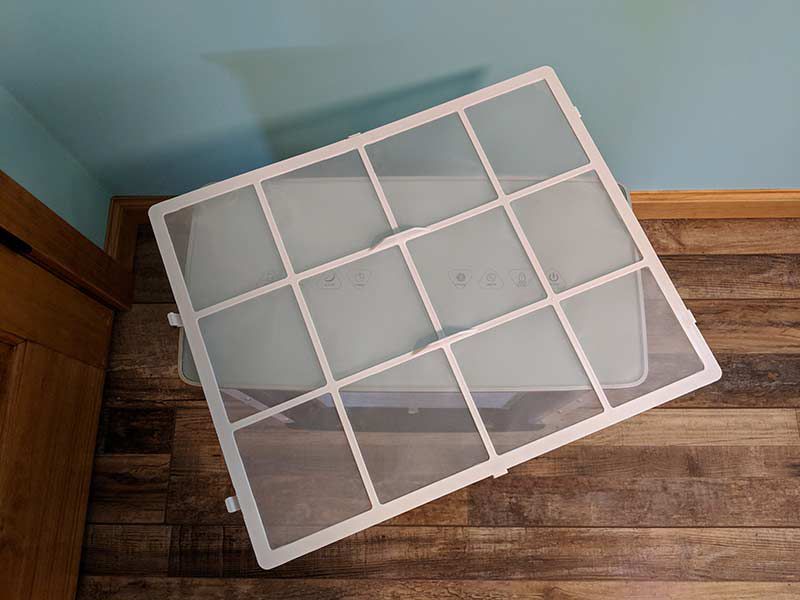
The pre-filter is designed to trap larger pollutants like hair, lint, and more.

The pre-filter fits over the main filter and is the first line of defense against to trap all the icky stuff you should not be breathing. The UC3101 air purifier sucks in air through the filters, to clean it and then sends the clean air back into the room through a vent on the side of the unit.

Operation

To use the UC3101 Air Purifier, all you have to do is make sure the filters are installed correctly, plug in the unit and press the on/off switch on the touch panel on top.

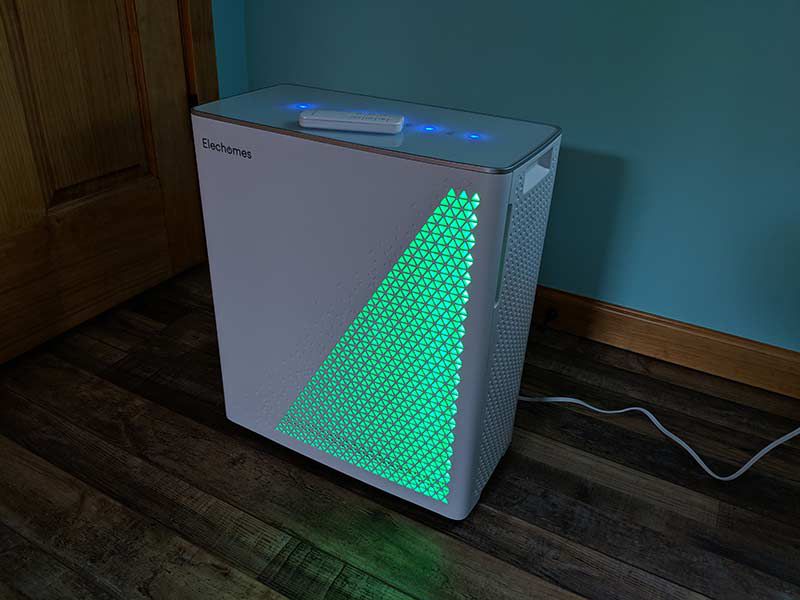
The touch panel buttons and display have bright blue LEDs that make them easy to see even in a dimly lighted room.

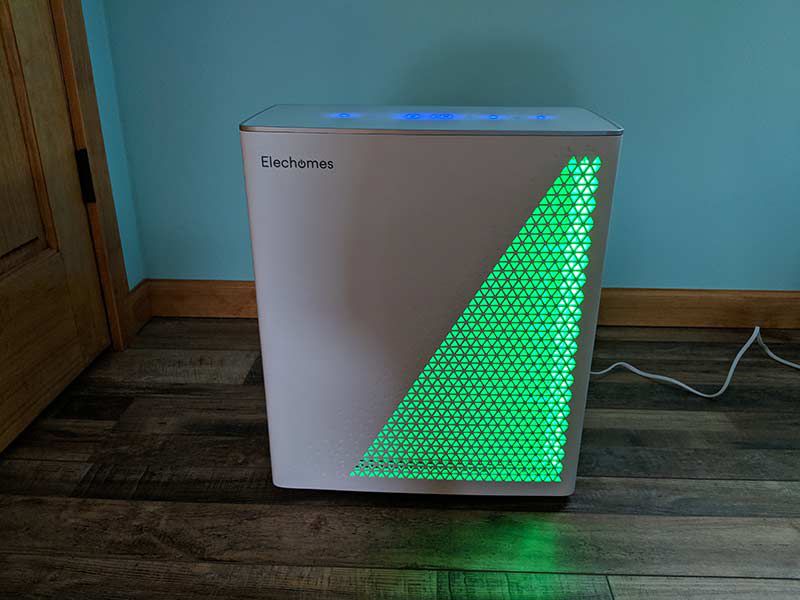
The front air vent of the air purifier also lights up to provide an easy to see a visual indicator of the air quality in the room. It should be obvious that green means good air quality. The PM display on top of the unit will have a reading of between 0-75 and the fan speed will be low.

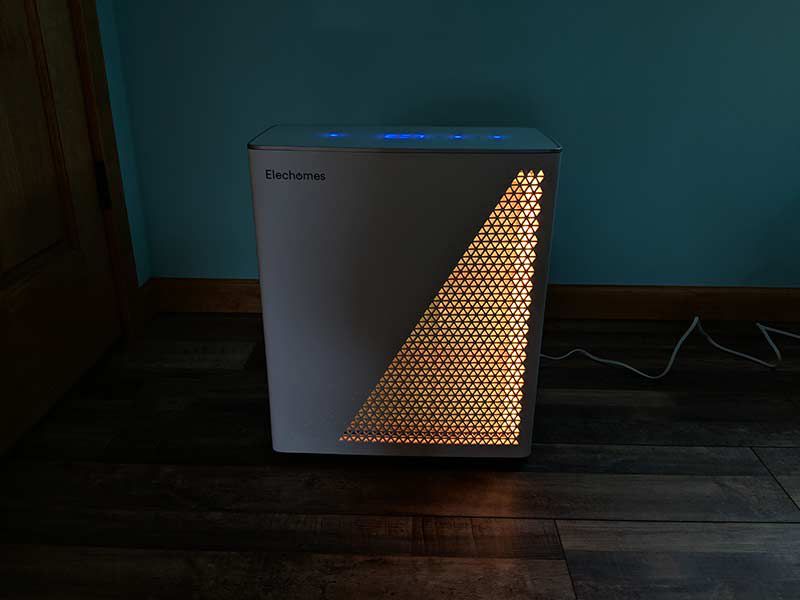
If the PM display on the top of the unit shows between 75-150, the vent light will turn yellow and the fan speed will increase to medium.

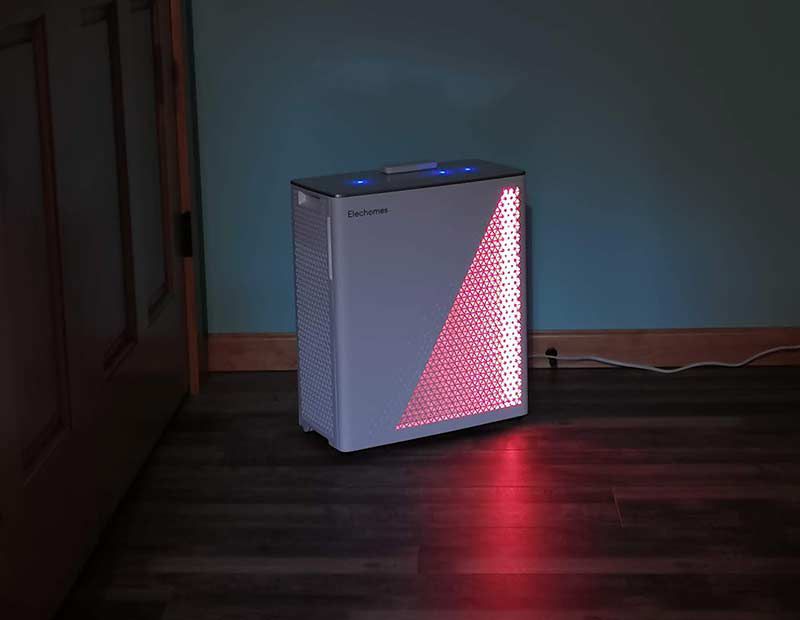
If the air quality is bad, the PM display reading will be over 150 and the fan speed will increase to high.

I’ve been having a lot of remodeling work done on my home lately and with remodeling comes a lot of dust and fumes. The Elechomes air purifier cranked into high gear after sessions of drywall sanding and even when we had some plumbing work and there were just glue fumes in the air. I was impressed that the sensors were able to detect both types of air quality problems very quickly.

The air purifier has a negative ion feature that is supposed to provide for maximum purification efficiency. I’ve tried using the unit both ways and I’ve just left that feature turned on even though I can’t tell a difference when it’s been disabled.

I have noticed that this air purifier is louder even when than other air purifiers that I’ve reviewed. This is true even when the air quality is good and the fan speed is low. When the air quality is bad and the fan speed is high, it is really loud.

Another issue is that the lighted function panel is bright. Even if you put the air purifier in sleep mode (shown above), the panel only dims slightly, which is still bright enough to light up a room and disturb your sleep. In sleep mode, the fans go to low speed but you can still hear the unit running. The unit does have a timer function that you can use to turn off the unit in 0-8 hours.

What I like

  • Easy to see air quality setting
  • Has dust and odor sensors
  • The HEPA filter should last for one year before needing to be replaced

What needs to be improved

  • Replacement filters are not yet available on Amazon
  • Fan is loud
  • Function panel lights are bright even in sleep mode

Final thoughts

The Elechomes UC3101 air purifier is an attractive appliance that will clean the air of a 350sq foot area of up to 99% of airborne pollutants. It’s easy to use and easy to maintain. The only downsides are that the fan is pretty noisy on the high-speed setting, the LEDs are bright even in sleep mode, and replacement filters are not yet available for purchase. It might sound like I have a lot of complaints, but the good side of this air purifier is that it makes the air smell better, and seem fresher after running for a short time. It’s made a big difference in the quality of the air in my home especially during the times that lots of dust and odors are being stirred up from remodeling projects.

Price: $299.99
Where to buy: Amazon
Source: The sample for this review was provided by Elechomes.

Filed in categories: Reviews

Tagged: ,

Elechomes UC3101 air purifier review originally appeared on The Gadgeteer on April 30, 2019 at 11:00 am.

Note: If you are subscribed to this feed through FeedBurner, please switch to our native feed URL http://the-gadgeteer.com/feed/ in order to ensure continuous delivery.
Lexip Mo42 Ceramic Glide Feet review

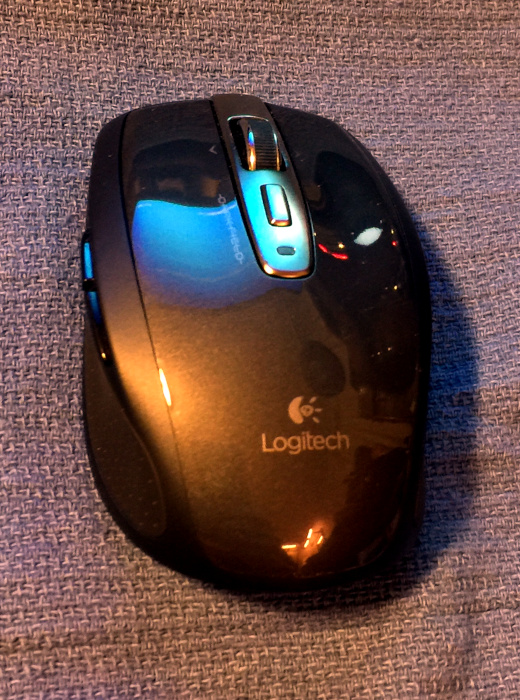
REVIEW – While I’m a HUGE fan of the Trackpoint navigation device–to the point of not buying laptops without it and having used TrackPoint-equiped keyboards for the past 25 years, navigating 2K and 4K displays using a TrackPoint is an exercise in frustration and loss of patience, and I’ve resorted to using a mouse when using my big screens. I’ve been happy with the general performance of my Logitech Anywhere MX (on my second one currently), but, after 5 years, it was starting to feel long in the tooth, so for the past year or so, I’ve been auditioning new mice for my daily-driver computer.  I haven’t found any that I like well enough to spend the money to upgrade from my trusty MX, including the new MX Anywhere 2. Each model that I tested was either just a bit off in the way it felt, way more expensive than what I wanted to spend, or worst of all, corded. So when Lexip offered the chance to upgrade my current mouse with some new shoes, I decided that I would give them a try.

What is it?

Lexip Mo42 Ceramic Glide Feet are add-on upgrades for your existing mouse which provide a more precise mousing experience.

What’s in the box?

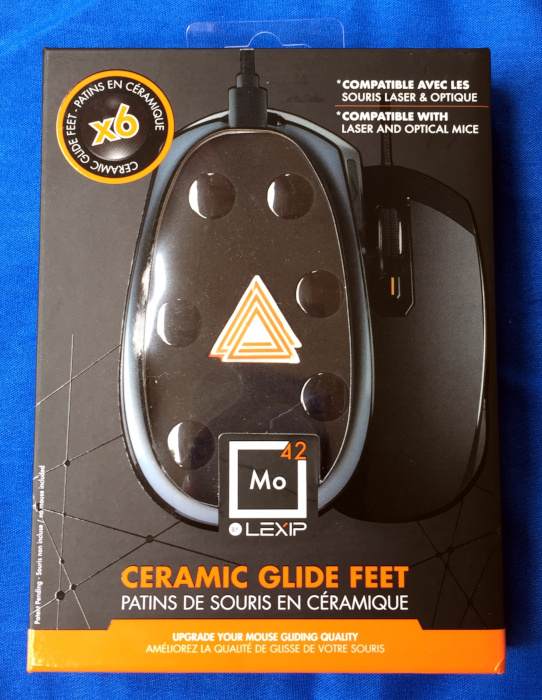
The Mo42 Ceramic Glide Feet, like beer, come in a 6-pack in a colorful container. This is where the libation simile will stop.

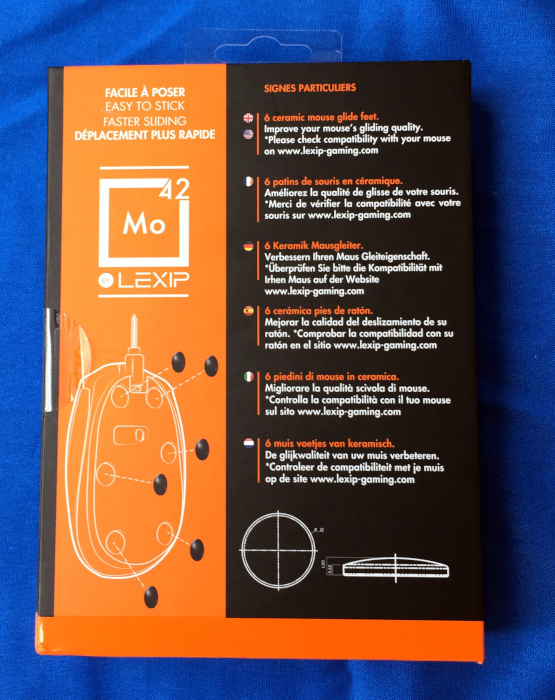
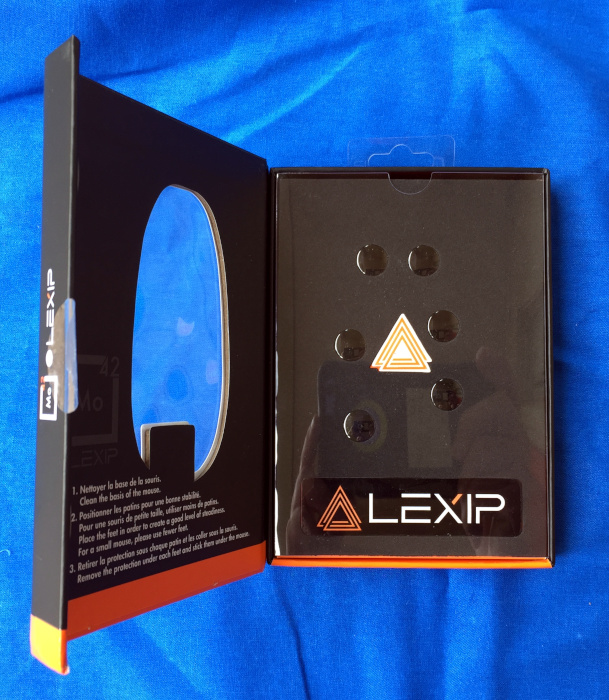
The full-color packaging shows off the mouse feet via transparent window and cutout on the front of the package. The rear of the package provides some basic sales information in a variety of European languages, including English. Lifting the magnetic side latch allows access to the package contents which are housed in a plastic sleeved foam and cardboard holder.

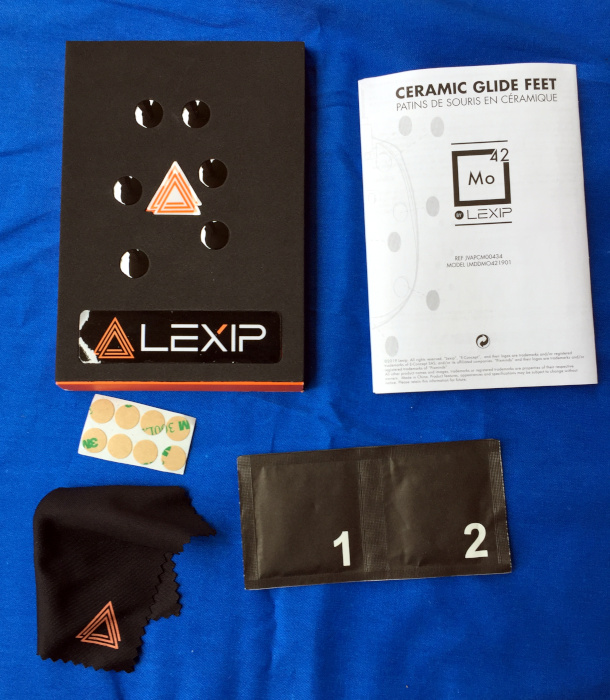
The package includes

  • 6 ceramic mouse feet
  • 8 3M adhesive dots
  • 2 cleaning wipes (alcohol swabs)
  • 1 cleaning cloth
  • 2 Lexip sticker
  • Instruction booklet

Hardware specs

Each of the individual Mo42 Ceramic Glide Feet is 12 mm in diameter and approximately 1.2 mm thick. The adhesive pad holding the foot to the mouse adds less than 1 mm to the overall height.

Design and features

In-depth description of the product and what it can do. This is the meat of your review. If there are additional sub-headings that you want to add in the main part of your review, use H3 titles (use the drop-down menu that is set to paragraph by default). Here are some examples that you might want to use but can remove if you don’t need them.

Setup

Installing the feet involves

  • cleaning the bottom of the mouse with one of the included wipes
  • drying in / removing lint and debris with the included cloth
  • removing one of the feet from the package
  • removing one of the adhesive dots from the sheet and adhering it to the foot
  • carefully removing the backer paper from the other side of the adhesive dot
  • placing the mouse foot on your mouse
  • repeat 2-5 times (3-6 feet / mouse)

By far the most difficult part was getting the mouse-side adhesive exposed once the dot was adhered to the feet. I had to fall back on my model decal placing skills to get the round backer paper loose from the identically sized adhesive disk.

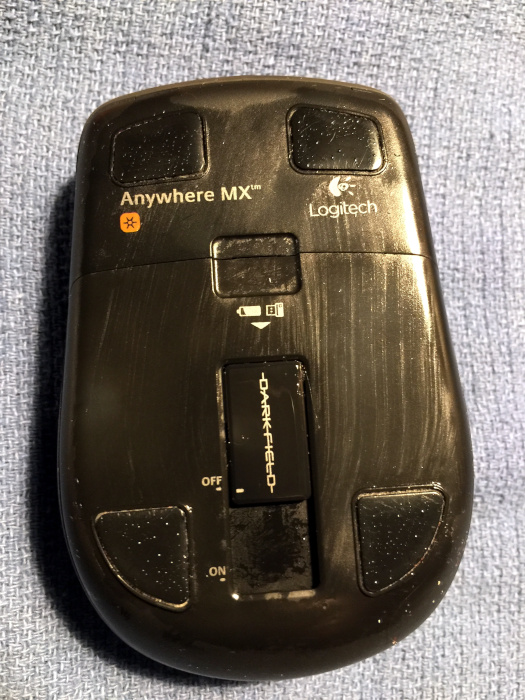
Here is the patient waiting for pre-op

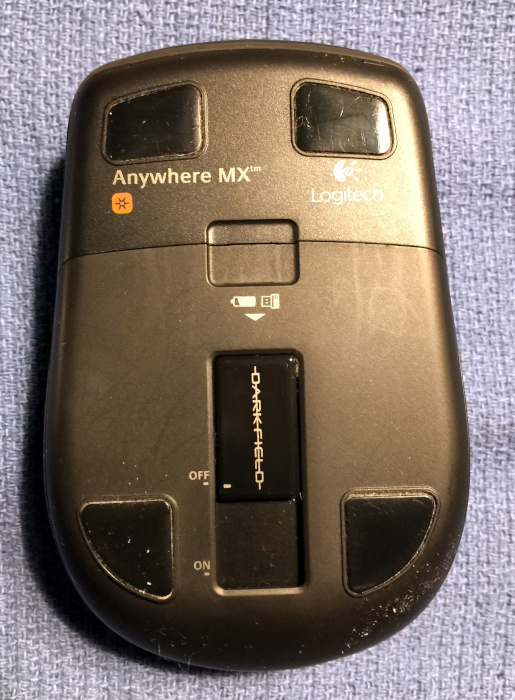
Peri-operative cleaning

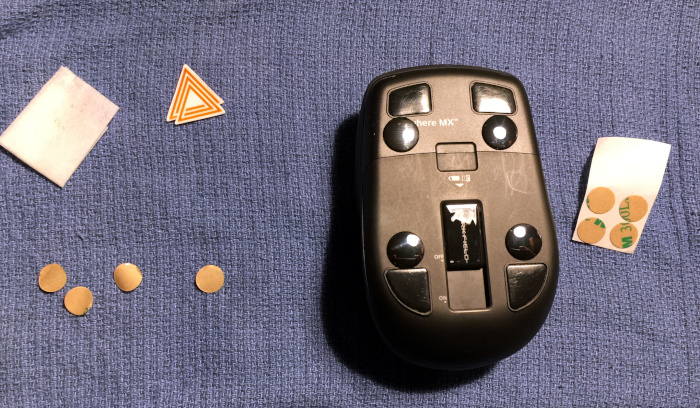
Post-operative recovery

I chose to only install 4 of the 6 feet as this matched up with the number of original pads on the mouse.

Performance

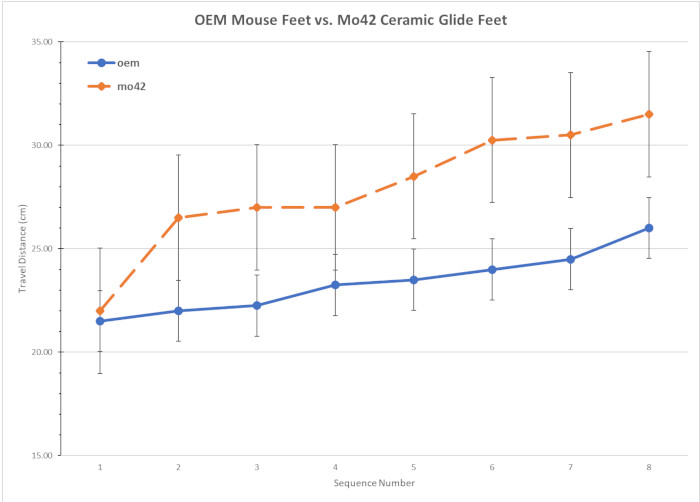
I would love to provide a detailed specifications about the coefficients of static and dynamic friction, but I sadly do not have access to force gauges that have fine enough resolution to measure the movement of the mouse. However, I did perform some surrogate testing by building an a-frame and swing arm from LEGO Technic pieces and used a large novelty eraser as both the swinging weight and striker to measure how far my mouse traveled when given an impulse from test rig. The mouse was not constrained as to travel direction. Measurements were made perpendicular to the axis of the swing arm.

The raw results were not as impressive as I had hoped based on the sales material, but showed a both a practical difference and a statistically significant difference between the two groups. The increased standard deviation in the Mo42 data is due to the mouse traveling at an angle to the the perpendicular measurement axis. All distances are in cm.

OEM Mouse Pads: 21.5, 22, 22.25, 23.25, 23.5, 24,  24.5, 26    mean:   23.38   standard deviation: 1.48
Mo42 Ceramic Feet: 22, 26.5, 27, 27, 28.5, 30.25, 30.5, 31.5    mean:  27.91    standard deviation: 3.02
Student’s T Test: p = 0.003


From a purely subjective standpoint, I will say that the Mo42 Ceramic Glide Feet feel like they have a smaller difference between the coefficient of static friction and the coefficient of dynamic friction. The practical upshot of this is that it takes less effort to get the mouse to start moving and keep it moving than it did with the OEM mouse pads. With the OEM pads, it took a bit more effort to get the mouse moving and then less to keep it moving.

The Mo42 Ceramic Glide Feet also seem to provide a better “road sense.” By this I mean that I can feel the texture (including debris) of my mousing surface which I think give me better control of the mouse.

What I like

  • Easy to install
  • Upgrade any mouse to move like a more expensive mouse

What needs to be improved

  • Nothing

Final thoughts

While I’m still not 100% happy with my Logitech Anywhere MX mouse, I’m much happier with my post-upgrade mouse. I’ll probably stick with my upgraded mouse for the foreseeable future, but will, like all Gadgeteers, be on the lookout for the next cool mouse.

Price: $19.99 MSRP
Where to buy: Lexip’s US store front and Amazon.
Source: The sample of this product was provided by Lexip.

Filed in categories: Reviews

Tagged: ,

Lexip Mo42 Ceramic Glide Feet review originally appeared on The Gadgeteer on April 30, 2019 at 9:00 am.

Note: If you are subscribed to this feed through FeedBurner, please switch to our native feed URL http://the-gadgeteer.com/feed/ in order to ensure continuous delivery.

LaView ONE Link Battery Powered WiFi Outdoor Security Camera with Smart Station review

REVIEW – I live on a corner with lots of foot traffic both day and night. Pair that with the recent increase in porch thefts and I felt the need to install an outdoor security camera. I needed one that was totally wireless. The LaView ONE Link Wireless WiFi camera with Smart Station met all my needs, but does it work? Let’s find out.

What is it?

The LaView One Link WiFi security camera is a wireless 1080P security camera with a rechargeable battery and easy 2-step installation. The Smart Station plugs into your router. It connects to the camera with the touch of a single button, extends the cameras battery life and expands WiFi transmission.

Hardware specs

Camera

  • Field of view: Wide angle 130º
  • IR Night Vision: 25 ft IR distance
  • Weight: 0.47 lbs
  • Size: 3.6” x 2.2” x 2.8”
  • Storage: Laview Cloud storage – Micro SD Card (Max. 128GB)
  • Audio: Built-in omni-direction microphone – Built-in loudspeaker – Noise suppression
  • Video: Smart H.264 compression – 1920×1080 Max Resolution – 50hz @ 25fps, 60Hz @ 30fps, Adaptive frame rate
  • Power requirements: 5500 mAh rechargeable lithium battery and 5V DC

What’s in the box?

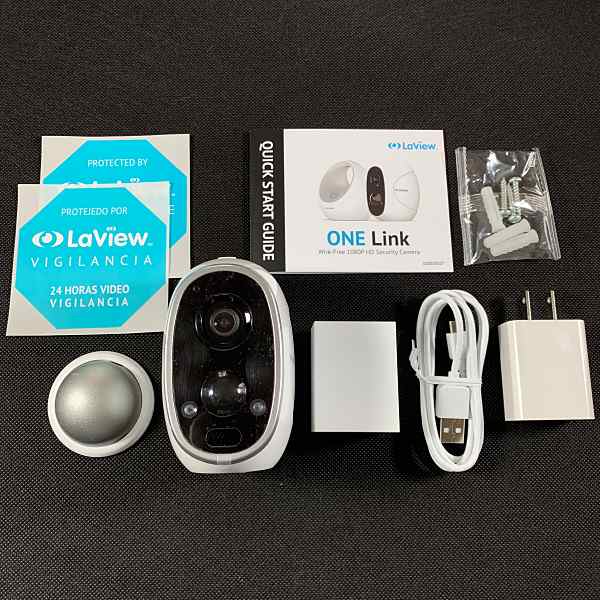
Camera

  • Battery
  • Magnetic mount
  • USB cable
  • Power adaptor
  • Screw kit
  • Surveillance stickers
  • Quick start guide

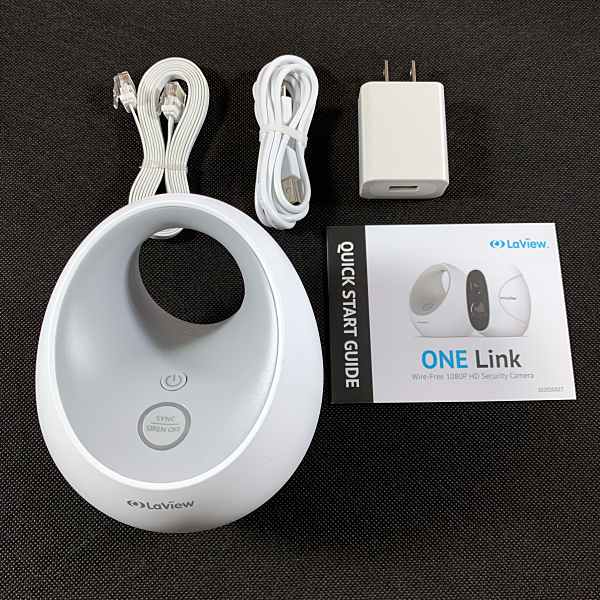
Smart Station

  • Smart Station
  • Ethernet Cable
  • USB Cable
  • Power adaptor

Design and features

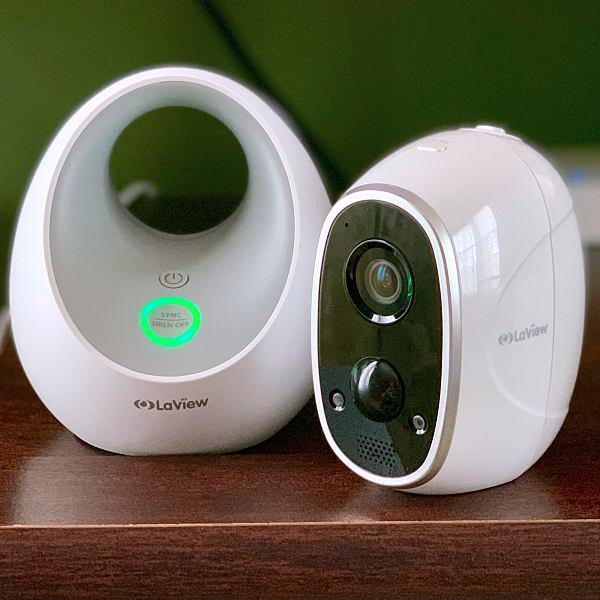
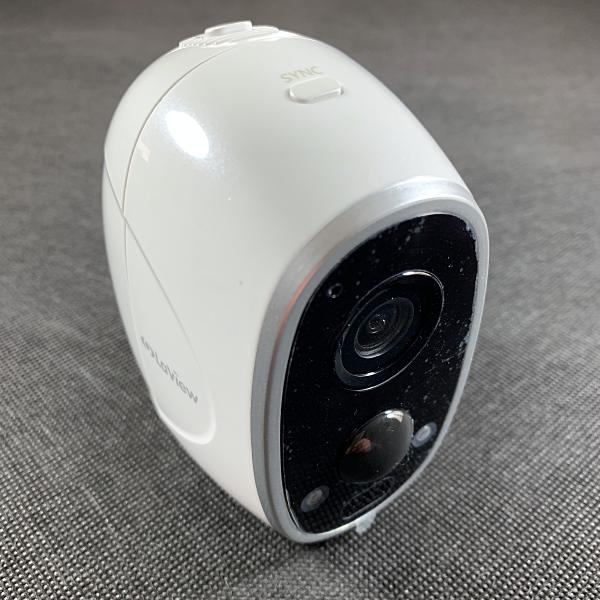
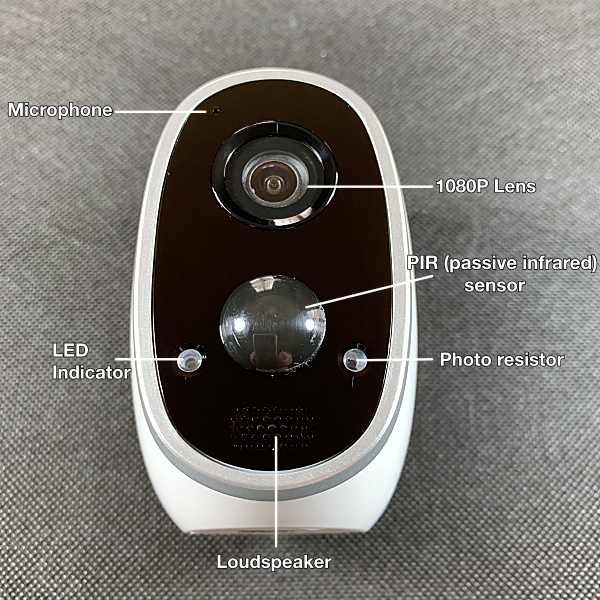
The Laview One Link camera has a pod-like design similar to those offered by Arlo and Eufy. On the front of the camera is the 1080P lens, microphone, IR light (used for supplementing recording light), LED indicator, loudspeaker, PIR (Passive infrared) sensor and Photoresistor (used to detect light conditions to activate the Day/Night switch functions.

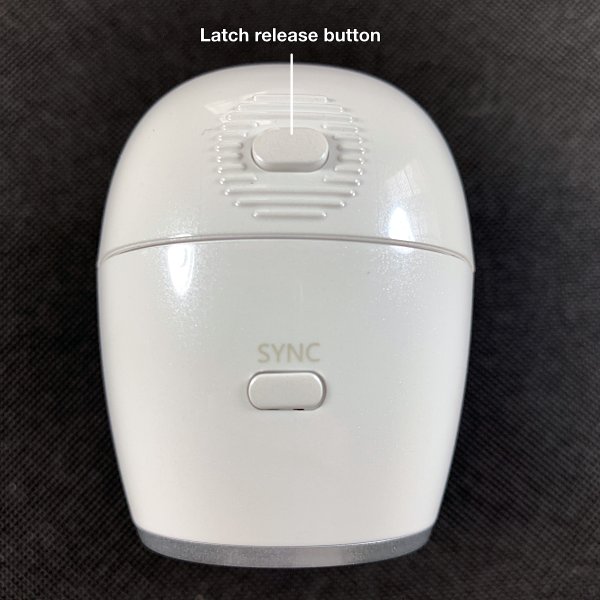
There’s a Sync button located on the top of the cam as well as a release latch to open the camera.

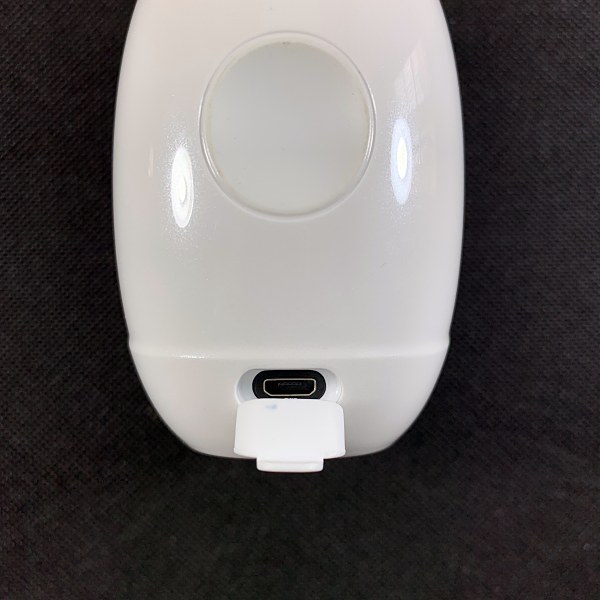
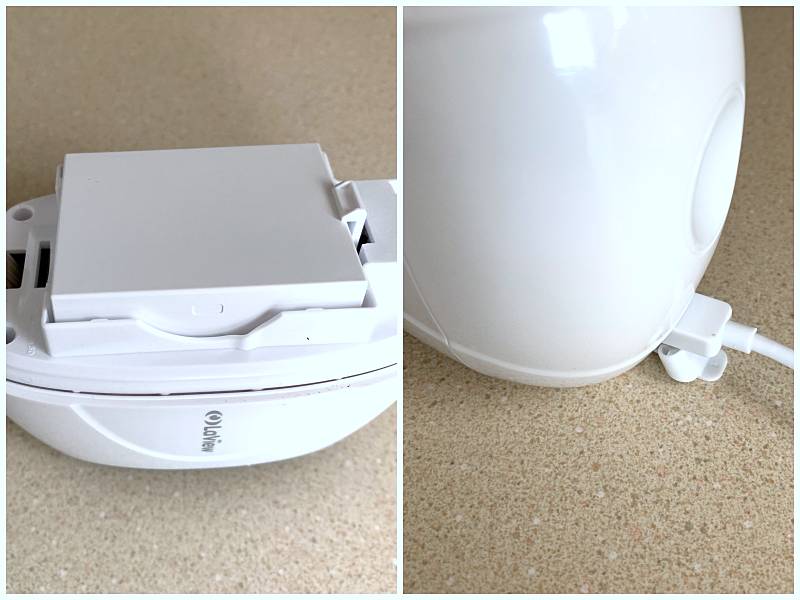
On the back of the cam, there’s a micro USB port used for charging the battery or powering up the camera. It’s protected by a flexible rubber cover that keeps out moisture.

The bottom of the camera has a threaded socket for mounting it onto a tripod.

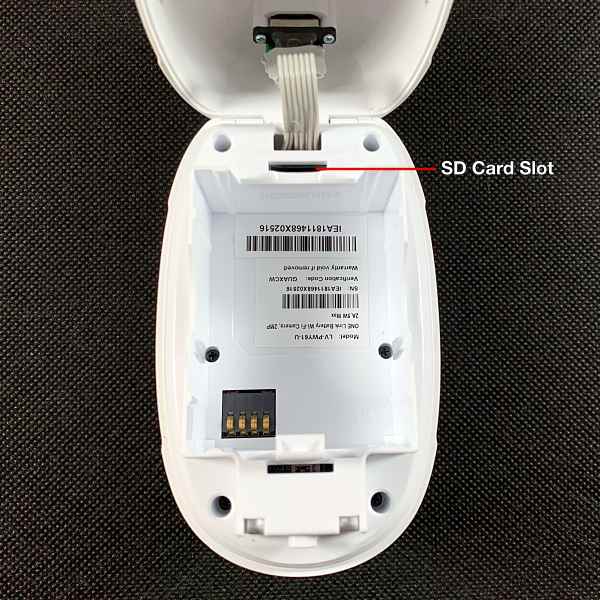
Opening the camera reveals the rechargeable battery compartment and Micro SD card slot.

The slot supports up to 128GB of HD footage or if you prefer LaView offers affordable Cloud service options.

The camera comes with 30 free days of ONE Cloud service, after that, you must subscribe to continue to use the service.

Note: Although you can access the ONE Cloud service via the app I was unable to find any info on plans or pricing.

The 5500 mAh battery will last 6+ months on a single charge when paired with the Smart Station. And when it does need a recharge all you have to do is pull it down and plug it in.

Smart Station

The Smart Station is the brains of the security system, supporting access for up to 6 wireless cameras.

The tear-drop design is quite small (3.7” x 3.7” x 4.3”) and weighs less than half a pound.

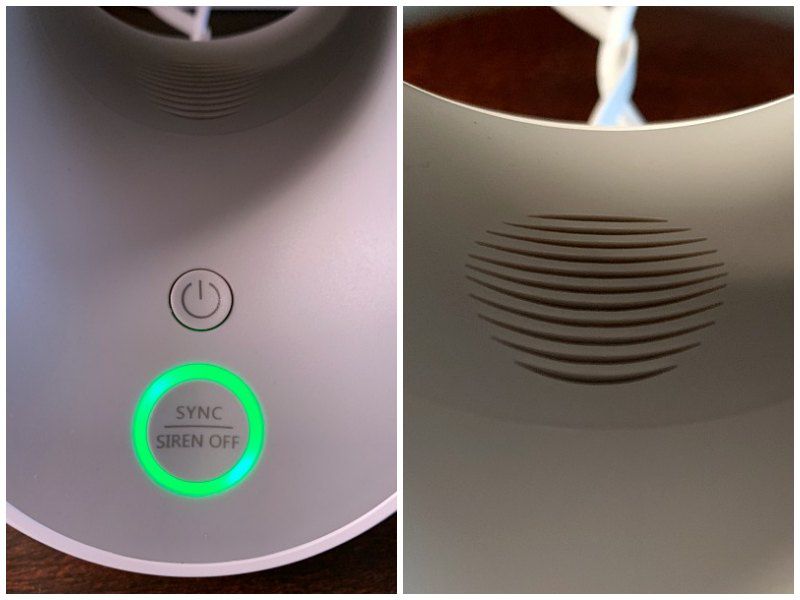
The front of the unit has a power button, a sync/siren off button with LED indicator ring and a speaker for the built-in 120-decibel siren.

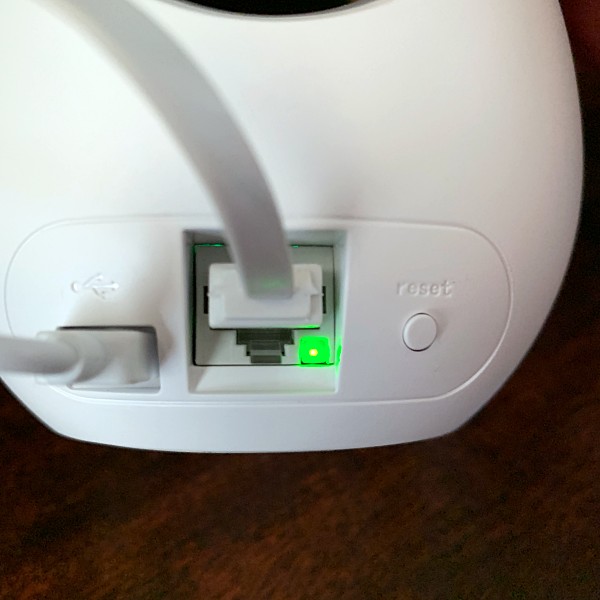
One the back there’s a micro USB power port, an ethernet port for connecting the Station to your router and a reset button.

The Smart Station creates a secure ecosystem of WiFi coverage. It also extends the battery life of the cam from 3 months to 6 months versus a WiFi only connection.

The built-in 120dB siren works in conjunction with the cameras motion detection. When enabled it will go off when the cam senses motion. You can set it to stay on from one to five minutes. Or you can manually disable it by pushing the siren off button on the Smart Station. I tested it, and it’s VERY loud! In fact, it had my ears ringing for a couple of hours afterward. And it was audible outside even with the windows closed.

The siren might be a little much for everyday use (especially if your cams motion sensor is set off by a critter at 3am), but I could see it being effective if you have it linked to an indoor camera. Or use it to ward off trespassers while you’re away on vacation.

Pairing camera with the Smart Station

Setting up the camera and Smart station is relatively simple. First, you must install and fully charge the camera’s battery. Fully charging the battery takes 6-8 hours.
Plug the Smart Station in and connect it to your router using the Ethernet cable.

To pair the camera to the Smart Station press and hold the SYNC button on both for 5 seconds. When the camera is connected to the Smart Station, the LED indicator on the front of the cam will slowly flash blue. There are also voice prompts that will update you on the connection status.

Camera installation

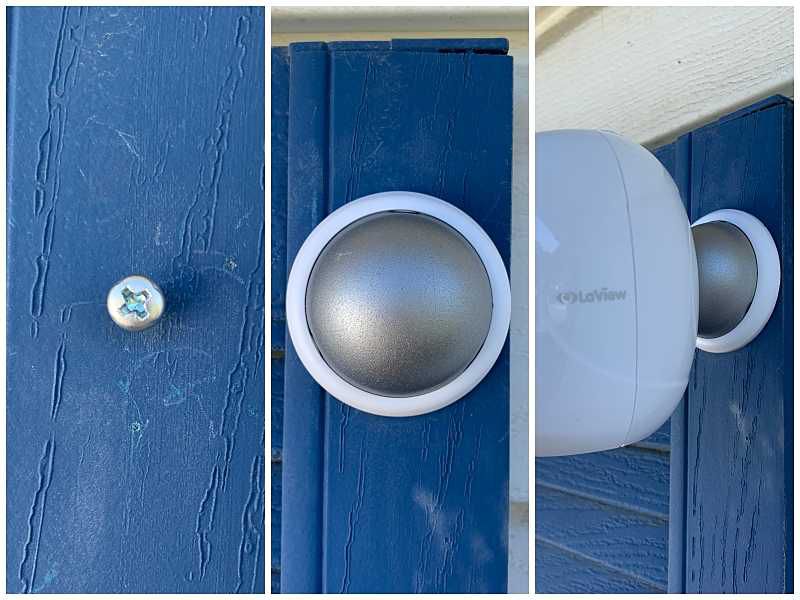
Installing the camera is as easy as 1-2-3. 1) screw provided screw where you want to mount the camera. 2) Secure magnetic dome to the screw. 3) Secure cam to the magnetic dome. You’re done!

LaView ONE app

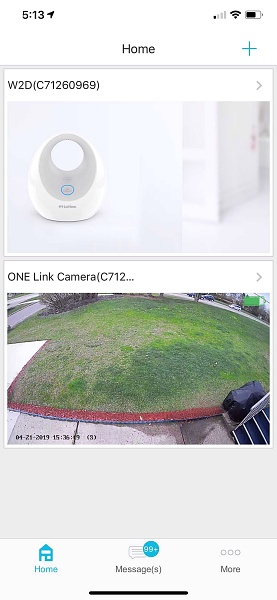
Launching the app takes you to the home screen which features thumbnails of both the Smart Station and the cams live view. From there you can access the cams live view by tapping the thumbnail.

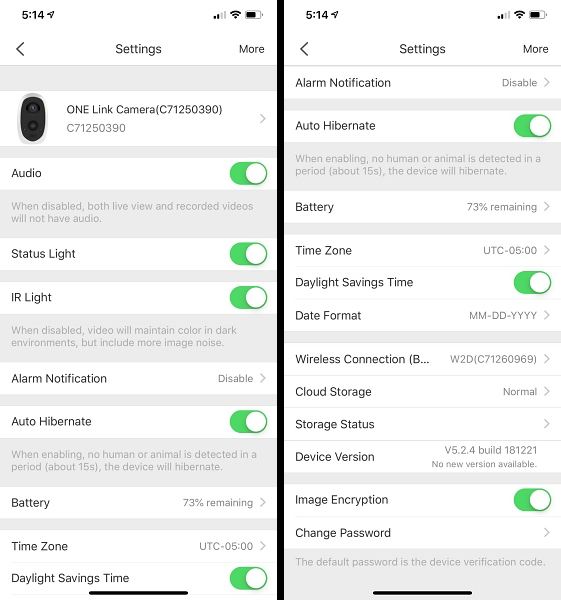
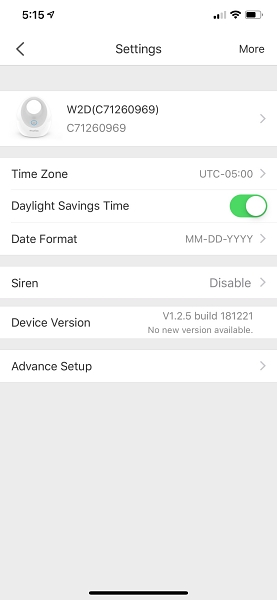
You can also access settings for both the Smart Station and cam. From there you can customize the camera and Smart Stations various features.

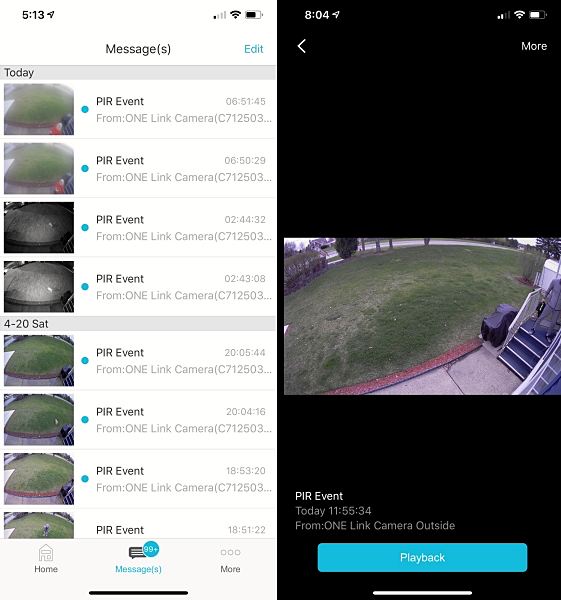
The Messages screen lets you view and playback recorded PIR (motion detection) events.

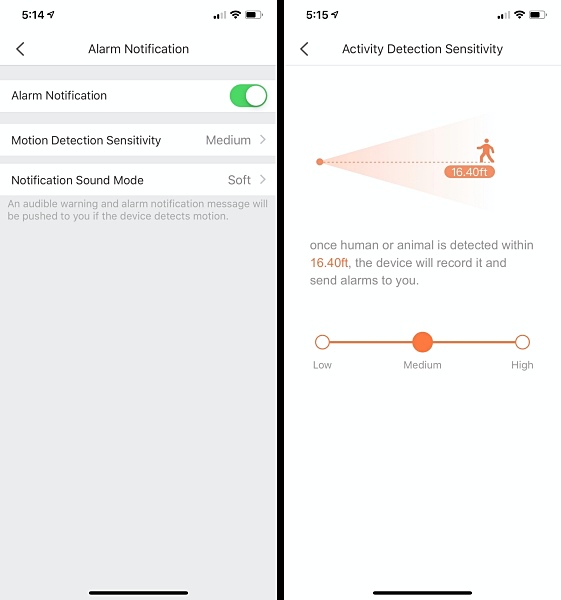
You can enable alerts and choose Motion Detection Sensitivity in the app’s settings.

When the cam detects motion, you receive an alert notification on your phones lock screen. Tapping the notification opens up the app, from there you have to go to Messages and tap on the thumbnail of the event to view it.

It would be nice if when tapping on an alert the app would open immediately to the cams live view or at least the recording of the PIR event.

Things I like about the app

  • Works with Face ID for faster login
  • Clean interface
  • Easy to navigate
  • You can view both live cam and recorded motion detection events
  • Easy to view and change settings for both the Smart Station and the camera
  • Ability to easily add cameras to the system

Things I don’t like about the app

  • Both the live view and recorded PIR events can be laggy
  • No way to check WiFi connection strength
  • Tapping on an alert doesn’t immediately take you to the cams live view
  • Not optimized for iPad

Camera performance

This camera has a lot of features, I wanted to touch on a few that I thought were the most important.

Motion detection

The camera has a PIR thermal detection sensor for advanced motion detection that focuses on objects with significant heat signals like people and animals. Weeding out false alarms caused by inanimate moving objects.

I did receive a few false alarms, but it was during extremely windy and rainy conditions. I found that lowering the Motion Detection Sensitivity level in the app helped with this.

During normal weather conditions, it works flawlessly.
Night vision

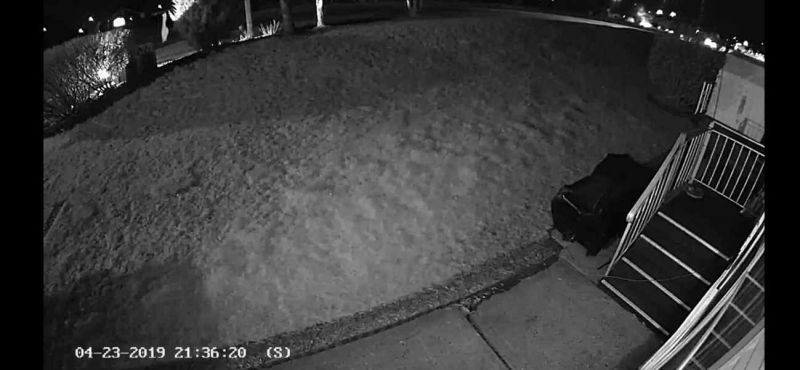
The cams night vision feature works at a distance of up to 25ft. As you can see from the pics below the picture quality is quite impressive.
2-Way audio

The 2-way audio feature is hit or miss at best. The biggest problem is that the built-in loudspeaker isn’t loud enough. And there’s no way to adjust the volume level to make it louder. I suppose that it would work to ward off a trespasser at night but trying to have a conversation with someone is nearly impossible.

What I like

  • Easy setup
  • Easy 2-step installation
  • Option of onboard SD card or Cloud recording
  • Good picture quality
  • Rechargeable battery lasts 6 month on a single charge
  • IP65 weatherproof

What needs to be improved

  • Viewing live cam and recorded alerts on the app can be laggy (Overall app performance is a little buggy)
  • 2-way audio doesn’t work as advertised

Final thoughts

The LaView ONE Link isn’t perfect, but its benefits far outweigh its flaws. If you’re looking for a totally wireless camera setup with lots of features that’s easy to install and use this camera should be on your shortlist.

Note: If you would like to add additional cameras to your system at a later date they can only be purchased by phone from LaView. To order call (626)566-7550.

Price: $229.99
Where to buy: Amazon
Source: The sample for this review was provided by LaView.

Filed in categories: Reviews

Tagged:

LaView ONE Link Battery Powered WiFi Outdoor Security Camera with Smart Station review originally appeared on The Gadgeteer on April 29, 2019 at 11:00 am.

Note: If you are subscribed to this feed through FeedBurner, please switch to our native feed URL http://the-gadgeteer.com/feed/ in order to ensure continuous delivery.