Creative Outlier Air True Wireless sweatproof earbuds review

REVIEW – When you think of Creative, you think of quality speakers at an affordable price or if you’ve been around for a while, you might think of Sound Blaster audio cards for PCs. But what about earbuds? It might just be me, but I haven’t associated the Creative brand with earbuds. But that’s about all to change. Let’s check out the new Creative Outlier Air TWS earbuds.

What is it?

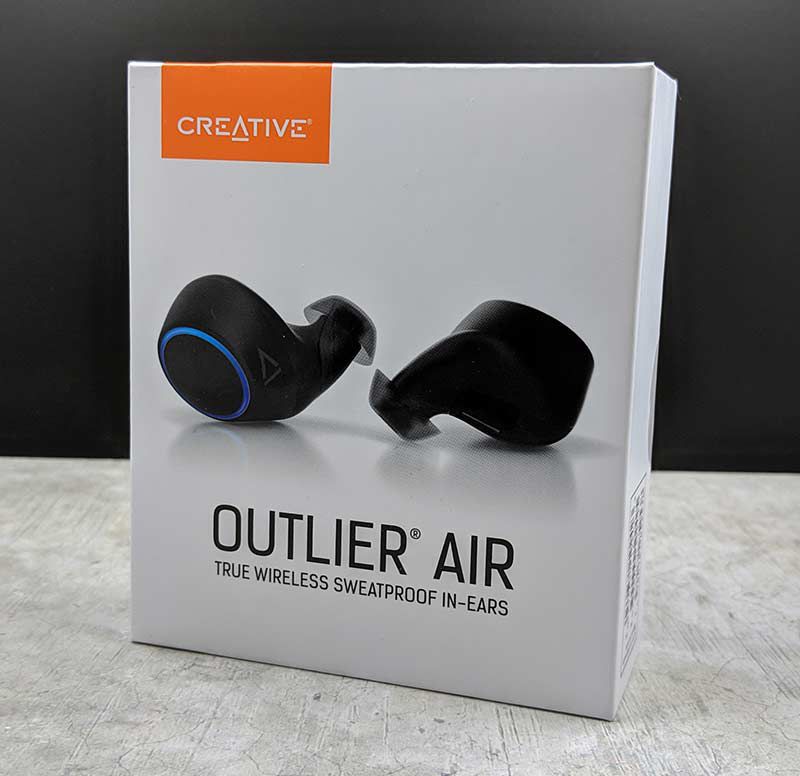
The Outlier Air earbuds are truly wireless stereo (TWS) earbuds from Creative.

Hardware specs

5.6mm graphene driver diaphragm
Bluetooth 5.0 with aptX and AAC audio
IPX5 sweatproof
Playtime of up to 10hrs per charge and up to 30 hours total with charging case

What’s in the box?
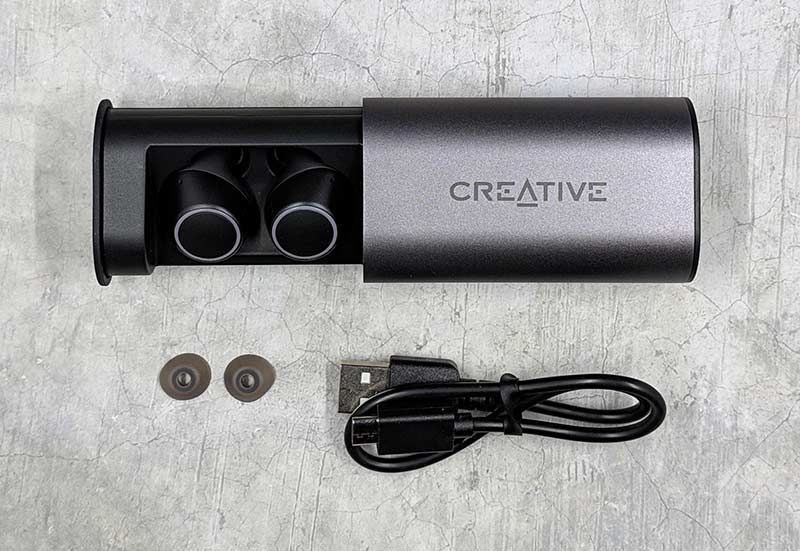
  • Creative Outlier Air TWS earbuds
  • Charging / storage case
  • USB-C charging cable
  • 1 extra set of ear tips
  • Instructions

Design and features

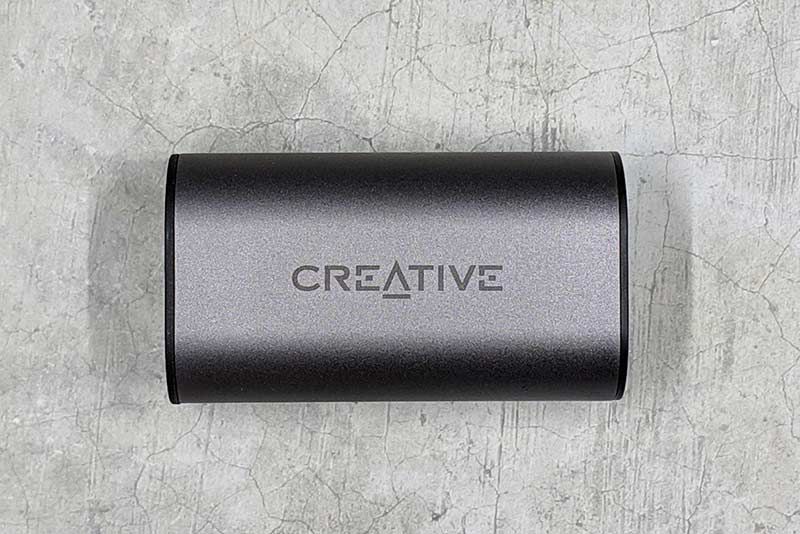
The Creative Outlier Air earbuds store inside a small aluminum shelled storage case that doubles as a charger.
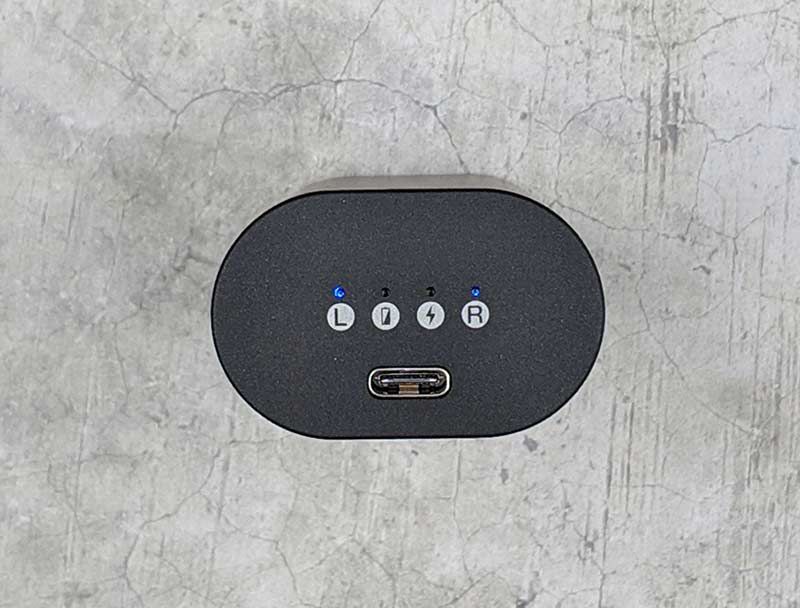
The charging case charges via USB-C (yay!) and has 4 LEDs on one end of the case that provide a quick way to check the battery charging status of the earbuds.
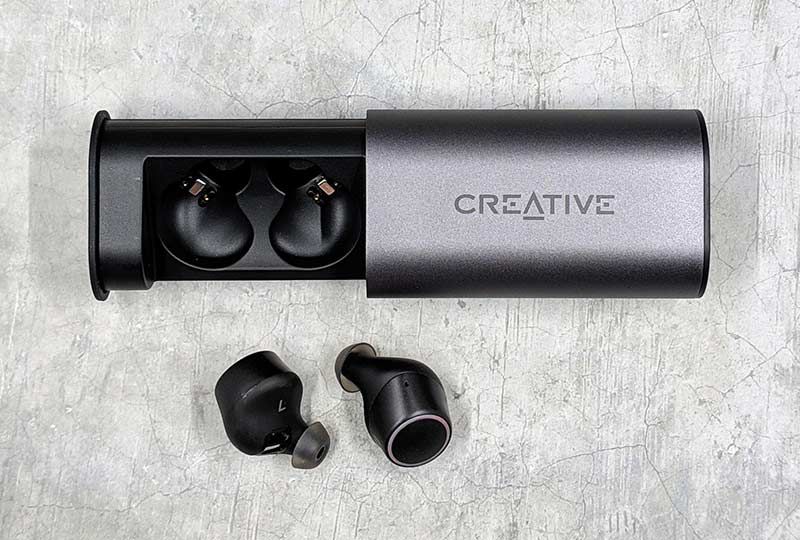
The case slides open to reveal a drawer that holds each earbud in its own charging slot.
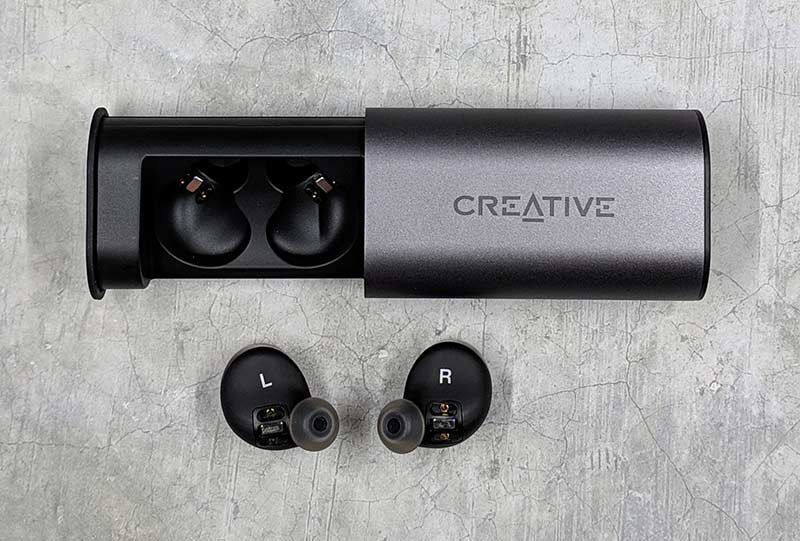
The inside surface of each earbud has electrical contacts that match up with contacts in the case. Just make sure they are seated correctly before closing the “drawer” so that they will make contact to charge.
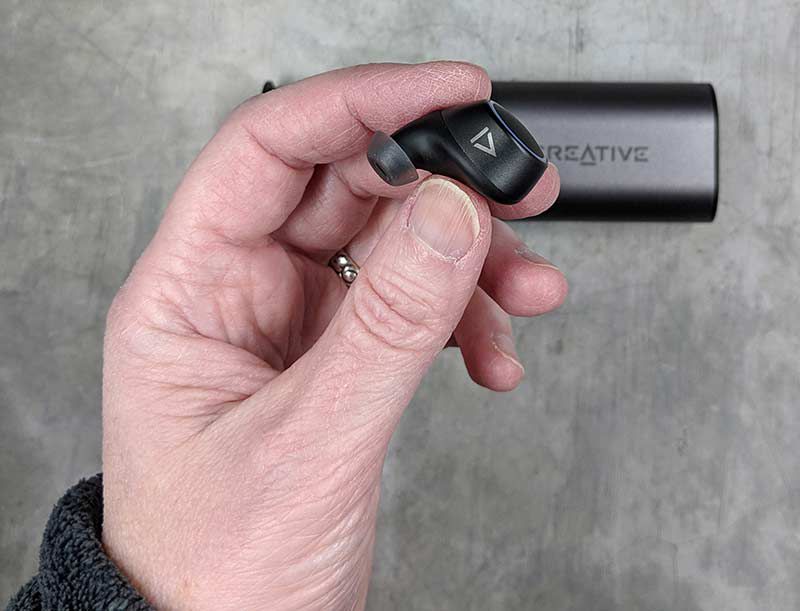
The earbuds themselves have a matte black plastic shell with the Creative logo on one side and a large printed L or R on the inside surface of each bud so that you’ll know which ear they are supposed to fit in.
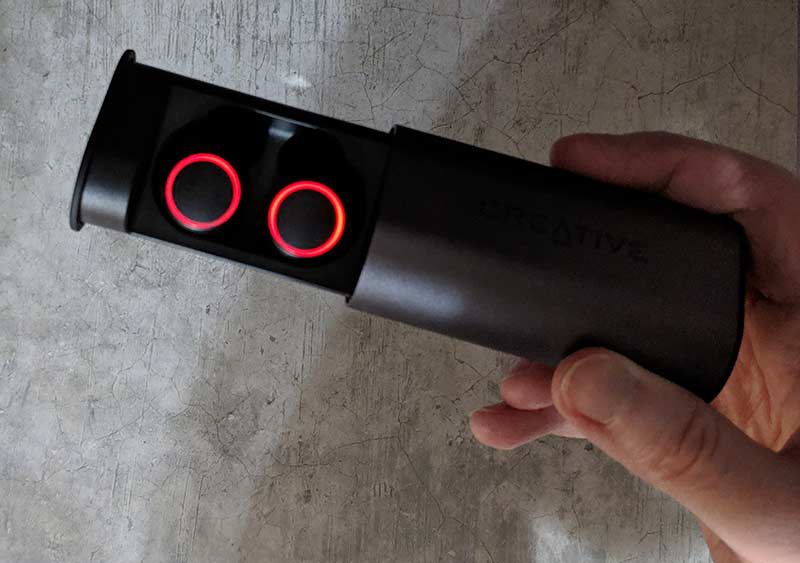
The outside surface of each earbud is a multi-function button that has an LED “halo” around it that glows red or blue depending on the status. The LED will throb red while charging and will throb blue while they are paired and sometimes while they are in use.

Fit and comfort
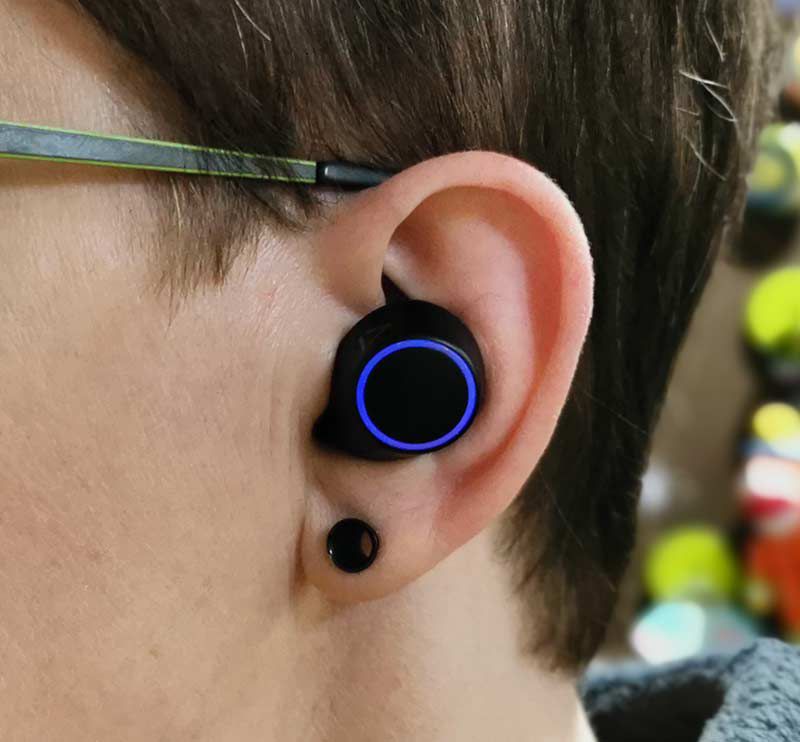
Unlike many earbuds that I’ve reviewed in the past, the Creative Outlier Air earbuds only come with one extra set of ear tips and for some really strange reason, the ear tips are all the same size. This can be a problem for people that have problems getting earbuds to fit in their ears as there aren’t different sizes of ear tips included to customize the fit.

The Outlier Airs fit my ears pretty well… at least for my left ear. My right ear canal is shaped slightly different, so more often than not, I have trouble with the fit for that ear. For that reason, I wasn’t surprised when I had trouble with the right Outlier Air earbud falling out of my ear if I was moving around a lot, like while working out. Sometimes it would dislodge from my ear causing the sound quality to diminish and sometimes the earbud would completely fall out of my ear.

Even though I have problems with the right earbud falling out occasionally, the fit is comfortable and I am able to wear them for extended (an hour or so) periods of time with little discomfort.

Note that my experience with the fit of these earbuds might not match yours as everyone has differently shaped ears.

Pairing and functionality
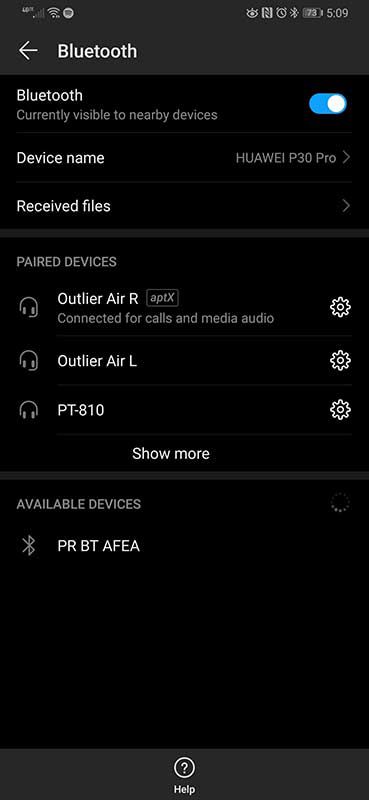
Pairing the Creative Outlier Air earbuds with my Huawei P30 Pro was a simple task. When I opened the charging case drawer, one of the buds started flashing alternating red and blue to let me know that they were in pairing mode. From there you just choose the earbud with the red/blue flashing LED in the Bluetooth devices list and pair it. You do not have to pair BOTH earbuds individually. Just one.

The only trick is that you have to decide which bud to make the primary earbud. The primary earbud is the one that you remove from the case first. Why does it matter? It matters because you can put the secondary earbud back in the case and still continue to use the primary earbud in your ear. It’s a great little way to get double the playback time out of the earbuds if you like to leave one ear open to hear what’s going on around you while still enjoying music.

To control the earbuds as far as answering calls, ending calls, play/pause, skipping tracks, adjusting volume, and using a voice assistant, you have to use the buttons on the earbuds. Let me just say that I hate using buttons on the outside of earbuds. Having to press a physical button means you have to push the earbud farther in your ear to activate that button. The buttons on the Outlier Air earbuds are pretty stuff, so pressing them is not comfortable at all.

Just like I want all new earbuds to start using USB-C for charging, I want all new earbuds to start featuring touch controls instead of physical buttons. Yes, the buttons work fine as long as you remember which one does what function and what you need to do to get that function, like single press, double press, hold, etc. But yeah, not a fan of physical buttons. Nuff said on that topic.

Sound quality for music, video, and calls

When it comes to sound quality, I was quite surprised by how much I enjoyed listening to music with the Creative Outlier Air earbuds. I paired them with my Huawei P30 Pro which has Dolby Atmos and they sounded great listening to my favorite tunes using Spotify and other streaming apps.

There was a good amount of bass (sometimes a little too much), warmth, and clarity. Compared to other earbuds I’ve reviewed recently, I would say that the Outlier Airs are in the lead for the best sounding buds for music.

As for watching video while using the Outlier earbuds, I’m happy to report that there are no video syncing issues when using the with YouTube and Netflix. What you see and what you hear is synced perfectly in the video.

Both earbuds have a built-in microphone for calls and smart assistant functions. You can also hear audio out of both earbuds while on a call.

People on the other end of the conversation said that I sounded fine and I heard no comments asking if I was talking to them from down in a well. On my side of the call, I was glad to have audio from both ears but I still had that in my head type of experience while talking. I also noticed that while people on the other end talked, there was a weird scratchy/static noise in the background. It’s not a deal breaker, but it is worth mentioning.

I’m also happy to report that I didn’t notice any problems with either earbud cutting out or losing connection with the other bud. Everything about the Outlier Air earbuds is rock solid.

What I like

  • Great audio quality for music and good for calls
  • No video syncing issues
  • Long battery life
  • USB-C charging

What needs to be improved

  • Add touch controls instead of a physical button

Final thoughts

I thought I’d ended my quest for the perfect pair of wireless earbuds when I reviewed the TicPods Free earbuds. I loved the fit and comfort and especially the touch controls of those earbuds, but the video sync delay issues eventually dethroned them as my favorites after I reviewed the Mavin Air-X earbuds. And now the Creative Outlier Air TWS earbuds have dethroned the Mavin Air-X earbuds to become my favorite TWS earbuds.

The Creative Outlier Air earbuds have better battery life, better sound, and you can’t beat the price at around $80. If you’re looking for your next favorite pair of TWS earbuds, you must check out the Outlier Airs.

Price: $79.99
Where to buy: Creative
Source: The sample for this review was provided by Creative.

Filed in categories: Reviews

Tagged:

Creative Outlier Air True Wireless sweatproof earbuds review originally appeared on The Gadgeteer on May 2, 2019 at 10:00 am.

Note: If you are subscribed to this feed through FeedBurner, please switch to our native feed URL http://the-gadgeteer.com/feed/ in order to ensure continuous delivery.

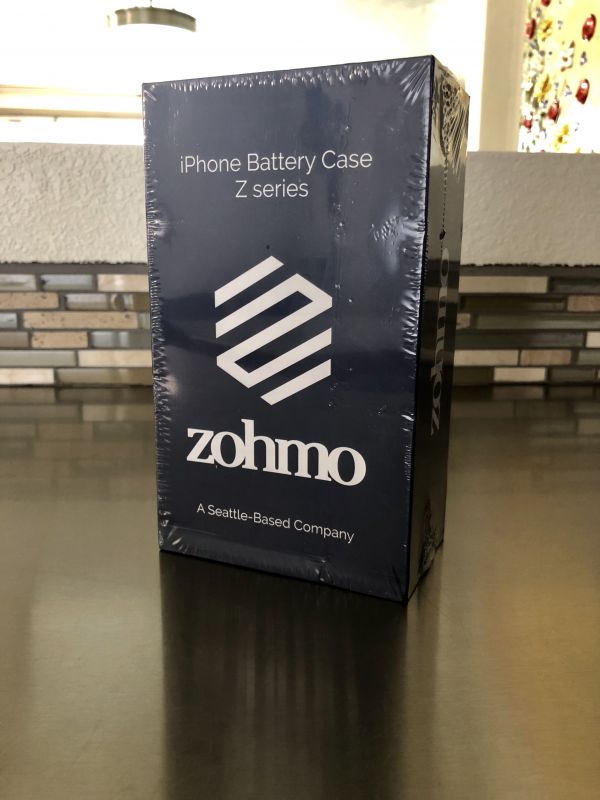
Zohmo iPhone Battery Case review

REVIEW – I am a high screen time phone user and regularly drain my battery – as well as spend a large portion of most days with it plugged in to a lightning cord to keep from it dying on me. I have a love-hate relationship with phone charging cases as they typically come with quite a bit of convenience, but at the cost of carrying around the equivalent of a hot brick in your pocket. I have a few standalone battery packs, but the problem there is that I never remember to put them in my pocket or backpack before I leave the house! I was intrigued to give the Zohmo Z Series Battery Case a try.

What is it?

The Z Series is a minimalist design battery back up charging case for your iPhone that will provide charging capabilities while also providing some protection from daily wear and tear.

What’s in the box?

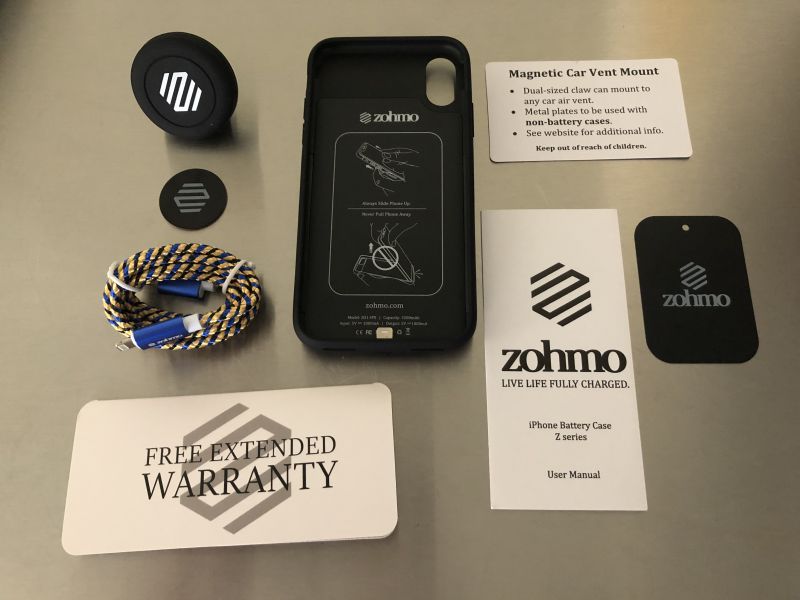
  • Air Vent Magnetic Mount
  • Magnet with adhesive sticker for non-battery case
  • Braided Charging Cord
  • Warranty Card
  • User Manual
  • Promo Tag
  • Battery Back-up Phone Case

Design and features

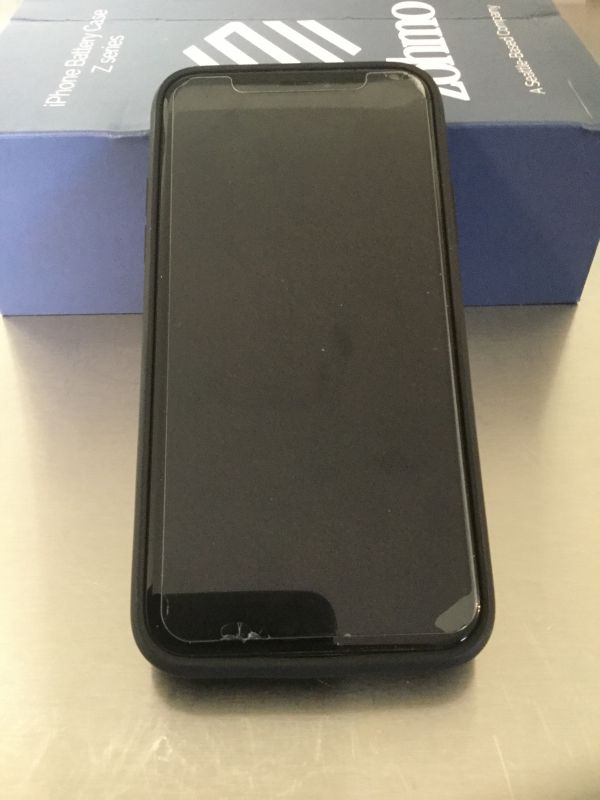
My phone slid easily into the batter case, it has a lightning adapter in the bottom that fits into the power/data port. Push the upper two corners over the edge of the phone and it is then snug within the case for use. Excuse the cracks from my screen protector but you can see that the case doesn’t change the profile of the phone any more (and maybe less) than most cases. This is great since the iPhone X screen does stretch so close to the edges of the screen.

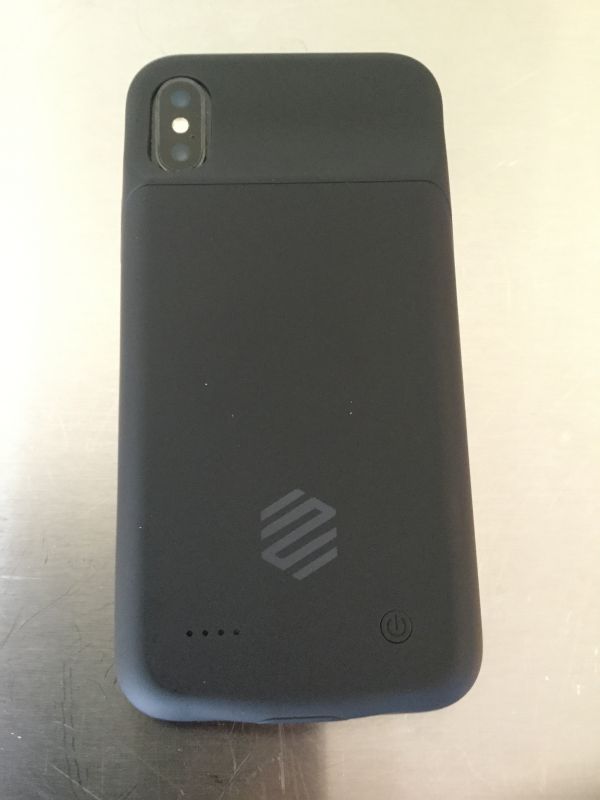
You can see here on the back, there is a power button, as well as 4 led indicator lights that show how much charge time is remaining. To turn the battery pack on, it takes a long press of the button. You can turn off with another long press, or it will turn itself off after fully discharged. It also has the cut out for the cameras, so you have no loss of functionality there. Along the side is a cut out for your mute/vibrate switch and then buttons for the screen power button and volume controls.

Performance

For about a month now, I used this case on a daily basis. And there hasn’t been a day go by that I didn’t utilize it to recharge my phone. Typically once I get my 20% battery remaining warning, I switch it on and let it go to work. Within an hour or so, depending on how much I continue to use it, I’m back over 80% at least and it lasts me through the rest of the day. The case only weighs 3.7 ounces, so with the phone it comes in at 10.0 ounces total weight. There is a bit of heat produced, even more so if I keep it in my pocket while but overall much less heat than previous batter cases I tested. Finally, the poly-carbonate material that this is made from is really great in that it not only looks nice, but it also provides a little bounce back when dropped and protects the phone.

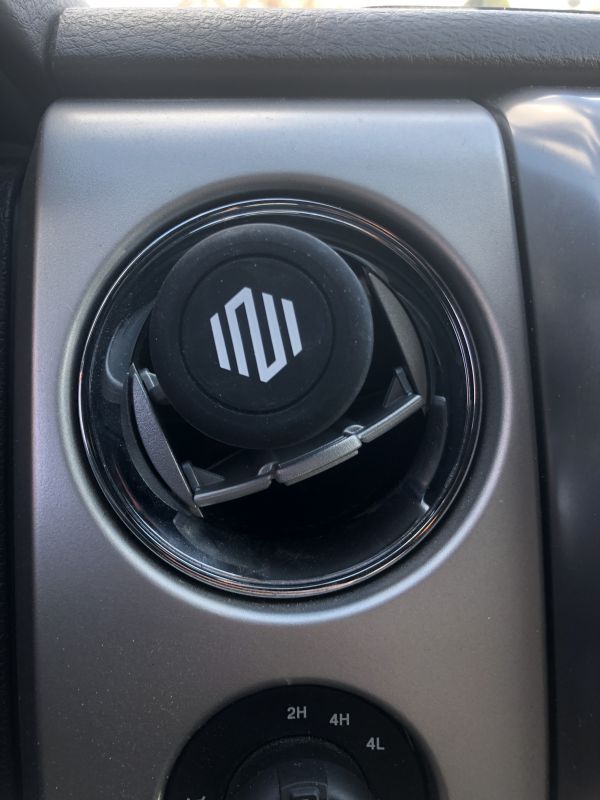
The sample I was provided came with the optional car kit, which has a magnetic air-vent mount which installed very easily in my truck.

The only problem I experienced with this is that on rough or bouncy roads, the magnet in the mount wasn’t quite able to hold the phone in place, either it would start to slide sideways or it would fall completely off and send my phone flying to the floorboard – not ideal while driving.

The only other thing I wanted to touch on is the charging port. It accepts any standard lightning cable and it located in the same place as all iPhone charging ports. The problem I experienced is that the charger cord (regardless of brand, make, model, etc.) simply slides into the port, it doesn’t really clamp or click into place. So again while driving, or even moving the phone around while cord charging, the cord slips out easily – especially while vertical on the mount. This is frustrating and even more so when you don’t notice it’s moved out just a bit and stopped charging either the case or your phone.

What I like

  • Light weight at only 3.7 ounces
  • Poly-carbonate material is soft, sleek and has a little bounce to it
  • Doesn’t overheat
  • Provides a reliable and consistent charge
  • Car mount kit with braided charging cord is useful

What needs to be improved

  • Plug in port for charging cord needs better hold on the lightning connector, falls out extremely easily
  • Magnet air-mount kit could afford to have a stronger hold

Final thoughts

Overall, I’m very satisfied with the Zohmo battery pack case. It doesn’t exactly what it’s designed to do and does so without the extra weight or heat I’ve experienced with other battery cases. The only problems I found with the unit are rather ancillary – in as much as they don’t impact the utility of the product, just become minor annoyances. I have yet to have to “abandon” my phone and leave it charging somewhere while I carried on with my day, although some could argue I probably should try and do that some time!

Price: $59.99
Where to buy: Can be purchased directly at Zohmo.com
Source: The sample of this product was provided by Zohmo.

Filed in categories: Reviews

Tagged: ,

Zohmo iPhone Battery Case review originally appeared on The Gadgeteer on May 2, 2019 at 9:00 am.

Note: If you are subscribed to this feed through FeedBurner, please switch to our native feed URL http://the-gadgeteer.com/feed/ in order to ensure continuous delivery.
BenQ ScreenBar Lite laptop light review

REVIEW – I’ve been using the BenQ ScreenBar Plus at my desk and I just love it. Plenty of light where I type, but minimal glare on the screen. Now BenQ has a clip-on version for laptops called the ScreenBar Lite.

What is it?

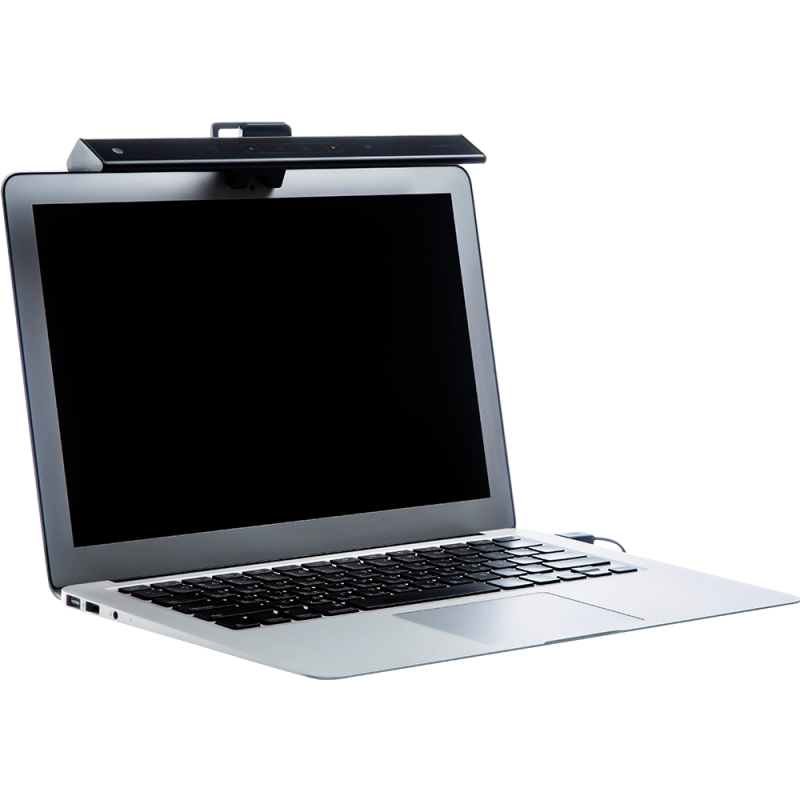
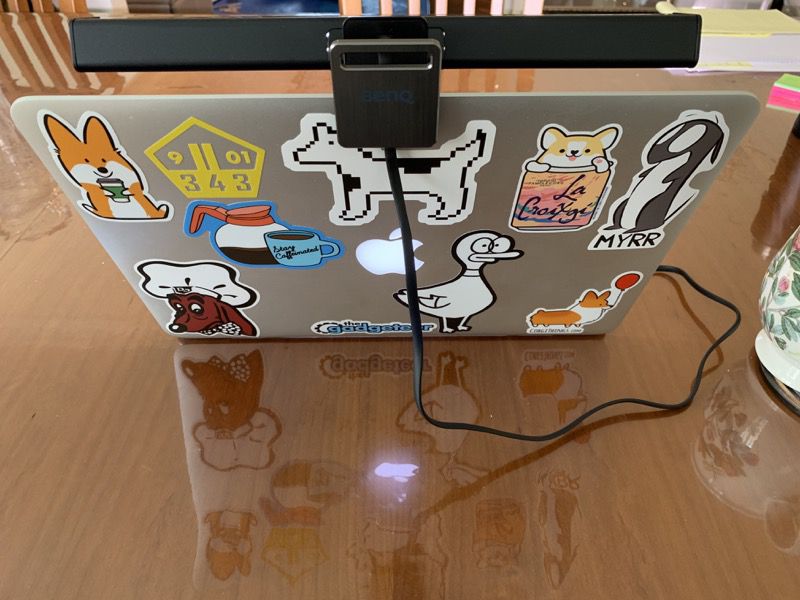
The BenQ ScreenBar Lite is a shrunken-down version of the standard ScreenBar that clips to the top of your laptop screen, and powered by USB.

What’s in the box?

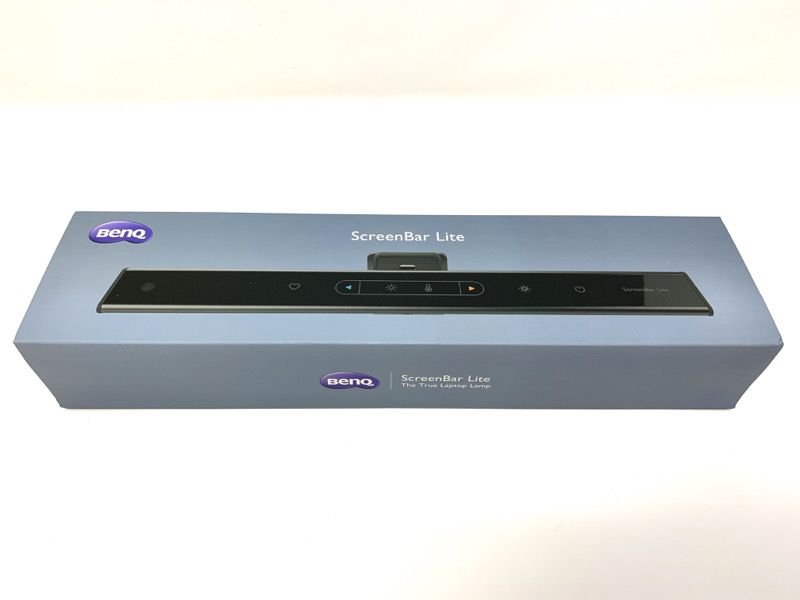
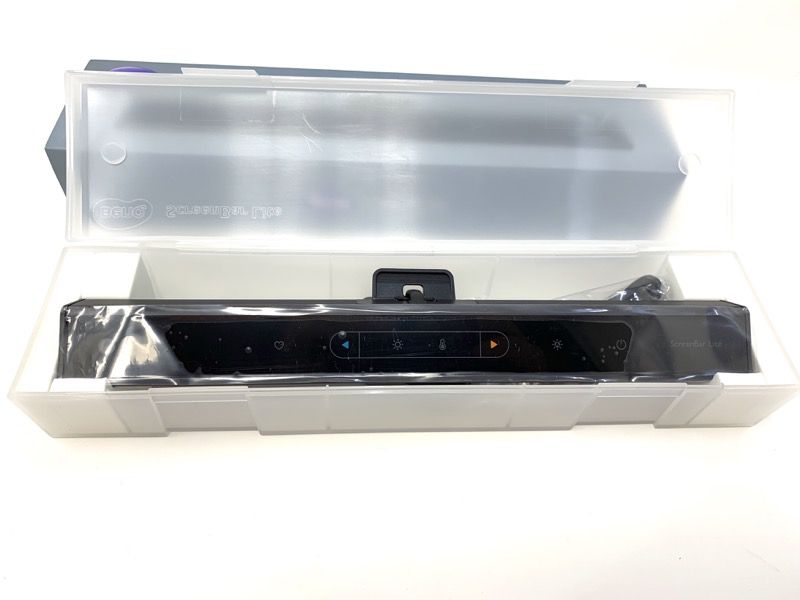
The ScreenBar Lite came in a plastic box that doubles as a travel case. No external power supply as long as your laptop has an available USB port.

Hardware specs

Light source‎: Dual color LED‎
Color Rendering Index‎: Ra 88
Illuminance‎: 1300 lux in the center (height 30cm)        
Luminous Flux‎: 250 lm
Color Temperature‎: 2700-6500K (ANSI White 8 quadrangles color temperature)
Power Input‎: 5V , 1A USB port‎
Power Consumption: 5W (max.)‎
Materials‎: Aluminium alloy, Polycarbonate
Dimension‎: 26cm x 5.5cm x 4.6cm‎
Net Weight‎: 170g (0.17kg)‎

Design and features

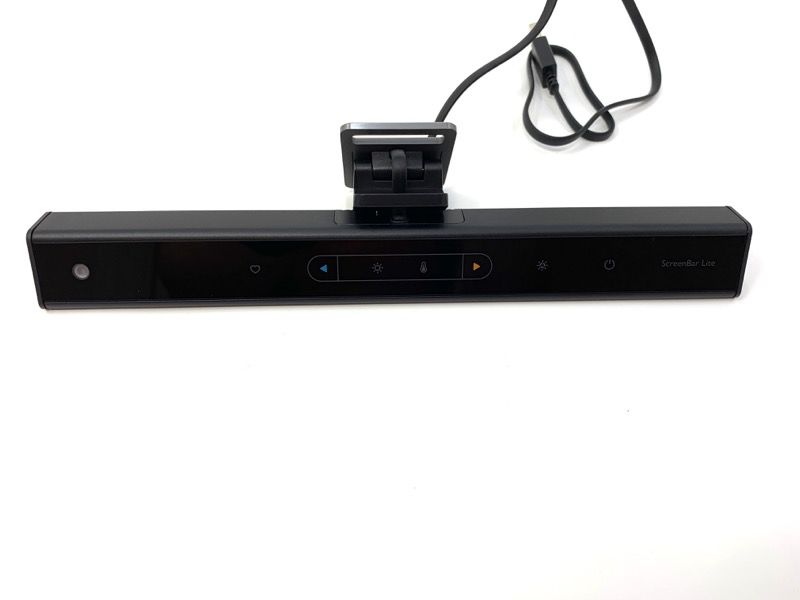
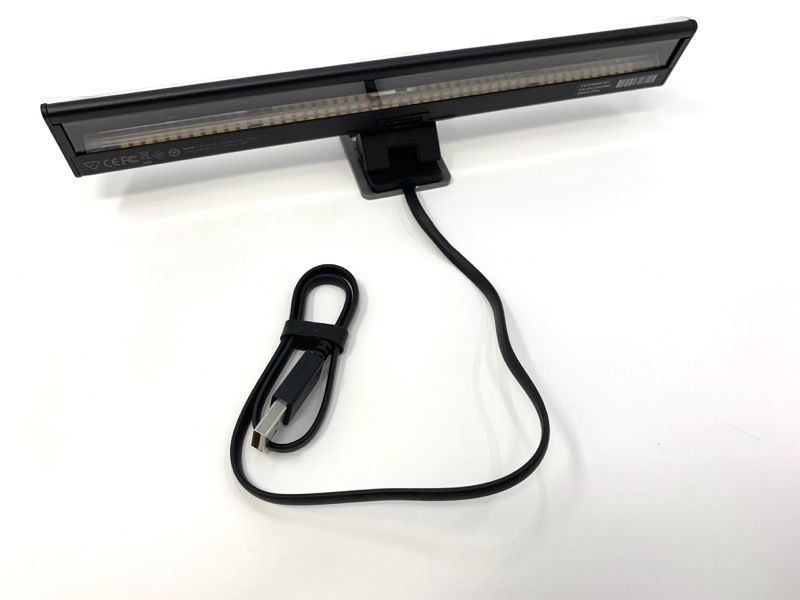
Similar to the other ScreenBar lights, the ScreenBar Lite features an auto-dimming ambient light sensor and two sets of LEDs for adjustable color temperature between warm and cool.

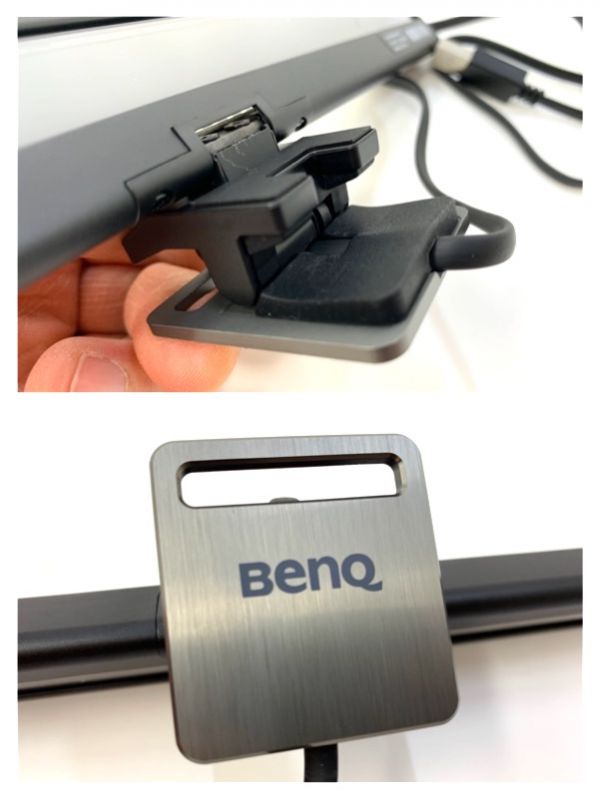
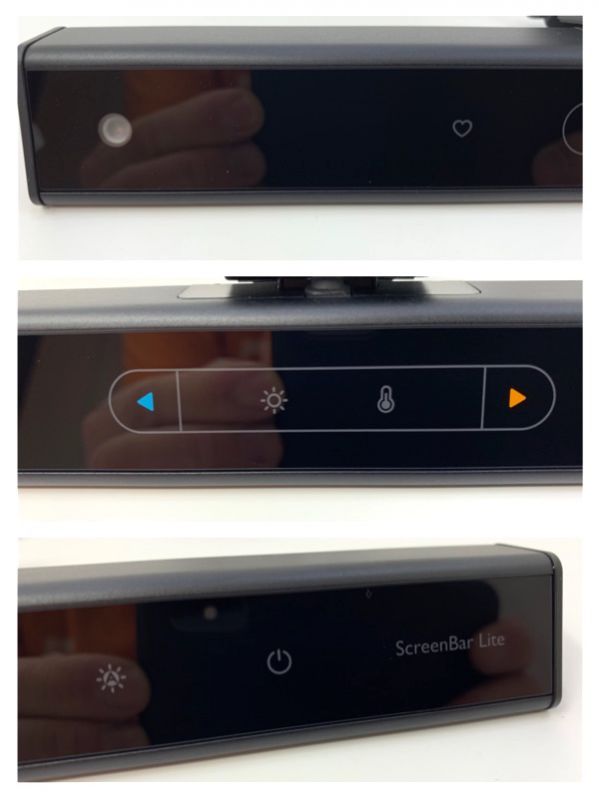
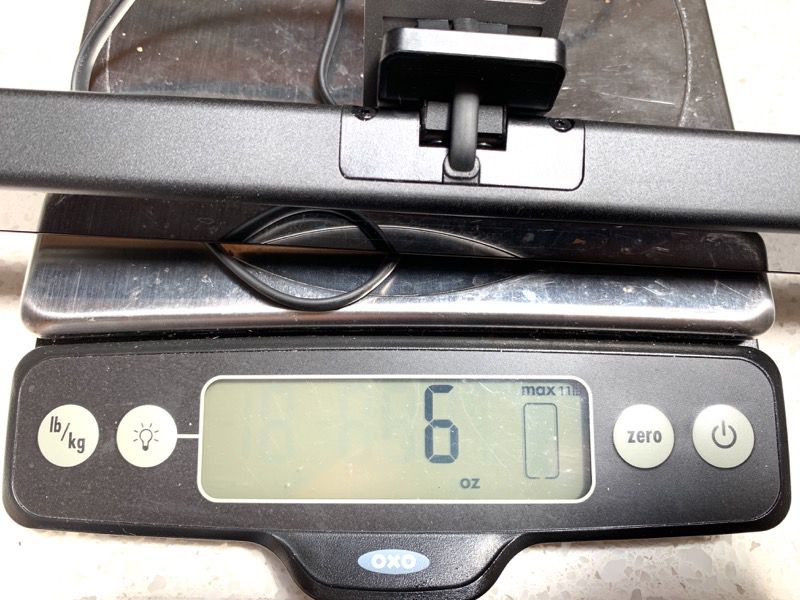
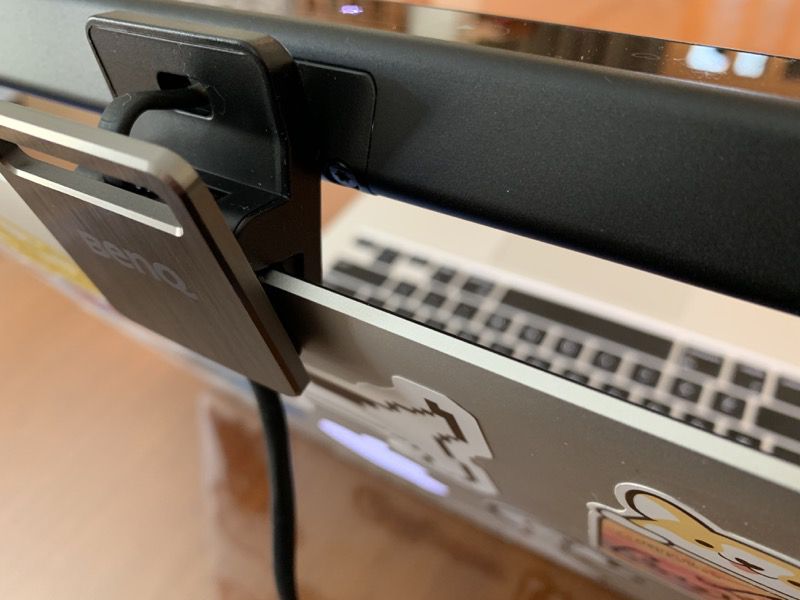
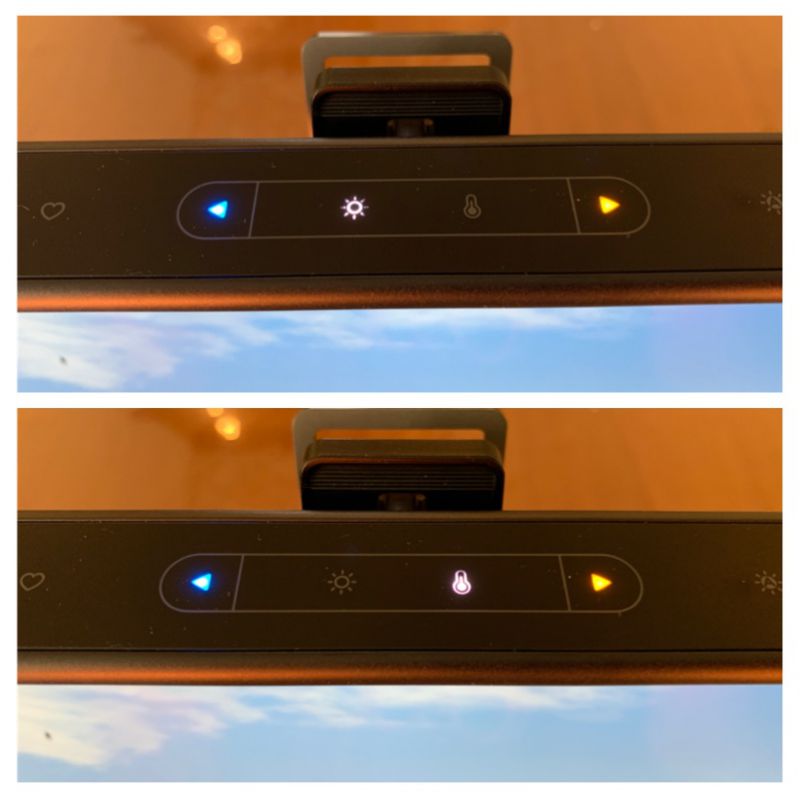
The clip is nicely padded so it doesn’t scratch the edge of your laptop. The light sensor is on the left side of the bar. To the right is a heart-shaped icon to set and recall a light level preset. In the center you’ll find brightness and color temperature controls. The “sun” with the letter A icon is a one-touch auto-adjust button that sets the light to match surroundings, and finally the power button. On the scale, the light weighs in at 6 ounces.

Setup

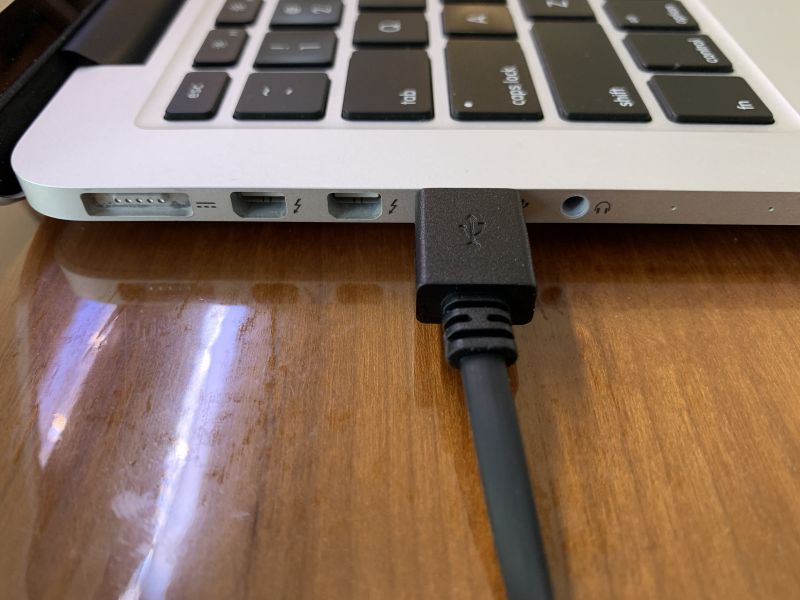
Setup is a snap: Plug in the USB cord to an open USB port, and clip the light on the edge of the screen.

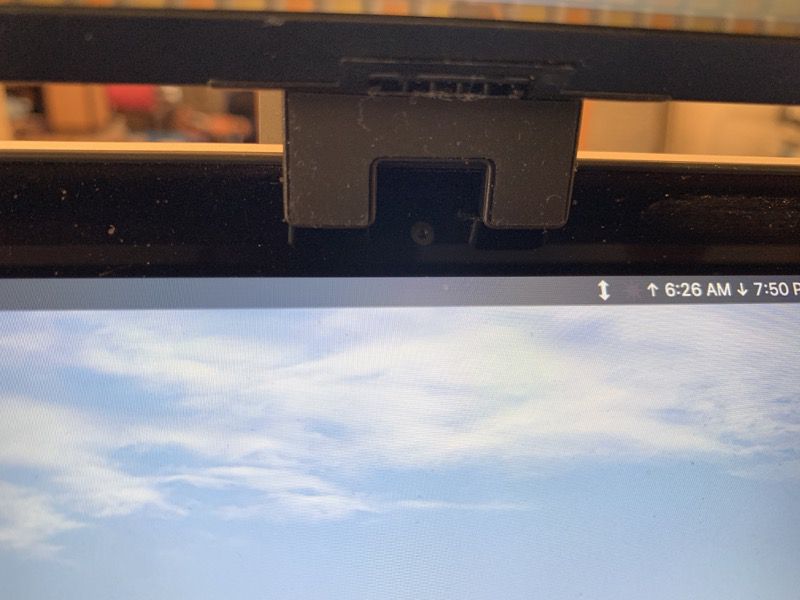
Got a webcam? No problem, the clip has a notch to go around the camera.

Performance

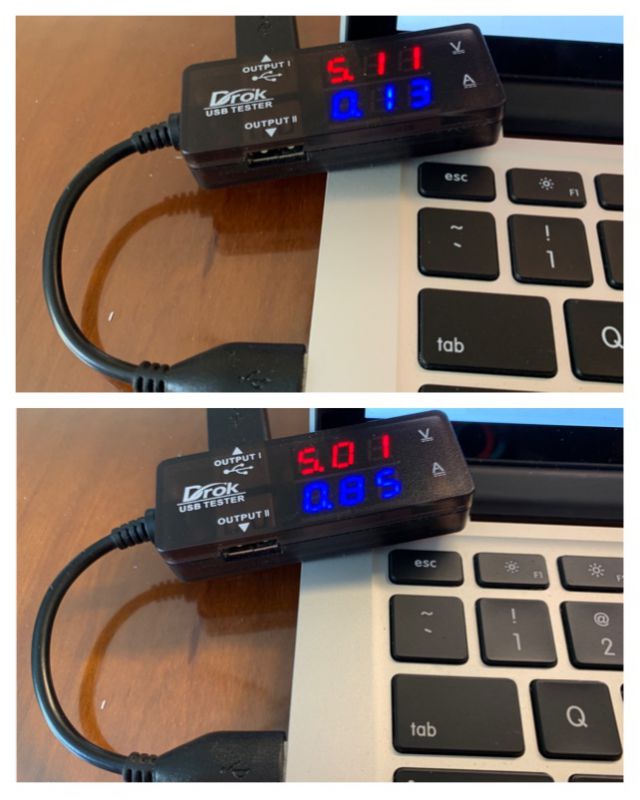
I wondered how much power the light uses. I measured 0.13A at the dimmest setting, and 0.85A at the brightest.

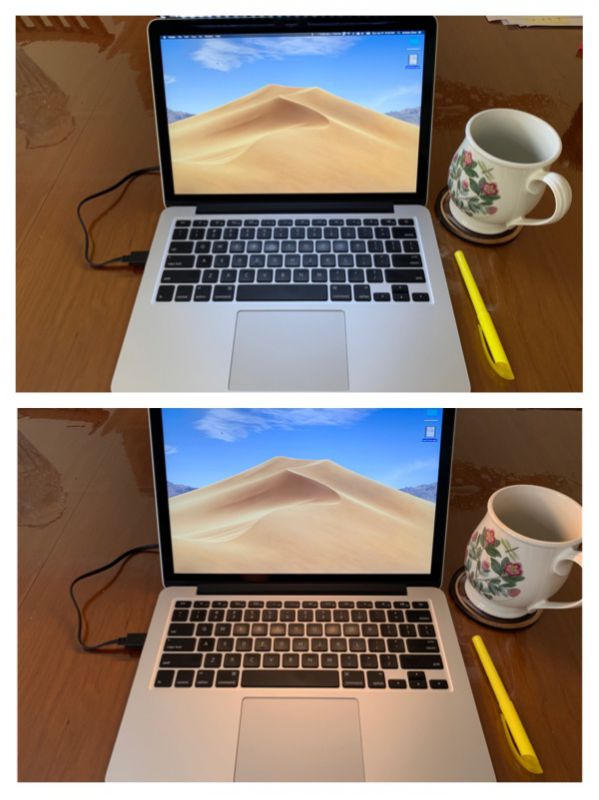
To adjust brightness, press the “sun” icon and then the right-left arrows. For color temperature, you press the “thermometer” bulb icon. Each icon lights up to show it’s been selected. To show the difference in color temperature, the shot on the top was taken with the cool setting, at full brightness. The bottom was taken on the warm setting. Notice the lack of glare on the screen itself.

What I like

  • USB powered
  • Easy installation
  • Provides customizable illumination to your workspace without the glare

What needs to be improved

  • Not sure how useful the “auto” setting is.

Final thoughts

I love my BenQ ScreenBar Lite for my laptop. I’m thrilled that I now have a portable option for my laptop.

Price: $99.99
Where to buy: BenQ Direct and Amazon
Source: The sample of this product was provided by BenQ.

Filed in categories: Reviews

Tagged:

BenQ ScreenBar Lite laptop light review originally appeared on The Gadgeteer on May 2, 2019 at 8:00 am.

Note: If you are subscribed to this feed through FeedBurner, please switch to our native feed URL http://the-gadgeteer.com/feed/ in order to ensure continuous delivery.
Z-Edge Z3Pro Dual Lens Car Camera review

REVIEW – Dash cameras have almost reached “necessity” level these days. I won’t be surprised to see them become standard equipment much the way back up cameras have in the past couple of years. They provide security and protect you in case of an accident or even provide a little entertainment should something odd happen while out on the road. Last Christmas, my mom got me a camera for my truck and it’s been very useful so I jumped at the chance to review the Z-Edge Z3 Pro dual lens car camera to use in my wife’s car.

What is it?

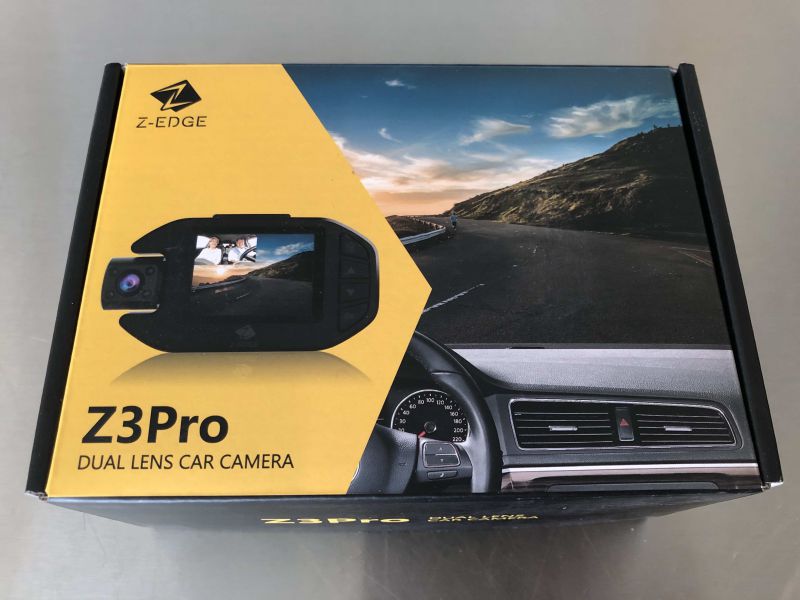
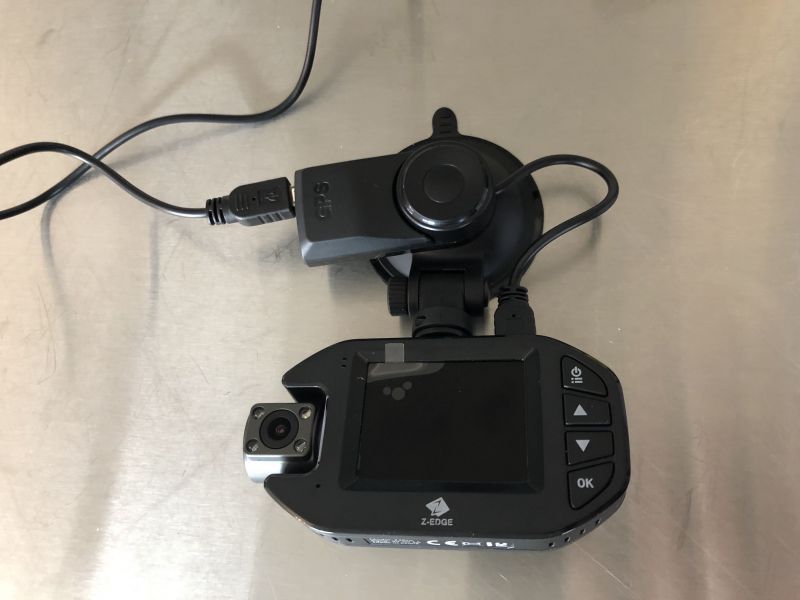
The Z3Pro is a windshield mount car camera that has a forward and rear facing camera to capture both the road in front of you and the view of the interior of the vehicle.

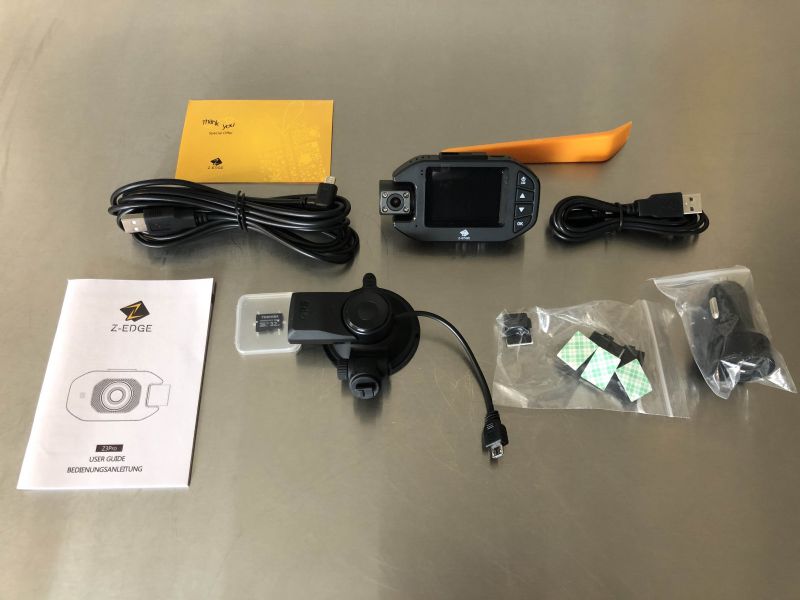
What’s in the box?

  • Z-Edge dash cam
  • User Guide
  • USB Data Cord for downloading from mount to PC
  • USB Power Cord
  • Warranty Offer
  • Micro SD Card 32 GB
  • Windshield Mount
  • Power Adapter
  • Sticker Clips for power cord
  • Removal Tool
  • Camara

Hardware specs

The camara is a full HD 1920 x 1080P WDR (wide dynamic range) with a 150 degree field of view. The display is 2″ diagonal measurement LED screen. The camera also has a microphone that will record the audio if you choose.

Design and features

The Z3Pro provides an advanced camera for both the front and rear facing lenses, providing full HD in both directions. There are a few optional features to deactivate or adjust if you prefer: Motion Detection, Vibration Detection and Loop Recording. As is fairly standard these days, the loop recording uses the 32GB of available memory to record and then re-record continuously over the oldest unprotected data. Therefore, if you have something that you want to keep, you’ll need to either “protect” the file or download the file to a PC somewhat quickly. You can adjust the settings to record in 1, 3 or 5 minute segments. Motion Detection will activate the camera, even while the vehicle isn’t in use, to record motion detected outside the car. Vibration Detection will also record a snippet if the camera picks up the vehicle/camera being moved or shaken while not in motion – for instance, if someone is trying to break into your car or if your car is hit while parked.

As you start and turn off your car, the camera powers on and off as it’s provided power. Additionally, the default settings have the display showing the front view and then a picture-in-picture style display showing the rear facing camera. You do have the option to show only the front facing camera on the display, however, it will still record both cameras while in use. It does save each file as a FRONT and BACK recording. Even while recording, the display will turn itself off to conserve energy but can be woken up with the touch of one of the buttons.

The camera has 4 IR LED lights and supports night vision recording as well, so even in low light or night time driving, you’ll still get a quality recording. Additionally, the camera records GPS data so when you playback the videos on a Mac or Windows PC, it will display the data as well as your location on Google Maps. I would love to be able to show you this, however, after downloading the software on multiple computers, I could not get the software to open any of the files.

Finally, the rear interior view is ideal for those who use their vehicles as a ride-share vehicle – however, I don’t know the ethical ramifications of recording passengers with or without their permission so I won’t get into this topic in this review.

Setup

The initial set up involves taking the product components from the box and assembling the camera, mounting hardware and cord to prepare the camera to be mounted in the car via the simple suction cup mount common to GPS and dash cameras.

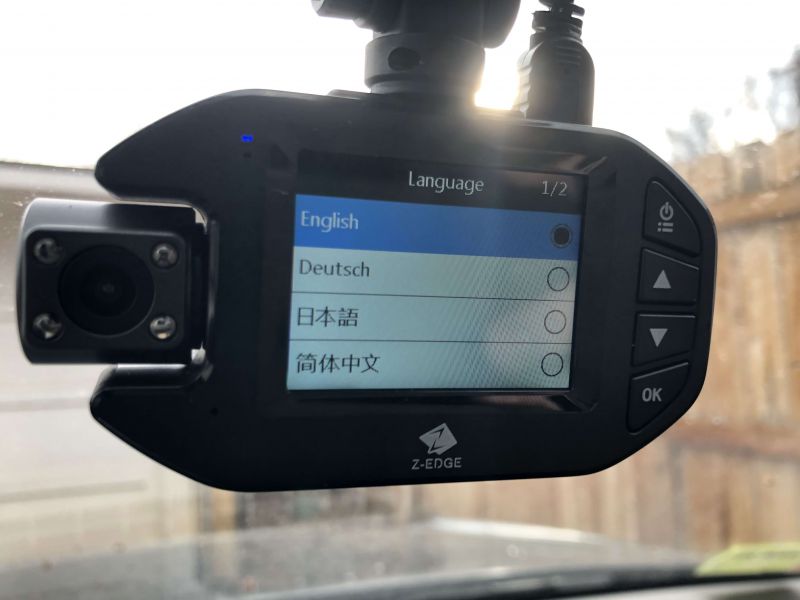
Then you follow a simple menu to set up the language, date and time settings.

Finally, you run the power cable up and around the windshield in the path you desire to get the power cord to the USB power port on the provided power adapter that you plug into your standard vehicle power port.

Performance

The camera has performed as expected throughout the three weeks it has been in use. It provides recordings of our trips throughout the city and occasionally picks up on movements while parked in our driveway or in parking lots – typically someone walking to their vehicle along side or in front of our car.

Unlike the camera I have in my truck, this camera does not have wifi or an app to access the videos. This then requires you to either remove the micro SD card and use an adapter to plug into your PC or take the entire camera off the windshield mount and plug into your PC via the provided USB data cable. If you find yourself in an accident or witness to an accident, you do end up then trying to show anyone the video on a small 2″ screen rather than being able to immediately download to your phone and share with officials or others involved in the accident.

The menu buttons take some getting used to as well. On many occasions, while simply trying to navigate the various menus we took unintentional selfies, which while hilarious was also rather frustrating. It would be highly advisable to keep the user guide in the vehicle, as there are also many different symbols that pop up on the status bar across the top of the display.

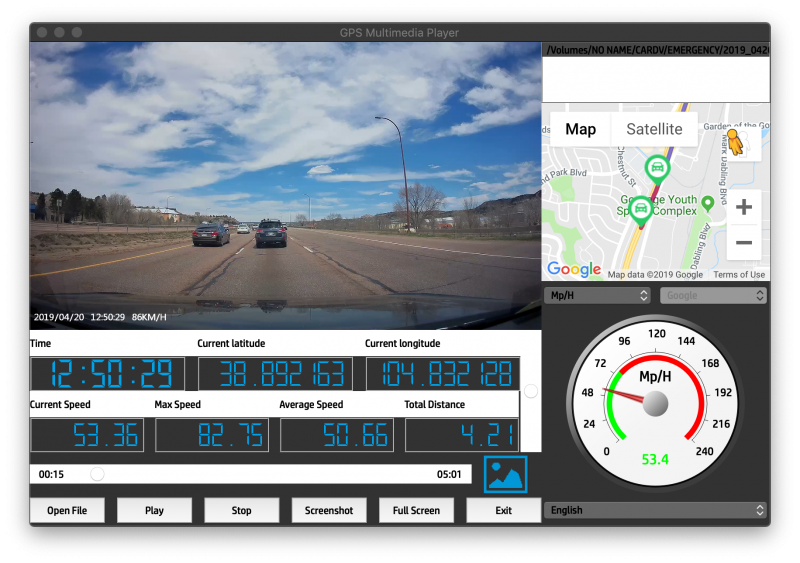
Finally, the performance of the software and interface with the camera unit is not the greatest. My first attempt at downloading videos involved using the provided USB cable to plug the camera unit directly into my laptop and desktop, neither would work properly and I had to go out and buy a MicroSD card reader to get the application to recognize the video and play them. However, taking the MicroSD card out of the camera is actually easier than taking the camera out of the car and plugging it in via the USB cable. Here is a screenshot of the software with a video loaded:

As you can see, it provides quite a bit of data: date & time stamp, speed, longitude & latitude along the route, current speed, max speed on the recording, average speed on the recording, & total distance for the recording. Additionally, it provides a google map overlay in the upper right corner that shows the start and tracks the route along the recording. The audio is very clear, picking up any conversation, noise or music playing within the cabin.

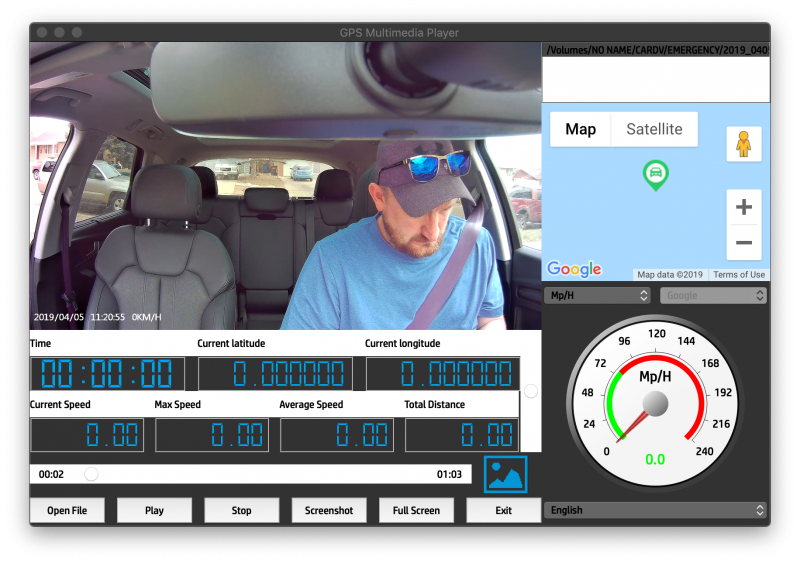
And here is an example showing the rear facing camera:

So, I’m not sure why but it does seem that some times the camera doesn’t get all the data points, map and speed info loaded when you open the video as you can see above. This could be a problem if you’re trying to prove something to an officer or otherwise and that data would support your claim. There is what looks to be a data file created with each recording so perhaps the data is still there, just doesn’t get picked up by the software when opening the file for some reason or another. That starts getting into technical info that I’m not educated enough to deduce.

I was able to upload the video directly from the MicroSD to YouTube. For this exercise, I selected a video where we had turned the audio off on a trip to the north side of town:

Finally, here is a look at the night time recording – which I was very surprised to find was extremely clear and well defined.

Not too bad for a trip to the store, I left the audio on this time to give an impression of the audio quality.

What I like

  • Full HD video
  • Rear Facing Camera providing additional video coverage in cabin
  • Protection of videos to keep from being recorded over
  • Easy physical setup
  • IR LED lights and night time recording

What needs to be improved

  • Access to videos – it would be great to have an app with wifi access to the videos instantly.
  • Menu navigation – the software takes some getting used to and could be clarified with clearer details in the user manual.
  • Power Cord – as with any of these cameras, having to route the cord and clip it around the edges of the windshield isn’t very aesthetically pleasing – not sure what the remedy would be outside of long life rechargeable batteries but until these style cameras are intrinsic to new vehicles, this is a problem we’ll all face.

Final thoughts

While we enjoy having this camera for the added security and safety features, I do not find that it provides enough value for the price point. There are equal quality cameras on the market at a lower price that provide much more efficient and convenient wifi data downloading and reviewing of video. For the price of this unit, I could buy two units like the one I have in my other vehicle & face one to the front and one to the rear, then download the footage to my phone without getting out of the car – and have some money left over. While originally struggling with the software, I did end up finding it easier to use once I got the MicroSD card reader – and the data it provides would be highly useful in any kind of investigation should it be needed. If you have no basis of comparison, I would imagine a buyer would be pretty impressed with the results of this camera, especially if they were unaware that wifi capable models are available. But again, you’re limited by having to wait until you get to a laptop or device to download/upload the content for whoever may need it. Overall, I think it’s a good camera system with great features, at just a bit too high of a price. So, if you see a price drop or see it go on sale, jump on it.

Price: $199.99
Where to buy: Amazon
Source: The sample of this product was provided by Z-Edge.

Filed in categories: Reviews

Tagged: ,

Z-Edge Z3Pro Dual Lens Car Camera review originally appeared on The Gadgeteer on May 1, 2019 at 4:46 pm.

Note: If you are subscribed to this feed through FeedBurner, please switch to our native feed URL http://the-gadgeteer.com/feed/ in order to ensure continuous delivery.

LumiCharge SmartLamp review

REVIEW – Charging phones is something that everyone in this modern world has to do. Even if you can get days out of your device, at some time you’re going to have to get more power into it. Having a lamp that can offer both a charging space for your flat screen device as well as providing an adjustable color temperature and intensity of light is quite a feat. The LumiCharge SmartLamp fills this space beautifully.

What is it?

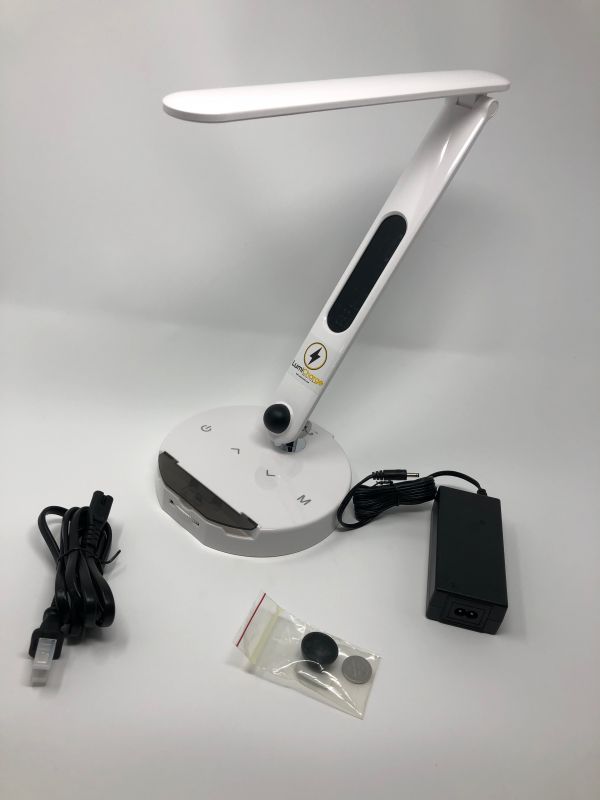
An adjustable-arm lamp with adjustable brightness, warm, cool, or mixed light LEDs, as well as charging spaces for Lightning, USB-C, or microUSB. There is a proximity light, desk clock and calendar display in the lamp as well.

What’s in the box?

  • Lamp with charger in the base and pivoting arm
  • power supply with DC 12V output

Design and features

The LumiCharge SmartLamp is available in black, white, and silver-grey. I was sent the white model. The surfaces are all glossy white, and the plastic feels adequate, if not substantial. It’s not fragile, but you can’t grab it and twist it hard. It passed the famous Gadgeteer “creak” test easily.


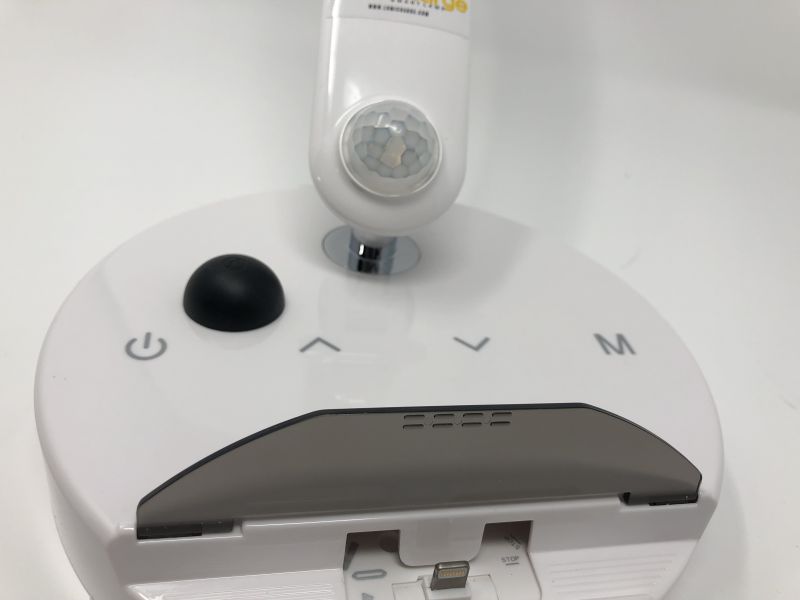
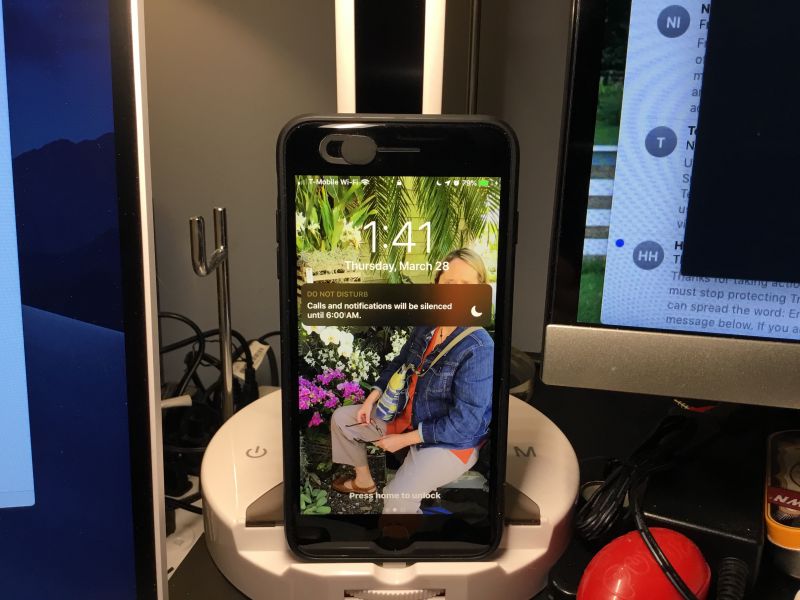
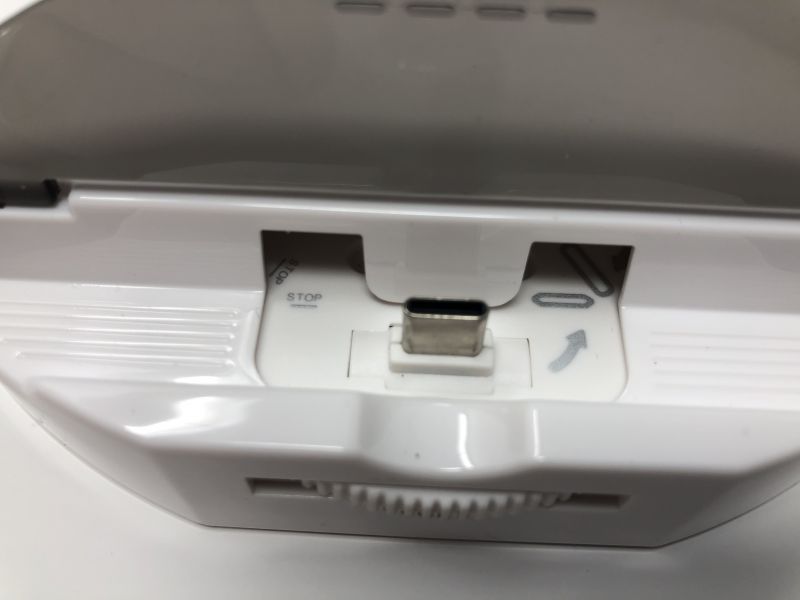
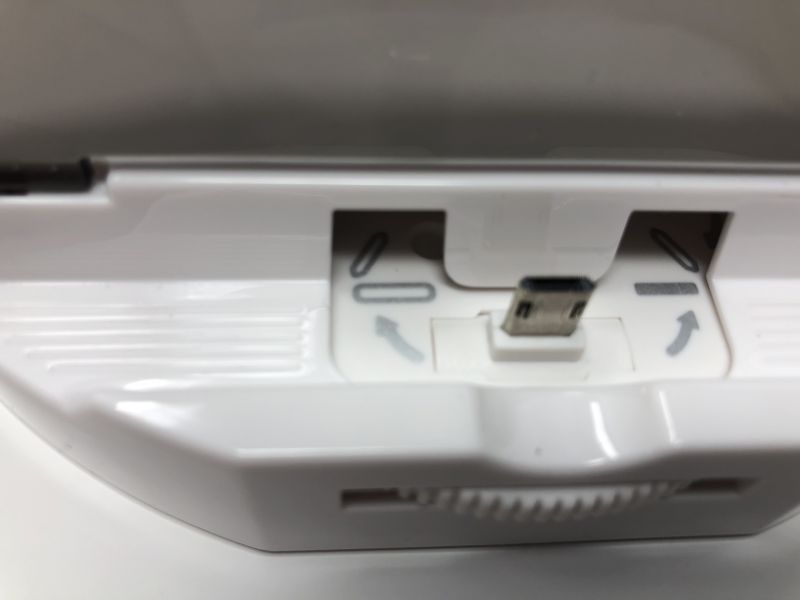
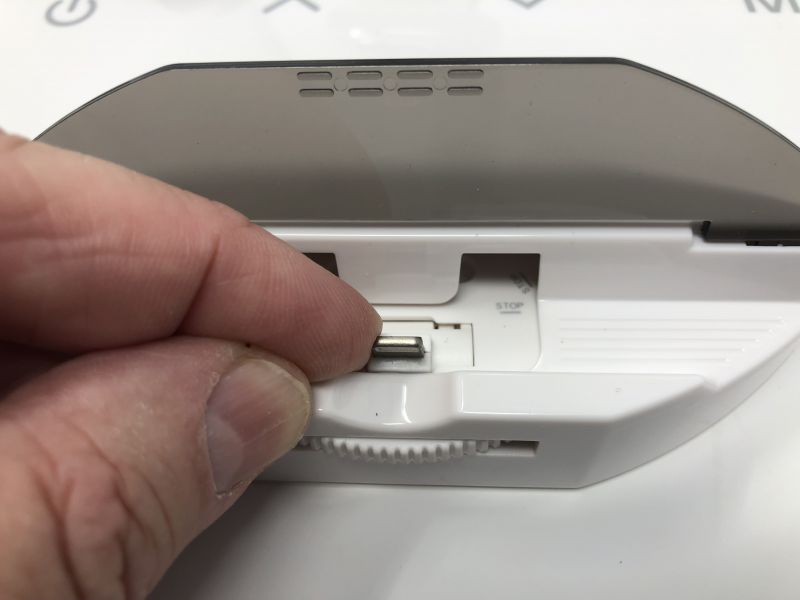
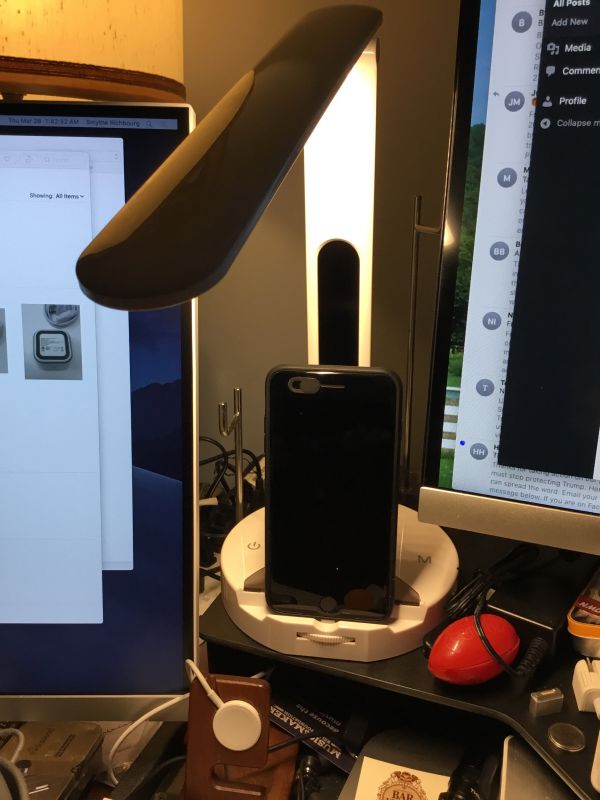
The base is a circle 1.25 inches high and 6.75 inches in diameter. There is a flattened area on the front face with a thumbwheel. Above the wheel is a smoked grey plastic flap that hinges up to reveal a charging post. The flap rises just past 90º to stay up. The charging post can be changed via the thumbwheel to be USB-C, microUSB, or Apple Lightning. Easy of these charging posts are on a pivot, so you can adjust for the thickness of the devices. There is no way to make them taller, though, so thick cases are not going to work here. The channel that the post is in is wide enough for any of my iOS devices but won’t connect with my iPod case. So it goes.


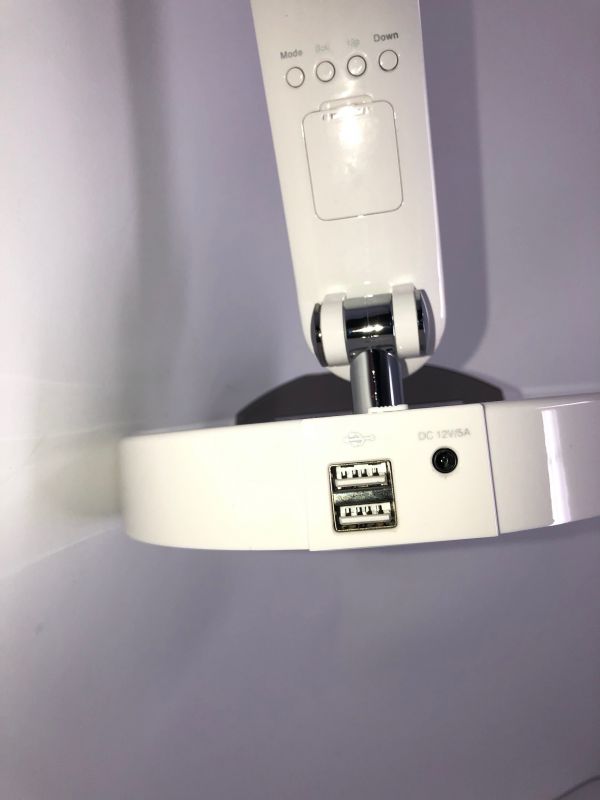
Across the center behind the charging area are 4 symbols: the on-off circle, up and down arrows that look like carets, and a capital “M”. Behind these symbols is the pivot arm, secured to a shiny chrome-like swivel fitting. The swivel will pivot 45º either way of the dead center. Behind this is an on-off switch for the proximity light (more on this later.) At the rear, opposite the thumbwheel is another smaller flat edge with the power input and two USB-A ports.


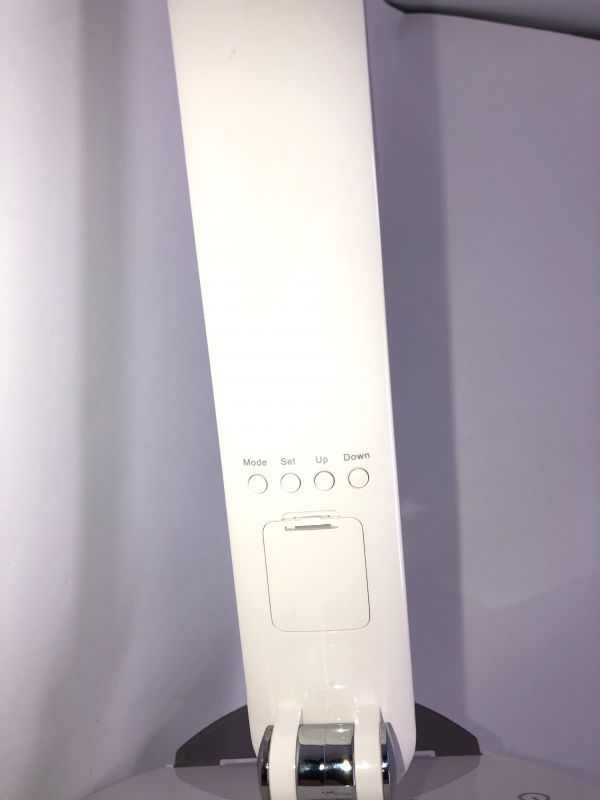
At the bottom of the upright arm, there is a domed light, that can be covered with an opaque black cap. This is the proximity light, which, when switched on, will light up when you walk into the room. Above this is a panel 4 inches high that will glow and show a calendar/clock/temp display. This is controlled and set up via pushbuttons on the back of the 13″ high upright. There is a coin battery that keeps this going when the fixture is unplugged. If it’s turned on, this will also light up (it’s back-lit) with the proximity light.

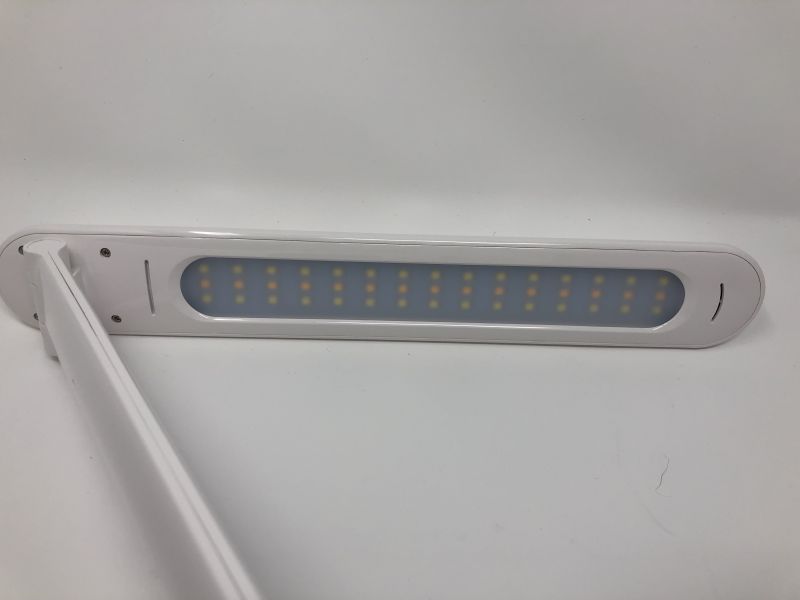
Atop the upright is a 12-inch headpiece. The lens on the bottom has 15 banks of three LEDs – two white on the outside, and one yellow inside. The “M” switches between these rows – cool white, warm white, or soft yellow. This and the dimmable light makes the light extremely adjustable to your lighting needs. The lighting head can go from 0º to 180º with the upright, so you can illuminate a large area if needed. The upright will fold back until the arm touches the base, but it will only angle forward 6º or so from straight up 90º.
The power cord is 60″ from wall to the DC power supply. The power supply is ~1″ x 2″ x 5″ with a 58″ captive center pin cable. That gives you ten feet from a plug to place this unit.

Performance

Adjusting the temperature of light from this lamp is as easy as holding down the arrow keys on the flat base. Changing the Color Temperature is toggled by pressing the “M” key on the base. Holding the on-off button will bring down the brightness. These all happened perfectly, every time I laid a finger on the icons. There is no button on them and no haptic feedback. I have no idea how it “knew” I was holding down the icon, but it did.
The thumbwheel clicks into place for each charging post type, but can easily switch to another position without undue force.

What I like

  • Easy change between all popular USB flavors for charging devices
  • Plugs pivot, so the angles can be changed for different device types
  • Two extra USB outlets to take care of items that don’t fit onto the docking area

What needs to be improved

  • It would be incredible if the calendar and clock would allow you to program a gradual change from cool white to soft yellow as the evening wore on. Far outside the tech here and the price-point, though.

Final thoughts

Having your desk lamp also be able to charge your device is cool. Since it’s adjustable, this should allow you to charge your device whether it’s in a case or not. Very flexible for all devices. I used the proximity sensor for a bit but then changed my desk layout. It was kinda nice to walk into my office and have the light come on when I stepped through the door, rather than having to fumble for the light.

Price: $119.00 on sale currently for $109.00
Where to buy: LumiCharge webstore
Source: The sample of this product was provided by LumiCharge.

Filed in categories: Reviews

Tagged:

LumiCharge SmartLamp review originally appeared on The Gadgeteer on May 1, 2019 at 10:00 am.

Note: If you are subscribed to this feed through FeedBurner, please switch to our native feed URL http://the-gadgeteer.com/feed/ in order to ensure continuous delivery.