VicTsing 10W Qi Wireless Fast Charger Car Mount review

REVIEW – One of the joys of getting to review gadgets is being introduced to obscure brands. Sometimes, they really do surprise you — in a good way — like this little Qi Wireless Fast Charger Car Mount (which is the official product name I believe) from a heretofore unknown manufacturer, VicTsing.

What is it?

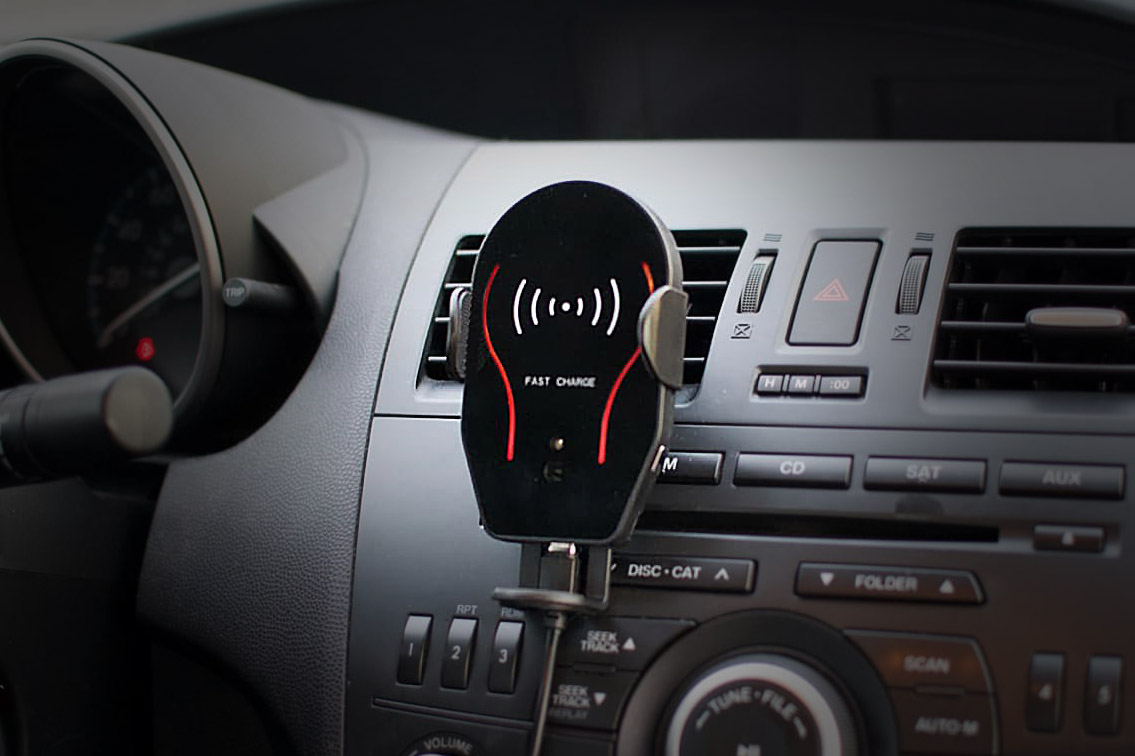
VicTsing’s Wireless Charger Car Mount is a phone holder with an embedded Qi-enabled wireless charging pad. It can be easily mounted to any flat surface or securely clipped to a vent.

What’s in the box?

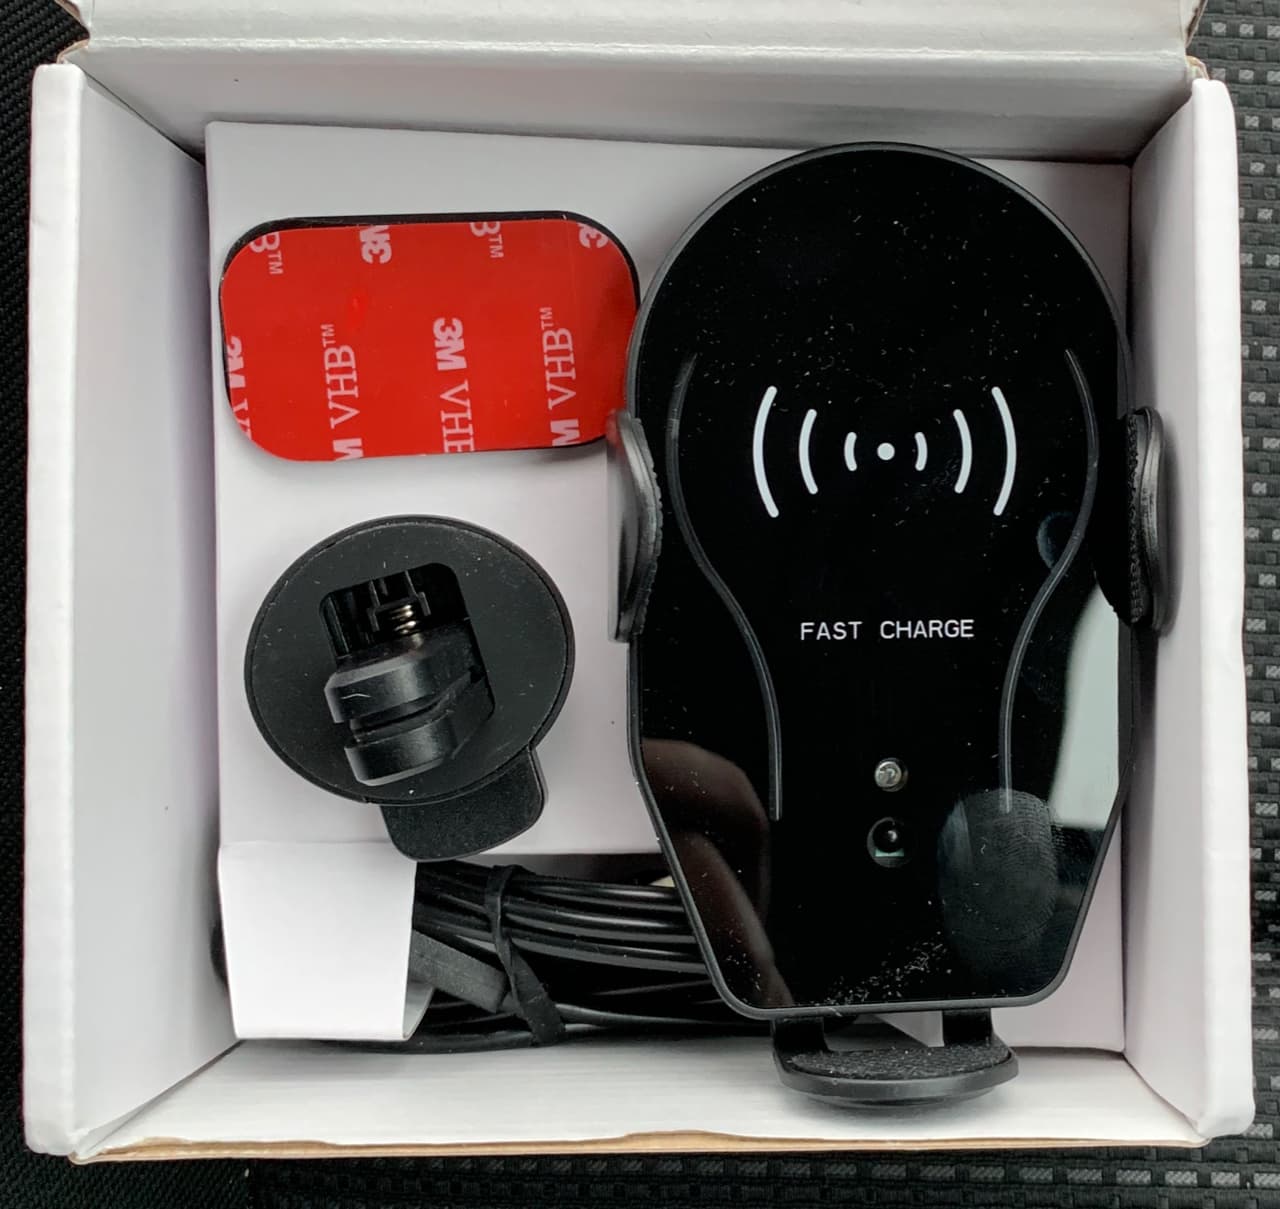
  • wireless charging bracket
  • air vent clip
  • 3M adhesive surface mount
  • user manual
  • USB-C cable and adapter
Also comes with some mild amounts of dust.

Hardware specs

  • Latest Qi Standard Tech
  • Material: ABS+PP mirror + silicone
  • Compatible with 7.5W and 5W
  • Input: 5V/2A 9V/1.67A
  • Compatible devices: iPhone Xs Max/Xs/XR/X/8P/8,Galaxy S9/S9 Plus/Note 8/9/S8+/S8/Note 5/S7 edge/S7 and other Qi enabled devices
  • Automatically adjusts to hold phones of size from 4.0”-6.0”
  • Charging distance: <= 8mm
  • Charging efficiency: >=82%
  • Product size: 11.3 x 6.8 x 4.5 mm
  • Color: Black

Design and features

VicTsing’s iteration of the simple car mounted charger looks very much like many other phone mounts you may have seen. It’s a basic side-arm mount with an adjustable support foot that the bottom of the phone rests on.
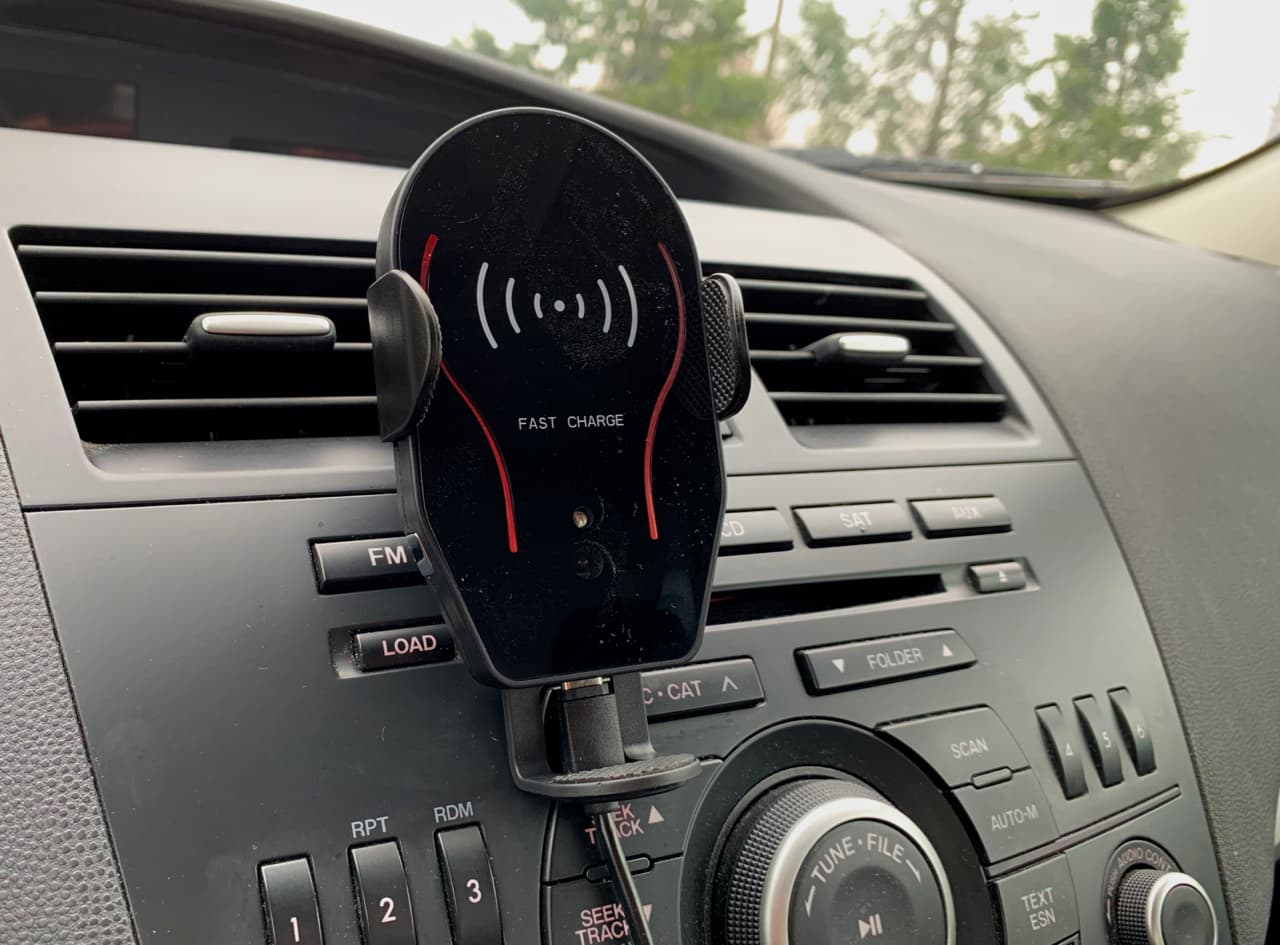
The red strips on the charging surface gently glow and turn blue when charging. You can see the white lens of the IR sensor as well.

However, one unique feature of this phone mount is the IR-activated arms that extend out when an object is placed near the sensor, and automatically “hugs” the phone to form a solid grip. It’s a cute feature that never fails to make me smile, seeing this small charging pad’s arms extend out and grab on to the edges of my phone like a warm embrace.

Initial setup is easy, but your mileage will definitely vary on where the mount itself can be positioned. My car, thanks to Japanese efficiency, has no flat surface to spare, so I had to opt for a vent-clip mount approach.
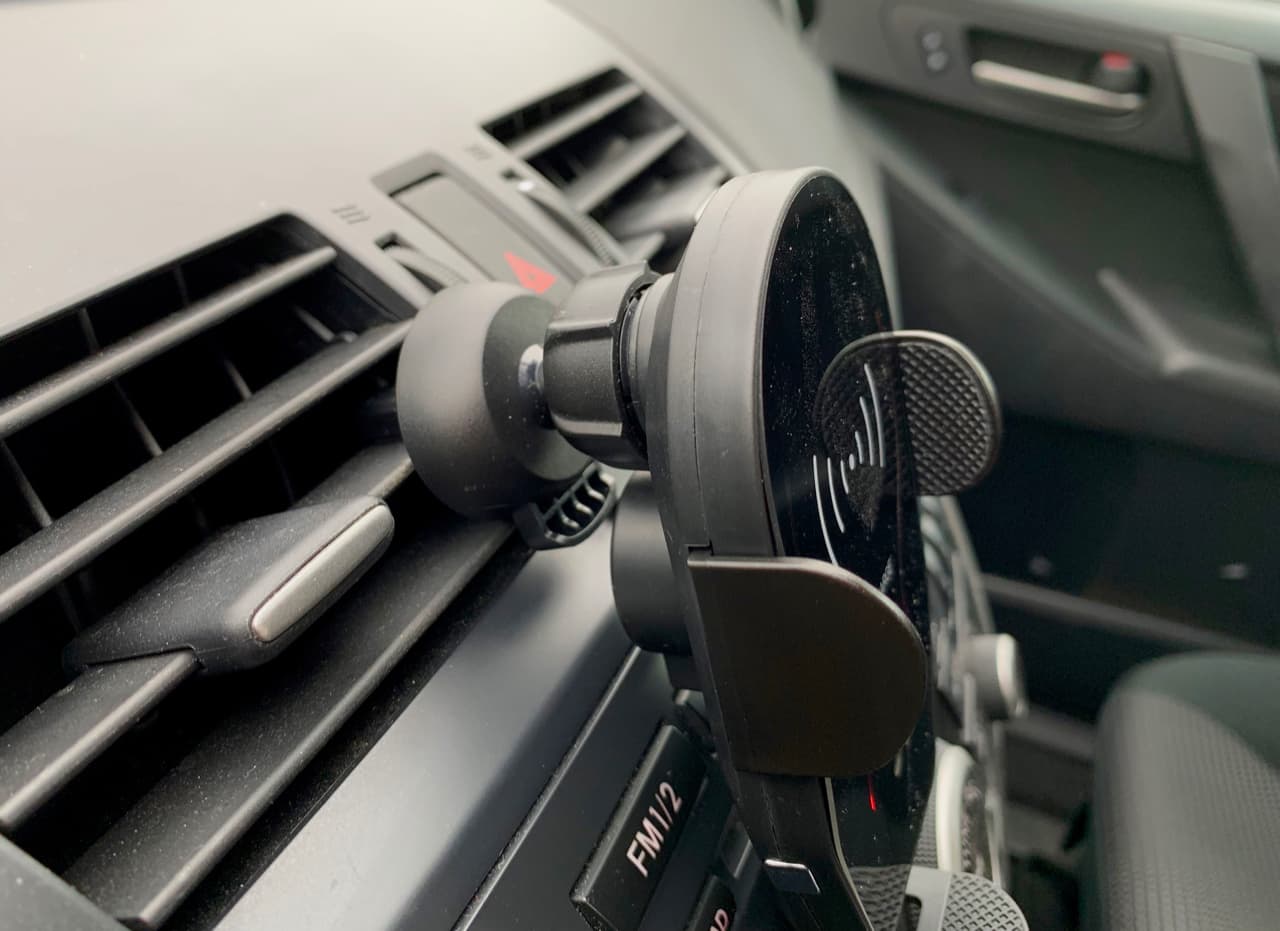
Might as well just turn that vent off.

I can’t say I’m a fan of having to block an entire vent, of which there are only four, effectively decreasing cabin air conditioning by 25%. I’m even less than a fan of the charging pad and USB cable covering up the stereo system buttons. The overall effect is ugly, as you can see.

I had tried mounting the charger a little to the left of the wide vent, but that resulted in activating the “hug” every time my hand veered too close to the sensor when my phone was undocked. After several times of hearing that sad little robotic embrace, I had to move the charger back to its original place over the stereo buttons.

I should mention that this isn’t a knock against this mount in particular. I’d have the same issue with any vent-clip design. It’s, unfortunately, the most universal approach to making a phone mount work with as many vehicles as possible.

However, the clip was quite secure. Once I got the 360º knob tightened and the clip positioned as deep as it would go into the vent, my phone didn’t go anywhere, even around sharp corners.

The functionality of the charger is great. It’s a standard 7.5W fast charger, so you can expect it to juice up your phone as quickly as one would expect, if your device supports it. I’d say it was a pretty consistent 4-5% per 10 minutes for my iPhone XR, but that would depend on the total capacity of your battery. No issues here.

It takes a little bit of practice to center your phone in the charger while placing it in the holder. Once your phone is about 3” away from the charger, the IR sensor triggers and the arms extend to their maximum width of about 6”. Then, after a 2-second delay, they close. That’s about the time you get to try to center the phone in the charger, place it flat against the charging pad, and make sure the bottom of your phone is nestled against the “foot” of the harness. Then the little arms hug that phone and sort of lock into place.

A profile shot of the phone resting in the grips.

If you’re a little bit too far to the right or left, it doesn’t create as good of a grip, so you sort of have to give your phone a little wiggle to get it into place. It might have to do with the silicone case that I have on my phone, it might be gripping the rubber on the foot a little too much to allow it to easily center. But I’ve gotten used to it, and you really only have to mount it once before you start driving.

To detach your phone, there are two silver capacitive buttons near the bottom of the charging pad. Simply brushing one of them with your finger is enough to trigger the arms to open again, and you can lift your phone out. You could try to lift it out without engaging the opening action, but you’d probably pull the entire charging pad and vent clip out before removing just your phone. That happened to me at least twice before I got the hang of the whole operation.
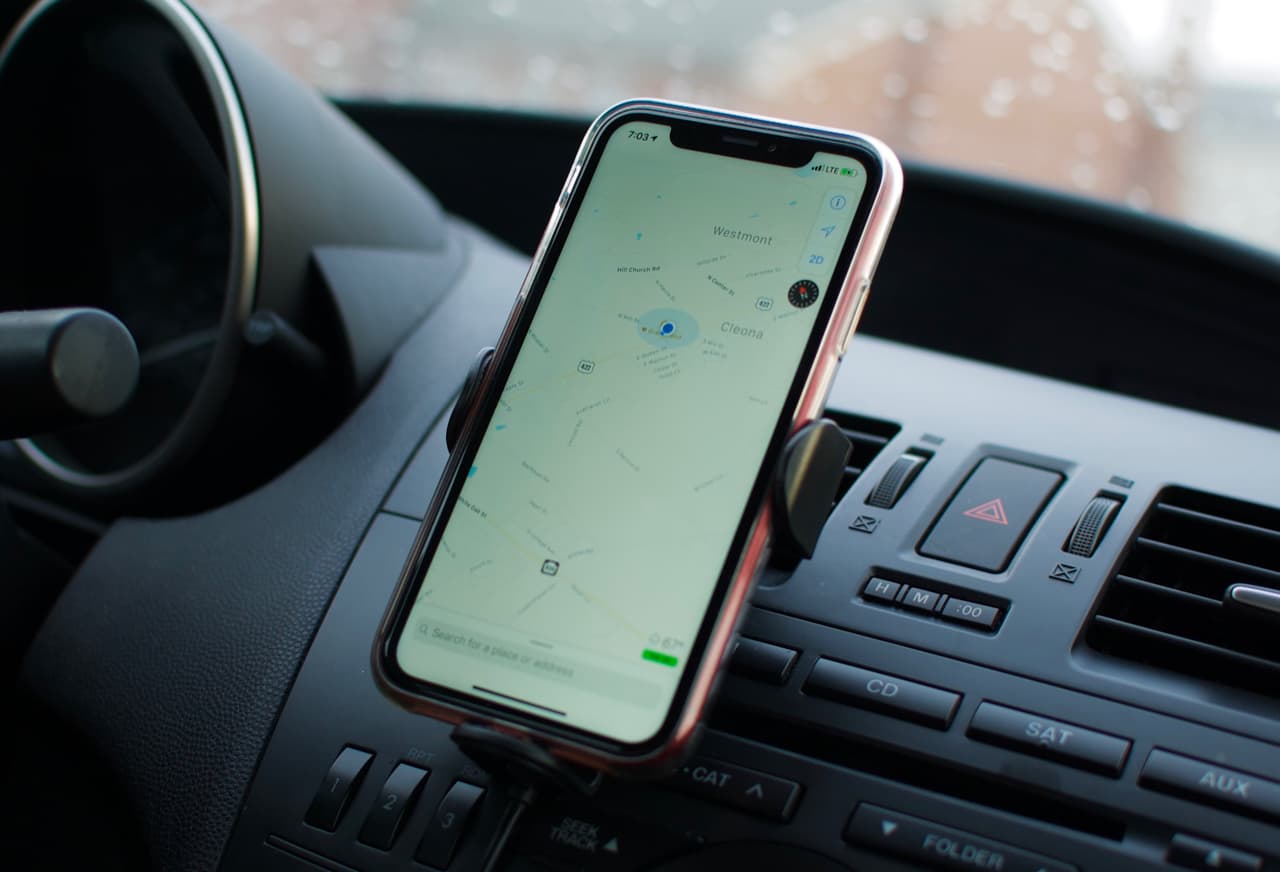
It’s a nice way of having access to a map if your car doesn’t already have GPS or CarPlay built into the console.

But once I figured out how to play nice with this little charger, I liked having my phone in a spot where I could fast-forward a podcast or check out a map without palming my phone.

I imagine anyone with a CarPlay system wouldn’t have much use for a charging mount, however, or anyone with a newer car that have Qi wireless charging pads in the console somewhere.

For $22 (yes, just 22 bones) you get a no-fuss phone mount, wireless charger, and friendly little hug-bot all in one. That’s pretty hard to beat.

What I like

  • IR sensor auto-opens to give your phone a little hug
  • Excellent value for the price

What needs to be “improved”

  • Blocks vent air flow
  • Potentially blocks other buttons due to cable

Final thoughts

I feel any of the negative thoughts I could have about this charger are more of an indictment of any vent clip or suction mounted holder, and aren’t specific to this particular device. This is a great little charger mount, especially for the very low asking price of $22.

Price: $21.99
Where to buy: WalMart.com
Source: The sample of this product was provided by VicTsing.

Filed in categories: Reviews

Tagged: ,

VicTsing 10W Qi Wireless Fast Charger Car Mount review originally appeared on The Gadgeteer on May 6, 2019 at 9:00 am.

Note: If you are subscribed to this feed through FeedBurner, please switch to our native feed URL http://the-gadgeteer.com/feed/ in order to ensure continuous delivery.

Polk Audio Commander Soundbar review

REVIEWI’ve owned or reviewed several soundbars, hoping to more closely approximate my beloved cinema experience. Looking to upgrade, Polk Audio’s Commander Soundbar has entered my living room to tantalize my eardrums.

What is it?

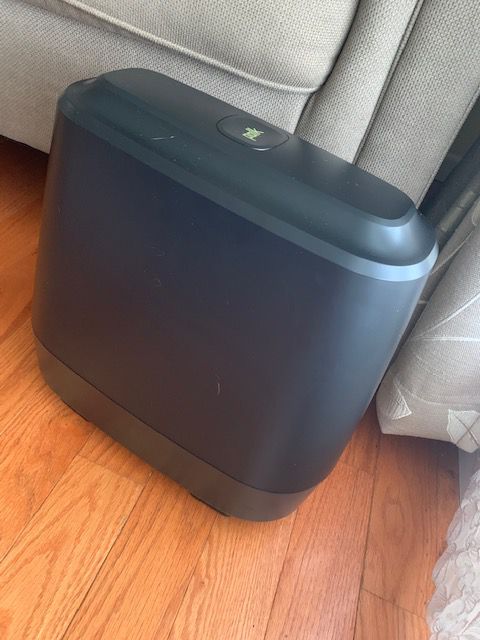
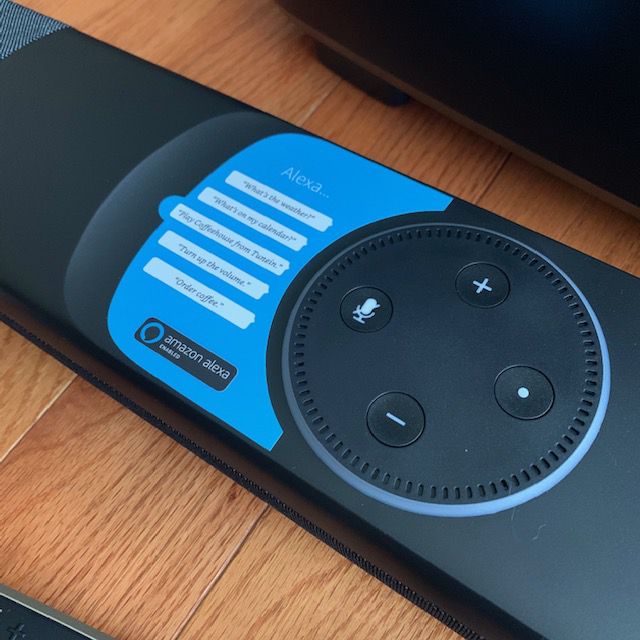
The Polk Audio Commander Soundbar is a self-contained, wall mountable speaker system with an integrated amplifier, Bluetooth receiver, built-in Amazon Echo (AKA Alexa) and wireless subwoofer.

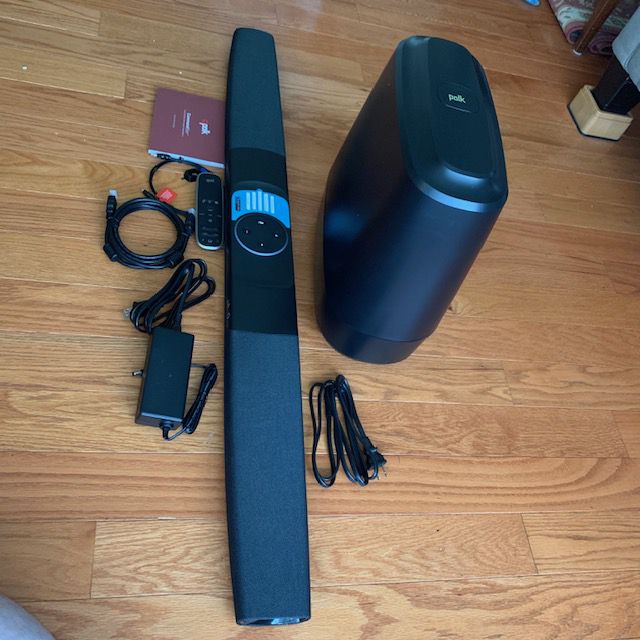
What’s in the box?

  • Soundbar
  • Wireless subwoofer
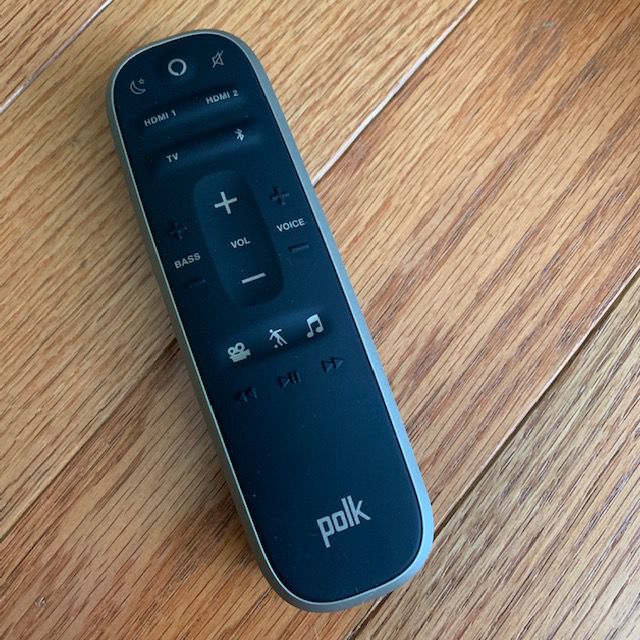
  • Remote control
  • Two AAA batteries
  • Two-meter HDMI cable
  • Two-meter optical cable
  • Soundbar power supply and cord
  • Subwoofer power cord
  • Product manual

Hardware specs

  • Soundbar Dimensions 2″ (5.08 cm) x 42.95″ (109.09 cm) x 4″ (10.16 cm)
  • Soundbar Weight 4.95 lbs (2.25 kg)
  • Soundbar Dimensions 2″ (5.08 cm) x 42.95″ (109.09 cm) x 4″ (10.16 cm)
  • Soundbar Weight 4.95 lbs (2.25 kg)
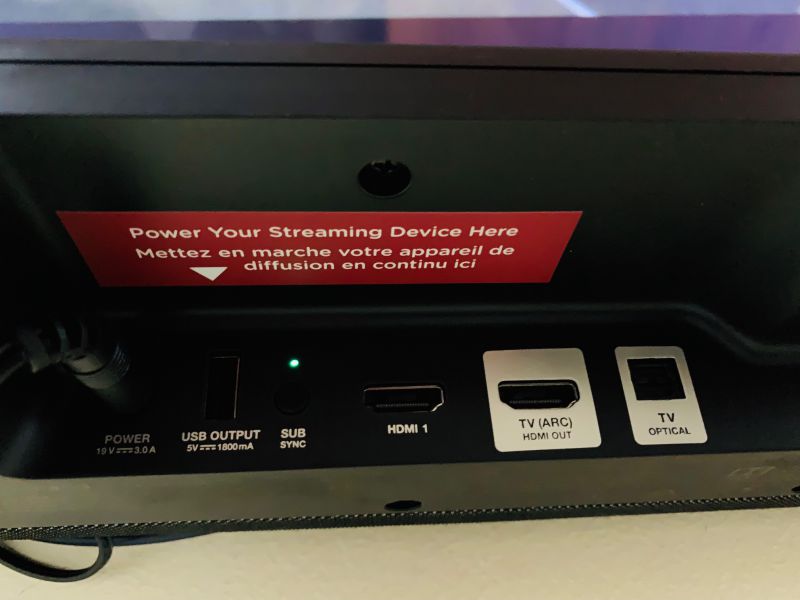
  • Bluetooth 802.11a/b/g/n/AC – 2.4GHz & 5GhzPower 160 watts, Class D amplifier
  • Two HDMI (ARC) inputs, 4K HDMI 2.0a (HDR Compatible)
  • One Toslink OpticalVideo Pass-through input
  • One output, 4K HDMI 2.0a (HDR Compatible)
  • Subwoofer dimensions 14.43″ (36.65 cm) x 7.4″ (18.8 cm) x 14.5″ (36.83 cm)
  • Subwoofer weight 8.65 lbs (3.92 kg)
  • Ported enclosure with integrated 6.5″ (16.51 cm) diameter subwoofer
  • Plastic construction

Design and features

Setup

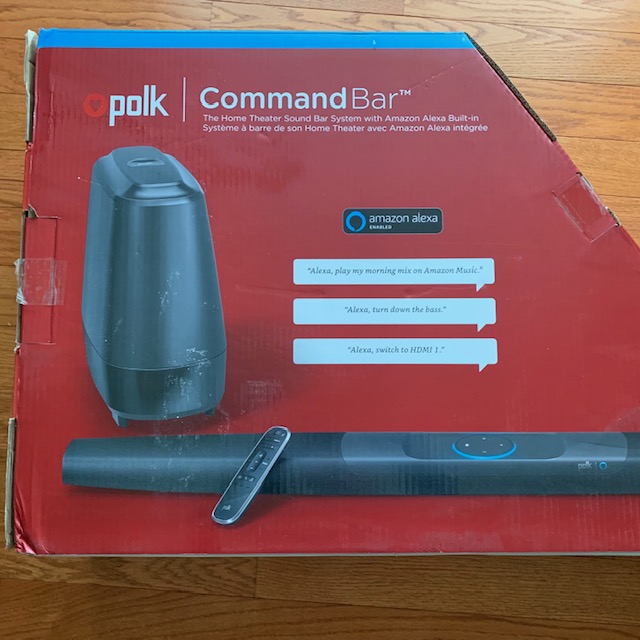
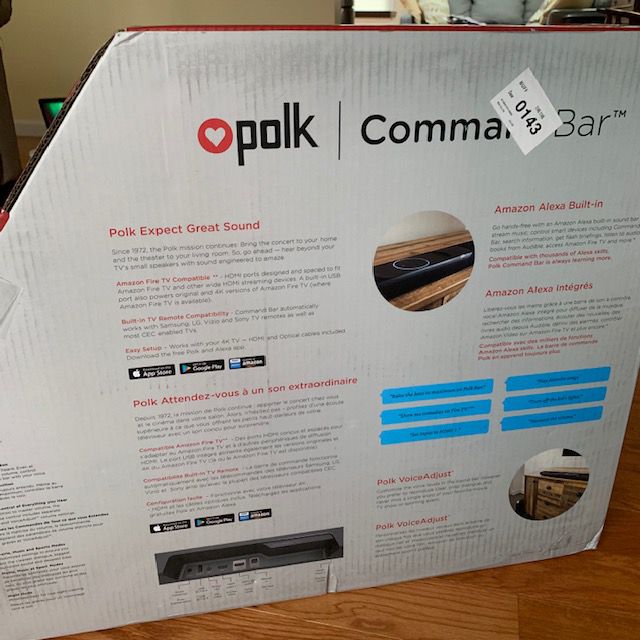
The box the equipment arrives in is a behemoth, protecting her contents with egg-carton loving care. Unboxing reminded me of pulling a car out of a tight-fitting garage.

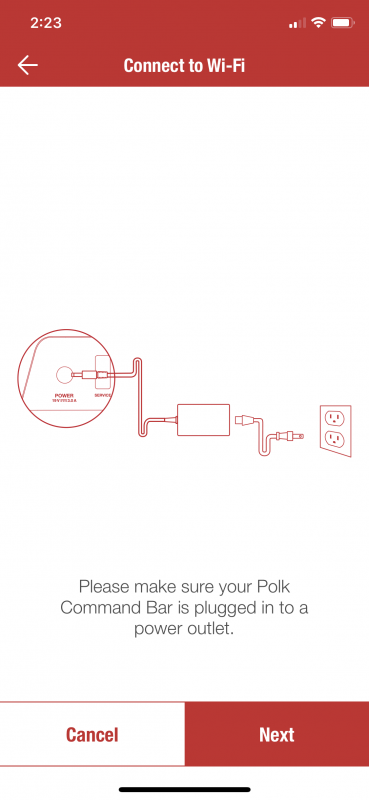
The Polk Commander soundbar hardware assembly is straight-forward –plug-in power, HDMI or optical to your TV, put batteries in the remote and place the soundbar on or under the TV.

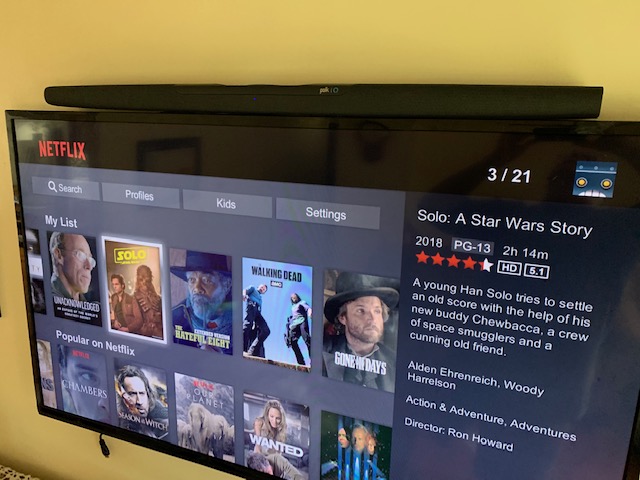
I elected to put mine on top for cabling reasons.

The subwoofer plugs in and that’s it. There are pairing buttons on the soundbar and subwoofer, but I didn’t need to use them because the components paired automatically.

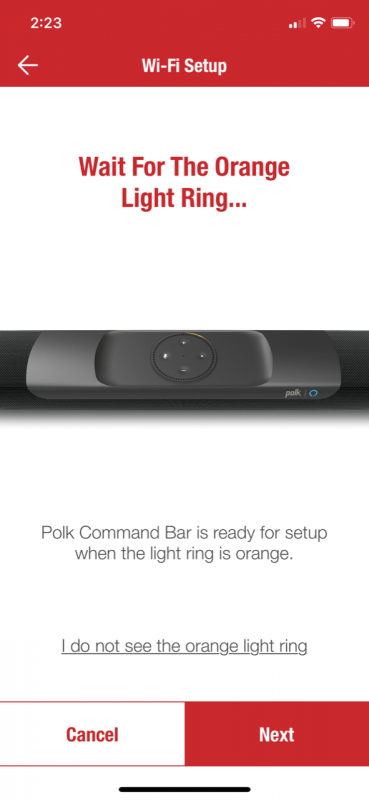
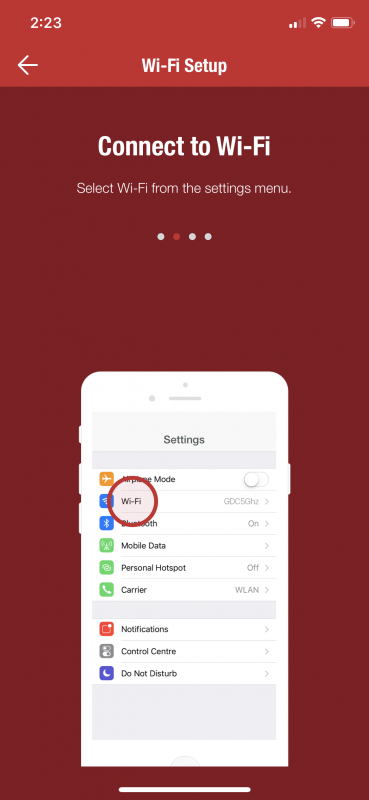
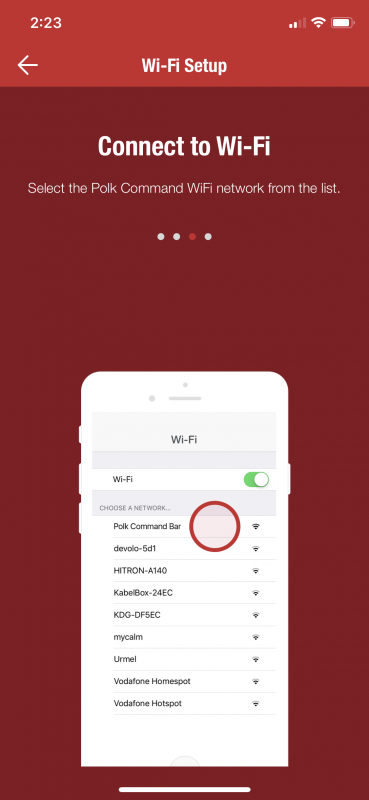
Next, the soundbar needs to connect to your home network with assistance from the Polk Connect app. After downloading and creating an account, the app walks through the Wi-Fi connection process and linking your Amazon account. All went smoothly with friendly voice prompts. Once connected, the Polk App no longer needed, save for FAQs or setting up another soundbar.

…and so on…

Performance

After everything was connected, I started Netflix and started a few different titles with lots of booms and “clink-clinks.” A few tweaks and my living room was shaking with thundering bass, crisp treble, and excellent high-quality audio, literally vibrating my sternum and hardwood floors, raising a few concerned expressions from our house bunny, Oki.

Even the contra-bass in Rimsky-Korsakov’s Russian Easter Festival overture could be clearly discerned – not an easy feat for audio reproduction. I had been listening to the same recording for years before I purchased headphones of sufficient quality to hear these near 20Hz notes. In fact, for some, the notes are so low they are more “felt” than heard. The Polk Commander had no problems coaxing these hidden musical gems out to play.

The Commander’s volume can be controlled through my TV so there is no need for juggling remotes.

PCM audio and 2-channel Dolby digital are supported. Make no mistake, this is not a true surround-sound system and won’t give you the sensory experience of having side and rear speakers, but the audio from the Polk Commander is pretty darn good.

I connected Bluetooth and fired up a playlist with some heavy bass and cranked up the volume. For the first time in many years, I felt so enraptured by my tunes that I broke into spontaneous air-guitar. So much fun! I’ll need to be cognizant of the volume as to not annoy my neighbors too much.

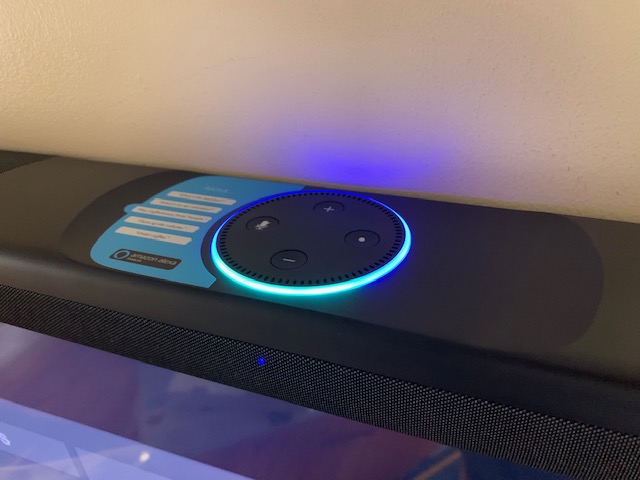
Using Amazon Echo was essentially the same as the other units I have in my home, but the microphones appear to be much more sensitive than my “Echo Dots” and audio is muted while Alexa is annunciating. I was impressed that Alexa actually heard me calling her other audio cranked up.

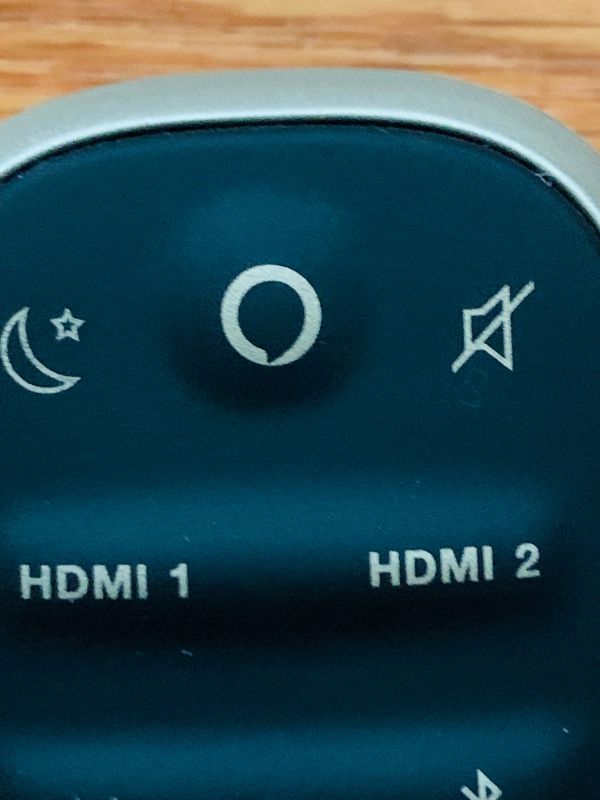
There’s also a dedicated remote control button should this be your preference.

What I like

  • Premium quality sound
  • Easy set-up
  • Great value

What needs to be improved

  • Some Amazon Echo functions are missing but may be introduced in subsequent updates.

Final thoughts

The sound quality is pristine and is a major improvement over other sound bars I’ve used and, at about $300 is an excellent value. Room-filling sound, faithful audio reproduction, and solid performance make the Polk Commander soundbar a big winner in my book.

Price: $249.00
Where to buy: Amazon
Source: The sample of this product was provided by Polk Audio.

Filed in categories: Reviews

Tagged: , ,

Polk Audio Commander Soundbar review originally appeared on The Gadgeteer on May 5, 2019 at 10:30 am.

Note: If you are subscribed to this feed through FeedBurner, please switch to our native feed URL http://the-gadgeteer.com/feed/ in order to ensure continuous delivery.
Roidmi F8 cordless vacuum review

REVIEW – Perhaps one of the most annoying things with vacuuming is the cord. The Roidmi F8 cordless vacuum aims to make that a thing of the past.

What is it?

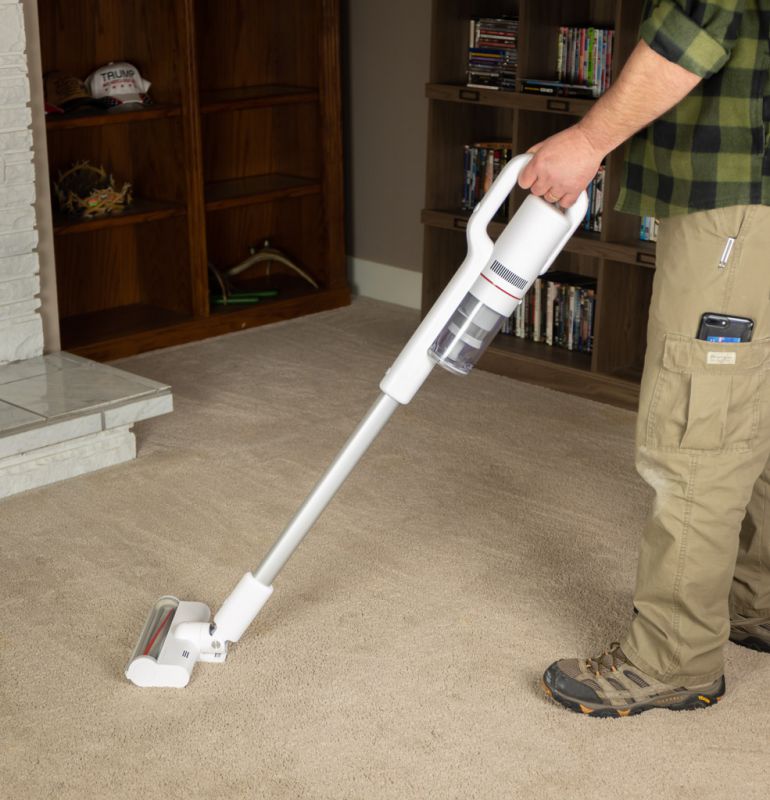
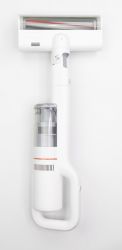
The Roidmi F8 cordless vacuum is a lightweight yet powerful cordless handheld vacuum featuring a wide range of useful attachments.

What’s in the box?

  • Main vacuum body
  • Large Soft brush head (Includes a hard floor brush and a carpet brush)
  • Small anti-mite brush head
  • Bendable extension pipe
  • Multifunction brush
  • Long flat suction head
  • Long connecting pipe
  • Spare HEPA filter
  • Multi-function brush for cleaning brush heads
  • Operation manual
  • Charging plug
  • Magnetic wall mount


Hardware specs

  • 18,500 Pa vacuum degree
  • 115W suction power
  • 55 minute battery
  • 3.3 lbs (1.5 kg)
  • 75dB(A) low noise
  • No nail magnetic mount

Design and features

The Roidmi F8 cordless vacuum features a sleek design that incorporates easy to use controls and a modular system that adapts to many different configurations.

The heart of the F8 is a battery that lasts for 55 minutes under standard mode (3800 square feet), and 10 minutes under maximum power. The charge time is rated at 2.5 hours. The 100,000 rpm brushless DC motor generates strong suction power.

Second to suction power for a vacuum is its ability to filter the air and debris that it sucks up. The Roidmi F8 features a 4 stage filtration system. The filtration system absorbs participles as small as PM0.3, purifying up to 99% of your air.

  1. Metal Mesh
  2. Cyclonic air flow
  3. HEPA filter cartridge
  4. Sponge filter.

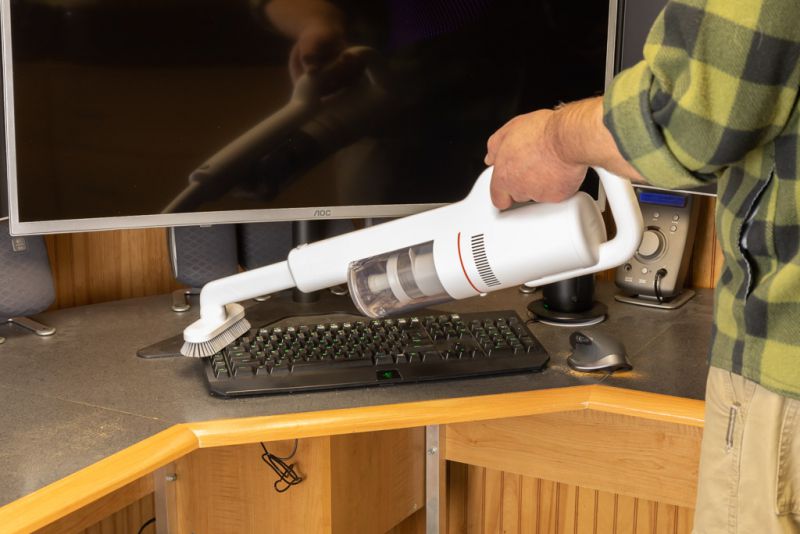
The Roidmi F8 also includes many attachments which make it very versatile.

  1. Large Soft brush head. Includes a hard floor brush and a carpet brush.
  2. Small anti-mite brush head.
  3. Bendable extension pipe
  4. Multifunction brush
  5. Long flat suction head
  6. Long connecting pipe


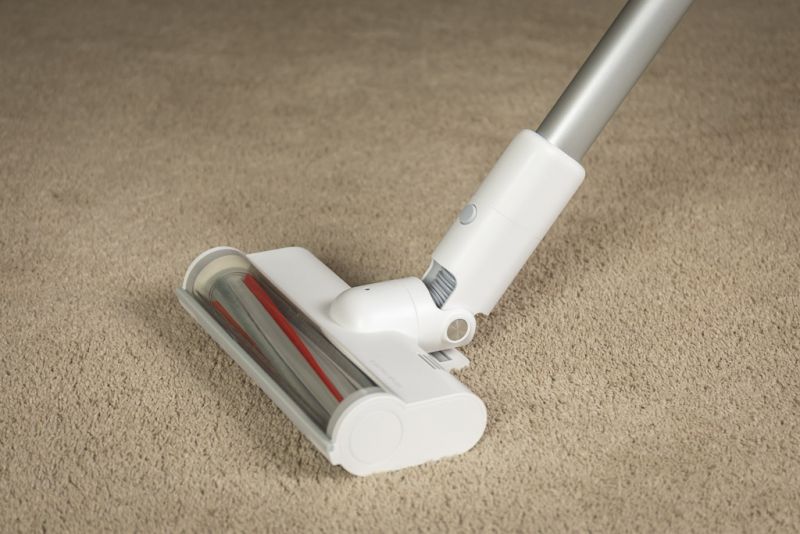
The brush heads are electrically powered, unlike some vacuums that just spin the head via air flow. The soft woven nylon roller brush is designed for hard floors and the carbon fiber brush is designed for carpeted areas. The brush rollers are easy to change without tools.

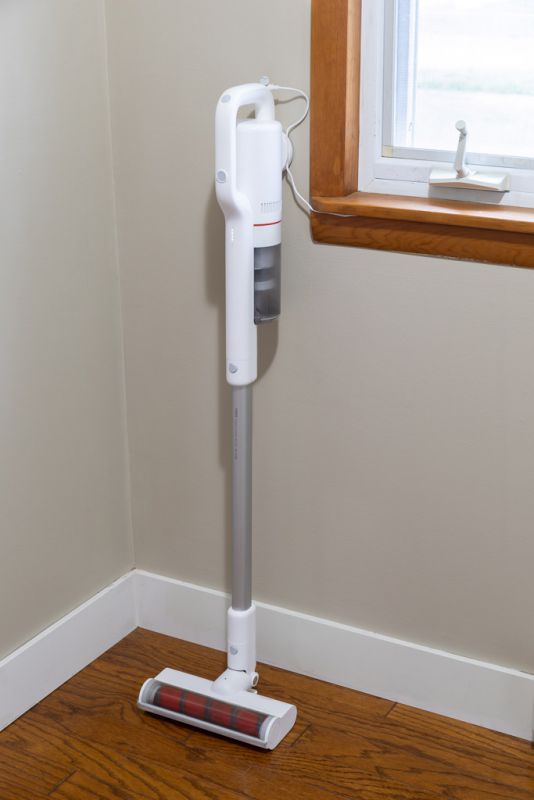
The biggest advantage to a cordless vacuum is obviously the time saving and convenience factor of not having to deal with unwrapping and wrapping up a cord. The magnetic mount is just for holding the vacuum in an upright position, the charging cord still needs to be manually inserted which does detract slightly from the convenience of it.

As for doing what it’s designed to do, the Roidmi F8 certainly has the power to vacuum quite a bit of space on one charge. I don’t think I would vacuum an entire carpeted room regularly with it, as a regular corded vacuum would do a better job, however for small areas or small cleanup jobs it will do just fine on carpet.

For hard floors, it does a great job. It’s so much easier than chasing around dirt and dust with a broom. It does take a little to get used to the weight being at the top instead of the bottom like a normal vacuum.


The head on the main brush also swivels nicely, making it easy to maneuver around obstacles.

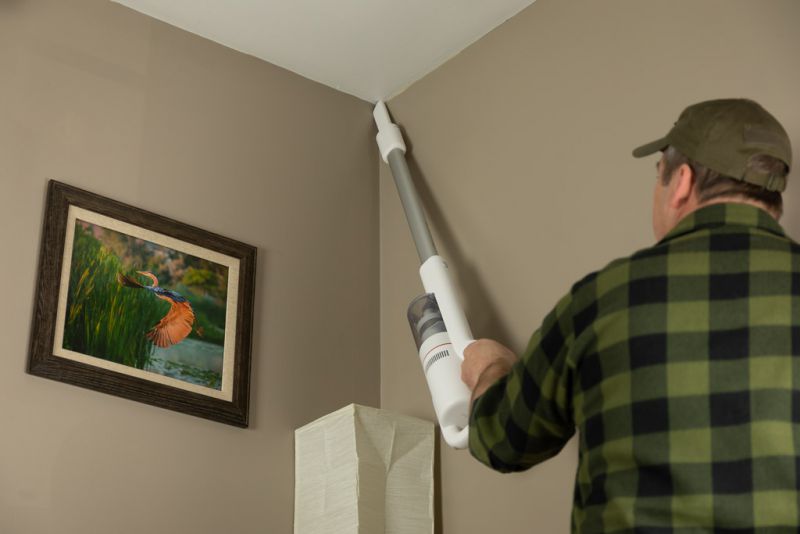
The other attachments make it so easy to quickly clean small things as you see them instead waiting to do them after you get out the regular “big” vacuum. When so see that cobweb or small pile of dirt you simply grab the Roidmi F8, clean it up, and then put it away.

I really like the extension tube as it can be used with all of the attachments. The dust cup is also easy to empty and clean.

There is also a smartphone app available that connects via Bluetooth and provides battery status, filter status, firmware updates and more.


What I like

  • Portable and powerful
  • Simple to operate and configure
  • Many attachments

What needs to be improved

  • Review unit came with a 240v charging plug so I had to use a travel adapter to charge it
  • It would be nicer if the brush went closer to the sides to clean closer to the wall
  • Manual plug-in for charging instead of charging from the mount

Final thoughts

Overall I think this vacuum is a great device, and will definitely see a lot of use around my house. Despite a few of the things I would like to see improved, none of them were a “deal-breaker” for me.

Price: $299
Where to buy: Amazon
Source: The sample of this product was provided by Roidmi.

Filed in categories: Reviews

Tagged: , ,

Roidmi F8 cordless vacuum review originally appeared on The Gadgeteer on May 5, 2019 at 9:30 am.

Note: If you are subscribed to this feed through FeedBurner, please switch to our native feed URL http://the-gadgeteer.com/feed/ in order to ensure continuous delivery.
Yolobox portable live stream studio review


REVIEW – As a videographer/photographer, I am always looking for ways to promote my business and for ways to offer more to my clients. The ability to live stream events like wedding ceremonies, business events, etc is one that I know many of my clients would find appealing because they have previously asked about it or mentioned it. For my needs, I have been looking for a small all-in-one device that would allow me to manage as many functions as I could including features like, encoding, recording, switching, and streaming. About a year ago, while web surfing, I stumbled across a product on IndieGoGo called Yolobox from a company called Yololiv. After much waiting, I finally got my hands on one to test and review. After all of my impatient anticipation, let’s get it going!!

What is it?

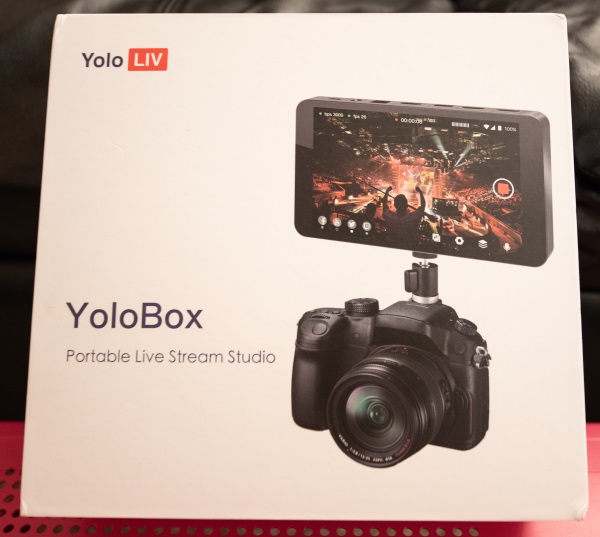
YoloBox is a hardware live stream solution that allows you to stream live video across Facebook, YouTube, Twitch and other platforms using many kinds of cameras, such as DSLR, professional cams, action cameras, and Drones.

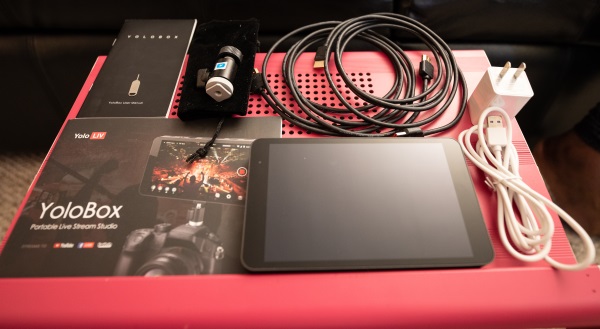
What’s in the box


1 x Yolobox
2 x HDMI Cable
1 x AC Adapter with USB-C Cable
1 x ¼-20” Tripod Mount
1 x Carrying Sleeve
1 x User Guide
1 x Holder with Sim Slot release tool

Design and features

Specifications

Encoded Format: Video Encoded Format:H.264
Audio Encoded Format:AAC (48k)
Video Recorded format:MP4
Audio Input Format:32kHz, 44.1kHz, 48kHz, 16-bit
Video Input Format:1080i/ 720p/ 1080p
Video Recorded Resolution:Up to 1080p:60fps
Live Broadcast Resolution:540P/720P/1080P
Video Storage: Storage Card Type:SD Card, Storage Card Capacity:Expanded to 128G
Network Connection: WiFi:2.4G/5G, Support 802.11a/b/g/n/ac, 4G Network:LTE-FDD B2/4/5/7/12/13/17/25/26,LTE-TDD B41
SIM Card Size:Standard SIM Card
Power Interface:Type C, Quick Charge 3.0
Battery Capacity:3.7V/5700mAh
Transmission Network Protocol:RTMP
Dimensions: 185mm(L) x 107mm(W) x 19.5mm(H)
Weight:480g

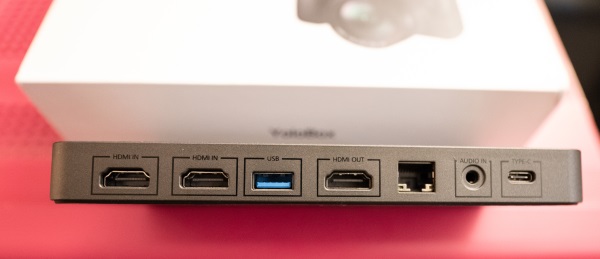
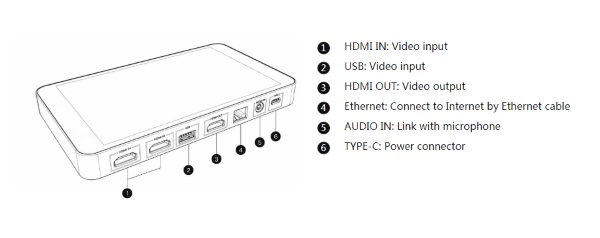
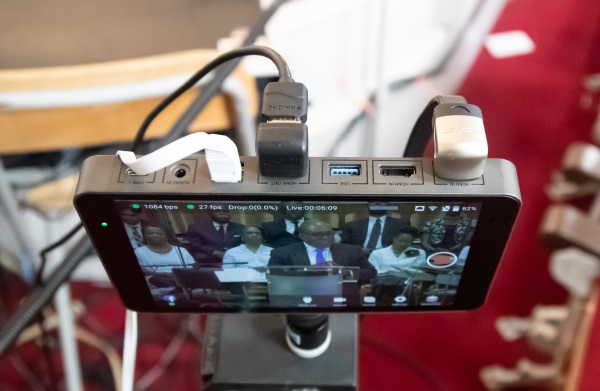
On the top edge of the Yolobox as shown in the photo below, from left to right there are 2 x HDMI input ports, 1 x USB input port, 1 x HDMI output port, 1 x Ethernet port, 1 x audio input port and 1 x  USB-C charging/powering port.

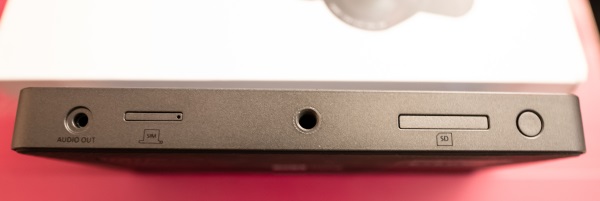
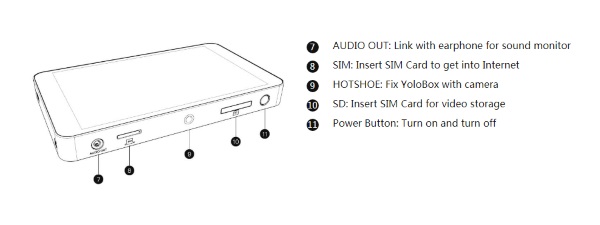
On the bottom of the Yolobox from left to right, as shown below, there is an audio out port, a Sim card slot, a 1/4-20″ mount, an SD card slot and the power button.

Performance

When I first took the Yolobox out of the box, I was very impressed by the build quality, the design and the sleek look. The front of the Yolobox is smooth with no protruding buttons.

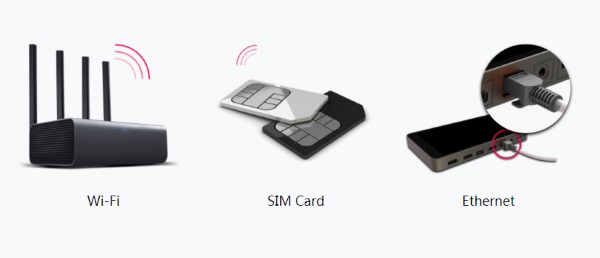
Once I charged it up and powered it on, I was greeted by a Yolobox splash screen and then it took me straight to the network screen that offered 3 choices for connectivity. The following are your choices:
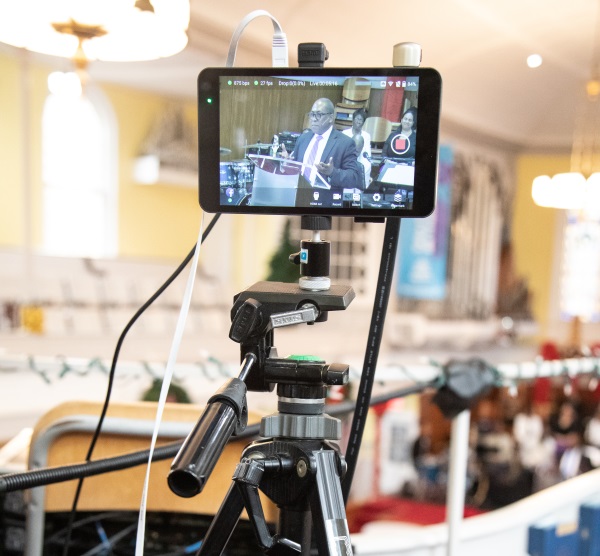
I have been using the hard wired ethernet cable choice since I have been live streaming the sermons from my church and I prefer not to risk any signal issues that may occur when using a wireless connection. As you can see in the picture below, I mounted the Yolobox with the 1/4-20″ head to a tripod so that I could operate it at eye-level. The touchscreen response is great, but the screen does attract fingerprints that are actually only visible once the device is powered off.

At the top of the device, as shown below, I have an HDMI cable plugged into the input. The other end of this cable is plugged into an 8-port Blackmagicdesign Switcher that has 6 cameras connected. So for this particular live stream, the camera switching is done on the BM Switcher. I also have an HDMI cable plugged into the HDMI output port. That cable goes to a large monitor approximately 10 feet away and is used by other members of the media team that keep an eye on everything. The white cable that you see is a flat Ethernet cable that is connected to one of the network switches for internet connectivity.


The picture below shows the Yolobox as it is actually live streaming a sermon. As you can see on the screen, the device provides the live streaming data including data rates, dropped packages metrics, the platform or platforms that you are streaming to (Note the Facebook Icon ion the bottom left corner. You can stream to multiple platforms simultaneously), as well as utilize the functional options on the toolbar across the bottom of the screen.

The features also include the ability to add custom graphics layers like a logo or watermark to your stream and you can also live switch between 5 video inputs((2 HDMI, 1 USB,1 SD card,1 from web source). You can stream video with picture-in-picture and audio from a separate external audio source if you choose to. Here is an illustration of the platforms that you can stream to:

There are a large number of settings that utilize the features and capabilities of the Yolobox, and too many to mention in this review. During the time that I have been testing this device, the Yolobox record feature was enabled so that you can record your stream onto an SD card and have it ready for other purposes. However, I have noticed an extreme audio/video sync problem with the recordings. The audio and video start off in sync, but over time, they become extremely out of sync and unusable without major editing. There is no sync problem with the live stream.

Another negative that I have been experiencing is that connectivity to Facebook has been a bit inconsistent. Out of every 4 attempts, there will be one occasion when it will not connect. I have identified this as an issue because I have a lower-end streaming box that connects every time. They are both on a 1GB/1GB FIOS connection, I did reach out to Yolobox support, and while they responded within a couple of days, they never offered any clear or practical solution.

You can click here to see one of the sermons that I live streamed to Facebook using the Yolobox.

What I like

  • Its size and sleek look
  • Build quality
  • Numerous included functions and features
  • The all-in-one concept/design
  • Battery life
  • Expansion capabilities

What can be improved

  • A redesign to include a user replaceable battery.
  • The ability to stream 4K
  • A storage capacity beyond 128GB
  • Fix the audio/video sync issue

Final thoughts

Yolobox is poised to make all of my live streaming needs and goals a reality. Right out of the box, its functions and features make it a winner in my book. It also seems that the architecture is already built-in to expand on its capabilities to make parts of it future-proof. Otherwise, the only test left is to see if it stands up to extensive use. This is where the weakness may exist partially because of the built-in battery that does not seem to offer a replacement option. In addition, I do think that a software fix is needed to ensure that the connectivity to all of the compatible platforms always works. Regardless, I am giving the Yolobox a well done!! And, two thumbs up!!

Price: $999
Where to buy: Amazon
Source: The sample for this review was provided by Yololiv.

Filed in categories: Reviews

Tagged: ,

Yolobox portable live stream studio review originally appeared on The Gadgeteer on May 5, 2019 at 8:23 am.

Note: If you are subscribed to this feed through FeedBurner, please switch to our native feed URL http://the-gadgeteer.com/feed/ in order to ensure continuous delivery.
Solo New York Lead Slim Brief review

REVIEW – Screens being what they are these days (thin slabs of glass of varying sizes), how we carry them around is changing. I’ve moved from a huge backpack to a smaller one, and then to a sling, and I’m still trying to find the sweet spot. Solo offered the team their new Lead Slim Brief bag, and I’ve been using it for a few weeks now, so I’m ready to report.

What is it?

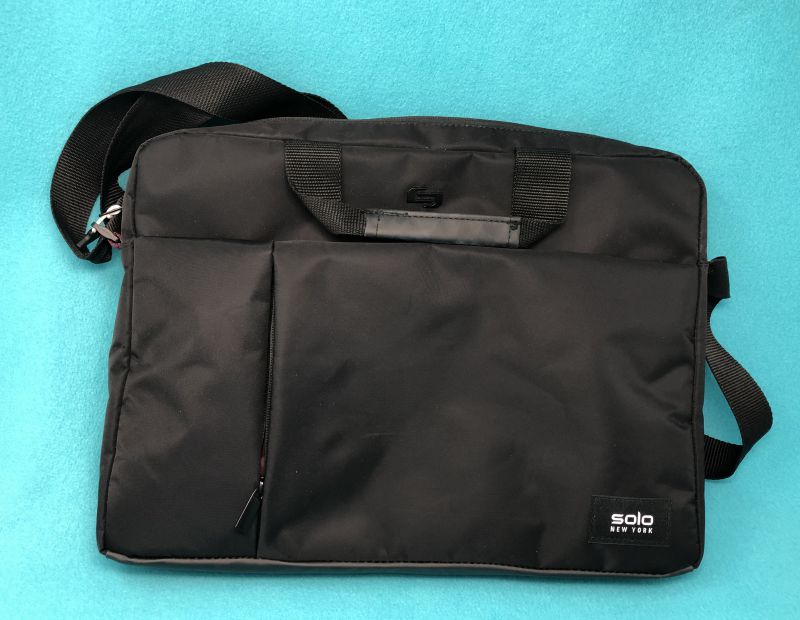
A standard sized briefcase with a permanently attached strap doesn’t sound that unique. Even with Solo’s signature t-bar zipper pulls, it’s still understated. But there are a few surprises inside.

Design and features

While the basics of a briefcase haven’t changed much in the past dozen decades, the materials and interior layouts have gotten smarter.

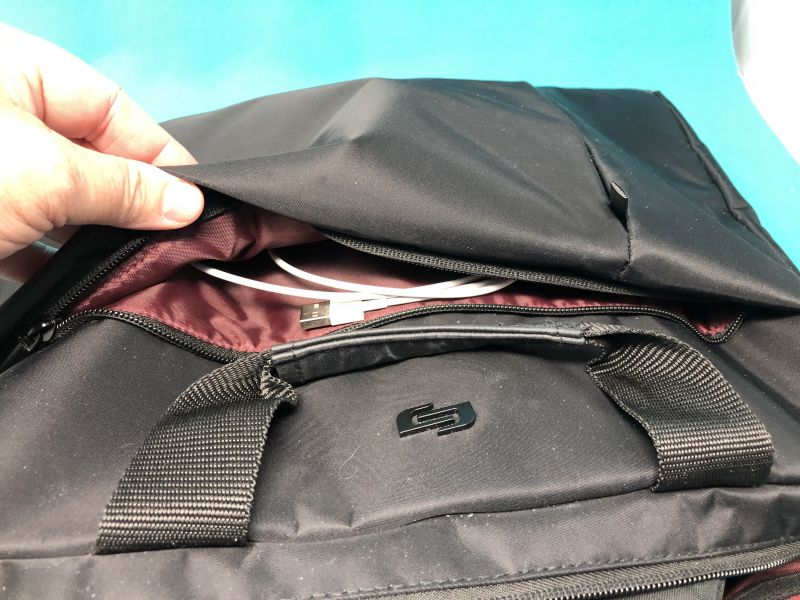
On the front, Solo added a full-length pocket tucked into a pleat of material that also includes another overlapping pocket. This outer area is secured with a vertical zipper. Inside the full-length compartment, there are a few tight pen loops and card slots. You’re not going to be able to store thick materials in here, but travel documents and pens for filling out the customs declaration will fit with ease. The rest of the pocket has enough space for chargers and cables.


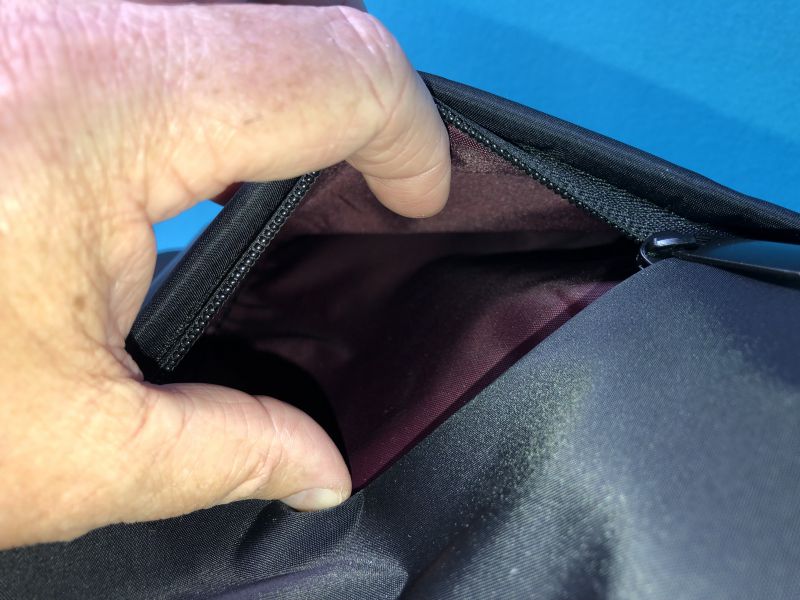
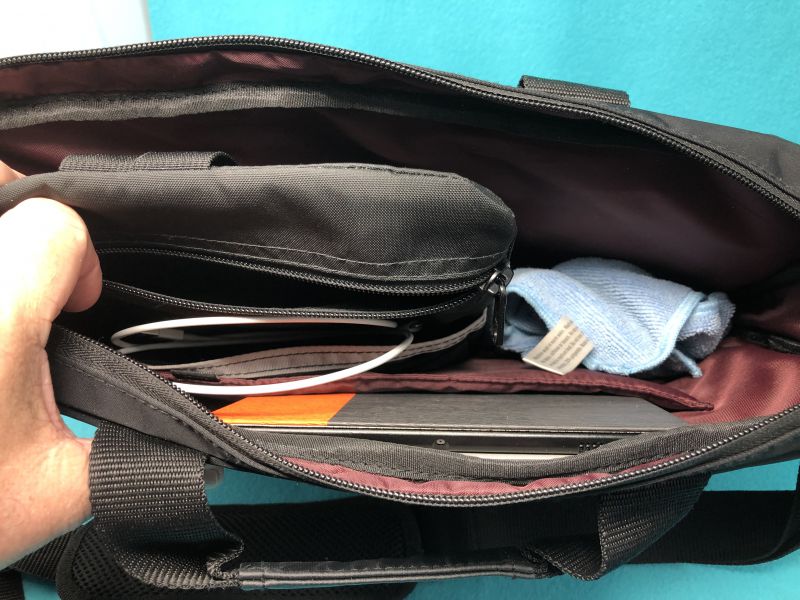
The main interior is one large compartment, with an 8” x 10” patch of padded material sewn onto the back wall, suspended just a little from the bottom of the case. At 16” x 13” x 2” outer dimensions, you’re easily able to fit all but the most daunting gamer laptop into the main pocket. Depending on what else you need to carry, this may be enough. The tablet pocket is not large enough for me to fit my iPad Pro 10.5” device laterally. It’ll just fit vertically, and still not block the zipper, but it’s close. Naked, the device fits with room to spare, but not enough for a two-sided folio case.


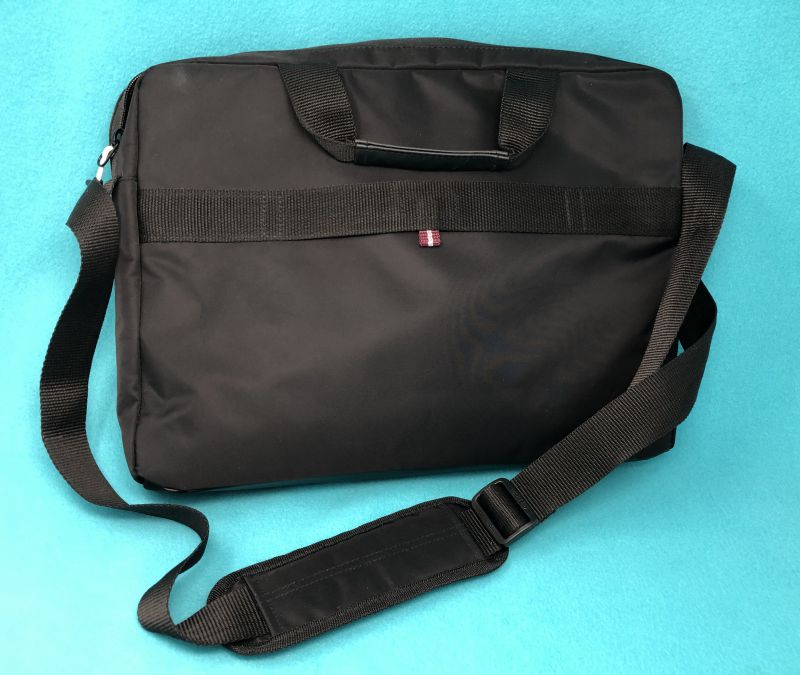
Across the back is a 1.75” strap of nylon webbing, sewn in to allow your roll-aboard’s handle to fit through. There’s a patch of Velcro to hold it down as well.


The outer materials of this brief are a black slick, tight nylon fabric. It is abrasion resistant, and probably somewhat water resistant. The very bottom piece is a rubberized fabric. Seams are all hidden, but there are a few hits of color to hint at the interior.


Inside, the seams are all covered and double-stitched. The lining material is a similar feel, but lighter weight of the outer material, but in a deep maroon, rather than basic black.
While the zippers are all covered, the material doesn’t feel water-resistant. I’m sure a sprinkle won’t soak you, but I’d avoid heavy downpours.

What I like

  • Professional look and feel in all materials and design
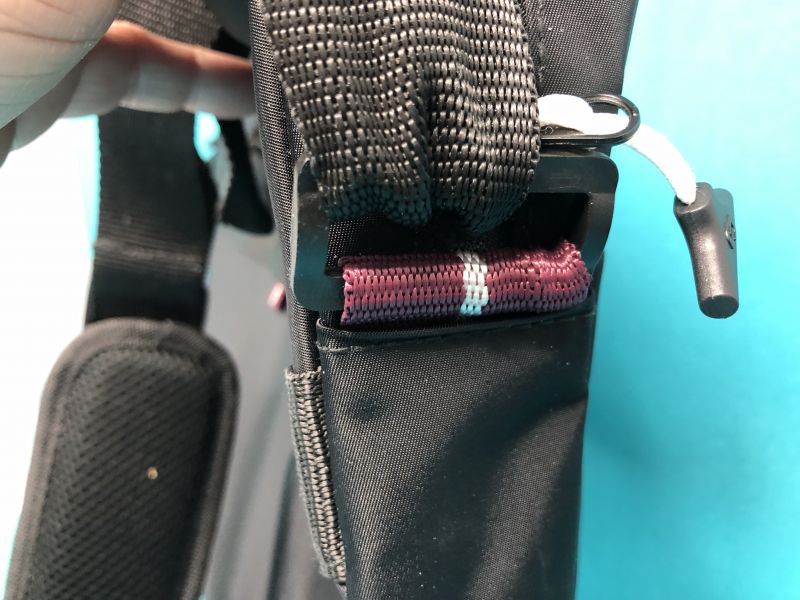
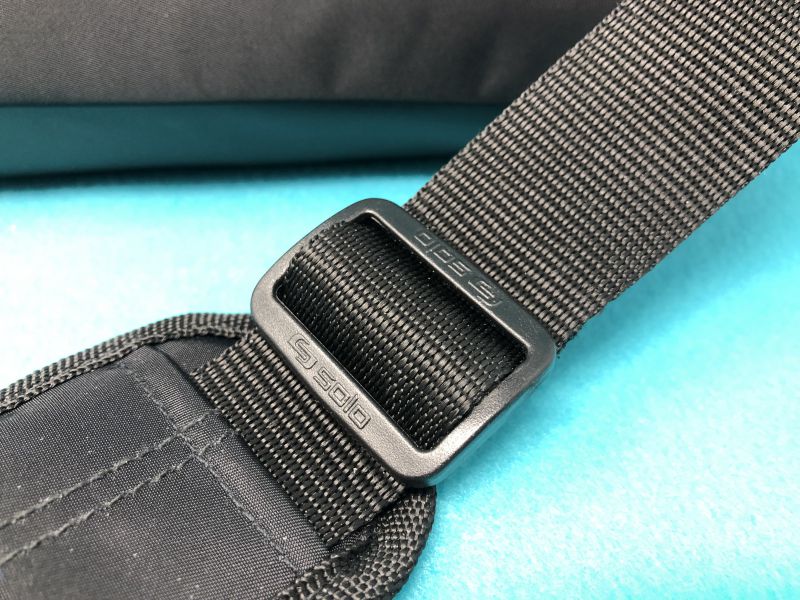
  • Long adjustable strap with sliding shoulder pad
  • Material is easy to keep clean
  • 5 year limited warranty

What needs to be improved

  • If you’re going to put in pen slots and card slots, put in enough fabric to actually get something into them.
  • Tablet pocket is also a bit skimpy. No one carries a bare tablet around.

Final thoughts

When I first saw the inside of this bag, I was a bit skeptical. But after using it, I’ve grown to like the sleek minimalism of having just this bit of kit. I can carry my meds, iPad, keyboard, and a few bulkier items with ease, and this bag makes me look like an expert.

Price: $49.99
Where to buy: Solo New York webstore
Source: The sample of this product was provided by Solo New York.

Filed in categories: Reviews

Tagged:

Solo New York Lead Slim Brief review originally appeared on The Gadgeteer on May 4, 2019 at 10:00 am.

Note: If you are subscribed to this feed through FeedBurner, please switch to our native feed URL http://the-gadgeteer.com/feed/ in order to ensure continuous delivery.