IFrogz Sound Hub Tone Wireless Earbuds

REVIEW – All I want is a great pair of earbuds for the gym. You’d think that would be easy… but there are a lot of little things in earbud design that make a difference. Today I’m reviewing the iFrogz Sound Hub Tone Wireless Earbuds. How did they do? To the review!

What is it?

It’s a set of clip-on, sweat-resistant, workout-friendly wireless earbuds.

What’s in the box?

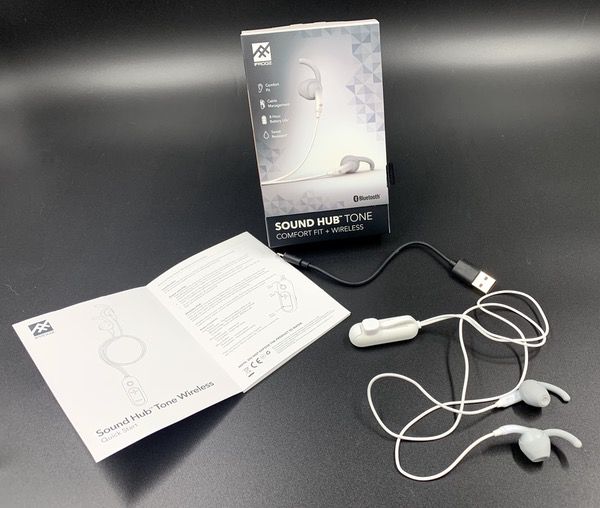
Your package comes with the headphones, a USB charging cable, and a user manual.
Hardware specs

  • IPX-2 water resistance
  • Bluetooth range of 30 feet
  • 8 hour battery life
  • 12mm audio drivers

Design and features

There’s a lot of nice detail in the iFrogz Sound Hub Tone Wireless Earbuds that demonstrates the focus of the design team. It’s all about great usability when you’re hitting the gym.

The earbuds are a one-piece unit, with a control pod that clips to your shirt. They are IPX-2 sweat resistant, so I wouldn’t take them on runs in a downpour… but the build feel solid and substantial for such tiny little things. The front clip design also means that they stay put if you’re doing more dynamic body movements. 18″ chords allow some flexibility for positioning the clip relative to the earbuds.

The control pod features only three buttons on the face: a multifunction/power button and your mandatory volume up/down toggles. You’ll activate all the functions through some combination of these buttons, which we’ll talk about shortly.

The clip on the back of the pod is made of flexible rubber with a magnetic weight on the end. This makes it easy to attach to whatever workout gear you may be wearing. No fumbling with snaps or slide-on clips!

The earbuds come with a silicone sleeve that includes a “wing” that secures in the whorl of your ear. Here’s a picture of the bud, followed by how it sets when in place. I found that this setup is extremely comfortable, and has yet to pop out during a workout.

If you don’t like that style of fit, then you can remove the wing. It has no impact on sound quality. Here’s how it looks and sets without the wing cover.

To be honest, I did find that the bud felt a little chunky in my tiny ears when I first used it with the wing cover in place. But I got used to that after a few days.

Here’s another neat little design trick: the earbuds are also magnetic and loosely connect with each other when not in use. Couple that with the flexible magnetic clip, and the whole unit wraps up nicely for storage.

Performance

There’s a lot that iFrogz gets right about the design of the Sound Hub Tone Wireless Earbuds. If you go to the gym on a regular basis like I do, I think you’ll be a fan.

I have some nice yoke-style earbuds that are great for running or the treadmill, but they flop all over the place if I am hitting the weights or doing exercises that involve different horizontal/vertical movements (like Yoga). The front-clip style design solves that problem right away. Clip the control pod anywhere on your shirt, and it stays put no matter what activity you’re into.

The buttons on the pod raised and nicely spaced, which means easy control management if you’re not looking at them. Everything is *just* big enough to manage without the pod being so big and clunky that it feels like it is dragging you down.

You’ve got your usual array of functions (play, pause, next track, previous track), but there are some bonus features here. These earbuds are voice-compatible with Siri and Android for voice commands. All of this is activated by some combination of buttons and/or short, medium, and long holds. It’s pretty straightforward stuff.

Sound quality is also excellent. I tested making and receiving calls, and got reports of clear sound on both ends. There is also an equalizer feature that enables a podcast and movie mode. I did notice a difference in the bass, treble, and overall tone in each setting. For relatively inexpensive ear buds, the audio drivers are really good.

My quibbles with the iFrogz Sound Hub Tone Wireless Earbuds are very minor. A heavier water resistance rating would be nice for outdoor activities. And while I really like the magnetic clip, just a wee bit more length and a heavier magnet would be nice to adapt to thicker clothes. But these are minor items in my opinion that don’t take away from an overall well-executed design.

What I like

  • Water- and sweat- resistant
  • Super lightweight and comfortable
  • Simple touch-friendly button design
  • Excellent sound quality
  • Rolls up and packs away nicely

What needs to be improved

  • Magnetic clip could be stronger
  • Higher water resistance would be desirable for outdoor activities

Final thoughts

I have been on a continual quest for the perfect headphones for the gym, and the iFrogz Sound Hub Tone Wireless Earbuds tick all my boxes. Simple usability, excellent sound quality, and some extra features that add flexibility. It’s a dialed in design that doesn’t get in the way when you’re working out. I think I’ll be using these for quite a while.

Price: $34.99
Where to buy: Zagg.com.
Source: The sample of this product was provided by iFrogz.

Filed in categories: Reviews

Tagged:

IFrogz Sound Hub Tone Wireless Earbuds originally appeared on The Gadgeteer on May 20, 2019 at 9:00 am.

Note: If you are subscribed to this feed through FeedBurner, please switch to our native feed URL http://the-gadgeteer.com/feed/ in order to ensure continuous delivery.

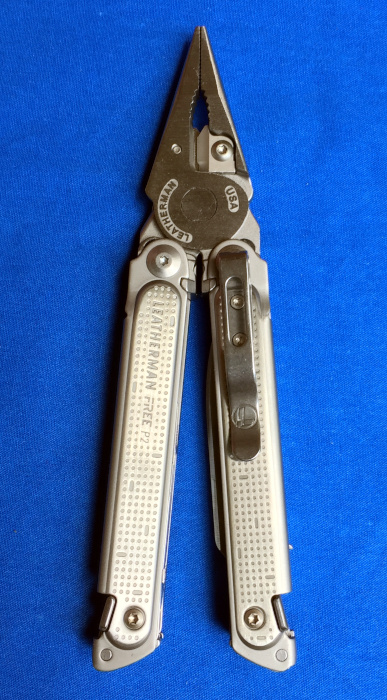
Leatherman Free P2 multi-tool review

REVIEW – The Leatherman Free P2 is the smaller of the two initial multi-tools in Leatherman’s new “Free” series of tools an knives. It is designed for simplified tool and pliers access. The P2 and it’s larger sibling the P4 are aimed at the same market as their cousin, the long heralded Wave series of multi-tools. Let’s see if the Free P2 can convince me to replace my EDC tools: Leatherman’s Skeletool, Wave, and Micra.

What is it?

The Leatherman Free P2 is a large multi-tool that is slightly smaller as the original Leatherman Wave multitool. Physically in my hands, I would consider the P2 a medium sized multi-tool, but then not everyone has L/XL hands.  It differs from previous generations of Leatherman multi-tools in the way the tool is kept closed, how the tools are deployed, and how the blade and tools are locked in place.

What’s in the box?

The Free P2 arrived in a striking black and white themed sleeved tray. There is a single seal holding the tray in the box which must be cut and the tray may then be slid out.

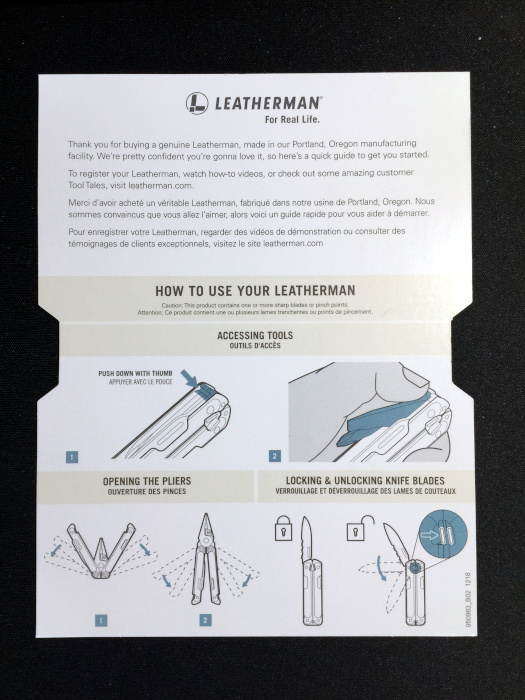
The tray is covered by a black cover card, that when turned over, highlights the new features of the Free line. These are the only instructions that came with my P2. Considering the straight-forward nature of the tool, this is much better than the tightly folded thin-papered instructions that have come with most of the previous generations of Leather multi-tools.

Inside the box are only two items

  • Leatherman Free P2 multi-tool (made in the USA)
  • Gray nylon sheath with Leatherman branding (made in China)

Hardware specs

The Free P2 weighs 220 grams out of the sheath. It is 107.41 mm long, by 34 mm wide, by 23.15 mm thick (measured at the highest point on the clip) Without the clip, it is 19.8 mm thick.

The Free P2 has the following tools

  • Pocket clip (potentially removable)
  • Pliers with needle nose and regular grip, replaceable wire cutters, hard wire cutters, and on the opposite side of the pivot terminal crimps
  • Large combination straight / serrated blade
  • Large scissors
  • Large philips screwdriver with bottle openner
  • Large straight blade screwdriver
  • Small straight screwdriver / awl
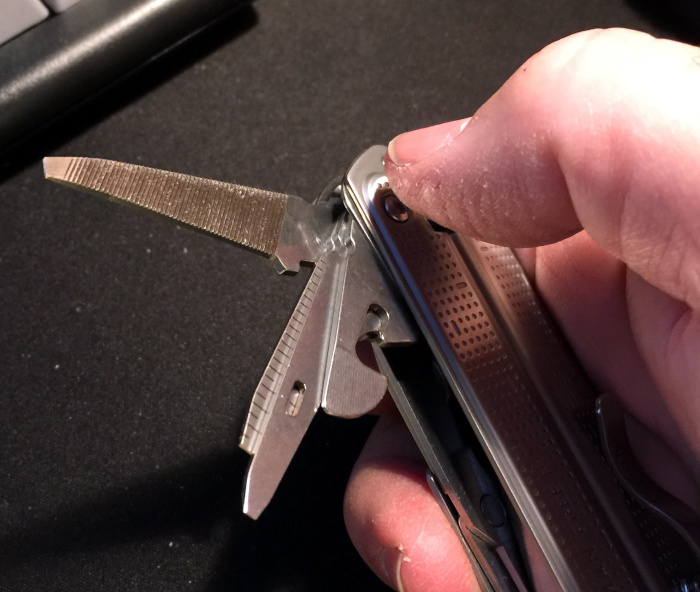
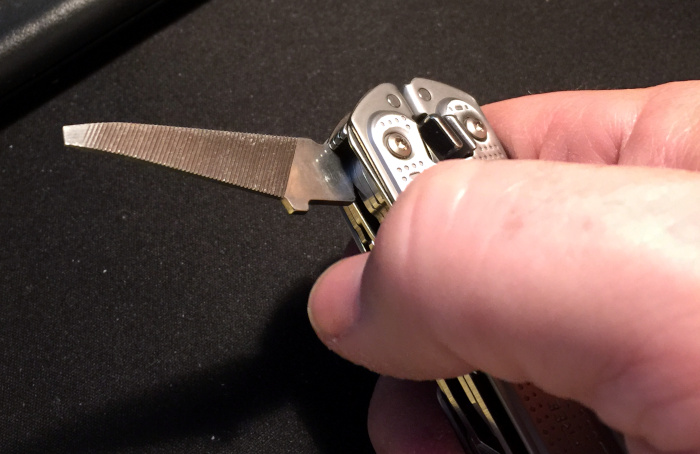
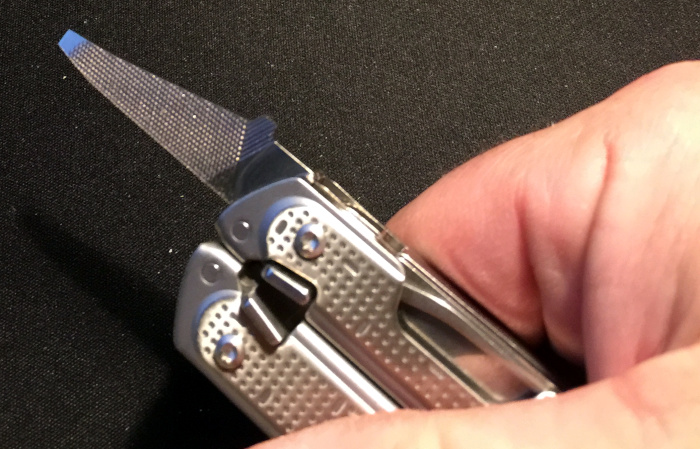
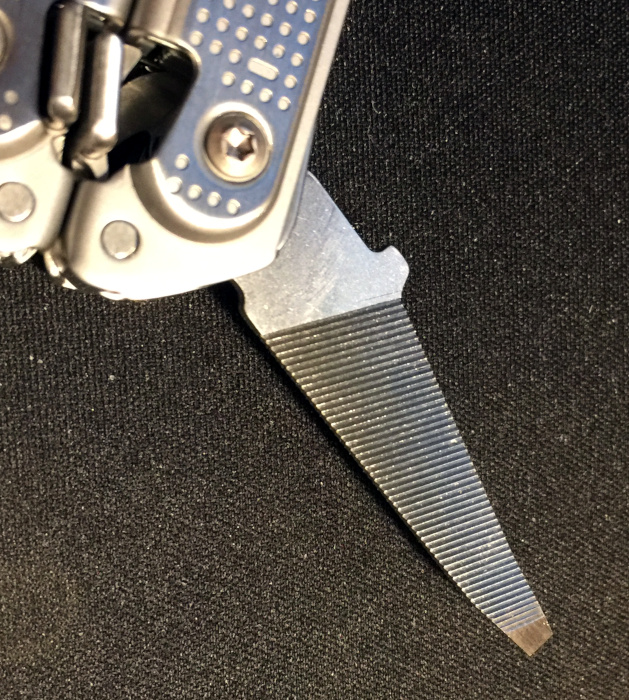
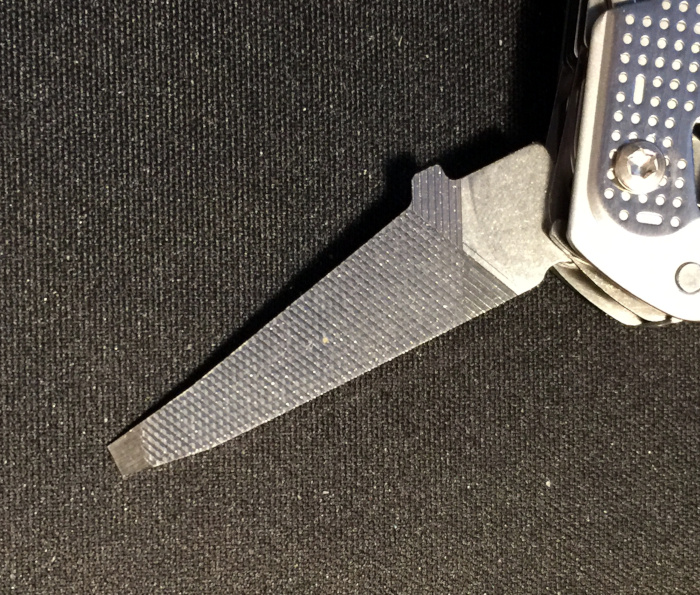
  • Slightly less small straight screwdriver / two sided file
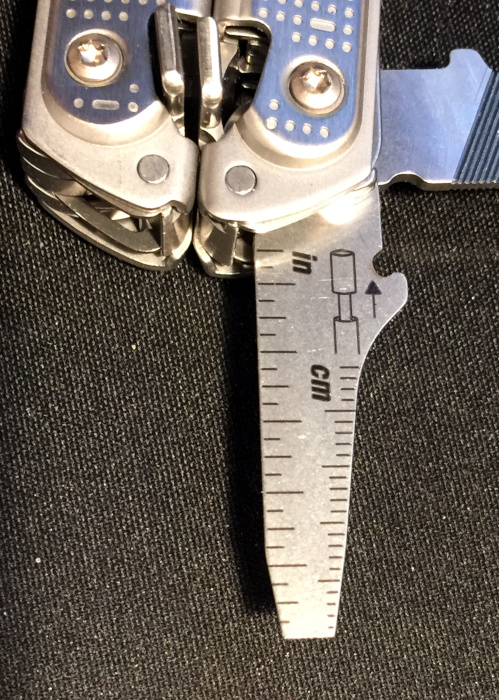
  • Medium sized straight screwdriver with integrated wire stripper and a 25 mm / 1 inch rule
  • Can opener / box cutter

The P2 is assembled with T8 Torx / lobe headed screws / caps and the clip is held on with T6 sized screws.

Design and features

The principal novel feature of the Free P2 / P4 is the mechanism by which the tool is held closed. This is a pair of magnets, one in each handle that meet when the tool is closed. These magnets are located just inboard of the locking mechanism for the tools (described below).

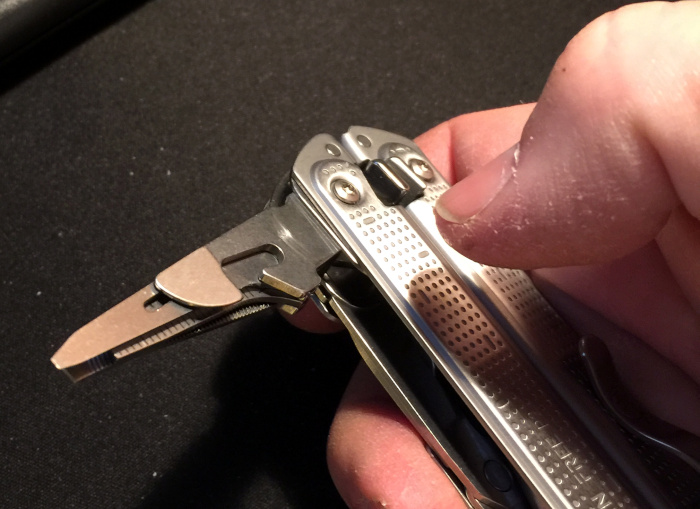
The pliers are deployed by separating the latch end of the tools with moderate pressure from a finger and then flipping the tool like a butterfly knife. For those readers coming of age in the 1980s and who have attempted to use butterfly knives you know that this takes some skill. A skill that I didn’t master then and still haven’t mastered. I can get the magnetic latch to release, but I can’t reliably get both handles to lock into place on the pliers head without smashing my fingertips. Still, I have lost any digits, so we’ll call it a win. I usually resort to simply unlatching the handles and getting them around and then locking them into place by pressing the free handle against my hip/thigh.

Closing the multitool is simply a matter of pulling to release the handles from the detents in pliers head and closing as you would any other similar Leatherman multi-tool. Just be careful as there is very little resistance to movement when the handles are free.

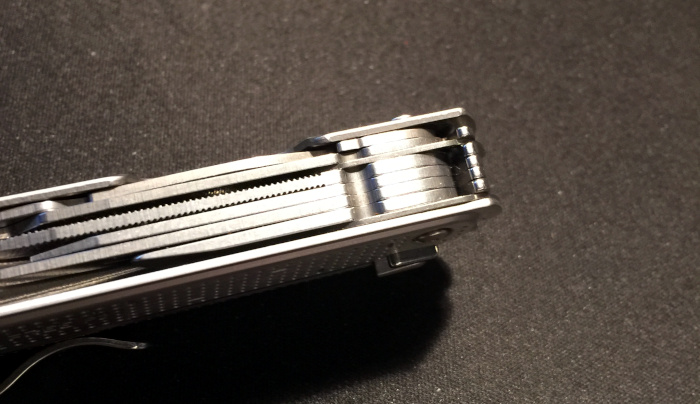
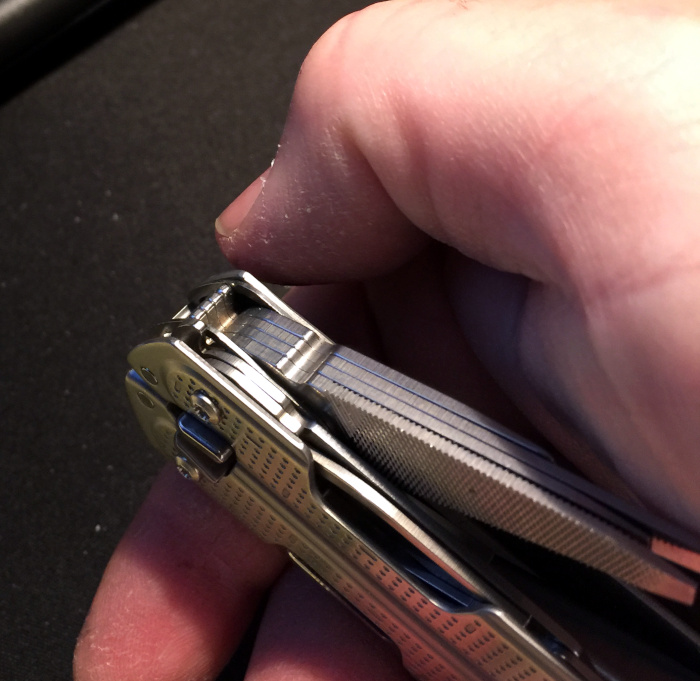
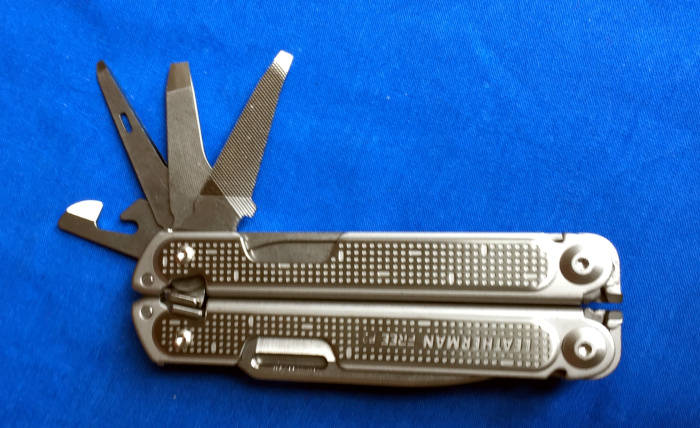
The individual tools (which are all on the outside) are accessed by pressing on the raised lip on the end of the tools and rotating all of the tools on the same pivot part way up at once fully opening the desired tool, and then closing the remaining tools which activates the spring lock holding the tool open (see below). This is similar, but different from, the tool locking mechanism on the Wave 2.0 / Wave + tools. Relocating all of the tools to the outside makes the handles much more comfortable when using the pliers. I hadn’t realized how uncomfortable my Skeletool was to use until I started using the P2.

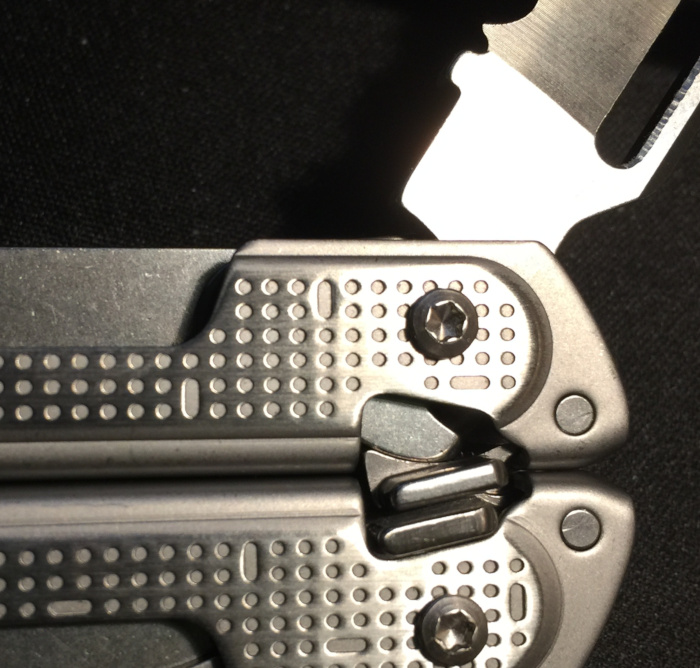
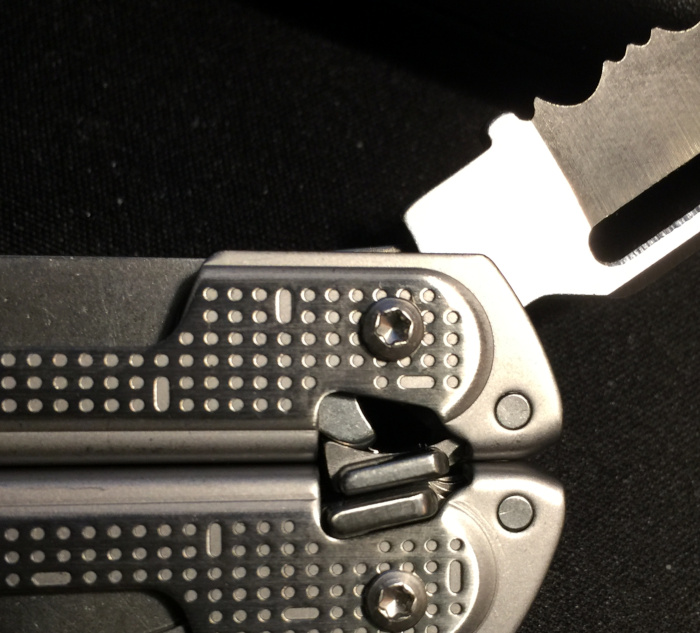
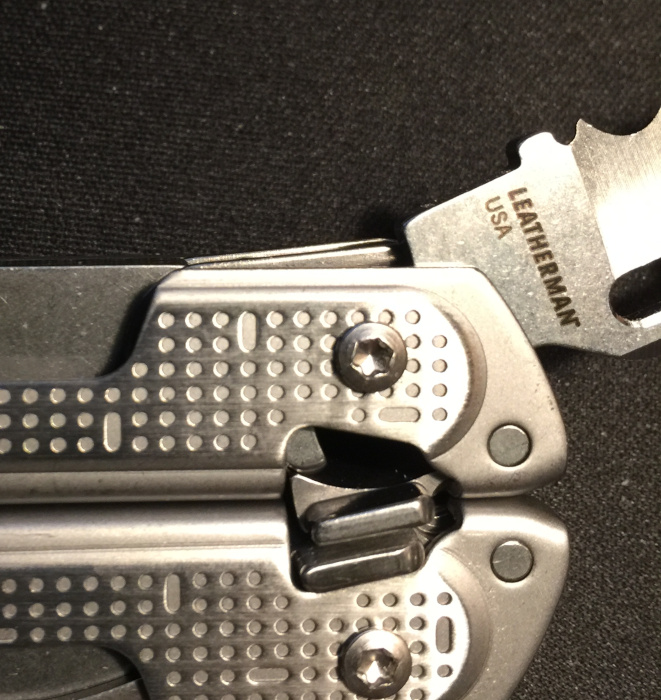
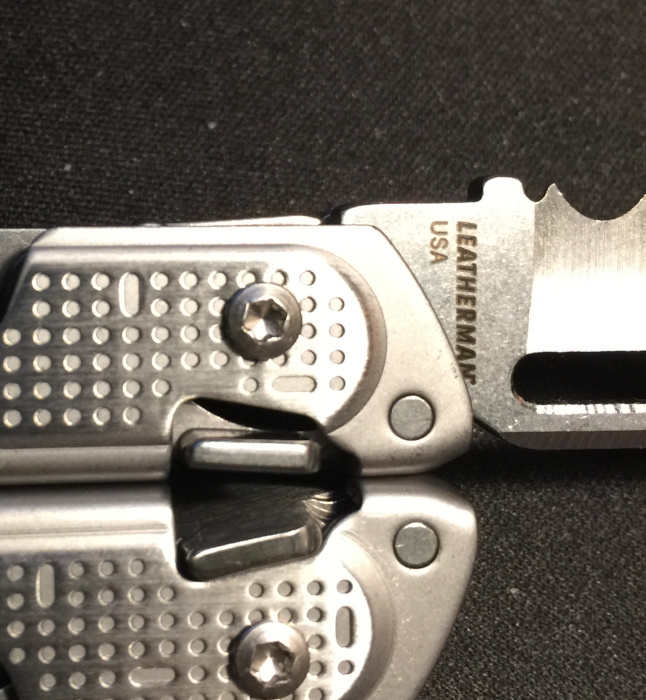
A big change, and one to which I am still adapting is the location of the main blade / large tool pivot. Unlike in previous generations, the knife blade does not share a pivot with the pliers head, but instead is on the far end sharing a pivot (separated by a gate / spring) with the other tools. This allows the knife to be secured by the same improved locking mechanism as the other tools rather than relying on a simple, but failure-prone liner-lock mechanism. This is something that I have been complaining about since I learned (the hard way) about the inherent design / performance trade offs between liner lock knives and more robust blade locking mechanisms.

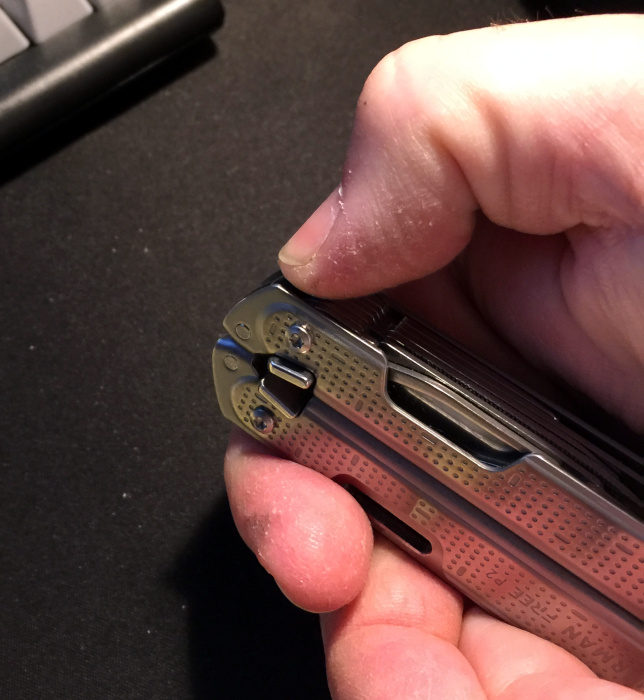
I am happy to see the more robust mechanism which utilizes a small notch in the back of the blade “tangette” which is locked by a spring-loaded lever. This mechanism appears to be strong and reliable. However, I’m still training myself to rotate the tool to open the blade. This is an operator training issue that I am happy to deal with to get a better locking mechanism.

The blade / tools are released by pressing the lever toward the opposite lever which releases the lever from the notch.

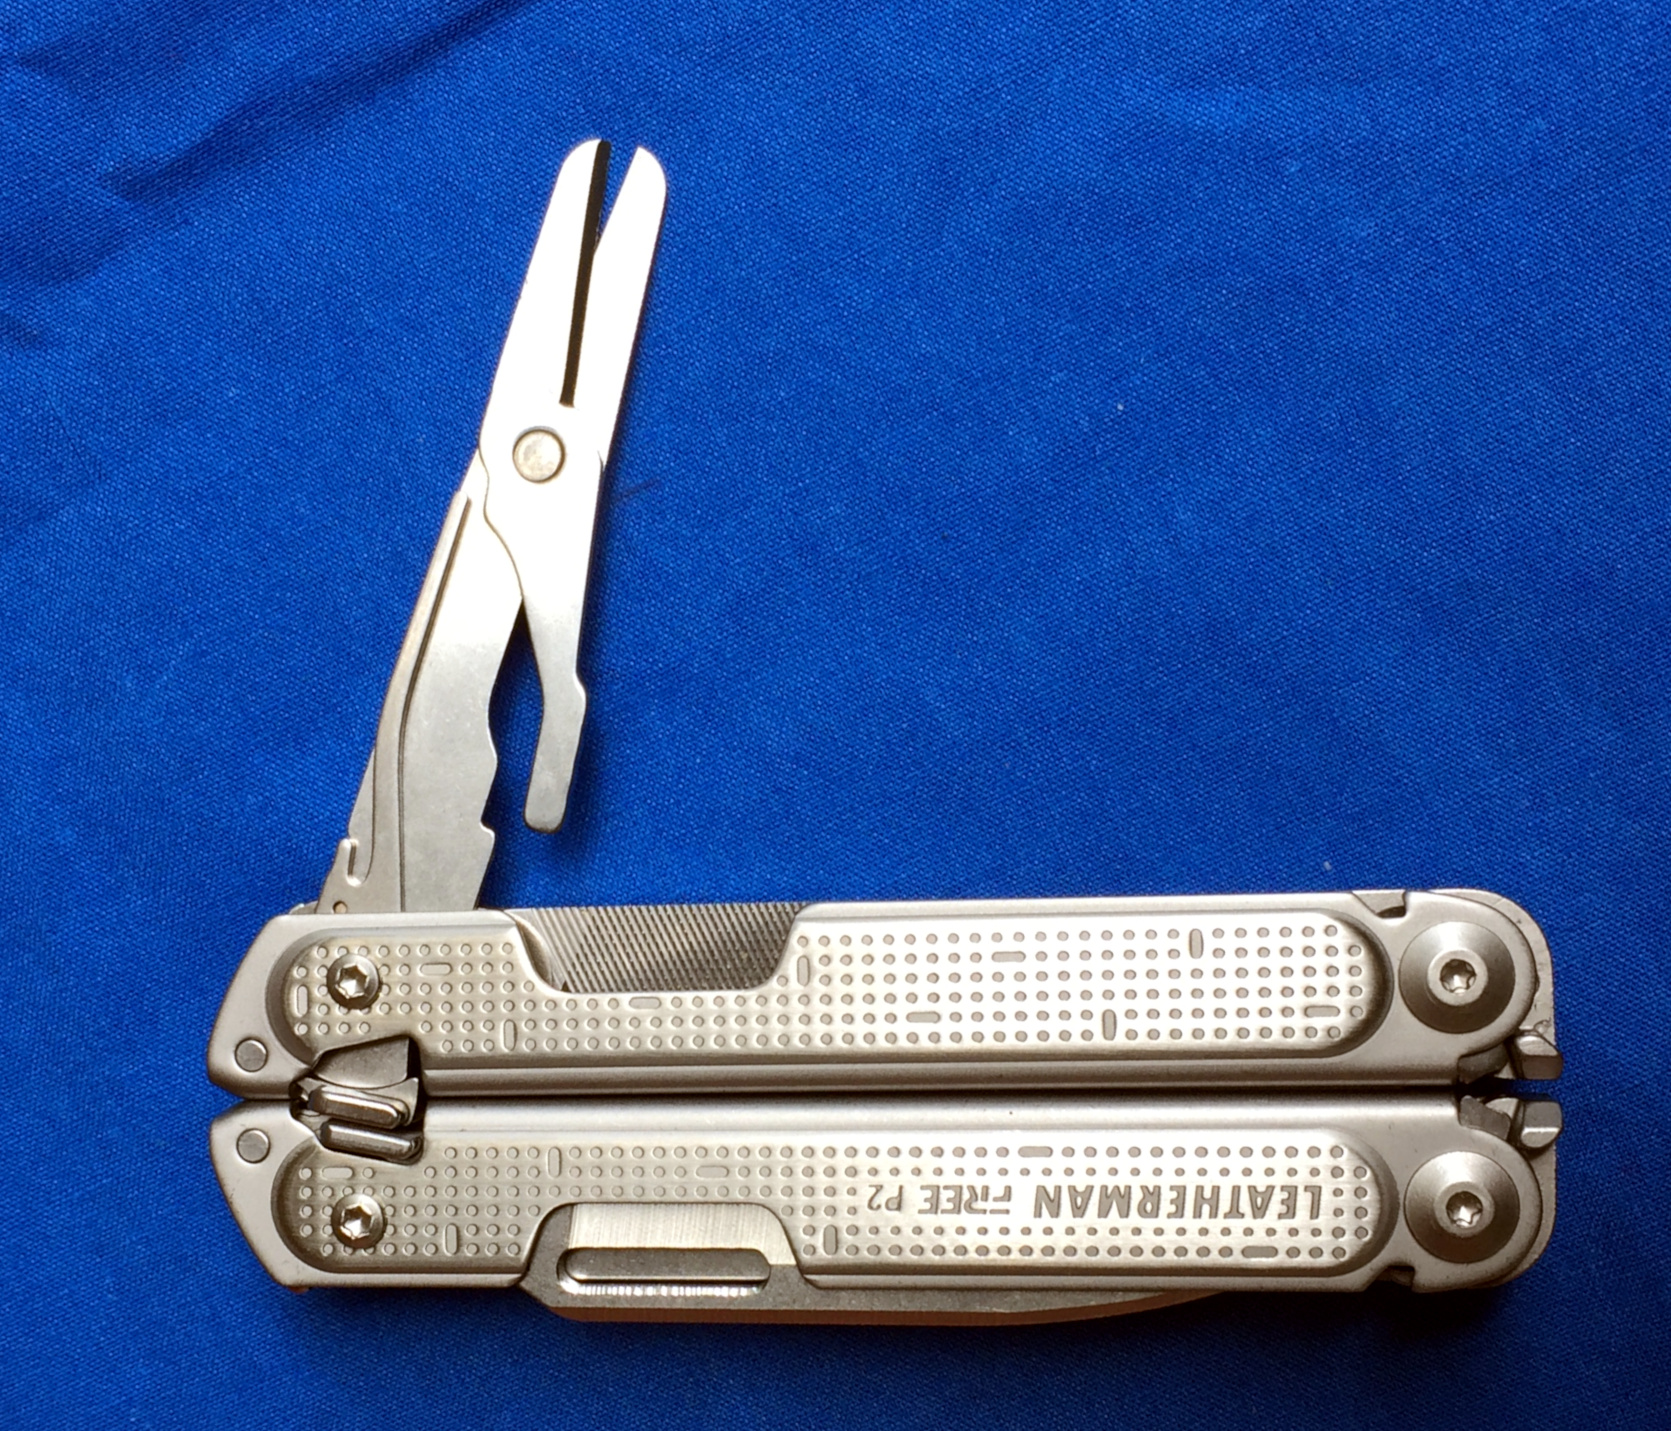
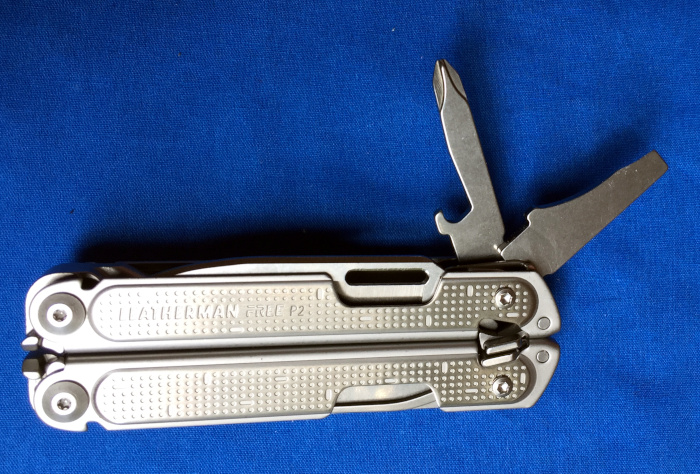
The scissors deploy from the opposite handle from the knife blade. The Philips and large straight screwdriver share a handle with the knife and the rest of the tools are on the opposite handle. The pocket clip is on the far side of the same handle as the knife blade.

Comparison to other Leatherman Multi-tools

Since the Free P2 is aimed at the Wave and similar sized tool market, let’s compare the weight of the Free P2 to other Leatherman products. Most of the tools to which the P2 is being compared have more individual tools / features, with the exception of the Skeletool which only has a blade, pliers, and a bit holder and bit carrier. Included in the table is the larger and specialized OHT (One-Handed Tool) which is designed for tactical / military use and is one of Leatherman’s other rapid / easy deployment models.

  • Skeletool             142.5  grams
  • Free P2                22o     grams
  • Wave                    225     grams
  • Wave 2.0             241.5  grams
  • Wave +                242.5  grams
  • Wave + w/ clip  246.5  grams
  • OHT                     268     grams

From the list above, it is easy to see that the P2 falls closer to the weight of the Wave family than to the Skeletool which reinforces my initial impressions.

Performance

I have been using the P2 for the past week as my EDC knife / pocket multi-tool. I have used it for everything from opening bottles to pruning vines to restoring antique lamps. I have several observations about the reliability of the P2 and its suitability as an EDC tool carried using the clip. I have not, to date, carried it using the sheath.

  • The pliers are more versatile, but larger than those on my Skeletool. This has resulting in having to go find smaller pliers on a couple of occasions.
  • The wire cutters (both soft and hard wire) are excellent at their jobs. They also make short work of greenbriar vines.
  • The scissor are a good size for multiple tasks from trimming finger nails to actually cutting paper. I have had an intermittent problem with the spring for the scissors not popping up into position which requires manual realignment. This seems to be related to the use of the spring as the finger catch for deploying the scissors.
  • I haven’t gotten used to the combination blade. I prefer straight knife blades, but this is a personal preference and not a knock on the P2.
  • The presence of individual screwdrivers rather than having a bit holder is both a blessing and a curse. I don’t have to worry about losing a bit, but I am limited to what tools I can carry.
  • With the free opening handles, the pliers should really be spring-loaded to make the tool more useful for one-handed use.
  • The pocket clip is well designed and keeps the P3 in the pocket securely, but easily accessible.
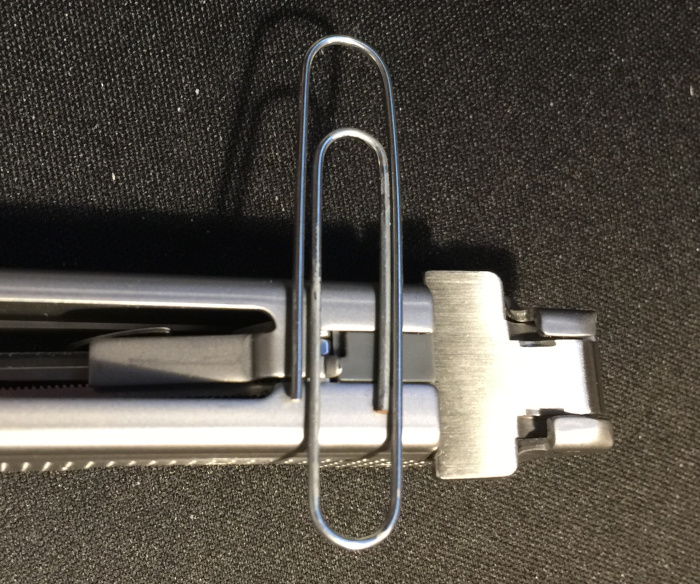
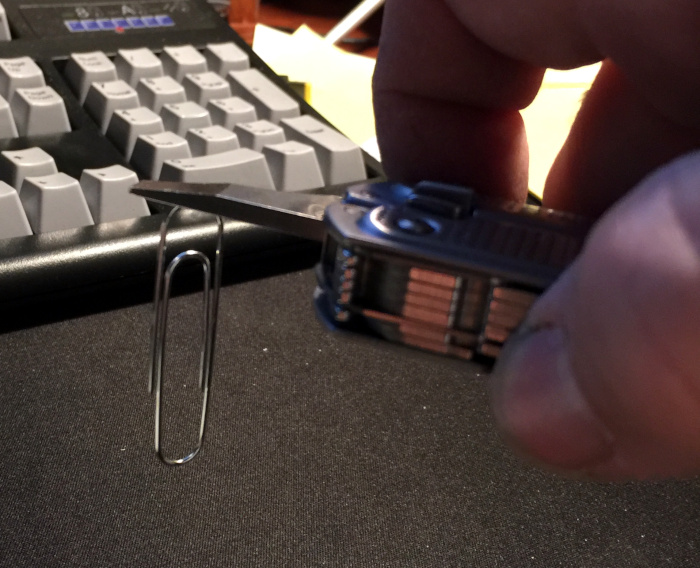
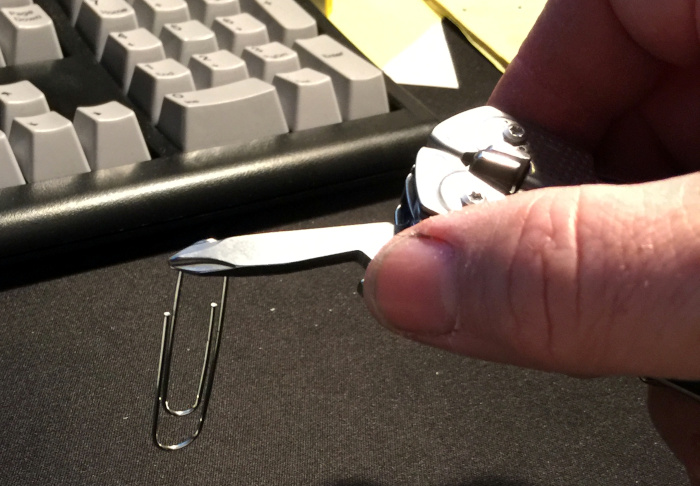
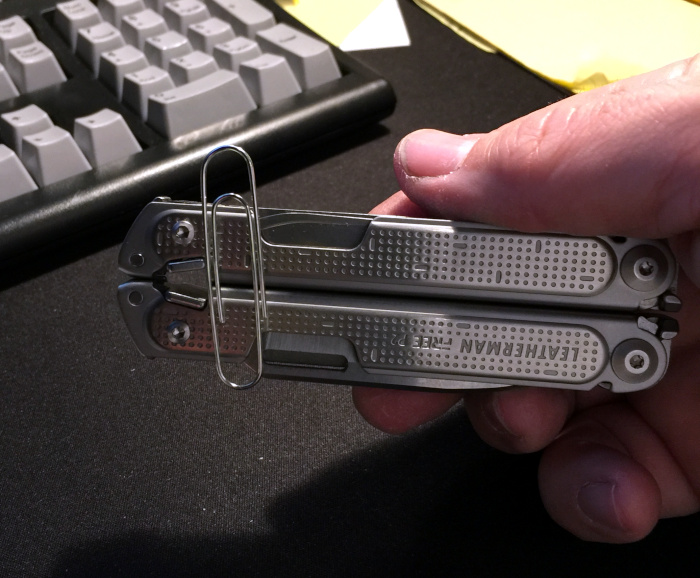
  • The tools are slightly magnetic when deployed and small magnetic field also surround the P2 when closed. The field is strong enough to pick up 0.75 gram paperclips.

What I like

  • BLADE AND TOOL LOCKING MECHANISM
  • Selection of tools
  • Replaceable wire cutters
  • Much more comfortable handle when using the pliers
  • All of the tools (except the pliers) are accessible from the outside

What needs to be improved

  • Adding a spring to the pliers to assist with opening them
  • Improve the positioning of the spring on the scissors
  • Make a straight blade an option on the P2

Final thoughts

After just a week, the Leatherman Free P2 multi-tool has made such an impression that the P2 will replace my trusty Skeletool for EDC in my pocket. I am very pleased with the improved locking mechanism for the blade and this just may be the tipping point for me.

I have decided that the P2 is not a replacement for the Wave 2.0 that I keep in my day bag, but I hope to compare the P2’s big brother (the P4) to my Wave before I head out to summer camp with my scouts. For bag carry, I think the extra tools on the Wave outweighs the 25 grams of extra carry weight.

In closing, the Free range of multi-tools with their new locking mechanism are a big hit with me and greatly improve the safety of the main blades on these multi-tools.

Price: $ 119.95
Where to buy: Leatherman Tool Group, Inc., Amazon, and many others.
Source: The sample of this product was provided by Leatherman Tool Group, Inc.

Filed in categories: Reviews

Tagged: ,

Leatherman Free P2 multi-tool review originally appeared on The Gadgeteer on May 19, 2019 at 9:30 am.

Note: If you are subscribed to this feed through FeedBurner, please switch to our native feed URL http://the-gadgeteer.com/feed/ in order to ensure continuous delivery.

OBDLink MX+ review

REVIEW – You know how a dealer will tell you what needs to be fixed on your car, and you find yourself scratching your head wondering if any or all of it was really necessary? This little gizmo claims to be able to help you know what’s wrong with your car before you get to the dealer or shop. Sounds like a good thing right? I agree and had the chance to test one out.

What is it?

The MX+ is a bluetooth adapter for the OBD port on your car that in combination with your phone and a free app creates a  powerful diagnostic tool and real-time performance monitor.

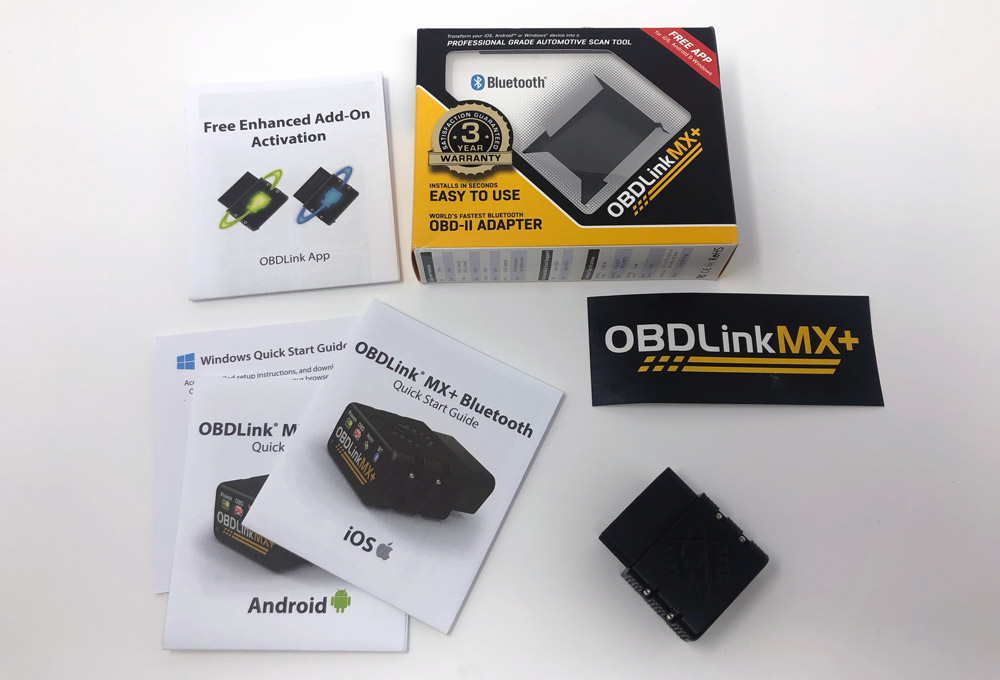
What’s in the box?

  • OBDLink MX+ adapter
  • Quick start guide
  • Item

Hardware specs

Bluetooth: Secure 128-bit data encryption, Class 2 BT v3.0 transmission (262′ max range)
Dimensions/Weight: 50 x 45 x 23mm / 85g
Supports: All OBDII protocols, Single wire CAN (GMLAN), Ford medium speed CAN (MS-CAN)
Power: 8-18v DC, 62mA operating current, 2mA battery saver mode
Thresholds: -4º to 131ºF operating temperature, 10-85% humidity (non-condensing)
Max Parameter ID: ~100 PIDs/sec for PC and Android
Certifications: International: Rohs, REACH | N. America: FCC Part 15B, IC ICES-003, ETSI EN 301 489-1 V1.9.2 & -3 V1.6.1

Design and features

The OBD port is usually found below the steering wheel in an accessible location, either immediately accessible or behind an easy to open panel. It’s been included on all US cars since 1996 and is primarily used for diagnostics by dealers and repair shops.

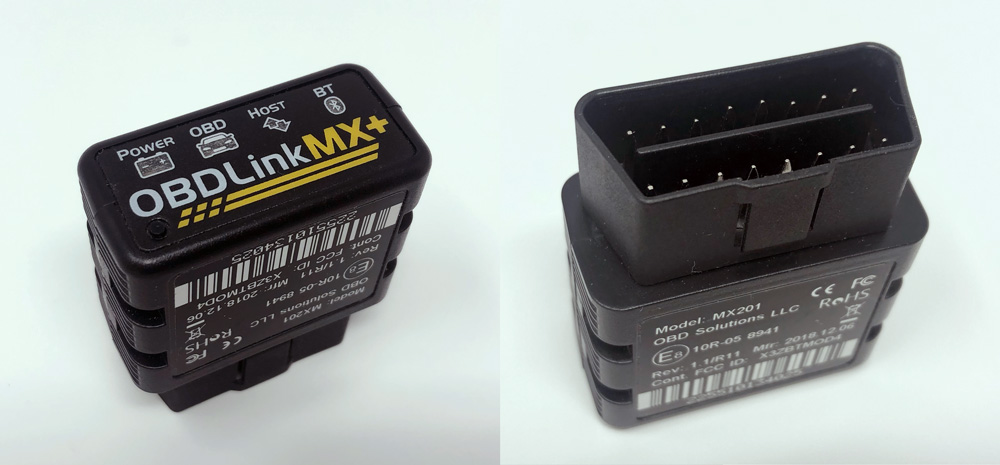
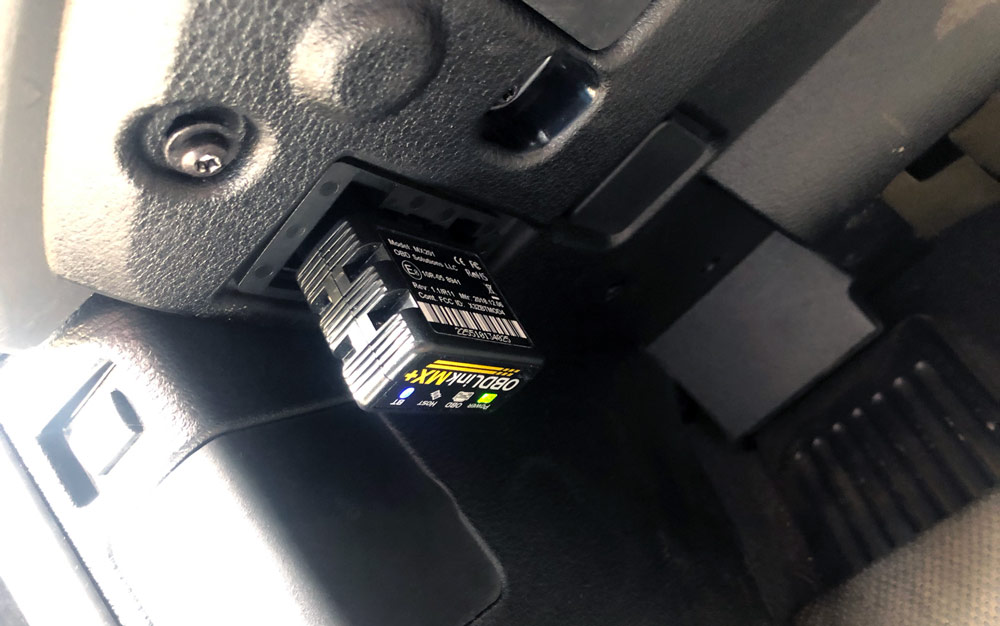
OBDLink designed the MX+ into a small form factor so that it can be inserted and left in that port for continual information flow over bluetooth. Part of that design choice was enabling a low power mode with auto-wake so you don’t need to do anything different when getting in and starting your car. LEDs sit behind the 4 logos on the front of the device; Power, OBD, Host and BT. There’s a small raised button under the O in OBDLink that you’ll need to press for pairing.

Setup

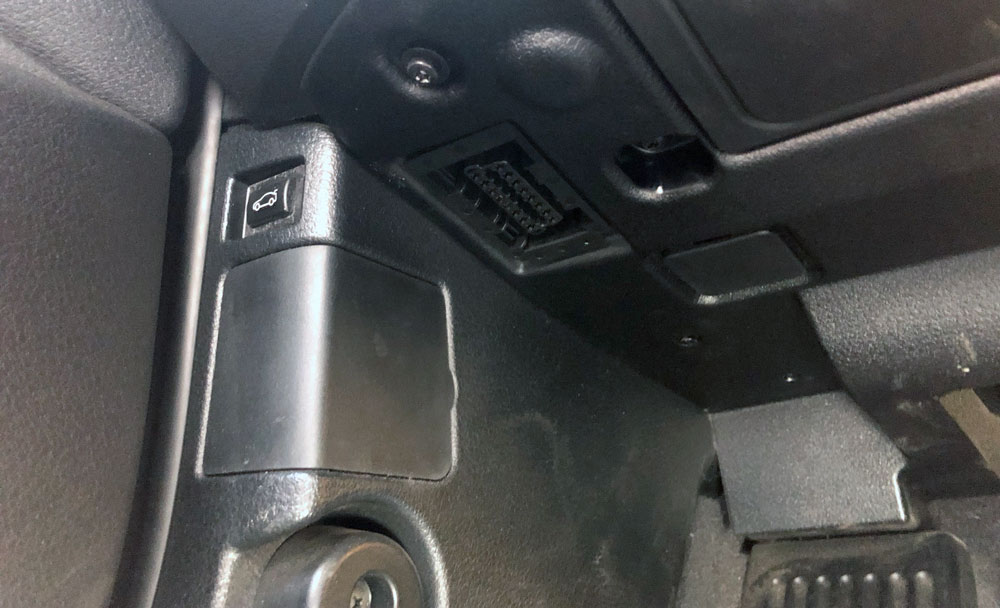
The hardest part about getting started is locating the port in your car, and more specifically determining the orientation. The camera on your phone can be handy here to avoid getting on your back in the driver’s footwell. Here’s the process for iOS.

In our car, the port is directly above the left footrest and is visible without opening or removing any kind of panel. Once you’ve made the determination for your car, go ahead and plug it in.

Next step is to put your car in the ON position without starting the car. You may need to press the ‘start’ button without your foot on the pedal if you have and electronic ignition and don’t have a standard key.

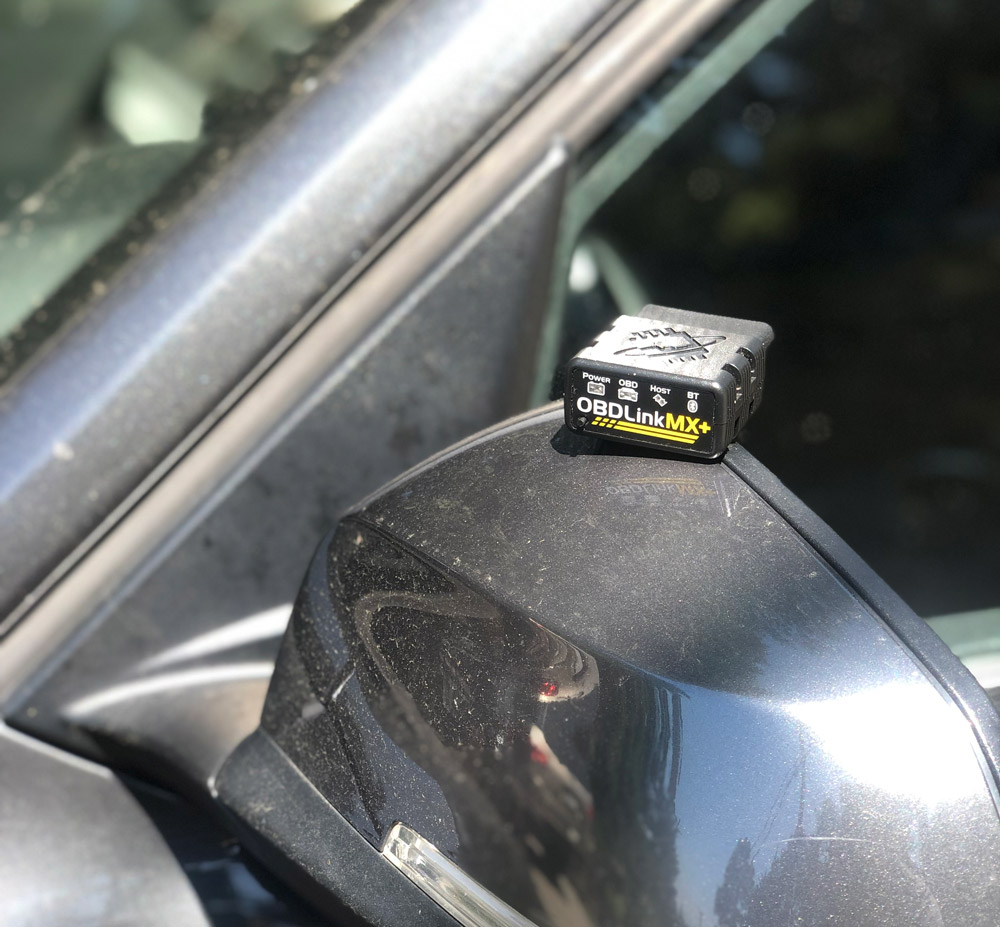
The above photo shows the MX+ installed and connected to my phone, indicated by the green Power and solid blue BT LEDS. The only tricky part here is that you may not be in a position to see those lights.

On your iPhone make sure bluetooth is on, then press the raised button on the MX+. Select OBDLink MX+ when it appears in the bluetooth menu on your iPhone.

Now you can launch the OBDLink app. In settings/preferences/communications choose Bluetooth, then go back to the main menu of the app and click connect at the bottom.

The app will auto-detect your car’s OBD protocol and then connect. The BT light on the MX+ will turn solid when complete.

Performance

I was able to install and connect the MX+ pretty quickly. I have an electric ignition, so I did have to turn the car back off and turn on again without my foot on the pedal to get to the ‘on with engine off’ scenario.

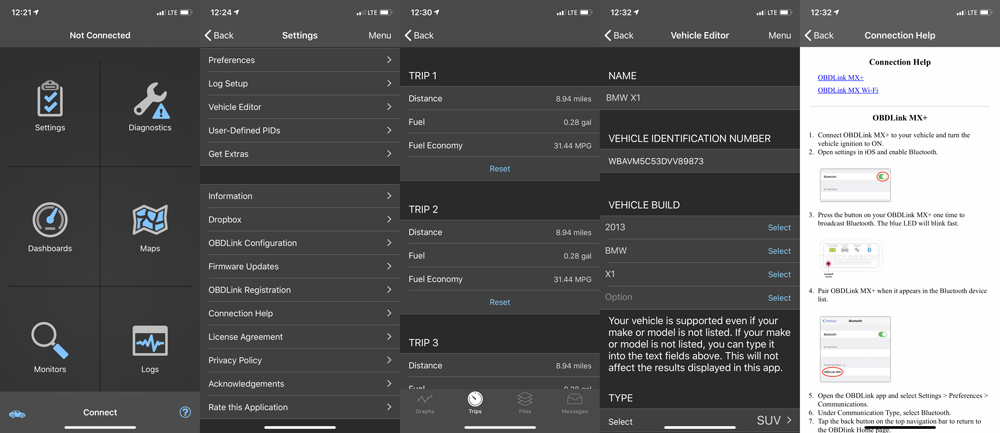
There’s a lot to digest when first opening the app. The first screen is pretty straightforward with 6 buttons; Settings, Diagnostics, Dashboards, Maps, Monitors and Logs. The blue Car and (?) icons in the bottom left and right are also buttons, but the ‘Connect’ in the bottom center is too. I get that it’s an action word, but it’s not very intuitive.

The Settings button takes you to the 2nd screen above. Each of those selections takes you to another myriad of selections which I’m not showing here. The app does an okay job of letting you know if you’re jumping into settings that you shouldn’t be messing around with.

Diagnostics and Maps are what they sound like. I’m not quite sure why you’d use maps here over a real map program. Maybe just to stay within the app?

Logs takes you to graphs, files, messages and trips (shown above middle) for your vehicle.

The Car icon takes you to a settings page specific to your car which you can also access through settings (4th screen above)

(?) will help you with connection issues (far right) which we’ll talk about at the end.

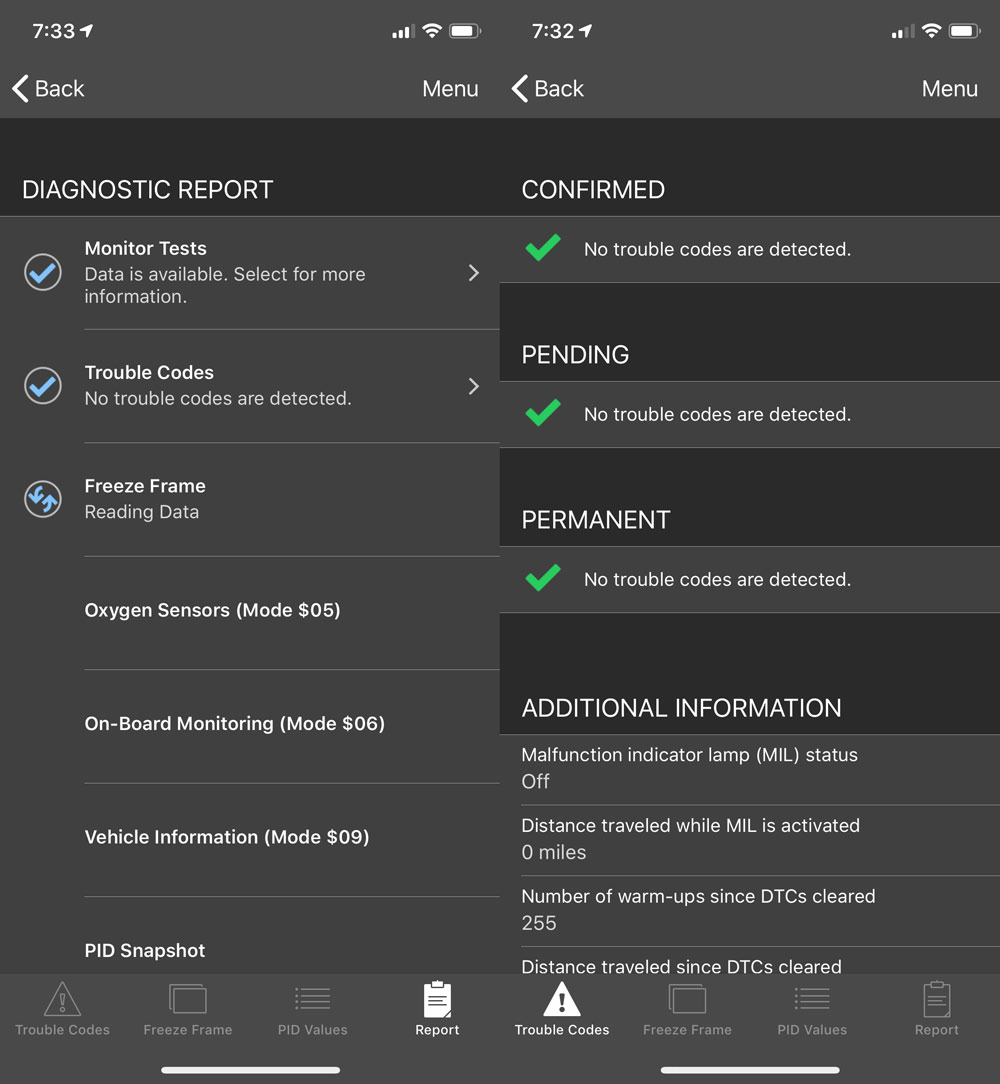
Let’s talk about diagnosing. Our car was overdue for service and had error messages on the instrument panel. We had a chronically low right rear tire and I knew that our coolant was low. I figured great, I’ll connect the MX+ and it’s guaranteed to show me some errors that I can dig into, so I connected and ran the diagnosis.

On the left is the in-process screenshot as the MX+ was gathering data. On the right was the outcome. No trouble codes. Hmm.

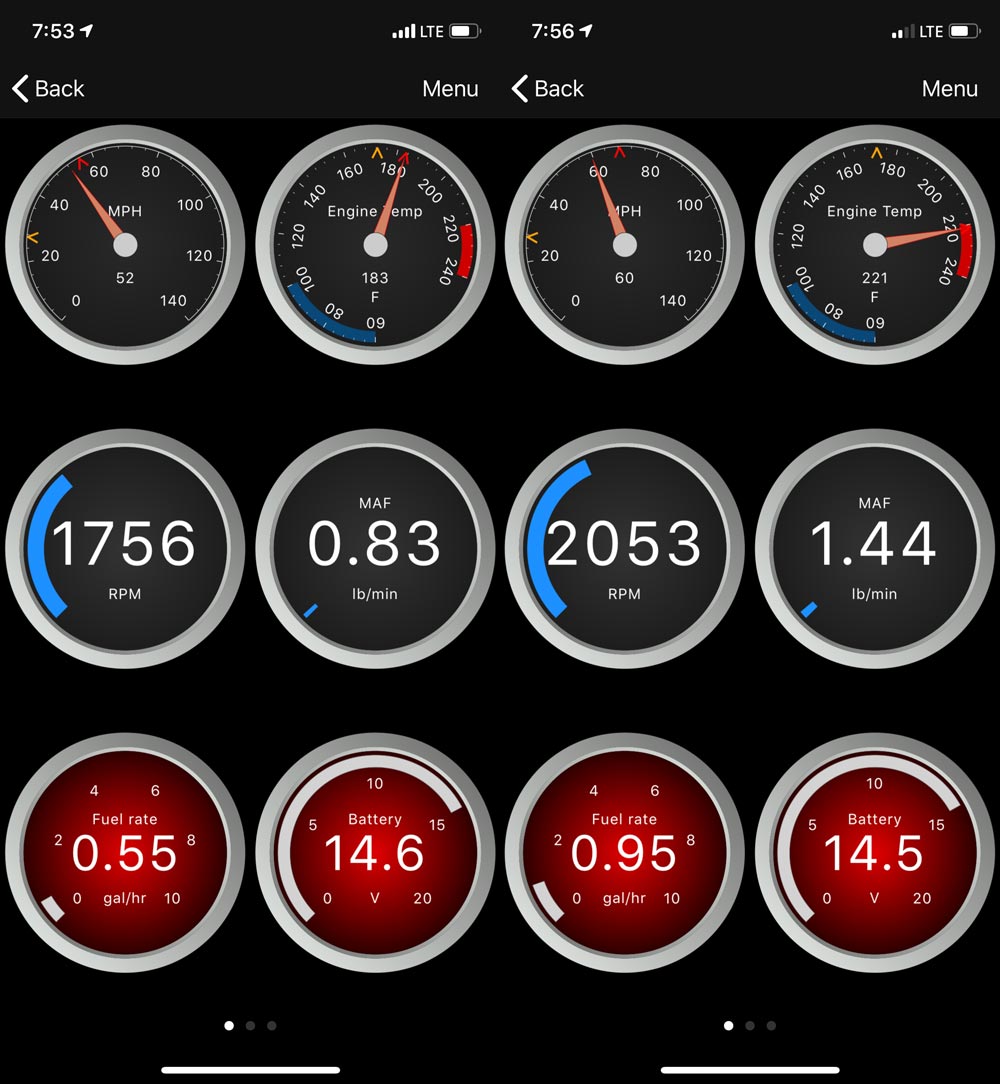
As this was the morning of my appointment, I put my iPhone in the dash mount, launched the app and drove to the dealer with the Dashboards screen up. This is probably the coolest and definitely most active screen in the app.

It’s about a 15 minute drive so I took a screenshot pretty quick (about 3 minutes in) and the second about 10 minutes later. All the gauges (except battery) jump a bit, the most interesting of which is the temperature gauge moving into the red. This completely makes sense as again, I knew I was low on coolant.

The dealer found a nail in the rear tire, both rear tires were in need of replacement and that I was a 1/4 low on coolant, but no leaks after a pressure test. Sounded about right, but not something that the MX+ helped me to diagnose or decide on.

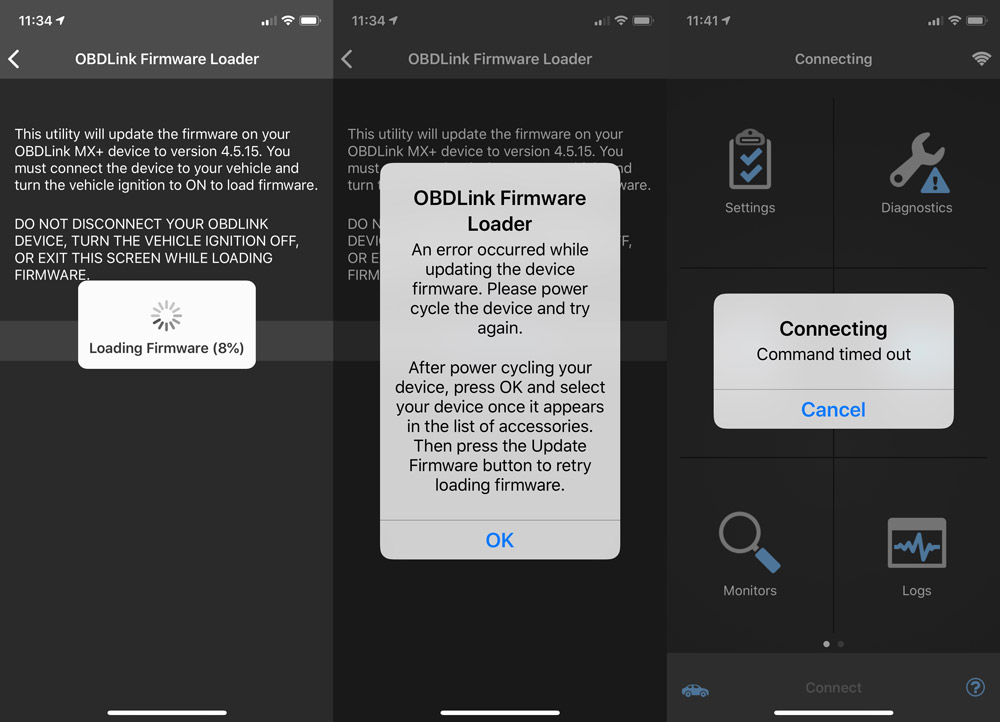
Jumping forward to today, I thought I would look into diagnostics again and re-run them. I noticed that there was a firmware update when I was in the settings panel. With the car in the on (not running) not running position. I followed the prompts to get the update started, but it then threw a firmware loader error. I followed those instructions and then continually hit a command time out error.

A quick visit to the support page showed 413 views on a ‘firmware update failure’ subject that isn’t taking comments. One troubleshooting tip says “Do not hit the OBDLink app CONNECT button at any time during this procedure” which I find ironic considering that it’s the first thing you’ll do if the app tells you it timed out. Needless to say I hit a wall here and have opted to take a break for now and finish up this review for the time being.

What I like

  • Price. It potentially pays for itself if it can avoid even one shop visit
  • Easy to use compact tool that you can connect and forget
  • Broad vehicle compatibility

What needs to be improved

  • May not be able to read all error codes for your vehicle
  • Better process instructions for how to use each screen
  • Better firmware update process, like a test that confirms connection is stable

Final thoughts

I really want to like this product. The dashboard feature is great and the diagnostic function is a feature many car types have a need for. I get that it’s hard to build any product for universality and that each car make and model creates scenarios that complicate issues. The Amazon reviews are positive overall so I’m clearly having issues that aren’t completely normal, but the fact that I know I had errors and the MX+ scan said no error codes bothers me. If you’ve used this and had good luck, let me know in the comments. I’ll give it another crack on an upcoming free weekend to see if I can turn this around.

Price: $79.95
Where to buy: Amazon.com
Source: The sample of this product was provided by OBDLink.

Filed in categories: Reviews

Tagged:

OBDLink MX+ review originally appeared on The Gadgeteer on May 18, 2019 at 9:30 am.

Note: If you are subscribed to this feed through FeedBurner, please switch to our native feed URL http://the-gadgeteer.com/feed/ in order to ensure continuous delivery.

EZVIZ CTQ3W outdoor surveillance camera review

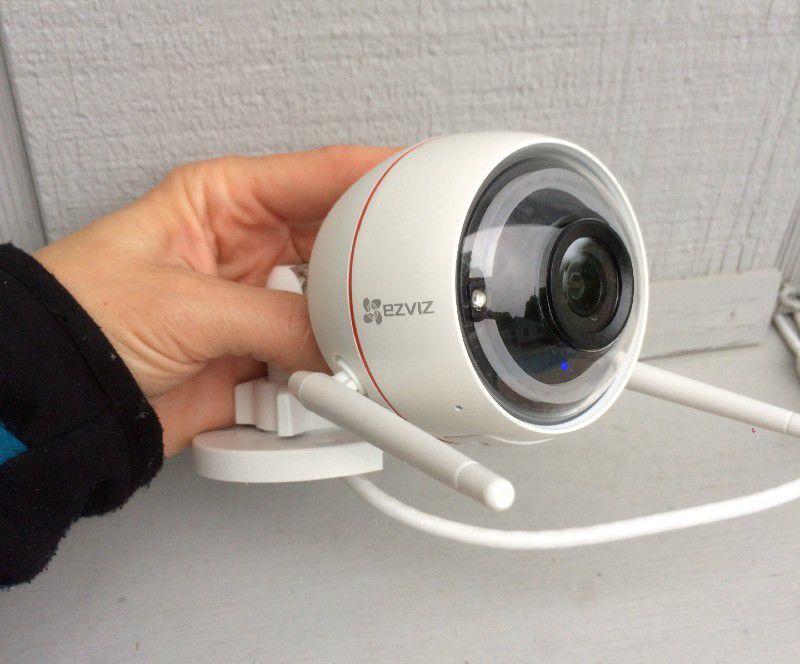
REVIEW – EZVIZ CTQ3W outdoor surveillance camera features full HD 1080-pixel resolution, two-way audio, and integrated strobe lights and sirens.

What is it?

A high quality, sensitive video camera with night vision and all sorts of bells and whistles to protect your home and property.

What’s in the box?

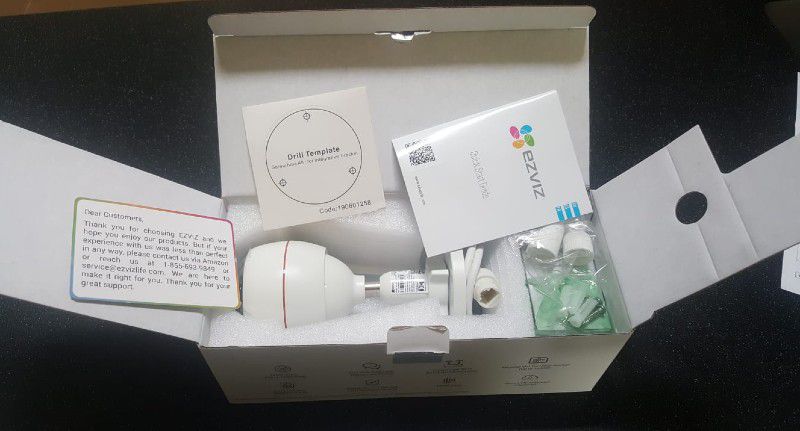
  • Camera, base and cord
  • Mounting hardware
  • Instruction manual

Hardware specs

  • 1920 x 1080 pixel camera resolution
  • Lens:

    • 2.8mm at F2.2 (horizontal angle: 103° and diagonal angle: 118°)
    • 4mm at F2.0 (horizontal angle: 87° and diagonal angle: 104°)
  • Connection: WiFi 2.4GHz or wired/ethernet
  • Image sensor: 1/2.7″ progressive scan CMOS
  • Infrared night vision: 2*850nm IR LEDs up to 98 feet
  • Smart features: Smart motion detection, supports audio pickup within 16 feet
  • Storage: EZVIZ cloud service (first month free) or micro SD card (up to 128GB)
  • Operating condition: -22°F to 140°F; Humidity 95% or less (non-condensing)

Design and features

Setup

We used this with our home wifi, and it was quick to connect and running in minutes. We’ve toyed with the idea of hooking it up to the ethernet, which is another option, and we probably will use a wired connection once we come up with a permanent fixed location for the camera. But right now, it’s so easy to use with wifi and move around as we want to, that we don’t feel any rush to wire it.

Storage

Similarly, we haven’t used the proprietary cloud storage system, because we found it easy and convenient (and free) to use our own micro SD card for storage. However, if you’re interested in cloud storage, your first month is free, and after that camera owners can opt to subscribe to EXVIZ CloudPlay for $5.99/month or $59.99/year for 7-day playback and $10.99/month or $109.99/year for 30-day playback.

App

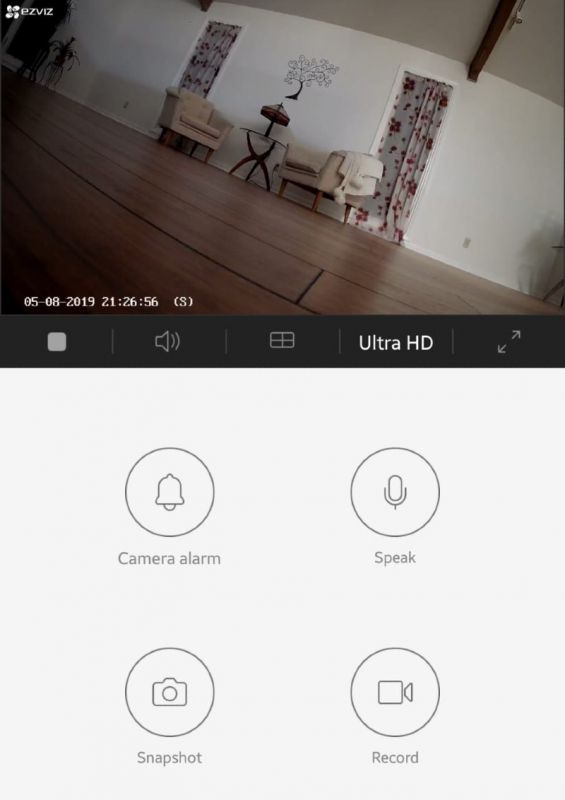
Two members of our family downloaded the EXVIZ app on their phones without issue. On the app you can elect to record 24/7 or only when motion is detected. Via the app, you can also control the sensitivity for notifications, the lights and siren.  

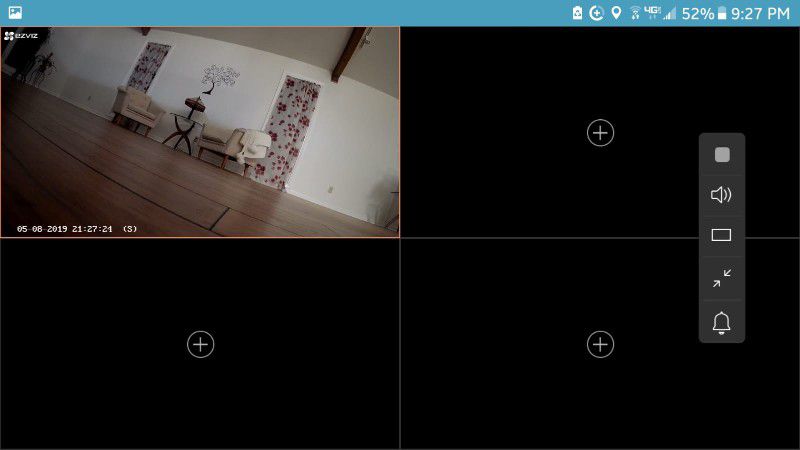
The app also lets you view up to four cameras at a time, which would be nice for a complete view of your property. We only have one camera, so we couldn’t test out this feature but could see how it would be very handy.

Instead of or in addition to using the app for monitoring the camera, it also works with Alexa and can be controlled via Echo Show. Simply ask Alexa to show you anywhere you have an EZVIZ camera. (We don’t have Alexa, so we didn’t test this feature.)

Performance

You can choose your sensitivity level 1-6 to determine when you receive a notification, with 6 being the highest sensitivity. At 6, ours was constantly triggered. Even on lesser settings, shadows or just slight changes in brightness would set it off. Ultimately, for our purposes, the lowest sensitive setting of 1 worked the best.

Using the app, you can select if you want the light to go off each time motion is detected. Or you can simply push a button on the app in realtime to trigger the light, which is billed as a strobe light, but we thought it looked more just like a flashing light. That said, in the dark, it would certainly be enough to give a would-be intruder a jolt.

The sound setting is all controlled in real-time. I should note that you can easily switch from motion-only notifications to your live camera feed. So, for example, if you’re not home but see some funny business triggered by motion, you can go directly to the live camera and, if you want to, get right on the microphone (and trigger the lights and alarm, too!) to make it very clear that you’re watching and recording every move.

The image clarity and especially the night vision are very impressive. We’ve had security cameras before and this one is a world apart when it comes to image quality.

And even though it’s geared for outdoor use, and it’s weather-proofed accordingly, we used it indoors when our dog was having some separation anxiety, and it worked great there, too.

Our only suggestion for improvement, and it’s a very minor one, is that when you use the motion-detect notification system, the app shows you the video thumbnail starting before the action (so they all look the same, like my typical backyard) and you need to watch through each video to see if it was a shadow, rabbit, falling leave or scary burglar captured in the frame. My husband noted that he had dozens of 15-second videos to watch and most were just shadows. He noted that it would have been nice on the thumbnail to see the “action” frame, like the actual bunny or masked bad guy. That way, you could quickly prioritize which ones to watch. It’s a minor issue, but it would make this camera more user friendly.

What I like

  • High-quality picture
  • Very easy to use

What needs to be improved

  • Video thumbnails could show peak action

Final thoughts

It’s a very impressive surveillance camera, with lots of options for wiring, storage and interactive features, making it useful for many different settings and situations.

Price: $89.99
Where to buy: Amazon
Source: The sample of this product was provided by EZVIZ.

Filed in categories: Reviews

Tagged:

EZVIZ CTQ3W outdoor surveillance camera review originally appeared on The Gadgeteer on May 17, 2019 at 10:00 am.

Note: If you are subscribed to this feed through FeedBurner, please switch to our native feed URL http://the-gadgeteer.com/feed/ in order to ensure continuous delivery.
Febote 1000 watt sous vide cooker review

REVIEW – There are a ton of different ways to cook.  You can fry, air fry, grill, barbeque, boil, stir fry and so on.  One of the trendiest cooking methods today is sous vide (pronounced soo-veed). Sous vide is French for under vacuum.  Sous vide cooking places the food in vacuum bags that are immersed in a precisely temperature-controlled water bath. For years, this cooking method was primarily confined to high-end restaurants because it took costly, dedicated equipment to achieve the required temperature precision, and, it takes time. In recent years, that has changed as a number of affordable sous vide cookers have hit the market.

What is it?

The Febote 1000W sous vide cooker is a standalone cooker that clamps into your 5 – 6 gallon pot.  It circulates and heats water to maintain a precise cooking temperature for a programmable amount of time.

What’s in the box?

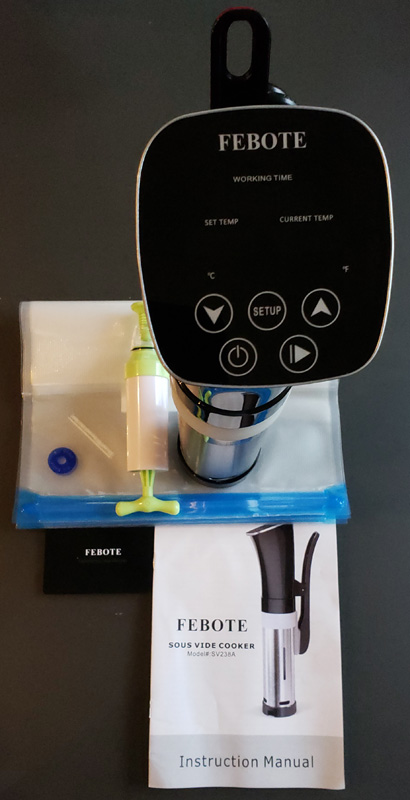
  • Sous vide cooker
  • Instruction manual
  • Five cooking bags with vacuum port
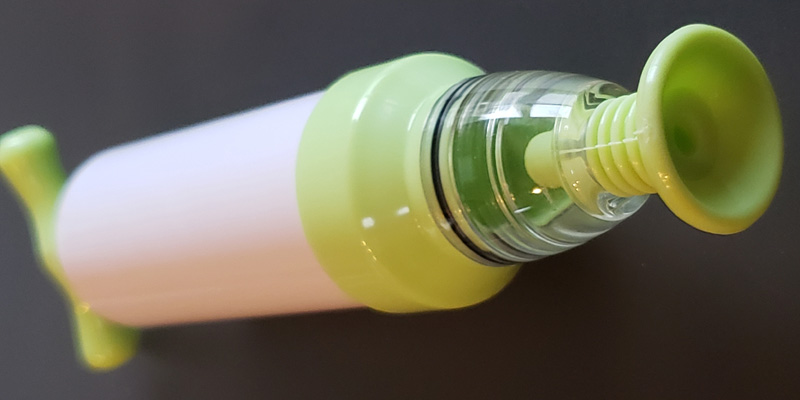
  • Bag air removal pump
  • Bag clip (not visible)
  • Warranty and contact card

Hardware specs

  • Dimensions: 3.2 x 14 x 6.5 inches
  • Weight: 3.8 pounds
  • Cooking power: 1000 watts
  • Temperature range: 32° F – 203° F
  • Temperature accuracy: +/- 1° F
  • Minimum water depth: 2.6 inches
  • Maximum water depth: 5.0 inches
  • Pump speed: 7 – 8 liters per minute
  • Maximum recommended water tank capacity: 5 – 6 gallons
  • Input voltage: 100V to 120V AC
  • Power cord length: 39″

Design and features

The cooker comes with several accessories. The first is a set of five cooking bags.

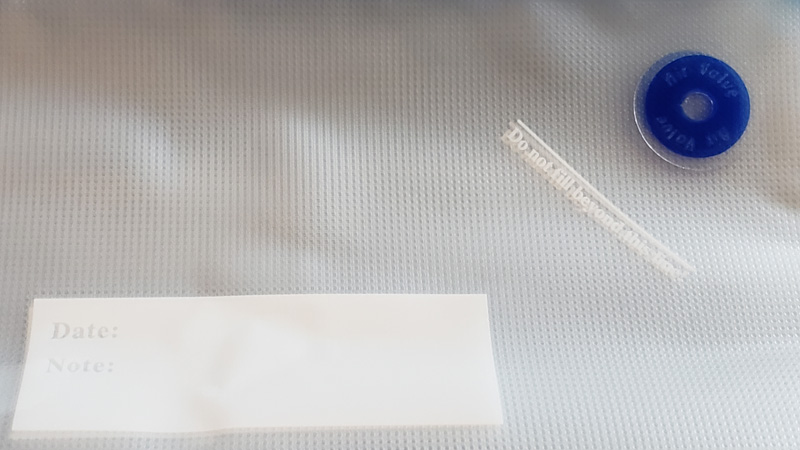
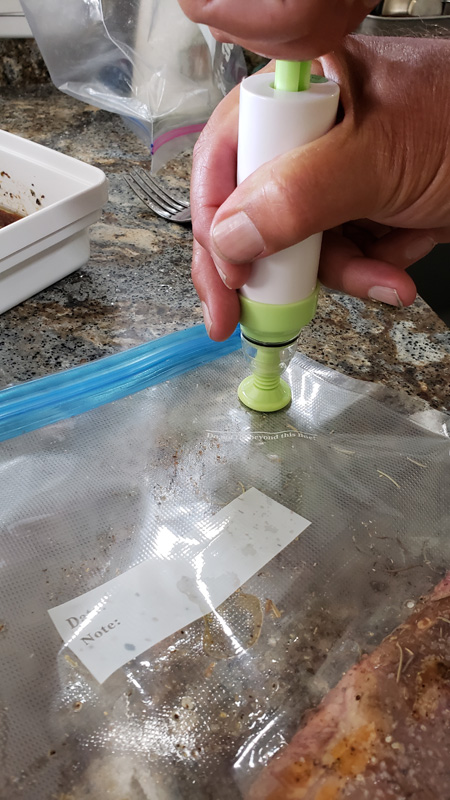
The bags have a space to write the date the items were cooked and a note.  This is great if you want to prep a bunch of food and freeze it. The blue circle is the air removal port.  To remove the excess air from the bag, you place the included pump over the port and repeatedly pull the handle to suck out the air.

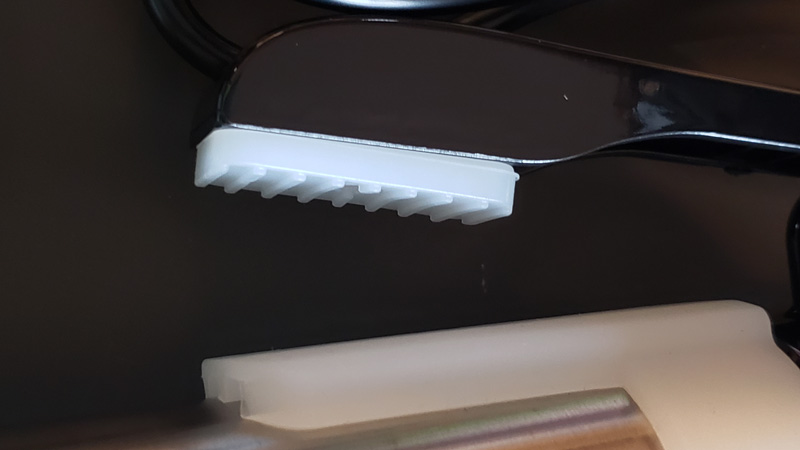
The cooker clips onto the side of your pot with the attached clamp with silicone pads.

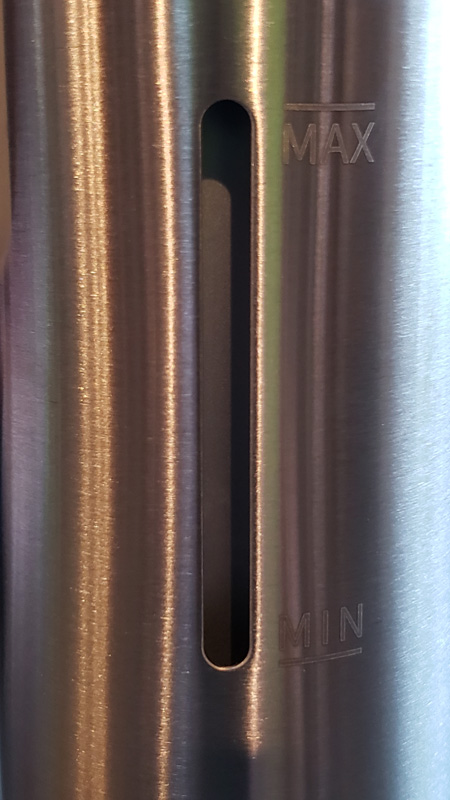
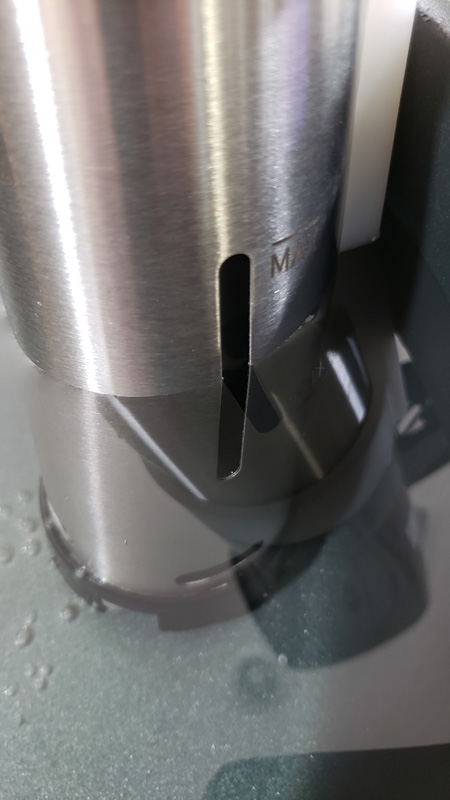
The metal column has etched markings to identify the appropriate water level.

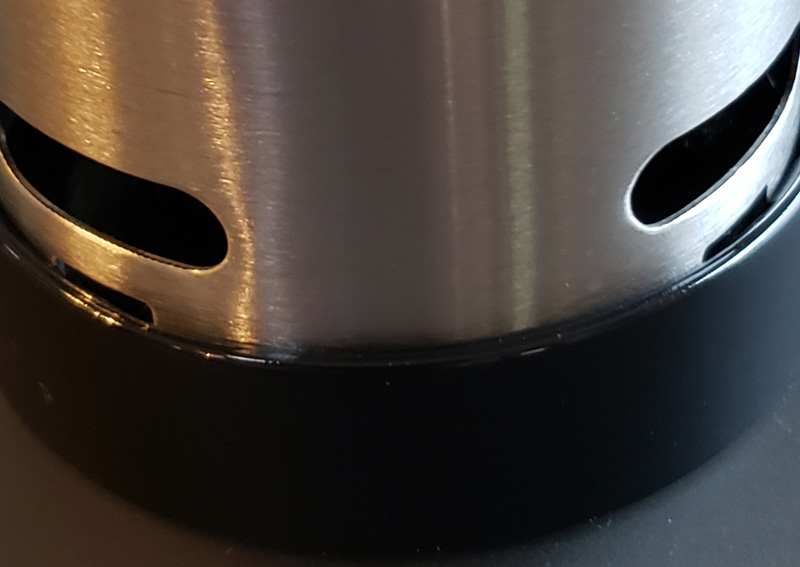
At the bottom of the column, we find several circulation ports where the water is pulled in, heated, and then expelled.

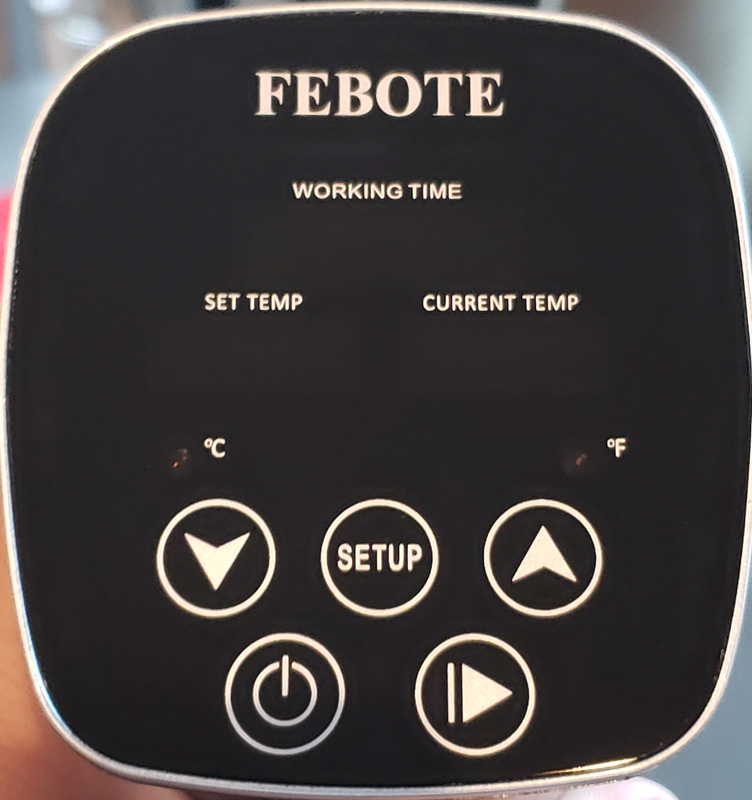
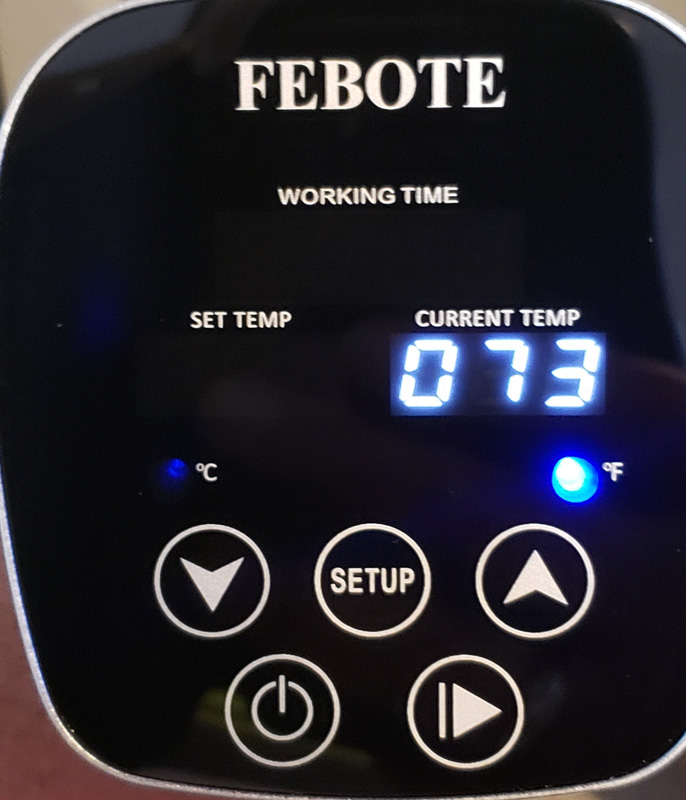
The control panel is located on the top and is shiny black with touch-sensitive buttons and multiple LED displays.

The buttons are used to turn the power on/off, enter the setup mode where you use the up/down arrows to raise or lower temperature and cook time and start cooking.

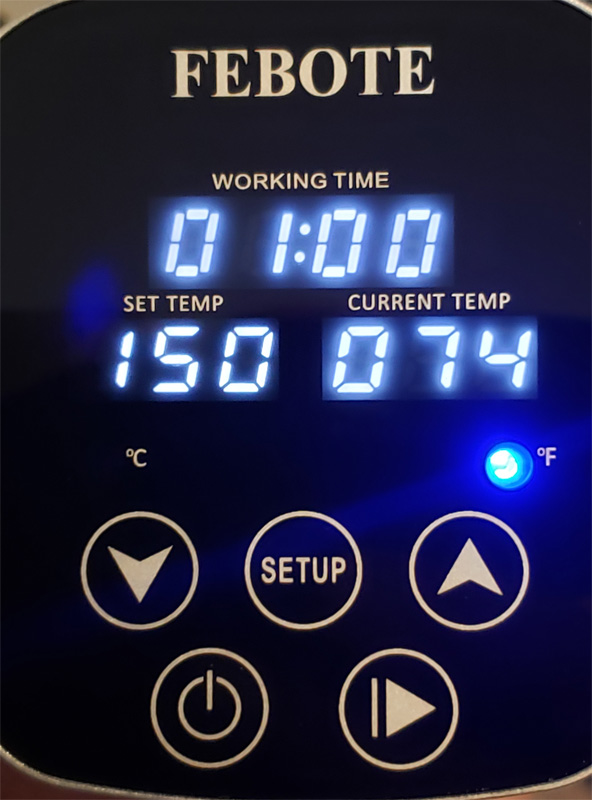
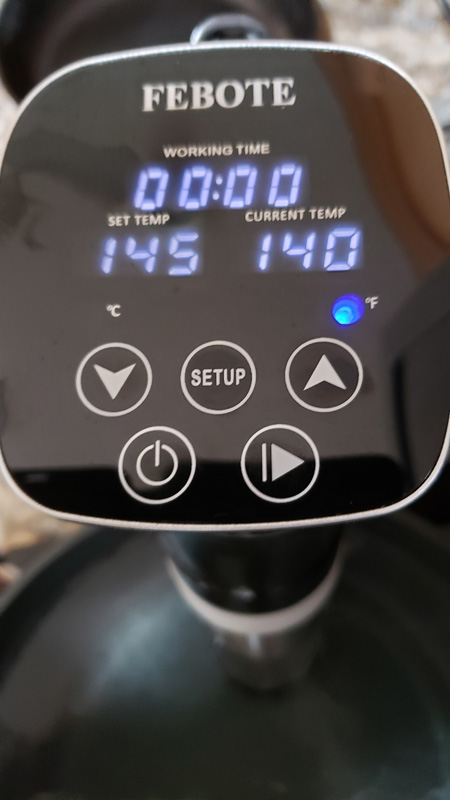
The LED displays show the current temp, set temp, cook (working) time, and a couple of LEDs that indicate whether the displayed temps are Fahrenheit or Celcius.

Performance

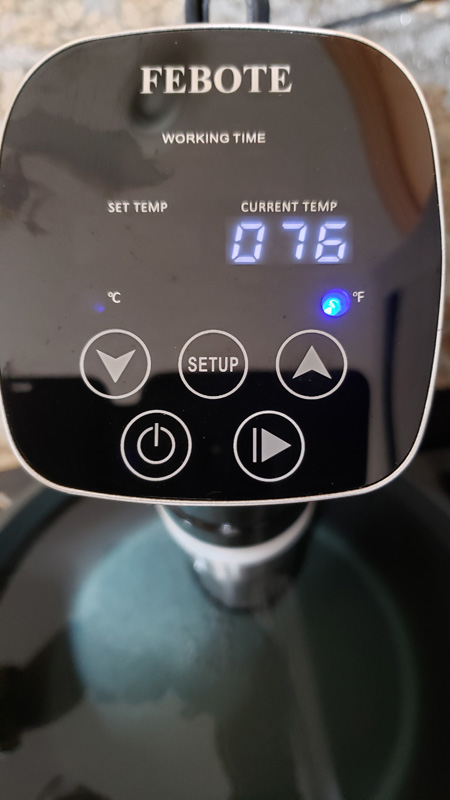
Plugging in the cooker, the current temp display comes on as does either the Celcius or Fahrenheit indicator LED.

Pressing the setup button takes you into the setting mode where you can set the cooking temperature and the cooking time.  You use the up/down buttons to change the values and the setup button to cycle through temp/hours/minutes. The active field flashes to indicate you can set it.  Holding the setup button for three seconds toggles the unit between Fahrenheit and Celsius.

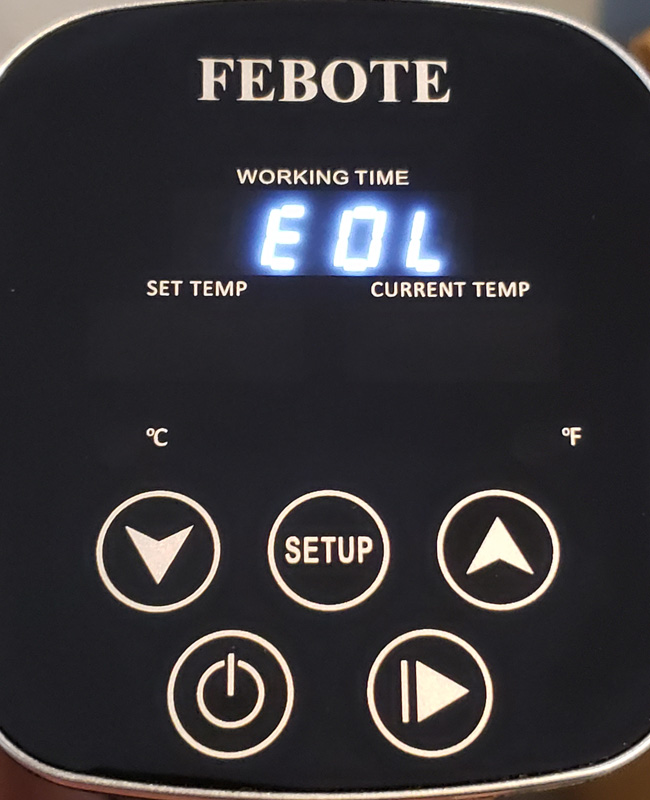
Once you have everything set up for your specific cook, hit the start button and the cooker will start circulating and heating the water.  If your water level is too high or too low, the display will show EOH or EOL and force you to power down and back up.

Once you have successfully started the cooker, it’s time to prep your food, since you have to wait for the water to reach cooking temperature. Place your food, along with any spices or other flavor enhancers into the cooking bags and press out as much air as possible.  Then, use the pump to remove the rest.

Once the water reaches cooking temp, the cooker will sound a one-minute alarm to alert you.  At this point, place the bags into the water and use the included clip to hold them in position so the food remains fully submerged.  After that minute is over, the cooker will go into cooking mode and the cooking timer will begin counting down.

Some commentary here:

Sous vide is not fast.  At all.  If you’re looking for a quick meal, look elsewhere.  Think of it like a low-and-slow smoker, but without the smoke. But, sacrificing speed gets you a pretty good and precise cook to your food.  You absolutely cannot overcook.  If your target temp is 160° F and your water bath is precisely maintained at 160° F, the food simply cannot cook beyond 160° F.  It’s that simple.  And, since your food is essentially vacuum sealed, it cannot dry out.  That’s the attraction to sous vide – you can perfectly prepare food, but it takes a little longer.  Once the cooking is done, most cooks then typically do a finishing sear on a hot cast iron pan, final broil, or other technique to finish the food.

Now, back to our regularly scheduled review…

The cook

We bought some nice sirloin strip steak and got to work.  My wife marinated the steak for flavor for a few hours.  I filled the pot to midway between the min/max markings.

As soon as you plug in the cooker, the display comes on with the water temp,

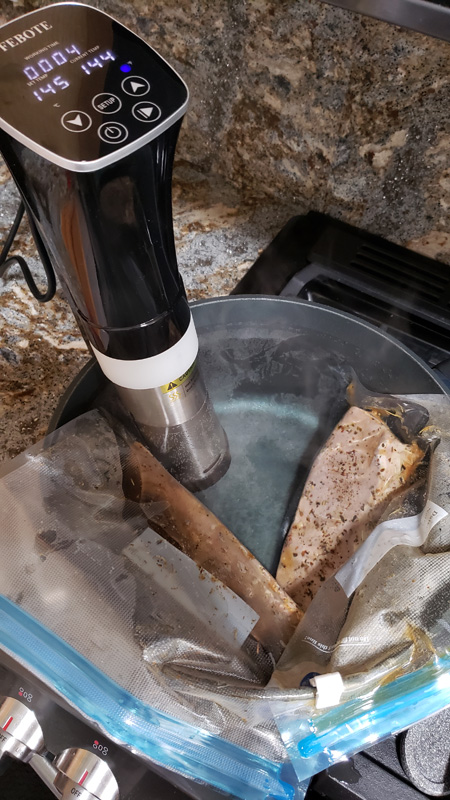
I set it for 1:30 cooking time and 135° cook temp and hit start.  The cooker started softly whirring and the water started circulating.

One thing to note is that the power cord is about 39″ long.  This means that you have to have a power outlet within that distance from wherever you plan to cook.  Since the cooker generates all the heat, you don’t need to cook on the stove, so that shouldn’t pose an issue.  Just place your pot on a hot pad or trivet near a power outlet.

While the water heated up, I pulled the steaks from the marinade, put salt and pepper on both sides and put them into the cooking bags with a little rosemary and thyme.  Once in the bags, I put the vacuum pump over the blue valve and pulled out the remaining air.

A note here – there were no instructions on how to use the bags and pump included in the instruction manual.  Granted, it isn’t exactly rocket science, but for those unfamiliar with things like this, putting it in writing would be nice.

The included bags and pump worked well, but you can use any zipper seal bag by using the immersion vacuum method.  Partially seal the bag and slowly immerse the bag into a water bath.  The water pressure will force out the air in the bag.  When the bag is nearly submerged, finish sealing the bag and you’re good to go.

The cooker took about ten minutes to heat the water.  Not too shabby.  About five degrees before it hits temp, it beep-beeps for a minute to let you know the cooking time is about to begin.  Personally, I think the beep is pretty soft and could use a little more volume to be able to be heard easily if you’re not right next to the stove.
I clipped the two bags on the pan to keep the meat submerged as the cooker started timing.  Rather than a countdown, the timer is a count-up, so you have to remember how many minutes you set it to know how much more cooking time is left. I didn’t like this.  In my opinion, it should count down to zero, not up to the cooking time.

Now, the ID-10-T error.  If you’re not familiar with that error, read the error code without the dashes as all letters.  I’ll swear the recipe said 145° for medium.  Nope – it said 135°.  Whoops.  So, I hit the start button, hit setup and then changed the temp down to 135° and hit start again.  Unfortunately, this restarted the cooking timer.  Dang.  But, there’s no way that in a few minutes the steaks were up to 145°.  And, since you really can’t overcook via sous vide, we should be all good.

Just before the cooking time ended, I cranked up the cast iron fry pan on the stove and got it toasty hot with a nice layer of bacon grease bubbling away.  Once the timer beeped, I pulled out the steaks, patted them dry and flopped them in the sizzling fry pan for a minute or so on each side and a few seconds on each end to give everything a good sear.  After shutting off the burner, I tossed in some mushrooms and onions for a quick saute and placed the steaks on the plates to rest for a couple of minutes. This is an important step as it lets the fibers in the meat contract a bit to hold in the juices, keeping the meat moist.  Here is the end result.

The steak’s color was uniform throughout the steak.  It was very moist as well.  I’d venture to say it was moister than a grilled or smoked steak.  Overall, it was a nice meal.

One thing I don’t like about sous vide cooking is that since the food is in a sealed bag, there is no way to test the meat with an instant-read thermometer to verify that the desired temperature is reached.  That isn’t a criticism of the Febote cooker – just a byproduct of the sous vide method.  There are many websites devoted to sous vide cooking where you can get cooking time suggestions for a variety of food.

Speaking of sous vide websites…I spent a bunch of time there looking for cooking suggestions for the steaks.  Why, you ask?  Febote doesn’t include any recipes with the cooker.  I think this is the first food prep kitchen appliance I have ever gotten without recipes.  Air fryer?  Yup. Food processor? Yup. Instant Pot? Yup. Blender? Yup. Febote sous vide? Big ol’ nope.  And, for me, this was an issue, since this is a very different cooking method with different prep methods and cooking times.

What I like

  • Fast heating time
  • Super quiet operation
  • Vacuum bags and the vacuum pump worked well

What needs to be improved

  • The cooking time beep could be louder
  • The cooking timer would make more sense as a countdown
  • No recipes included
  • No instructions for the included vacuum bags and pump
  • No way to check food temp – an issue with sous vide cooking and not the cooker

Final thoughts

Sous vide is an interesting addition to our cooking repertoire.  We already smoke/barbeque, pressure cook, air fry, and all the usual bake, broil, stir fry options.  It will be interesting to try chicken breasts as they notoriously dry out on grill or smoker.

As far as this specific sous vide cooker goes, it was easy to use, and based on our cooking results, worked perfectly. If you’ve got the time to cook using sous vide, don’t mind the count-up timer, and are adept at finding your own recipes, the Febote sous vide cooker might be the right choice for you.

Price: $79.99 direct, or $72.99
Where to buy: Direct from Febote.com and Amazon
Source: The sample of this product was provided by Febote.

Filed in categories: Reviews

Tagged: , ,

Febote 1000 watt sous vide cooker review originally appeared on The Gadgeteer on May 17, 2019 at 9:00 am.

Note: If you are subscribed to this feed through FeedBurner, please switch to our native feed URL http://the-gadgeteer.com/feed/ in order to ensure continuous delivery.