Drones By Us DBUS2 drone review

REVIEW – Drones are available in many shapes and sizes and are used as toys, tools, or both. The budget to buy a drone can be as little as $25 or even less for a toy drone or thousands of dollars for a professional drone that you can use to take high-quality video and photos for all sorts of reasons. Today I want to show the DBUS2 from Drones By Us. It’s a midrange drone when it comes to price, so let’s find out if it offers enough bang for your buck. Let’s take it for a spin!

What is it?

The DBUS2 is an easy to fly drone that offers 4K (unstabilized) or 1080P (stabilized) video capture.

Hardware specs

Camera – Sensor 1/3.06″ CMOS, 13 MP, 3840 x 2160,
Video Resolution – 4K unstabilized, 1080p at 30 fps Stabilized
Video Format – MP4, MOV (MPEG-4 AVC/H.264)
Memory – 16 Gb non-removable or expandable
Maximum Speed, horizontal flight, no wind – 2 m / 6.6 ft. per sec.
Hover accuracy – ±0.1 m (.33 ft.) Vertical and Horizontal
Maximum Operating Distance (Range) – Up to 100m. (328 ft.) horizontal and at 30 m (98 ft.) altitude above ground level
Maximum Flight Time – Up to 15 minutes
Battery – 1500 mAh
Dimensions: Folded – 145.5 x 80.8 x 52 mm / 5.7 x 3.2 x 2 in., Unfolded – 151 x 146 x 52 mm / 5.9 x 5.7 x 2 in.
Weight: 8.4 oz.

What’s in the box?
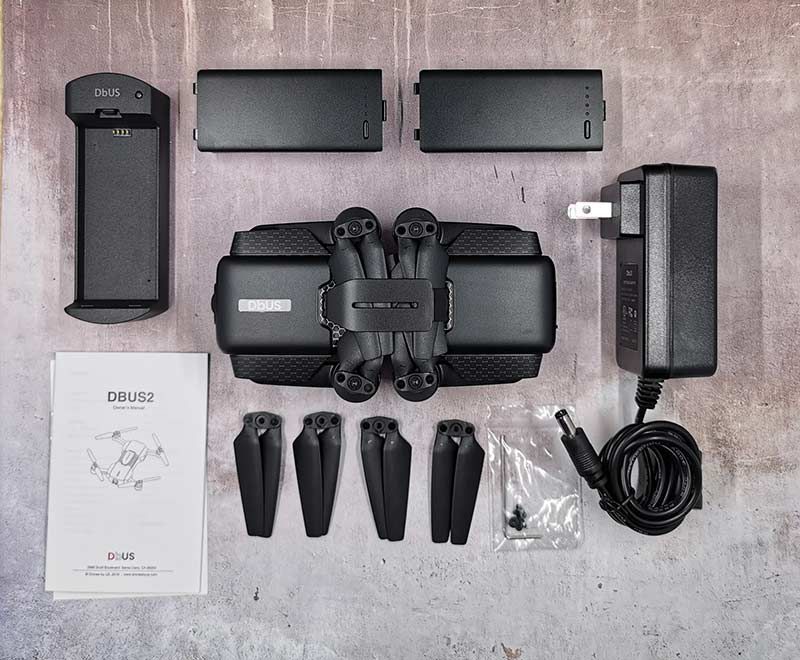
  • DBUS2 Drone
  • 2 Smart Flight Batteries
  • Charger Adapter
  • Replacement Propeller Mounting Kit
  • 8 Propellers
  • Know Before You Fly Card
  • Owner’s Manual

Design and features?

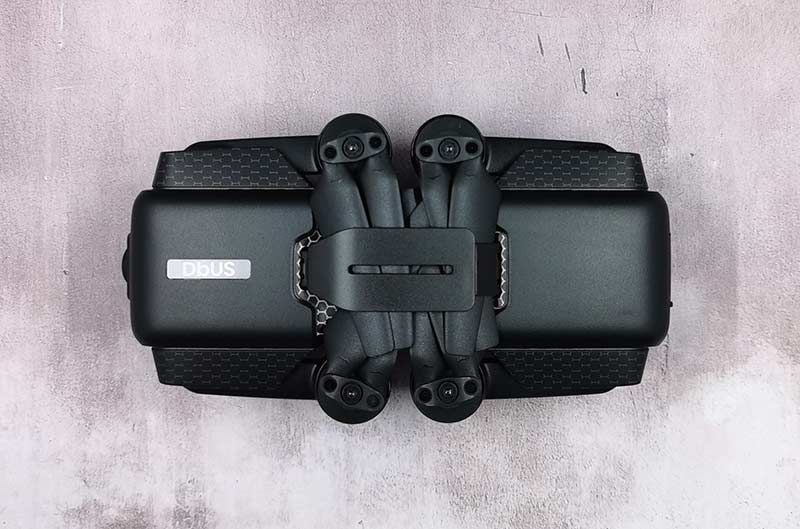
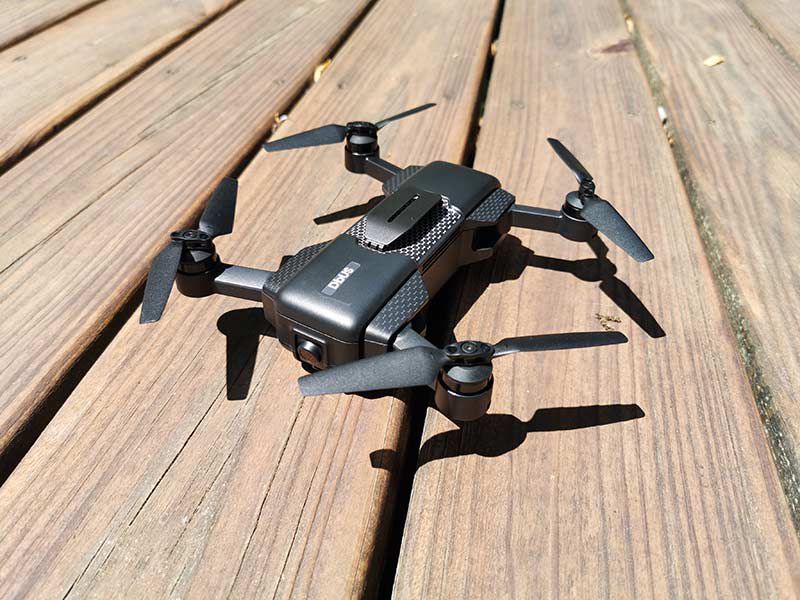
The DBUS2 has a durable matte black Polycarbonate and ABS plastic case with a strap across the top that holds the arms and propellers in place when the drone is folded.
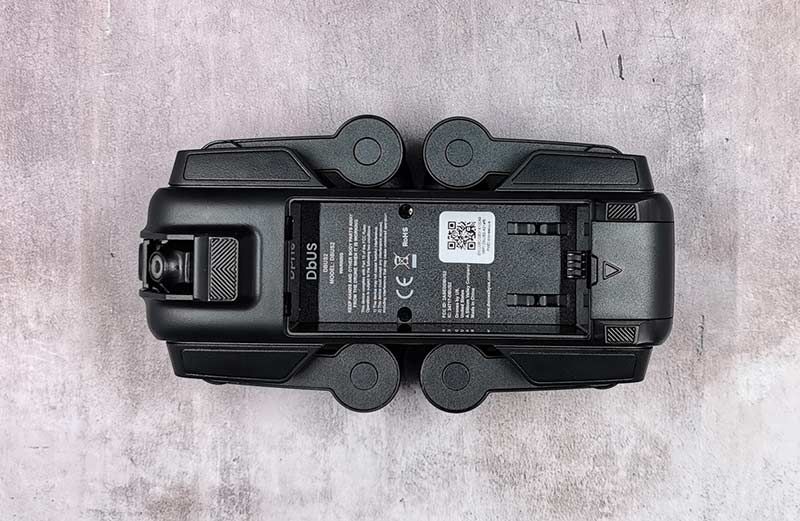
On the bottom of the drone is the battery compartment. In the image above you can also see the VIO (Visual Inertial Odometry) camera which is located below the main camera. This drone does not use a GPS to position the drone while in flight.

The VIO navigation system uses a 160° ultra-wide-angle camera optimized for odometry, inertial motion sensors and sophisticated software to recognize object shapes and determine where the drone is in relation to its environment. VIO enables drones the ability to see paths through objects, recognize optimum landing spots, and navigate indoors without GPS. It also does not require you to calibrate the drone by rotating it in a variety of positions each time you go out for a flying session.
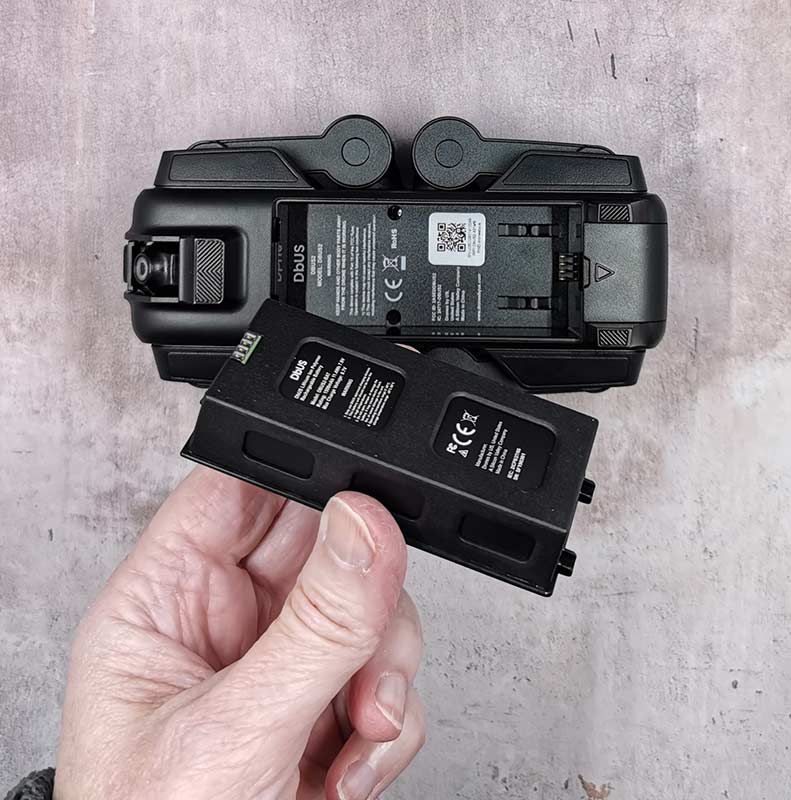
The DBUS2 ships with 2 batteries that easily snap into the bottom of the drone.
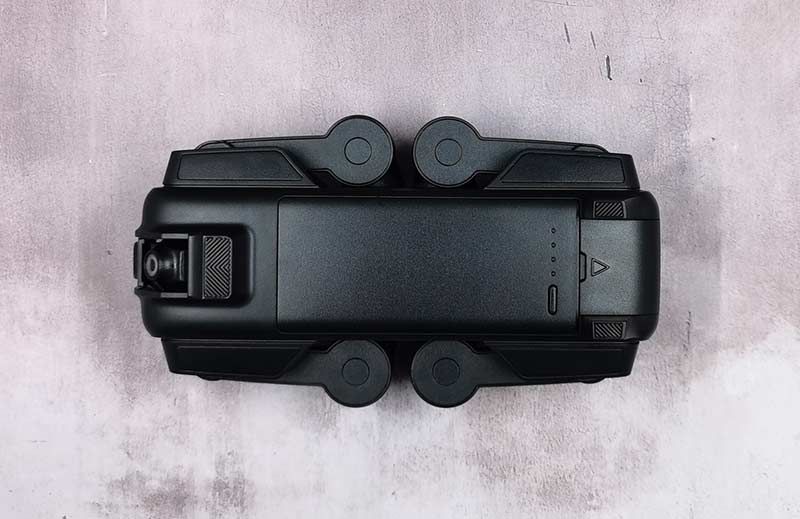
A button on the battery provides a quick visual indicator of the battery level by lighting up 1-4 LEDs. A fully charged battery can provide around 15 minutes of flight time. It takes about 45 minutes to fully recharge each battery.
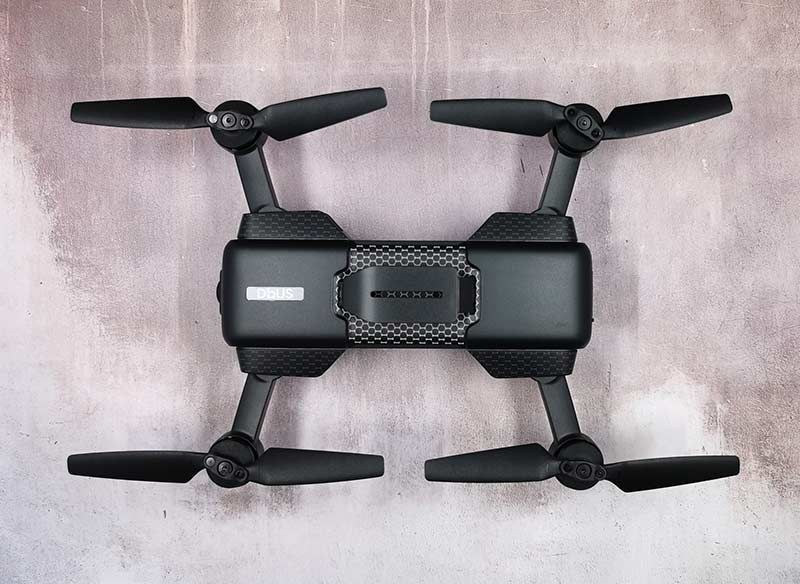
The propeller arms easily unfold when you’re ready to fly the drone.
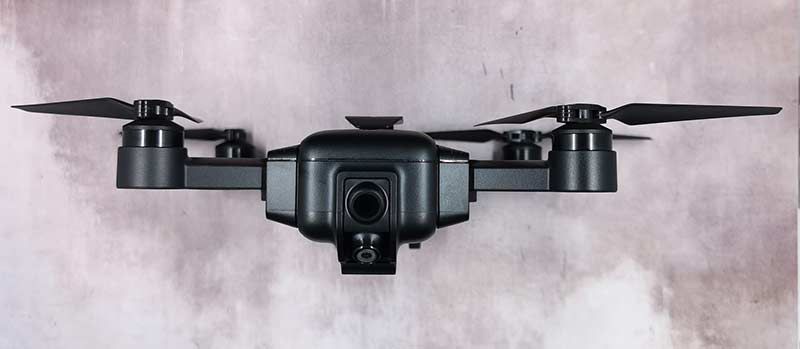
The image above shows the main camera with the VIO camera below it. The main camera has a 160 degree wide angle lens that is fixed at a 27-degree vertical angle. That means that you’re not able to change the angle of the camera if you want to record video directly below you or in front of you. This the biggest issue that I have with the DBUS2, but I’ll talk more about that later.
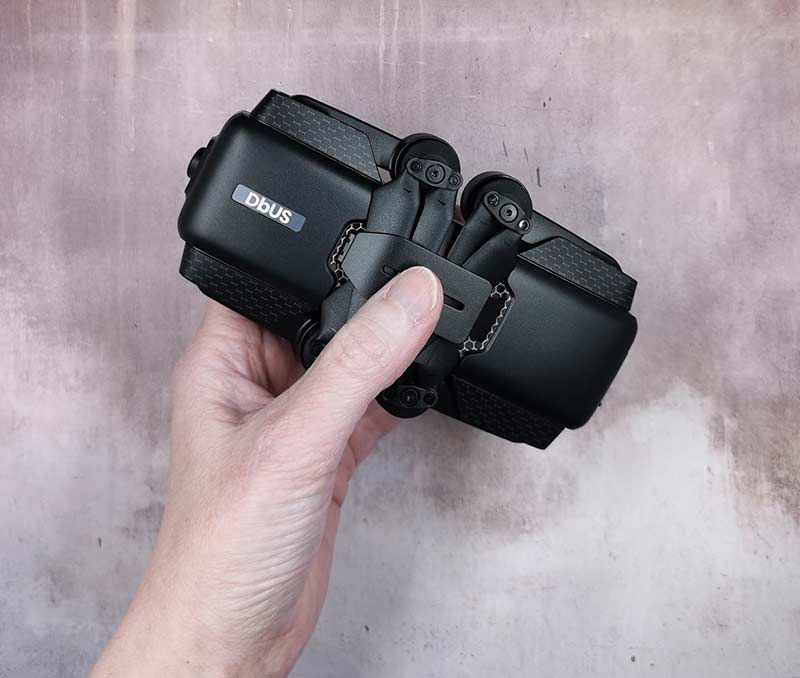
I love the size of the DBUS2. It’s just the right size to make it easy to take with you day-to-day and on your travels.
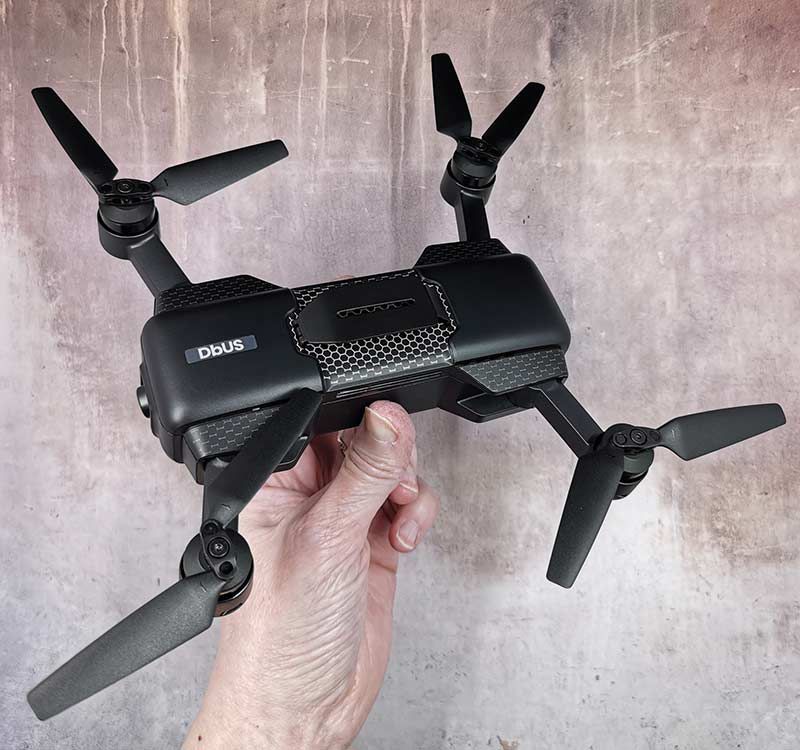
When it’s unfolded, it’s not so large that you’ll attract attention. It’s also not too loud when it’s powered on and in flight. It’s not silent either. It sounds like an angry bumblebee 😉

Let’s fly this thing!

I’ve tested a few drones over the years and with each one, I’ve gotten better and better at flying them. I have to say that the DBUS2 drone is incredibly easy to fly and it’s rock solid when it comes to hovering. It’s so steady that you can fly this drone in the house without worrying that it will drift into a wall or furniture. As a matter of fact, I can see this drone as a fun tool for a realtor to make a walk (fly) thru of a home.

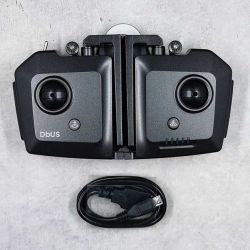
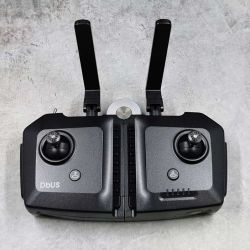
You can fly the DBUS2 drone just using the DBUS2 app on your Android or iPhone, or you can buy the optional DBUS controller $195.95. Yeah, that’s crazy expensive for a controller, isn’t it?


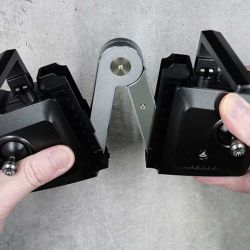
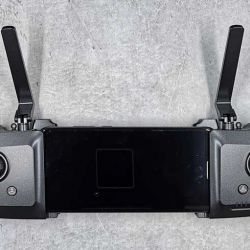
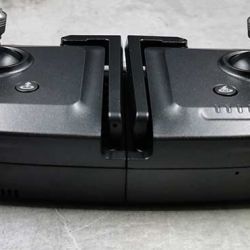
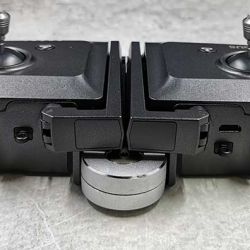
The controller features two removable joysticks and it has a built-in holder for your phone. The controller folds out so you can slide a phone between the left and right sides. I had some trouble finding a phone that would fit it though. My Pixel 2 XL barely fit it with the case off and my Huawei P30 Pro wouldn’t fit it. I wasn’t too bummed though because using the app is actually easier and means you don’t have to buy something extra to fly the DBUS2.
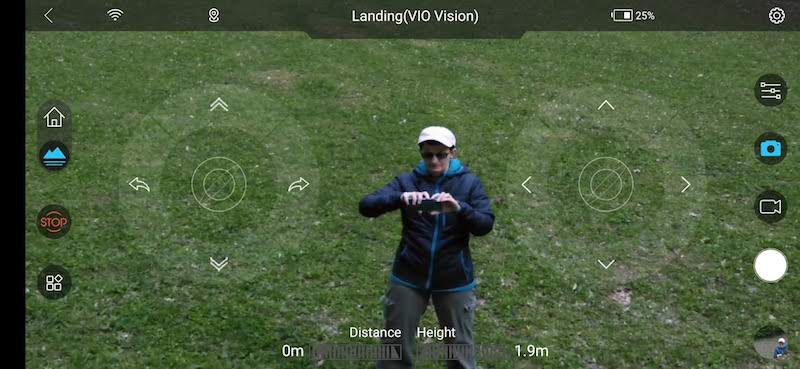
I used a Huawei P30 Pro for all my testing and flying of this drone. The app is easy to use and just requires that you turn on the drone, launch the app, wait for the drone to beep, tap the WiFi icon in the app, pair with the drone’s WiFi and you’re ready to go.

From there, the interface is basic and uncluttered, just the way I like it. You can use the onscreen buttons to launch, land, and maneuver the drone in flight. There are buttons to change from outdoor to inside flying, settings, snap a picture, start video capture, and go into the special flight features menu.
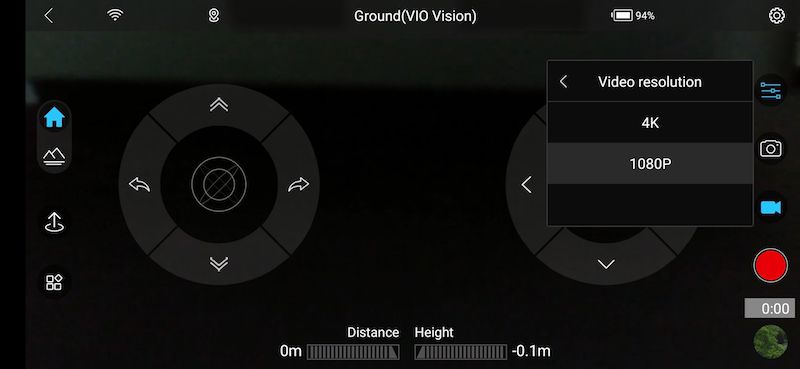
The DBUS2 drone defaults to 1080P resolution, but can also do 4K. The only caveat to using the 4K setting is that the video is not stabilized in that mode and jitter will be noticeable as you will see in the demo video below.
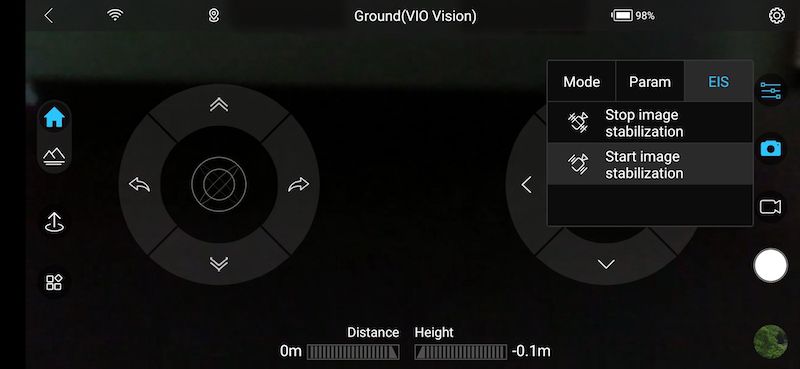
You can manually turn stabilization on or off while in 1080P mode.
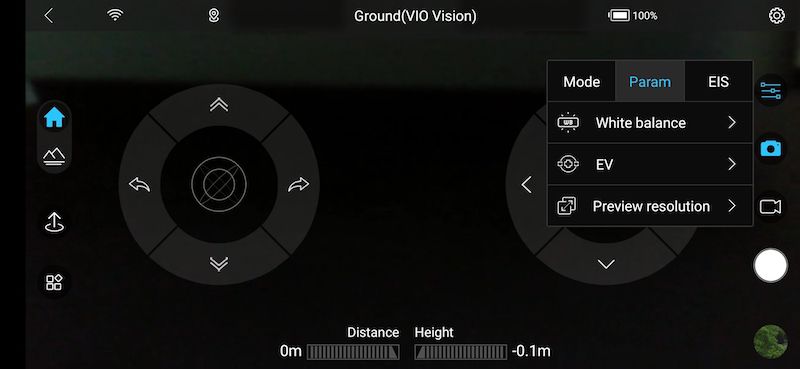
You can also adjust for white balance and other settings.
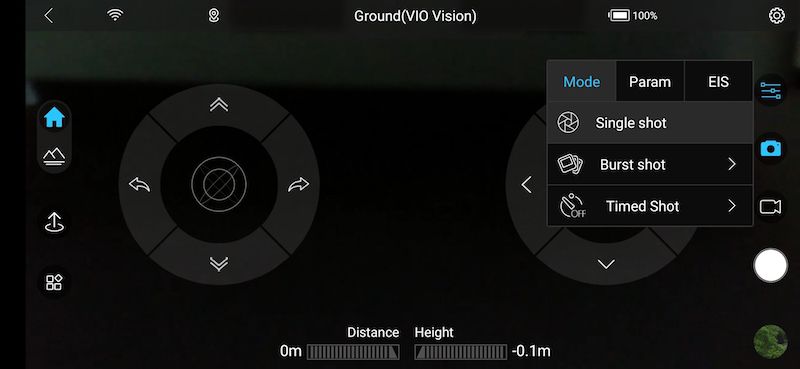
There are camera options that you can use to take single snaps, burst shots that take multiple consecutive images, and even timed shots.
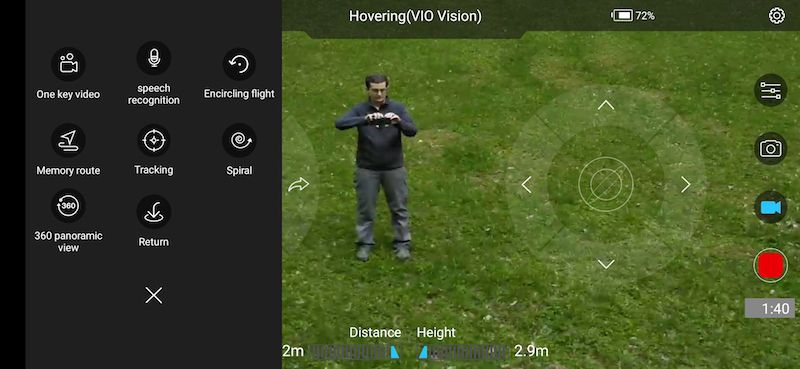
The special flight features menu gives you several fun ways to capture video including the ability to record a route by manually walking the camera around.
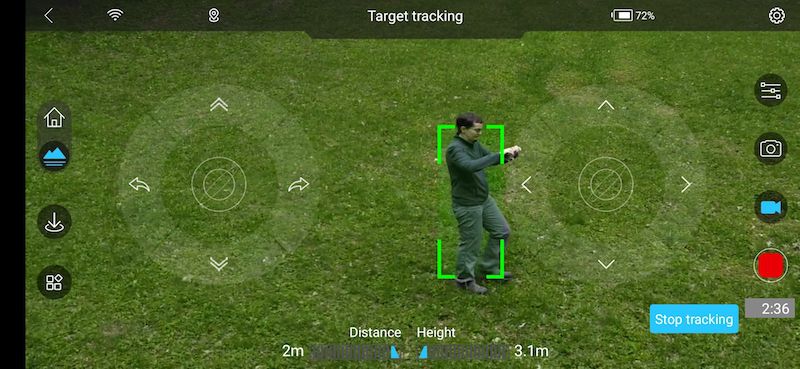
There’s a follow feature that is pretty fun to play with. You can draw a box around the subject and the drone will automatically follow it around (see my video demo for a clip of this feature in action).
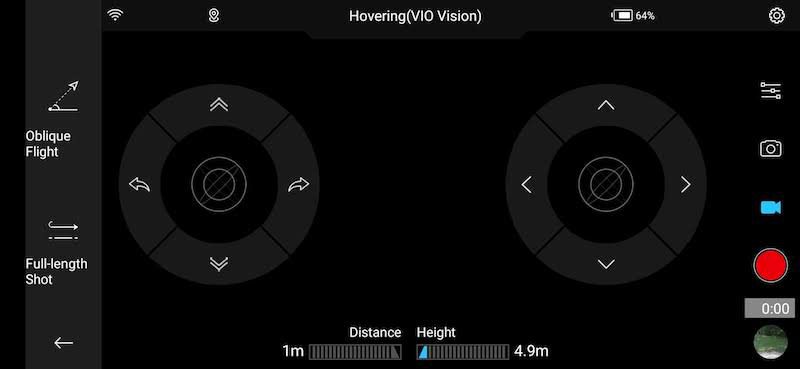
You can also do some cinematic shots where the camera will start at a certain point and then fly back and up at an angle or fly left or right for a horizontal pan.

See it in action


It’s really a shame that the DBUS2 can’t fly higher and that you can’t change the angle of the camera. Not being able to shoot directly below the drone is my biggest disappointment with this drone.

Working with the video and image files
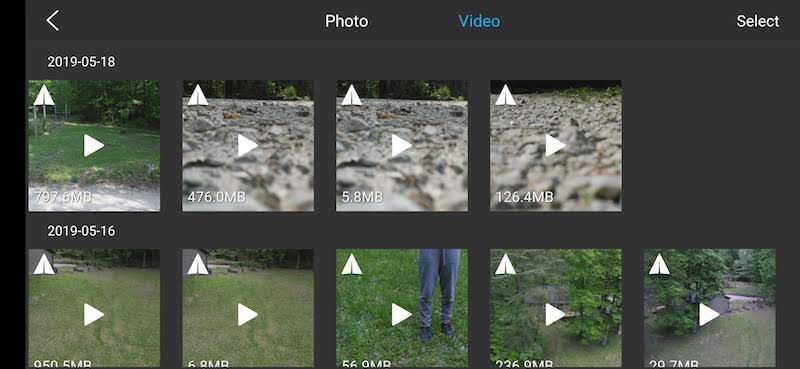
All of the drones I’ve reviewed in the past have featured removable storage in the way of a micro SD card. The DBUS2 drone has 16GBs of file storage but it is built-into the drone itself. To download the files, you have to use the app to download them to your phone. Or you can plug the drone into your computer using a micro USB cable (not included).

Connecting the drone to your computer will mount it like any other removable drive if you’re a Windows user. From there you can copy the files to your computer using drag and drop. But if you’re a Mac user like I am, you have to jump through an extra hoop to access the video files because plugging the DBUS2 into a Mac will result in nothing happening until you install the Android File Transfer app. That’s right, the DBUS2 is powered by Android. Although this app works fine, it’s not a very elegant solution in my opinion.

What I like

  • Compact folding design
  • Easy to fly
  • Extremely stable hovering
  • Includes 2 batteries

What needs to be improved

  • Add the ability to change the camera angle
  • Needs to fly higher
  • Add 4K stabilization
  • Improve file storage drive mounting for Macs

Final thoughts

The DBUS2 is a fun little drone. It’s super stable while hovering and easy to fly. It’s just too bad that the camera angle is fixed and that you can only fly a maximum of 100 feet in the air. At that height, you can’t even get above the tree line where I live.

Despite the fact that this drone lacks the ability to adjust the angle of the camera lens and it doesn’t offer image stabilization when recording in 4K mode, I still have thoroughly enjoyed testing the DBUS2 drone. My favorite features are the fact that it folds into a compact form factor that fits in a jacket pocket or bag and I love how easy it is to fly.

As it is, the DJI Spark is only $10 more and offers an adjustable gimballed camera, max altitude of 500m, obstacle avoidance, and most of the same cinematic features of the DBUS2. The only thing the Spark doesn’t offer is 4K video capture, but the DBUS2’s 4K video capture isn’t stabilized, so it’s a wash.

So I have to say that the DBUS2 doesn’t offer the same bang for your buck as other drones in this price range. That said, I look forward to what Drones By Us comes up with in the future. If a future Drones By Us drone can add an adjustable camera, stabilized 4K capture, other higher-end features, and can lower the price, I think they could have a winner on their hands.

Price: $389.95
Where to buy: Drones By Us
Source: The sample for this review was provided by Drones By Us.

Filed in categories: Reviews

Tagged:

Drones By Us DBUS2 drone review originally appeared on The Gadgeteer on May 22, 2019 at 5:51 pm.

Note: If you are subscribed to this feed through FeedBurner, please switch to our native feed URL http://the-gadgeteer.com/feed/ in order to ensure continuous delivery.

Creative Labs Pebble Plus 2.1 USB desktop speakers with subwoofer review

REVIEW – I am a sucker for 2.1 channel audio systems: A left and right speaker plus a subwoofer. As an admitted bass-head, I really wanted to try out the new Creative Labs Pebble Plus speaker.

What is it?

the Pebble Plus is a USB-powered 2.1 desktop speaker system with subwoofer.

What’s in the box?

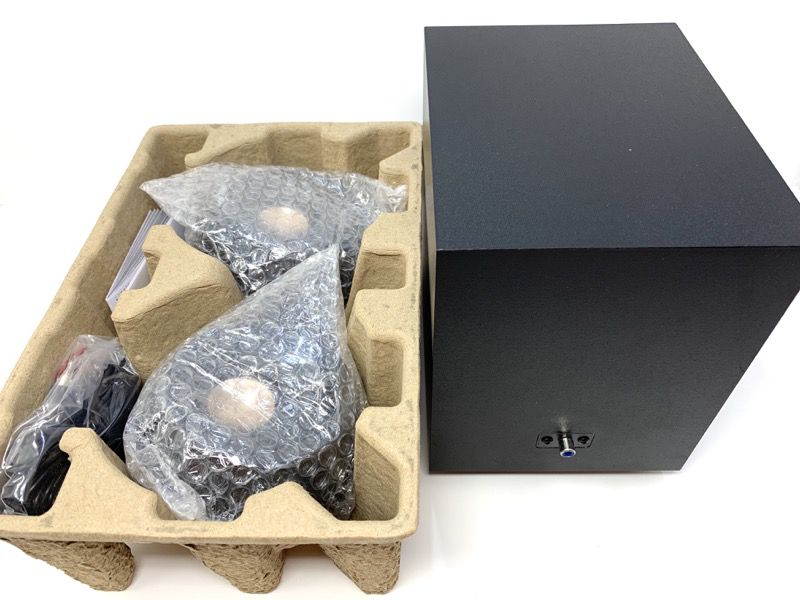
  • Left and Right speakers
  • Cabling (attached)
  • Subwoofer

Hardware specs

2x2W RMS, 1x4W RMS (up to 8W RMS, peak power 16W)

Signal-to-Noise Ratio: 75dB

Frequency Response: 50Hz – 20kHz

Design and features

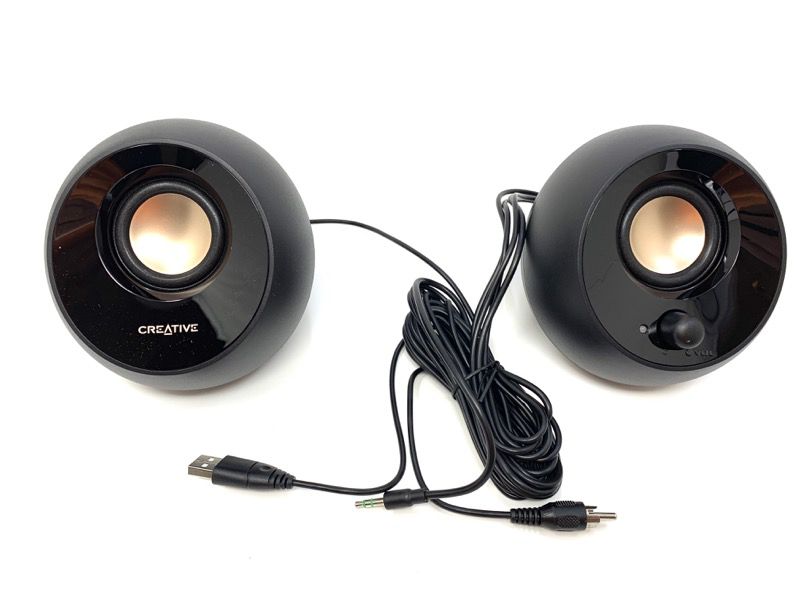
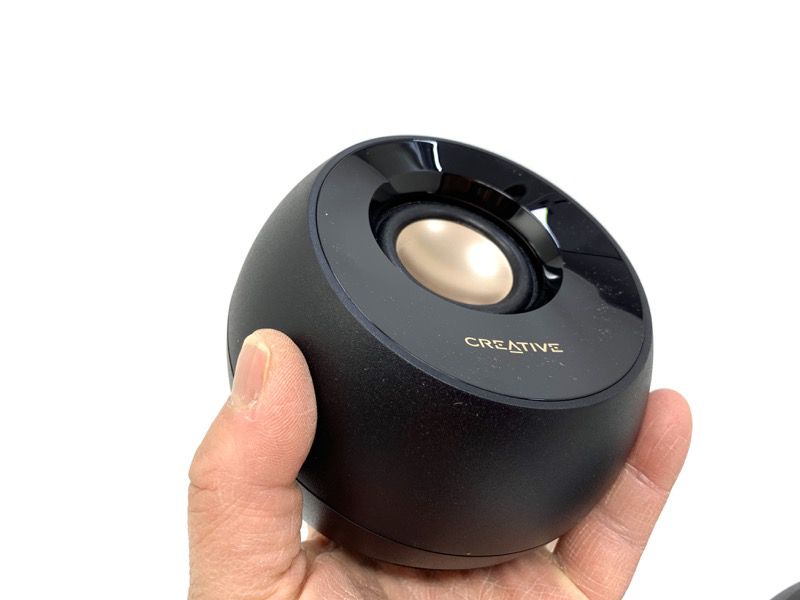
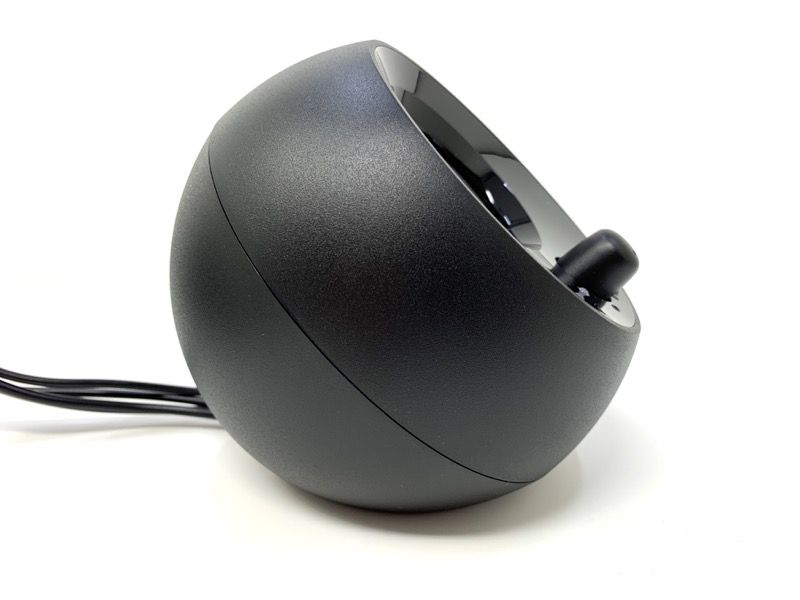
The two sphere-shaped speakers are permanently attached together with cabling.  They stand with a 45 degree upward angle, ideal for desktop use.

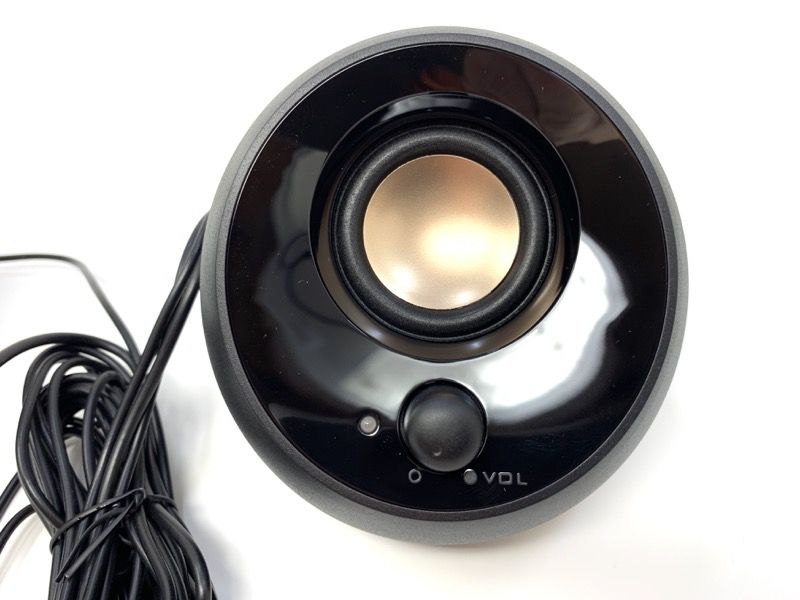
The right speaker features a volume knob that doubles as a power switch, and an LED indicator.

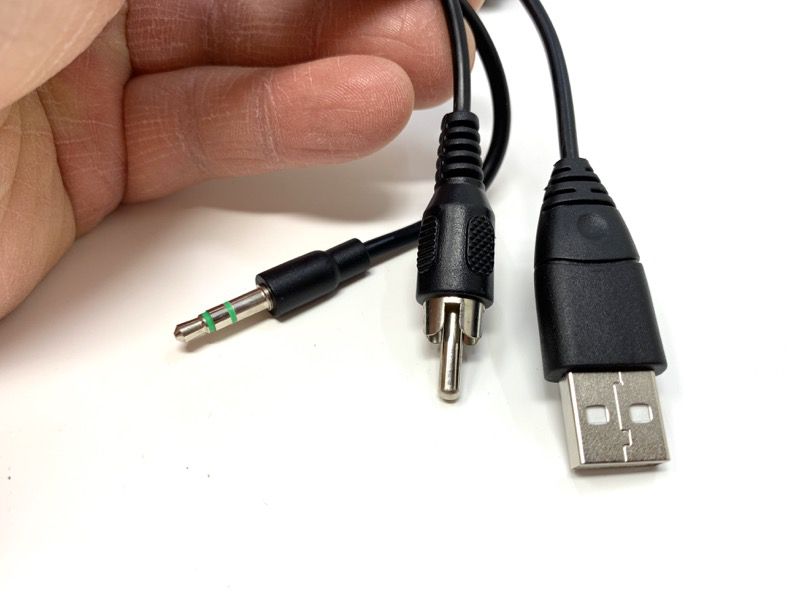
There are three cable ends: 1/8″ stereo plug for audio, a single RCA-style connector for the subwoofer, and a USB connector for power.

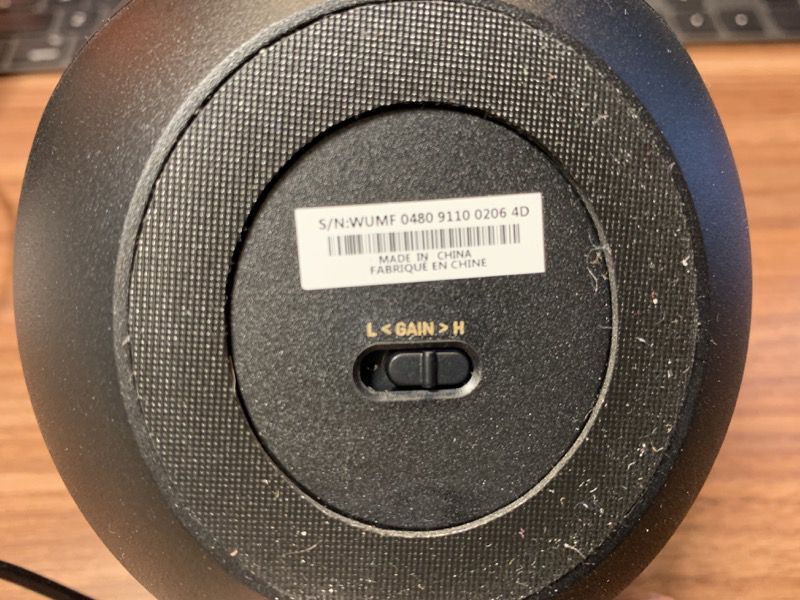
There’s one hidden control under one of the speakers: A high-low gain switch. I almost missed it.

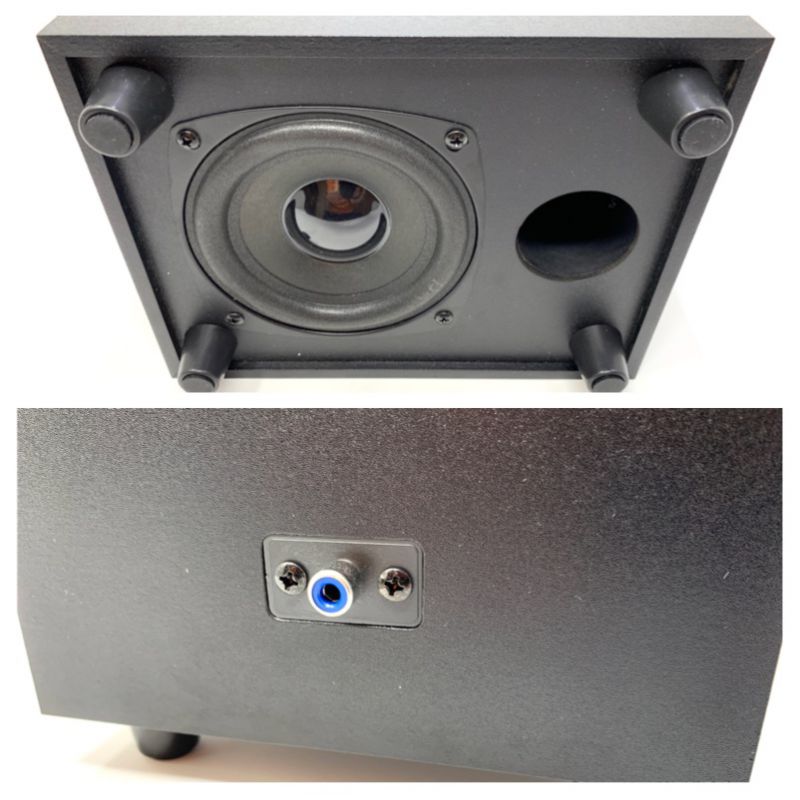
The subwoofer has no adjustments, and just one audio input. It has no amplifier built-in.

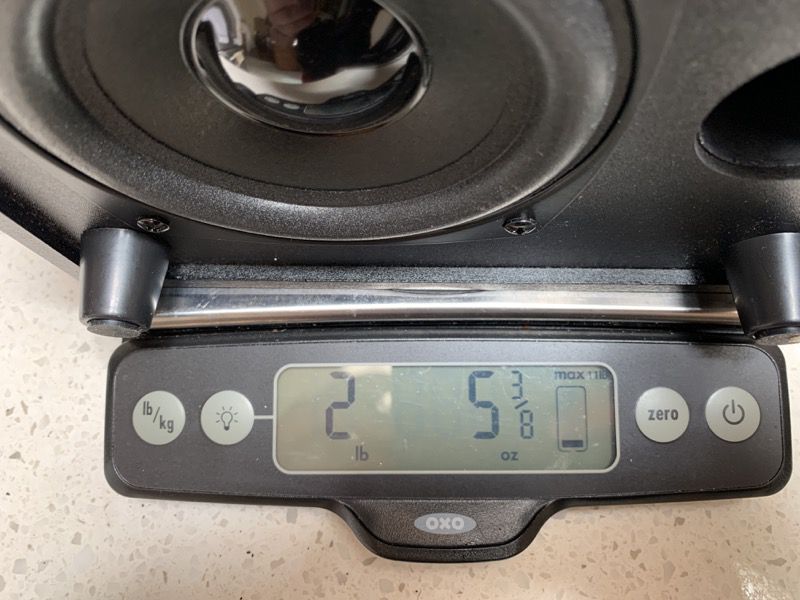
It’s quite small and light, weighing in at under 2-1/2 lbs.

Setup

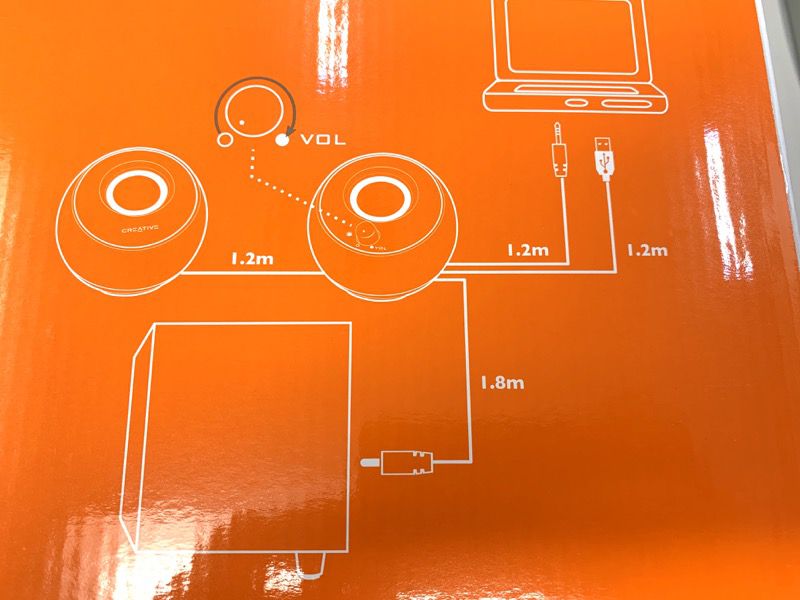
I did not find any instructions in the box, but there is a wiring diagram on the side.

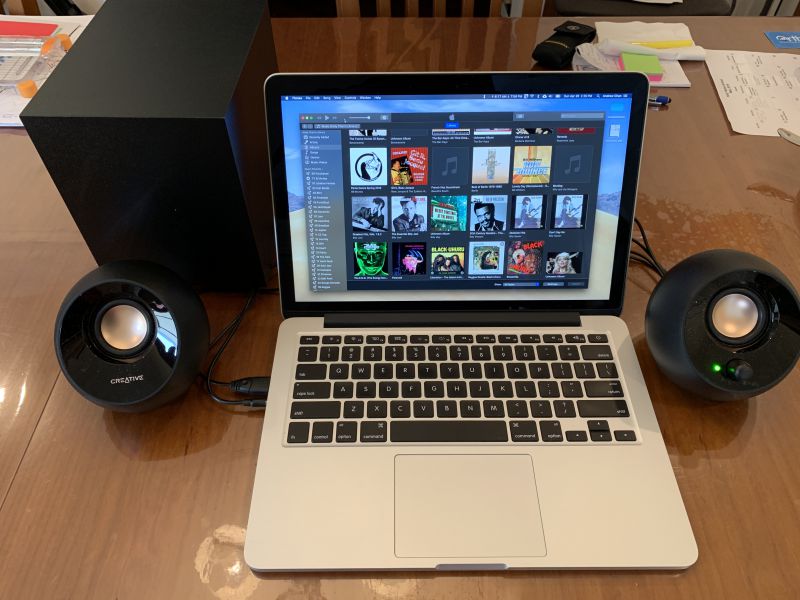
Here’s the entire setup with my 13″ MacBook Pro. Note that both the audio connector and USB are connected to the laptop.

Performance

I found the 45 degree angle of the left and right speakers provided a very nice sound to it. But for you bass-a-holics, be warned: The subwoofer is deeply disappointing. A few times I had to lean in and wonder “is this thing working?” Yes, it works, but only just. No rumbling low frequencies. It’s merely some low-end fill.

What I like

  • Angled speakers
  • Easy to use
  • Handsome

What needs to be improved

  • Anemic low-end for bass-heads

Final thoughts

For the price, the Pebble Plus 2.1 USB desktop speakers with subwoofer are “just fine”. But if you want something with more boom and thunder, look elsewhere.

Price: $39.99
Where to buy: Amazon
Source: The sample of this product was provided by Creative Labs.

Filed in categories: Reviews

Tagged:

Creative Labs Pebble Plus 2.1 USB desktop speakers with subwoofer review originally appeared on The Gadgeteer on May 22, 2019 at 9:00 am.

Note: If you are subscribed to this feed through FeedBurner, please switch to our native feed URL http://the-gadgeteer.com/feed/ in order to ensure continuous delivery.
Spectral Body Alkaline Blue water bottle review

REVIEW – Hydration is important and although the old adage of needing 8 glasses of water a day may not be 100% valid, it is true that plain water is better for your body than sodas, and other sugary drinks. Can you make plain water even better for you though? Some people believe that alkaline water is more healthy for your body than regular tap or filtered water. The vast majority of people believe that bacteria free water is healthier for you (duh!). Is there a way to turn your ordinary water into both more alkaline and free of bacteria? That’s where the Spectral Body Alkaline Blue water bottle comes in. Let’s check it out and take a swig.

What is it?

The Spectral Body Alkaline Blue water bottle is a 420mL (14.2 oz) glass water bottle that has a built-in filtration system that purifies and alkalizes water within 3 minutes with a touch of a button.

Is alkaline water better for you than regular water?

Regular water is supposed to be neutral with a pH level of 7.0. Alkaline water should have a pH level in the 8.0 – 9.0 range.

I’m not a doctor or a scientist. So I can’t tell you one way or another if the claim that alkaline water is better for your body than regular water is true. But if you Google “benefits of alkaline water”, you’ll come up with many opinions on both sides.

Some people believe that alkaline water is good for your skin, increases energy, helps reduce inflammation, helps prevent cancer, helps prevent osteoporosis, cures acid reflux, and more.

People who don’t believe in the claims cry BS and many health professionals say there isn’t enough research to support the many health claims.

Hardware specs

Type: Ionizer / Small water filtration system
Material: Stainless Steel
Average Alkaline Content: 9.2 PH
ORP Reading: -650
TDS Reading: 47 (contaminants) Parts Per Million
Water temperature: 5-40℃
Charging: USB charge
Bottle capacity: 420ML

What’s in the box?

  • Spectral Body Alkaline Blue water bottle
  • USB charging cable

Design and features

The Alkaline Blue water bottle is made of a double walled glass cylinder with a screw on top and a screw on base that’s a self-contained battery-powered filtration system.

The base contains an ionizer which puts the water in the bottle through the process of alkaline water electrolysis. The water runs over positive and negative electrodes emitted from the ionizer and when this occurs it will create alkaline water while flowing through the alkaline minerals and ORP water purification beads in the bottom in the reservoir.

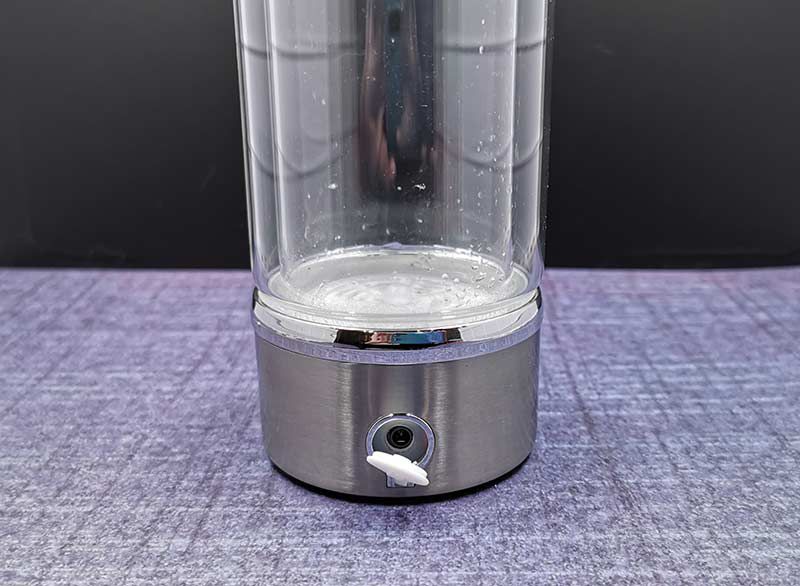
The built-in filtration system has a rechargeable battery and comes with a proprietary USB cable that is used to charge it. A full charge will allow for multiple 3-minute filtration sessions. Depending on how much water you drink a day, the battery should last at least a day or two before requiring a recharge.

I asked Spectral Body about the lifespan of the Alkaline Blue bottle’s base unit and was told that it has a 2-year life span because the built-in battery does eventually die.  This 2-year figure is based on using the bottle multiple times every day. They are developing a better battery replacement solution.

When the bottle is charging, an LED in the base glows red.

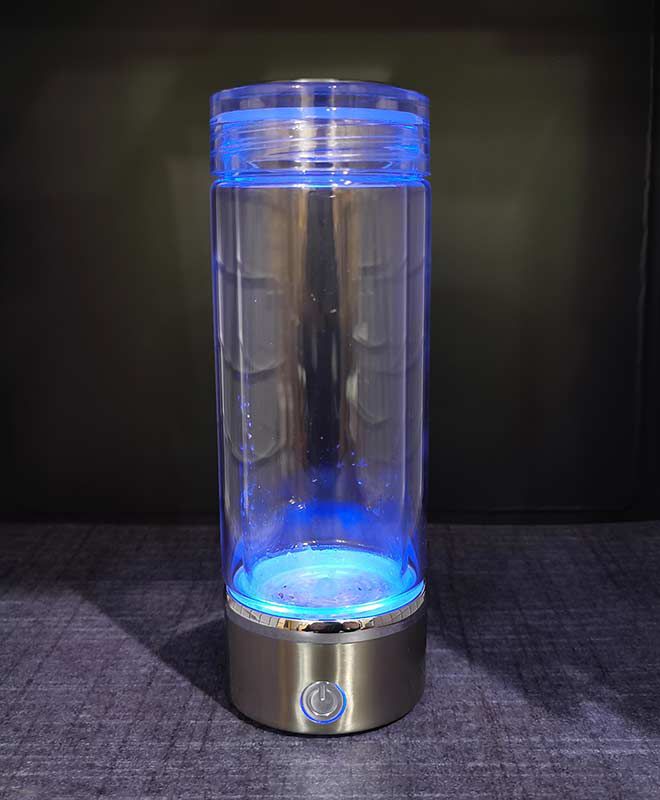
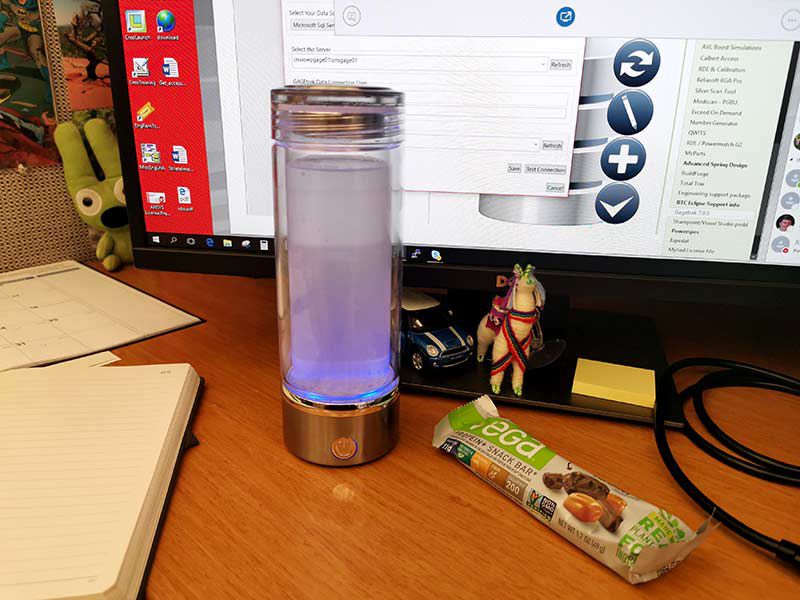
There’s also a Blue UV light that glows when the button on the base unit is pressed to start the purification and alkalizing session.

Note that the bottle can be washed, but the base should not be submerged in water. It’s best for cleaning that you remove the top cap and the base and just wash the glass tube.

Does it work and what does the water taste like?

The first time I tried the Alkaline Blue bottle, I just filled it with cold water, put the cap on, and pressed the button. The base emitted a blue glow and after 3 minutes, the bottle beeped and the blue UV light turned off to let me know that the alkalizing and purification process had ended.

I drank the water and didn’t notice any significant difference in the way it tasted or the way I felt after I drank it. However, when I sniffed the water, the smell reminded me of the way it smells when you walk outside after it’s rained. Kind of a fresh clean smell.

The second time I tried the bottle, I paid more attention to it and noticed a cool lava lamp effect while the water was going through the purification session. I took a quick video to show you what I mean. Check it out.

Wild right? I drank the water and again, didn’t really notice much of a taste difference when compared to un-purified water from the same source. I continued to use the Alkaline Blue water bottle for a couple of weeks once or twice a day and except for the fact that I was actually drinking more plain water instead of my usual drink of choice – tea, I didn’t notice any effects on my body, mind, etc.

So was anything really happening to the water beside the interesting bubble show?

To find out, I used a bottle of pH testing liquid from Think Alkaline that Spectral Body included with the water bottle review sample. I tested multiple water samples at a couple of different locations with water right out of the tap, through a house filter, from my day job tap water, and day job water filter machine.

For each test, I tried as best as possible to use the same amount of water and the same number of pH testing drops. I drew the water for each test at the same time by filling the Alkaline Blue bottle and a cup with the same water. Once the 3 minute filter session in the bottle was completed, I put 5 drops in each cup and waited a few seconds to see the results.

The image above shows the Alkaline Blue water on the left and plain unfiltered tap water from the faucet in my home on the right. According to the pH test bottle colors, the water on the left (from the Spectral Body bottle) is more alkaline than the tap water. The water on the left is more blue which means it has a higher pH level than the more green / neutral pH level water on the right. So the Spectral Body water bottle’s filtration base did make raise the pH level of the water.

But when I tried the same test at my office using the tap water there, the results between the two water samples were the same. There was no discernable change between the treated and untreated water that I could tell.

I tried quite a few more tests and most of the time I was able to tell that the Alkaline Blue water bottle raised the pH level of the water usually from a neutral 7.0 level to around 8.0 just using the colors on the pH testing bottle

Note: I didn’t have a way to test how effective the Blue UV light was on killing bacteria in the water.

What I like

  • Only takes 3 minutes to purify the water
  • Rechargeable

What needs to be improved

  • Not sure how effective the alkalization process is
  • The longevity of the product
  • It would be nice to offer a larger capacity bottle

Final thoughts

The Spectral Blue Alkaline water bottle is a nicely made bottle and I like that you can remove the cap and the base for easy cleaning.

As for using it to make your water bacteria free and more alkaline, the jury is out on those claims. The bottle may be able to effectively kill bacteria in the water using its UV light but I wasn’t able to confirm or deny that claim because I didn’t have a testing method.

Regarding the claim that the bottle can raise the level of alkalinity in water, most of the time I could see that the Spectral Body Alkaline Blue water had an elevated level of alkalinity. But having said that, I was not able to feel any benefits from drinking the alkaline water. If you’re a believer in alkaline water, I think the Spectral Body Alkaline Blue water bottle is the only bottle on the market that will let you raise the pH level of ordinary water. Whether or not there are benefits to consuming alkaline water is a question for which I don’t know the answer.

Price: $69.99
Where to buy: Spectral Body
Source: The sample for this review was provided by Spectral Body.

Filed in categories: Reviews

Tagged: ,

Spectral Body Alkaline Blue water bottle review originally appeared on The Gadgeteer on May 21, 2019 at 11:00 am.

Note: If you are subscribed to this feed through FeedBurner, please switch to our native feed URL http://the-gadgeteer.com/feed/ in order to ensure continuous delivery.
GameSir GK300 Wireless Mechanical Gaming Keyboard review

 REVIEW – Most of my leisure time these days is spent playing Dota 2, so to support my keyboard-mashing habit, last year I bought a really nice keyboard, a Razer BlackWidow Ultimate.  It’s a super study mechanical keyboard that can take a lot of abuse.  It is, however, a wired keyboard.  As a gamer, I am generally skeptical of wireless keyboards, worried about getting lag and running low on battery, so I was excited to test out GameSir’s GK300 wireless keyboard to see how it stacks up against my Razer.

What is it?

The GK300 is a wireless keyboard that is designed for gaming.  It’s a full-sized keyboard with 104 mechanical keys and has a built-in, rechargeable, lithium battery.

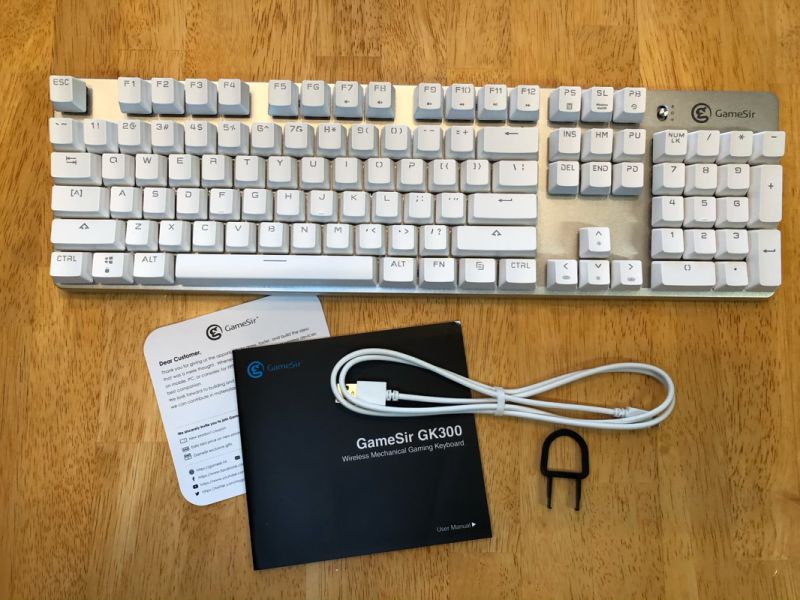
What’s in the box?

  • The keyboard and a wrist rest
  • A wireless dongle
  • A micro USB cable
  • A user manual with 6 pages of English instructions

Hardware specs

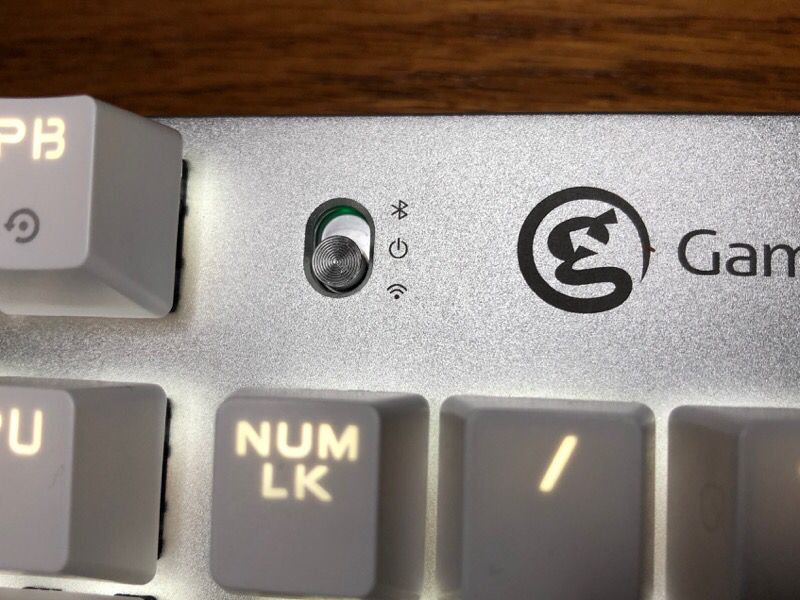
The keyboard can connect to a computer using either 2.4 GHz wireless or Bluetooth 4.1.  There’s a small switch on the keyboard that allows me to choose my preference.

The keyboard is compatible with both PC and Mac.  I tested it on my Windows 10 gaming computer and my MacBook Pro.  Unlike my Razer keyboard, it lacks a USB port and a headphones jack, but this is not surprising, as it’s battery-powered.   Speaking of the battery, the GK300 has an internal, 3600 mAh lithium-ion battery.  GameSir’s website says that it should last 300 hours if you don’t turn on the backlighting, and only 30 hours if you do.  Keep in mind that the battery is not replaceable.

Design and features

The keyboard is a standard, full-sized keyboard.  The unit I tested has white, plastic keys and a white wrist rest.  I can’t say that I’m a fan of white, and I anticipate that it will show dirt too easily.  GameSir also sells this keyboard in space gray, which is probably a better choice for most gamers, as we don’t have the reputation of being the neatest, cleanest people on the planet.

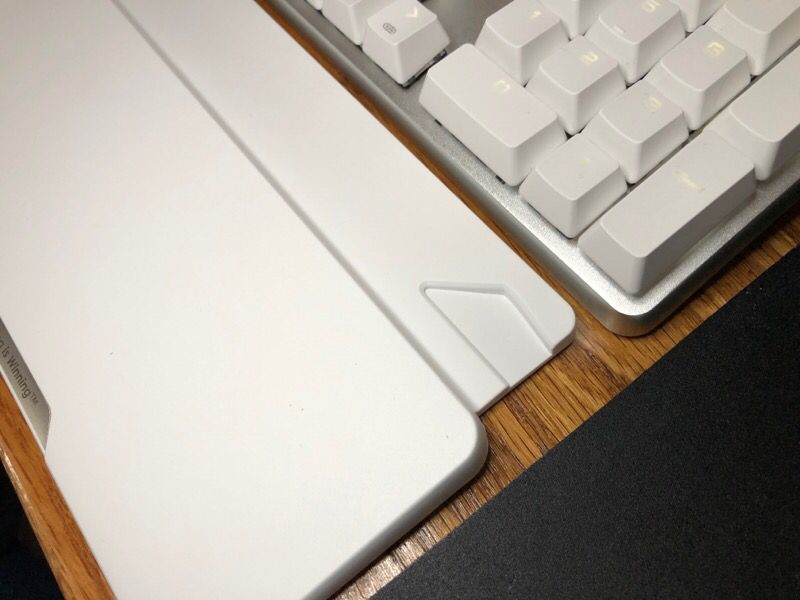
The keyboard is angled at 7.5 degrees and comes with a wrist rest; it’s an ergonomic design that should help to minimize carpal tunnel syndrome.  The wrist rest has 3 notches embedded in, which have corresponding stubs under the keyboard.  The keyboard fits perfectly in them, and this keeps the wrist rest in place.

Additionally, there 6 rubber feet on the bottom of the keyboard and 5 more on the wrist rest; together they did a good job of preventing them from sliding around on my desk.

The top cover of the keyboard is made from an aluminum alloy, while the underside is made from white plastic.  The keyboard is solid and fairly heavy; when I grabbed the ends and twisted, it didn’t flex.  From all appearances, it’s a well-made gadget.

Installation and setup

The keyboard comes with an internal, rechargeable battery, and the first thing I had to do was charge it.  I plugged the micro USB connector into the side of the keyboard and the other end into a USB port on my PC.  GameSir’s website says that it needs 3 hours to charge and recommends that I let it charge fully before playing, so I did.

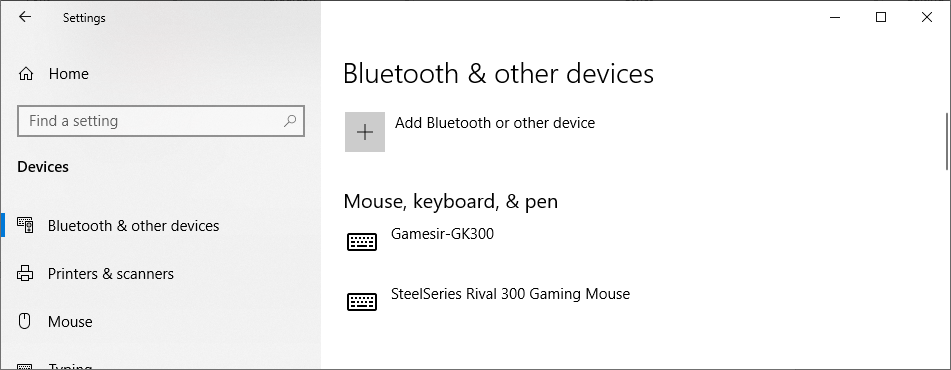
The keyboard supports both 2.4 GHz wireless and Bluetooth 4.1, but as my motherboard doesn’t support Bluetooth, the only thing I tested was the wireless.  On the bottom of the keyboard is a small slot that stores the wireless dongle.  I pulled it out and connected to a USB port on my PC, and Windows 10 promptly found and installed the driver.  When I tested it on my MacBook Pro, it did the same.

Performance

When it comes to the performance of a wireless keyboard, I admit that I have concerns.  My first concern is obviously, “Is there any lag?”  When playing online, competitive games, there’s no room any amount of lag.  The good news is that I could not discern any lag at all.  I jumped right into my favorite game and began playing.  No lag detected!

My second concern is the feel of the keys.  When pounding away, I want them to be very tactile and give strong feedback letting me know that each key was successfully pressed.  This is why all good gaming keyboards use mechanical keys.  I’m happy to report that the GK300 performed as expected.  In fact, once my game got going, I forgot that I wasn’t using my trusty Razer.

My third concern is battery life.  What happens when the battery gets low in the middle of a game?  The manual says the LED under the wireless/Bluetooth switch will flash red when battery life drops below 15%, but this is not what actually happened.  After several days of playing, about when the battery should have been getting low, the switch started flashing green and red.  This left me a bit confused, because it’s not what the manual says.  Assuming that this was still a battery problem, I plugged in the USB cable, and it charged while playing.  I’ll always need to keep the cable handy because I can’t afford to have my keyboard die during a game.

After many hours of gaming, I can say with confidence that the GK300 plays very similar to my Razer keyboard, and that’s a compliment!

Extras

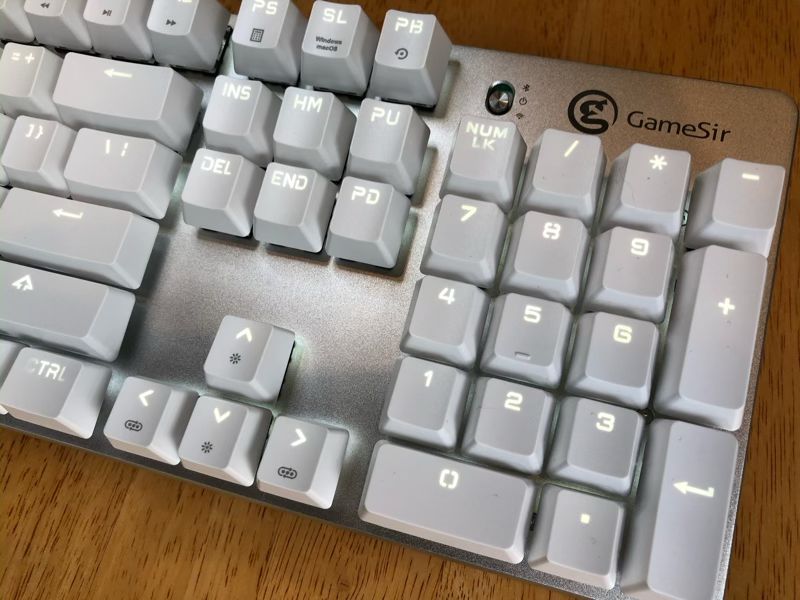
These days all gaming peripherals come with some sort of extra lighting, and the GK300 is no exception.  Using the function key, I can set the lights to roll across the keys like a wave, to light keys as I touch them, to pulse out in wave from each key I touch, to light all the keys, etc.  Personally, I prefer to leave all the lights on, as the room I game in is a bit dim, but it’s nice to have these choices.  The lights on this keyboard only come in one color, white, and I can control how bright they get.  What I really appreciate is that I don’t have to install any extra software in order to set the lighting, something that I have to do for my Razer keyboard.

I’m not normally a fan of wrist rests, but as this keyboard comes with one, I decided to test it out.  After playing with it for several days, I can say that it’s not bad.  It doesn’t squirm around, and the support it provides is comfortable.  It does push the keyboard a bit further away from the edge of the desk than I prefer, but it needs to have some room.  If having a wrist rest is important to you, you’ll probably like this one.

The GK300 manual notes that the keyboard can use Bluetooth and connect to an Android or iOS device.  While I don’t really have a need to connect my iPad to a keyboard, I decided to test it out anyway.  I followed the instructions in the manual, and while the iPad was able to detect the keyboard, it was not able to pair with it.  I kept getting a “the pairing took too long” error. Just to make sure there wasn’t some problem with my iPad, I tried it on my daughter’s as well but got the same error.  The manual notes that if pairing fails, I should hit the function and reset keys simultaneously; that’s great, but there is no reset button on this keyboard, so I don’t know what the manual was trying to tell me.  I tried to use other keys instead of the mythical reset key, but nothing worked.  If connecting to your phone or tablet is important, you’ll want to look elsewhere, but honestly, if you that’s what you need, there are better keyboards for the job.

Tech Support

GameSir’s GM300 wireless mouse comes with utility software, G-Core, that provides some extra configuration options.  I couldn’t find anything similar in the GK300 manual for their keyboard, so I decided to test GameSir’s tech support.  Their “Ask for Help” page has a form that I filled out with my question.  Although their website guaranteed a reply within 1 day, I never got one.  It appears that GameSir doesn’t actually offer any tech support.

What I like

  • Solid, responsive keys
  • Sturdy construction
  • Good wireless performance

What needs to be improved

  • Bluetooth connection to iOS devices
  • Inaccuracies in the manual
  • AWOL tech support

Final thoughts

I played a lot of games using GameSir’s keyboard, and I must say that I like it; in fact, I am surprised by how much I like it.  As I was comparing it to my Razer, I was expecting it to fall short, but that didn’t really happen.

Do I plan to replace my Razer with GameSir’s keyboard?  No, I don’t.  With a wired keyboard, I have the peace of mind knowing that lag and battery problems just aren’t a thing.  If was I looking to buy a wireless, mechanical keyboard for gaming, would I consider the GK300?  This is tough, but probably not.  If I were only comparing the keyboard to other keyboards, I would consider the GK300; however, when I consider the entire package (the poor manual, the problems with Bluetooth, and the lack of tech support), I think I would look elsewhere.  If GameSir wants to compete with top-tier providers of gaming peripherals, like Razer, Logitech, and Sennheiser, then they are going to have to step up their game.  And I hope they do because the GK300 is a solid product.

Price: $69.99
Where to buyGameSir’s store or Amazon
Source: The sample for this review was provided by GameSir.

Filed in categories: Reviews

Tagged:

GameSir GK300 Wireless Mechanical Gaming Keyboard review originally appeared on The Gadgeteer on May 21, 2019 at 9:00 am.

Note: If you are subscribed to this feed through FeedBurner, please switch to our native feed URL http://the-gadgeteer.com/feed/ in order to ensure continuous delivery.
myGEKOgear OwlScout dual dash cam review

REVIEW – I’ve reviewed a few dash cams in the past, but this time I tried out the myGEKOgear OwlScout dual dash cam. I’ve reviewed a few dash cams from this company, but none with dual built-in cameras. Let’s see how this one performs.

What is it?

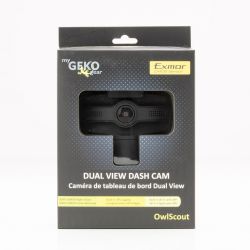
The myGEKOgear OwlScout dual dash cam is a dual camera dash cam designed to record video of both the inside and outside of your vehicle simultaneously.
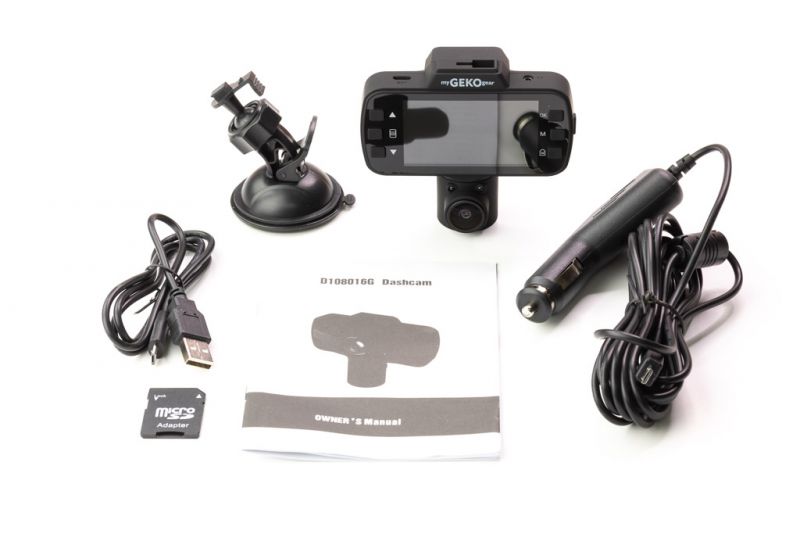
What’s in the box?

  • OwlScount Camera
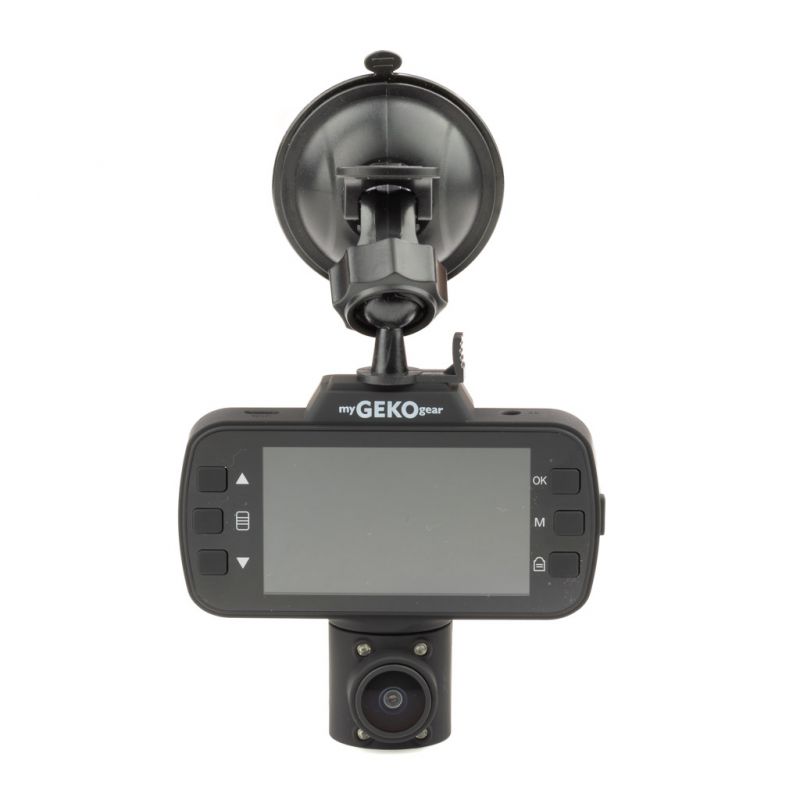
  • Suction cup mount
  • Car charger plug and cord
  • Micro-USB Cable
  • 16GB Micro-SD card
  • Quick Start Manual


Hardware specs

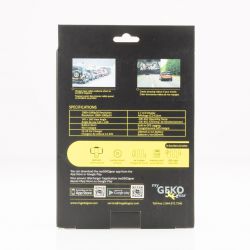
Recording Resolution: 1080P + 1080P 30FPS
Imaging Sensor: Sony Exmor, Infrared Night Vision
Display Size: 2.7″ LCD
View Angle (F.O.V.): 145°+145° (F+V)
Max. Capacity of microSD card: 16GB microSD included
Batteries Included: 170mAh Li-ion battery embedded
Automatic Incident Detection (G-Sensor): Yes
Loop-Cycle Recording: Yes
Built-in Wi-Fi: Yes
Integrated Microphone: Yes
File Format: .mp4
Dimensions: (H x W x D) 3” x 3.7” x 1.3”

Design and features

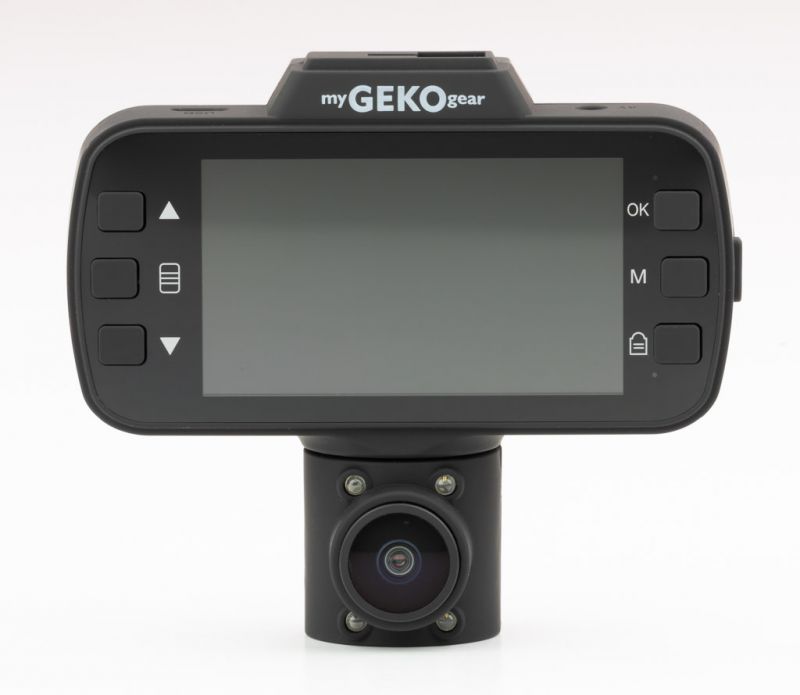
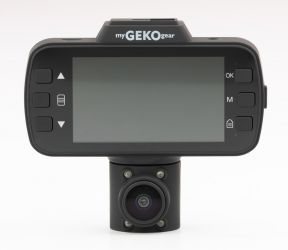
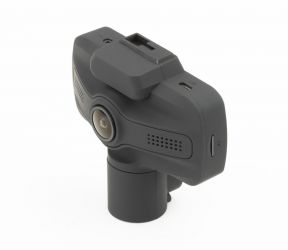
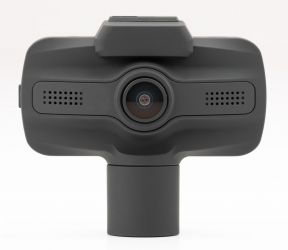
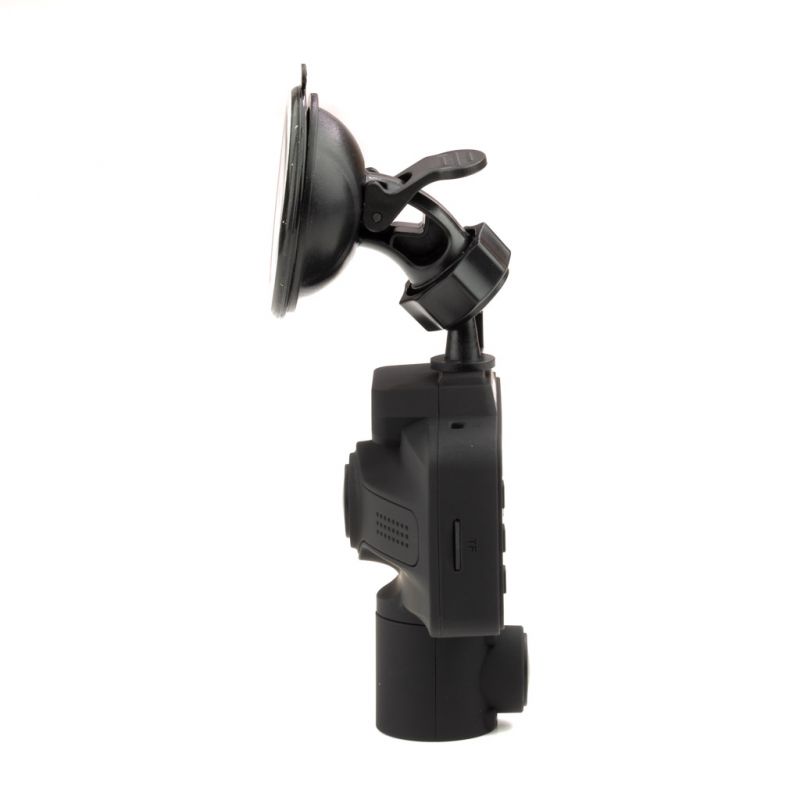
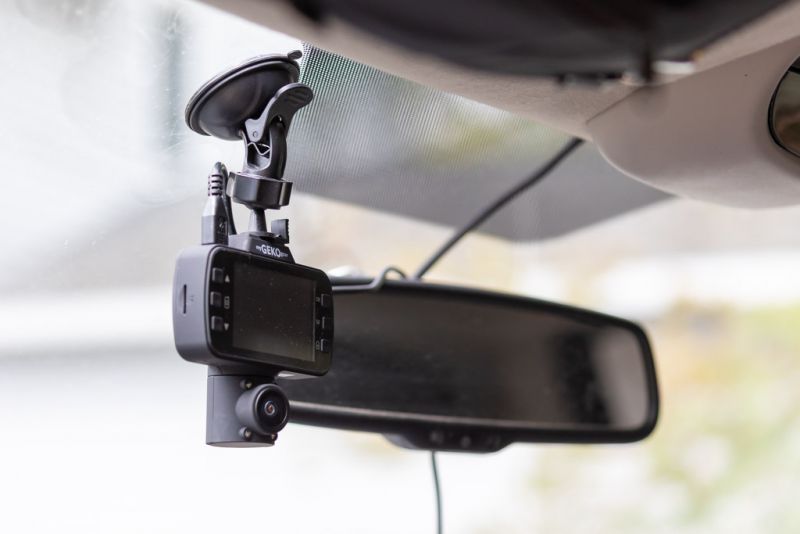
The myGEKOgear OwlScout dual dash cam is a suction cup mounted dash cam that features a large 2.7″ LCD screen and both front facing and rear facing cameras. At the heart of each camera is a Sony Exmor imaging sensor that provides great video in both day and night conditions. The rear facing camera features infrared illumination. Both cameras feature a 145 degree field of view. Each camera’s video is saved to separate files on the memory card.


When recording video the rear facing video is displayed in the upper left quarter of the screen, allowing for easy positioning of the camera without having to press any buttons.

Screen capture from smartphone app

The micro-USB power cord is a welcome feature that allows you to use the provided car charger plug, or your own cable as you desire. A 170mAh embedded battery provides enough power to save video files when the camera is powered off via the ignition, or during a power loss in the event of a crash. In the event of a crash, the G-Sensor will detect the impact and automatically save the video so that it is not overwritten.

The OwlScout comes with a 16GB micro-sd card and features the ability to loop-record. Loop recording will save the video in 3, 5, or 10-minute clips, overwriting the oldest clips when the card is full.


I found the integrated microphone to be surprisingly good. The audio in my sample footage (below) is directly from the camera. I think the microphone should work great for capturing all conversations in the vehicle.

The camera has three modes: Video (dash cam), Photo, and Album. Photo mode takes up to 12MP images, and the Album mode is to view and playback photos and videos.

The OwlScout also has built-in Wi-Fi for connecting to the camera via an iPhone or Android smartphone. I found the app to be a bit limited, but sufficient to view and transfer videos or view live video. I did find though that the settings in the app would not correspond to settings that were already set in the camera, and the camera would revert some settings after the app was used. For example, I had the recording loop set for 3 minutes, and after going into the app and then disconnecting, the camera then showed a 10-minute loop interval.

There is a parking monitor feature that can be turned on which will start recording when an impact on the vehicle is detected.

I do like how the videos that are either automatically saved by the G-Sensor or by manually pressing the lock button are saved to a separate folder on the SD card, as well as accessible from the “Emergency” tab of the album view in the app.


The GPS logging feature mentioned on the website feature list was nowhere to be found in the camera or the app despite there being a GPS icon on the screen.

I did find that the playback operation was a bit confusing as to which button did what, such as play, fast forward, etc. I also found that after switching from video to photo to the album (playback) and then back to video, the dash cam video did not automatically start recording until I clicked the OK button. I lost quite a bit of video because of that. I think it should always revert to recording after a certain period of time when you are in video mode.

Here’s some sample video from the OwlScout camera, along with a few comments as I was driving. The video is unprocessed except that I overlayed one video on the other and spliced the 3-minute clips together. Other than that no video or audio editing was done.

What I like

  • Simple to use menus
  • Easy to see buttons
  • Great microphone
  • Wi-Fi connection with a smartphone
  • Dual Cameras
  • Range of motion for mount
  • Micro USB connection
  • Well named file names in the following format: yyyy_mmdd_hhmmss_001A

What needs to be improved

  • Price – a little high for the feature set
  • Confusing playback controls
  • GPS logging feature missing from app

Final thoughts

Overall the I really liked the video display and its size, and the video quality from this camera was pretty good. The audio captured was fantastic. I think the price might be a little high for the feature set, as some cameras have more features, but may not have video as good as this one.

Price: $199.99
Where to buy: myGEKOgear
Source: The sample of this product was provided by myGEKOgear.

Filed in categories: Reviews

Tagged: ,

myGEKOgear OwlScout dual dash cam review originally appeared on The Gadgeteer on May 20, 2019 at 11:00 am.

Note: If you are subscribed to this feed through FeedBurner, please switch to our native feed URL http://the-gadgeteer.com/feed/ in order to ensure continuous delivery.