70Mai Dash Cam Pro review

REVIEW – Dashcams are used to record outrageous occurrences on the road or provide evidence of collision, vandalism, or corruption. However, only Tesla has a built-in dashcam; in other cars, the dashcam is purchased separately. The 70Mai Dash Cam Pro is one of the newest models to hit the market. Read on to see what I think!

What is it?

A dashcam is a small digital video camera that mounts to the dashboard and records the point of view of the driver. Each country and jurisdiction within the country has rules about the use of dashcams and the distribution of the videos that they record, so users must ensure their legal right to operate the camera.  These legal restrictions are one of the reasons that automakers generally do not incorporate them. The benefit to these restrictions is that dashcam manufacturers can rapidly develop features outside of the snail’s pace of evolution that automakers are restricted to.  As a result, consumers and manufacturers are no longer satisfied with a dashcam as merely a windshield mounted HD wide-angle camera that can store video to a microSD card. As part of this trend, the 70Mai Dash Cam Pro has some very innovative design and features and is an example of the rapid evolution of the dashcam.

What’s in the box?

  • 70mai Smart Dash Cam Pro
  • Car Charger
  • USB Cable
  • Two Electrostatic stickers
  • Wiring tool
  • mounting bracket with heat resistant adhesive
  • manual

Hardware specs

  • Model: Midrive D02
  • Image sensor: SONY IMX335
  • Resolution: 2592 x 1944
  • Camera: FOV 140° , F1.8, 6 glass
  • Wireless connection: Wi-Fi IEEE 802.11 b/g/n/ 2.4GHz
  • G-sensor: Acceleration sensor
  • Expandable memory: MicroSD card with a capacity of 16-64GB and read/write speed of Class10 and above
  • Supported OS: Android4.4/iOS8.0 and above
  • Power supply: car cigarette lighter
  • Battery type: li-polymer battery
  • Battery capacity: 500mAh
  • Input: 5V 2A
  • Operating temperature:-10C 60C
  • Dimensions: 82 x 58.2 x 40.5mm

Design and features

first thoughts

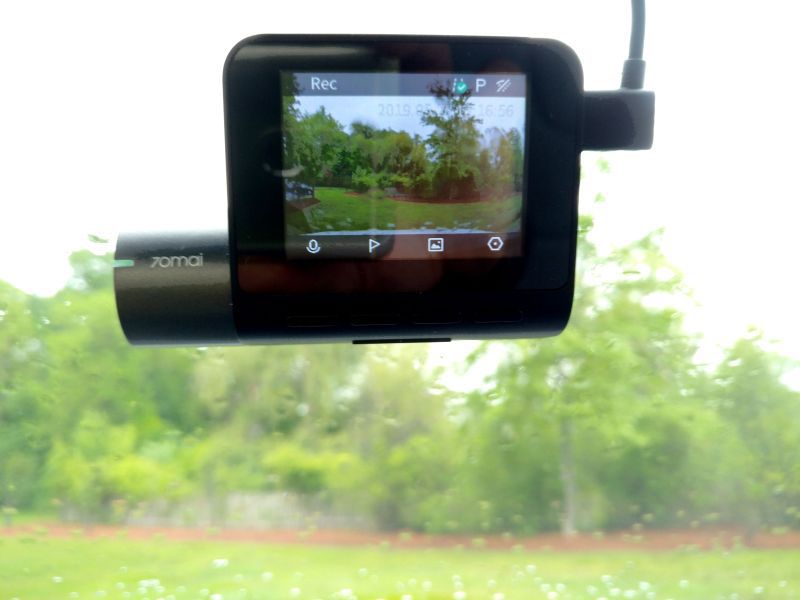
The physical design of the dash cam is very sleek and unobtrusive. This is the first camera that I have seen that supports mounting using an electrostatic film. This is similar to that film that is applied to glass phone screen protectors. Once the film has bonded to the windshield it is held securely in place but may be removed by peeling back one edge without leaving any residue. or film. This design allows the film to be freely repositioned without leaving traces of adhesive. This also permits the camera to be used on rented or other short term vehicle and then returned to the main vehicle. You can see the oval film in the photo below.
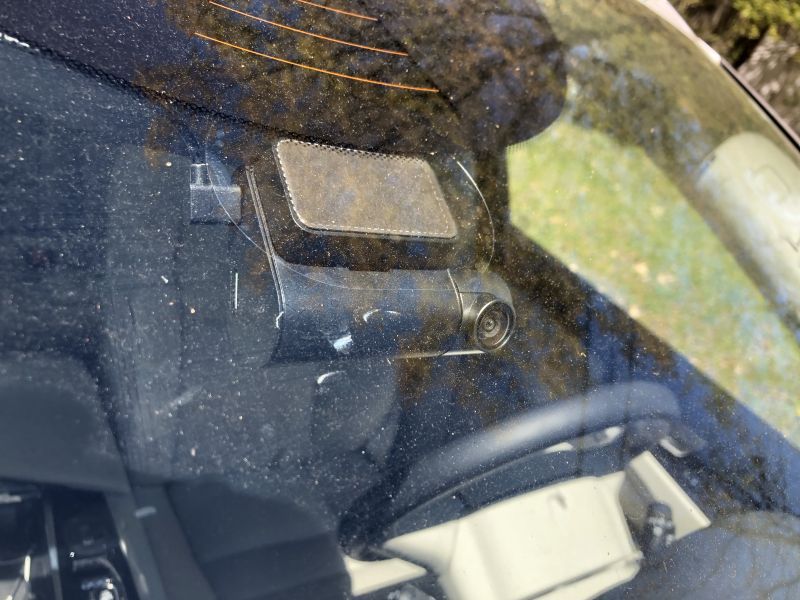
The camera mounts to the windshield so that the LCD display and buttons for the user interface are mounted in a fixed position against the windshield. This is a great option for a vast majority of vehicles but may be difficult to access for some vans or cars that have large windshields mounted at a low angle.
Setup

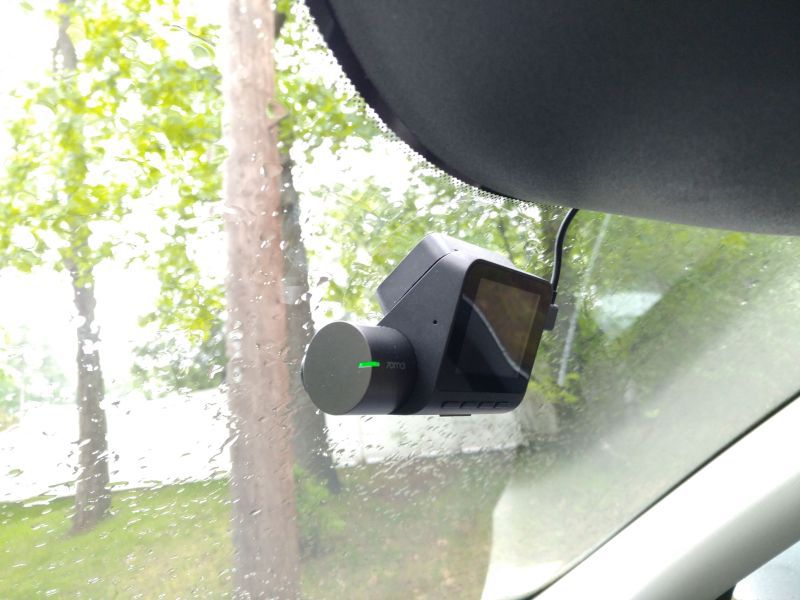
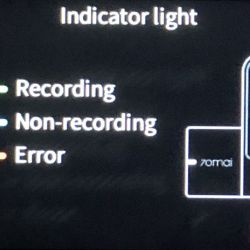
The camera is on the left-hand side and the USB cord is on the right-hand side. I would expect that since more cars are left side drive that the camera would be on the right-hand side so that the camera could be mounted center with the screen and buttons closer to the driver. The camera mount has an indicator light designed to alert the driver so a left side drive was definitely the target platform when the camera was designed. The camera is mounted on a rotating bezel so that the most use of the field of view can be obtained. The camera does not have any left to right adjustment, so the unit must be mounted in the center of the windshield to obtain the best results.

The review sample of the dashcam was provided with an accessory GPS mount holder that has an adhesive on it and is used to mount the camera to the electrostatic sticker. If the GPS mount is not purchased then a standard mount is provided. The mount allows quick connection and disconnection from the windshield without removing the electrostatic sticker. It also has small rubber feet so that it acts as a shock absorber for recording. The camera doesn’t have any built-in image stabilization so a little help from these rubber feet goes a long way.

Once the camera is mounted it looks very sharp and more like a built-in piece of the car versus an accessory stuck on the windshield. The USB power cable is very long, about 10.5 feet, and should allow inconspicuous mounting of the camera cable in a variety of cars. Owners should be careful to not block the operation of airbags. If you are able to remove the A-pillar faring and tie the wire to the other cables running in this area then that is best.

Operation

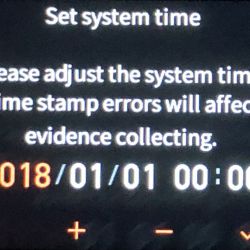
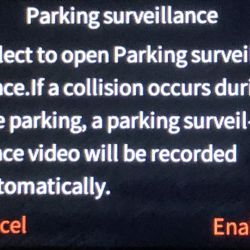
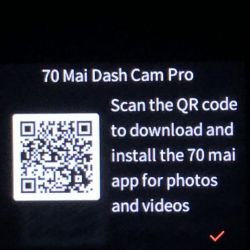
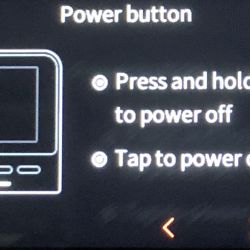
The instruction booklet is in the English language and gives a brief overview of the use. In addition, the camera and electrostatic mounts each come with screen protectors printed with instructive text. The camera screen protector indicates the function buttons and that the unit may be reset by holding the power button for 15 seconds. The electrostatic film protector describes the instructions for mounting the film and camera. The camera also provides some information upon the first use, but there is no way to revisit this information from a help submenu. The gallery below shows what it is like.


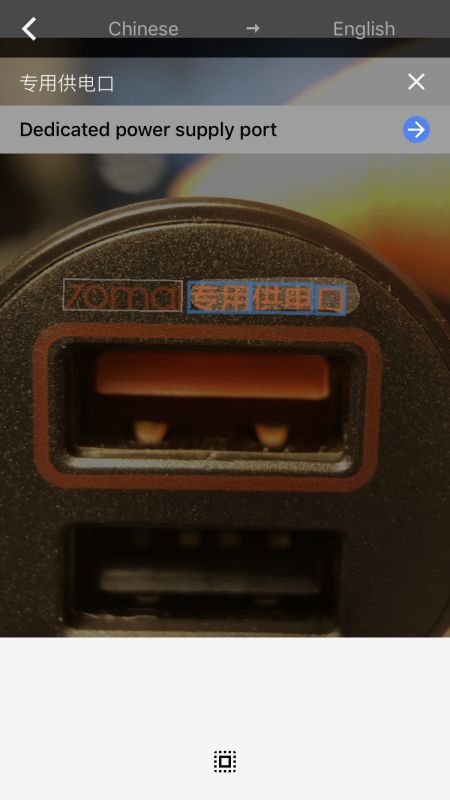
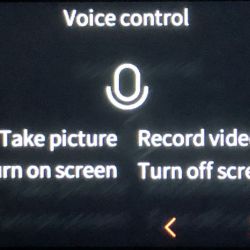
The website at the beginning of the book,  https://help.70mai.asia/278.html, is quite helpful and provides much more information than the booklet shipped with the camera.  Specifically, the website describes the voice control capabilities, the P vs N setting (PAL vs NTSC), the limited number of photos (100), and other items not mentioned in the booklet. (I suddenly long for the hundreds of pages that Microsoft Ofice included in the early ’90s.) One thing I couldn’t find any info on was what the 12V adapter said. The text is very hard to read amber on black and it is in Chinese. Good thing Google translate knows that this says “Dedicated power supply port.”
You will need to supply your own microSD card for the camera. The manual recommends a card that is 16 to 64 GB but I used a 128 GB card without issue and it was able to access the whole capacity. The camera records video in one-minute intervals and will delete the oldest video when the capacity of the memory card is nearly exhausted. The card capacity relates to how many minutes of driving record you wish to keep.  The card must be formatted in the camera and will have four directories of video storage: Normal video which is the looped record of the drive, Emergency video which is triggered by a hard acceleration during driving, Parking video which is triggered by the movement of the accelerometer after power is cut off, and photo storage. I was surprised to read that the emergency video is also looped. I would think that these videos should be persistent until the storage of the card is full.  The recordings are constant bit rate and each video has an audio track even when the audio is not recorded. The audio on silent clips is 1 minute of constant bit rate mono 44kHz 24bit sample.

The camera is able to record video in 4 different resolutions. The higher resolutions are recorded in H.265, which may not be supported natively on all devices and the lower resolutions are recorded in H.264. Each video segment also has a preview video in 640×360 that is downloaded to the mobile app for preview. The total capacity for each video is identified in the table below.

resolution (pixels) codec Frame rate (1/sec) file size (KB)
2592×1944 H.265 30 163840
2560×1440 H.265 30 163840
1920×1080 H.265 30 122880
1920×1080 H.264 30 122880
1280×720 H.264 30 122880
640×360 H.264 30 20480

Photos are taken at the resolution that the camera is operating at. Each photo was stored in a 5 MB file. Even the highest resolution photo shouldn’t be more than 2 MB.

It seems based on this table that the incremental difference in the capacity required for higher resolutions is small based on the compression used and the way that video is stored on the card.  Apparently, the 128GB card I used was formatted with a 5120 MB cluster size.  I also tried a 32 GB card and it was formatted in the same way. The card is readable by a PC or Mac using an adapter.

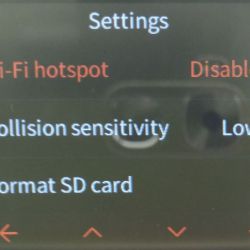
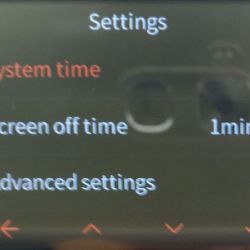
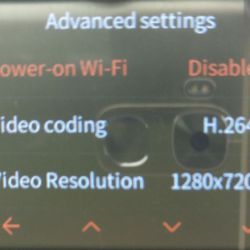
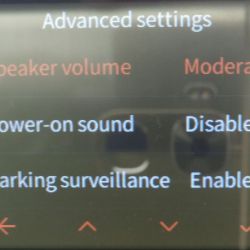
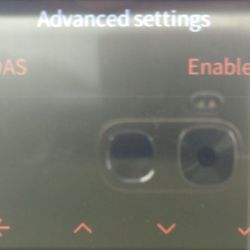
The operation of the camera is menu driven. I think that some menu items are in the wrong place, but here is the layout.


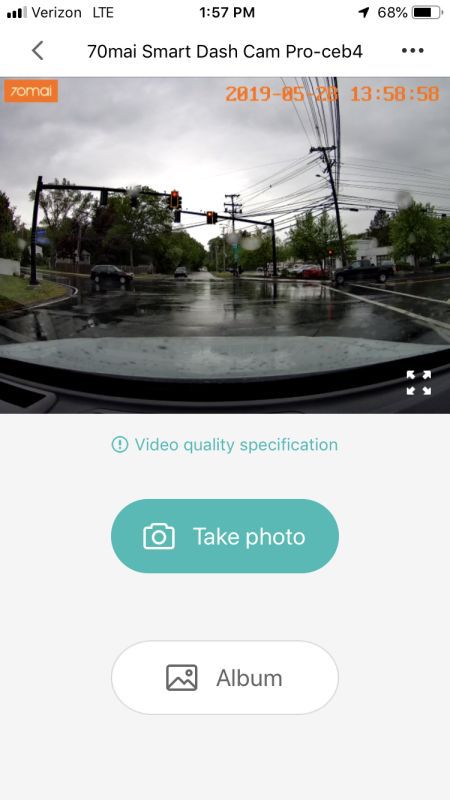
The camera app allows you to manage all of the 70mai gadgets. The app has a local album of videos and photos that you download to the app. The app also has the same info presented on the web page above. The app settings allow you to clear the app cache and provide feedback to 70mai. The main screen of the app is a preview window of the camera feed and allows the user to take a photo using a button on the app. The app pairs with the camera using a WI-FI access point.
Once the power is cut to the camera the camera will remain on standby. if there is any movement detected by the camera in this state it will record a video. The camera also records a video while the car is moving if there is sudden acceleration.

A de-fog algorithm sharpens video taken in snow, smoke or haze but without a way to turn it off, I was unsure how well it works.

There is an optional GPS module that replaces the camera’s mount. The GPS mount enables a feature called Advanced Driver Assistance System, which gives real-time alerts when your car is leaving its lane or rapidly approaching a vehicle ahead. This feature didn’t work as well as my car’s built-in system. What I find frustrating is that the GPS isn’t used to EXIF tag the photos, label the files of the video or set the camera’s time. These should be minor programming changes that could have a profound benefit to understanding what happened on the road and when. One other item is that the operation is restricted to between 14 and 140 degF. Car’s interiors often reach conditions outside of this range and I’m not sure that the parking monitor will work in these extreme conditions.

Performance

I’ve included a few videos of the performance at the links below. Overall the videos are clear. I think that the enhancement that the advertisement shows is more like CSI than reality, but license plates are visible and readable.

This is the manufacturer’s video:

This is my video taken during the day at the highest resolution. The sun is setting to the left of the video but the glare doesn’t wash out the rest of the scene. I bet the couple who got in a collision had one of these cameras.

Here is another video that I captured taken at night. It is impressive how the sensor compensates when the headlights are turned off. It is actually brighter on the video display than it is through the windshield.

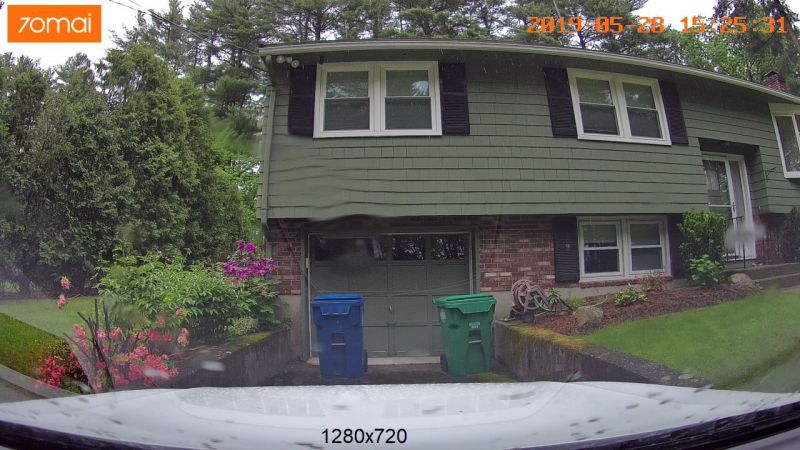
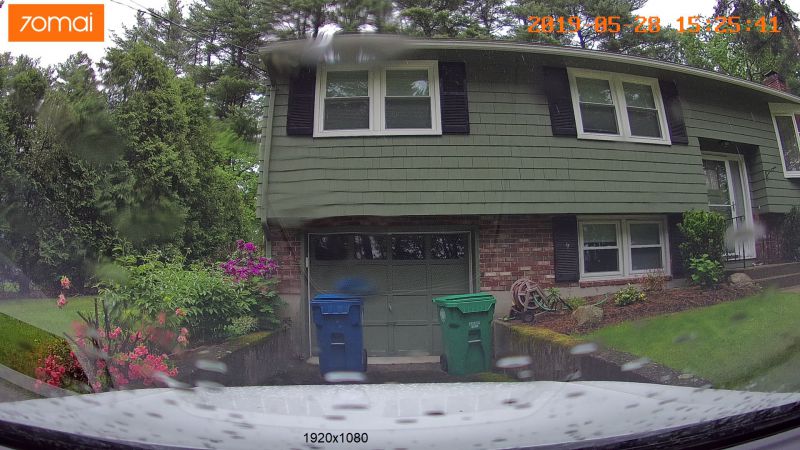
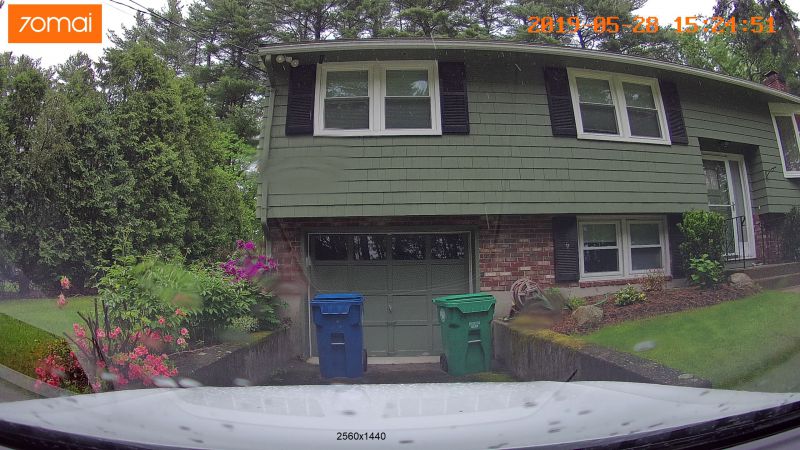
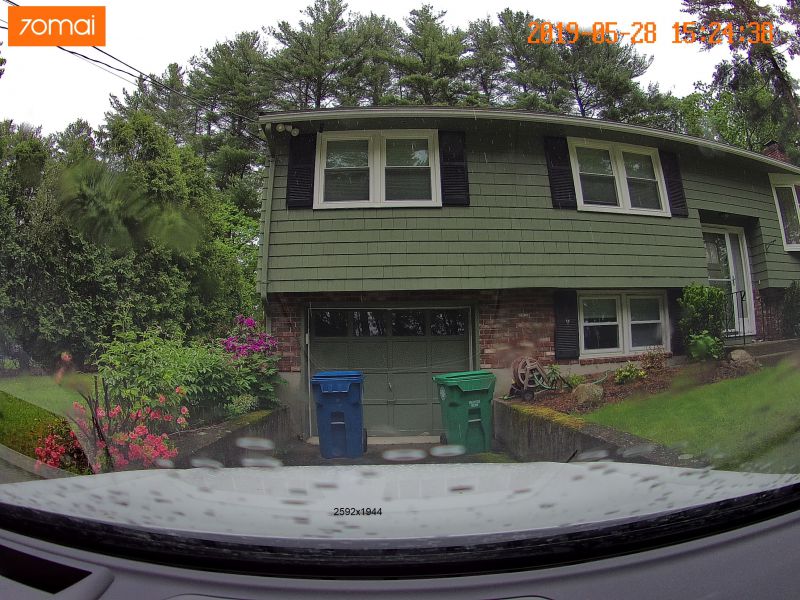
The images of my garage below show the different resolutions available. I added the resolution text but everything else is standard and not configurable.


What I like

  • Design
  • User interface (both verbal and button based)
  • App

What needs to be improved

  • ADAS implementation
  • GPS integration
  • Extreme weather operation
  • It is a bit difficult to get the microSD card in and out

Final thoughts

Ideally, the dashcam is the gadget that you won’t know you have until you really need it. This unit’s small size, easy function, and affordable price mean it won’t take up room in your car or burn a hole in your wallet.

Price: $75.97
Where to buy: Amazon
Source: The sample of this product was provided by 70mai.

Filed in categories: Reviews

Tagged: ,

70Mai Dash Cam Pro review originally appeared on The Gadgeteer on June 5, 2019 at 9:00 am.

Note: If you are subscribed to this feed through FeedBurner, please switch to our native feed URL http://the-gadgeteer.com/feed/ in order to ensure continuous delivery.

Skullcandy Indy Truly Wireless Earbuds review

REVIEW – Every time I think I’m done looking for the perfect pair of wireless earbuds, someone offers me a new pair to try and I just can’t help but accept because Gadgeteers always be questing for greatness! This time I’ve been testing driving the Skullcandy Indy TWS earbuds. Let’s see if they end up being my new favorites.

What is it?

The Skullcandy Indy TWS earbuds are truly wireless earbuds that feature touch controls (yay, no annoying buttons!).

Hardware specs

Headphone Type: True Wireless In-Ear
Connection Type: Bluetooth® 5.0
Impedance: 16 Ohms ±15%
Driver Diameter: 6mm
THD: <3% @1khz
Sound Pressure Level: 95±3dB
Frequency Response: 20Hz – 20KHz
Weight: 10.5g (earbuds); 59.5g (case)

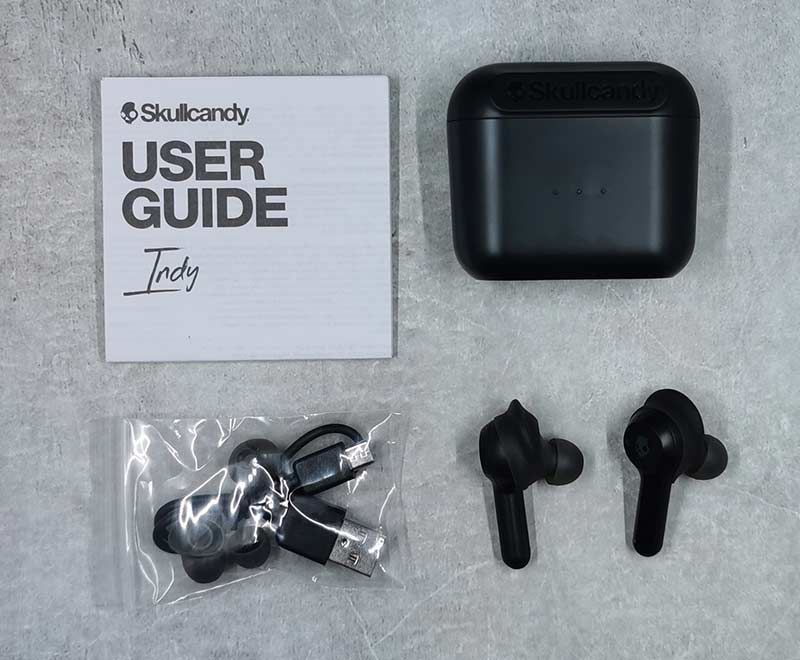
What’s in the box?

  • Skullcandy Indy earbuds
  • Charging case
  • micro USB charging cable
  • 3 sizes of ear gels
  • 1 stability gel
  • User guide

Design and features

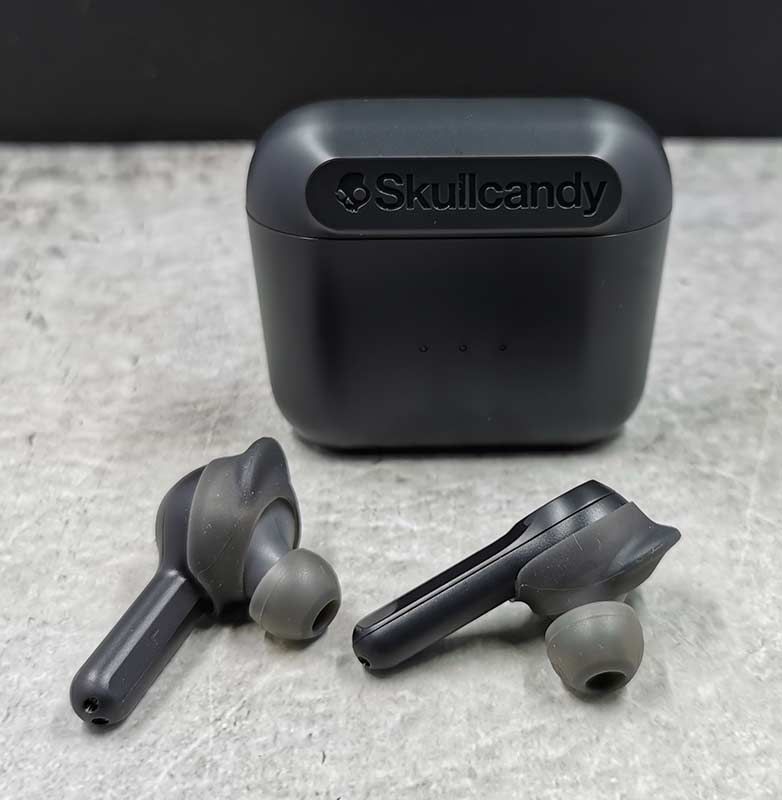
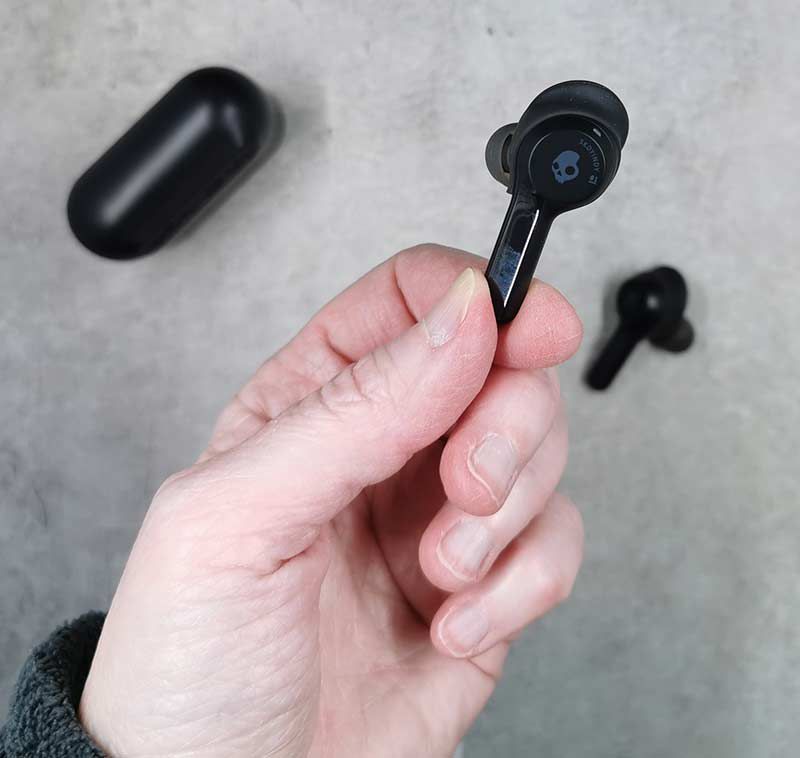
The Skullcandy Indy TWS earbuds look somewhat similar to Apple Airpods since they have the dangling plastic piece.

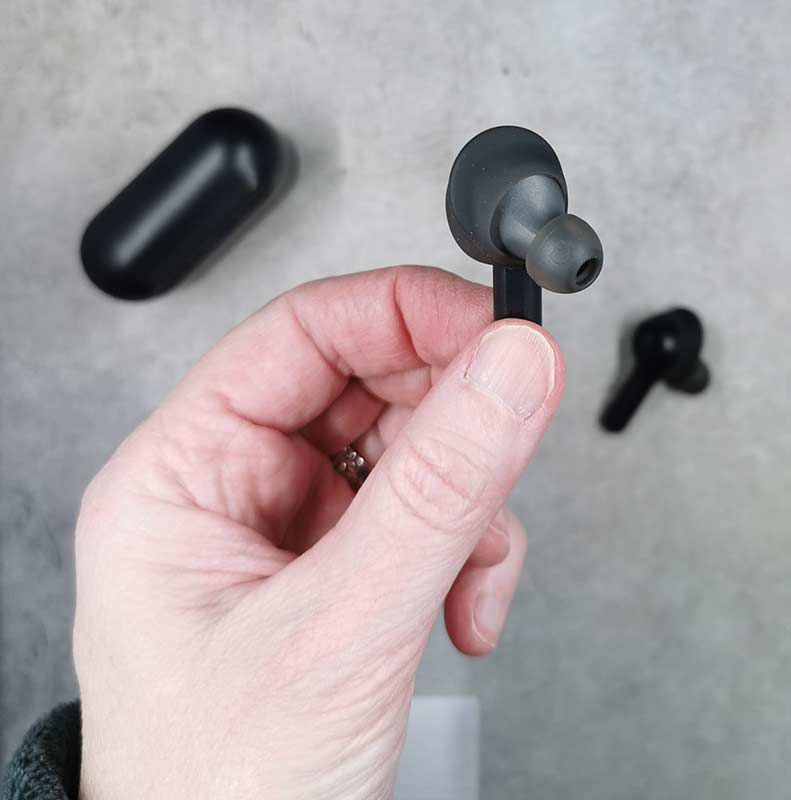
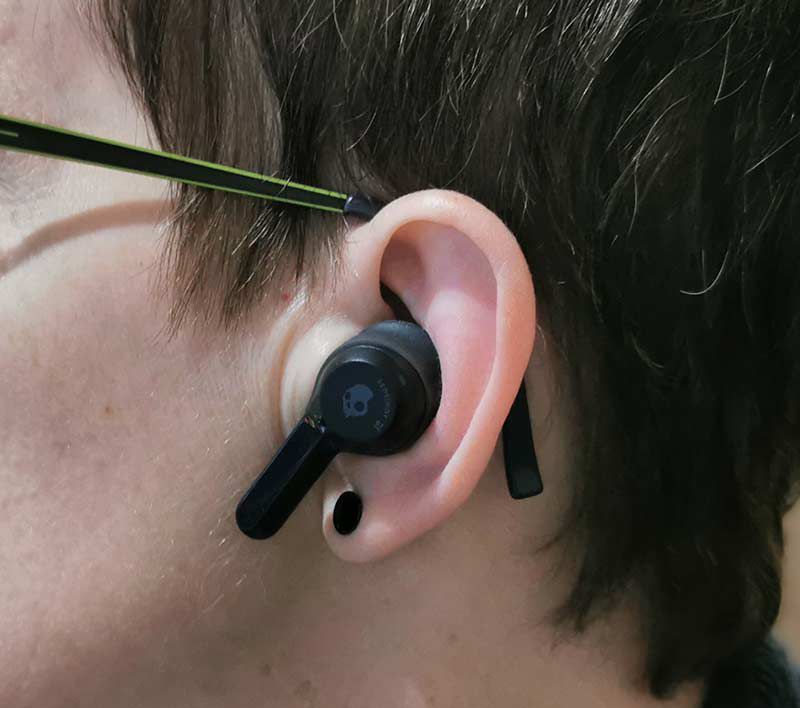
The Indy earbuds have what Skullcandy calls ear gels and stability gels which are basically eartips and an ear wing that gives the buds a secure fit in your ears even if you’re running.

These earbuds do not have any physical buttons (YAY!). Instead, they have touch controls on the round part of the outside casing. You’ll just have to learn the gestures which include tapping the left bud to turn down the volume, tapping the right earbud to turn up the volume. You can also tap and hold the left earbud to go back a track and tap and hold the right earbud to go forward a track. Double tap the right side to play/pause or answer/end a call.

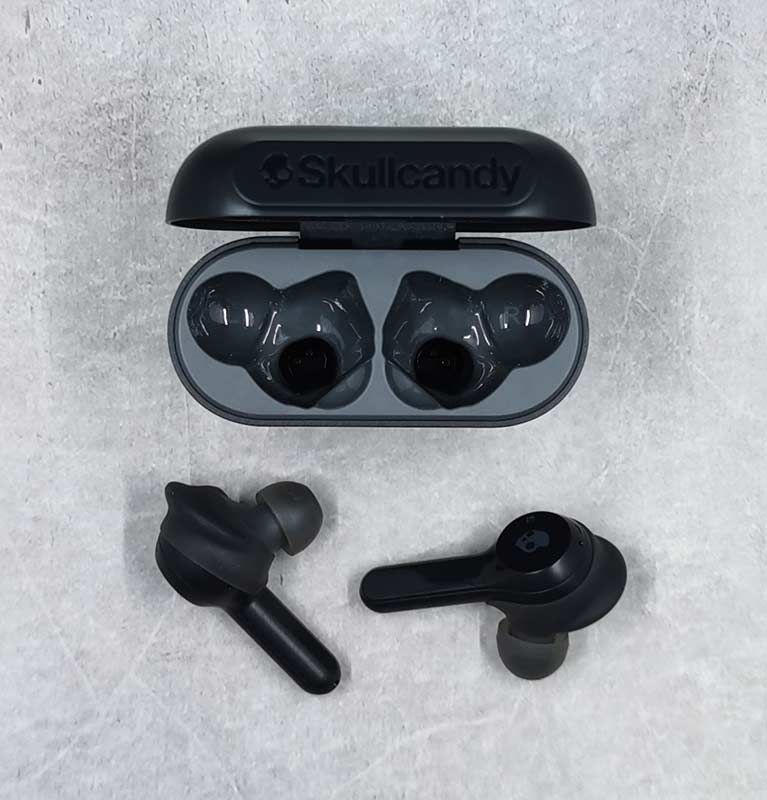
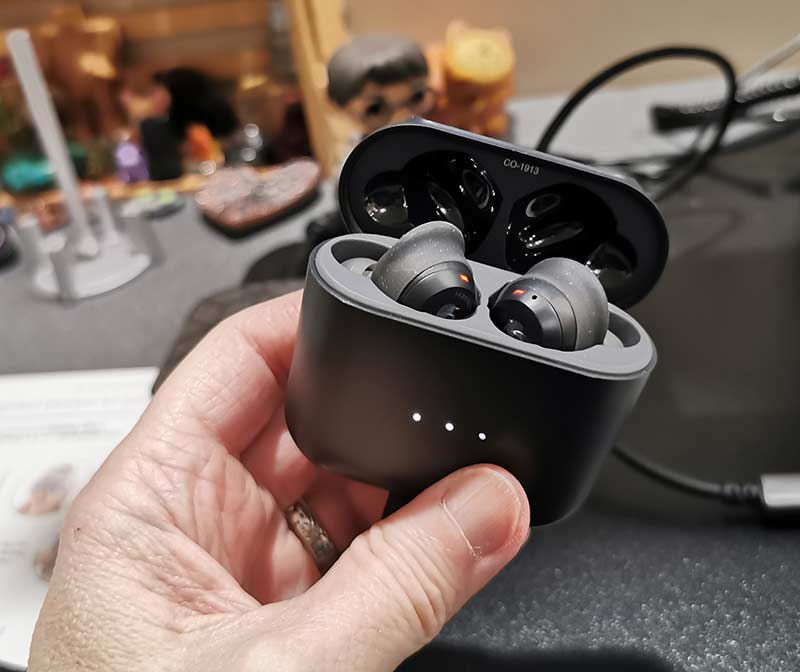
The battery charging storage case is easy to open and easy to insert/remove the earbuds. The battery contacts are on the dangling end of each earbud so you have to properly seat each earbud in its individual silo where it is held in place with a magnet.

Three LEDs on the front of the case provide a visual indicator of the juice left in the case and red LEDs on the earbuds glow red while charging.

Unfortunately, the case uses micro USB to charge. Someone, please remind me how long USB-C has been out now?

As mentioned before, these earbuds fit securely in your ears and I had no worries that they would fall out during my workouts. Everyone’s ears are different, so I can’t promise that they will fit you. But they did for me and I found them to be comfortable enough to wear for an hour or two at a time.

Pairing and functionality

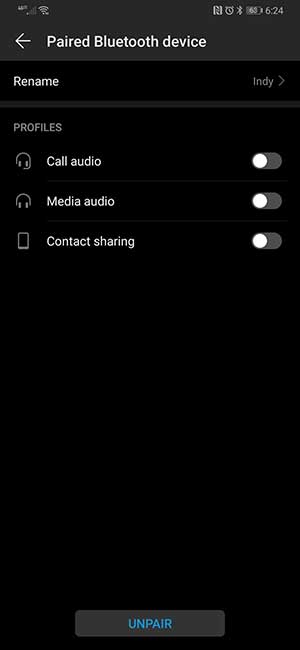
Pairing the Skullcandy Indy earbuds with my Huawei P30 Pro was quick and easy. When I opened the charging case lid, the LED on each bud started flashing white to let me know that they were in pairing mode. From there I just chose “Indy” from Bluetooth devices list and paired them.

Unlike other TWS earbuds that I have reviewed in the past, like the Mavin Air-X earbuds, you can’t just take out one Indy earbud from the charging case and start using it by itself. You have to remove both earbuds before they connect to the paired device. From there you can return the left earbud back to the case and just use the right earbud. But, you can’t return the right earbud to the case and only use the left earbud because as soon you return the right one, you’ll hear an Asian female voice say “disconnected” in the left bud and game over.

Sound quality for music, video, and calls

I tested the Skullcandy Indy earbuds with my Huawei P30 Pro smartphone, and with a Dell laptop at my day job. I tested by using Amazon Prime streaming music, Spotify, YouTube, and Netflix. The earbuds sounded good with all types of music that I tried and I was impressed with the sound quality. Of course, it depends on the source of your music. I found listening to music with Spotify was really disappointing, but Amazon Prime Music sounded great with excellent bass, highs, and mids. If I would have only tested with Spotify, I would have rated the Indy earbuds much lower than what they are capable of so just keep that in mind.

I am happy to say that I could use these earbuds while watching streaming video on YouTube and Netflix. The audio and video synced very well with no noticeable delay which is something I can’t say about all earbuds I test.

For calls, I could clearly hear the person on the other end of the call and they could ear me as well. But since these earbuds fit tightly in your ears, you will hear yourself talking in your head which may or may not bother you.

I do want to mention that I experience random connection drops with these earbuds using various apps like Amazon Music and Spotify. These dropouts were not consistent as far as only happening with a specific app but happened with all the apps that I used during my tests. The drops didn’t happen frequently which was good but happened about once an hour where the audio would just go dead for a second. This would happen regardless if I was sitting at a desk or walking around. I can’t be 100% sure that the problem wasn’t with my phone dropping a connection to the streaming service instead of the earbuds losing connection with the the phone, but I don’t think that was what was happening.

What I like

  • Secure and comfortable fit
  • Touch controls
  • Great sound quality

What needs to be improved

  • Can’t use the left earbud by itself without leaving the right earbud out of the charging case
  • Infrequent random connection dropouts

Final thoughts

At the $80 price level of the Skullcandy Indy TWS earbuds, I have to say that they are impressive with fit and comfort and of course with sound quality. The only dings I can give them are that you have to take them both out of the case even if you just want to listen with one earbud and the infrequent audio drops. But other than those two minimal gripes, I’m happy to report that the Skullcandy Indy earbuds are now my faves!

Price: $79.99
Where to buy: Amazon
Source: The sample for this review was provided by Skullcandy.

Filed in categories: Reviews

Tagged:

Skullcandy Indy Truly Wireless Earbuds review originally appeared on The Gadgeteer on June 4, 2019 at 2:01 pm.

Note: If you are subscribed to this feed through FeedBurner, please switch to our native feed URL http://the-gadgeteer.com/feed/ in order to ensure continuous delivery.
Allett Nylon Original Wallet, RFID Slim Original Wallet, Slim ID Wallet, and Slim Sport Wallet review

REVIEW – A few years ago, I reviewed a wallet from Allett and I was quite impressed with its durability and slim, minimalist style.  Recently, Allett sent us a handful of their latest wallet designs to try out.  In a wallet, I typically consider three factors: appearance, slimness, and organization features.  How did this latest crop of Allett wallets fare?  Let’s check them out!

What is it?

Allett makes some of the slimmest yet more attractive-looking and affordable wallets on the market today.

What’s in the box?

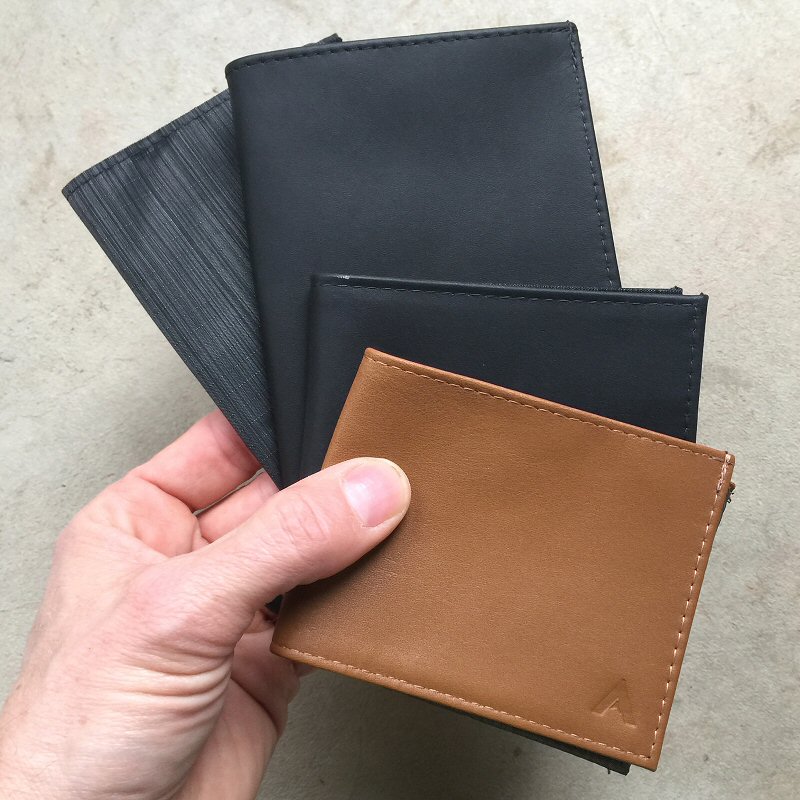
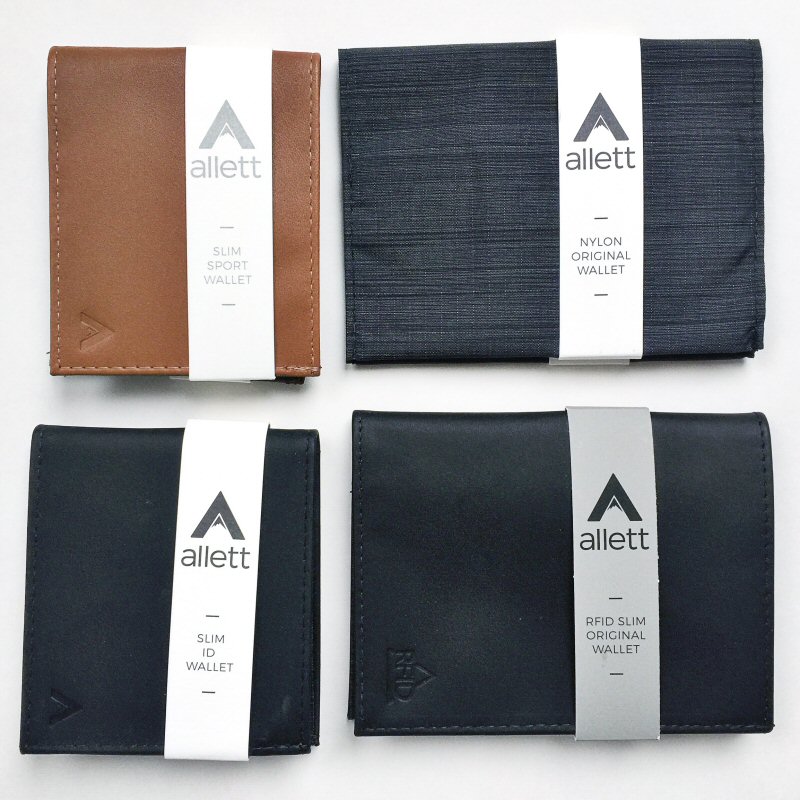
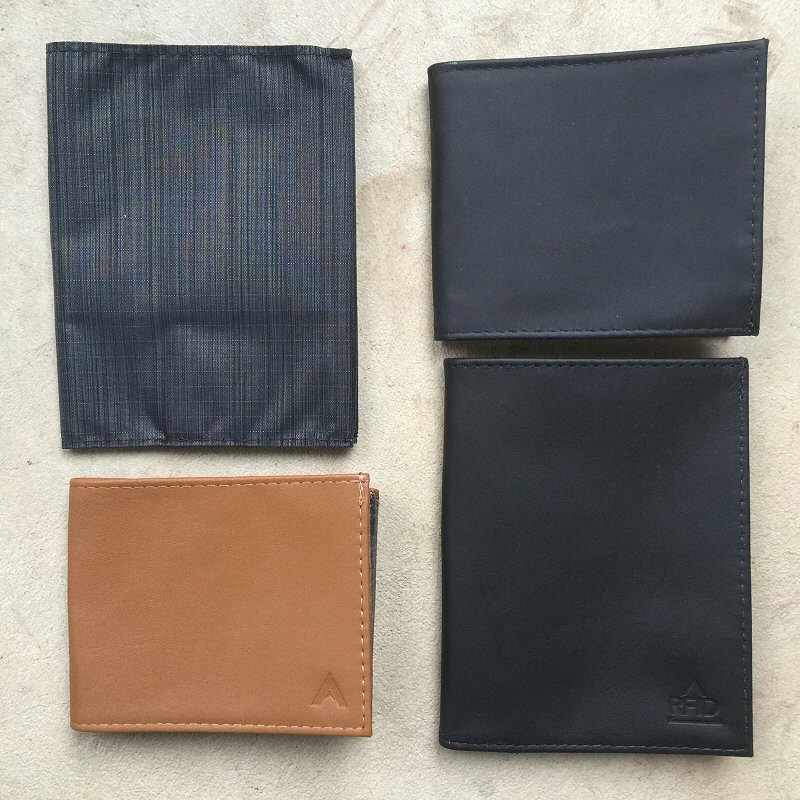
The Allett folks sent a variety of some of their latest and most popular wallet styles.   Included in the box were the following:

  • Nylon Original Wallet
  • RFID Slim Original Wallet
  • Slim ID Wallet
  • Slim Sport Wallet

Nylon Original Wallet

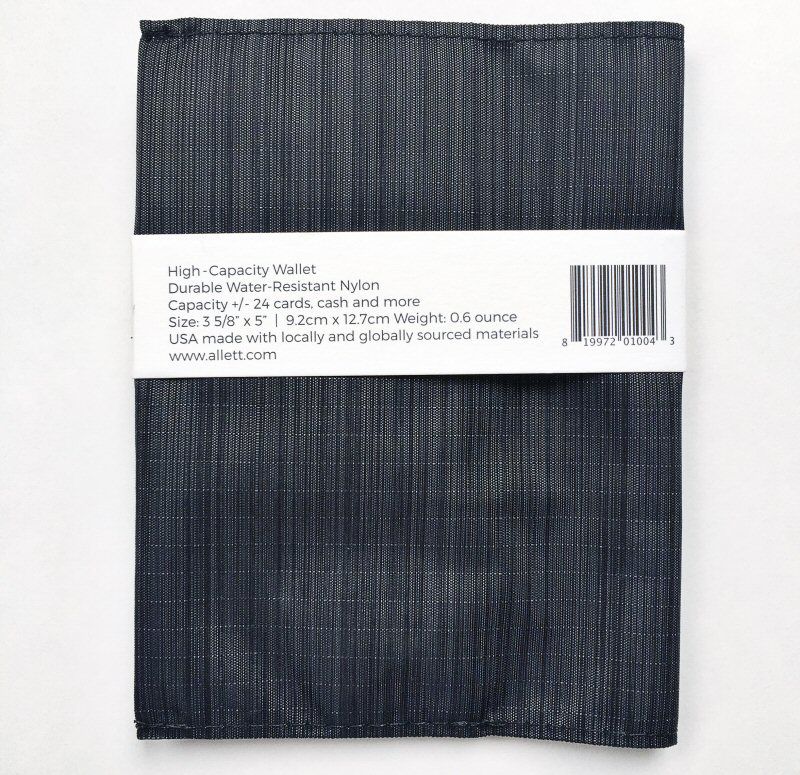
  • Material =  Nylon fabric (interior and exterior)
  • Options = Black (pictured), Pebble, or Red color
  • Capacity =  4 to  24+ cards
  • Dimensions =  5″ x 3.8″x 0.19”/ 127mm x 92mm
  • Weight = 0.6 oz.
  • Price = $30
  • Location of Manufacture = USA

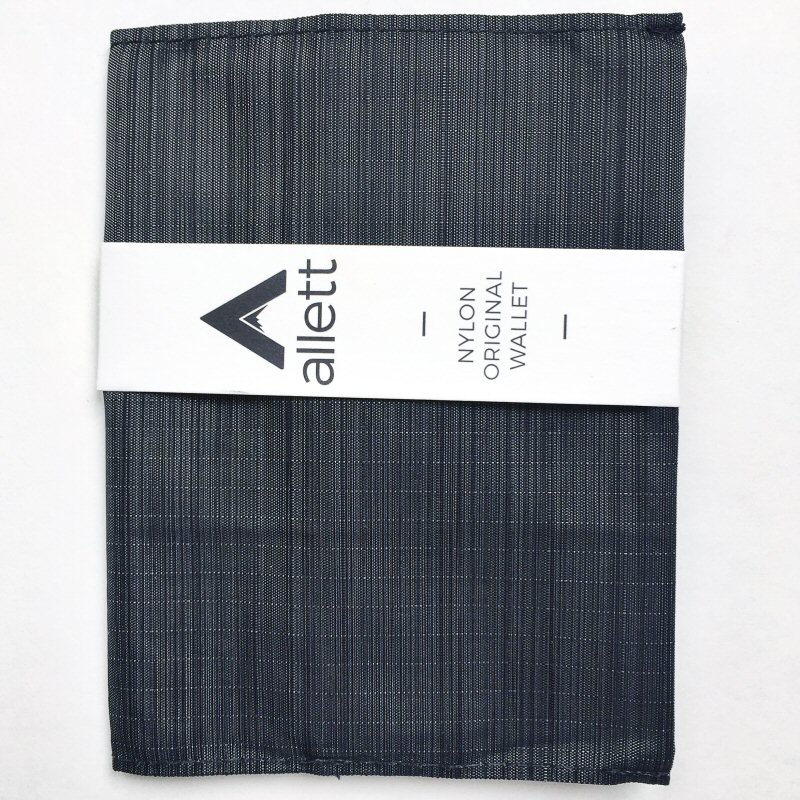
The Nylon Original Wallet (called the Nylon Original Slim Wallet on the Allett site), is one of their original designs.  

Like all Allett wallets, this one is made in the USA.

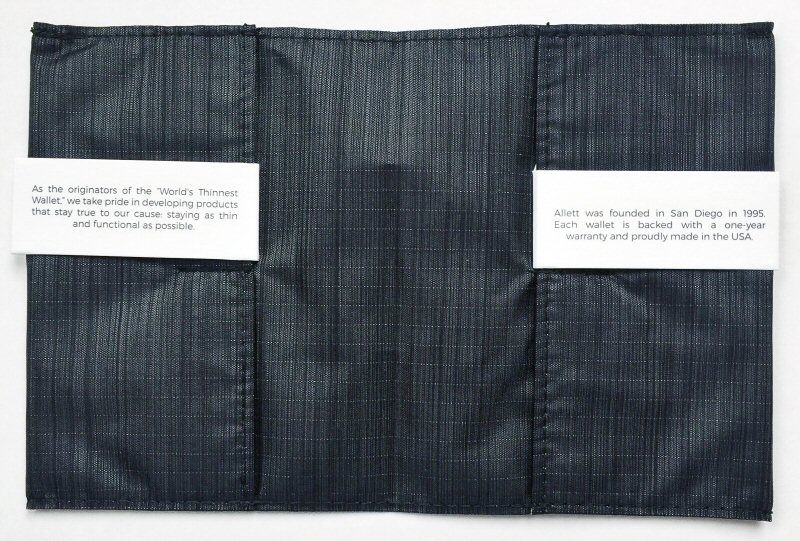
The nylon fabric used on the exterior is also used on the interior, as seen above.  Also, note that this wallet appears to have a one-year warranty.

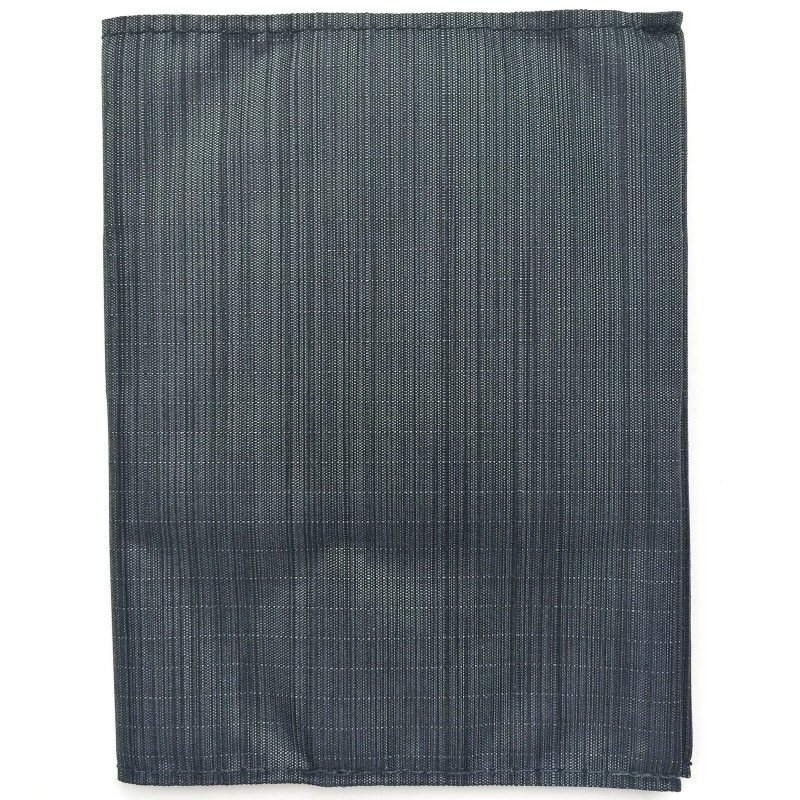
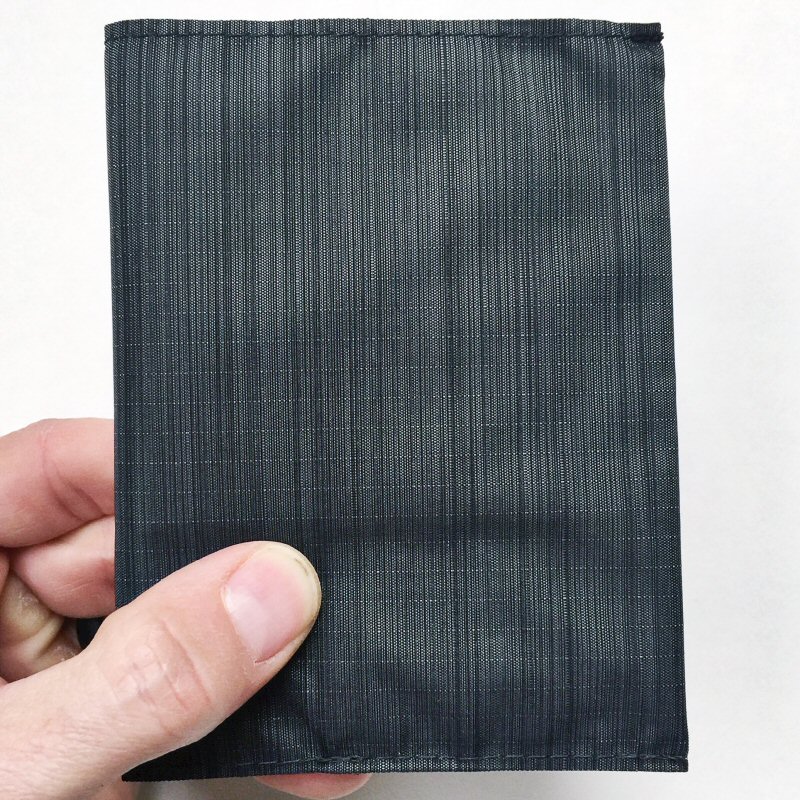
This wallet’s design is very clean, with no external logos on it, front or back, which I really like–companies that feel the need to splash large, gaudy logos all over their products always seem a bit pathetic.  Allett goes the sleek, minimalist route and pulls it off nicely.

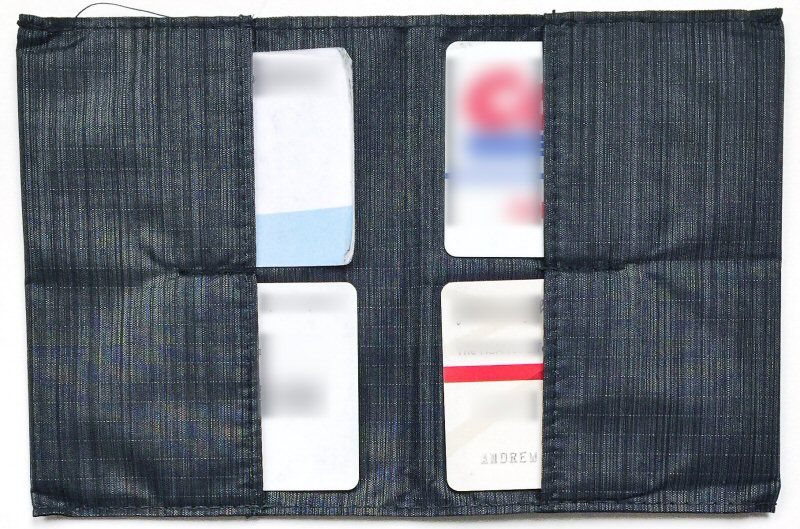
Opening the wallet, the main four pockets are visible immediately, but the bill pocket behind them is not quite so visible.  More on these features below.

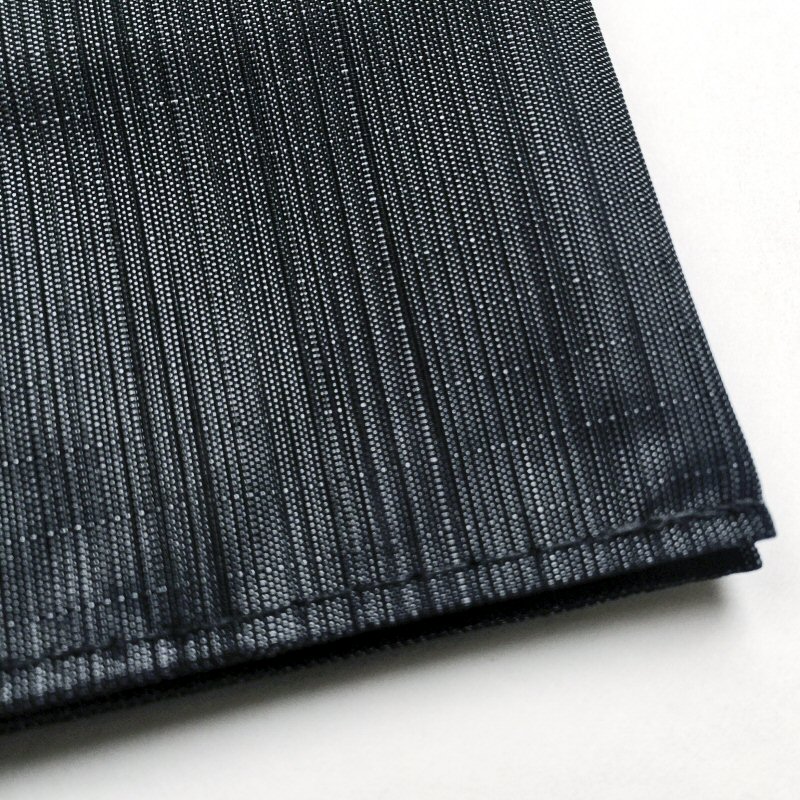
The nylon fabric is rip-resistant and moisture wicking.  It is really amazing how thin yet durable this material is, and its texture gives it just a bit of increased grip, so it is less likely to slip out of your hand.  Additionally, although Allett calls this color black, I found it to be a combination of mostly dark grey of fibers that gives it an overall dark gray look.

At only 0.6 ounces, this wallet is almost ridiculously lightweight, owing to the material properties and thinness of the fabric.  Additionally, although it does have a somewhat large “footprint,” this helps minimize its thickness.  More on this below.

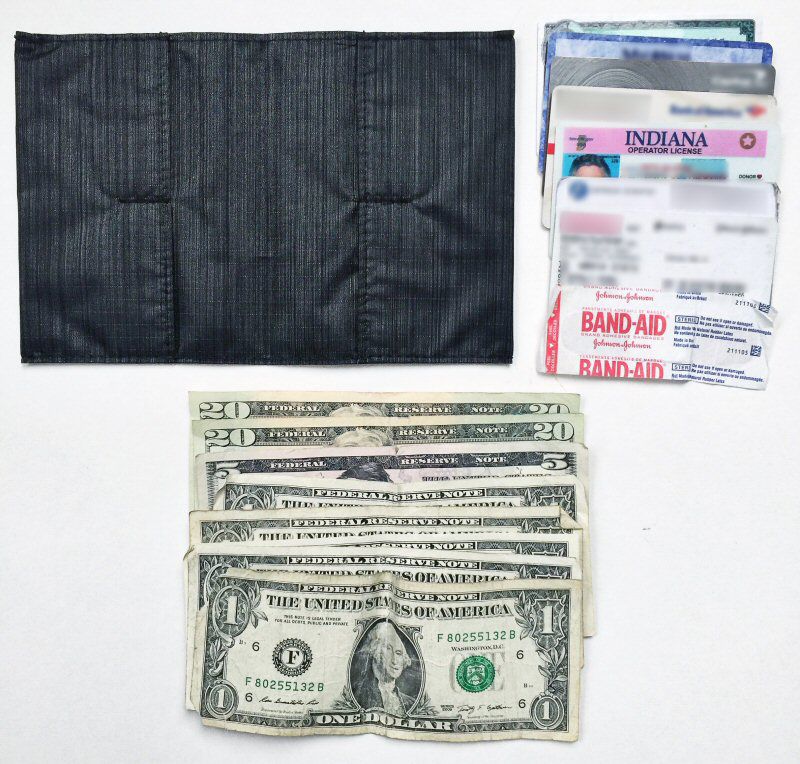
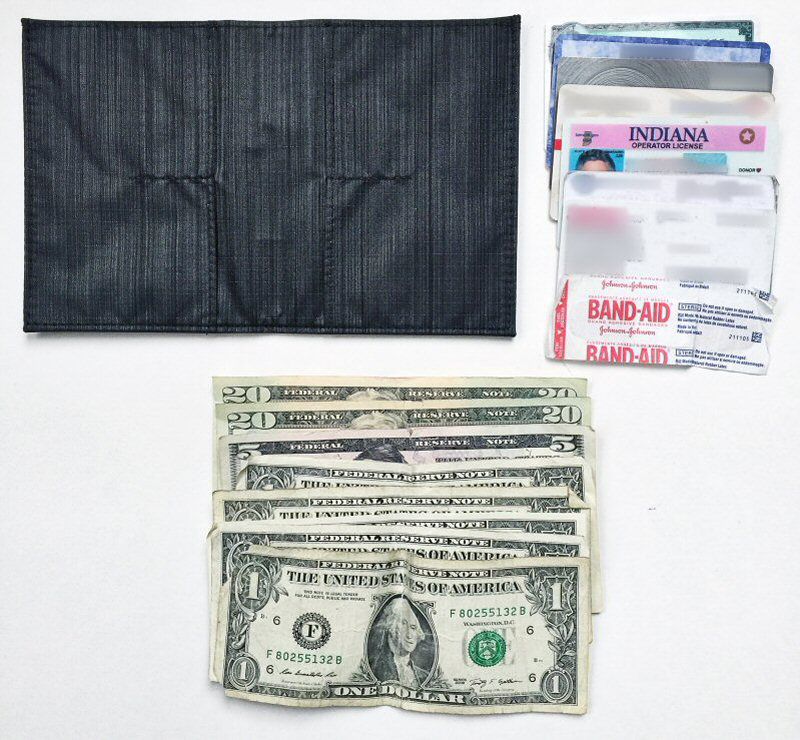
The above items are what I actually had in my wallet when I took the photos for this review, so this represents fairly close to my wallet EDC items (I already carry a pretty slim wallet, so I try to keep my wallet contents minimalist).  It’s a total of seven cards, 8 bills and a Band-Aid (a “just in case” holdover from when my kids were younger).

Although extremely thin, this wallet includes not only a generously-sized (wide and deep) bill pocket but also includes a divider inside the bill pocket.  I really like this because I often end up with receipts from purchases and I can slide them into one side of this pocket, and keep my bills in the other.  It should also be noted that the outer portion of this pocket is a bit shallower than the inner portion, the depth of which runs the full length of the wallet.

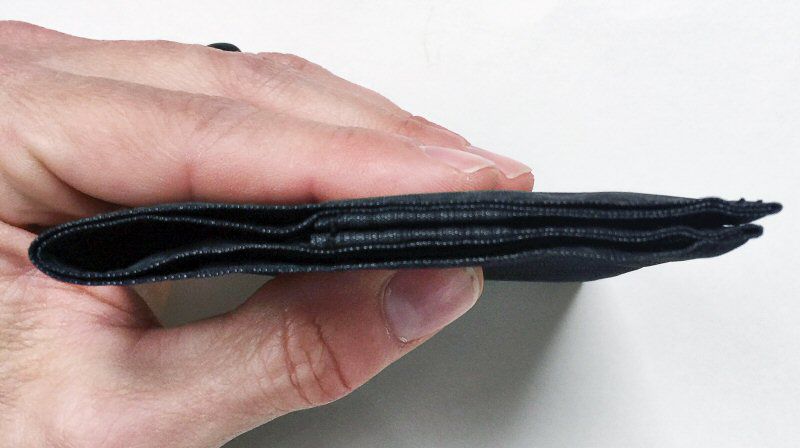
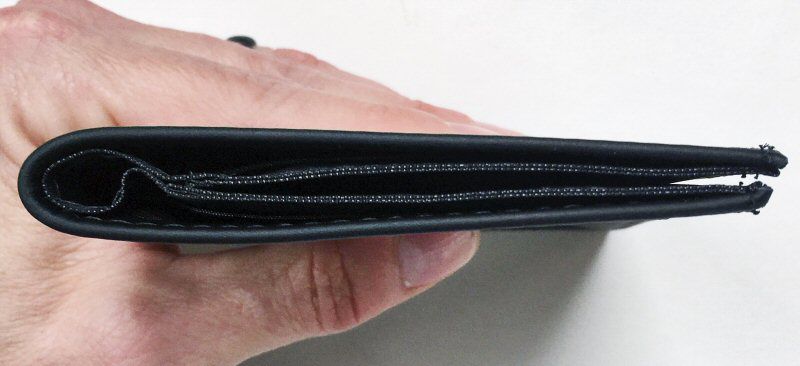
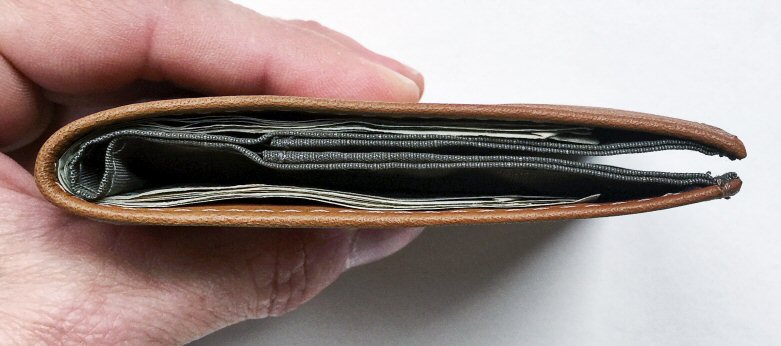
The above view shows the wallet without the content inside, and although you can see that it is indeed truly thin, I had some difficulty in depicting just how thin it actually is.

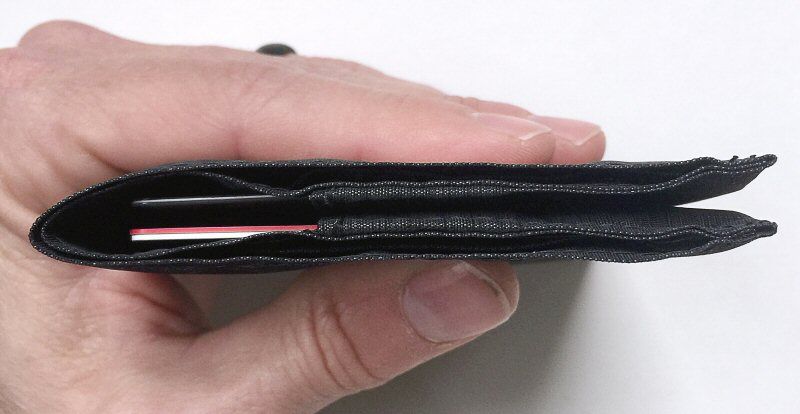
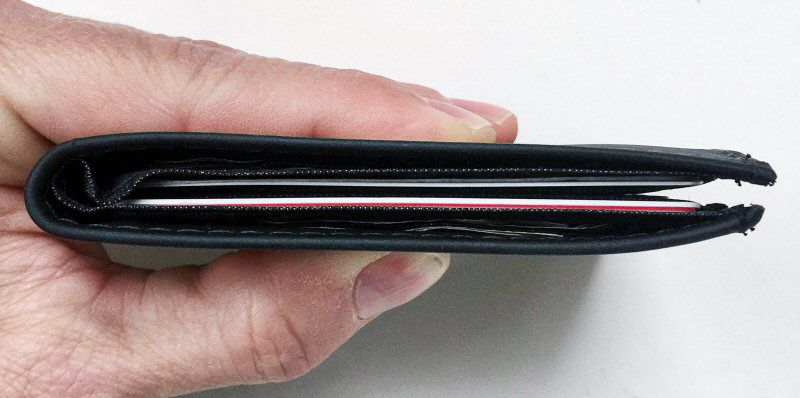
The photo above shows the wallet with the contents inside.  It’s still pretty darn slim, only a bit thicker than its contents, owing to the thinness of the material.

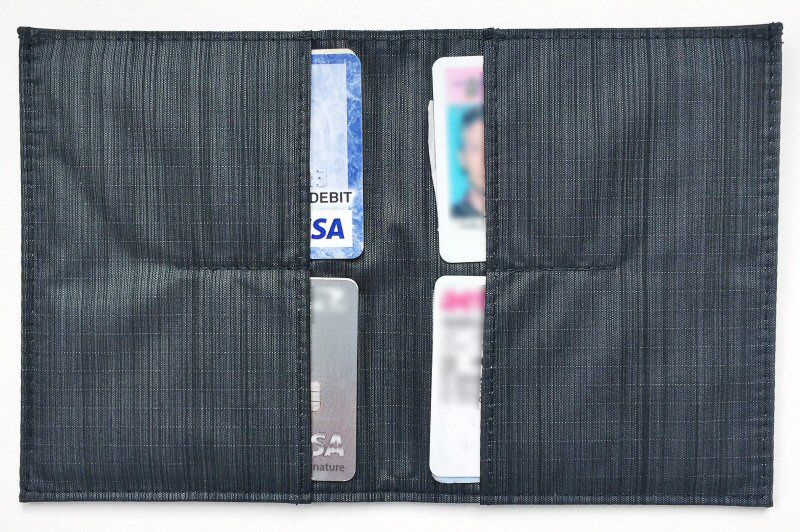
I like the layout of this wallet for two reasons, and dislike it for one reason.  First, I like it because it spreads the cards out so that they are not all stacking on top of each other.  This results in a thinner wallet overall, though it does mean a larger “footprint” size in your pocket.  Additionally, I like that this card placement results in a sort of “hinge” effect when placing the wallet in your back pocket, which helps a wallet with a footprint of this size to better conform to your…anatomical curvature.  Second, I like that Allett made the pocket openings all point inward, toward the center of the wallet, which secures them better than having the openings pointing upward or outward.  Now for the dislike: the pockets all need to be just a bit deeper because they tended to fall out, especially if I only had 1-2 cards in each pocket.  However, I think Allett may have solved this problem; more on this below.

RFID Slim Original Wallet

  • Material =  Napa leather exterior, Nylon fabric interior
  • Options = The RFID version of this wallet is available in Black only (pictured)
  • Capacity =  4 to  24+ cards
  • Dimensions =  5″ x 3.9″x 0.22”/ 127mm x 98mm x 5.59mm
  • Weight = 1.1 oz.
  • Price = $55
  • Location of Manufacture = USA

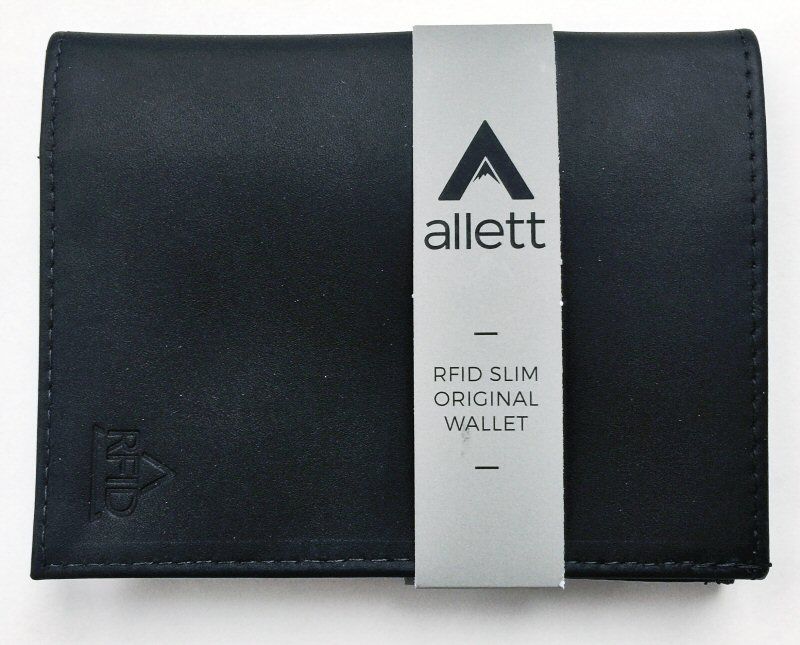
The RFID Slim Original Wallet is a bit of a variant of the Nylon Original Wallet reviewed above.  It has basically the same dimensions, but as shown below, its interior and exterior materials are different from each other.

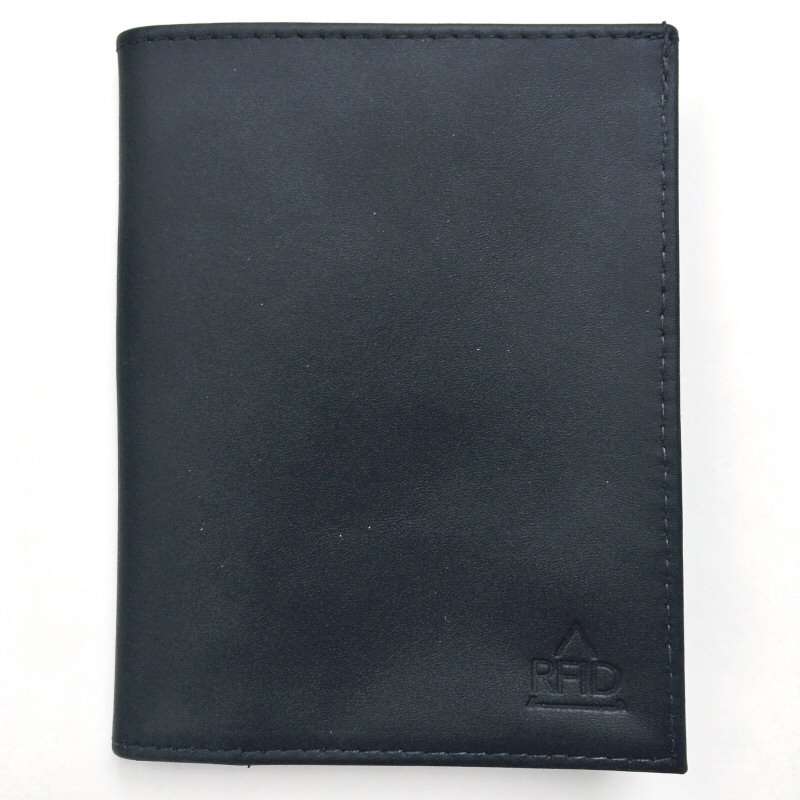
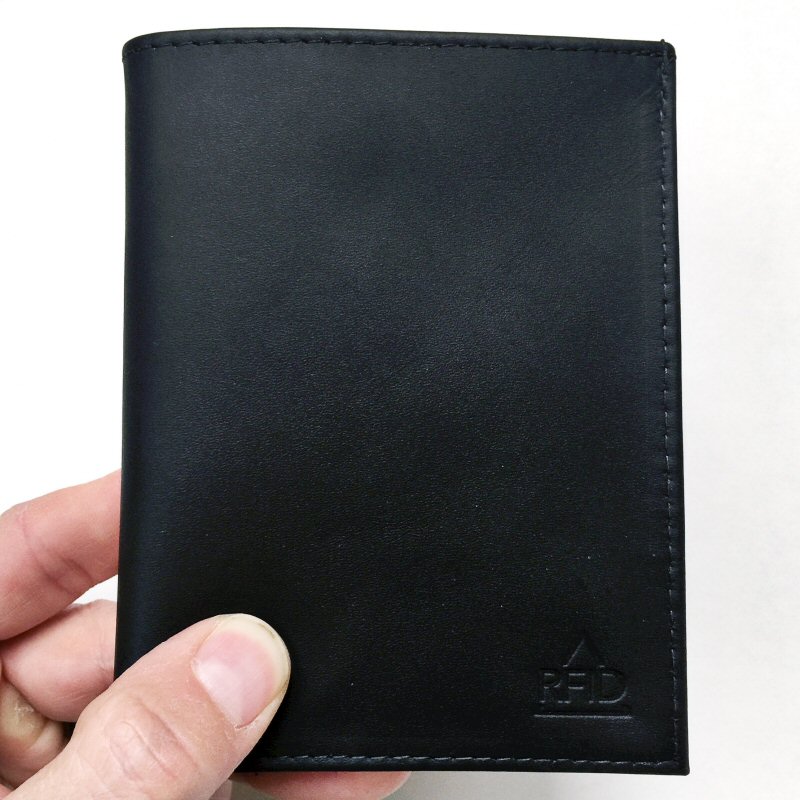
This wallet’s exterior is Napa leather with a very attractive look and soft feel.  It is not too thick such that it adds dramatically to the wallet’s overall thickness.  More on this below.

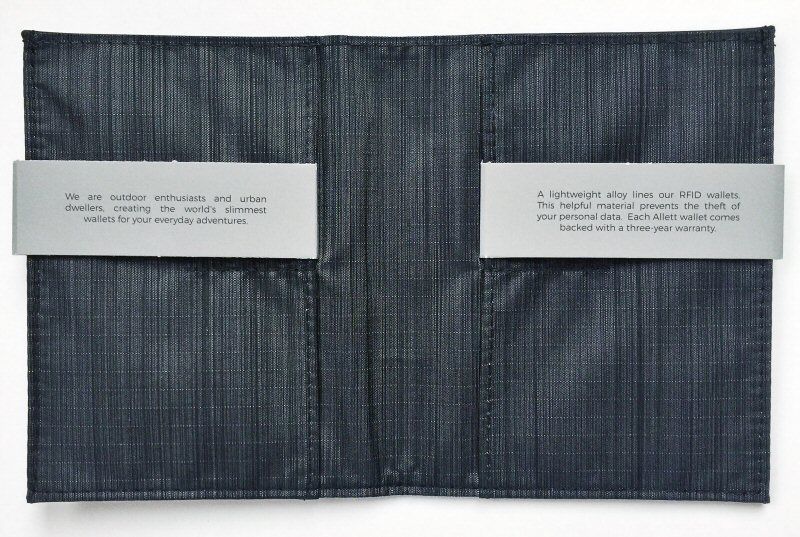
Opening the RFID Slim Original Wallet, you can see that the interior is the same nylon material as the Nylon Original Wallet above.  This wallet appears to have a three-year warranty.

The RFID Original Slim Wallet has a handsome, minimalist style.  I really like its look.  It’s a bit more of a classic look as opposed to the Nylon version’s more casual look.

To help keep this wallet thin, as mentioned above, its interior is made from Allett’s Nylon material, which is not only thin but durable and moisture-wicking.

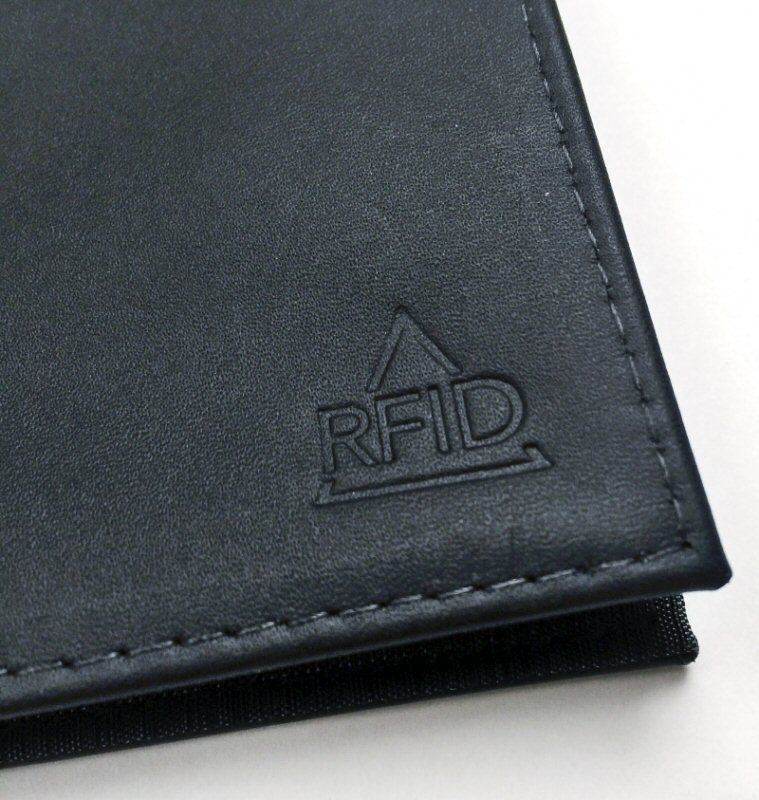
The only logo on the exterior of this wallet is the above “RFID” emblem that is embossed into the front of the wallet’s lower right corner.  Additionally, the stitching throughout, as with all of the wallets in this review, is impeccable.

The best way that I could think to confirm this wallet’s RFID functionality was to keep my credit card in the wallet and attempt to use the card at a “tap to pay” device at a retail store.  The wallet did indeed block transmissions from inside the wallet and prevented my “tap to pay”-enabled card (and everything else in my wallet) from completing a transaction.

As with the first wallet reviewed, the above photo shows the items I actually had in my wallet when I took the photos for this review, so this represents fairly close to my wallet EDC items.

And as with the Nylon Original Wallet, this one has a generous bill pocket, which has conveniently been divided in half, with the innermost section being deeper and the outermost section being shallower.

The RFID Slim Original Wallet is indeed slim, but not quite as slim as its all-Nylon counterpart.  The Napa leather on the exterior adds just a bit of extra thickness, but the Nylon interior still keeps it slim.

However, Napa leather exterior notwithstanding, it is still a thinner wallet than many that I’ve evaluated, even with contents inside.

The interior of the RFID Slim Original Wallet has a very similar layout to the Nylon Original Wallet, with its 4 card pockets laid out flat, helping give the wallet an even flatter profile.

One area in which I think the RFID Slim Original Wallet has improved upon the Nylon Original Wallet’s is the interior card pocket depth.  The RFID Slim Original Wallet’s pockets are a bit deeper, perhaps a quarter of an inch, as seen in the comparison photo above.  It may not seem like much, but it’s enough the prevent cards from falling out just that much better.

Slim ID Wallet

  • Material =  Napa leather exterior, Nylon fabric interior
  • Options = Black (reviewed here), Brown, Blue color
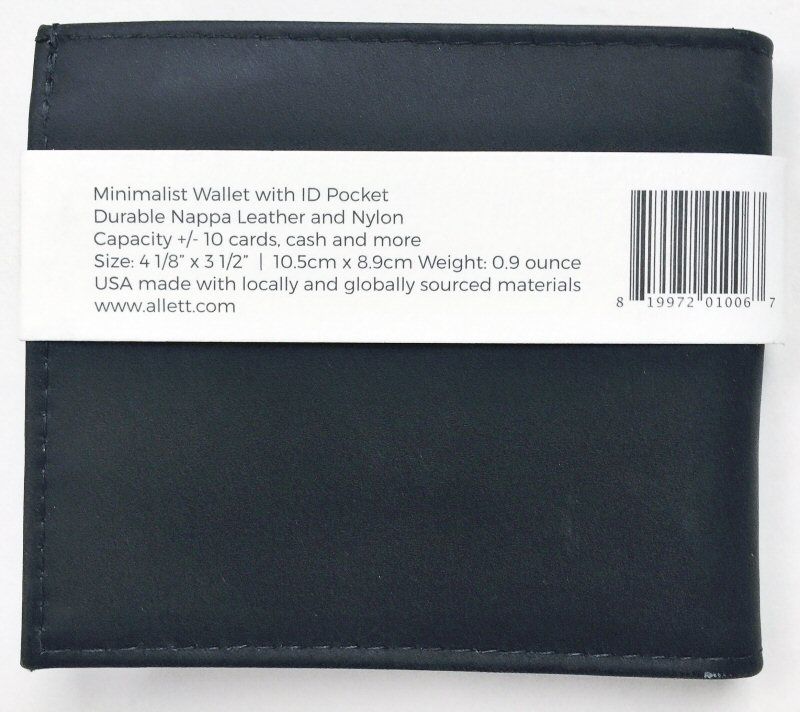
  • Capacity =  3 to  10+ cards
  • Dimensions =  4.125” x 3.5″ / 105mm x 89mm
  • Weight = 0.9 oz.
  • Price = $45
  • Location of Manufacture = USA

The Slim ID Wallet (called the Leather ID Wallet on the Allett site) is a basic bi-fold wallet, but with several upgrades.  It’s very similar to their Nylon ID Wallet, but with a Napa leather exterior that is identical to the Napa leather on the exterior of the RFID Slim Original Wallet.

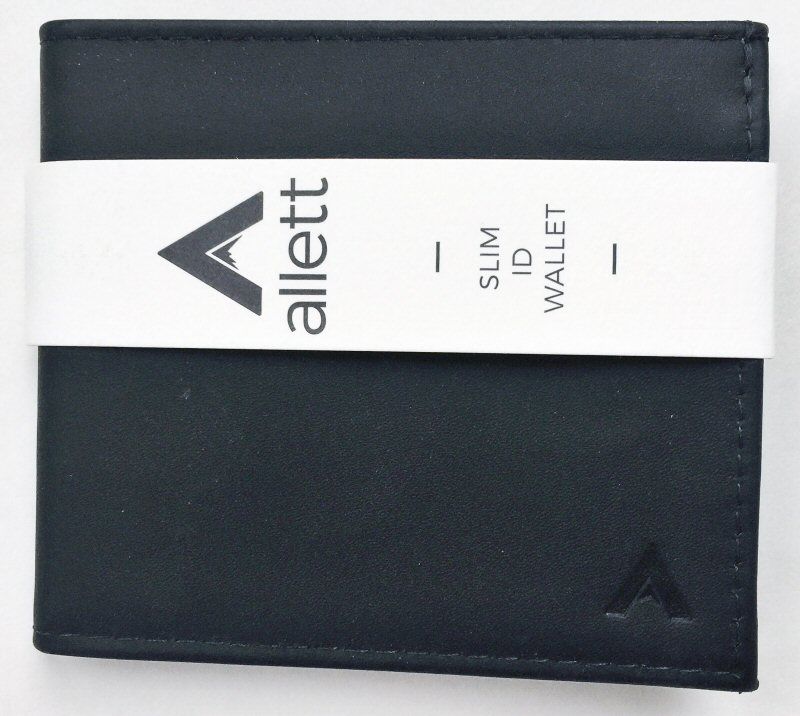
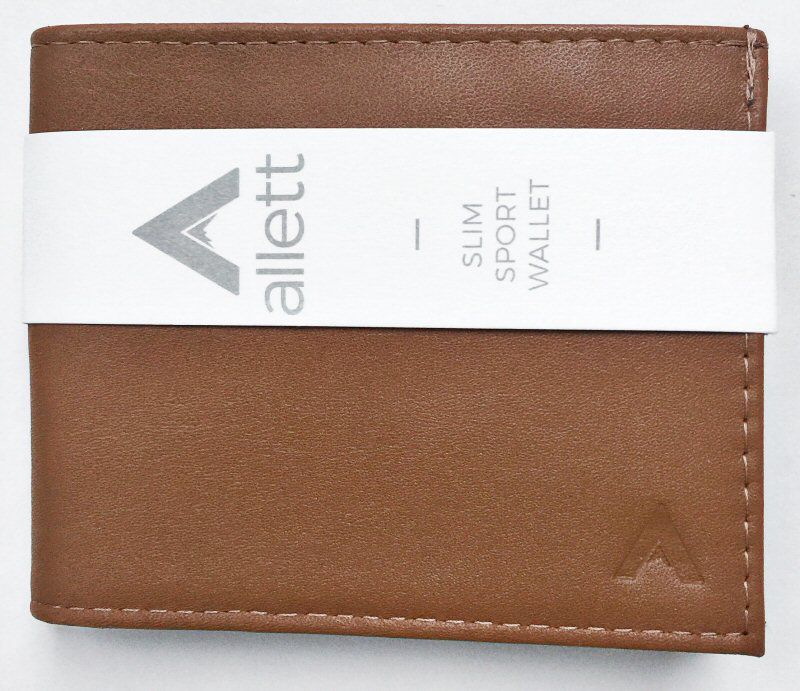
Allet even calls this wallet “minimalist” on its packaging wrapper.  And it is.

The interior material of the Slim ID Wallet is made from the same thin, durable, moisture-wicking Nylon material as the interior of both the Nylon Original Wallet and the RFID Slim Original Wallet.  Additionally, this wallet also appears to have a three-year warranty.

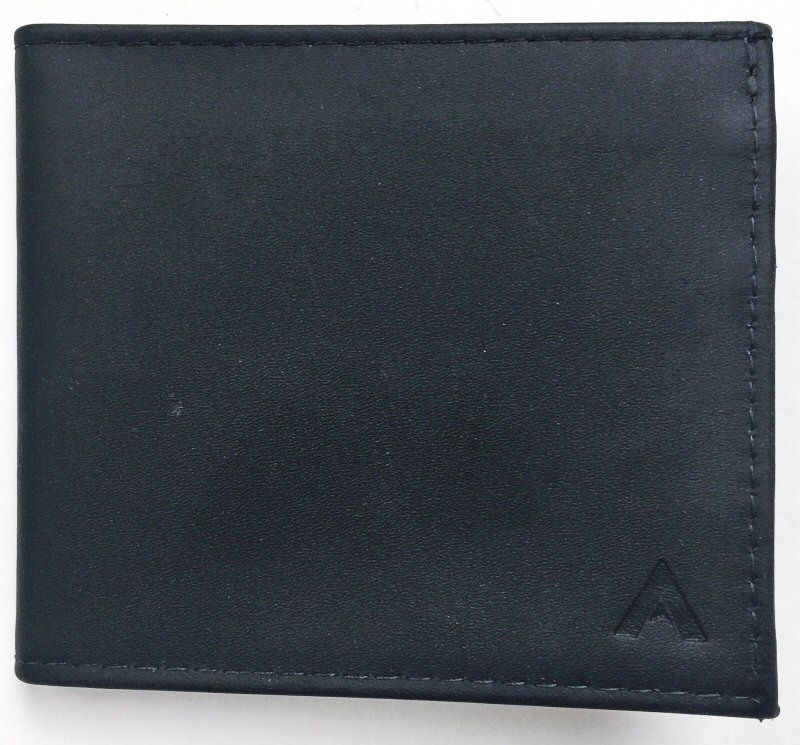
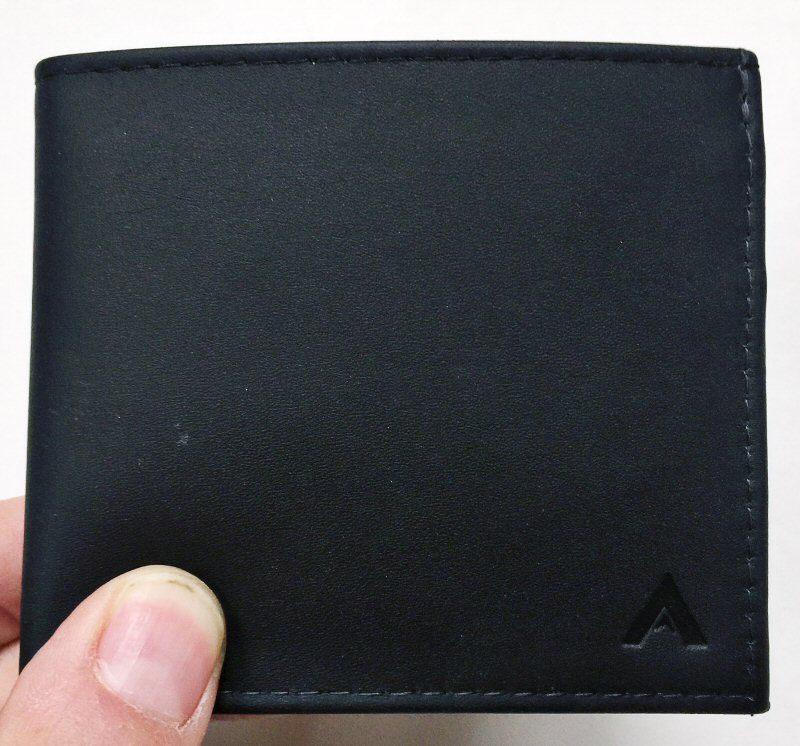
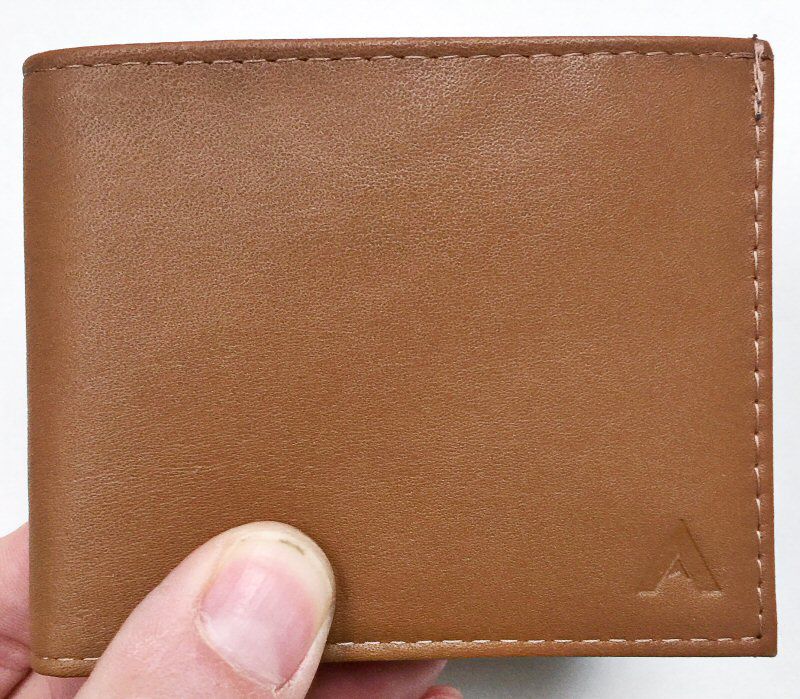
This wallet has an understand, classic exterior, as seen above.

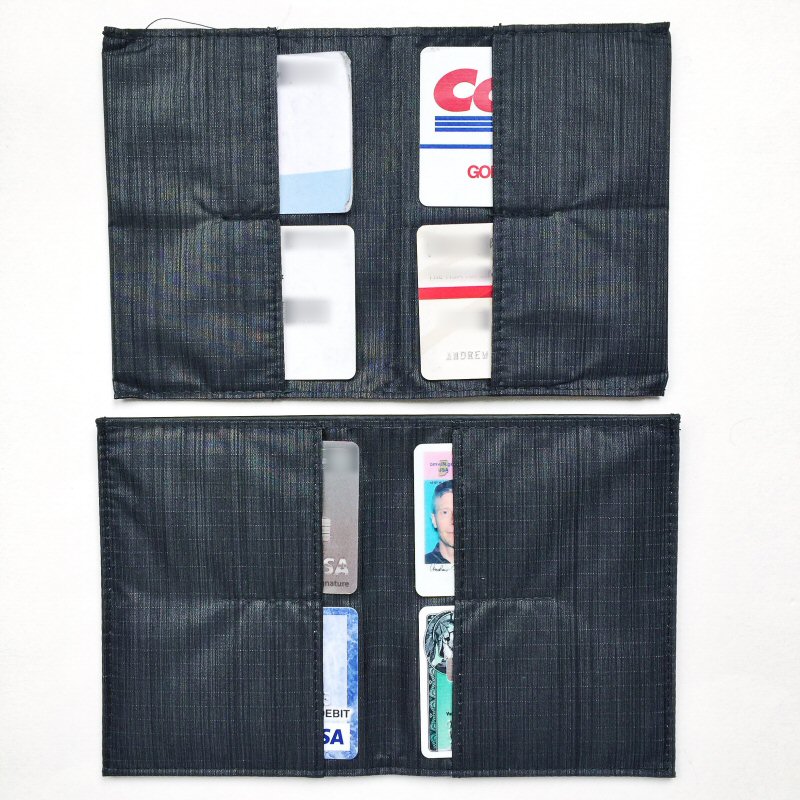
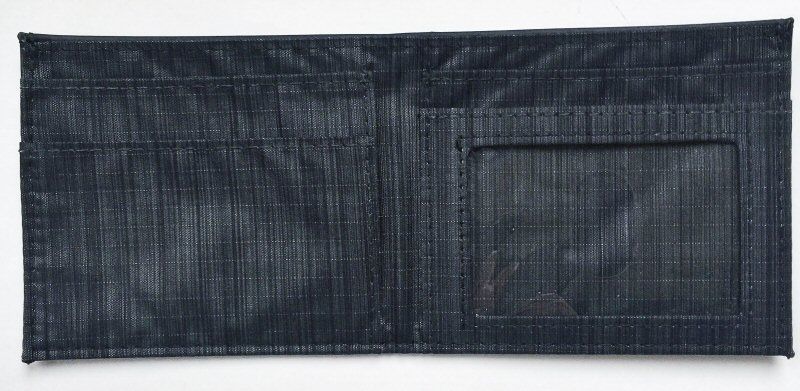
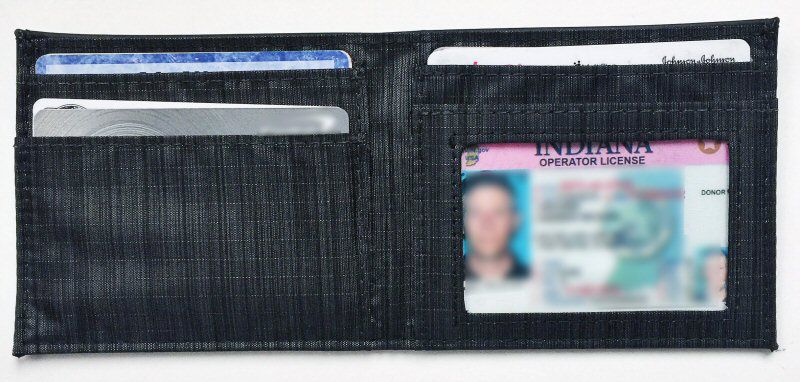
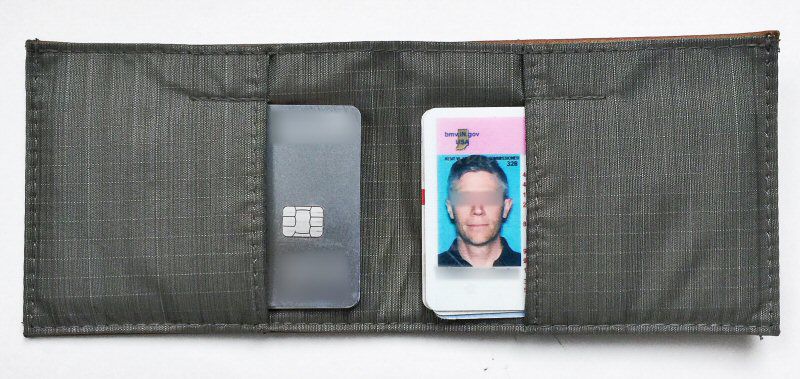
As mentioned above, this wallet’s interior wallet is essentially a classic bi-fold style.  It has two card pockets on the left, and on the right is one card pocket and a transparent ID pocket that also includes a thumb slot for helping to quickly deploy your ID.

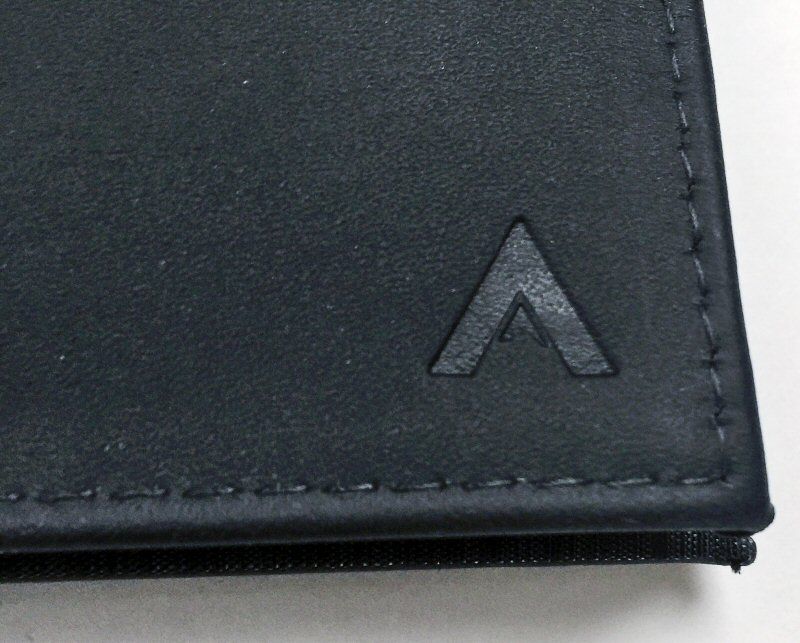
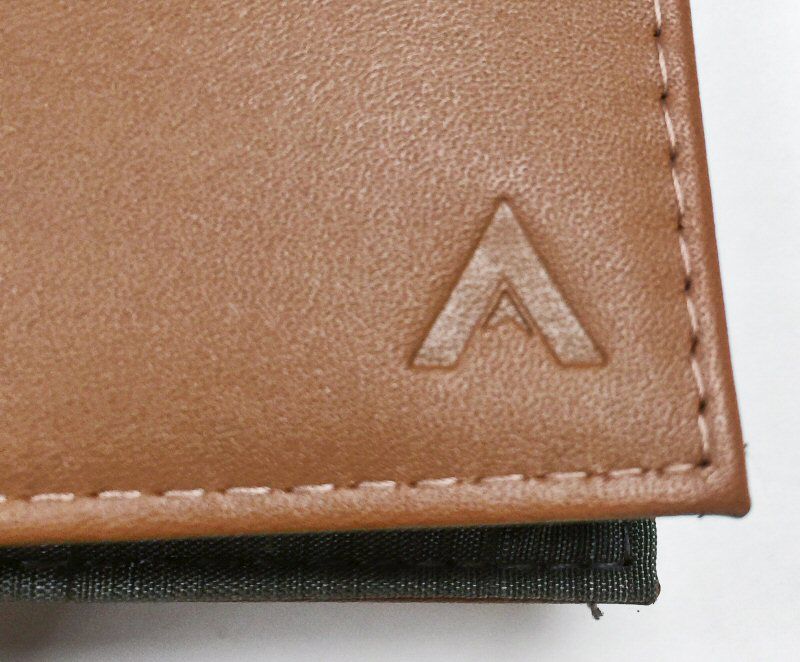
The Slim ID Wallet has but one emblem embossed into its front bottom right corner, which is the Allett “A” logo.  Although I typically eschew logos on the exterior of products, I can appreciate subtle ones like this one.  Well done, Allett.  Again, the stitching is precise and not a threat out of place.

True to form with Allett’s wallet’s, The Slim ID Wallet has a small footprint and classic, handsome styling.

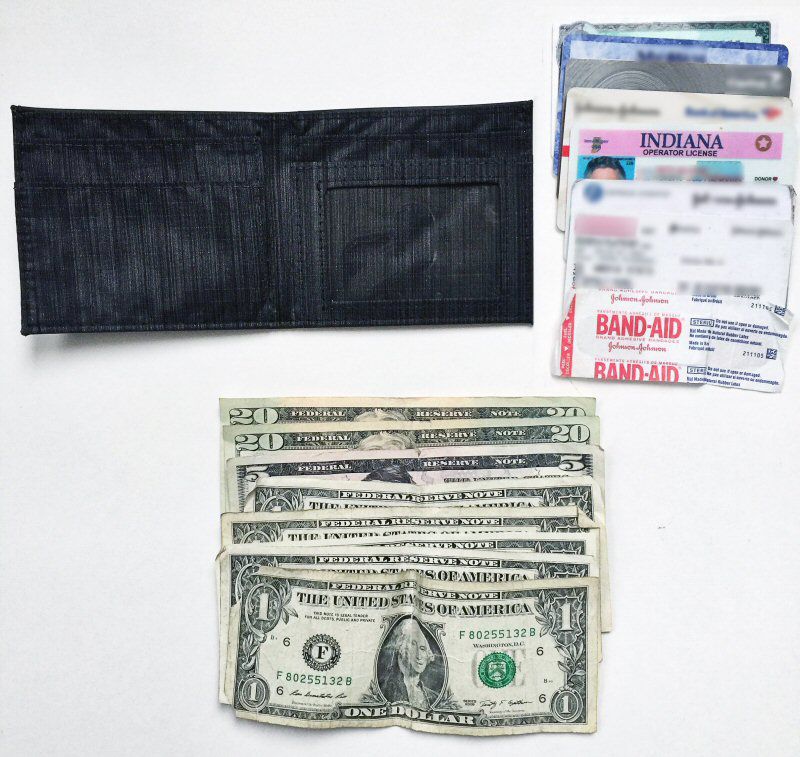
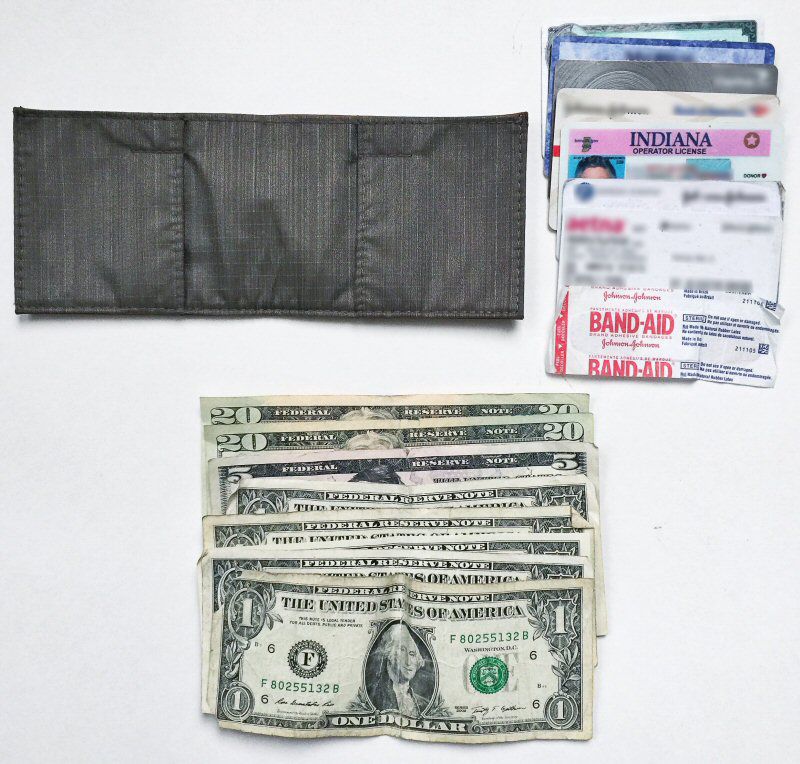
As with the two wallets reviewed, the above photo shows the items I actually had in my wallet when I took the photos for this review, so again this represents fairly close to my wallet EDC items.

The Slim ID Wallet has a long, generously-sized bill pocket that runs the length of the wallet and is divided into two compartments, which can be used to separate bills, receipts, or other items.

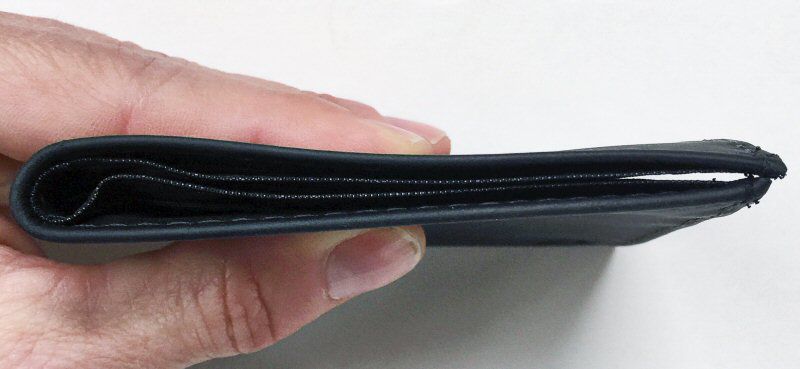
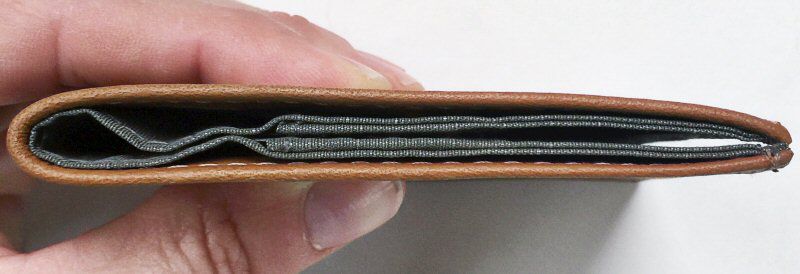
When empty, the Slim ID Wallet is indeed quite slim, as seen above.

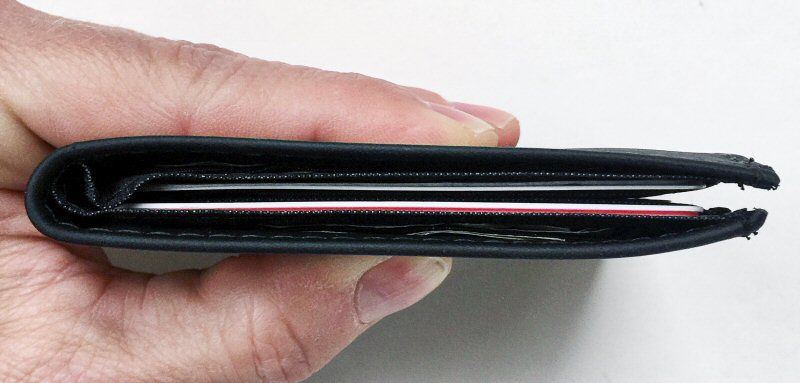
However, even when loaded with several items, the Slim ID Wallet remains quite slim, which I believe is the whole goal with this wallet.

The Slim ID Wallet is essentially Allett’s take on a classic bi-fold wallet.  It is very minimalist, which helps keep it slim and also has a small footprint, which helps make it ideal for front-pocket carry if desired.

Slim Sport Wallet

  • Material =  Napa leather exterior, Nylon fabric interior
  • Options = Blue, Black, Darl Brown, Dark Red, Tan (reviewed here), Bright Red, Purple color
  • Capacity =  2 to  10+ cards
  • Dimensions = 3″ x 3.9″ x  0.2″ / 78mm x 99mm x  5.08mm
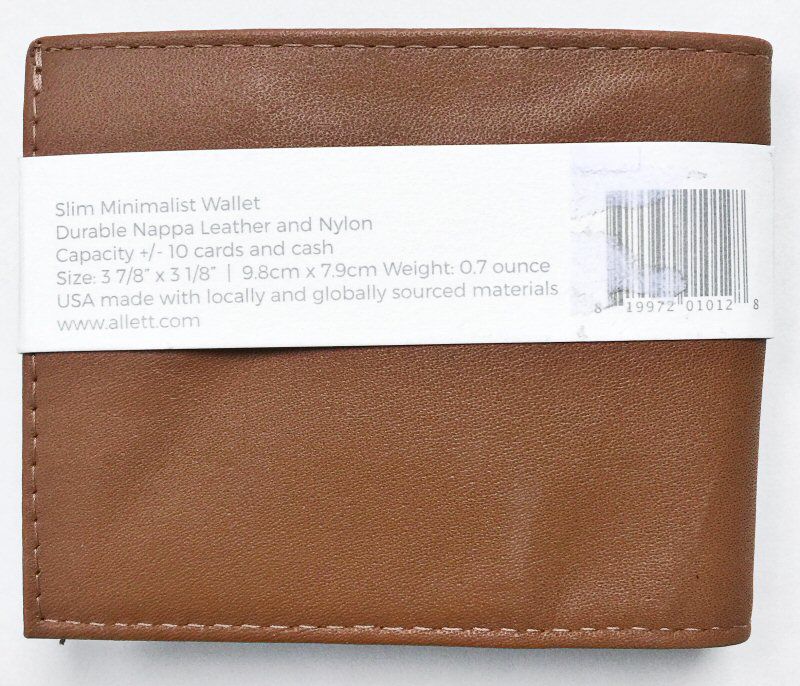
  • Weight = 0.7 oz.
  • Price = $40
  • Location of Manufacture = USA

The Slim Sport Wallet is similar to a classic bi-fold, but with Allett’s own spin on some features, as seen below.

You can really see the richness of Allett’s Napa leather in the photo above.  It has a very fine, soft appearance and feel.

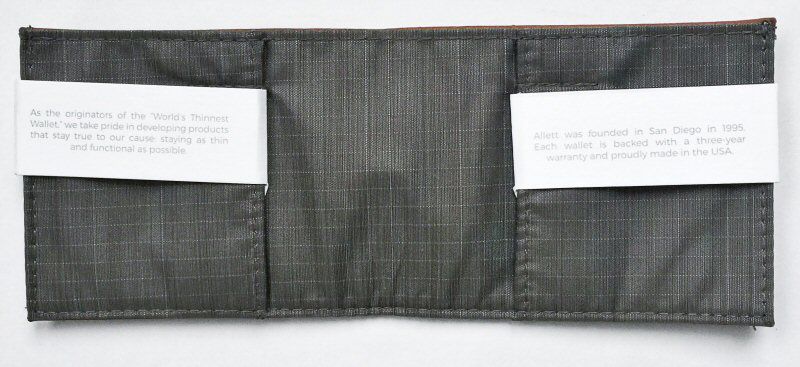
The Slim Sport Wallet’s interior has that same ripstop Nylon as the previous three wallets reviewed here, which is thin yet lightweight, durable and moisture-wicking.  This wallet also has a three-year warranty.

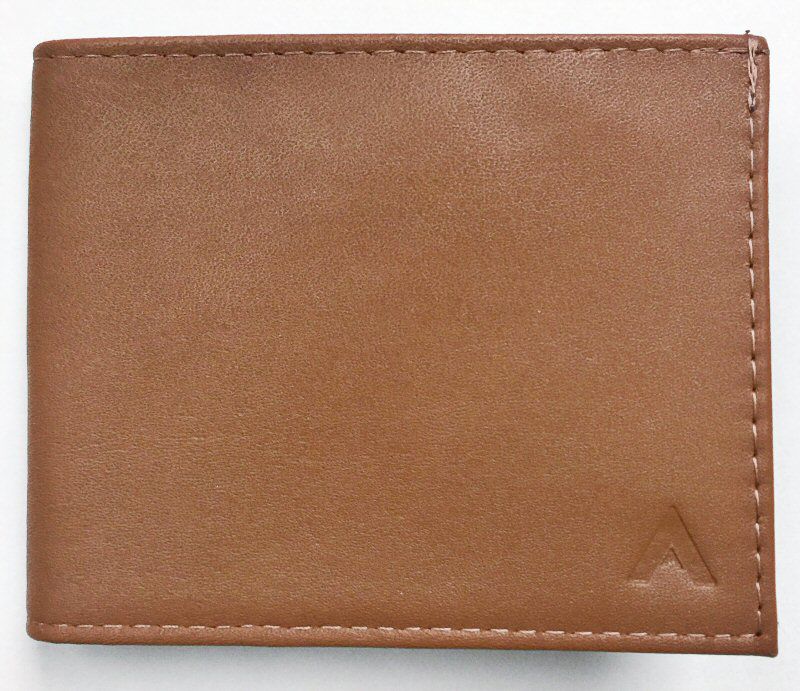
The above photo showcases the Slim Sport Wallet’s classic styling.

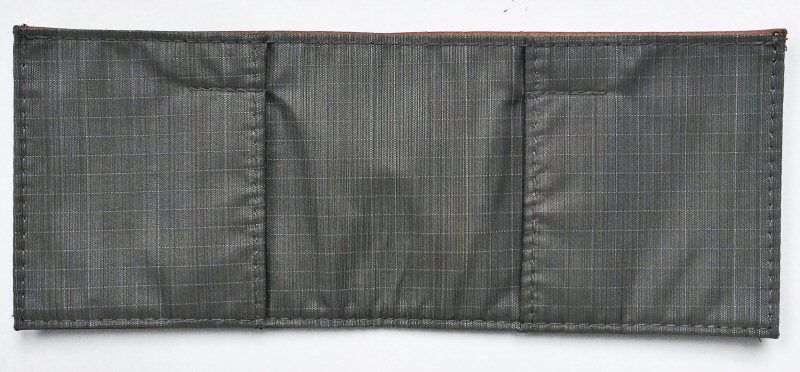
As mentioned above, the Slim Sport Wallet’s interior layout resembled a bi-fold but has some changes from that classic layout.  While it does indeed fold in the middle, it only has two card pockets which are facing inward toward the wallet’s center.  Additionally, it has two very slim pockets above the card pockets.  More on each of these below.

Like the Slim ID Wallet, the Slim Sport Wallet has but a single Allett “A” logo embossed into its front lower right corner, which is a nice touch (not a huge, gaudy logo).  Again, Allett’s stitching on this wallet is impeccable.

The Slim Sport Wallet is not only slim, but it also has a small footprint as well.

To keep the comparison similar, I again used the same contents that I’d used for the previous wallets, as seen in the photo above.

Like the previous three wallets, the Slim Sport Wallet includes a wide bill pocket that runs the length of the wallet.  However, this one does not have a divider as the other three wallets do.  While lack of this divider will eliminate this wallet’s ability to separate bills and receipts, it will help reduce the wallet’s thickness.

The Slim Sport Wallet is indeed slim—the thinnest of the leather-exterior wallets in this review.

Even loaded up, the Slim Sport Wallet is definitely thin, owing to its lack of a divider for one thing, but also because of its generally thin design.

The other feature that keeps the Slim Sport Wallet slim is that cards are simply stacked atop one another, without layers of fabric between them.  While this does greatly reduce the ability to separate and organize cards, if this isn’t as important to you, it will keep the wallet more minimalist and help keep the wallet slim.  Additionally, note the two very slim pockets just above each of the card pockets.  I think these are intended to hold one of Allett’s tiny Micro Pens—however, as of this writing, the Micro Pen does not appear to be available on Allett’s site (however, its refills are available).

Final Thoughts

What I like

  • These wallets range from very slim to SUPER slim
  • Each wallet has a classy, understated, and minimalist style
  • Very affordable pricing

What needs to be improved

  • The card pockets on the Nylon Original Wallet could be a bit deeper (more like the card pockets on the RFID Slim Original Wallet)

Final thoughts

I am every bit as impressed with each of these wallets as I was with the first Allett wallet I reviewed.  They all have very classy looks, have thoughtful features for storage and separation, and the materials are very handsome and durable.  If you are looking for a slim, stylish, affordable wallet, definitely check out Allett’s selection.

Price:

  • Nylon Original Wallet,  $30
  • RFID Slim Original Wallet $55
  • Slim ID Wallet $45
  • Slim Sport Wallet $40

Where to buy: Allett.com
Source: Allett.com

Filed in categories: Reviews

Tagged:

Allett Nylon Original Wallet, RFID Slim Original Wallet, Slim ID Wallet, and Slim Sport Wallet review originally appeared on The Gadgeteer on June 4, 2019 at 10:00 am.

Note: If you are subscribed to this feed through FeedBurner, please switch to our native feed URL http://the-gadgeteer.com/feed/ in order to ensure continuous delivery.
Zhiyun 4 3-Axis Handheld Smartphone Gimbal Stabilizer review


REVIEW – As a Videographer, I am always looking for ways to add versatility and enhancements to my video shoots, including ways to be totally mobile and lightweight when on the go. Sometimes, I find myself in situations where I use my smartphone to get unplanned video, but when holding it in my hands, the footage shows signs of instability and there is the lack of the benefit of creative angles. Enter the Zhiyun 4 3-Axis Handheld iPhone Gimbal Stabilizer as a possible perfect solution. So, here we go!

What is it?

The Zhiyun 4 3-Axis Handheld Smartphone Gimbal Stabilizer is a versatile device that features overall diverse functions. It can also sync with camera settings to control the zoom and focus. It has 4 built-in operating modes that can capture more advanced footage.

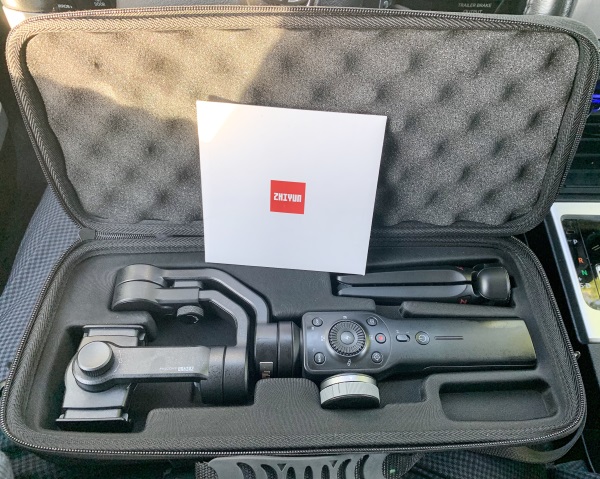
What’s in the box


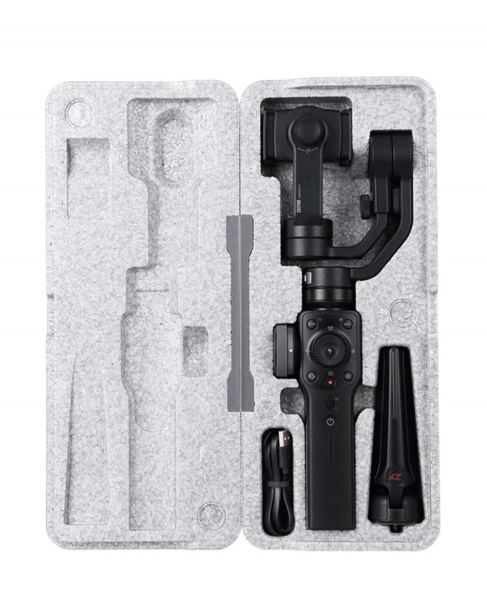
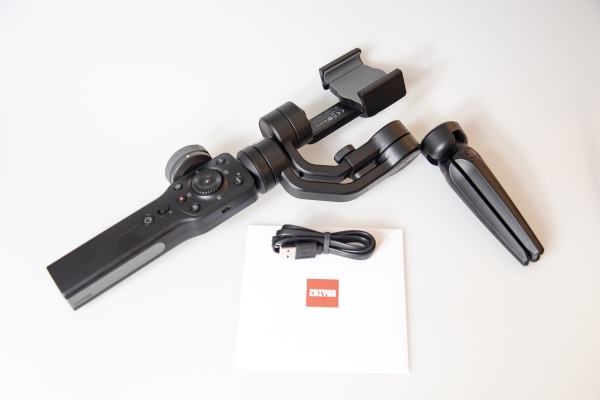
1 x Zhiyun 4 3-Axis Handheld iPhone Gimbal Stabilizer
1 x Carrying Case
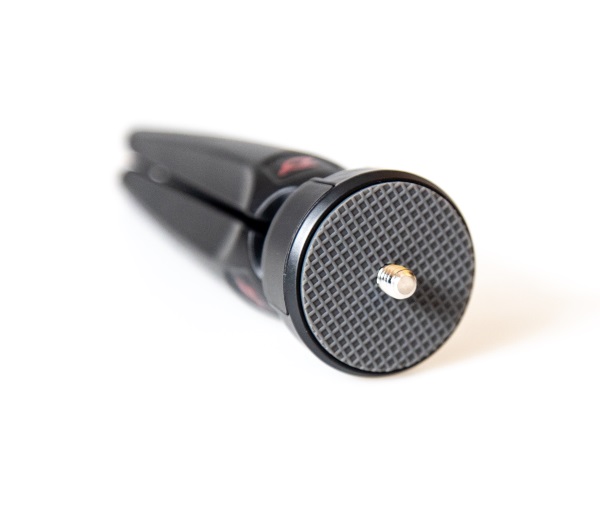
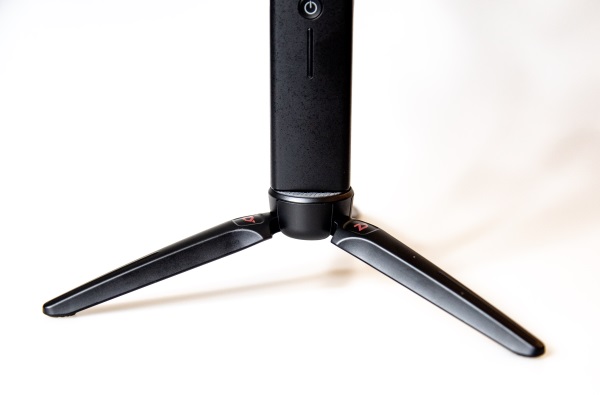
1 x Tripod
1 x USB-C Charging Cable
1 x User Guide

Design and features

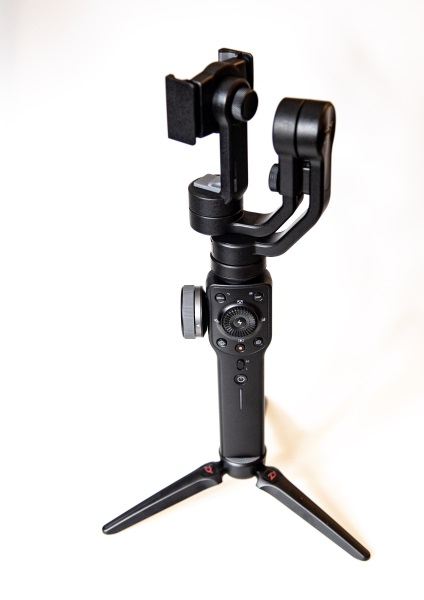
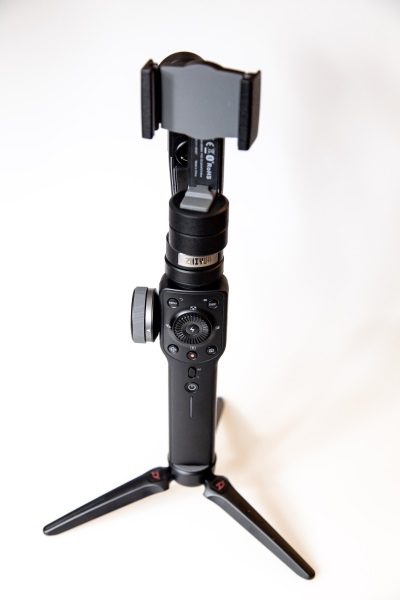
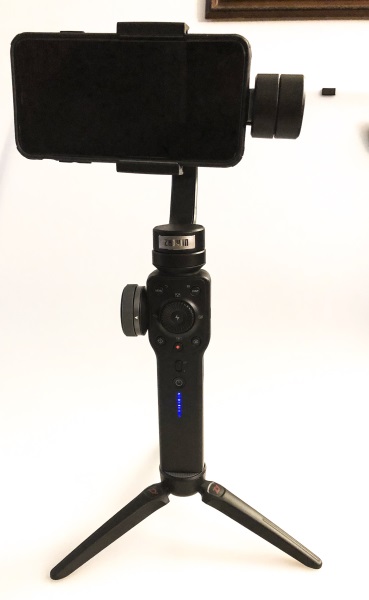
The Zhiyun 4 3-Axis Handheld Smartphone Gimbal Stabilizer is designed to allow the user to shoot smooth video and to take pictures with a smartphone inserted in the holder and connected to the gimbal via Bluetooth.

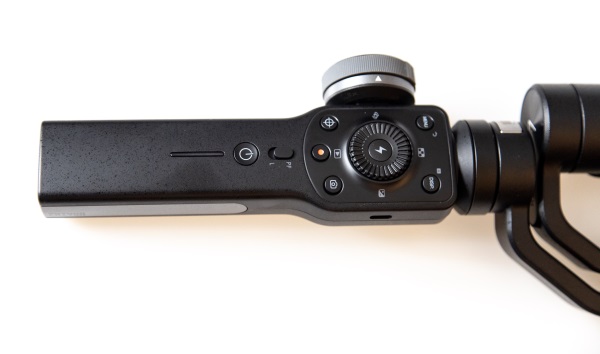
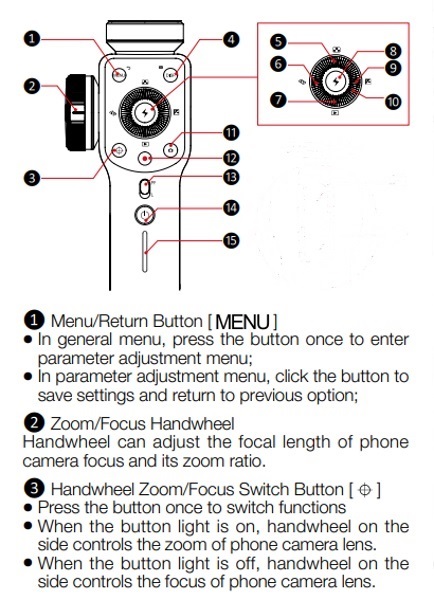
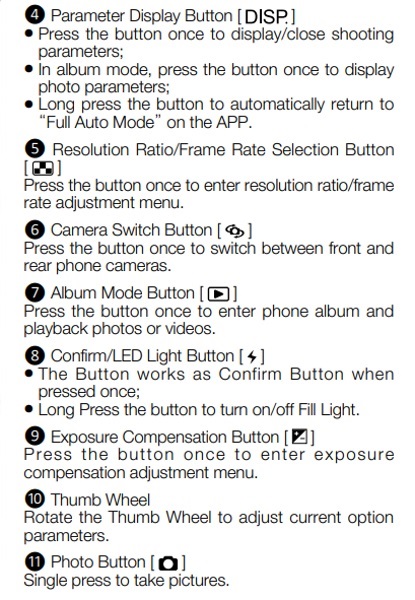
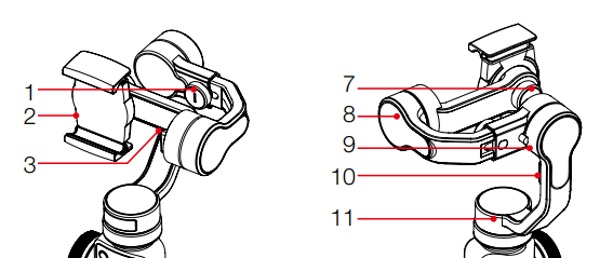
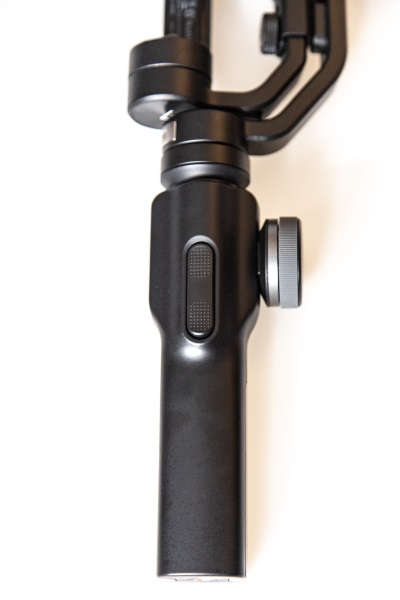
On one surface of the handle of the gimbal, there are the main controls that include the power on/off, menus, camera/video switching, and several other functions. (See the illustration and function list below the picture)


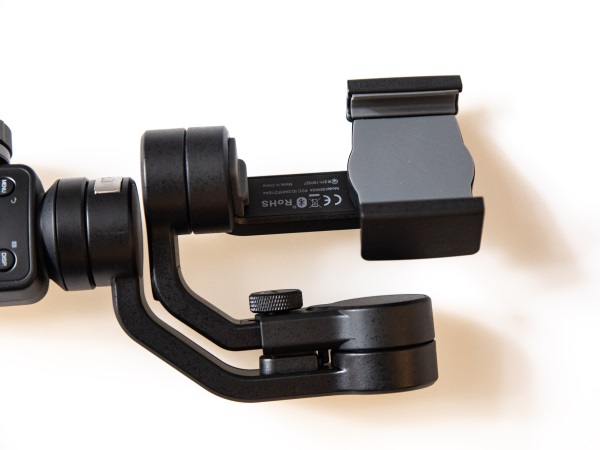
The picture below shows the “head” of the gimbal that includes the cell phone holder and the rotation mechanism. Below the picture is the related illustration of the parts and functions.


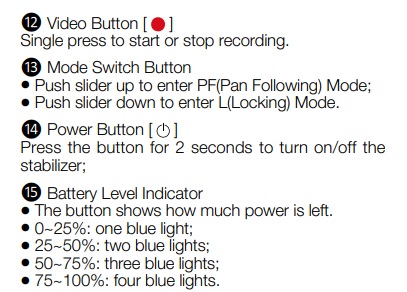
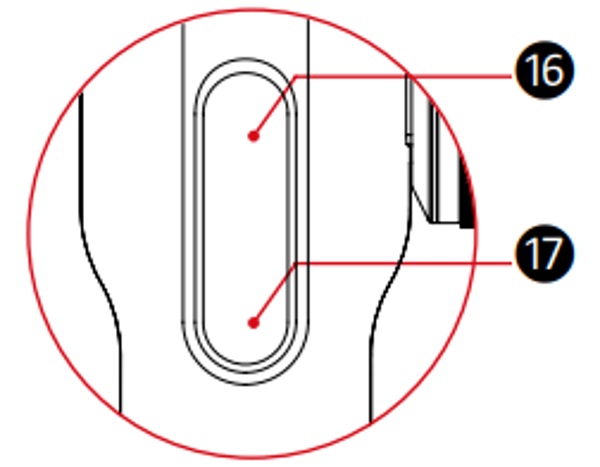
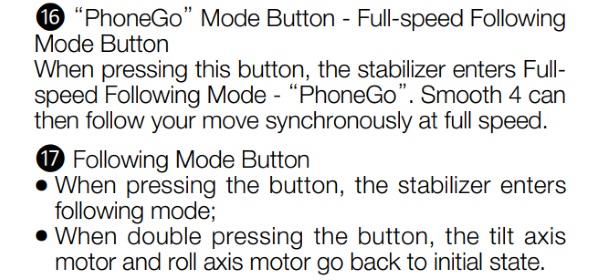
On the handle of the gimbal on the side opposite the main controls, there is an up/down toggle switch that controls the “phone go” and “Following” modes. See the illustration and related function list and description below.


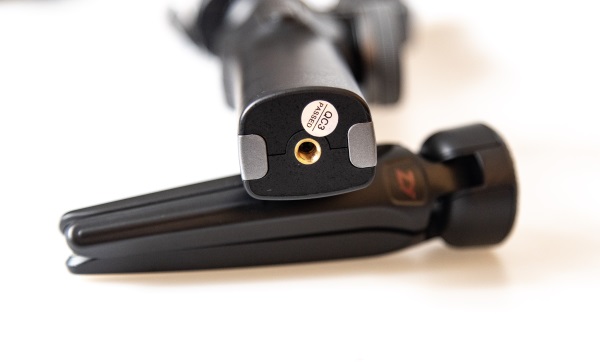
At the bottom of the gimbal, there is a female 1/4-20″ tripod mount.

Performance

The gimbal comes well packaged in a molded case that is described as a carry case but it does not have any handles or real way of keeping it securely closed while transporting. So, one of the first things that I did was to buy an aftermarket hard case that comes with a zipper and carrying strap.

Once the gimbal was charged, I read the instructions and placed my iPhone into the holder. The sides of the holder are spring loaded so that it can accommodate size differences of phones and case types, etc. The spring is quite strong and holds the phone quite well. I immediately noticed that despite using the adjustment knob to center my phone, it would not center partially because of the phone case, and I was reluctant to use my phone without the case. The instructions indicated that once powered on depending on the weight/size of the phone, that the gimbal should be able to accommodate for the off-center issue and it absolutely did. The phone became perfectly balanced when I turned it on. Important note: The instructions say not to turn on the gimbal until the phone is in the holder. When I first took the gimbal out of the box to charge it, I did what many would do and turned it on without reading any instructions. Luckily, there does not seem to be any damage done.

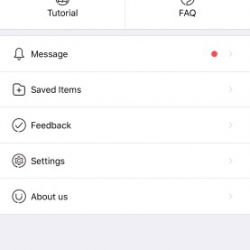
The second part of this operation is to download the app and connect to the gimbal via Bluetooth from within the app. Here are some screenshots from the app:


Connecting via Bluetooth is very simple and straightforward and soon I was on my way to recording. The easy access to the record button along with the camera button to take pictures and switch back to video mode as well as to the menu button to set up preferences is great and right at your fingertips.

While shooting the following video, I moved the gimbal abruptly several times both vertically and horizontally to see how it would affect the video. I also walked normally allowing my body to make deliberate movements while shooting. You can also seem some focus adjustments:


I was also able to just press the camera button to take photos while shooting the video.

The gimbal is capable of many modes of shooting video including follow mode, panoramic, subject switching, etc. You can click here to read the manual and to learn a lot more about it.

What I like

  • Build quality
  • Features
  • Battery life
  • Overall performance
  • The secure way that it holds the phone

What can be improved

  • It does exactly what it is supposed to do. I do wonder if it is possible to have videos stored on an SD card that is housed on the gimbal. This way it would not take up any memory on the phone for long video. The videos and photos are currently stored in the app.

Final thoughts

This gimbal exceeded my expectations, especially since I have tried earlier models from different manufacturers and in many cases was unsatisfied with the basic movement that was at times jerky and hesitant. This gimbal moves smoothly and even when I thought I was challenging it with excessive jerky movements, the resulting video was smooth and really good. I have not yet tried all of the features it offers, but I can definitely say that I really like this gimbal, and the accompanying app works well for me on IOS. I will be trying it with the Android version soon and I will provide an update if things go sideways. For now, I give it a well done and two thumbs up!!

Price: $119
Where to buy: Amazon
Sample: The sample for this review was provided by Zhiyun

Filed in categories: Reviews

Tagged: ,

Zhiyun 4 3-Axis Handheld Smartphone Gimbal Stabilizer review originally appeared on The Gadgeteer on June 4, 2019 at 9:00 am.

Note: If you are subscribed to this feed through FeedBurner, please switch to our native feed URL http://the-gadgeteer.com/feed/ in order to ensure continuous delivery.
StudioPress Review: The Best WordPress Themes in the Business?

There’s never been a better time to be a WordPress user — with so many high-quality themes and plugins to choose from, the types of websites you can build with WordPress are virtually unlimited. However, one of the downsides of having so much freedom can be making the right choice. With so many products on… View Article
The post StudioPress Review: The Best WordPress Themes in the Business? appeared first on WinningWP.