Jibbon Key Organizer review

REVIEW – I have been using a product called the OrbitKey since June of last year to organize and hold my car keys.  I was recently given the opportunity to review the next iteration of this key holder.  It promises to do a lot of nice things in addition to what the original OrbitKey does.  Let’s see how it worked out for me.

What is it?

The Jibbon Key Organizer is exactly what it states it is.  It is an organizer for your keys.  It wraps them in a nice leather sleeve and keeps your keys from scratching anything else that happens to be in the same container (pockets, purse, bag) as your keys.
What’s in the box?

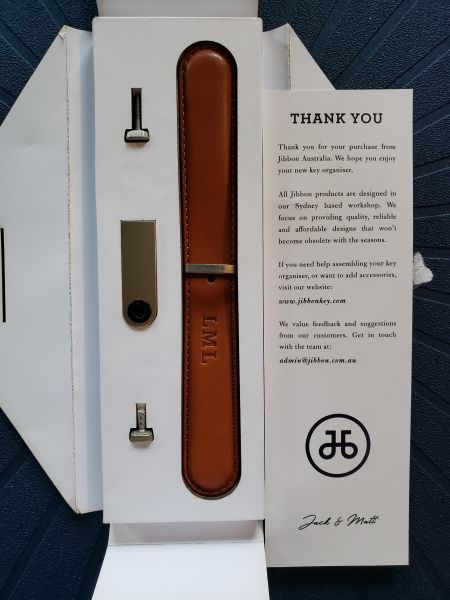
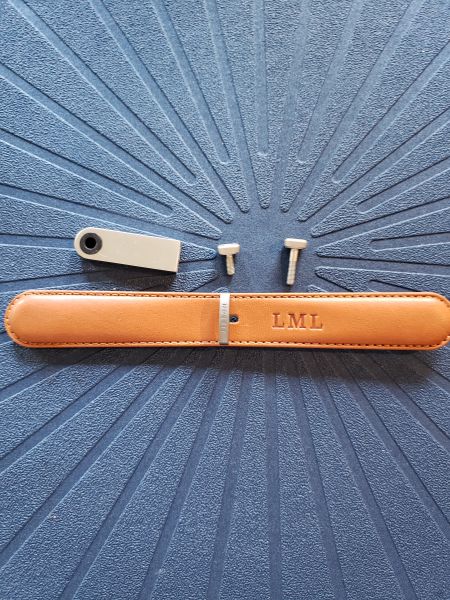
In the pictures above you can see the actual box the Jibbon came in and then the individual items were taken outside of it.  You can see the box is very minimal, but everything is nicely packed and contained in its own pocket.  In the box I received:

  • A leather Jibbon Key Organizer that was engraved with my initials.  The color I was sent was tan.
  • Two different sets of screws to hold the actual keys.
  • A USB key accessory made to fit the key holder.  My key was 32GB.

Design and features

I want to start off by saying I was given a preliminary version of this key holder.  The Kickstarter for this key holder has just started and a few changes have been made since then.  The picture above shows a close up of the embossing of my initials in the key holder.  They did an excellent job on this.  I love the way it came out.
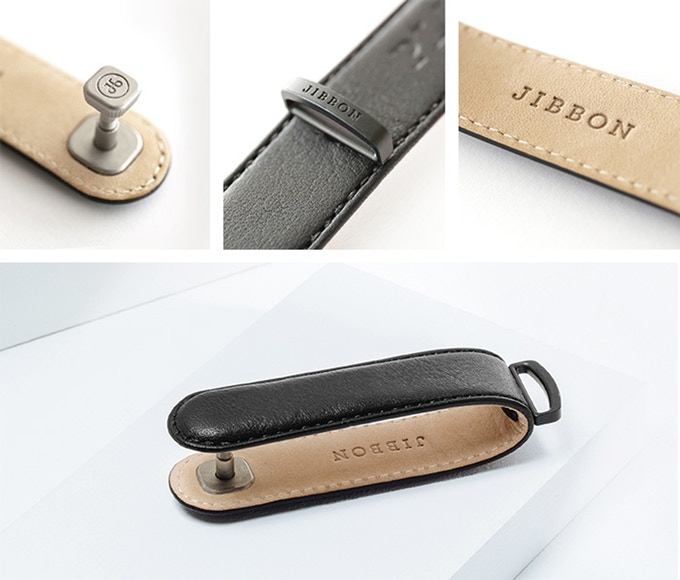
This next set of pictures show the inside of the key holder.   On the top left, you can see one of the screws that have been screwed into one side of the organizer.  That top head of the screw snaps into a metal holder on the other end completely flush with the leather.  The top middle picture is the D-ring that can hold additional items like your car remote.  The inside of the holder is stamped with the Jibbon name.  You can also see the stitching which is very clean and neat.

The Jibbon Key Organizer is made to hold three to nine keys.  I currently have 3 keys in my OrbitKey holder.  I have them pictured above.  These keys fit very nicely in my current key holder.  I chose the smallest screw and attached them to the Jibbon.

In the video above you can see how the keys are not held tightly in the key holder.  Now, this could be due to the fact that the last key is a slightly thinner key than normal, but there was no way to tighten the key organizer to make it hold the keys solidly without making them swing.   As I mentioned earlier, I was given an early prototype of the key holder.  They may have a way to prevent this from happening.  In the OrbitKey, they provided some flexi-washers that let you control how tightly the keys were held in place.

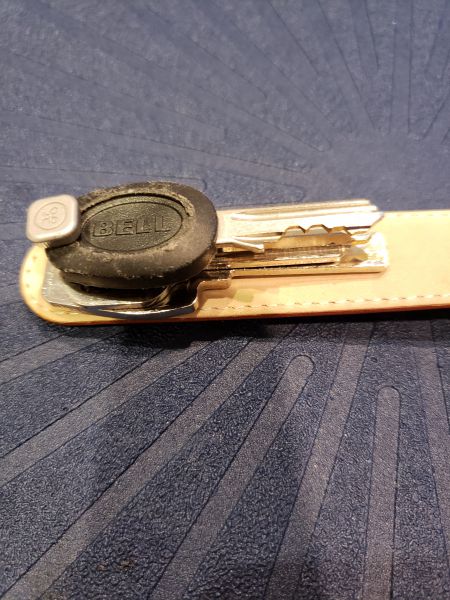
Since my house keys did not work, I decided to try out the keys I have for my motorcycle.   One of the keys has a large rubber coating on the end.  I used the longer screw in this case.  I screwed them down until it felt snug and I was still able to move the keys easily.  In the middle picture above you can see the screw holding the keys in place.  Note that you have to keep the screw head centered so it can clip into the opposite side of the key holder.  The third picture shows the key holder closed.  I do love how the head of the screw pops into the metal snap on the other side to be completely flush.  You don’t see any extra washers or the screw itself when you have enough keys to keep them in place.
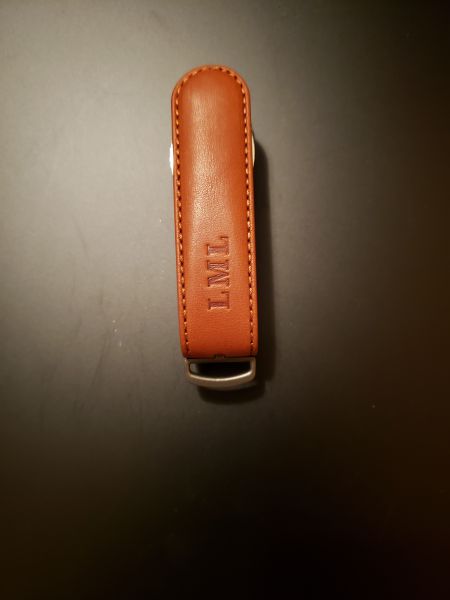
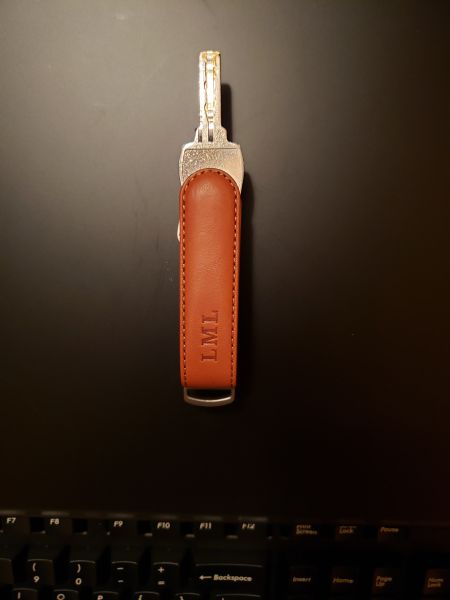
The next two pictures above show the top of the key holder with the keys in place and with a single key extended.  You can see that it is a very nice and clean look.  I also want to mention that the metal ring at the end of the key holder is removable if you wish.  You simply rotate it and it will slide out of its slot.   You can see a video of the D-ring being removed here.
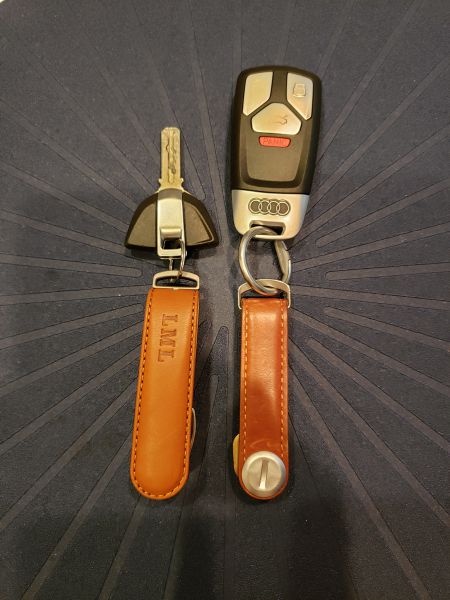
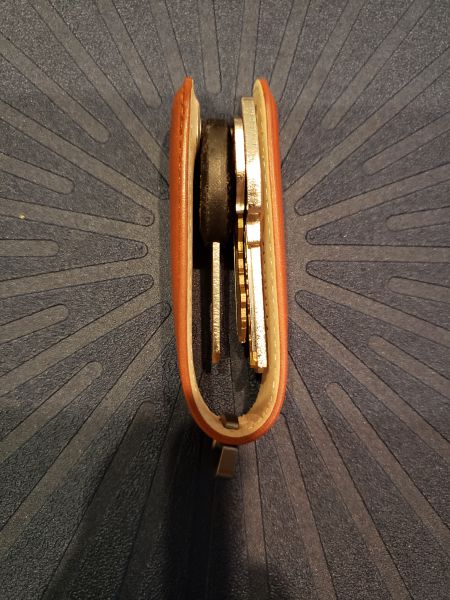
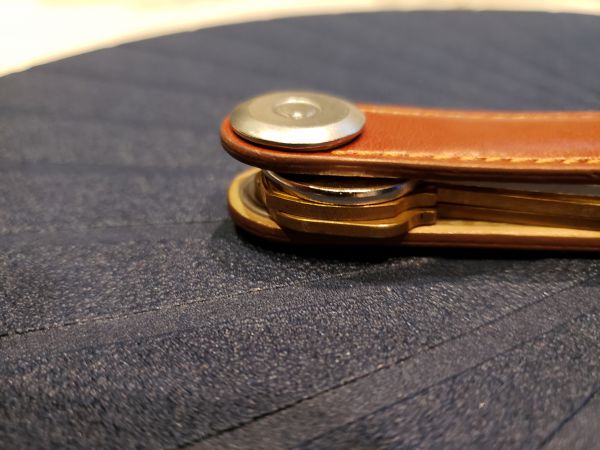
The shot above shows the new Jibbon Key Organizer on the left and my OrbitKey on the right.  You can see that I use the D-Rings at the end to attach my car remote and the larger key for my motorcycle.  The picture on the right is a side shot of the OrbitKey with my original 3 keys.   You can see it makes a nice compact package, but it does have the metal button on the outside that can still possibly scratch items in your pocket.   The OrbitKey also requires the use of a coin in order to remove or add keys.   The Jibbon is designed to require no tools at all.

Another cool feature of the Jibbon is that they offer additional accessories for the key holder.  In addition to the USB key, they offer a nice multi-tool device.  The multi-tool has a bottle opener, box cutter, and nail file all in one.
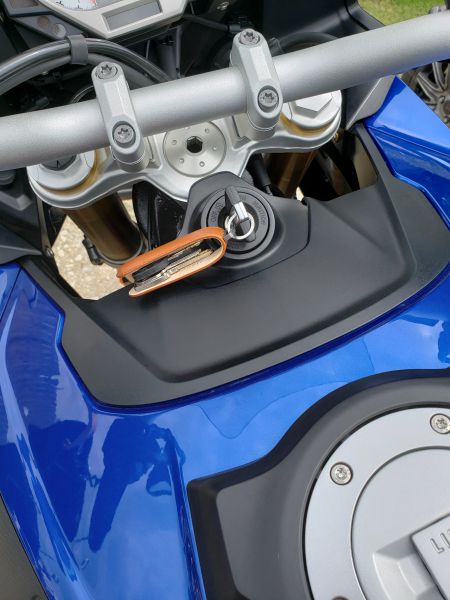
Finally, I included a picture of the key organizer on my motorcycle.  A lot of bikes are keyless now, but for those that require an actual key, you often end up with scratch marks from the other keys around the ignition switch due to the wind knocking them around.  With my keys now in the Jibbon Key Organizer, I now no longer have to worry about scratches on my bike.  Since it is leather it will be pretty weather resistant as long as I treat it with some conditioner.

What I like

I love that there are very few parts to this key organizer compared to the original OrbitKey.  There is just the leather strap and a single screw.  I also love that you do not need to use any tools to add or take away keys.  The organizer is very elegant looking and will certainly not scratch my motorcycle or anything in my pockets.  They use real Italian leather and it shows in the quality of the device.   The materials are solid and well made.

What needs to be improved

The only suggestion I can make is to possibly have the smaller screw have a few extra threads on it so it can screw in a bit further.  I really wish it could have held my original three keys solidly.

Final thoughts

I am really enjoying this key organizer.  I can totally recommend it for anyone who is looking for an elegant and efficient way to hold their keys.

Price: $31 – Early Bird Kickstarter
Where to buy: Kickstarter
Source: The sample of this product was provided by Jibbon.

Filed in categories: Reviews

Tagged: , ,

Jibbon Key Organizer review originally appeared on The Gadgeteer on June 7, 2019 at 10:01 am.

Note: If you are subscribed to this feed through FeedBurner, please switch to our native feed URL http://the-gadgeteer.com/feed/ in order to ensure continuous delivery.

Rescue GoCLIP Yellow Jacket and Mosquito Repellent review

REVIEW – When enjoying the outdoors it is almost inevitable that you will have to deal with the biting and stinging pests with whom we share the outdoors. There are many options that may be tried to combat these flying and crawling menaces, but they all have their disadvantages. The Mosquito GoCLIP and Yellowjacket Repellent GoCLIP from Rescue promise to minimize these disadvantages while still performing their basic purposes.

What is it?

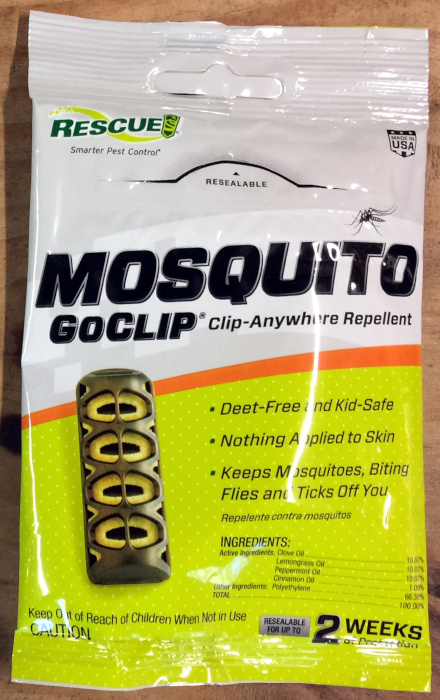
The Mosquito GoCLIP and Yellowjacket Repellent GoCLiP are DEET-free and kid/pet-safe clip-on repellent emitters that use passive diffusion of various plant oils to deter stinging / biting insects from getting too friendly. The active ingredients are incorporated into a solid bar which is held in a plastic clip-on case. These are multi-use devices which provide up to 48 hours of active protection and may be sealed back in their foil bags and reused, up to the 48 hours total, for 2 weeks.

What’s in the box?

I was sent one of the Mosquito GoCLIP and one YellowJacket Repellent GoCLIP units. The contents of each packet are identical with the exception of the type of repellent.

Each GoCLIP pack consists of a reusable foil pouch with descriptions of how and when to use each GoCLIP and a list of ingredients.

Inside each reusable pouch is a smaller mylar-type sealed packet. Inside this packet was a sealed plastic bag containing the actual GoCLIP. The two inner packets are disposable. The main foil package is heavier and is intended for reuse / storage of the GoCLIP between wearings. The reusable package is closed with a zip-lock style seal.

Specs

Each GoCLIP measures 74 x 26 x 19 mm (l x w x h) and weights 6 grams.

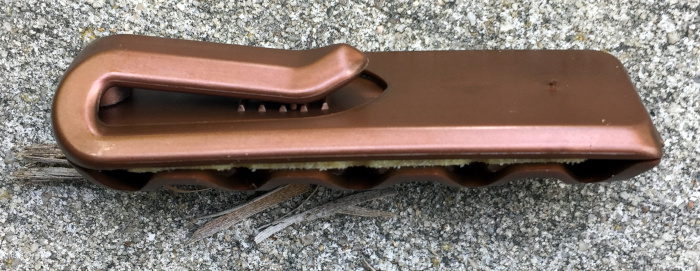
The GoCLIPs each have a clip on the back that allows the GoCLIP to be clipped to a pocket, belt, beltloop, or ring, such as on a pet’s collar.

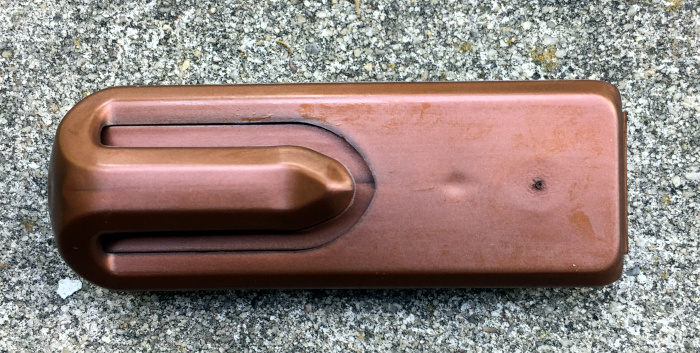
The only immediately discernible physical difference between a mosquito-repellent GoCLIP and one designed to ward off stinging insects is the color of the holder. The mosquito-repellent modules are green, while the stinging insect modules are bronze colored.

Design and features

The GoCLIP consists of a plastic housing and the plant-oil infused polymer insert. It is an efficient design. The GoCLIP system could lend itself to a reusable housing in either a more durable plastic or light-weight metal with a replaceable insert.

The Mosquito GoCLIP is designed to repel mosquitoes, biting flies, and ticks. The YellowJacket GoCLIP is intended to ward off yellow jackets, hornets, wasps, and bees.  The active ingredients in both include clove oil and lemongrass oil. The mosquito formula add peppermint oil and cinnamon oil, while the yellow jacket formula substitutes geranium oil and rosemary oil. When in use, the predominant smell is of cloves. It is definitely noticeable, but not overwhelming.

Setup

Setup consists of opening the layers of packaging and clipping a GoCLIP to your clothing or your pet.

Performance

I put the Mosquito GoCLIP to one of the most daunting tests I could think of: camping in North Central Florida in the late spring after a few weeks of intermittent rain at a camp with two terminal lakes and a number of streams.

Several of the people with whom I go camping are extremely sensitive to DEET due to exposure to various and unknown chemical during their military service, so I was quite happy to review the GoCLIP in an attempt to keep from becoming anemic due to the mosquitoes in my area.

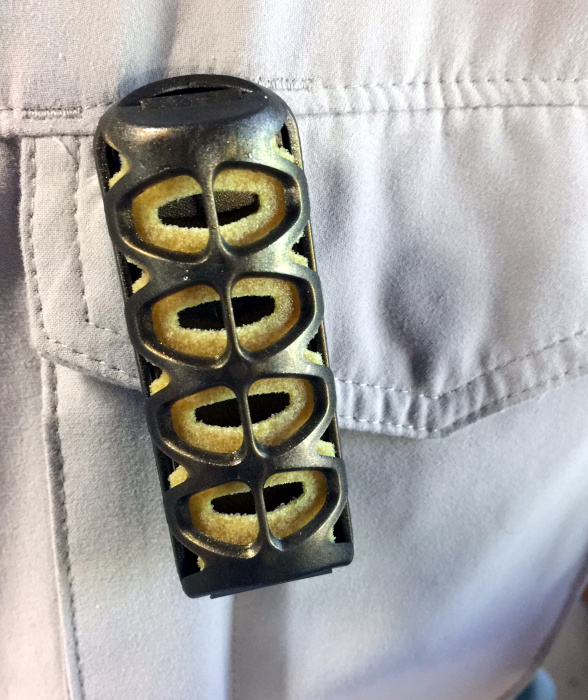
I wore the GoCLIP from sunrise until well after dark on the Saturday of my test. During this time, I alternated the GoCLIP from my shirt pocket (above photo) to my belt. During the time I was wearing the GoCLIP, I saw many mosquitoes flying around others at the site and scoring hits on many of the other campers. The mosquitoes would approach me and the veer away when they came within 6 or 7 inches of me. I was quite impressed. I was not successfully attacked by a mosquito while wearing the Mosquito GoCLIP. I will also attest to its apparent ability to ward off ticks. The camp in question is notorious for ticks, but I found no tick on me after Saturday while several of the other campers removed multiple seed ticks during this same time. As a control, I did not wear the Mosquito GoCLIP on either Friday night or Sunday morning / early afternoon. During these times, I was bitten by mosquitoes more than 6 times (most of these on Sunday).

The Mosquito GoCLIP scores over my ThermaCell repellent because I didn’t have to rely on still air and remaining within 10 feet of a fixed point, like I have to do with the ThermaCell. As a further test, I was at this same camp two weeks later and attempted to use my ThermaCell to ward off mosquitoes and was sorely disappointed by the effectiveness of the ThermaCell compared to the Mosquito GoCLIP.

I tested the YellowJacket Repellent GoCLIP while working around my house cleaning out some brush and mowing. I had previously been stung while working around the house and saw several flying stinging insects during my cleaning, but none of them approached close enough to me for me to even attempt to swat them away (which may have led to a few stings).

I did not have the opportunity to test the GoCLIPS on a pet, but I only assume that as long as the pet kept the GoCLIP on its collar the results would be similar. The only problem that I can foresee using a GoCLIP on a dog or cat would be getting them used to the smell of the GoCLIP. I have had scent hounds that loved to go roll or rub against my herbs and scented geraniums (including citronella plants) and others that became very agitated with anything with a strong smell (other than a dead animal that they decided to roll in) was put on them.

What I like

  • DEET-free
  • Reusable for up to 2 weeks (stored) or 48 hours (continuous use)
  • No residue on skin, fur, or clothes

What needs to be improved

  • Longer life
  • Smaller units that can be more easily clipped to shoes / boots sold as a pair
  • Make a more robust reusable housing and sell inserts with the active ingredients

Final thoughts

I’m quite impressed with the performance of the Mosquito GoCLIP and will be purchasing many more for use during the upcoming camping season. The convenience and efficacy more than make up for the price of the GoCLIP. I’m in the process of cleaning up many of the areas around my property that are the favorite nesting spots for the stinging insects targeted by the YellowJacket Repellent GoCLIP, so I’m not sure if I’ll be purchasing additional units, even though it seems to work well.

If you’re planning to be outside this summer, do yourself a favor and at least try the Rescue Mosquito GoCLIP and YellowJacket Repellent GoCLIP.

Price: $ 8.18 via Amazon Marketplace
Where to buy: Online (including Wal-Mart and Amazon.com) and various local retailers (including some local Do It Best hardware stores, True Value Hardware stores and Rural King). To find your local retailer go to “Find a Retailer” on the Rescue website.
Source: The sample of this product was provided by Rescue / Sterling International, Inc.

Filed in categories: Reviews

Tagged: ,

Rescue GoCLIP Yellow Jacket and Mosquito Repellent review originally appeared on The Gadgeteer on June 7, 2019 at 9:00 am.

Note: If you are subscribed to this feed through FeedBurner, please switch to our native feed URL http://the-gadgeteer.com/feed/ in order to ensure continuous delivery.

Gamma+ Italia Absolute Zero USB rechargeable shaver review

REVIEW – Shaving – the bane of most men’s existence.  Every morning, and for some poor dudes, twice a day, we drag razors over our faces, hacking the whiskers off to give us that smooth, professional look. In my case, as a retired guy, I do it so I am not all hairy and scratchy and my wife will still kiss me.

Truth be told, I have never used a regular razor.  When I started shaving, somewhere in the late 1970s, I inherited my grandfather’s plug-in electric shaver. To be clear, my grandfather died in 1968, so when I got it, it was well over ten years old and was a little rough.  From there, I graduated to a variety of foil and rotary electric shavers over the years.  I kept switching back and forth, looking for a close, comfortable, and fast shave. Foils tend to give me a closer shave, but are slow and miss hairs on my face. Rotaries are faster, and do a better job for me getting all the tricky hairs, but aren’t as close.  I currently use a triple-head rotary shaver that gives me a fairly close shave and does it pretty quickly. When I was offered the opportunity to test out a new foil shaver with a spiffy Italian design, it sounded like a great idea.  Let’s see if it makes the cut.

What is it?

The Absolute Zero is a foil-style electric shaver with a pop-up trimmer.  It is powered by a rechargeable lithium-ion internal battery.  A novel feature is that it recharges via USB, eliminating a dedicated charging power adapter.

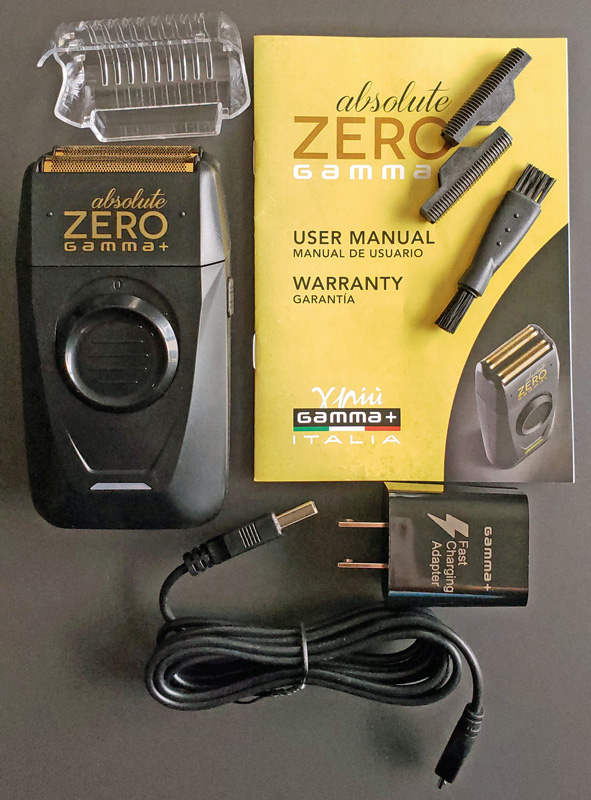
What’s in the box?

  • Shaver
  • Foil protective cover
  • Two replacement cutters
  • Cleaning brush
  • USB charging adapter
  • USB-A to micro USB cable
  • User manual

Hardware specs

  • Weight: 4.6 ounces
  • Cutters: 2
  • Trimmer: pop-up
  • Battery life: 120 minutes
  • Battery type: lithium-ion
  • Recharge time: roughly 30 minutes
  • Foil composition: gold and titanium

Design and features

Setup

There really isn’t any setup, other than charging the shaver. It only takes about a half-hour to recharge.  The manual cautions to not overcharge as it can damage the battery.  To me, this is a bit of a problem, since most folks won’t sit and watch it for 30 minutes, or set a timer to unplug the shaver.  I usually plug mine in and unplug it the next time I’m in the bathroom, assuming it catches my eye.

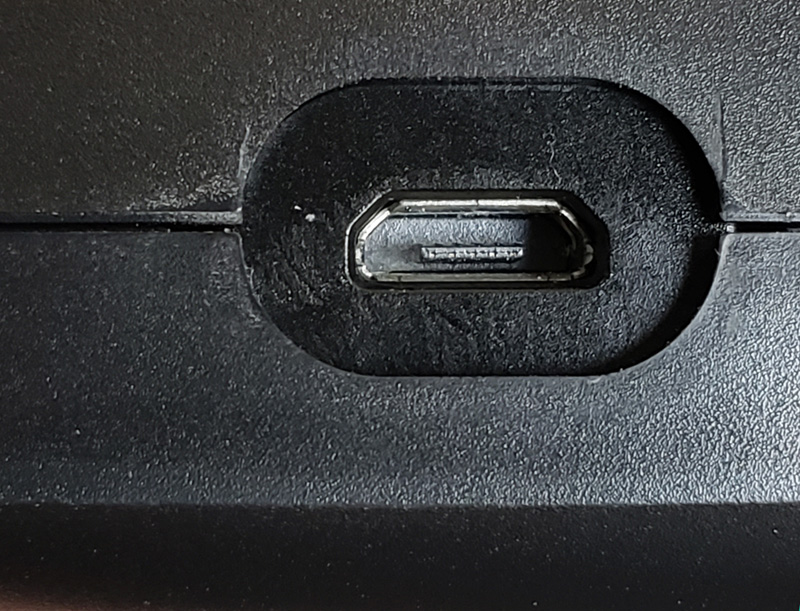
The micro-USB port is located on the bottom of the shaver. Note that this is micro-USB. Why can’t everyone just get on the USB-C train?  It would simplify so many things.  Just sayin’.

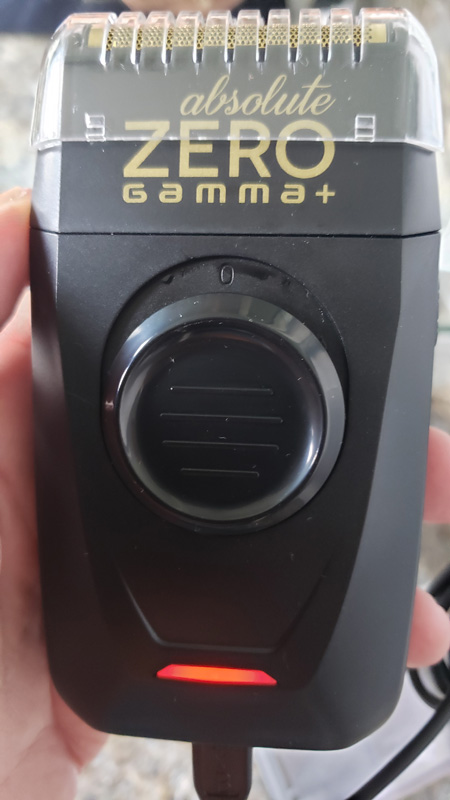
Plugging in the shaver turns the status LED red.

The LED turns green when the charging is complete. With a two-hour runtime, assuming a five-minute daily shave, you should be able to go nearly four weeks between charges.

One nice touch is that as long as the shaver has at least a basic charge, you can use the shaver while plugged in.  That means that even if the battery is really low and needs a charge, you can still get a shave in before you walk out the door.  Of course, that brings us back to the issue of not leaving the shaver plugged in all day.

Like most rechargeable shavers, toothbrushes and such, the battery is not user-replaceable, so once the battery reaches its end of life, you won’t be able to charge it anymore.  With this shaver, you could potentially still use it as a plug-in shaver.

Features

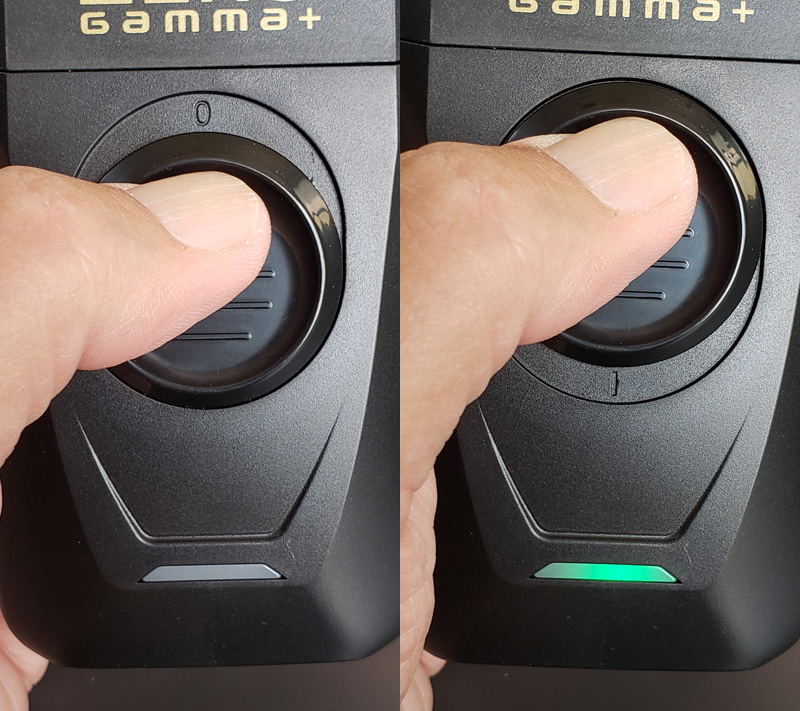
There is a single switch on the front of the shaver.  Pushing it up turns on the shaver.

The status LED glows green when the shaver is running.

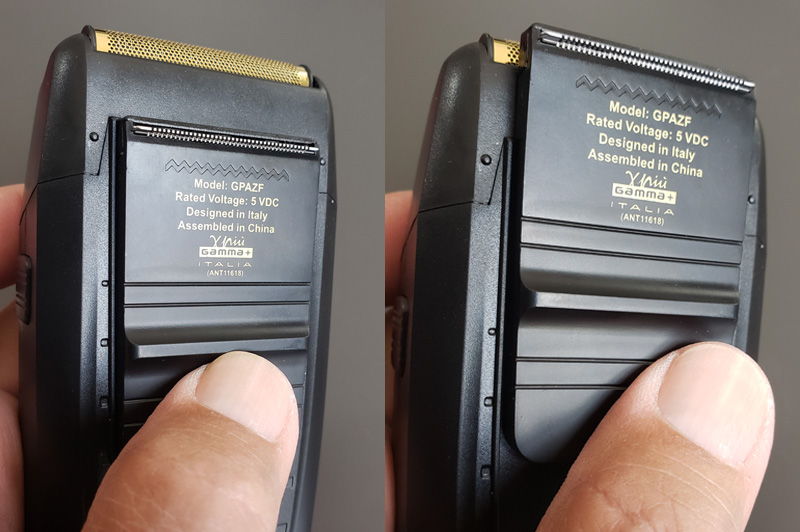
The trimmer is on the back of the shaver.  Pushing it up turns it on, provided that the shaver is already running.

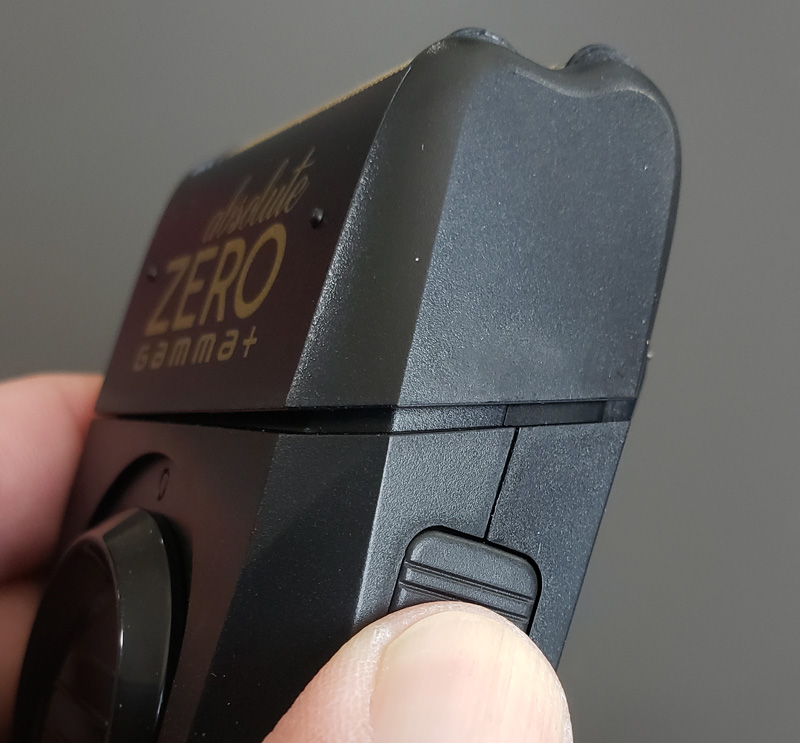
On the right side of the shaver, we find the foil release button.

Pressing that button releases the foil assembly so we can access the cutters.

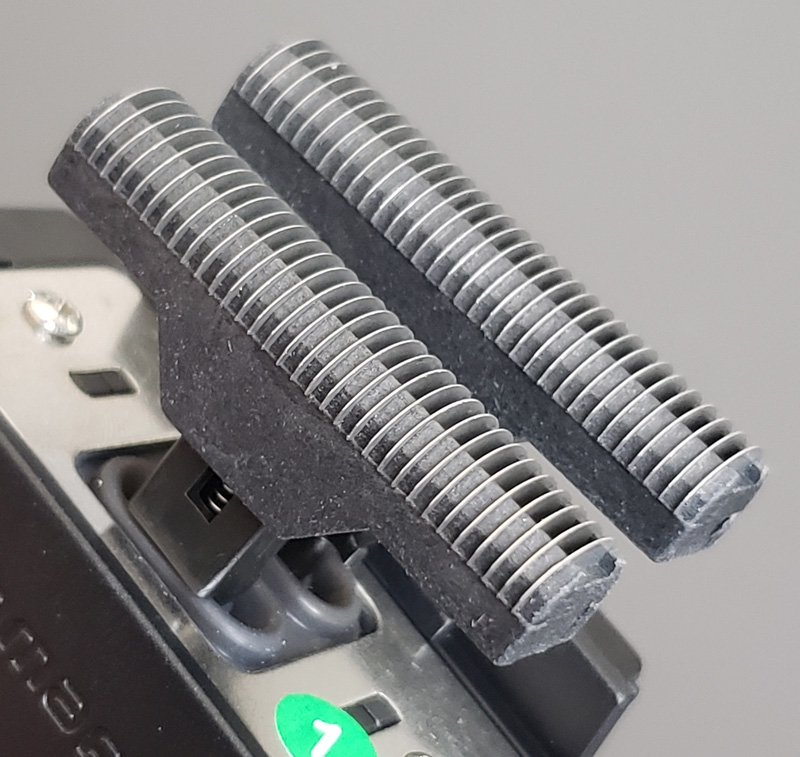
The cutters vibrate rapidly back and forth, just underneath the foil, immediately cutting any hair they encounter. The cutters are replaceable.  Grasp a cutter on the sides and pull up to release.  Then, snap a new cutter back in place.  The shaver ships with two replacement cutters.

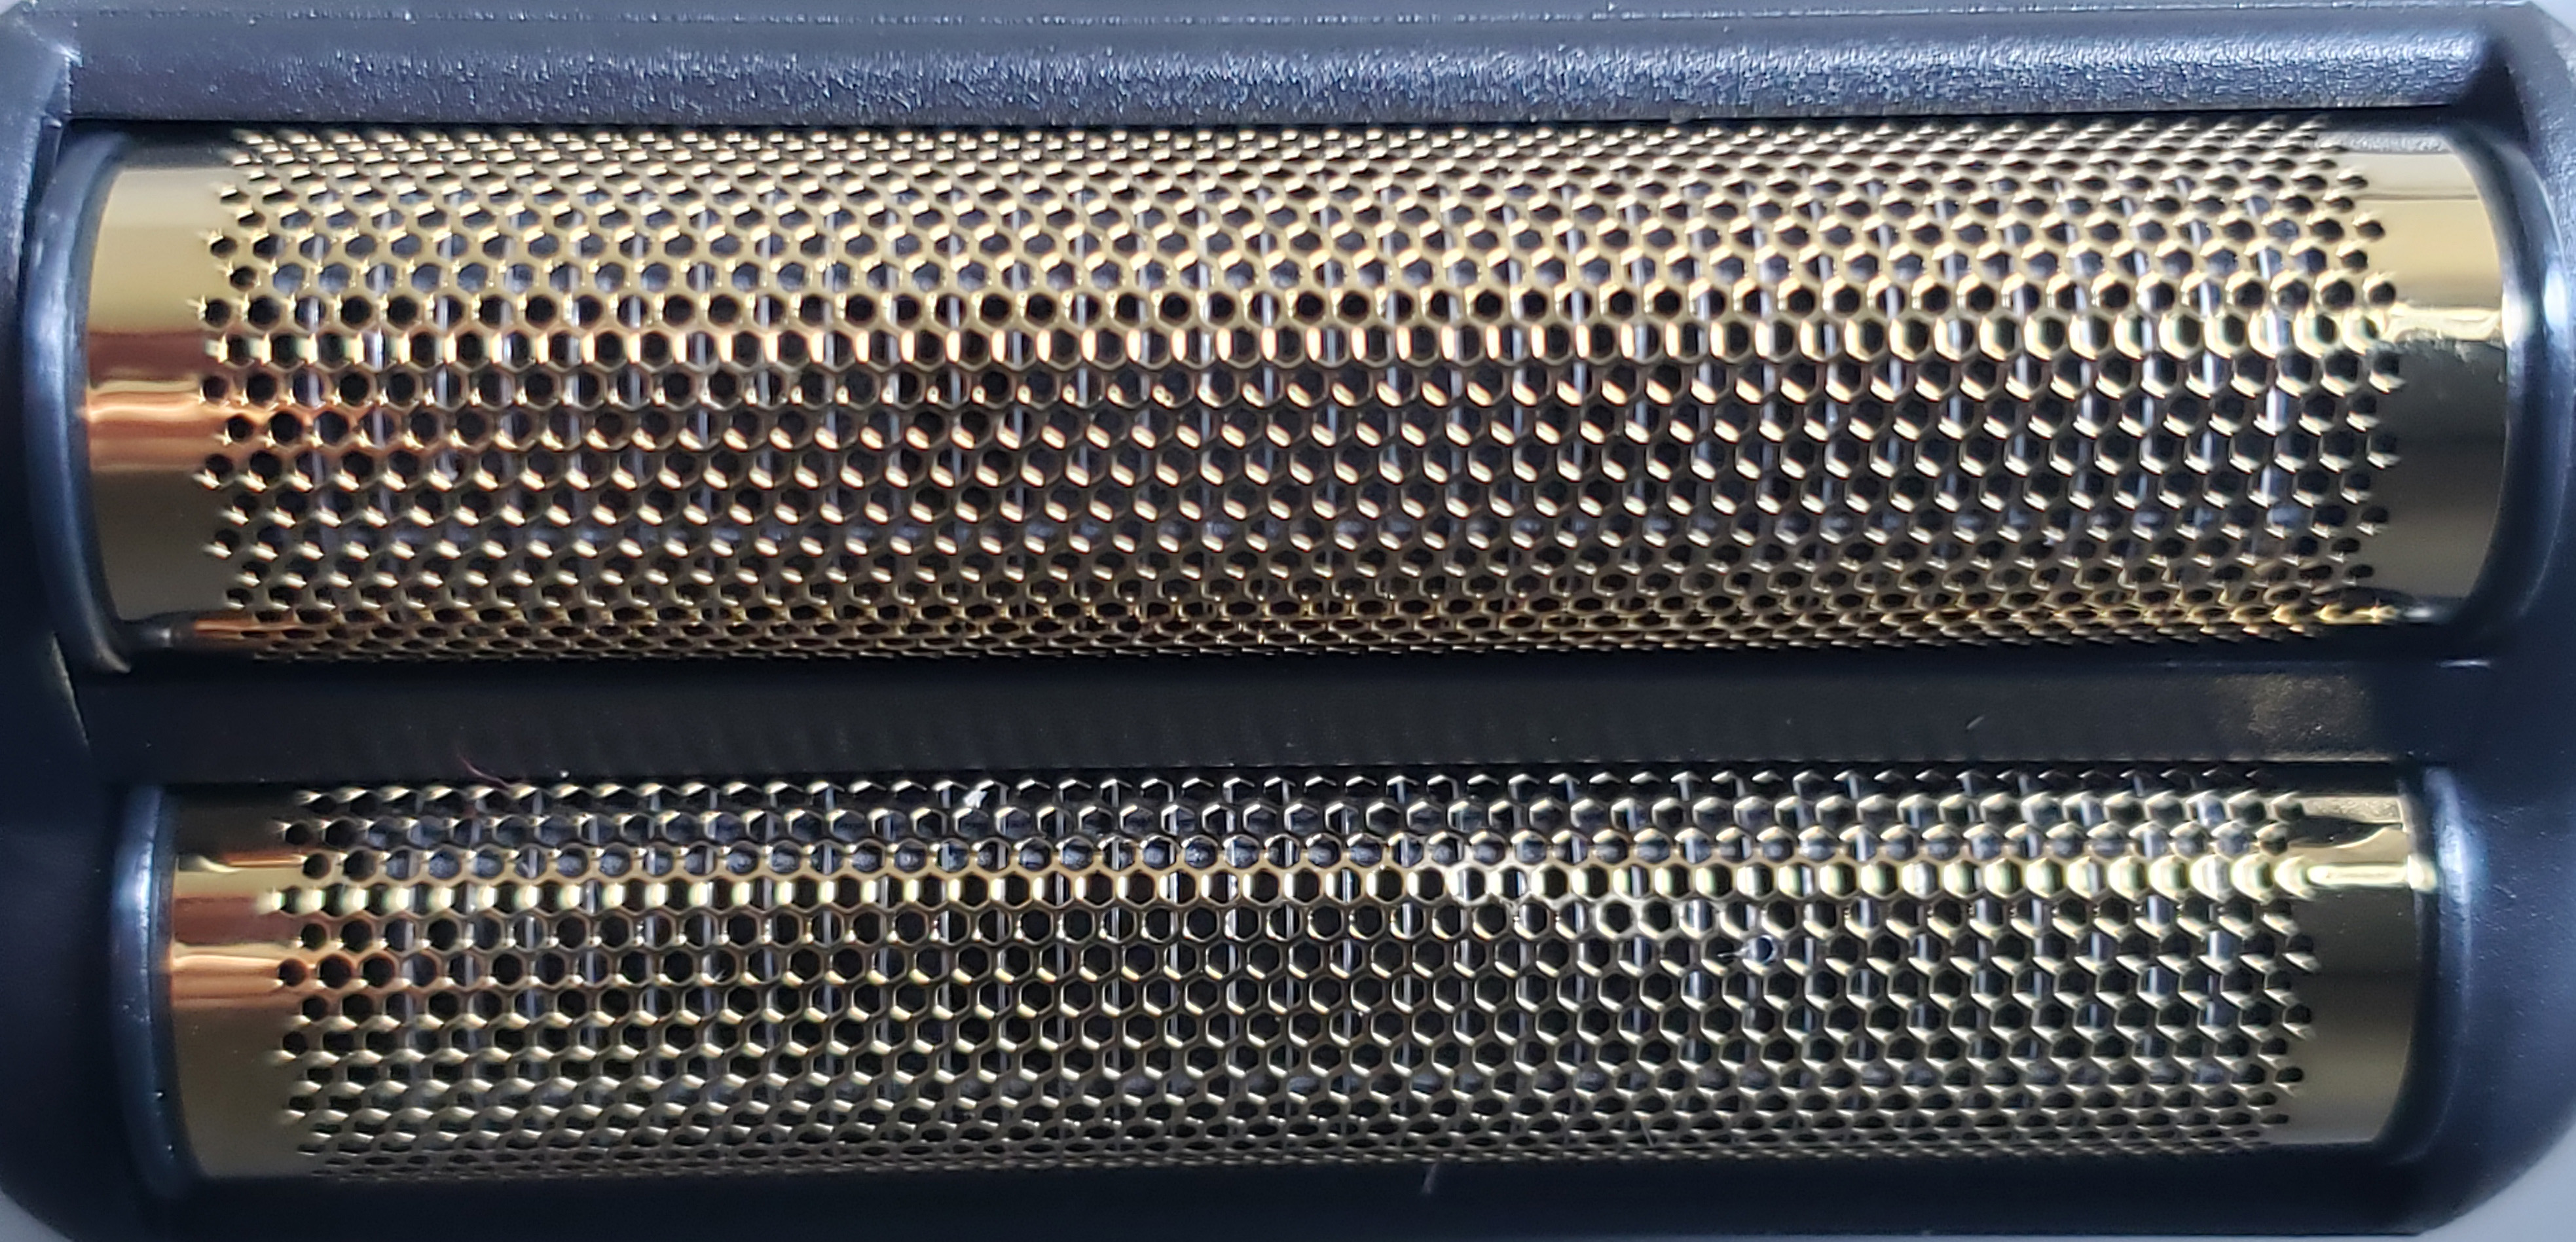
The foils themselves are a gold and titanium mixture, allowing for a very thin and flexible surface.

They feel very smooth to the touch and should reduce potential irritation.  The thin foils should provide a close shave. The foils are also hypoallergenic.

Let’s get shaving and see how the shaver does.

Performance

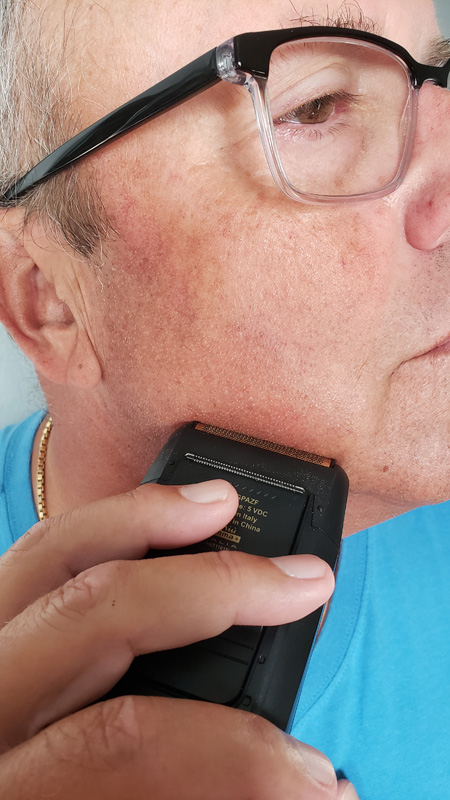
The shaver is very light at 4.6 ounces.  It fits well in my hand and is easy to glide over the shaving area. I have a couple of areas that have proven tricky for foil shavers – the area right beneath my nose and the lower area of my neck.  For some reason, foil shavers never seem to capture some hair in those areas.  This shaver seemed more adept at trapping those tricky hairs and did a good job cutting everything.

One issue I had was where my fingers fell on the shaver. If you look at the photo above, my index finger falls right on the trimmer.  At one point, I inadvertently pushed the trimmer up, activating it.  Not a big deal, but the design does lend itself to doing that.

The first thing I noticed was that the Absolute Zero shaver was noticeably louder than my rotary shaver.  That isn’t surprising given the different mechanisms in play when they are running.  The rotary is spinning three small cutters in a circle.  That’s a fairly quiet operation as there is no change in direction.  A foil shaver rapidly vibrates the cutters back and forth.

The second thing was the difference in comfort. The rotary gives a fairly comfortable shave.  A foil shaver, in my experience, always generates a little more irritation, at least initially. I think that is partly due to the nature of how they cut and the relative thinness of the foil.  This isn’t a slam on the Absolute Zero, as for me, this has been true for every foil shaver I have ever used.  The irritation is short-lived as your face adjusts to the new shaving method.  In the past, with other foil shavers, the initial irritation manifested itself with some red marks on my face.  I didn’t experience any of that with the Absolute Zero, so kudos for that.

The third thing was that shaving was fast.  With previous foil shavers, it seemed I had to go over areas, particularly on my upper cheek and lower neck, multiple times to ensure I got everything.  With this shaver, a couple of quick passes took care of business.

The trimmer did a nice job of trimming sideburns.  It is nice and long, so it easily covers longer areas quickly and efficiently.

As a means to compare this shaver to my rotary, I shaved one side of my face with the new shaver and the other side with my trusty triple-head rotary shaver. The real proof in how close a shave you get is how the area feels.  I enlisted the expert opinion of my lovely wife.

Without knowing which side was done with which shaver, she struggled to determine which was which. Ultimately, she thought the rotary side was slightly smoother than the foil side.  I was surprised by this, as to my fingers, I thought the foil side was a bit smoother. We tried the touch-test again later in the day. If a shave is closer, it should manifest itself later in the day as whiskers grow.  That after-dinner touch-test was still pretty much inconclusive.  Both sides felt very similar to my wife’s touch. If I pressed her, she reluctantly gave a very, very slight edge to the Absolute Zero side, but she repeatedly stated that it was a statistical dead heat.

What I like

  • USB charging – no need to travel with a specific power adapter
  • I was able to shave as quickly as I do with a rotary shaver
  • Pretty close shave, all things considered

What needs to be improved

  • USB charging port should be USB-C
  • No overcharge protection
  • It is a little noisy
  • The pop-up trimmer can be activated too easily during regular shaving

Final thoughts

With its sharp Italian design and overall good functionality, this is a capable little shaver.  It is priced reasonably and certainly gets the job done.  If you’re looking for a new foil shaver with good battery life and simple USB charging, the Gamma+ Italia Absolute Zero is worth a look. With its small size, light weight and no need for a specific charging adapter, this is a terrific travel shaver.

Price: $69.95
Where to buy: Direct at Gamma+ and Amazon
Source: The sample of this product was provided by Gamma+ Italia.

Filed in categories: Reviews

Tagged:

Gamma+ Italia Absolute Zero USB rechargeable shaver review originally appeared on The Gadgeteer on June 6, 2019 at 11:00 am.

Note: If you are subscribed to this feed through FeedBurner, please switch to our native feed URL http://the-gadgeteer.com/feed/ in order to ensure continuous delivery.

Plugable HS53 Gaming Headset review

REVIEW – I have a confession to make:  Although I have a nice gaming rig and a set of quality peripherals, I’m still using a Logitech H570e for my headset.  While this $35 device might be fine in the office for making the occasional Slack call, it’s not exactly a high-quality gaming headset.  It’s time for an upgrade, so I’m checking out Plugable’s HS53 gaming headset to see how it compares.

What is it?

The HS53 is a budget, wired, gaming headset from Plugable.

What’s in the box?

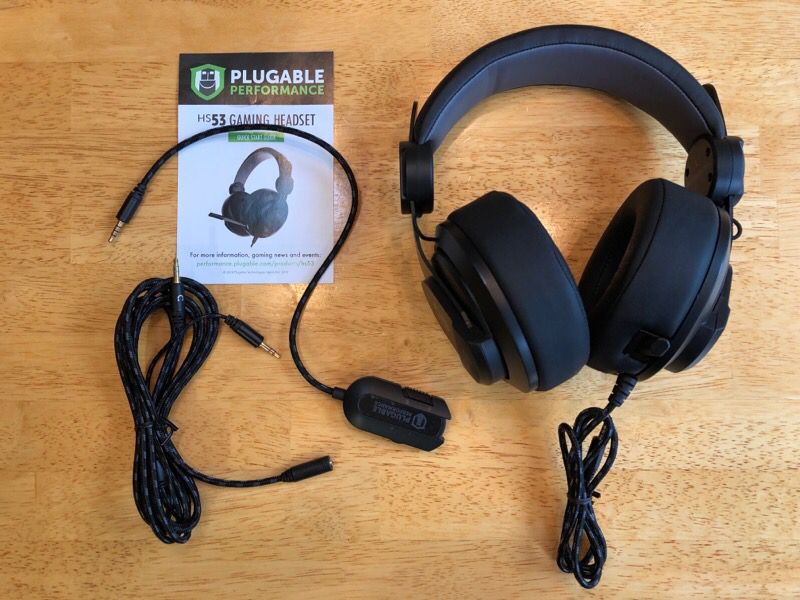
  • The headset with microphone
  • In-line remote
  • TRRS-to-TRS Y cable
  • Quick start guide with 1 page of English instructions

Hardware specs

  • Compatible with PC (Windows, Linux, and macOS), PlayStation 4, and Xbox One.
  • 53 mm drivers
  • 3.5mm TRRS connection for the microphone and headphones channels

Design and features

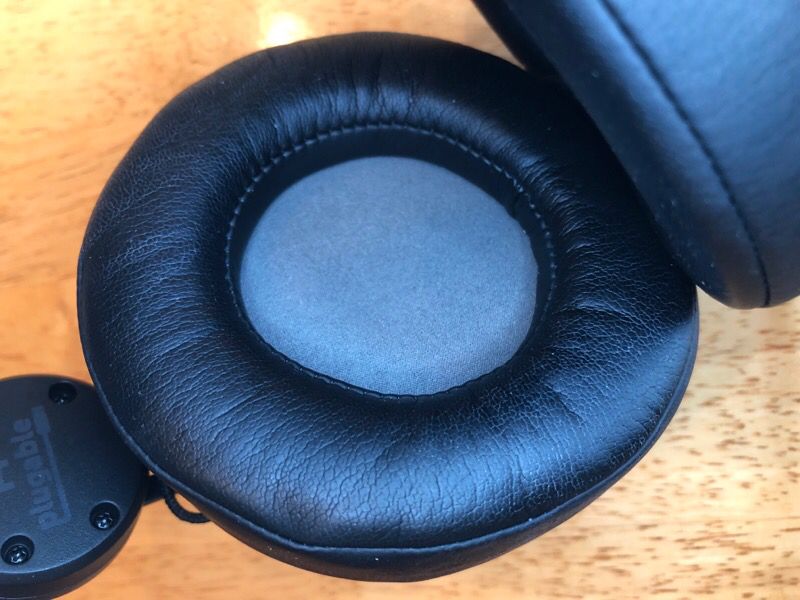
When I pulled the HS53 from the box, the first thing I noticed was the earcups.  On gaming headsets, most earcups are oval, roughly in the shape of an ear.  Those on the HS53, by contrast, are round.  They still fit over my ears, which they can do as they are rather large.  This size is what allows Plugable to include speakers with 53mm drivers, which are larger than most headsets.

The second thing that I noticed is that the TRRS-to-TRS Y cable is really, really long; in fact, it’s almost 15 feet long.  This cable is obviously intended to be used with a PlayStation or an Xbox, and thus makes perfect sense.  The cables that come with just the headset and the remote together are only 4 feet 4 inches long; personally, I wish they were 2 feet longer to give me a bit more flexibility.  If your PC is really close to where you sit, you’ll be fine, but if it’s further away, or if you like to move around, you’ll either need to use the very long cable (and deal with cable management) or buy a different cable.  The cable on the headset is not detachable.

Installation and setup

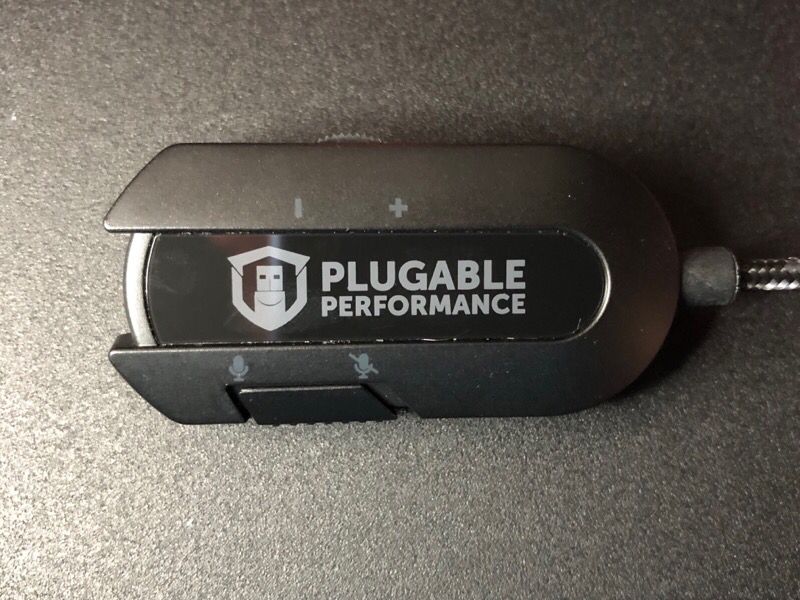
Installation was simple.  I plugged the audio cable from the headset into the remote and then plugged the cable on the remote—although Plugable calls this a remote, it’s really just an inline volume control—into the green audio jack on my soundcard.  On the remote, one side has a switch that mutes the mic, and I had to look closely to see which way was muted and which way was not.  The other side has a volume wheel, which was equally difficult to see which way was loud and which was soft; I set it to the middle to start.  If Plugable would make the symbols on here white instead of grey, they would be a lot easier to see.

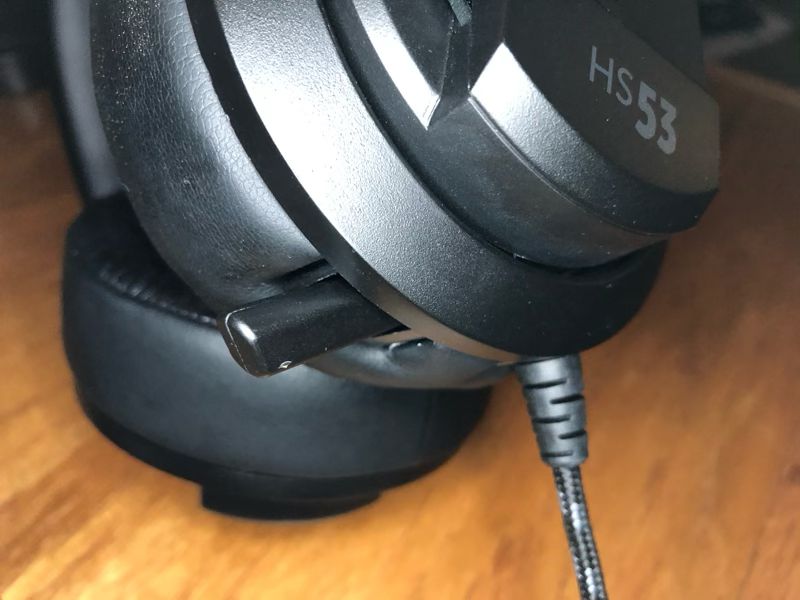
The mic is connected to the left earcup and extends out about 4 inches.  If you choose not to use the mic, it can retract into the earcup.

Performance

The earcups are certainly soft and comfortable to wear.  They tend to be a bit loose on the head and not fit very well, at least at first.  After wearing them for a couple of hours, however, they seem to tighten up a bit.  I’m not sure if this the memory foam, which is in the earcups and on the headband, kicking into gear or what, but they definitely feel better over time.

The headset has good sound.  The music, the game sounds, and the voices of other players are all very clear, and they are certainly richer than my old Logitech.  There isn’t a notably deep bass sound, but that was fine with me, as too much bass tends to create a mushy sound.

Although the HS53 does not have any noise canceling capabilities, the earcups completely cover my ears and do a decent job blocking external sounds.  Plugable’s website says that the earcup pads create a seal that will keep my ears cool and comfortable.  While I agree with the comfortable part, I found that the lack of airflow left my ears on the warm side.

Features

Most gaming peripherals, including headsets, come with some sort of ambient lighting.  The HS53 does not.  This doesn’t detract from the actual game play, but it does lower the “cool factor” of this gadget.  I suppose the lack of lighting is a way to keep costs down, but even a simple lighting scheme would be welcome.

The cables are braided and feel like they are of a decent quality.  The remote, on the other hand, feels cheap and plastic.

What I like

  • Good sound
  • Soft and comfortable

What needs to be improved

  • Longer cable attached to remote

Final thoughts

This is a solid headset from Plugable.  It’s not a fancy headset, but it’s comfortable and has good sound, which are the two most important features.  If you’re looking for an entry-level headset, the HS53 is worthy of your consideration.  It’s certainly a huge step up from my Logitech headset.

Price: $44.95
Where to buyAmazon
Source: The sample for this review was provided by Plugable.

Filed in categories: Reviews

Tagged: ,

Plugable HS53 Gaming Headset review originally appeared on The Gadgeteer on June 6, 2019 at 9:00 am.

Note: If you are subscribed to this feed through FeedBurner, please switch to our native feed URL http://the-gadgeteer.com/feed/ in order to ensure continuous delivery.

IOGear Ultra-Fast 60GHz Wireless 4K UHD Video Extender review


REVIEW – My wife constantly complains about the number of wires I have running in our home. From her perspective, they seem to be everywhere. I have about 7 network switches and connected CAT5 cables running everywhere. I recently decided that I wanted to add projectors to a couple of rooms and she cringed at the thought of additional HDMI cables running everywhere. I believe in “Happy wife happy life”, so the opportunity to test and review the IOGear Ultra-Fast 60GHz Wireless 4K UHD Video Extender was a much-welcomed opportunity.

What is it?

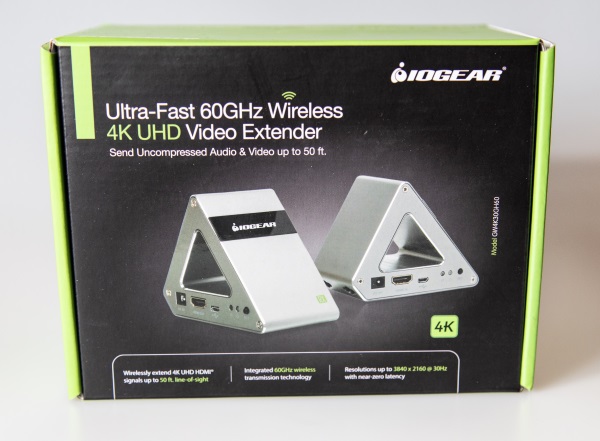
The IOGear Ultra-Fast 60GHz Wireless 4K UHD Video Extender enables you to transmit 60GHz Wireless 4K Ultra High Definition UHD) Video with digital 7.1 surround sound audio from an HDMI source from the Transmitter to the Receiver up to 60 feet away with near-zero latency.

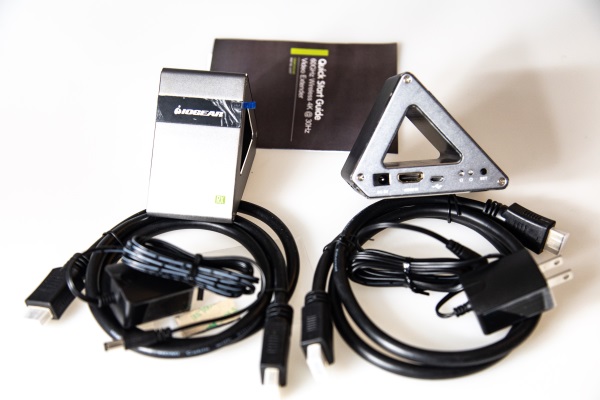
What’s in the box


1 x HDMI Extender Transmitter
1 x HDMI Extender Receiver
2 x 5VDC/2A Switching Power Supply
2 x HDMI Cable
1 x Quick Start Guide
1 x Warranty Card

Design and features

Specifications
Video Input: HDMI 2.0/ HDCP 2.2
Video Output: HDMI 2.0/ HDCP 2.2
Power: 5V/1A
Video Resolution: 3840 x 2160 @ 30Hz
Video Streaming: Uncompressed
Audio Output: Dolby TrueHD, DTS-HD Master Audio and LPCM digital audio streaming up to 7.1 channels HBR lossless audio
Frequency Band: 60 GHz
Antenna Type: Printed Circuit Board
Operation Temperature: 32~122ºF (0~50ºC)
Storage Temperature: 14~158ºF (-10~70ºC)
Humidity: 10 – 90%
Power Adapter: 5 VDC/1A
Height: 3″
Depth: 4″
Length: 1.125″

Features:

  • Wirelessly send 4K UHD video from one HDMI source to one HDMI TV/Projector
  • Extends signals up to 60 Ft. line-of-sight
  • Uncompressed audio and video at near-zero latency – ideal for gaming and streaming
  • Resolutions up to 3840 x 2160 @30Hz
  • Minimal interference with existing Wi-Fi devices via 60GHz wireless frequency
  • Support 7.1 surround sound audio, Dolby® True HD and DTS-HD® Master audio format
  • Plug-n-Play – Transmitter, and receiver come pre-paired from the factory
  • Dedicated closed wireless system – Requires no Wi-Fi network
  • Advanced wireless technology speeds to 18 Gbps
  • LED status lights for source/display connections and wireless link
  • Supports dual power option via USB or included AC adapter
  • Compact mountable design for easy placement
  • HDMI 2.0 & HDCP 2.2 compliant
  • Supports 4K UHD High Dynamic Range (HDR) TVs and content

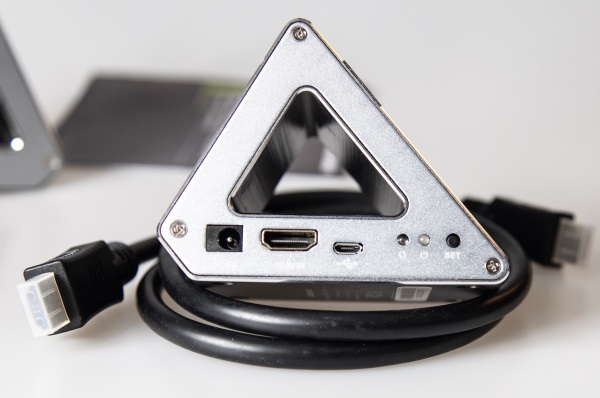
The IOGear extender kit consists of two main components that are the Transmitter and Receiver. They both have identical ports on one side. As shown below from left to right they are the power port, the HDMI port (Input on Transmitter and output on Receiver), the USB optional power input port, the Data Transmission Indicator, the Power Indicator, and the SET button.


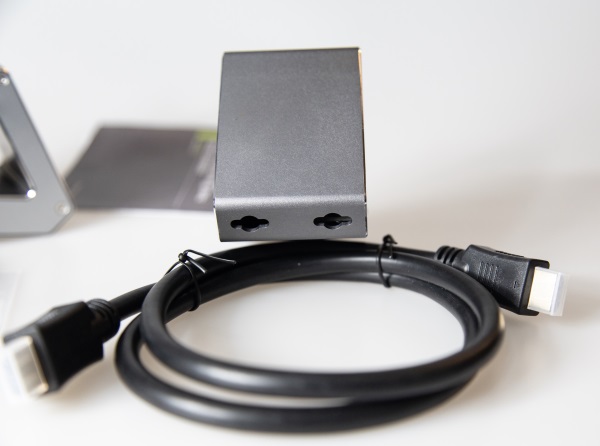
The back of both the Transmitter and Receiver has mounting holes.

Performance

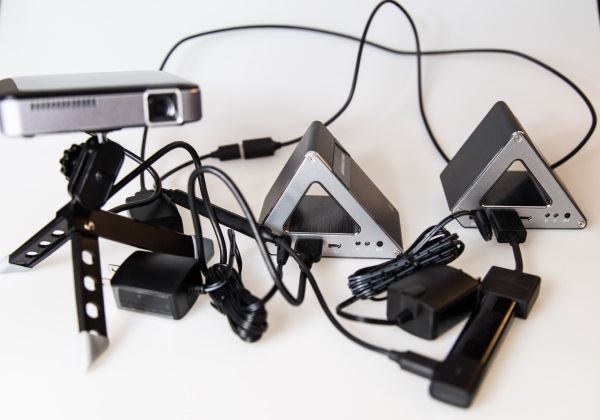
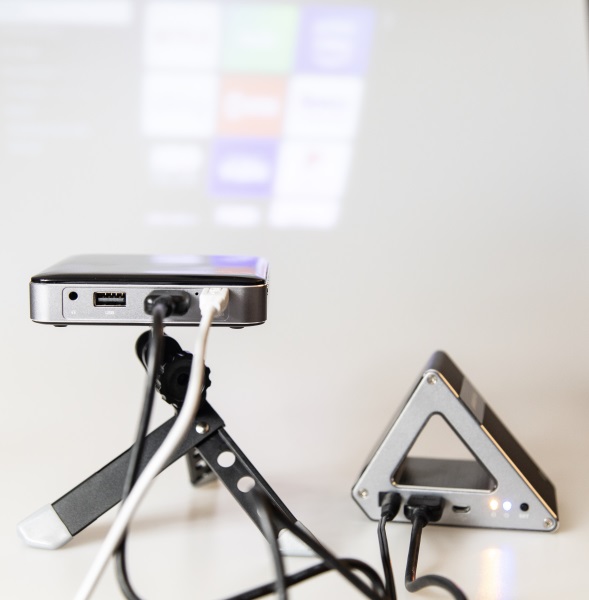
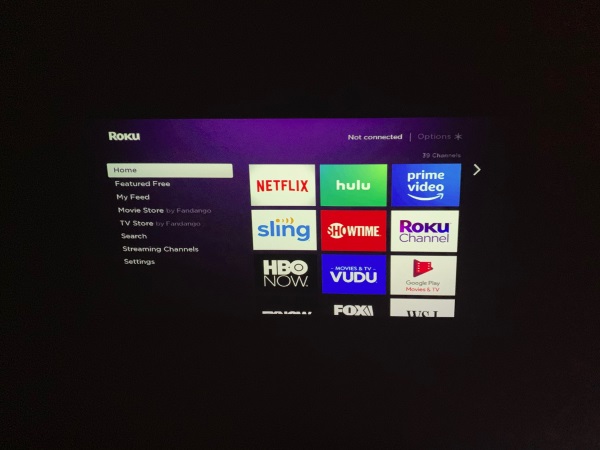
The Video Extender kit is very simple and straightforward to use right out of the box. For my testing, I connected my 4K Roku streaming stick to the Transmitter as well as the power supply. On the opposite end, I connected one of my portable projectors to the Receiver via an HDMI cable and the power adapter to the Receiver.

And voila!! As shown below, the Roku menu was immediately displayed via the projector.

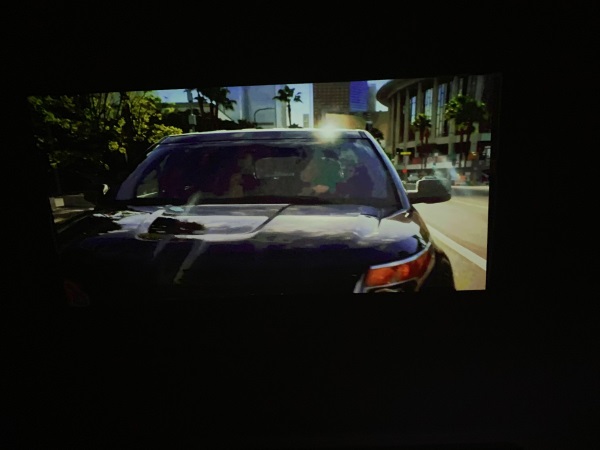
Here is a better visual of some shots of the picture when I displayed it on the ceiling in the dark:


I also tested full 4K all the way through with my BenQ HT2550 4K projector and I did not notice any discernable latency or dropped signal in any of my tests.

What I like

  • The build quality
  • The simplicity of the design and the ease of use
  • While I was only able to test at a distance of about 20 feet, the quality of the video produced

What can be improved

  • Nothing as of yet

Final thoughts

While I am a fan of many things wireless, I am only a fan if the resulting service is close to or equal to that of wired service. In many cases, this is not so, and there is often noticeable degradation and latency when opting for the convenience that wireless provides. After reading several online reviews, I was expecting mediocre results at best when I tested this IOGear extender, but much to my joyful surprise, the performance was great and there was not any noticeable impact on the video output. I have read many reviews that indicate connectivity problems between the Transmitter and Receiver and the dropping of the signal. I also read reviews that stated that the extender simply stopped working after a few months. I can honestly say that I have not experienced any connectivity issues or quality of video issues, albeit that I only had limited 4K content to test with. It works flawlessly with 1080P and also with my current mini projectors that either downscale the output to 720P or accept a 1080P input signal irrespective of their output resolution. It also worked well with my 4K projector. I do understand that I have only had this device for a few weeks and that my testing distance is shorter than the claimed limits of the device. Many reviews indicated that there were connectivity problems from even just 10 feet away, so time will tell. If I experience any issues in the weeks or months ahead I will certainly submit an update. But until then, I am giving the IOGear 4K Extender two thumbs up!!.

Price: $245.35
Where to buy: Amazon
Source: The sample for this review was provided by IOGear.

Filed in categories: Reviews

Tagged: , ,

IOGear Ultra-Fast 60GHz Wireless 4K UHD Video Extender review originally appeared on The Gadgeteer on June 5, 2019 at 11:00 am.

Note: If you are subscribed to this feed through FeedBurner, please switch to our native feed URL http://the-gadgeteer.com/feed/ in order to ensure continuous delivery.