SANSI Stellar Cam Floodlight Camera review

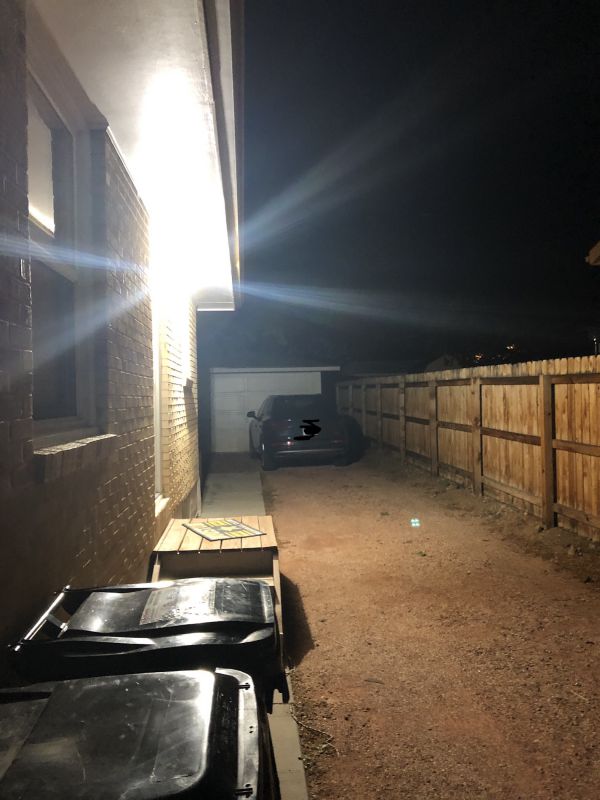
REVIEW – Home security has emerged to be a very DIY sector of the home improvement market and along with our ADT monitored system, we have added cameras to the front, back and now side of the house with the SANSI Stellar Floodlight Camera. We had been wanting to add a camera on the side of the house but knew we would need some lighting as well with the way driveway runs along the side of the house.
What is it?

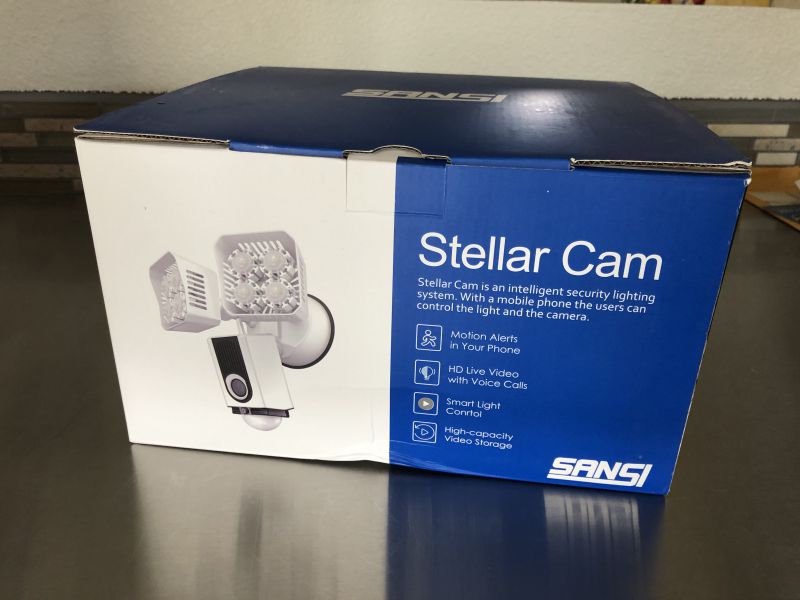
The SANSI Stellar Floodlight Camera is a hardwired, wifi-enabled security camera and floodlight with motion sensing and night vision capabilities.

What’s in the box?
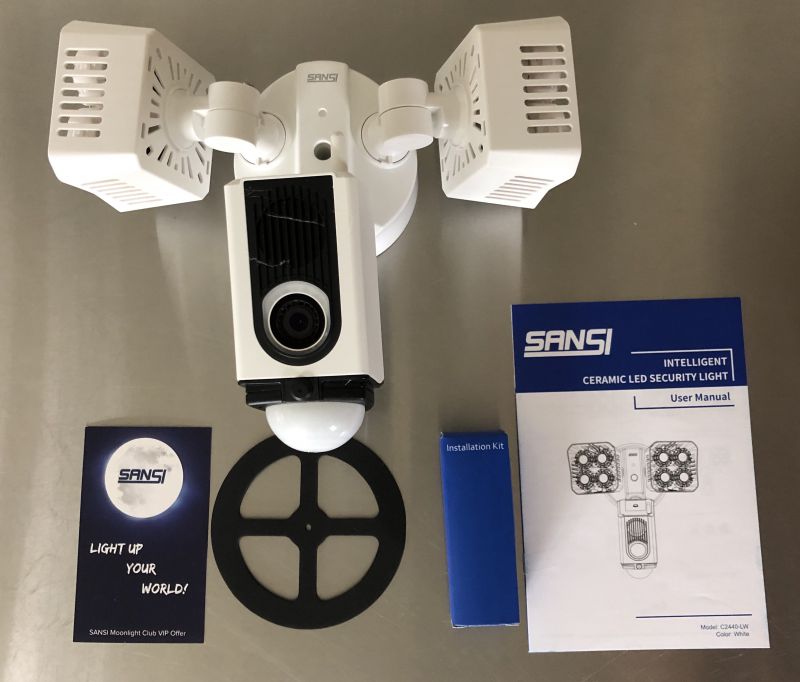
  • Camera and Floodlight Unit
  • Instruction Book
  • Mounting Hardware

Design and features

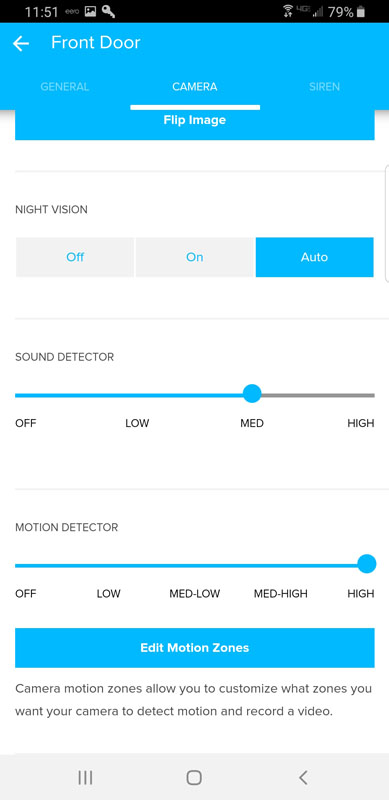
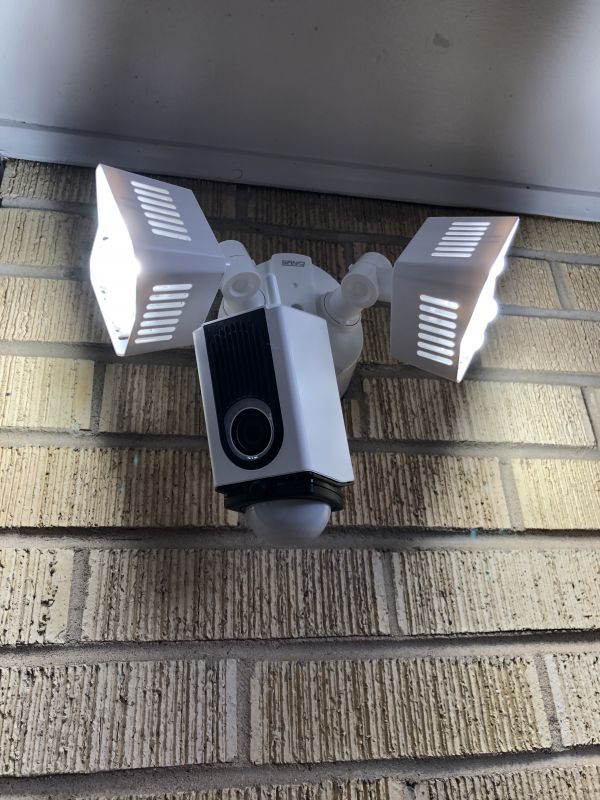
The unit features a full HD camera, with adjustable motion sensing allowing you to choose the distance from the camera you want to have notifications for motion. The camera has a 270 degree viewing angle so it is ideal for an area where you desire a wide angle view. Internal 16gb memory allows for up to 70 hours of recording. The dual LED lights provide 3600lm of light that comes on either by physical command via the app or wall switch, or via motion detection. Additionally, this camera does allow you to talk back and forth through it with whoever is outside. We did test this a bit initially and while it does work, it is on about a 7 second delay so it’s not in real time. Finally, it has an alarm that we did not test as we didn’t want to frighten our neighbors but it is a setting that you can enable for added security.
Setup and Performance

This camera was very easy to physically install, if you’ve ever replaced a light fixture or ceiling fan in your home this isn’t much different. Simply flip the breaker, remove the old light, then follow the step by step instructions to connect the white, black and ground wires properly and mount to the plate included in the product.

The difficult part, however, is when you get to the app and connecting the camera up to your wifi. It was very finicky at first and we had to reset it once to get it to recognize our wifi signal – even then we had to make multiple attempts to get it to recognize and connect to the wifi. Then, it literally took us two weeks of fussing with the app before we were able to sync the time to our current time zone, and this only happened because there was an update to the camera software that was released (I believe). Previous to this, the time was so off sync that we had videos labeled as being in the middle of the night and it was full daylight – also we couldn’t access videos except if they were hours and hours old. But after the update to the camera software, the times synced up and all videos to the current were accessible.

The app itself isn’t the most user friendly, and gets a bit bug-y at times with allowing you to access and download videos. If you aren’t connected with a strong wifi signal, you’ll only get the first 5 seconds or so downloaded – we’ve found we need to be pretty close to it to get the videos to download reliably.

We were able to capture the below video of some vicious intruders into our yard – which, if they had been actual thugs meant to do harm, I believe would provide sufficient and great evidence capable to be turned over to police to help capture the criminal.

As far as storage, it is nice to have 70 hours of recording space on the internal memory, however, it would be nice to at least have the option to store video to the cloud. If you don’t catch it before it’s recorded over then you’ve lost the video forever. This could be a problem if you’re away for an extended period of time without a strong wifi signal to download any videos of interest.

You can set up the app to send notifications when motion is detected – and depending on how much you want to be bothered this can be a blessing or a curse as sometimes the camera picks up simple motions such as moving tree limb shadows and reports them as motion. But realistically, you’re wanting to get those notifications if you have concerns about the security of your home.

What I like

  • Bright lighting to deter thieves or intruders via motion detection
  • HD quality video is perfect for security footage
  • Easy physical install
  • 70 hours of recorded videos on internal memory
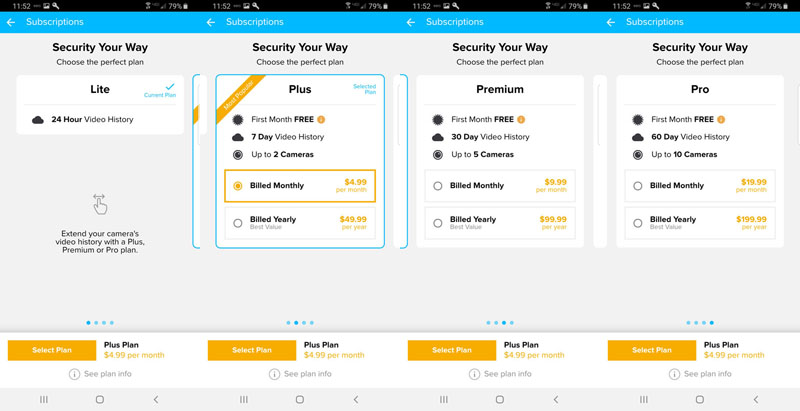
  • No subscription plan

What I’d change

  • Cloud access for storage
  • Better app/user interface – too many bugs and glitches and too difficult to make setting changes especially at initial install.
  • Would be nice to have more precise controls over notifications – as is, it’s basically on or off with some limited adjustments to the viewing distance/area.

Final thoughts

Overall, this product has become a welcome member of our home security – now being our 4th camera installed and third different brand. It measures up to the others in both video quality and reliability once we got the kinks out and were able to get the settings right. It definitely isn’t “ready to go” out of the box – so some tinkering and adjustments will need to be made to get it aligned to your needs. But in the end, I think most will be pretty happy with the footage, quality and sense of security it provides. Knowing it picks up even cats and raccoons really puts our mind at ease that if a person or persons were trying to be nefarious, we would not only have the footage to show the officials but we could talk through it or possibly sound an alarm as well to keep our home safe. However, I will say that if we had purchased this unit for install and had the trouble we did with it, I am not 100% certain we would have had the patience to see it through to the point where everything worked correctly. Be patient though, it’s worth the small annoyances in getting it to that point.

Price: $169.99
Where to buy: Amazon
Source: The sample of this product was provided by SANSI.

Filed in categories: Reviews

Tagged: ,

SANSI Stellar Cam Floodlight Camera review originally appeared on The Gadgeteer on June 28, 2019 at 12:23 pm.

Note: If you are subscribed to this feed through FeedBurner, please switch to our native feed URL http://the-gadgeteer.com/feed/ in order to ensure continuous delivery.

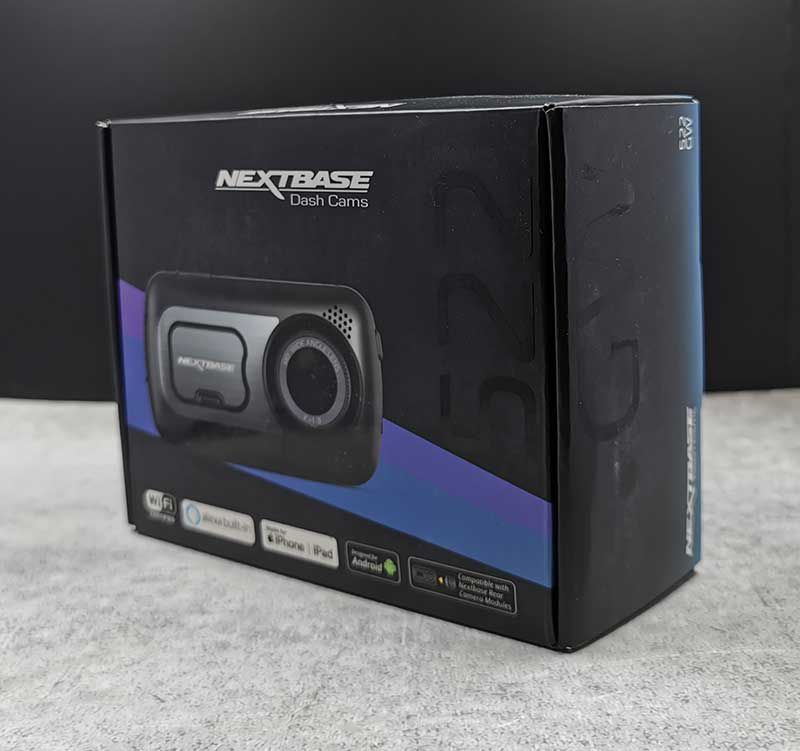
Nextbase 522GW dash cam review

REVIEW – Do you have a dash cam in your vehicle yet? A dash cam is a type of gadget that you install and then forget about it. The hope is that you’ll never need it unless it’s to review some fun footage it captured instead of accident footage.

Choosing a dash cam can be similar to choosing a laptop or a smartphone. There are so many dash cams available that it can be difficult to choose one. I’m here today to make your choice even more difficult because I’m going to tell you about the 522GW dash cam from Nextbase. Put on your seatbelt and let’s take it for a ride.

What is it?

The Nextbase 522GW dash cam is a camera that sticks to your windshield and automatically records video footage as you drive your vehicle.

Hardware specs

Resolution: 2560×1440 @ 30fps, 1080p HD @ 60fps
Lens: 6 layer f1.3
Viewing Angle: 140°
Screen: 3″ HD IPS Touch screen
GPS: 10Hz
Bluetooth: Bluetooth 4.2

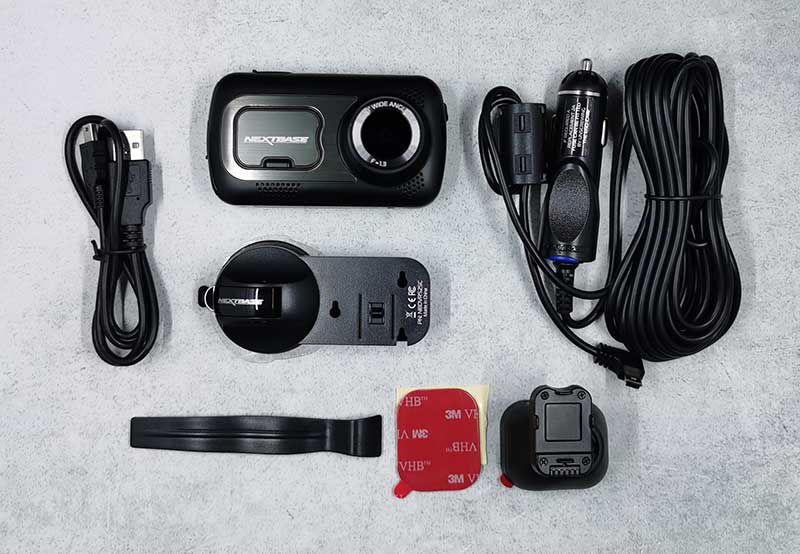
What’s in the box?

  • 522GW dash cam
  • Windshield suction mount
  • Click & Go GPS mount
  • Power cable fitting tool
  • Vehicle power adapter
  • mini USB cable

Design and features

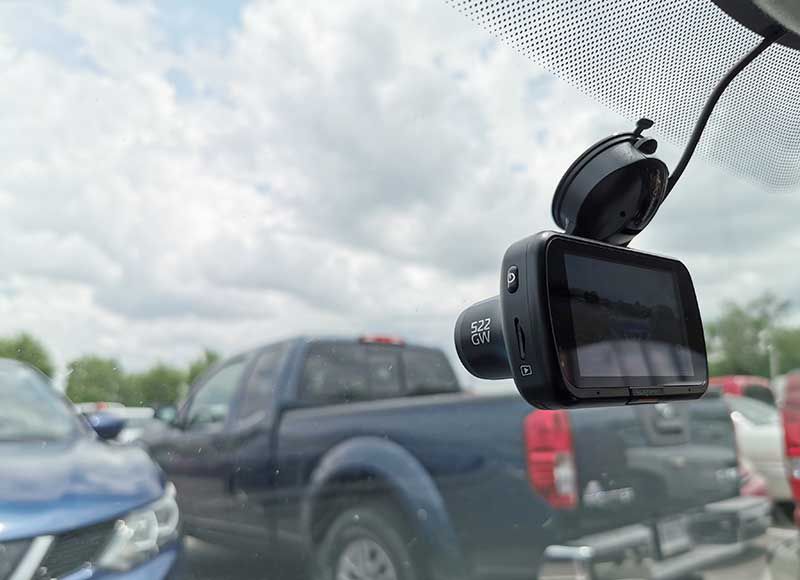
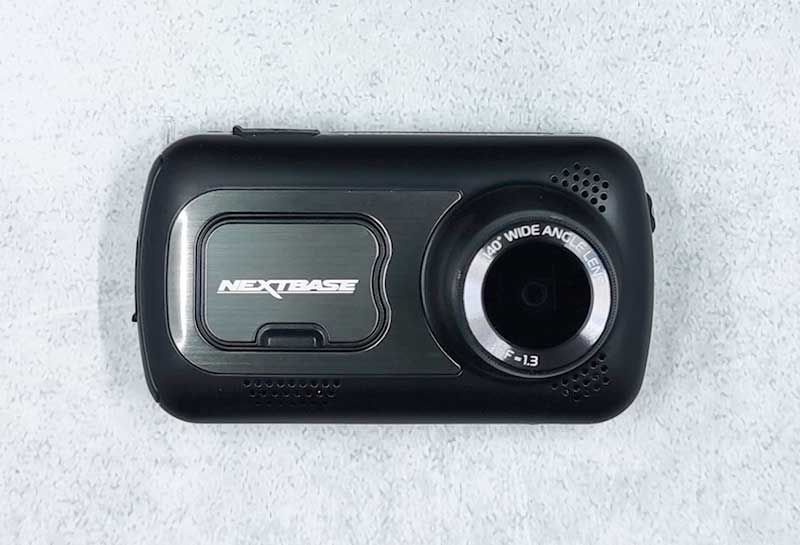
The 522GW dash cam is one of the larger dash cams that I’ve had the opportunity to review. This isn’t necessarily a bad thing, but it does mean that it will be easily noticed if someone looks at your windshield.

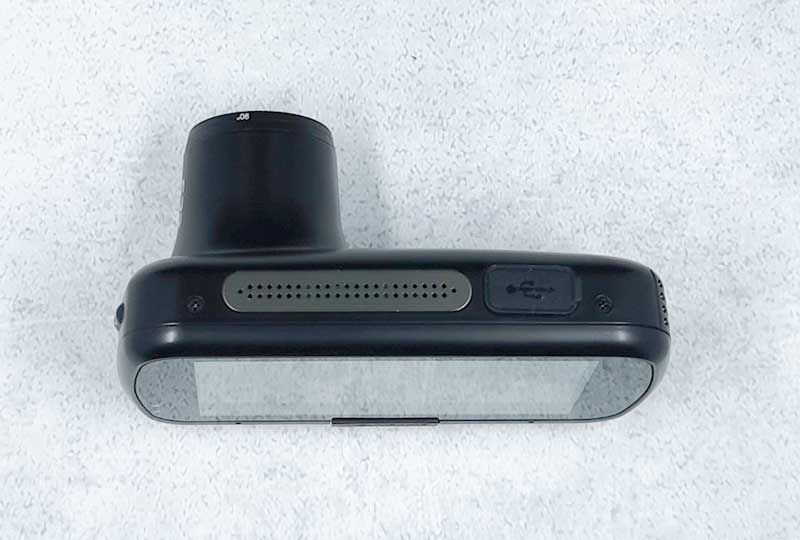
As you can see, the lens sticks out from the body of the dashcam quite a bit. If you look closely at the image above and the one below, you can see that the front edge of the lens has an adjustable polarizing filter ring. You can turn this ring to reduce any glare from your dash board.

You will also notice the USB port. This can be used to connect the camera to your computer in order to transfer video files.

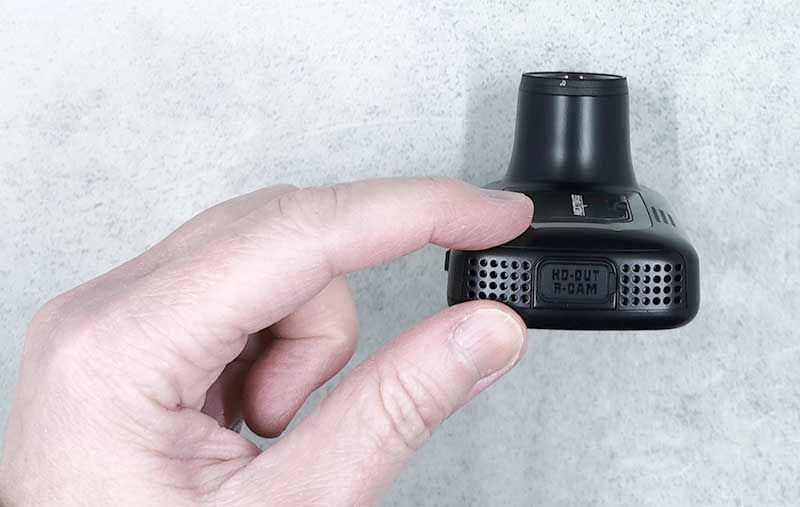
On one side of the camera, there is a covered port that can be used to attach an optional rear camera or connect the camera to a larger monitor using an HDMI cable.

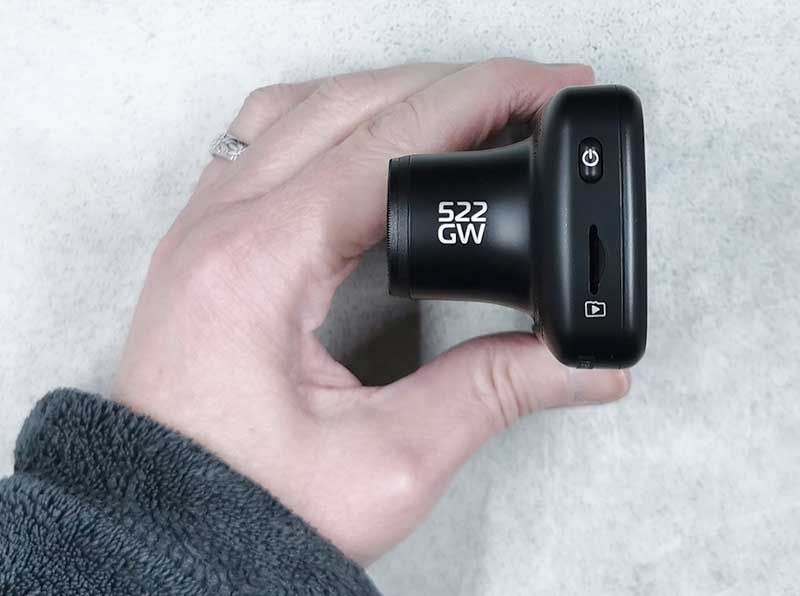
The other side of the camera has a power button and a micro SD card slot.

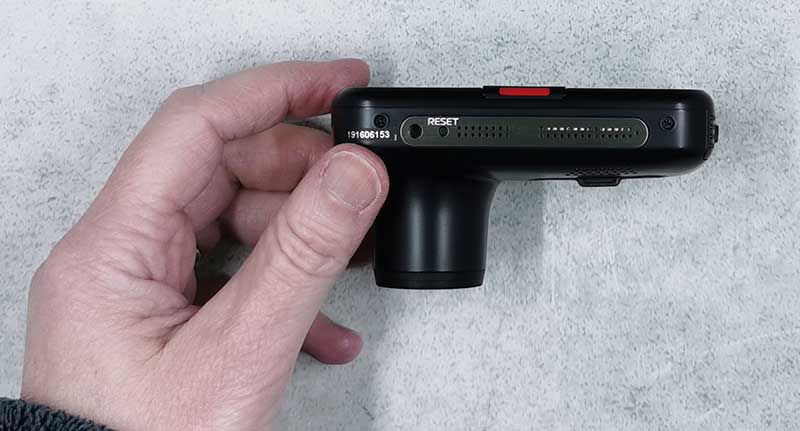
On the bottom of the Nextbase 522GW dash cam is a light sensor for the Screen Dimming feature and a reset switch.

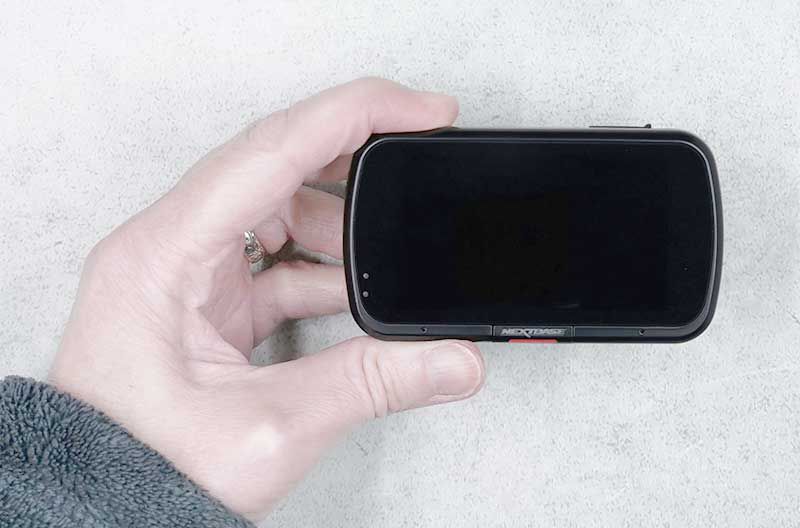
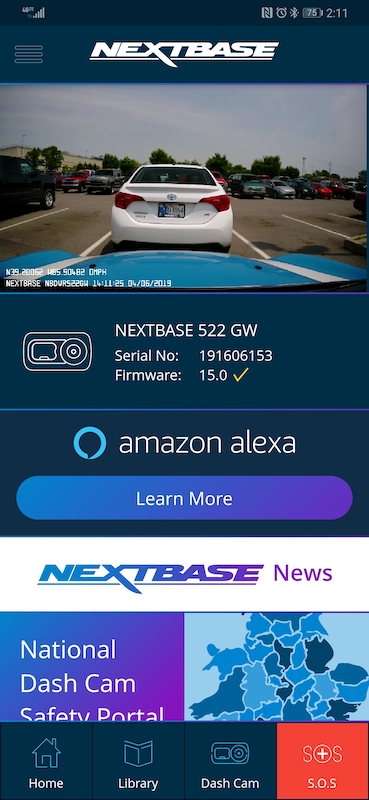
The back of the camera has a large color touch screen that you use to customize the settings. You can do this through the myNextbase Connect app as well. Since the settings configuration and even a live view of the camera can be accomplished through the MyNextbase app, a built-in screen really isn’t needed.

Below the display is a red button that you can press to make a separate video file containing 10 seconds prior to the button press and 20 seconds after the button press. This video file is saved to the Protected folder on the micro SD card.

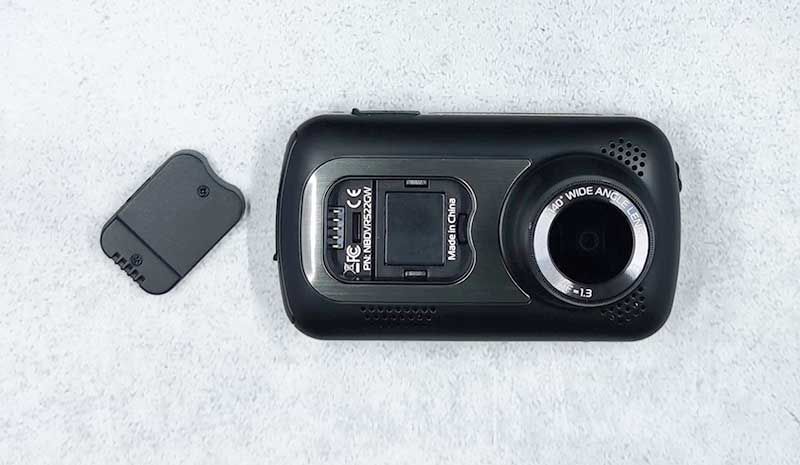
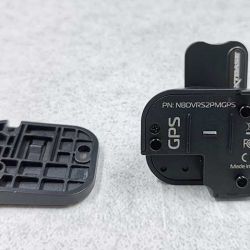
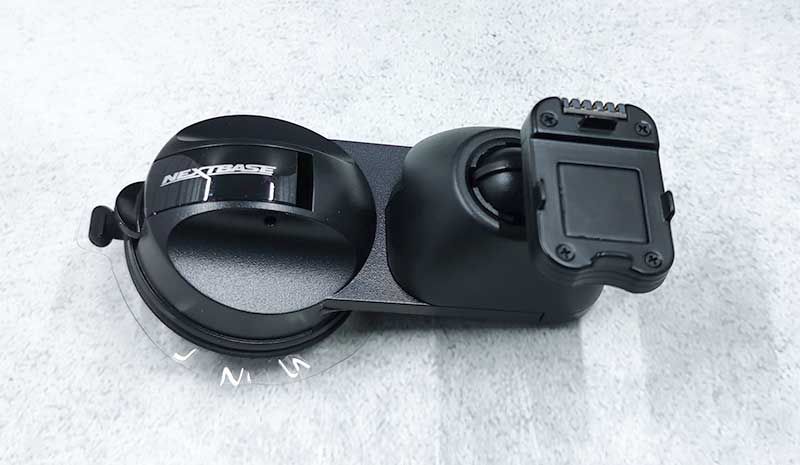
There’s a magnetic cover on the front of the camera that protects a connector for the included Click & Go GPS mount.


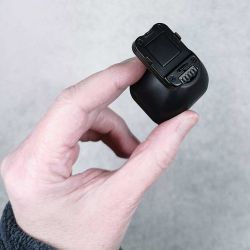
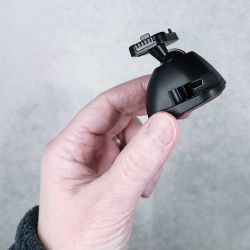
The Click & Go GPS mount is a windshield mount that uses 3M adhesive. But if you’re like me and prefer not to stick a strong adhesive directly to your windshield, you can remove the adhesive part of the Click & Go GPS mount and attach it to the included suction mount and use that instead.

The suction mount has a lever that makes it easy to stick and unstick the mount from the windshield.

Once installed on your windshield, the power cable can be routed and hid under the car’s headliner and plastic molding around the windshield using the included tool. This tool helps you wedge the cable under the plastic for a much neater installation.

The myNextbase Connect app


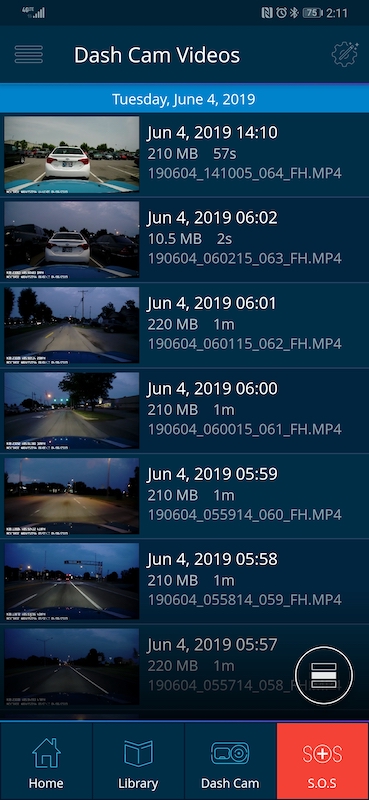
You don’t have to use the myNextbase Connect app with this dash cam, but doing so makes it easier to configure the camera’s settings and watch/download recordings without removing the microSD card from the camera.

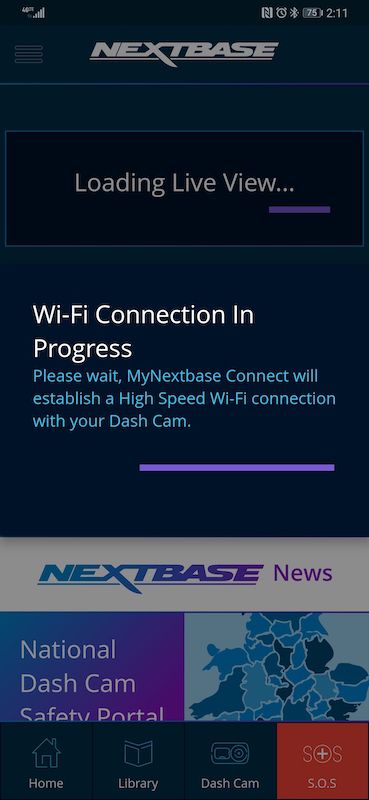
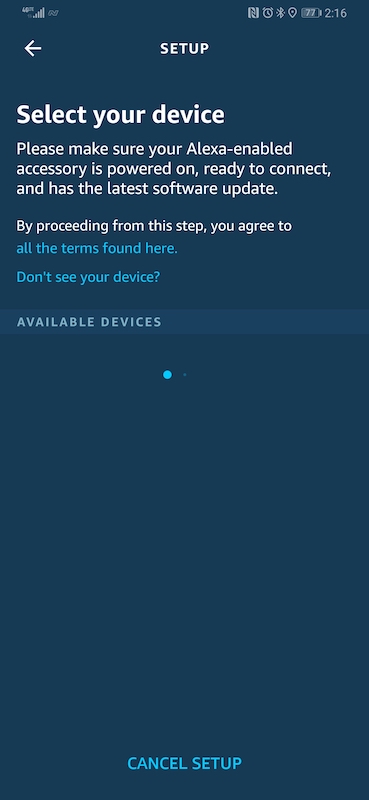
Setting up the app is relatively easy, but I did find it to be a little fiddly at times. For one thing, the app connects to the dash cam via WiFi and initiating that connection can be painfully slow.  I also had issues configuring the Alexa feature. But more about that in a minute.


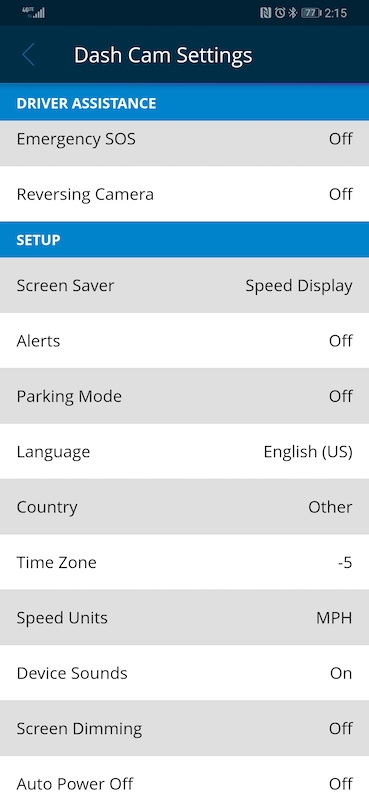
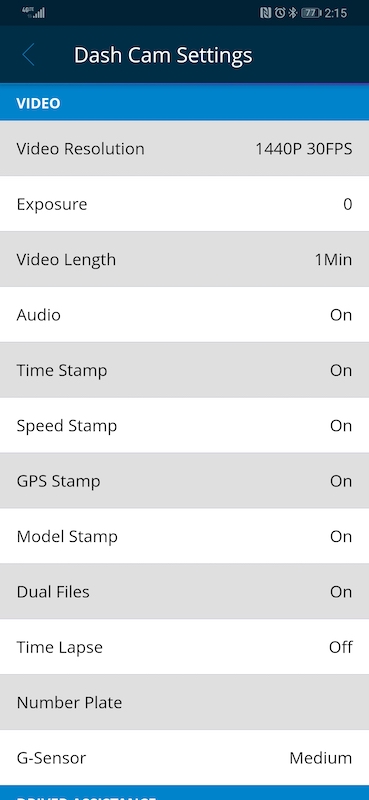
There are many settings that you can adjust and features that can be toggled. Some of these settings include:

Video resolution

1440P @ 30FPS 720P @ 30FPS
1080P @ 60FPS 720P @ 30FPS
1080P @ 30FPS 1080P @ 30FPS

Video length

1, 2, or 3 min

You can also toggle the screensaver so that your speed is shown on the dash cam’s display instead of the live view.


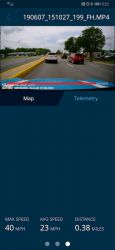
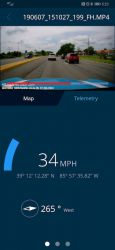
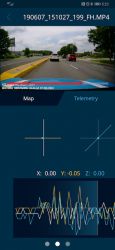
Accessing the video from the dash cam is easy with the app. I like that the Nextbase app collects speed, and GPS info so that it can show an animated map of your travels for each video clip.

Some of the other features of this dash cam include:

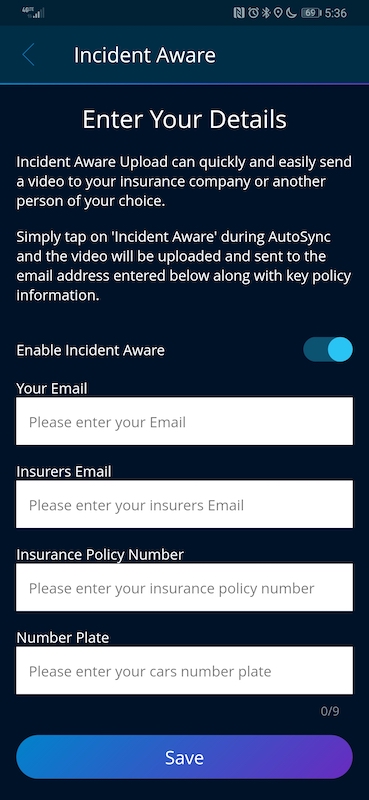
Intelligent Parking Mode (Incident Aware)

When this feature is enabled, it records any bump or physical movement on the vehicle when left unattended. Of course, this means that you’ll need to provide power to the camera at all times for it to work.

I didn’t crash my car on purpose to test this feature, but it was activated when I drove over a pothole and it saved a locked video that wouldn’t be overwritten.

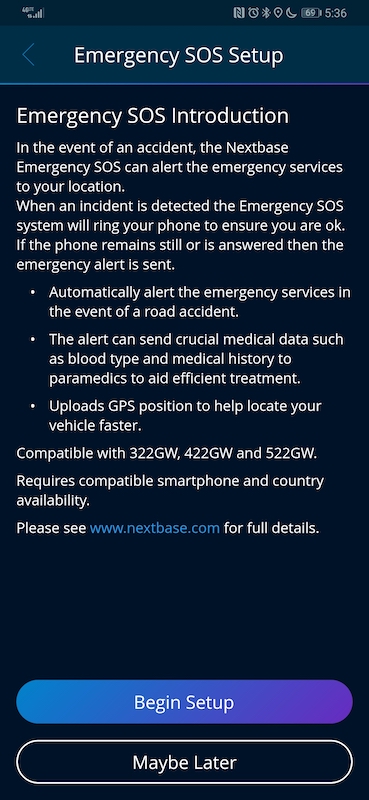
Emergency SOS

In the event of an accident where the driver is unresponsive, the Nextbase Emergency SOS feature can alert the emergency services of your location along with important medical details that you add to the app.

When an accident is detected, the Emergency SOS feature will do some checks before contacting emergency services. This includes calling your phone. If you answer it, it will cancel the action to contact emergency services.

Alexa

The feature that I had the most trouble setting up was the Alexa feature. This feature requires that you also install the Alexa app on your phone and have it running when you want to use this feature. My first attempt configuring Alexa with the 522GW Nextbase dash cam wasn’t successful and I ended up having to uninstall the MyNextbase Connect app, the Alexa app, and the Bluetooth pairing with the dash cam on my phone. Then I had to reinstall and reconfigure everything. Doing all of this was successful but it only allowed me to test the Alexa feature for one test drive. The next time I tried it, it wouldn’t work again and I refused to uninstall everything for a 2nd time to try to get it working.

I questioned the people at Nextbase as to why an Alexa feature would even be necessary or desirable when you could just use the Alexa app on your phone and be done with it. This was the response that I received.

Here is why you would want Alexa in the Dash Cam rather than just on your phone:

1 – The Nextbase Dash Cam has two inbuilt microphones specifically tuned to pick up speech in a car – making the recognition of your voice commands significantly better than through a single microphone on a phone. Having 2 very sensitive microphones near your head is very beneficial to voice recognition.

2- In order to make Alexa work on a phone you need to “press” the Alexa symbol on the phone to activate it. With the Dash Cam you don’t need to touch the screen

3- As the dash cam is connected to your phone, you will shortly be able to “control” the dash cam with commands like “take a photo” or “lock that video” – using an upcoming Nextbase dash cam “Skill”. This will soon give handsfree control of the dash cam.

4- You can have you phone in a bag/pocket and still control Alexa – to then play music through your car speakers etc

If you notice their third reason, it states that the Nextbase skill is not yet available. So at this time, you can only use the feature for other Alexa commands like asking about the weather, playing music, etc. It’s also important to know that the audio from Alexa comes from your phone and not the dash cam. So yeah, I really don’t see the point.

Video quality

Let’s see some video clips from the Nextbase 522GW dash cam.

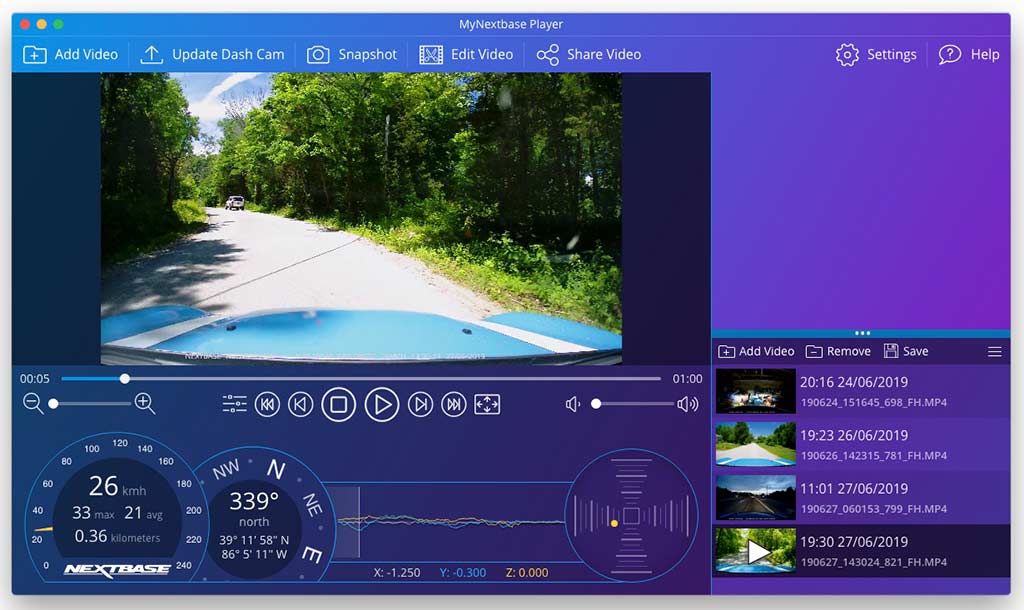
If you don’t want all the info at the bottom of each video, you can toggle off the various stamps like time, GPS, and speed.

Desktop app

Nextbase also offers a desktop app for Windows and Mac that will let you load the videos from the micro SD card to see the same info that you can see when you watch them through the mobile app.

What I like

  • Built-in GPS
  • Expansion capability for rear cameras
  • Trip info in app
  • Mounting options

What I’d change

  • Lower the price
  • Improve connection speed between app and camera
  • Implement Alexa skills
  • Fix Alexa connectivity problems

Final thoughts

The Nextbase 522GW is a nice dash cam and it worked well for me except for the Alexa feature and slow WiFi connection. The camera has good video quality in day time and night time. I do think it’s a little overpriced though as I’ve seen other 2K dash cams with GPS capability and G-Sensor features for less than $200.

Price: $259.99
Where to buy: Nextbase
Source: The sample for this review was provided by Nextbase.

Filed in categories: Reviews

Tagged: ,

Nextbase 522GW dash cam review originally appeared on The Gadgeteer on June 28, 2019 at 10:00 am.

Note: If you are subscribed to this feed through FeedBurner, please switch to our native feed URL http://the-gadgeteer.com/feed/ in order to ensure continuous delivery.
Momentum Robbi Wi-Fi camera review

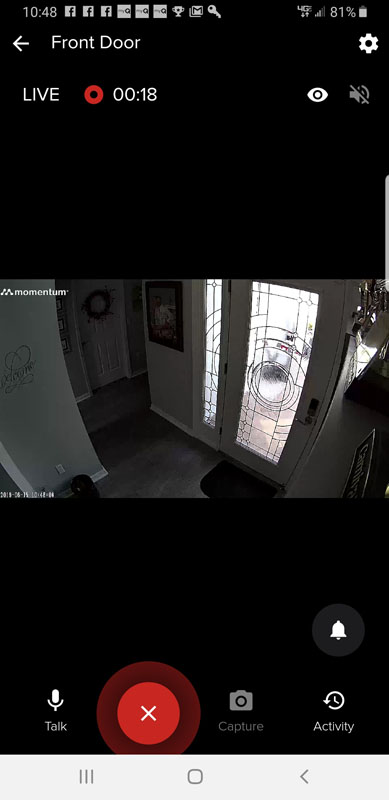
REVIEW – I have been looking for a security camera for inside my front door. When the opportunity came up to review the Momentum Robbi, it seemed like a great fit.  Was it?  Read on!

What is it?

Robbi is a 1080P, plug-in HD video camera that connects to your network via Wi-Fi.

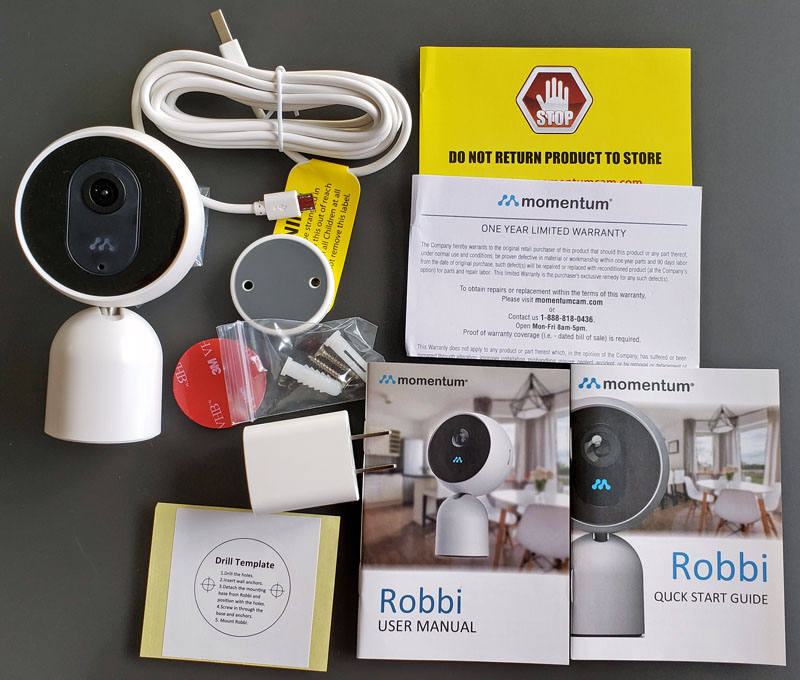
What’s in the box?

  • Robbi camera with articulated neck and magnet base
  • Plug-in USB power adapter
  • 8-foot USB-A to micro-USB cord
  • Mounting disk with magnet attachment to Robbi
  • 3M adhesive mounting disk
  • Wall anchors and screws
  • Drilling template for wall anchors
  • Instruction sheet for how to handle returns/issues
  • Warranty information
  • User manual
  • Quick start guide

Hardware specs

  • Camera: 1080P Wi-Fi
  • Field of view: 130° wide-angle lens
  • Motion detection: adjustable sensitivity with push notifications
  • Night Vision: infrared LEDs that illuminate up to 25 feet with automatic night vision mode
  • SD card slot: Micro SD Slot (up to 128GB SD card)
  • Connectivity: 802.11 b/g/n Wi-Fi connection @ 2.4/5GHz
  • Audio: two-way audio
  • Dimensions: 4.51” x 2.52” x 2.03” (h x w x d)
  • Weight: 0.27 lbs
  • Power: 5V DC

Design and features

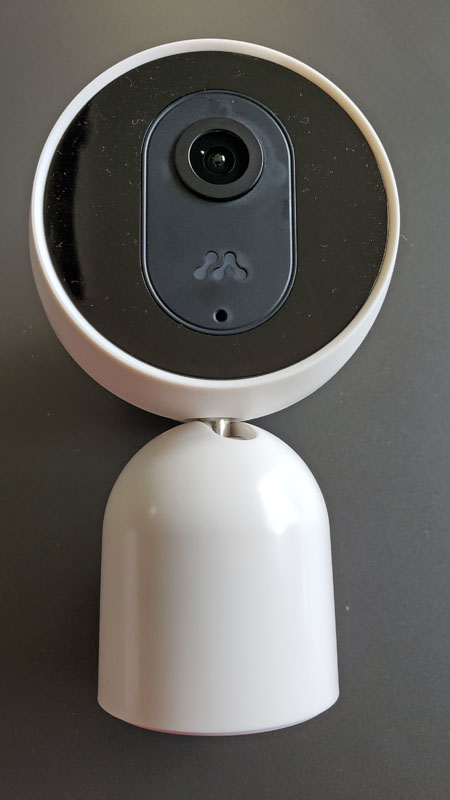
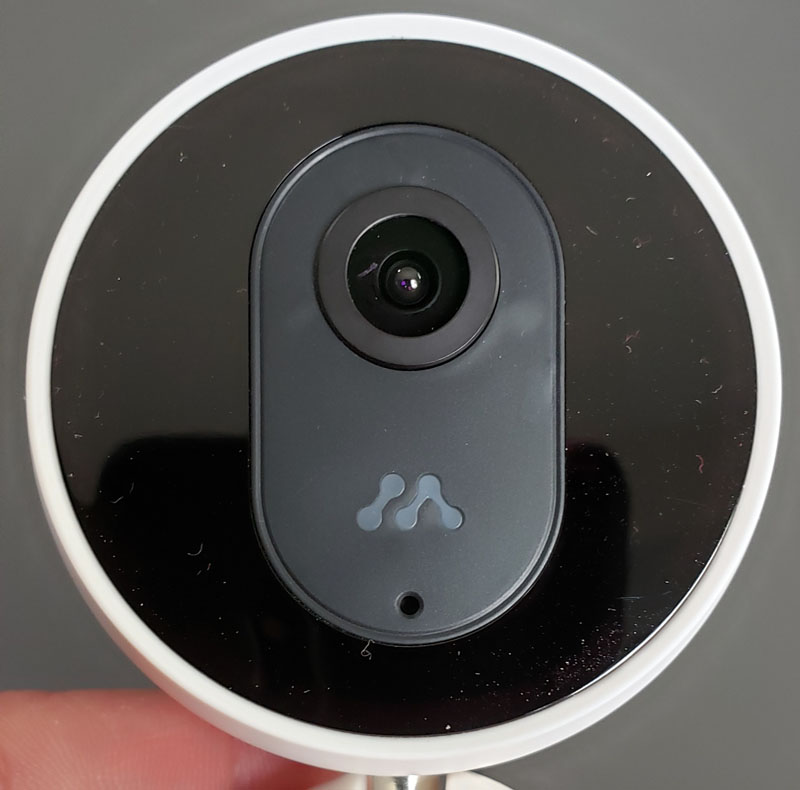
The Robbi camera is a pretty cute little camera. The face of the camera features the lens and a Momentum logo that lights for various statuses. It glows red when rebooting, blue when online, etc.

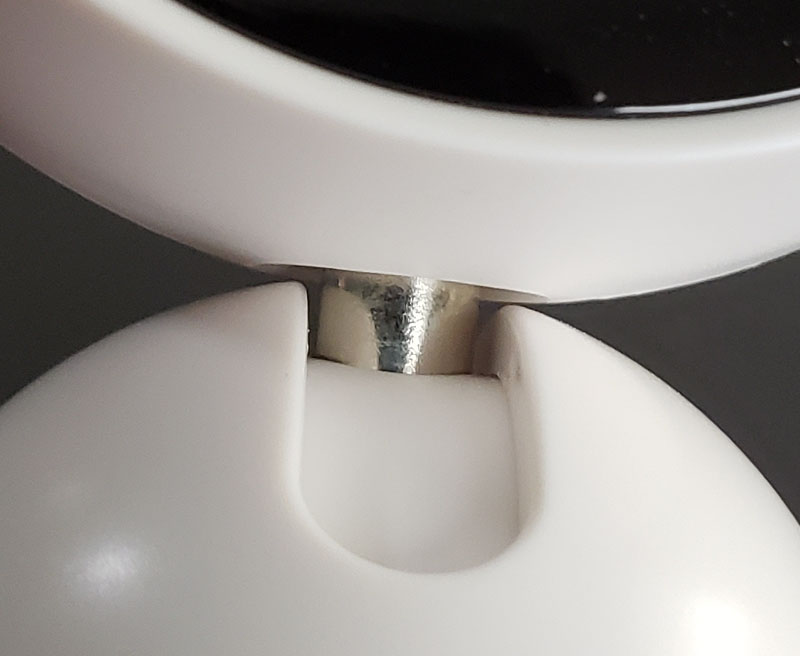
The top of the camera is mounted to the body with a metal rod that allows the head to both tilt and swivel.  It’s a simple mechanism that works very well.

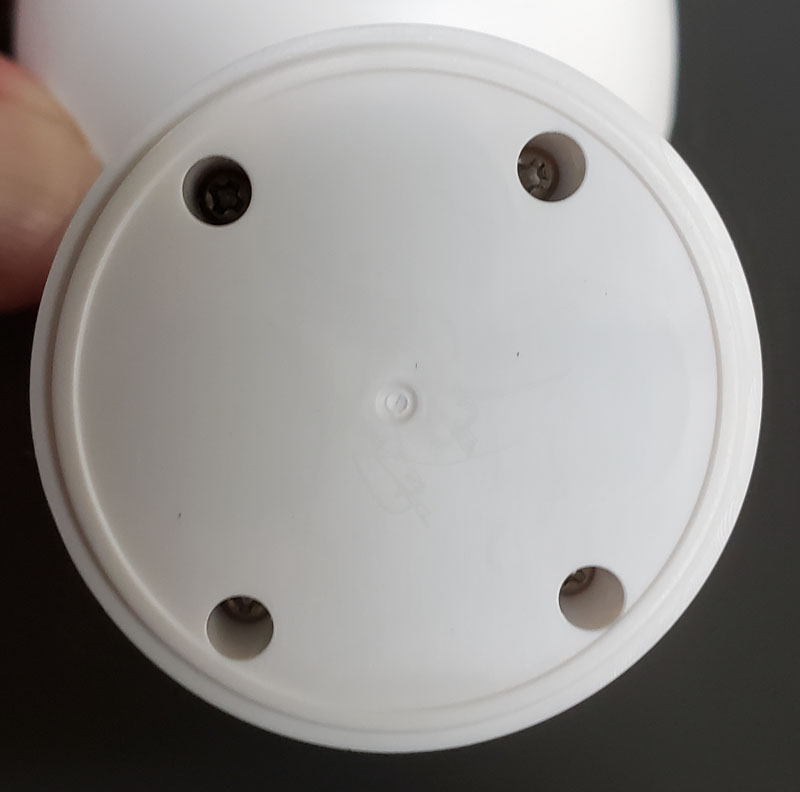
The bottom is magnetic so it will attach firmly to the magnetic mounting base.  That base can be stuck to a surface with the included 3M mounting disk or screwed in place with the included wall anchors and drilling template.

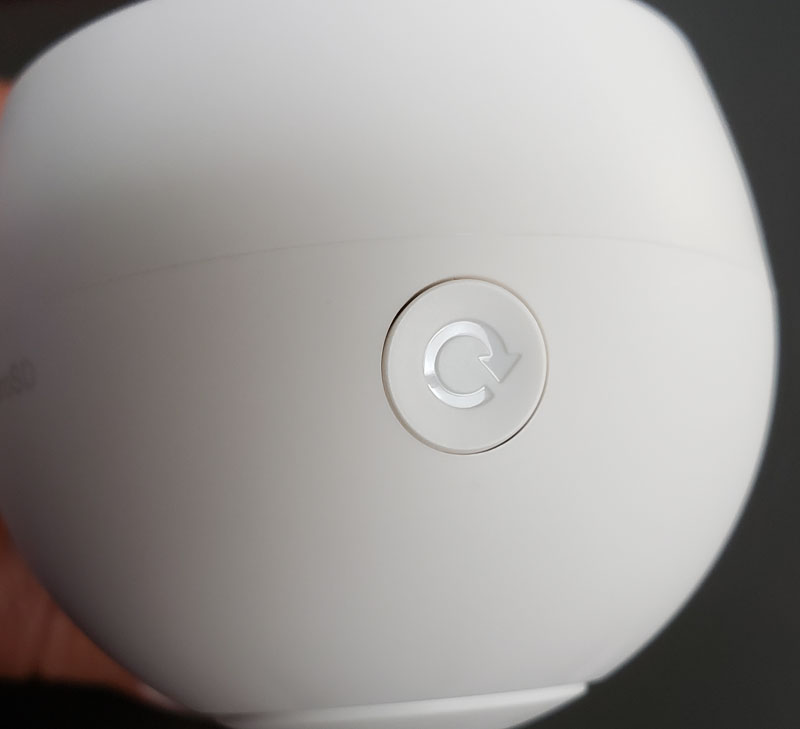
On top of the camera, we find the reset button, to be used in the event of a camera lock-up.

On the back is the speaker grill for the alarm and for two-way audio.

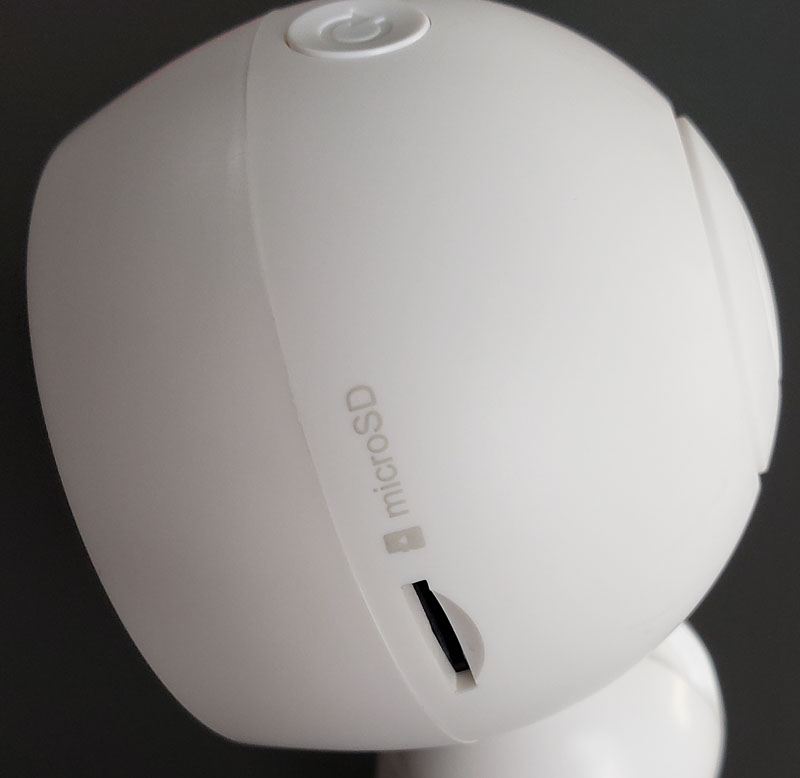
On the side, we find the SD card slot.  Note that none of this is sealed as this is an indoor-only camera.

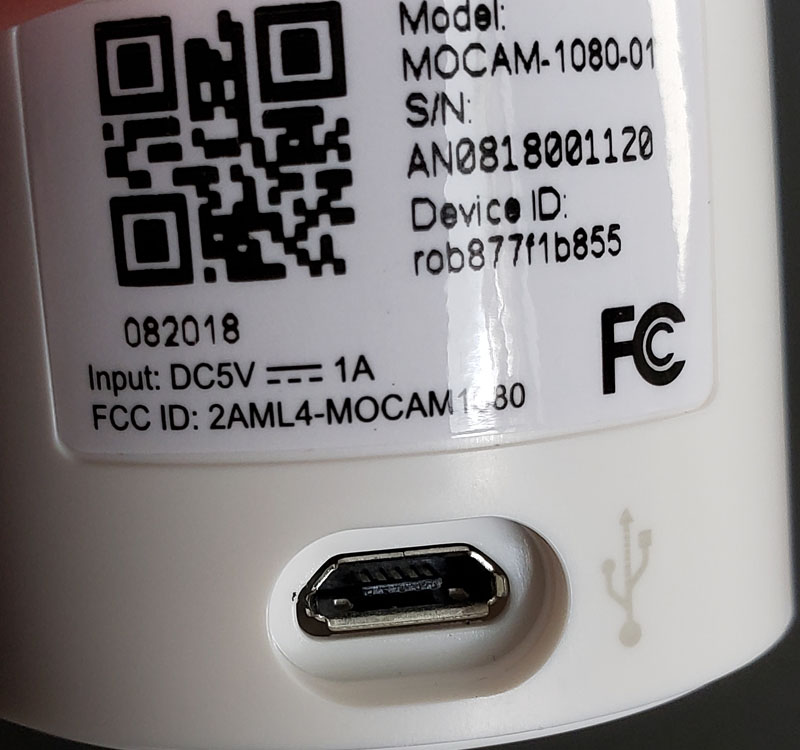
Finally, the identification sticker is on the back of the base as is the micro-USB power port.

Setup

I started the setup by installing the Momentum app (available for IOS and Android) on my Samsung Galaxy S9+. This is where I ran into my first issue.

The instructions included a QR code for the app.  I decided to take the easy route and scan it.  This is what I got:

So, it appears that Momentum isn’t keeping up with that very well.  I went to the Play Store and installed the app manually.

I placed the camera on the top right corner of our curio cabinets with a view of the front door.  The included eight-foot USB cable and magnet base made this all incredibly simple. And, I’ll answer this before anyone asks – yes, my wife really likes pandas.

With the app installed and the camera in place, I started setting it up.

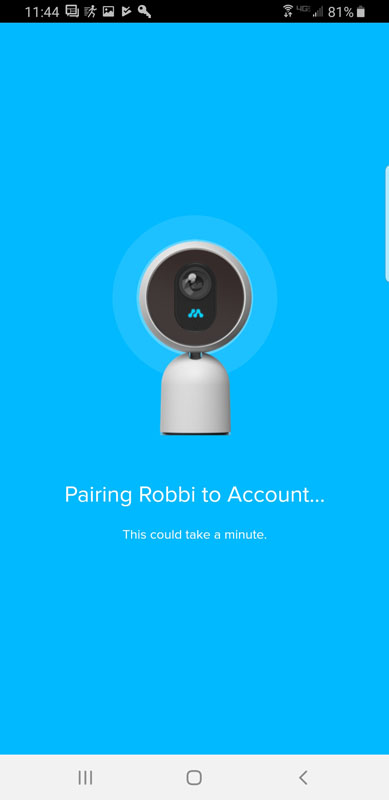
Pairing went perfectly and the camera provided an audible confirmation that pairing was successful.

As soon as we were paired, the app determined that an update was needed.

The app provides friendly updates along the way and the update went quickly.

At this point, I was prompted to choose a cloud storage plan.  A very nice feature is that Momentum provides free storage for 24 hours.

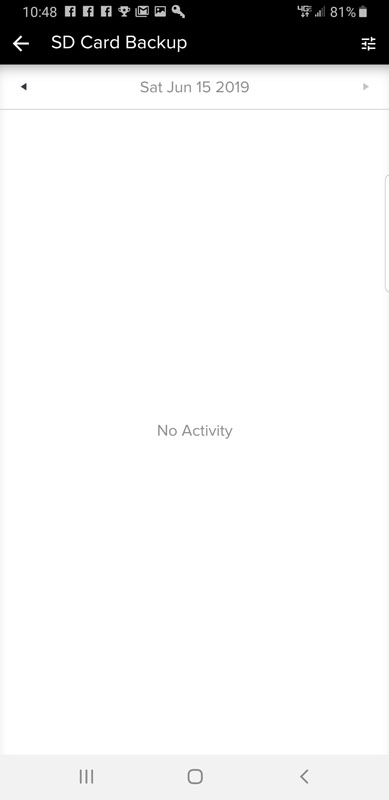
I opted for the free plan and also popped in an 8GB Micro SD card I had sitting around as a local backup of recorded events.

The app supports multiple cameras and you can provide meaningful names for each.

Each camera can have its own settings for sensitivity to motion and sound as well as image orientation.

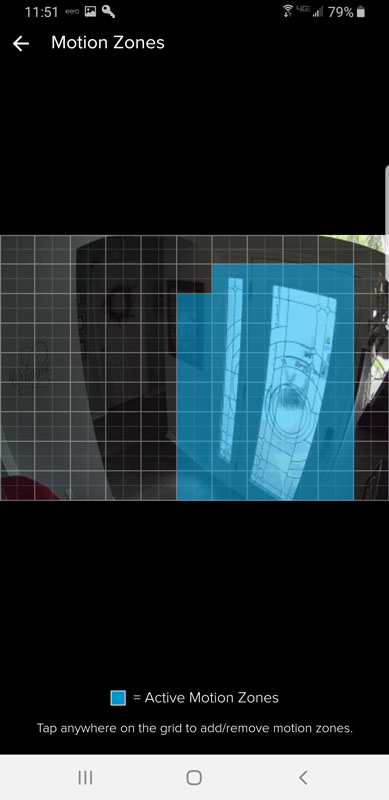
You can also limit the zone where the camera will detect motion.  The blue squares are the motion zone.  I opted to not include the area to the left so I wouldn’t get notified every time someone went to use the guest bathroom.

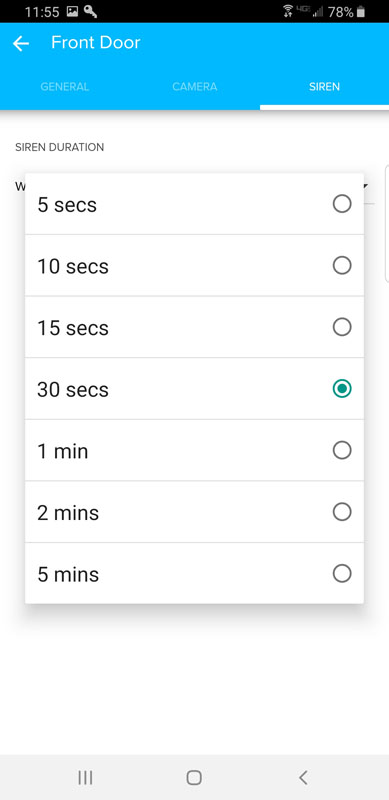
The final setup item was for the siren duration whenever the siren is invoked.


Performance

So far, other than a minor issue installing the app, setting up the Robbi camera has been pretty pleasant.

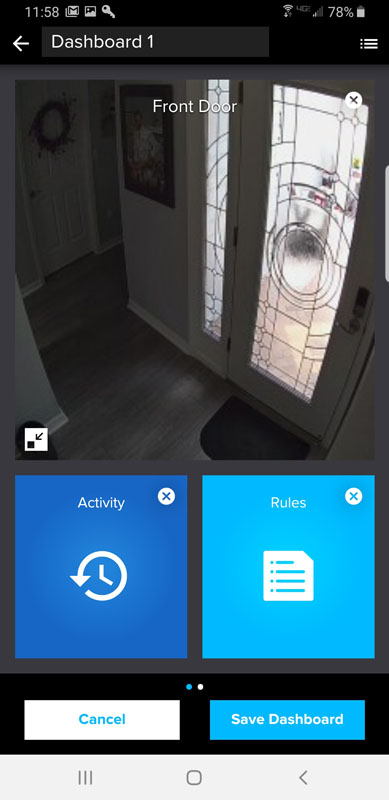
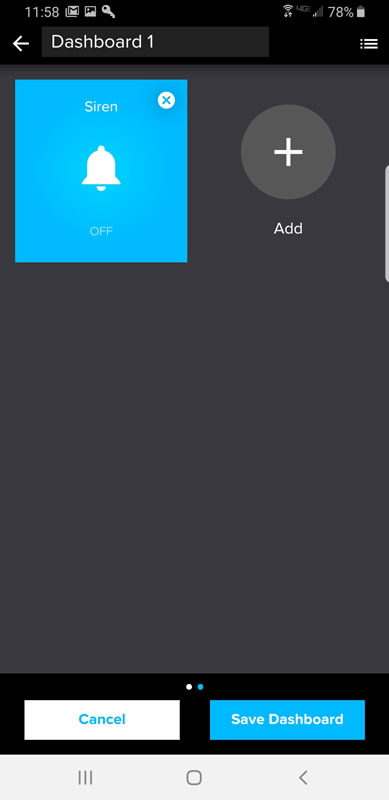
I didn’t modify the default dashboard for the camera.  This is where you access the stored events and camera rules as well as triggering the siren.

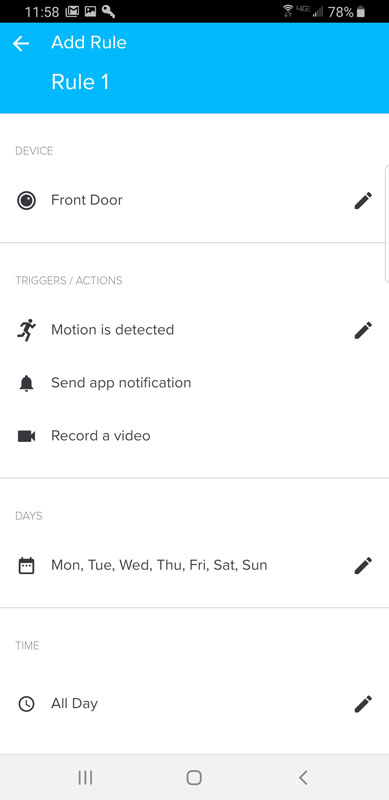
Rules determine what happens when an event occurs.

As you can see, I have it set to send a push notification and record video whenever motion is detected, 24×7.

The performance part of this review is where the wheels fall off.

First, let me address the last setup item above – the siren. The odd thing is that the siren can only be triggered manually in the app.  I was expecting an option for motion or sound to trigger the siren, based on time of day.  Nope.  The only way to trigger the siren is to open the app, open the specific camera you want to sound and push the siren button.

When I set up the camera, I opted for the automatic night vision mode. The camera will turn on night vision when the ambient lighting is too low for a quality picture.  What really happened was this – as we were sitting watching TV that first night, we kept hearing a clicking sound every few seconds.  I finally figured out that even though I had the foyer light on like I do every evening, Robbi couldn’t decide on night vision or no night vision, so it was continuously turning the night vision LEDs on and off, each time with a fairly loud click. To make matters worse, every time it did that, the camera interpreted that as motion and sent a motion push notification to my phone. So our evening sounded like: click – beep – click – beep – click – beep.  I tried turning up the brightness of the foyer light (I usually have it at about 20%), to no avail.  Click – beep – click – beep. I finally lowered the motion sensitivity to low and the beeps stopped but the clicks continued.  I finally turned off night vision.  Of course, later, after the foyer light turned off, the camera was useless. Turning on night vision permanently makes daytime images black and white and poor quality.

The joy continued when I tested actual motion. I walked out the front door.  Nothing.  I walked in. Nothing. I stood in front of the camera and waved frantically.  Nothing.  Then, I clicked to manually record a video of me waving frantically.  The camera will allow a 20-second manual clip.  It said it recorded.  Nope.  Not in the cloud and not on the SD card.

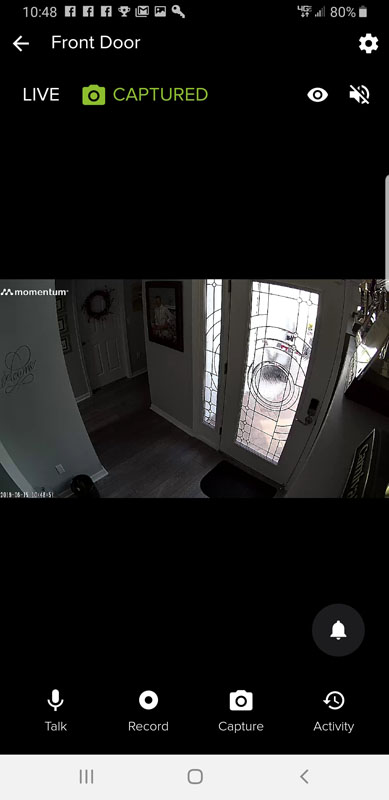
I tried capturing a still image.

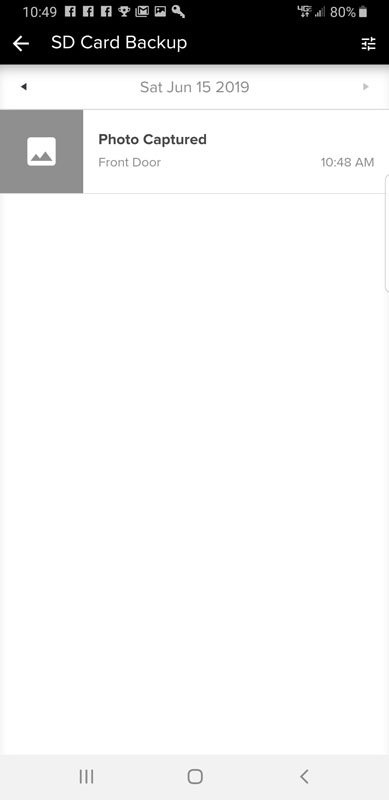
When I looked on the SD card, the image was available, so I know the SD card storage was working.

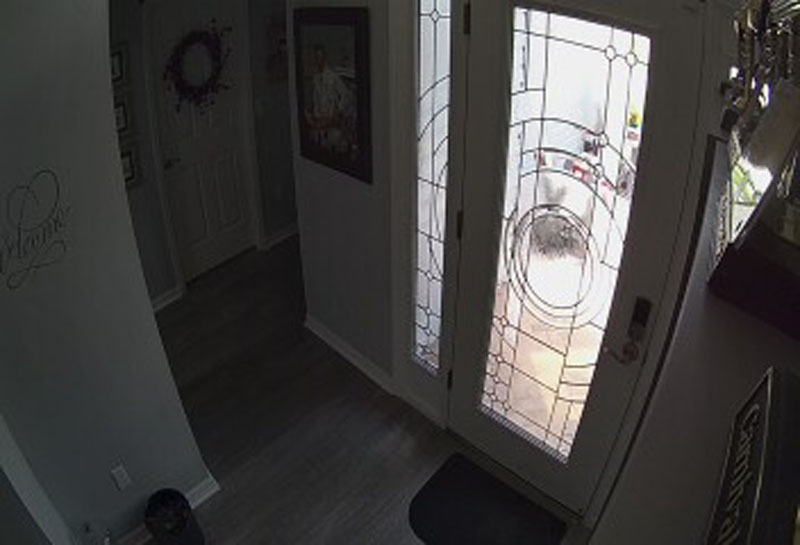
And, I could view the image.

But when I tried capturing video:

There was nothing saved to the cloud.

And, nothing stored on the SD card.

I reached out to Momentum support with all of these issues.  It has been several days and I have received no response.

And then everything changed…

Fast forward two days…<insert swirly video and funny sounds here>

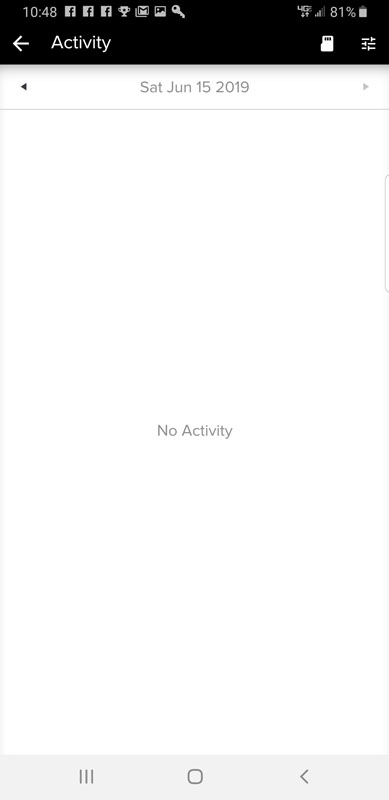
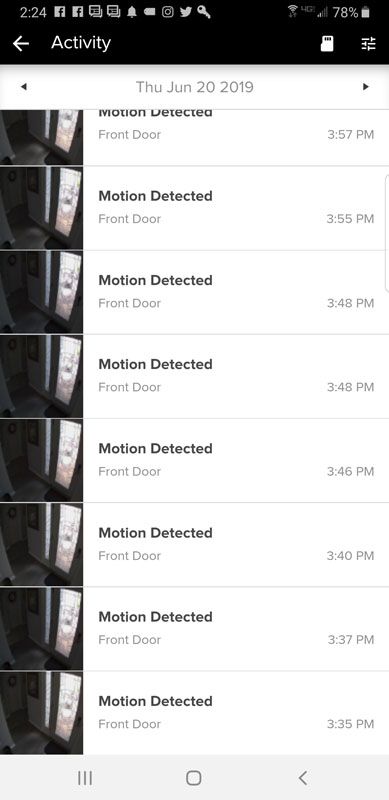
Suddenly, and inexplicably, I started getting motion notifications on my phone.  A lot of notifications.  And, video was being recorded for all those events, both in the cloud and on the SD card. For example, here’s a portion of notifications from 6/20:

As you can see, I was getting notifications essentially continuously, and I verified that the sensitivity was set to low.  Here’s an example of what was recorded:

If you listen closely, at 9 seconds in, you can hear the notification of movement sound go off on my phone.  The bottom line is that even on its lowest sensitivity setting, the tiniest of change in lighting is interpreted as movement and triggers the camera to send a notification. I even have the sound trigger turned completely off, so noises don’t trigger events.

So, I went from no notifications, even with frantic waving to constant notifications with no actual movement. It is recording video to the cloud and to the SD card, so that’s an improvement.

The ultimate outcome here is that the camera provides so many false notifications, the notification feature is essentially useless to me.  I understand that I am placing the camera into a very difficult lighting condition.  But a change in lighting, any change, is interpreted as motion.  In fact, as I typed those last two sentences, a cloud came over the sun and then passed, so the sun came out again.  I got two motion notifications while I typed.

What I like

  • Attractive physical design
  • Easy, step-by-step setup
  • Long USB cable adds installation flexibility
  • SD card backup
  • Free 24-hour cloud backup

What I’d change

  • Start detecting motion when motion exists (it did after a couple of days)
  • Stop interpreting changes in lighting as motion
  • Save supposed motion event videos (it did after a couple of days)
  • Allow recording video manually (it did after a couple of days)
  • Improve ambient light detection
  • Have some sort of automatic siren options with schedules
  • Have tech support return email

Final thoughts

I really wanted to like this camera.  I liked the design and it installed perfectly for my application. But given that it simply didn’t work and then did, with absolutely no application changes or hardware changes makes me concerned. In addition, tech support is completely non-responsive. Solely relying on contrast changes to identify motion means that this is useless in any application where lighting conditions change at all. I would say that if you’re looking at the Momentum Robbi as a security camera, you should keep looking.

Price: $99.99
Where to buy: Direct from Momentum also available for $79.99 from Amazon
Source: The sample of this product was provided by Momentum.

Filed in categories: Reviews

Tagged:

Momentum Robbi Wi-Fi camera review originally appeared on The Gadgeteer on June 28, 2019 at 8:00 am.

Note: If you are subscribed to this feed through FeedBurner, please switch to our native feed URL http://the-gadgeteer.com/feed/ in order to ensure continuous delivery.
Ooler Sleep System review

REVIEW – My wife turns into a small furnace when she sleeps. She also likes to be covered by heavy, thick blankets. This is great during the cooler fall and winter months, but becomes problematic during the summer. I also tend to sleep warm and enjoy the embrace of a fluffy, well feathered comforter. With both of us regularly overheating while we slept, our only solution was to turn the air conditioning down to the mid 60’s. Given the power required to cool our house to this degree, we were both very interested in the Ooler Sleep system and the possibility that we’d be able to cool ourselves directly without having to turn our entire upstairs into an arctic wasteland.

What is it?

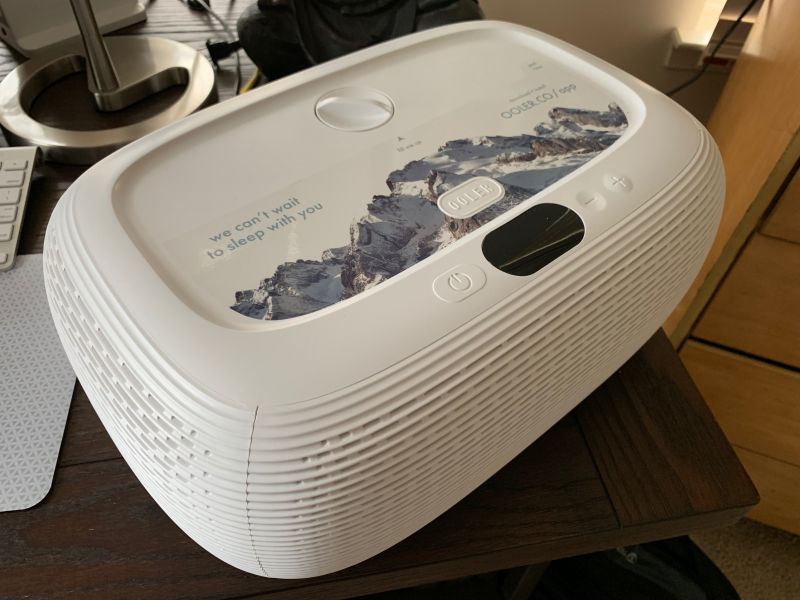
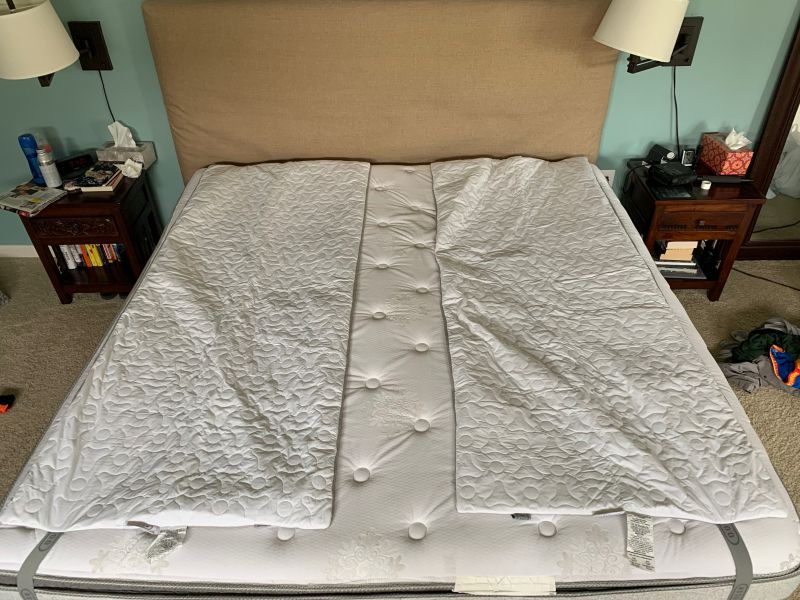
The Ooler Sleep System consists of a hydronic mattress pad and control unit. It’s designed to help you improve your sleep by regulating your body temperature through the use of cooled or heated water circulating through a mattress pad. Ooler states that by cooling your body it will help you achieve a deeper and more restful sleep. Alternately, the control unit can heat the mattress pad as a way of either as a means of gently waking you up or warming the bed on those cold winter nights (much like an electric blanket).

What’s in the box?

  • Control Unit
  • Hydronic pad with non-detachable insulated hoses
  • App (not technically in the box, but the user is provided with a download code)
  • Instruction pamphlet

Design and features

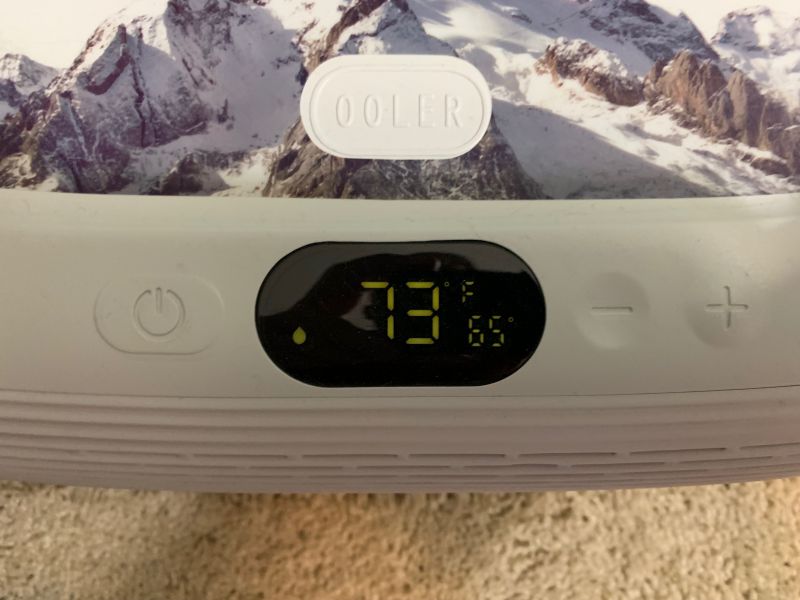
The Ooler Sleep System is designed to keep you cool at night by circulating water through a hydronic pad placed on top of your mattress. The control unit cools the water coming from the pad, sending it back out at temperature you specify (55-110 degrees F). The control unit has a small display on the top that shows the current temperature of the pad, along with a Bluetooth connectivity icon and if needed, a water refill warning light. It also allows you to increase or decrease the set temperature with the plus and minus buttons to the right of the display.

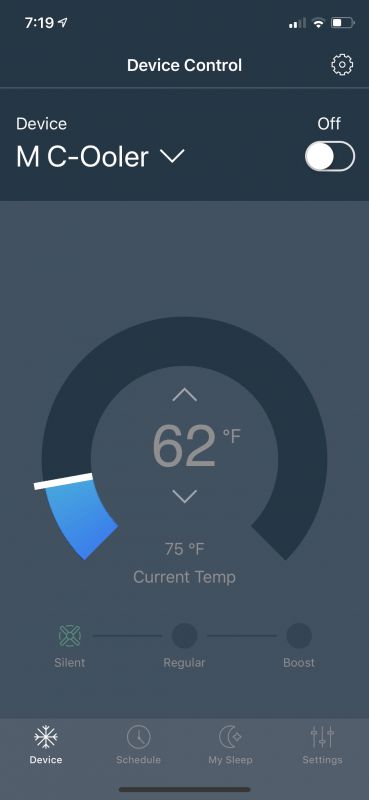
Most of the interacting that you’ll do with the system will be through the app. I should mention that as of this writing, the app is in beta and available only through Apple Testflight, so the final version may differ in functionality from what I’m detailing here. That said, the main screen is where you’ll interact with the most important feature of Ooler: the temperature setting. You’ll see the current temp of the pad and be able to adjust it between 55 and 110 degrees. You can also change the fan speed from silent to regular to boost. We typically left it at silent and it was no more noticeable than our ceiling fan set to a medium speed. Regular was noticeably louder and Boost was significantly louder. We only used Boost when we wanted to cool down the pad quickly. Along the bottom of the screen are icons that allow you to navigate between the device itself (you can have multiple Ooler units connected to a single instance of the app), schedule creation, a sleep rating form and general settings for the device and app.

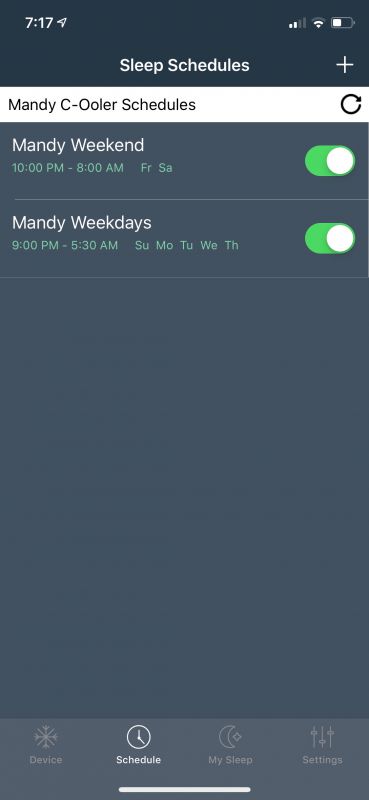
The scheduler allows you to set the start and stop time of the control unit and what the temperature of the pad should be when you go to bed and wake up. Initially, we set the sleep temperature to 60 degrees and the wake-up temperature to 80. After trying a few colder temps, 65 seemed to be the sweet spot for my wife whereas 60 was perfect for me.

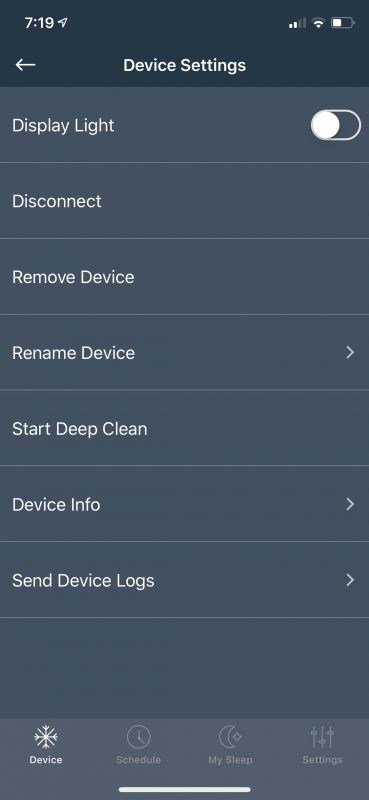
The settings menu along the bottom of the screen allows you access to general maintenance functions such as password resets, Ooler support, firmware updates, and set up instructions. The gear icon on the main screen allows you to turn off the display light, remove or rename a device, enter a deep cleaning mode and displays general device information and logs.

Setup

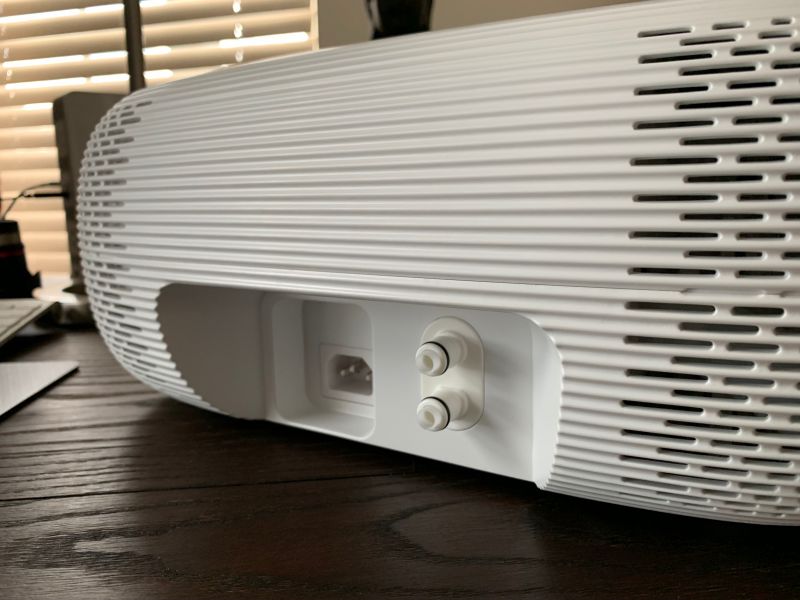
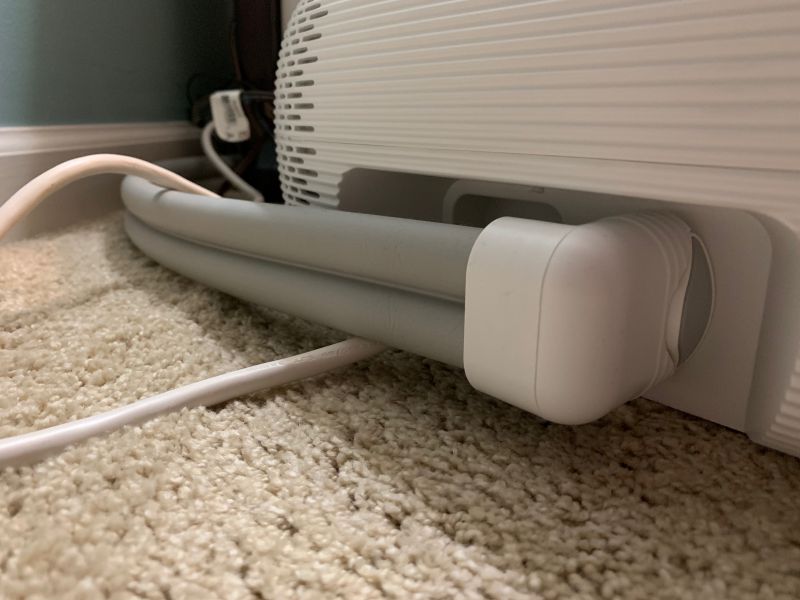
If you can change the sheets on your bed, you can set up the Ooler system. The pad comes with two elastic bands that wrap from the top to bottom, allowing you to secure it to your mattress. This minimizes the extent to which the pad will shift if you are someone like me who moves around a lot at night. You then attach the two hoses connected to the pad to the back of the control unit. They seat firmly in the unit and you’ll know they’re connected when you hear a click. Once this is done, you fill up the control unit with water (distilled is suggested so as to limit mineral build-up inside the machine). You then turn on the control unit and allow it to cycle the water through the pad. Once the control unit has circulated for a few minutes, you may have to add more water. Aside from connecting the optional app to the control unit via Bluetooth, that’s all you need to do.

Performance

So, with all of the technical details and set up out of the way, how did it perform? Both my wife and I are pleased to say that we definitely noticed a difference in our sleep quality from before using the Ooler Sleep system. I found that I didn’t wake up as much during the night and my wife said she slept much more soundly. As she travels for work quite a bit she was also able to compare it with various hotel room beds and came away impressed with the system. To be fair, most hotels are terrible when compared to the comfort of your own bed. However, the Ooler system made her long for home even more than usual.

One thing that initially concerned me about the hydronic part of the mattress pad was that it might feel like I was lying on a waterbed. Thankfully, the amount of water circulating through the pad is was not enough to make me feel like I was floating. It actually felt like I was lying on a normal mattress pad and once I’d used it for a few days I never really noticed it. The only indication of its presence was the fan operating in the background or when I bumped one of the circulation hoses with my arm (I’d positioned them at the top of the bed as I have long legs and figured I’d be likely to kick them in the middle of the night).

What I like

  • Provides a noticeable degree of cooling, creating a comfortable sleeping environment
  • Fairly unobtrusive in operation and I hardly knew it was there when I was using it.
  • The app reliably connected to the control unit and was responsive to temperature changes and other device input

What I’d change

  • You can’t do much from the control unit and have to interact with the system mainly from the app
  • Depending on how you have the circulation hoses positioned (either at the foot or head of the bed) you may end up hitting them with your arm or foot.
  • As the app connects to Bluetooth, I had to be relatively close to the control unit to interact with it. So, if I was downstairs and decided that I wanted to go to bed early, I’d have to go upstairs to turn on the unit. Wifi might be a better way to connect.
  • It’s a tad expensive.

Final thoughts

In sum, both my wife and I were pleased with the Ooler Sleep System. It provided a comfortably cool sleeping environment and was able to maintain the selected temperature throughout the night. The hydronic mattress pad was unobtrusive and the control unit fan, at it’s lowest setting, was quiet enough to not bother either of us while we slept. In the three weeks that we used it before writing this review we didn’t have to refill it with water or run a cleaning cycle. While that may change in the winter when the heating ability is used more often, to date, the unit has remained maintenance free.  Finally, as it costs $699 on the low end, it’s definitely a investment, but if cooler sleep is what you’re after, the Ooler Sleep System just might be the thing.

Price: $699: Half Queen (tested here), $799: Half King, $1,399: Queen, $1,499: King & Cal King
Where to buy: Chili Technology Ooler Sleep System
Source: The sample for this review was provided by Chili Technology

Filed in categories: Reviews

Tagged:

Ooler Sleep System review originally appeared on The Gadgeteer on June 27, 2019 at 9:10 am.

Note: If you are subscribed to this feed through FeedBurner, please switch to our native feed URL http://the-gadgeteer.com/feed/ in order to ensure continuous delivery.
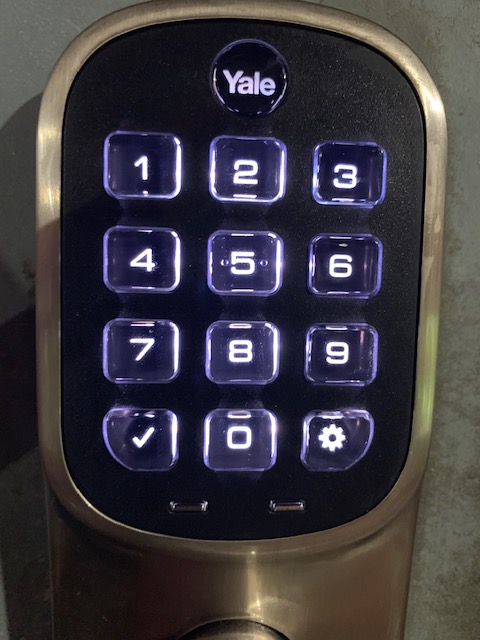
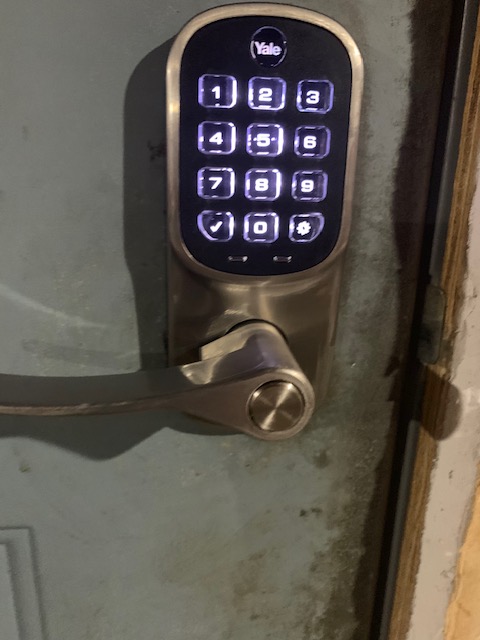
Yale Assure Lever Smart Keypad Lock YRL236 review

REVIEW – A few months ago I had the opportunity to review the Yale Assure deadbolt lock and jumped at the opportunity to review another of their great products. Like its older brother, the Yale Assure Lever Smart Keypad Lock doesn’t disappoint.

What is it?

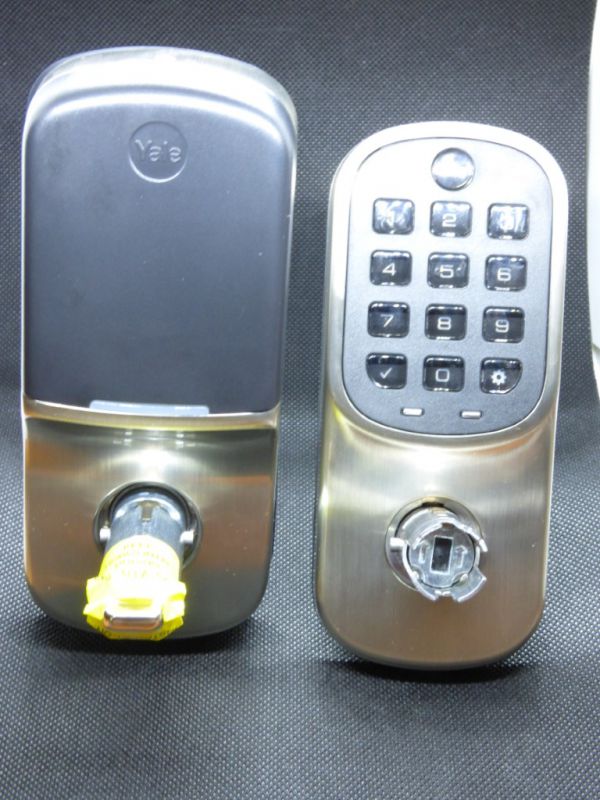
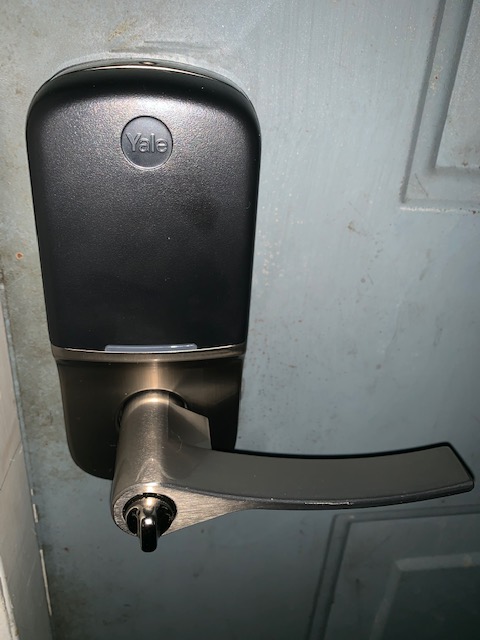
The Yale model YRL236 is an interior door lock with an integrated keypad and wireless capabilities, enabling a homeowner to lock or unlock a door using multiple, user-programmable codes, Bluetooth, Cellular or Wi-Fi.

Hardware Specs

  • Installs in standard doors in minutes
  • Door Thickness: 1 3/8” – 2 ¼”
  • Back Set: 1 3/8” – 2 ¼”
  • Face Bore: 2 1/8”, 1″ Diameter
  • Edge Bore: 1″ Depth, 1″ Diameter
  • Cross Bore: 1″ Diameter, Round Corner
  • Latch bolt Type: Adjustable Latch to Accommodate a 2 3/8″ or 2 3/4″ Back Set, reversible
  • Strike Front: Round Corner
  • Strike Dimensions: 1 1/9″ x 2 3/4″
  • Certifications: A156.36 ANSI/BHMA
  • Temperature range: -22F to 140F
  • Warranty: 1-year electronics, Unlimited Lifetime on Finish and Mechanical
  • Power: 4 AA batteries, 9V Battery can be used as a backup
  • Battery life: Approximately 12 months with regular use
  • User Codes: 25 User codes, 250 User codes with an optional Yale Smart module
  • Works with Amazon and Apple Home Kit
  • Available Finishes: Satin Nickel, Oil Rubbed Bronze, Polished Brass

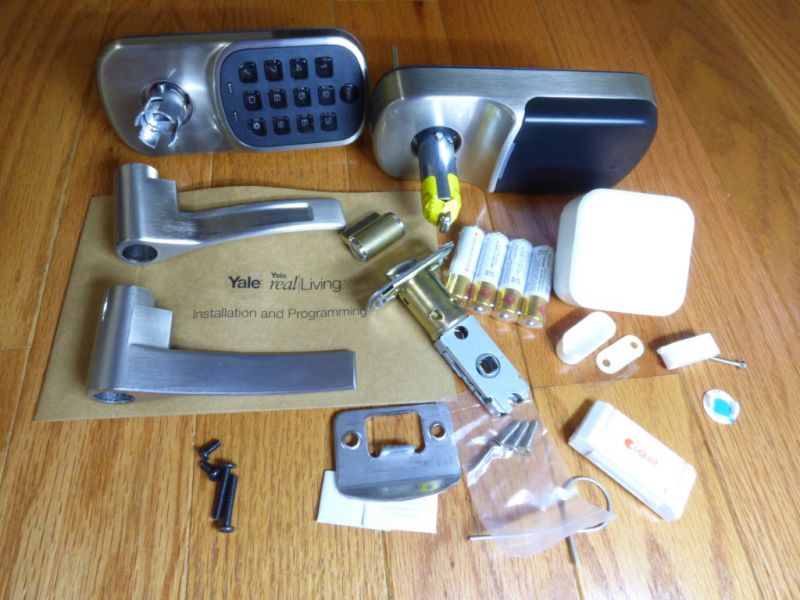
What’s in the Box?

  • Yale Assure Lock
  • Two Academy Levers
  • Mounting Screws
  • Door Template
  • 4 AA Alkaline Batteries
  • Installation Manual
  • Yale Smart Module
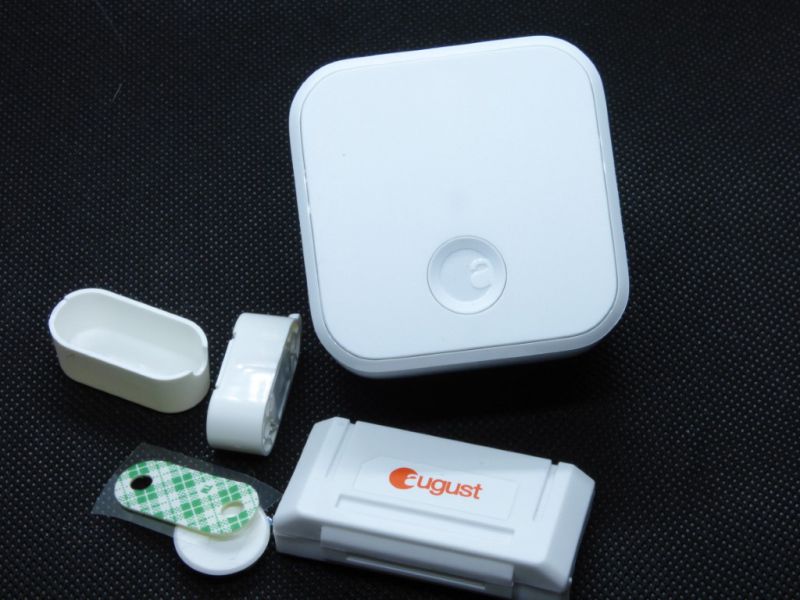
  • August Wi-Fi Bridge module and Bluetooth lock module
  • August Warranty card

Design and features

Setup:

Arriving in characteristically cardboard containment, Yale’s lock hardware was well protected from the ever-present tossing system embraced by our shipping friends.

Like all locks, some assembly is required, but it’s not much different than a standard lock with respect to the hardware.

Since I was replacing a current lock, I did not need to drill, but Yale includes a template should your situation warrant.

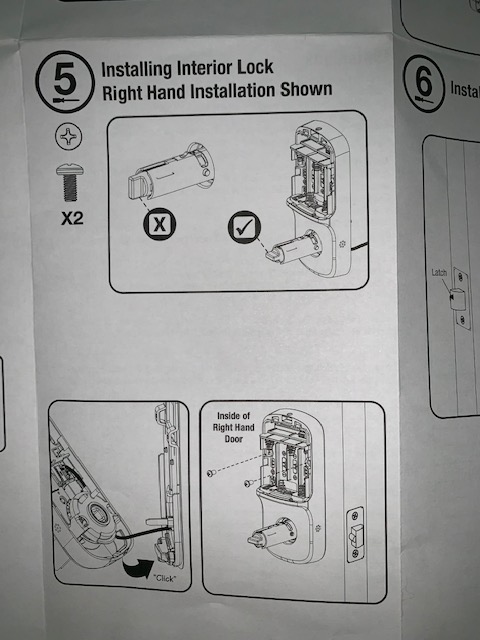
Graphic directions for assembly are excellent. I had no difficulty with form, fit or function.

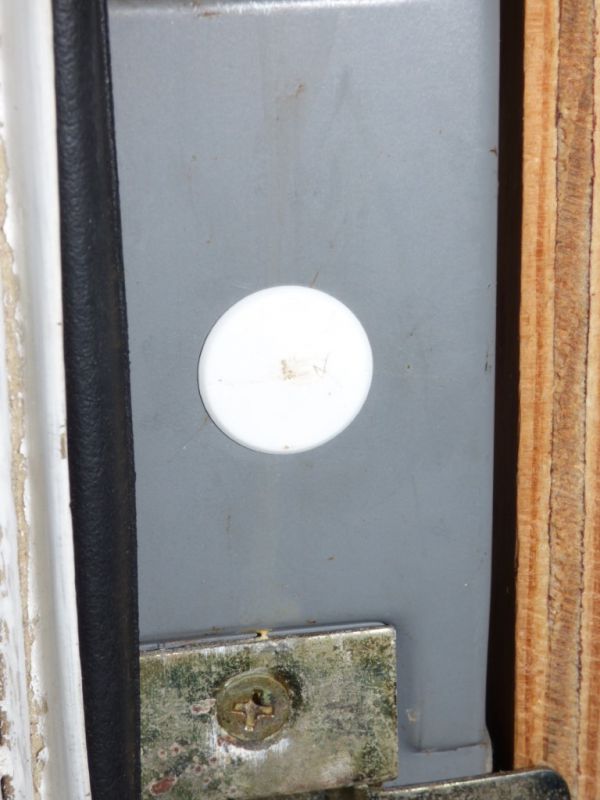
I elected to place the magnetic door sensor into my door frame for a cleaner look.

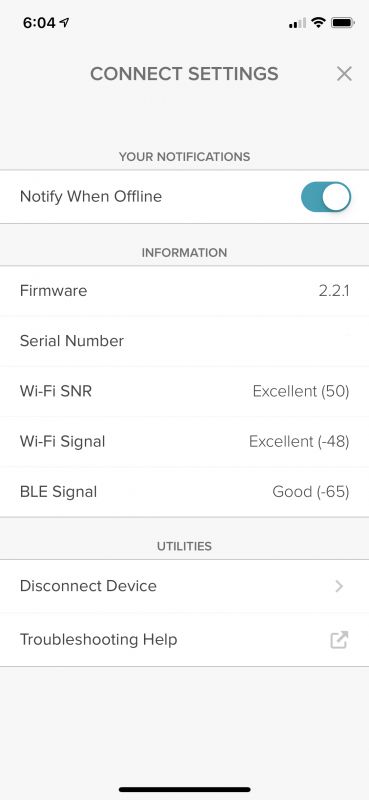
Once installed, the August app must be installed and an account created. If needed, the app is excellent in walking through the hardware and software installation process and has some well-executed FAQs and troubleshooting features. Nicely done!

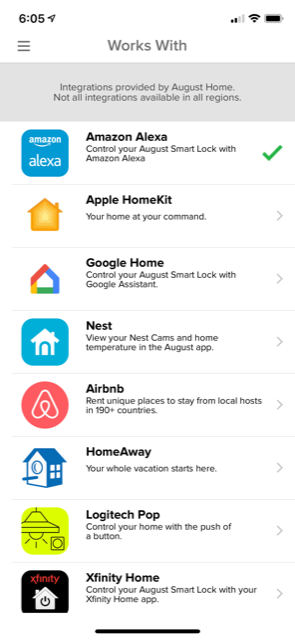
The app steps the user through connection and calibration features and goes so far as to provide step-by-step instructions for Amazon Alexa and Apple Homekit connections. I ran into one very minor issue during configuration – for whatever reason, my Homekit code would not register, but restarting my smartphone solved the issue.

Curiously, those with an existing August bridge will still need to install another to enable all of the functions of a second lock. Yale’s online documentation states the bride modules and bride modules are ae a 1:1 ratio – curious, but far from problematic.

Performance

Once everything is connected, calibrated and copacetic, operation was flawless. Correct codes were always accepted from the keypad and it’s a blast to use Siri or Alexa to lock or check the status of my doors

This lock does not talk as my other Yale lock does, but has beeping as feedback.

An activity log provides a record of when and how the door was opened

What I like

  • Quality manufacturing and workmanship
  • Outstanding installation documentation and illustrations
  • Easy hardware and app installation
  • Plenty of locking options
  • Excellent variety of connectivity options

What I’d change

  • Lower the price

Final thoughts:

This Yale’s Assure Lever YRL236 is my second connected lock in my home and is a very welcomed addition. Quality and workmanship are excellent, installation and configuration were simple, and in the future, I hope to equip all of my home’s outer doors with Yale locks. These locks are so fancy I need to consider replacing my crappy doors!

Price: $279
Where to buy: Amazon
Source:  The sample for this review was provided by Yale.

Filed in categories: Reviews

Tagged: ,

Yale Assure Lever Smart Keypad Lock YRL236 review originally appeared on The Gadgeteer on June 27, 2019 at 8:00 am.

Note: If you are subscribed to this feed through FeedBurner, please switch to our native feed URL http://the-gadgeteer.com/feed/ in order to ensure continuous delivery.