

I really like portable chargers that have built-in cables so that I can eliminate having to carry additional charging cables with me when I’m away from home. I have Android devices (that use only micro-USB charging cables) and iOS devices that may need a charge when traveling, so the OLALA 7800mAh Power Bank with its built-in micro-USB cable and built-in Lightning cable attracted my attention when it was offered to the Gadgeteer for review. I found this charger to be a wonderful compact size (it fits well in my hand) and that it worked well charging my devices.
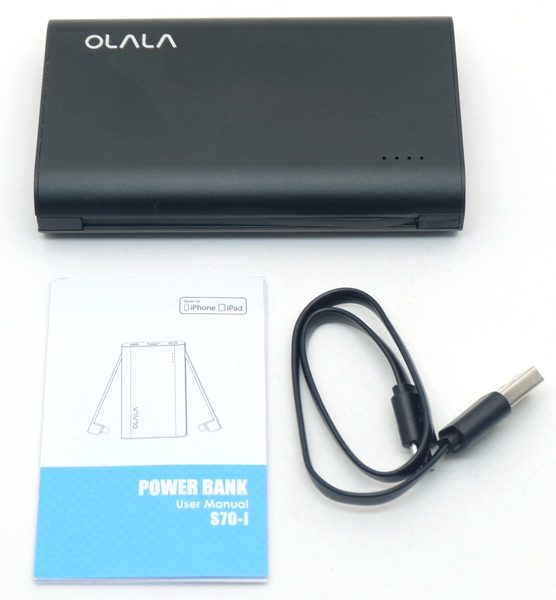 Package Contents

- OLALA 7800 mAh Power Bank
- Micro-USB charging cable
- User Manual
Technical Specifications
| Basic Spec | Capacity | 7800mAh |
| Dimension | 110.5 x 66 x 22 mm/4.35 x 2.60 x 0.87 inches | |
| Weight | 223 g/7.87 ounces | |
| Battery Type | Lithium-ion battery | |
| Performance | Input | 5V / 2.0A |
| USB Port Output | 5V / 2.4A max | |
| Built-in Lightning Connector Output | 5V / 2.4A max | |
| Built-in Micro USB Connector Output | 5V / 2.4A max | |
| Fully Charged by 2A Adapter | 5hrs | |
| Cycle Life | >500 times | |
| Conversion Efficiency | 85% | |
| LED Battery Indicator | 1LED | 0~25% |
| 2LED | 25%~50% | |
| 3LED | 50%~75% | |
| 4LED | 75%~100% | |
| LED Charging Indicator | Blue Light Flashing | Charging |
| 4 Blue Lights On | Charged | |
| Environment Condition | Operation Environment | -10 to 55℃ |
| Operation Humidity | 10%~85% RH | |
| Storage Environment | -20 to 70℃ | |
| Storage Humidity | 5%~90% RH | |
| Package List | Power Bank | 1pcs |
| Micro USB (for charge) | 1pcs | |
| User Manual | 1pcs | |
| Warranty | 1 year | |
Design & Build Quality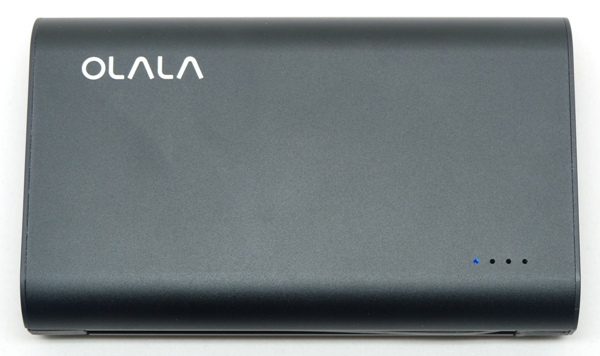
The OLALA 7800mAh Power Bank is enclosed in a matte black metal case and measures 4.35″ x 2.6″ x 0.87″ and weighs 7.87 oz. The metal casing makes the battery feel well made and it is small enough to fit in my purse. The rounded sides also make it comfortable while carrying it around. However, it does NOT come with a carrying case.
There are four LEDs that illuminate to indicate the amount of charge left in the battery:
- 0-25% – 1 blue LED
- 25-50% – 2 blue LEDs
- 50-75% – 3 blue LEDs
- 75-100% – 4 blue LEDs

This charger comes with built-in micro-USB and Apple MFi certified Lightning cables, thus allowing you to eliminate having to carry around additional charging cables (unless you want to charge a third device or charge the battery itself while traveling).
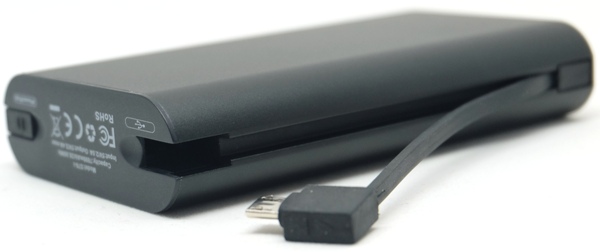 The lengths of the built-in cables (which are about 3.75″ long) tuck neatly into the side of the charger.
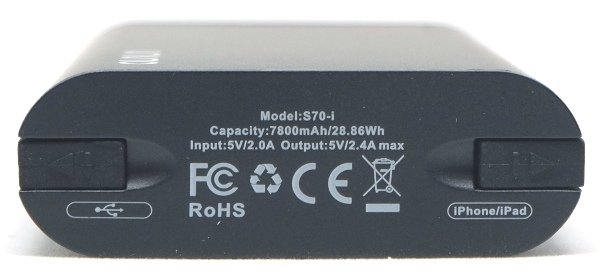
On one end of the charger, you can see that the micro-USB and Lightning cable connectors fit flush with the charger when inserted into the battery. You can also see the technical details of the battery in the above photo. 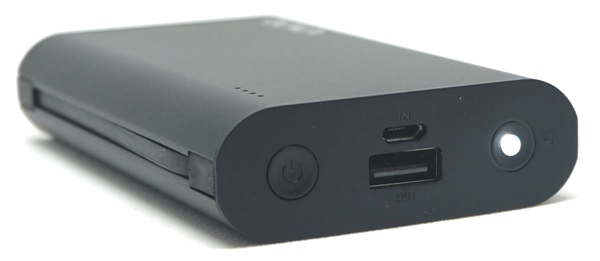
The other end of the charger contains the power button (which MUST be pressed to start charging), the micro-USB port to charge the battery, a USB port to charge a third device and an LED flashlight.
Use
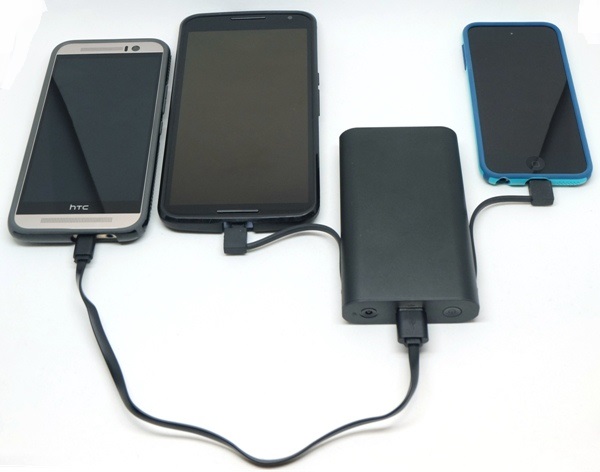
In order to start charging any device using this battery, it is necessary to press the power button. I found that this battery successfully charged my Nexus 6 phone (3220mAh battery) 2.5 times on one charge of the OLALA battery and about 2.75 times in another test (each time my phone was below 10% when the battery was used to charge it). It was able to charge my iPod Touch 6G (1043mAh battery) 5.75 times in another test (each time my iPod was at or below 16% charge when the battery was used to charge it). And, it was able to charge an HTC One M9 (2840mAh battery), a Nexus 6, and an iPod Touch 6G completely before needing to be charged. Since the battery has an output of 5V/2.4A max per each of the three outputs (which makes this portable charger better than my RAVPower Savior external battery with built-in micro-USB cable), it charged each device as quickly as their OEM chargers did (e.g. Nexus 6 was fully charged in one hour and 43 minutes or less).
Another attractive feature of this battery is that it only took about four to 4.5 hours to charge it after being completely depleted in my tests. When the battery is depleted, the first of the four LED lights flashes blue when the power button is pressed. When the battery is charging, the first LED light flashes blue until the battery reaches 25% charge and then remains lit, after which the second LED light flashes blue until it reaches about 50% charge and then remains lit, etc. When all four LEDs remain lit, the battery is fully charged.
This battery also has an LED flashlight as an added feature. In order to turn it on, you need to long press the power button for about three seconds and repeat the process to turn it off. My phone’s flashlight is about twice as bright as the flashlight on the OLALA battery, so I’m not so sure how useful this feature is.
Final Thoughts
I am impressed with the OLALA 7800mAh Power Bank – it is a well-made, compact portable battery. Its primary benefit is that it has a built-in micro-USB and Apple MFi certified Lightning cable so that you don’t have to carry around additional charging cables when traveling. It charged my Nexus 6 phone about 2.5 times on one charge of the OLALA battery and my iPod Touch 6G 5.75 times. It only took about four to 4.5 hours to charge the battery itself. The only drawbacks are that you have to press the power button to start charging a device and I would love to have the ability to directly plug the charger into an outlet so that I don’t have to carry ANY additional cables around to use it. Also, as time goes by and you upgrade your Android devices to USB-C devices, the micro-USB built-in charging cable will become obsolete. But until then, this charger works like a charm and you’ll be able to eliminate having to carry additional charging cables.
Source: The sample used in this review was provided by OLALA. Please visit their website for more information or Amazon to purchase one.
Product Information
| Price: | $29.99 |
| Manufacturer: | OLALA |
| Retailer: | Amazon |
| Pros: |
|
| Cons: |
|
Filed in categories: Reviews
Tagged: Batteries and Chargers
OLALA 7800mAh Power Bank review originally appeared on The Gadgeteer on October 4, 2017 at 11:00 am.
Note: If you are subscribed to this feed through FeedBurner, please switch to our native feed URL http://the-gadgeteer.com/feed/ in order to ensure continuous delivery.
 As with many of us Gadgeteers, most especially our fearless Gadgeteer-in-Chief, Julie, I like writing implements of all kinds, but I really like pens. Something about a well designed and built pen elevates the experience of handwriting, which feels increasingly like a lost art, to a higher plane of enjoyment. That said, I’ve been a big fan of Baron Fig for several years, now, having reviewed both their
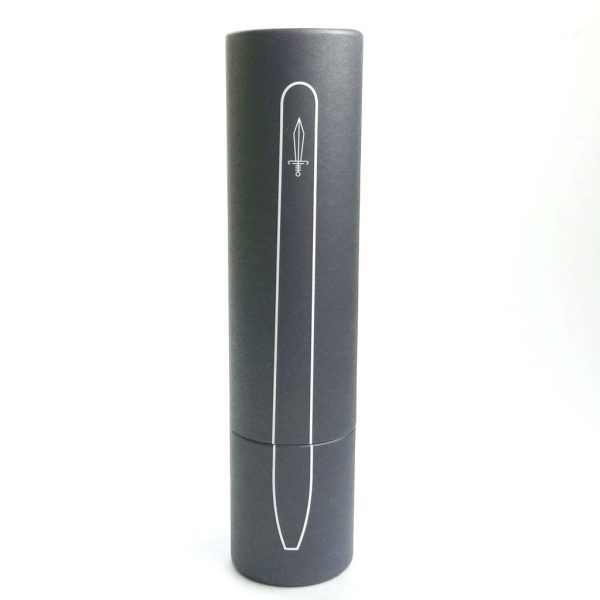 Of note is that the Squire began life as a very successful crowdfunded Kickstarter campaign. I believe that those pens shipped with a square box, but this cylindrical box seems more suited to the shape of the object inside it.
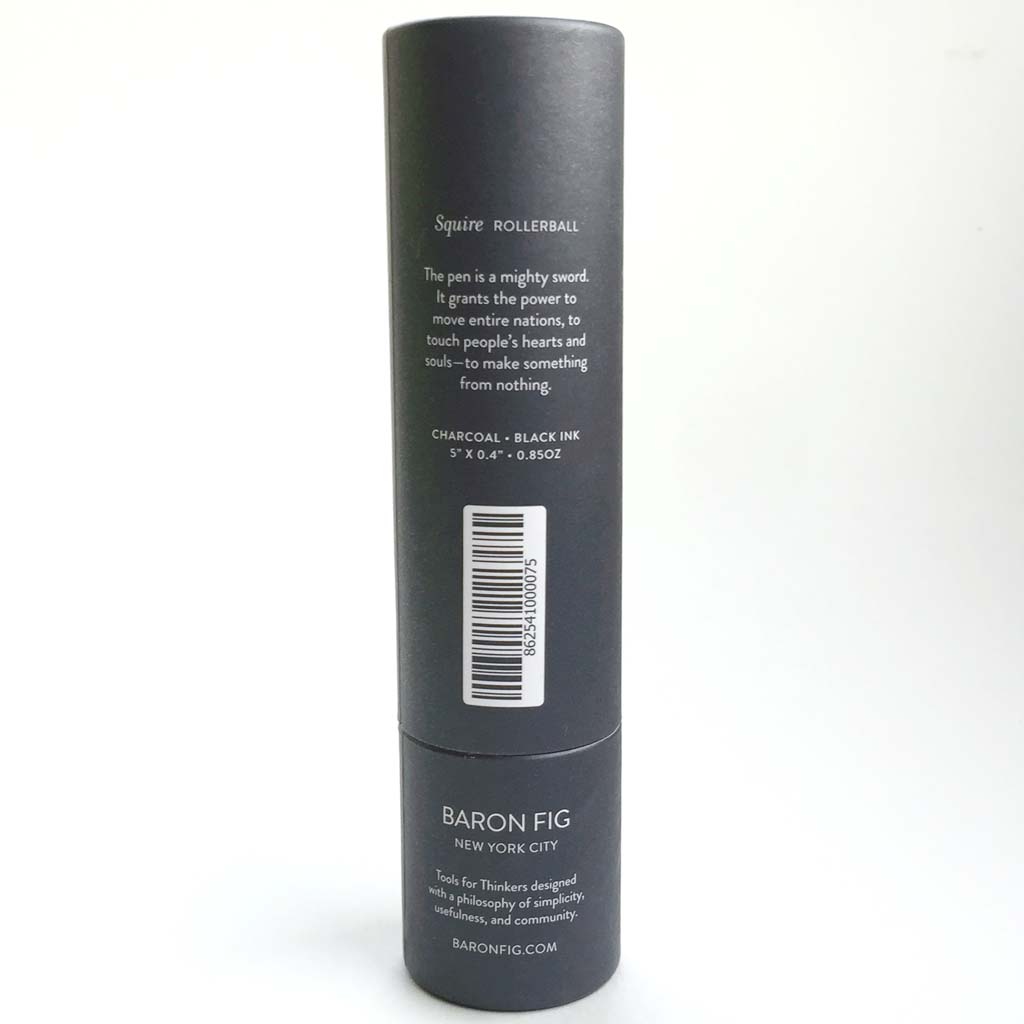
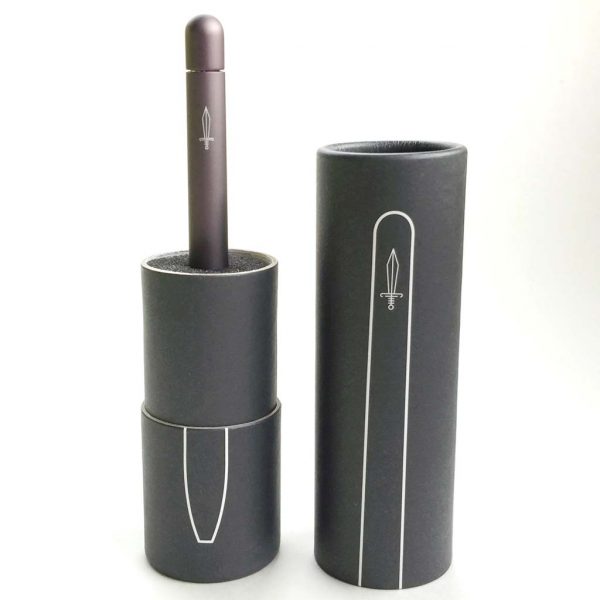 I’d also point out that the Squire’s package was quite protective, as seen above. It was basically encased in a block of foam within a semi-rigid cardboard cylinder. In fact, the bottom portion of the box can be used as an upright pen stand.
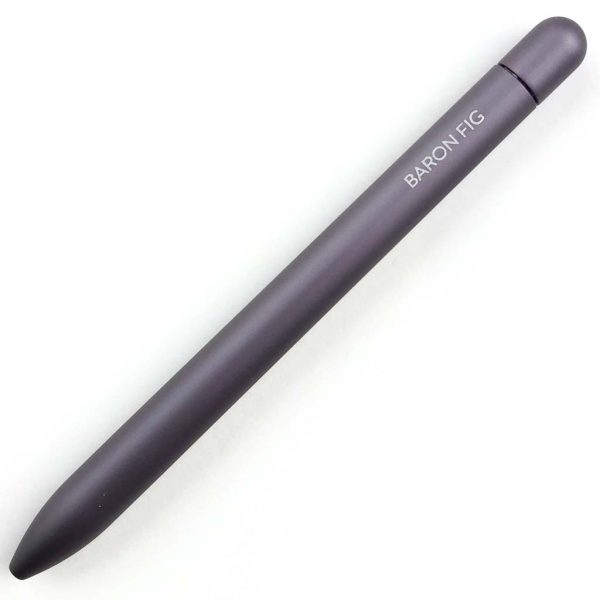
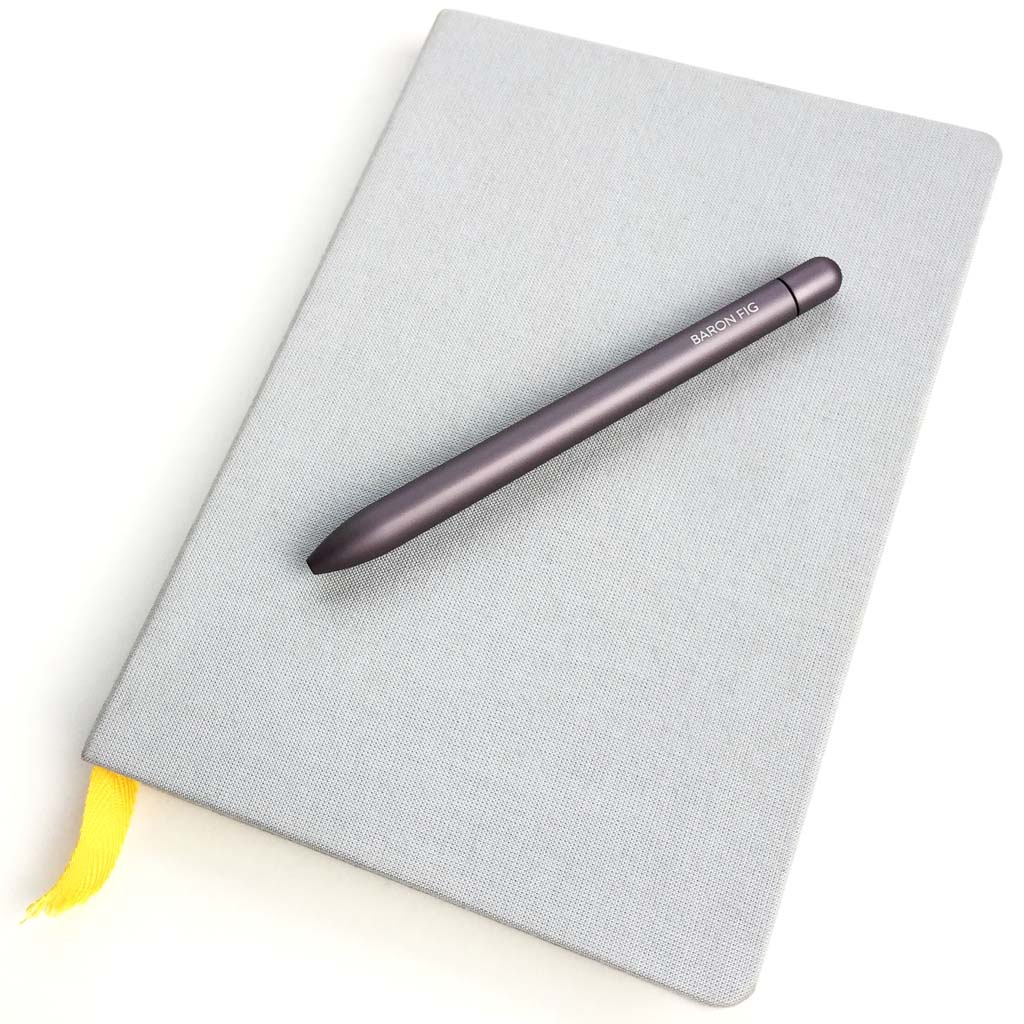
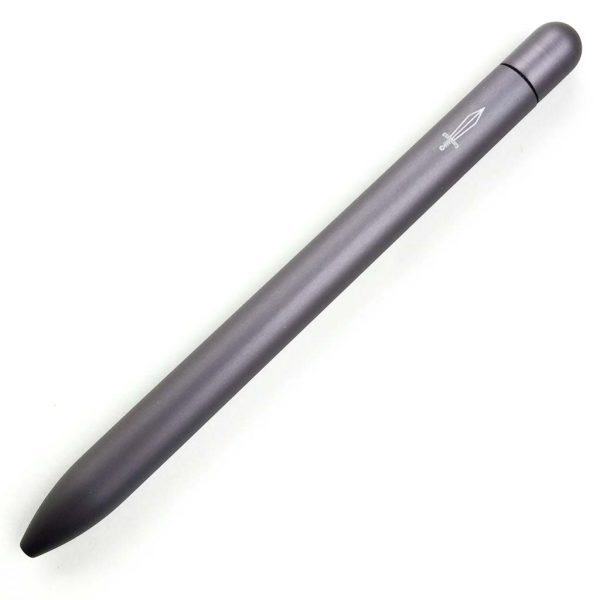 Baron Fig’s products are all designed to be minimalist in style, and the Squire fits into that philosophy perfectly. Only two logos are present on it, “BARON FIG” and a sword emblem.
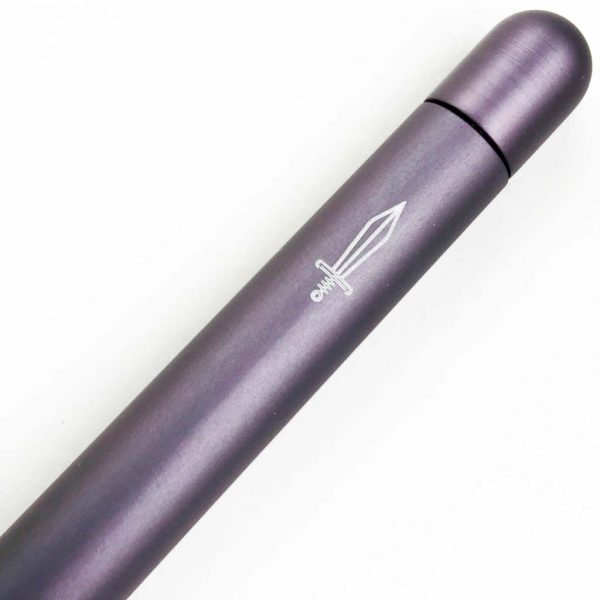 The sword emblem, as seen above, comes from Baron Fig’s tagline for the Squire, which is, “The pen is a mighty sword.”
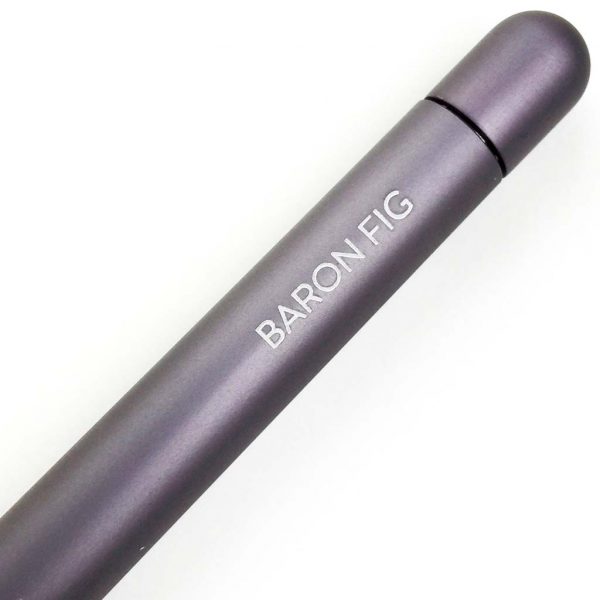 The Baron Fig logo and the sword appear to be laser-etched into the aluminum body and backfilled with paint or some type of pigment. Bottom line is that they look and feel like they will last a long time without wearing off, if ever.
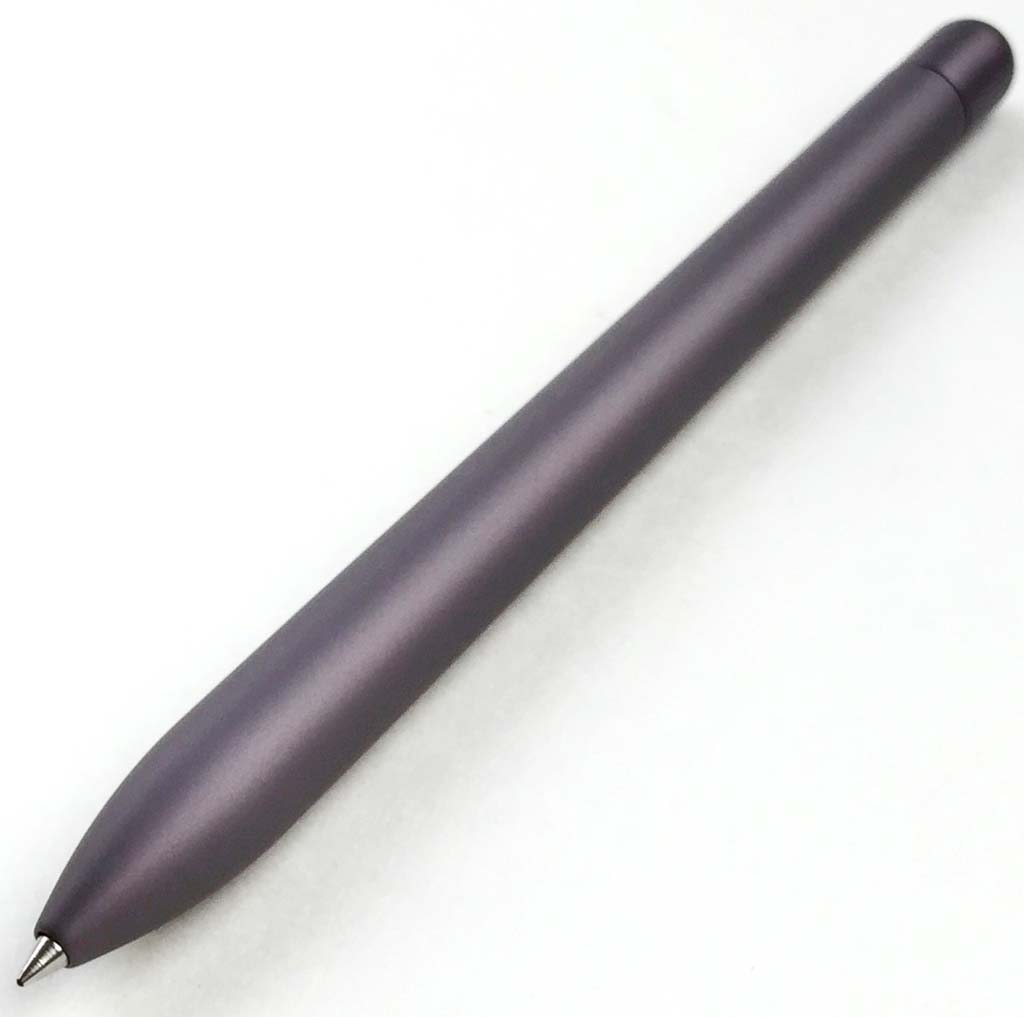
 The shape of the Squire tapers from wider near the writing tip to narrower at the logo end, similar to the sword logo depicted on it.
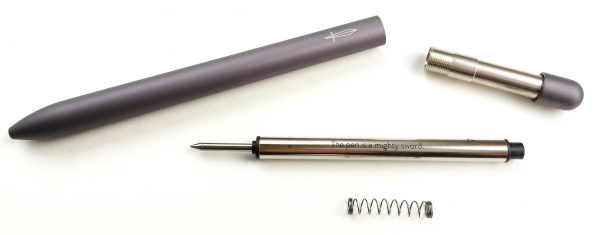 Above is an exploded view of the components of the Squire. It consisted of four parts, the main body, the twist top, the ink cartridge and a spring. Accessing the cartridge is simple: just twist the top far to the left and unscrew it, then remove the cartridge and spring. Reverse the order to replace the cartridge, which are available in black, blue, red and green ink colors. The refills are sold by Baron Fig in a 3-pack for $12. (FYI NOTE: Doing a bit of research, it appears likely that the Squire uses the Schmidt P8126 0.6mm Short Capless Rollerball ink refill.)
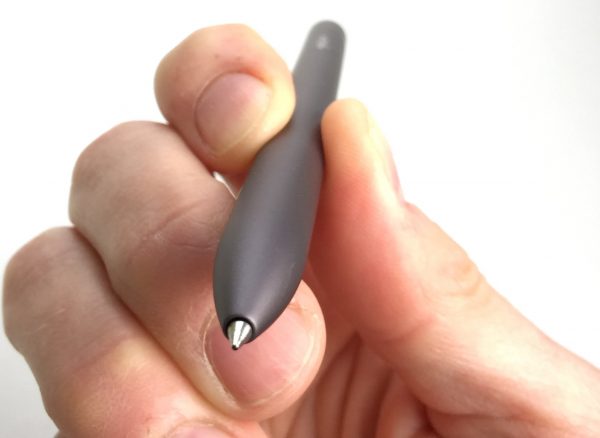 Above, you can see the tapered shape of the Squire, which is very ergonomic. This subtly tapered shape prevents your fingers from sliding down toward the tip while you are writing.
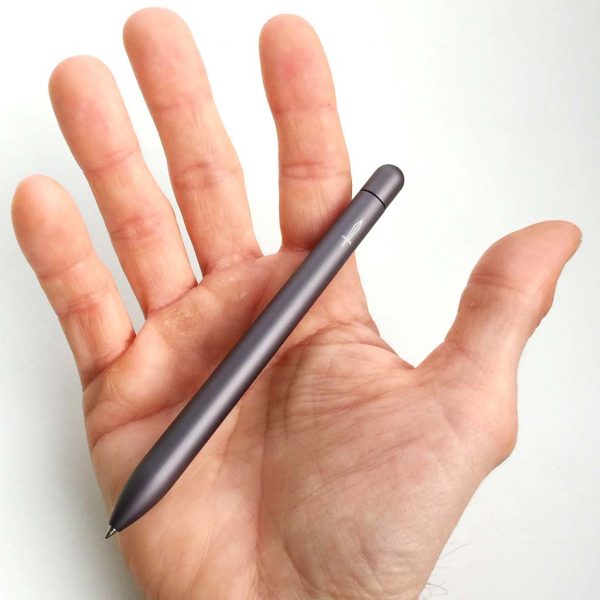 Even the length of the Squire has been carefully considered. It is shorter than the average pen but longer than the average “pocket” pen, so it fits into a perfect spot for either using it at the office all day or tossing it into your pocket as part of your mobile EDC. Plus, since it is twist-to-open and not push-button, you don’t have to worry about it opening accidentally and inking your britches.


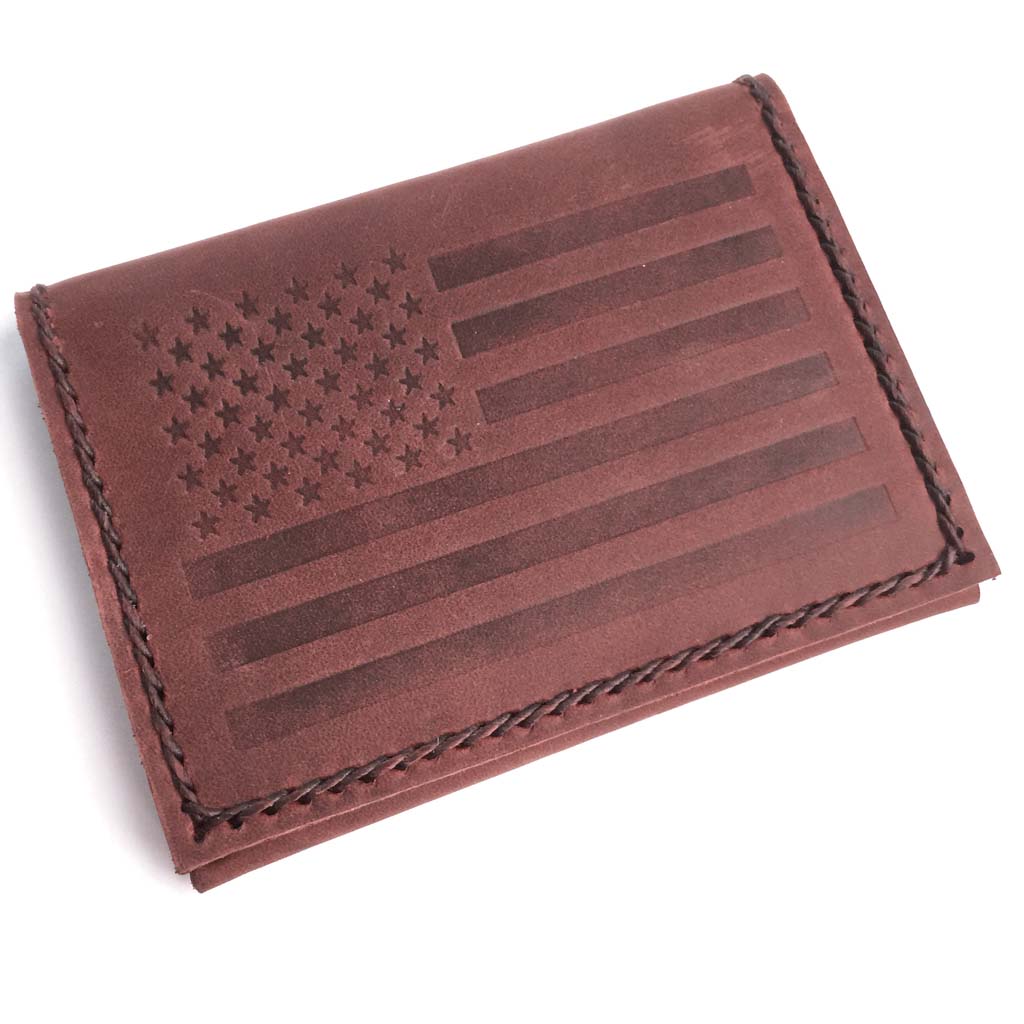
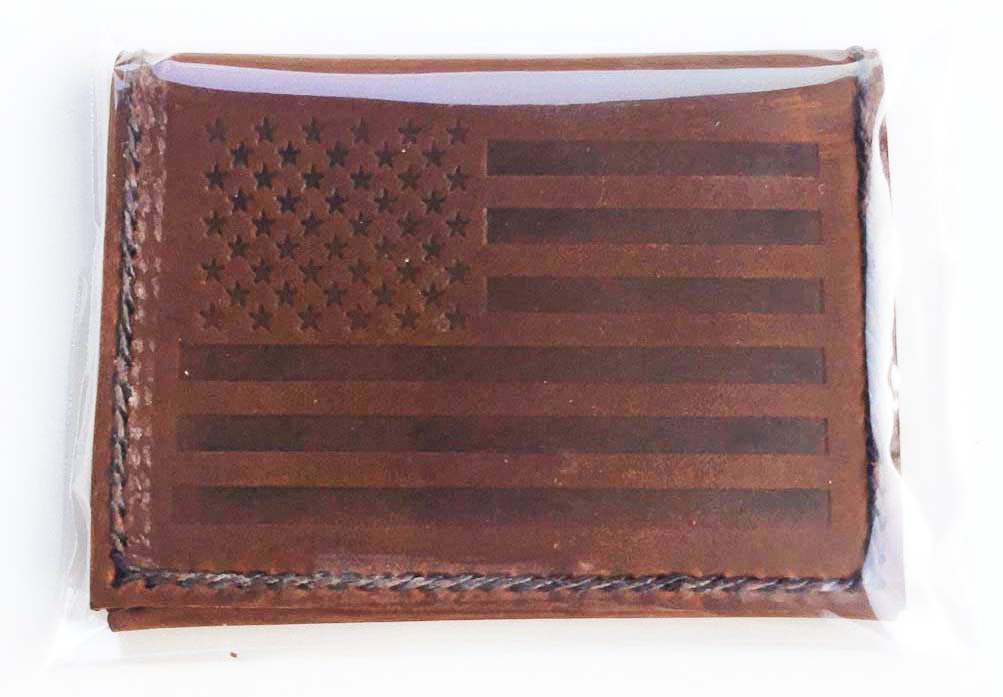
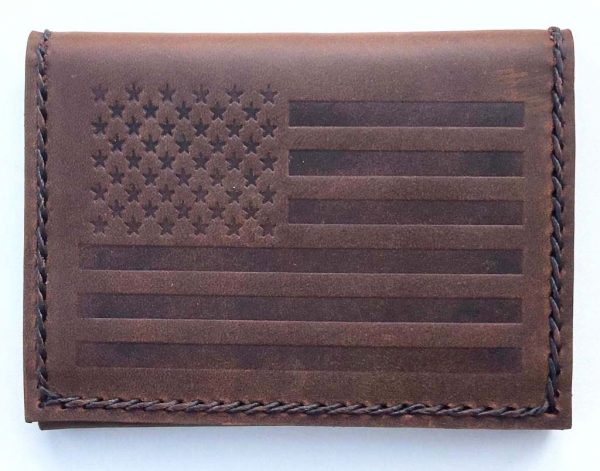 First impressions: High quality, great leather. You know how you can pick up and handle something and you can feel the quality in it? This wallet did that for me.
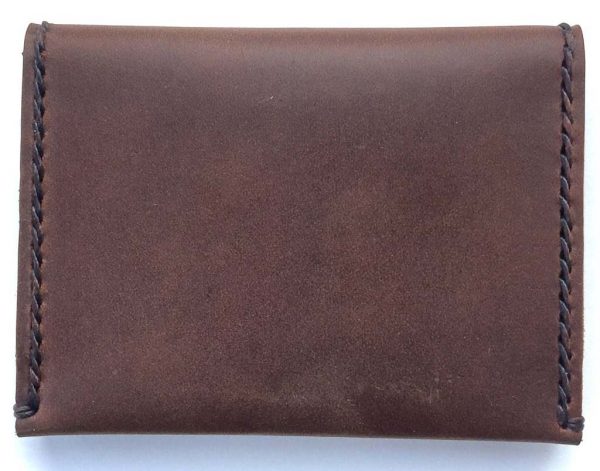 Clean design, both front and back.
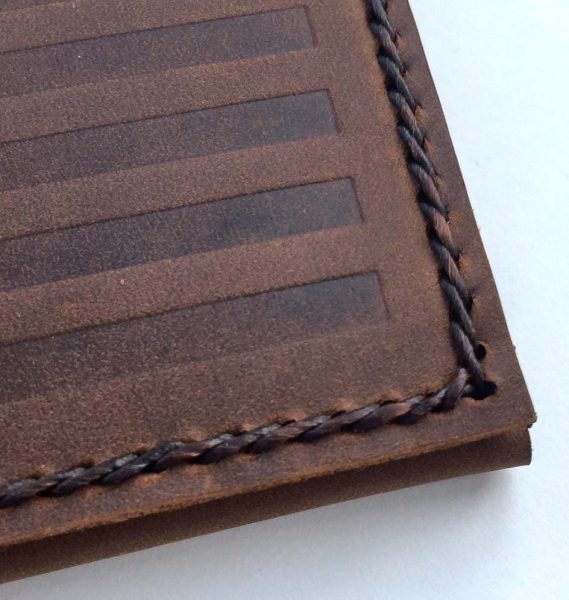 The stitching around the perimeter was flawless and secure.
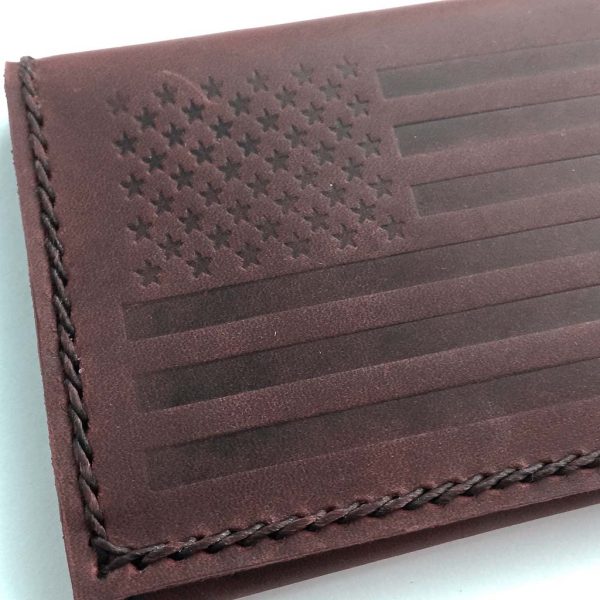 The embossed American Flag looked great. Very understated yet dignified, fitting of Old Glory.
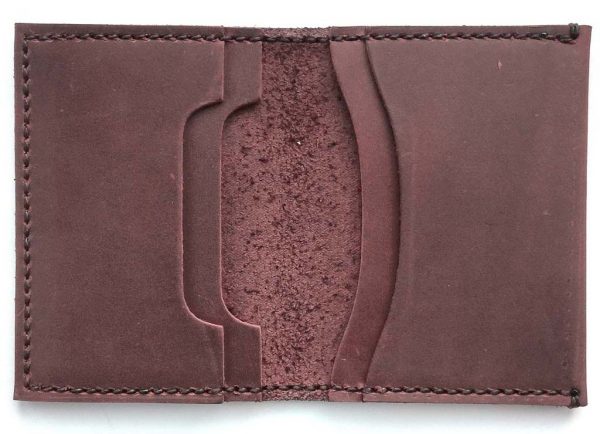 Inside, there are two pockets on either side. I found it interesting that the pockets have slightly different shapes. On the left the pockets have cutout notches to aid in removing cards. On the right, the pockets have more of a curved shape.
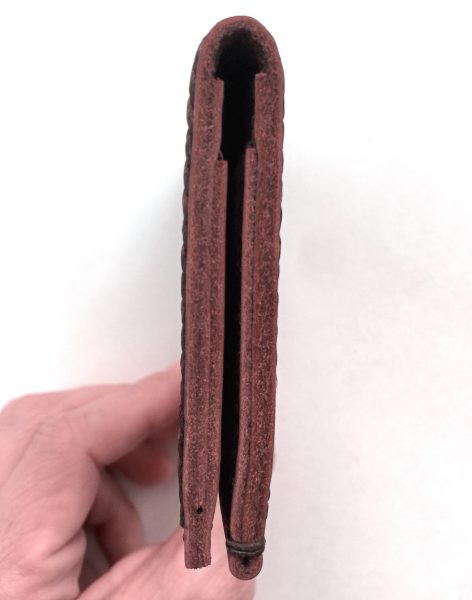 Closed and unloaded, the wallet is fairly thin, though with a total of six layovers of leather stacked up, its a bit too thick for me to call it a “minimal” wallet.
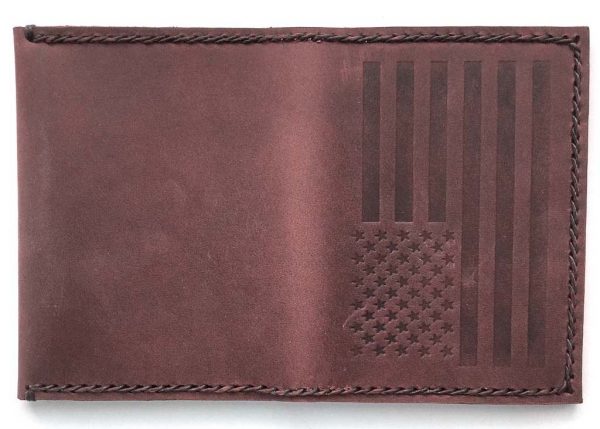 While the thickness of the wallet doesn’t necessarily lend itself to being called minimal, its footprint is fairly small, which lends itself a bit to being used as a front-pocket-carry wallet.
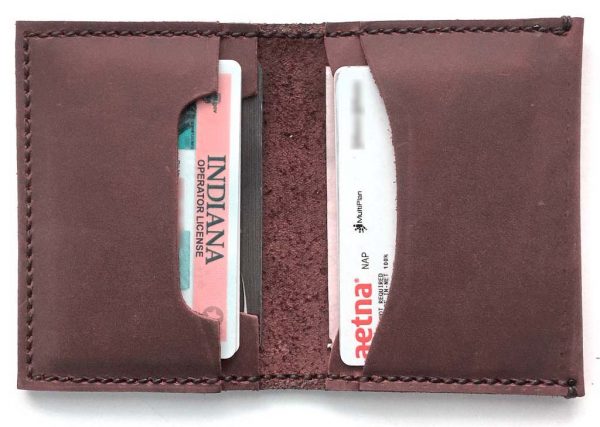 Above, I’ve loaded the wallet with a total of 6 cards and three once-folded bills.
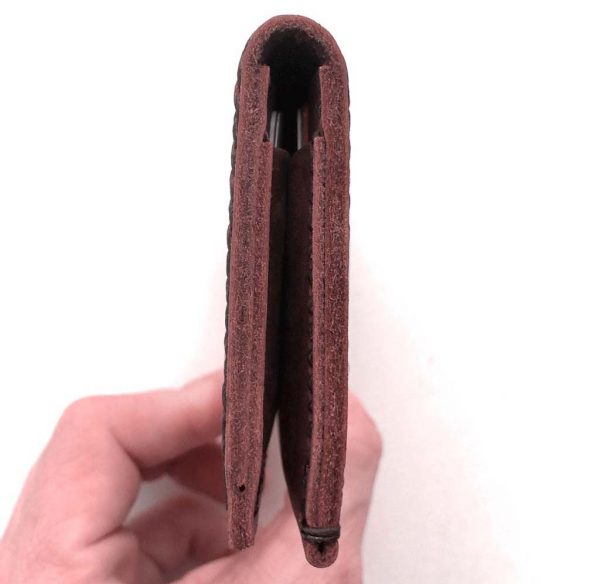 Above, you can see that the loaded wallet does grow a bit in thickness, expanding to almost 2x its unloaded thickness.
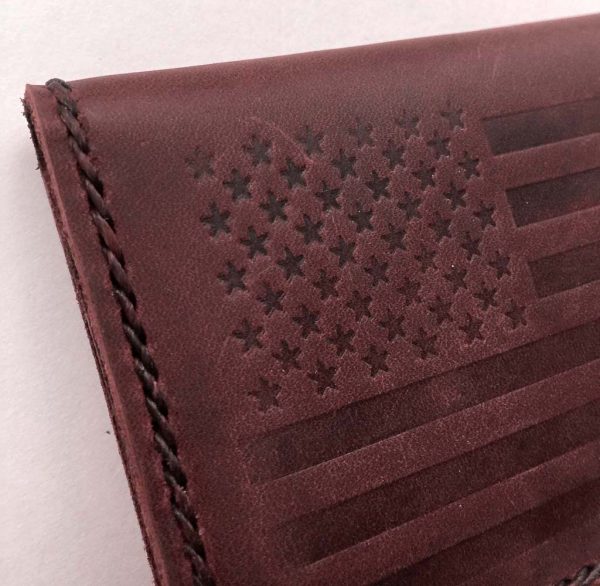 As mentioned above, this Dark Brown stitching looks great all around, and I found myself wondering what the Natural Tan thread would look like on this wallet.
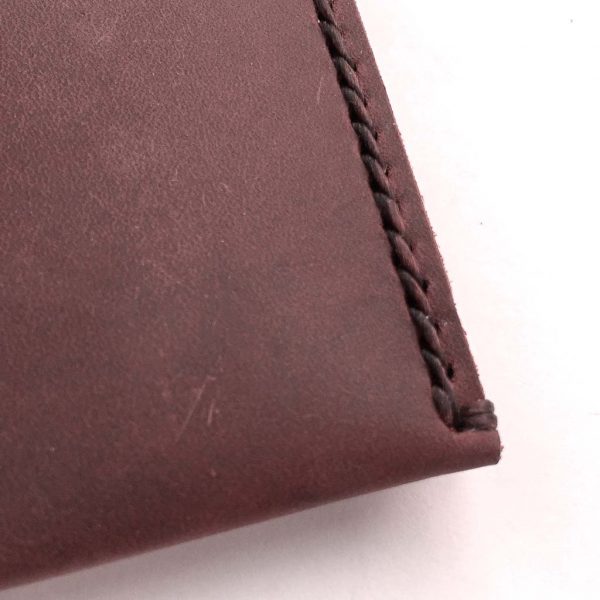 Above, the stitching along the back.
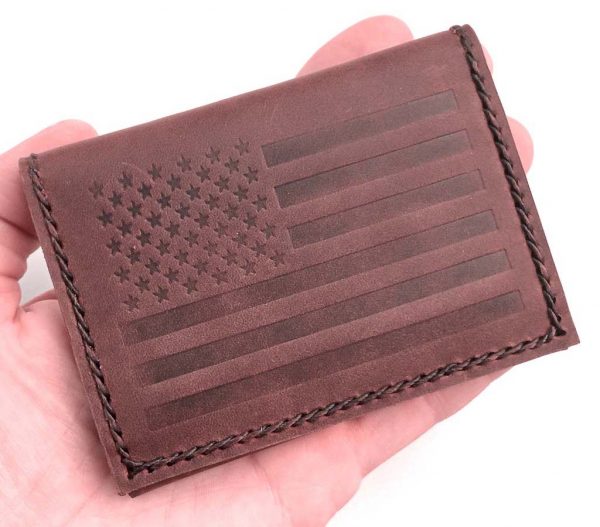 As mentioned above, this wallet has a fairly slim footprint, which helps keep its overall size down.
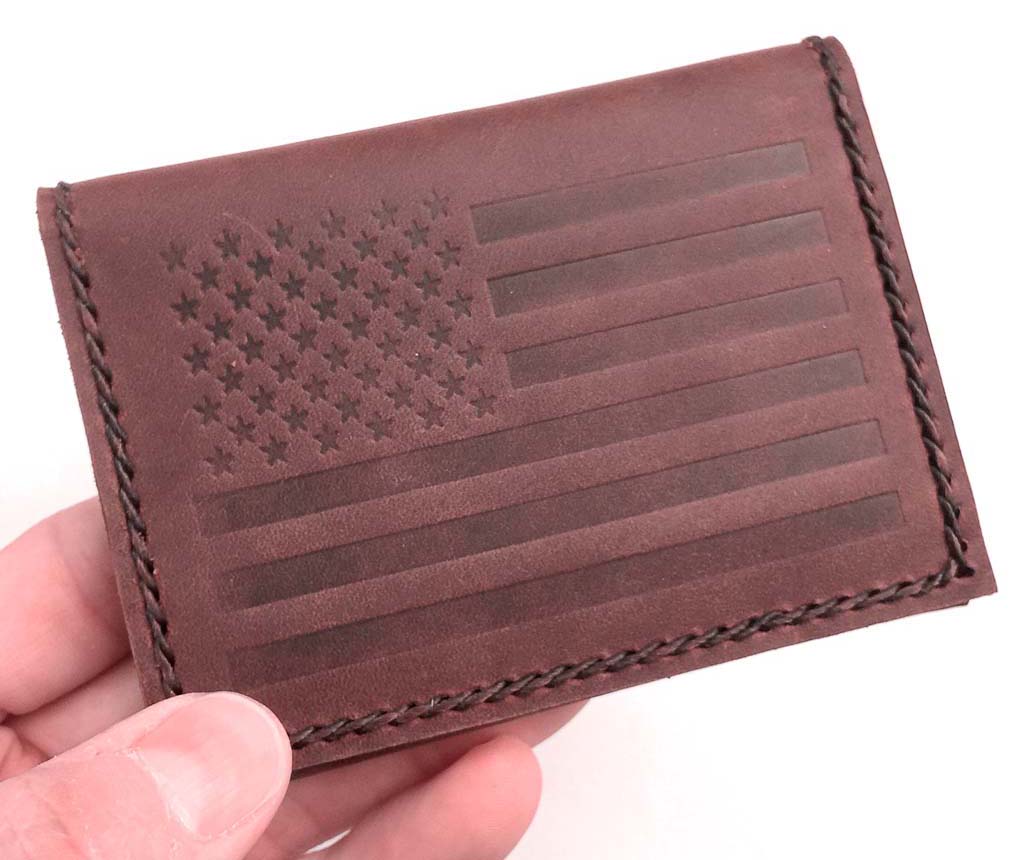
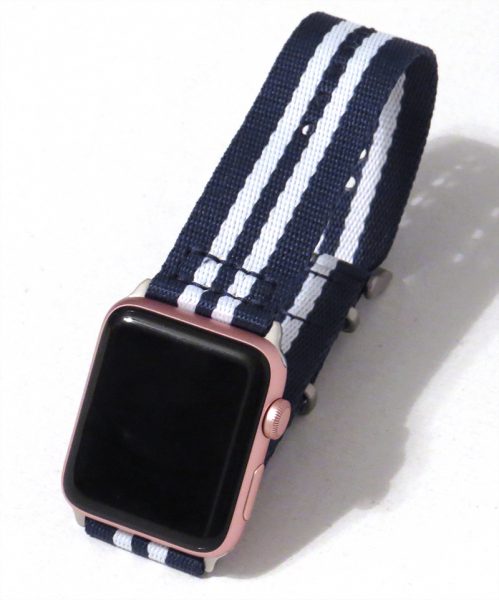
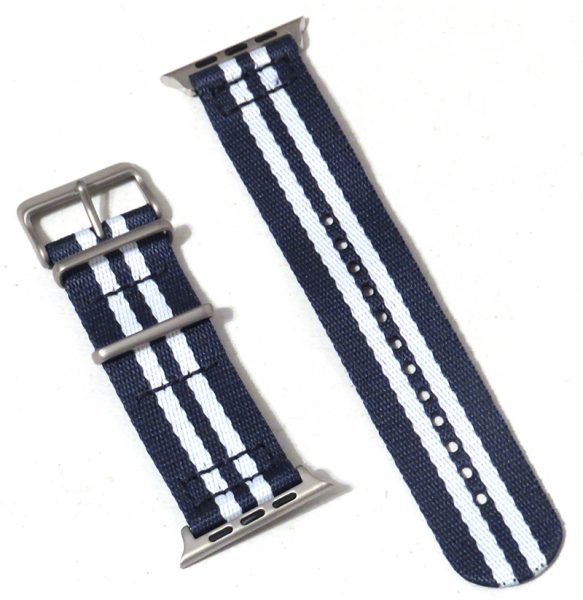
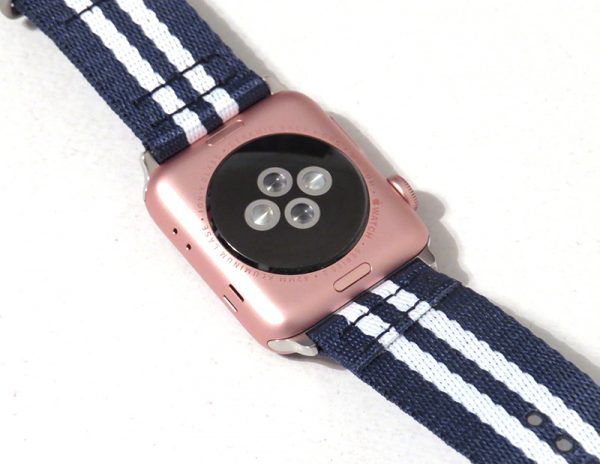
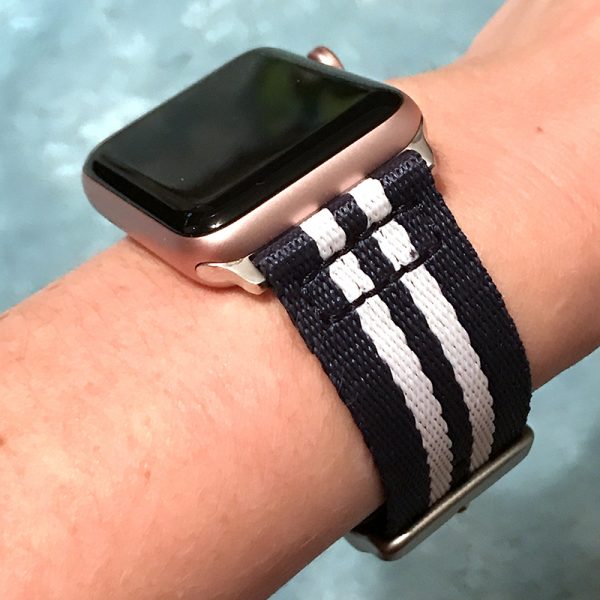 The band itself seems well made and has been really easy to wipe off and clean. Since I still work out, it got sweaty several times, and so far it looks great. The stitching is even and the color is a nice rich blue with the nice contrasting white. I only wish the metal pieces were rose gold, but beggars can’t be choosers.
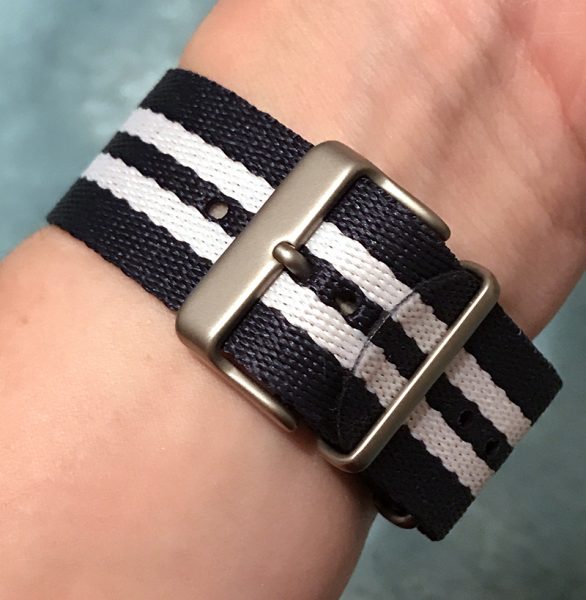 There are plenty of holes to allow the band to fit a wide variety of wrist sizes. Due to my small wrists, I am a few holes from the end, and there is a lot of excess band. I am not sure if it is in the design of the product or if I stumbled upon it, but I just looped the excess back and tucked it under one of the metal pieces. It looks quite normal this way. Putting on and taking off the watch with the band on it was very easy; just as easy as the original sport band that I started with.