Like flipping a switch on a lamp, it’s turned from summer in the 90’s to what already feels like winter in the 30’s here in Southern Indiana. When the leaves start turning and the mornings get crisp, it’s time to grab a jacket. OROS apparel sent me some jackets and outerwear to check out that use the same technology that protects astronauts in space to keep you warm on earth without weighing you down. Let’s take a look.
What is it?
OROS jackets use a thin breathable insulating aerogel material called SolarCore which uses the same technology that NASA uses to keep astronauts warm and toasty in outer space.
OROS sent me two jackets and a pullover shirt let’s take a closer look at each one.
OROS Women’s Essential Quarter Zip

When OROS sent me the samples in September, it was still in the 80’s – 90’s here in Columbus, Indiana. It took a few weeks for the weather to cooperate enough so that I actually wanted to try on the gear for more than a few minutes at a time.
The lightest item that they sent me was the Women’s Essential Quarter Zip which is more like a shirt than a jacket and is perfect for 60-degree weather, drafty office buildings, or even on flights. That is is how I tested the Essential Quarter Zip a week ago. It was the only long-sleeved clothing that I took with me on a vacation to Sanibel Island Florida.

I always get a little chilled waiting at the airport gate and also on the plane, so this shirt was a perfect remedy for that. You can see that Jeanne is wearing a bulkier hoodie and I am wearing the Essential Quarter Zip which is much lighter but still kept me warm.
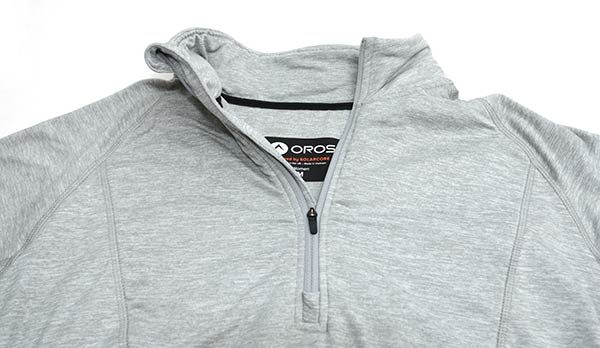
Just looking at the shirt, you wouldn’t notice that there’s anything special about it. It looks like an ordinary gray knit shirt. But it has a special layer of the SolarCore material between the front and the back panels of the shirt, and even around the neck. Note that the sleeves and side rib areas of the shirt do not have SolarCore.
The shirt feels heavenly to wear. The sleeves are silky smooth and feel like they are lined with microfleece inside even though they really aren’t.
The Essential is made of 88% polyester and 12% spandex. It only comes in the gray color that you see here in sizes XS to 2XL. Their sizing might run slightly large. I was sent a Medium and I think I would have been better served by a Small.
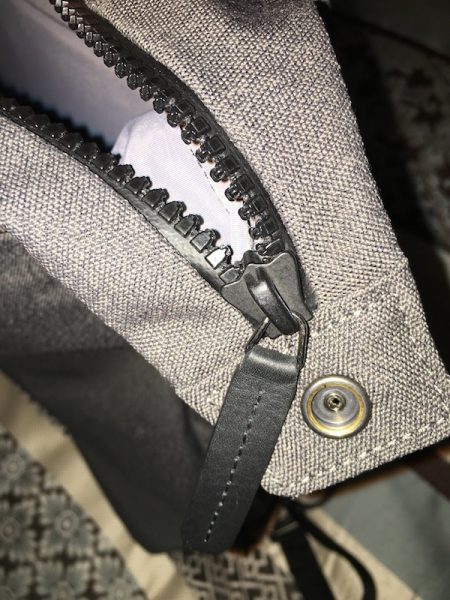
The shirt has a quarter zip nylon locking zipper at the neck and the collar has a flap that covers the top of the zipper to prevent it from rubbing your neck or chin if you like to wear it completely zipped up.
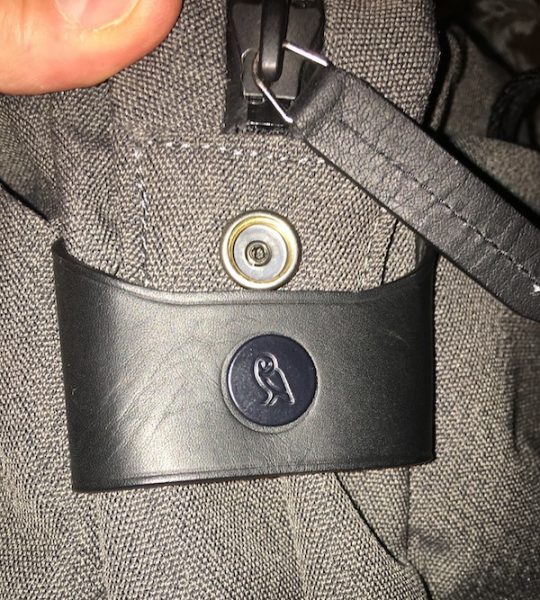
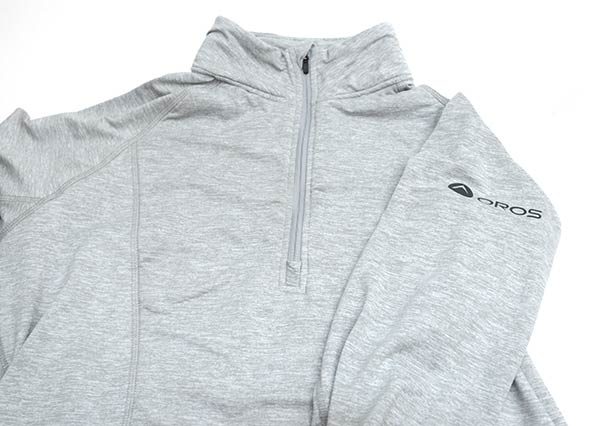
In the image above you can see the OROS logo on the left shoulder. There’s also a second logo on the back right hip.
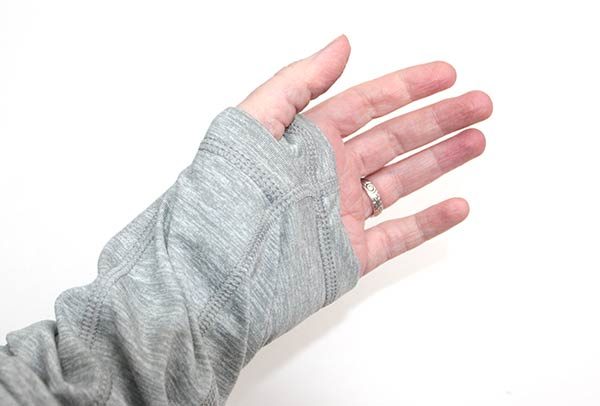
Another feature of the Essential Quarter Zip is the thumb hole in each sleeve cuff that makes it easy to keep the sleeves from sliding up your arms if you put another layer over the Essential.
I wondered how the SolarCore material would stand up to being washed, so I ran the shirt through the washer and dryer. I’m happy to report that it came out looking and feeling no different than when I first unboxed it.
The OROS Essential Quarter Zip saved me when we came home from Florida and got off the plane in Indianapolis to 35 degrees and rain. I hadn’t been smart enough to bring a coat with me would have frozen if it hadn’t been for this shirt.
Price: $120.00
OROS Women’s Discovery Fleece

The next heaviest jacket that OROS sent me is their Discovery Fleece which is available sizes XS up to 2XL and in Charcoal, Green, and Reflecting Pond colors. No, I didn’t name that color which is blue  I was sent the Charcoal version.
The Discovery Fleece is made of 100% polyester with a 100% nylon lining.
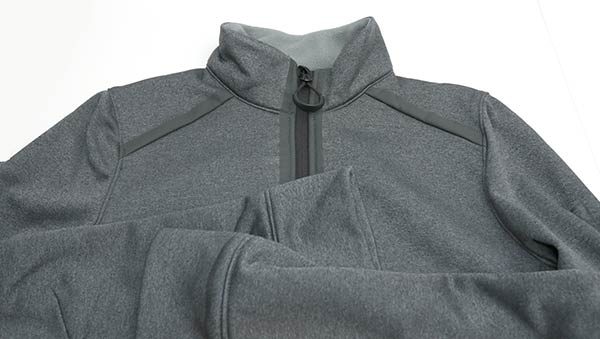
The jacket has a stand-up collar and a nylon zipper with a large easy to grab zipper pull.
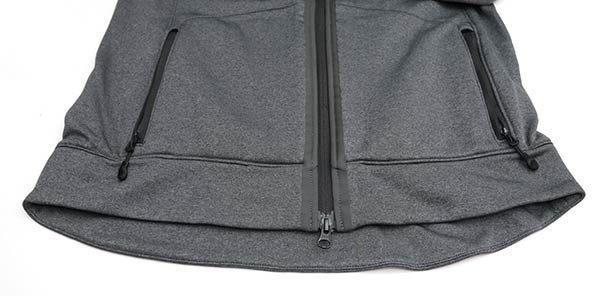
There are two pockets on either hip that have small zipper pulls.
The image above shows one of my favorite features of this jacket. Can you guess what it is? It’s the longer waistband in the back. It really helps keep your lower back warmer.

Like the Essential Quarter Zip, the Discovery Fleece also has SolarCore on the front and back. The sleeves and side rib area of the jacket do not have SolarCore which keeps the jacket lightweight and comfortable.
I really like the OROS Discovery Fleece multi-season jacket. It has a nice understated look, is very comfortable, and will keep me warm in the spring and fall temps.
Price: $150.00
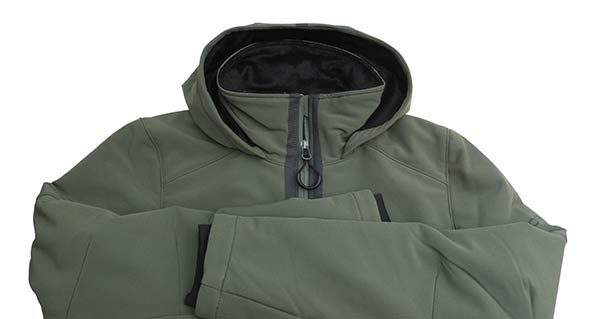
OROS Women’s Discovery Jacket

The Discovery Jacket is the heaviest jacket of the trio. It is designed to be versatile and to withstand various cold, wind, rain weather conditions. The jacket is available in black, green (what you see here), and gray. It’s made of 90% polyester/10% spandex and has a 100% nylon lining.

The exterior of the jacket has a water repellant coating and there’s a hood to keep your non-water repellant coated head dry. Note that the hood is not removable and does not have drawstrings.
The jacket has a tall collar that’s lined in a silky short pile “fur”.
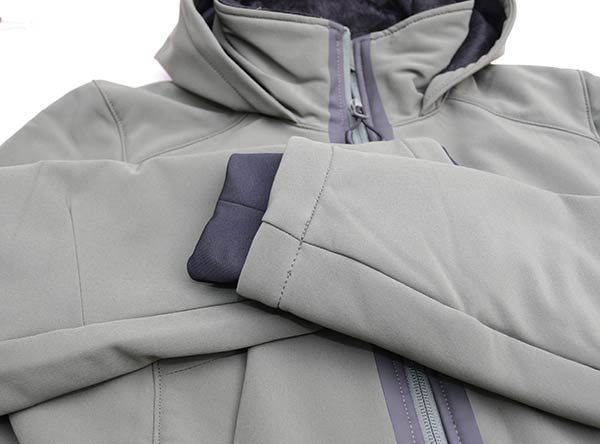
The sleeves have an extended knit cuff that keeps the wind from blowing up your arms. This jacket also has a longer hem at the bottom like the Discovery Fleece jacket.
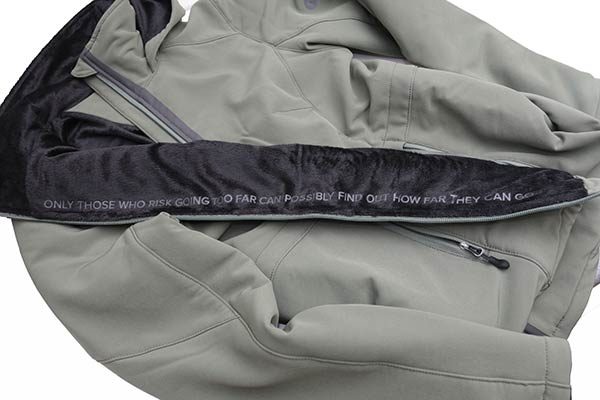
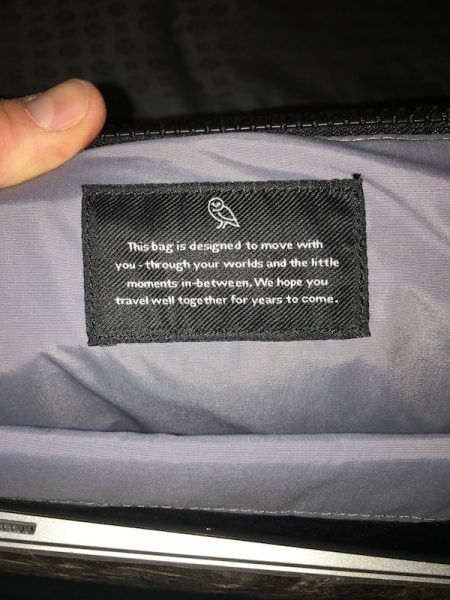
OROS put an inspirational quote inside the lining of the jacket that says:
Only those who risk going too far can possibly find out how far they can go.
Although I didn’t show an image, this same quote is printed inside the Discovery Fleece jacket too.
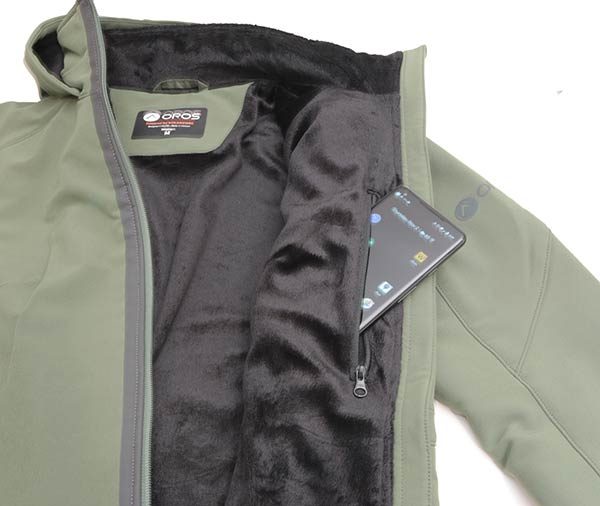
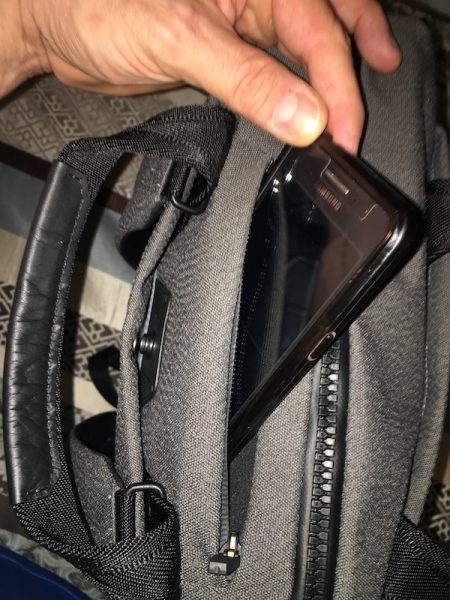
In addition to the zippered pocket at each hip, there’s a zippered chest pocket inside the jacket that is large enough to hold a phone, sunglasses, wallet, etc.
The OROS Discovery Jacket not only looks nice, but it’s comfortable to wear, moves well, and really keeps you warm with the SolarCore thermal material.
Price: $215.00
Final thoughts
I’d never heard of the OROS brand before being offered the chance to review the Essential Quarter Zip pullover, Discovery Fleece, and Discovery Jackets. Now I can say that they are quality made outerwear that will make you look and feel good while wearing them.
I’ll update this review in a month or two after we’ve had temps in the 20’s and lower.
Source: The samples for this review was provided by OROS. Please visit their site for more info.
Product Information
| Price: | See above |
| Manufacturer: | OROS |
| Pros: |
|
| Cons: |
|
Filed in categories: Reviews
Tagged: Clothing, Outdoor Gear
OROS Discovery jackets review originally appeared on The Gadgeteer on November 3, 2017 at 12:00 pm.
Note: If you are subscribed to this feed through FeedBurner, please switch to our native feed URL http://the-gadgeteer.com/feed/ in order to ensure continuous delivery.


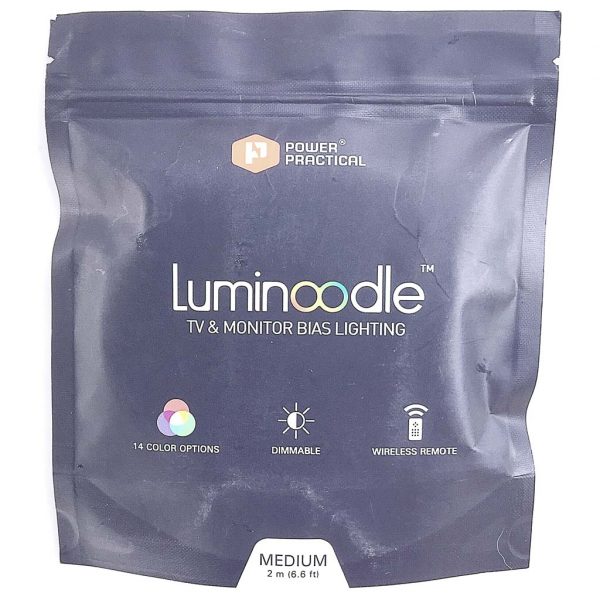 The Luminoodle arrived in a slim plastic zip-closure pouch with a tear-off opening.
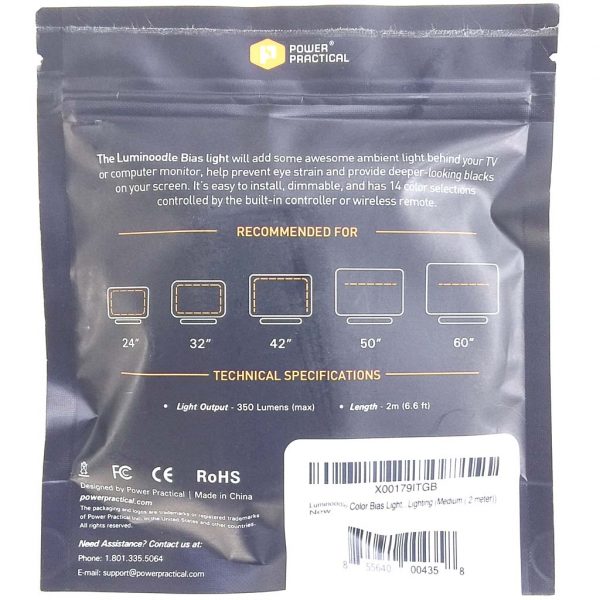 The back of the pouch depicted a brief explanation of installation configurations for the product inside.
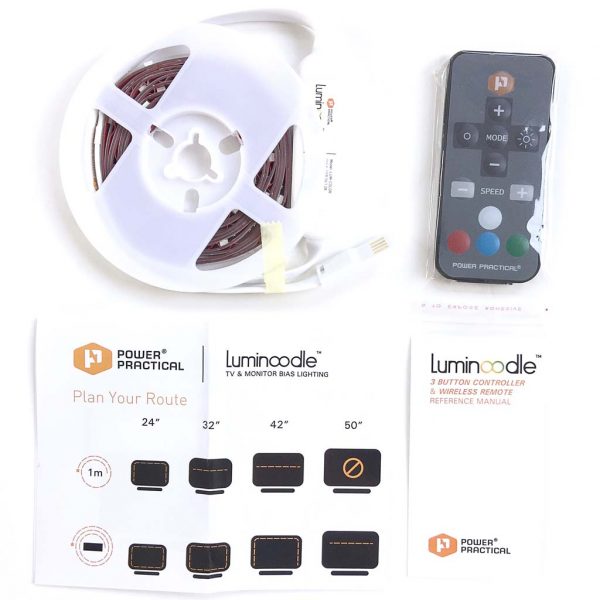
 The Luminoodle is powered by plugging it into a standard USB port. Bonus: this is a reversible USB plug!
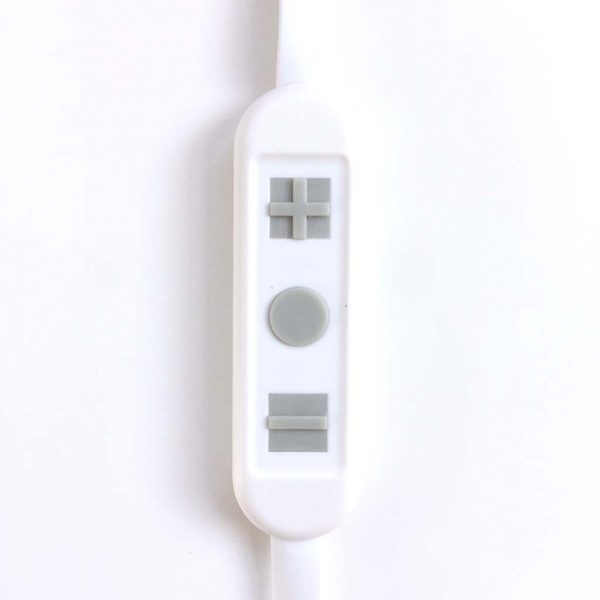 The Luminoodle can be controlled with a simple in-line remote that includes three buttons, as shown above.
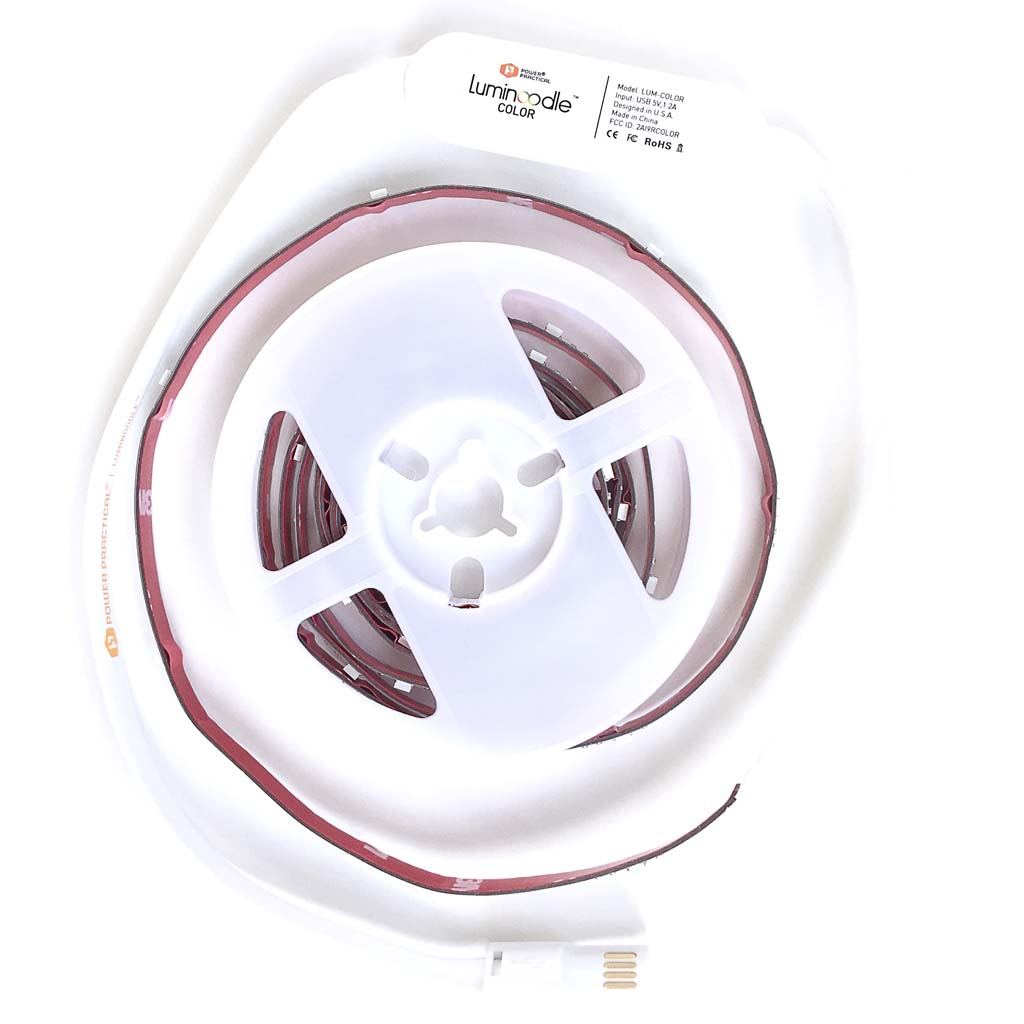
 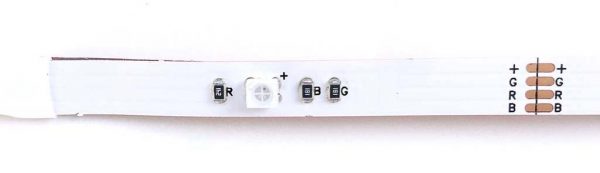 Above is a closeup of a segment of the Luminoodle’s ribbon cable. The Luminoodle’s color illumination is driven by sets of RGB (Red Green Blue) LEDs. NOTE: If for some reason you need to trim off the excess length of cable, the Luminoodle can be cut at any of the points where the “+GRB” copper connectors are located, as seen on the right side of the image above.
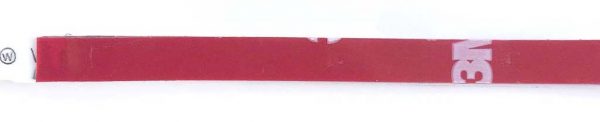 As shown above, the Luminoodle utilizes some high-strength 3D tape to attach to the back of a TV, computer monitor or any other surface.
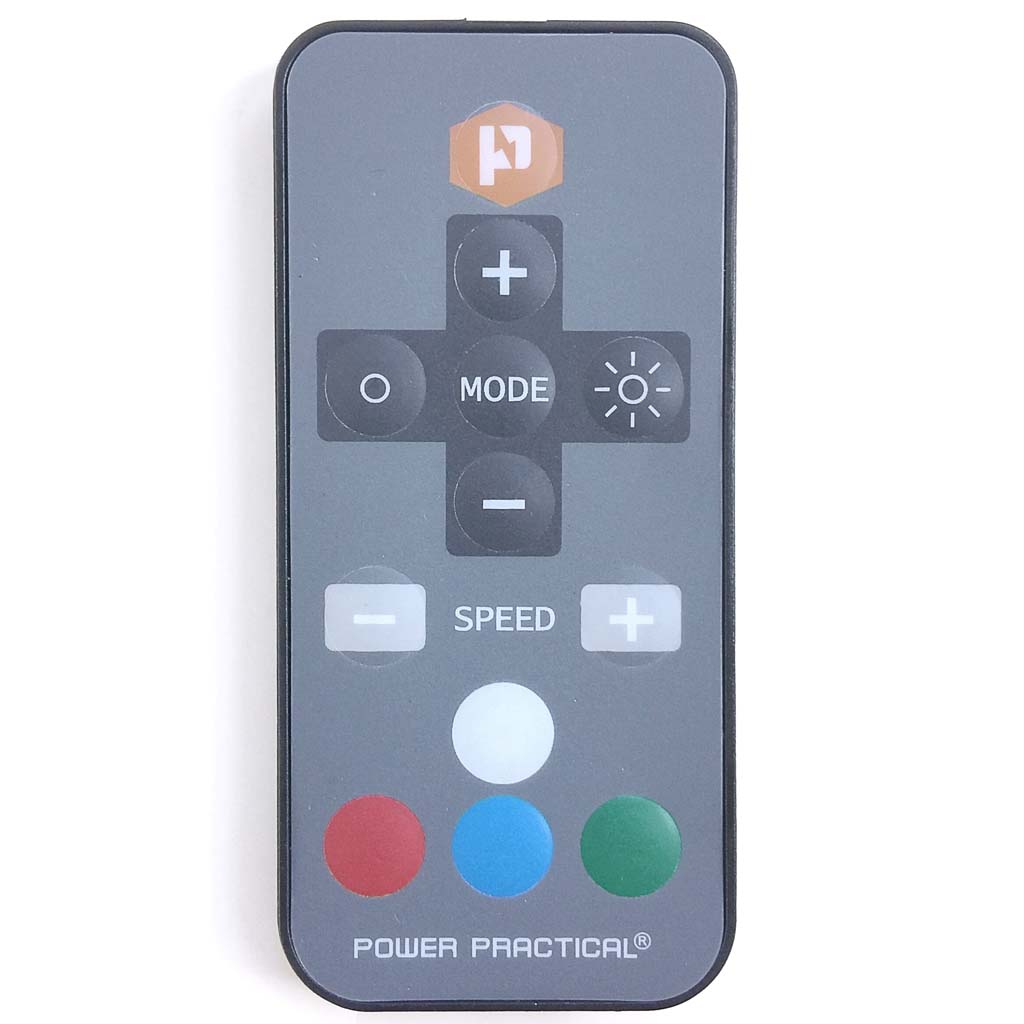
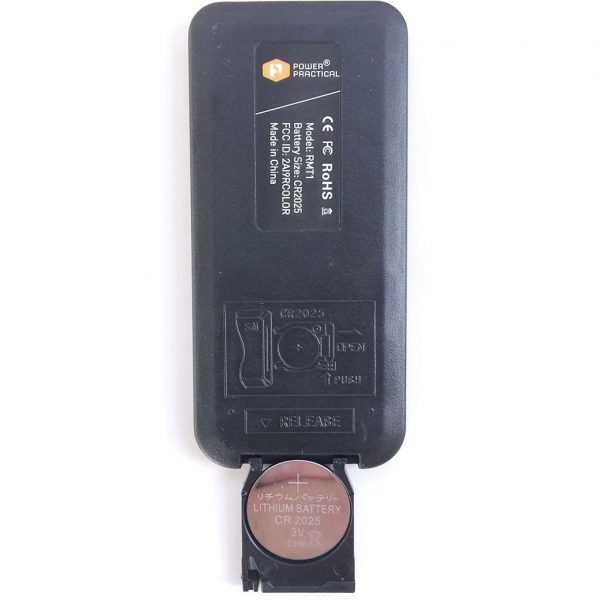 The wireless remote is powered by a single CR 2025 3V lithium battery. The battery is simple to change; it fits into a small tray that slides into the bottom of the remote.
 The wireless remote is quite small and thin and very lightweight.
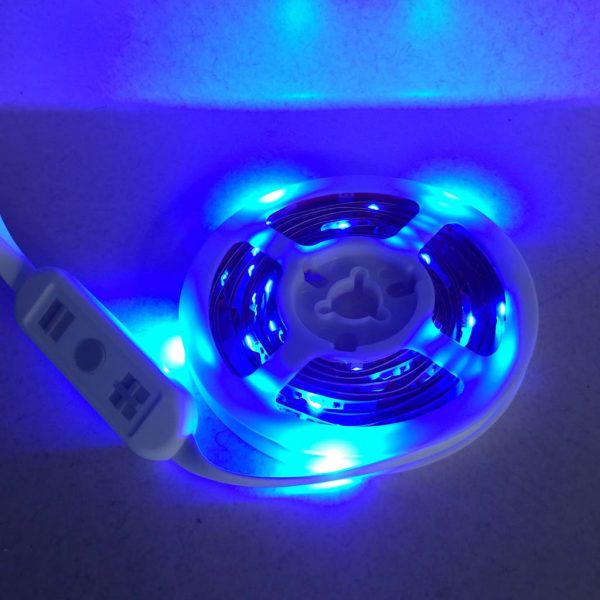
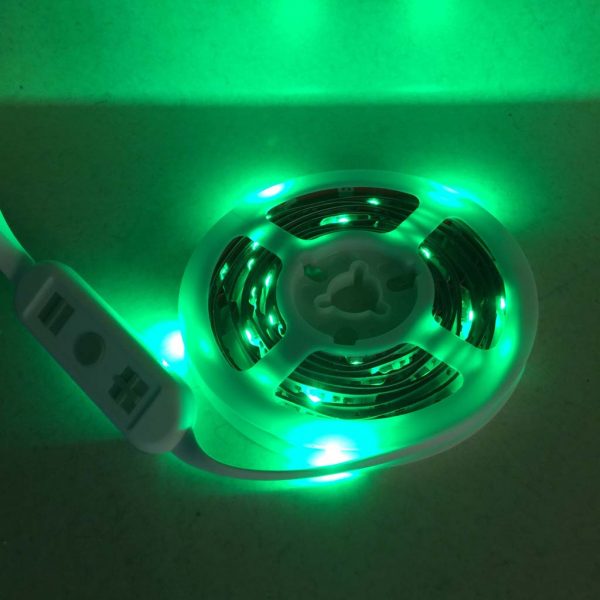
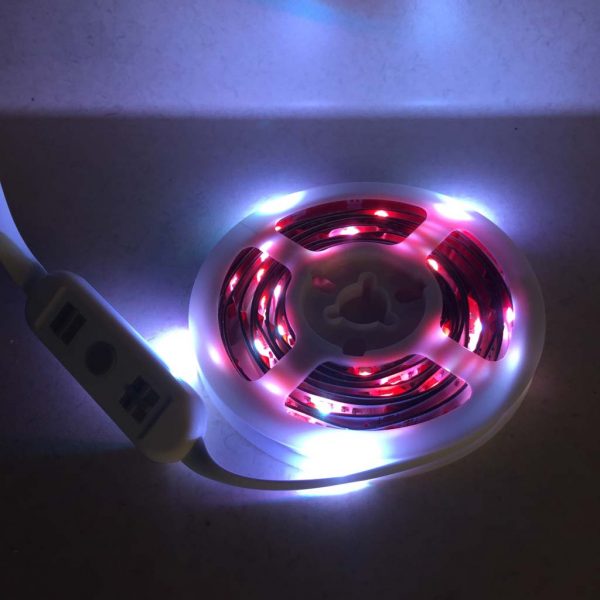 Almost immediately upon opening the pouch, I just had to power up the Luminoodle. Without even removing it from the spool, I plugged the Luminoodle into an iPad power adapter and cycled through its four primary colors: white (above) and red, blue and green (all below). I literally giggled to myself—it was already pretty fun, and I hadn’t even installed it yet.
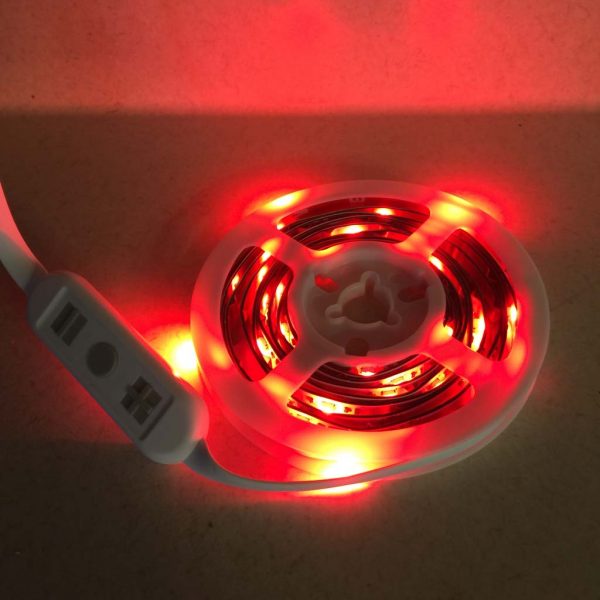
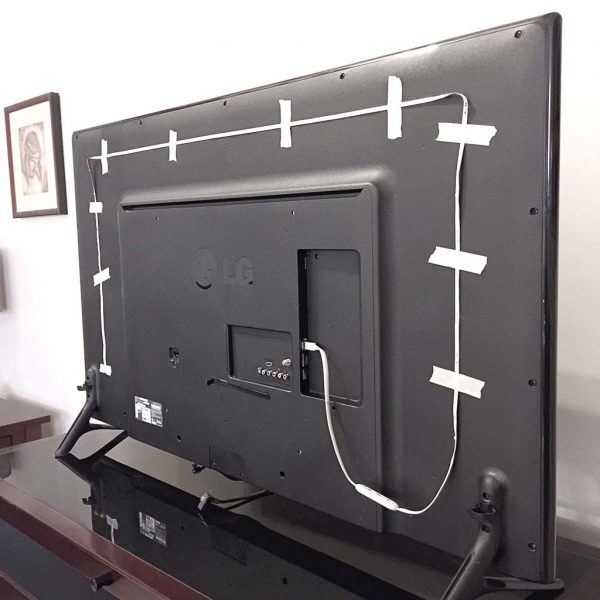 I began the installation process by turning my TV around so that I could access its rear. My TV measures 55 inches diagonally, and the Luminoodle I was sent was 2 meters in length, so I figured it would wrap around most of the back of my TV, but probably not in a full loop. Next, I carefully dusted the back of the TV to help the adhesive backing adhere better. Then I used some masking tape to mock up where I would ultimately place the Luminoodle (see above image). After a few adjustments to make it as symmetrical as I could, I was satisfied.
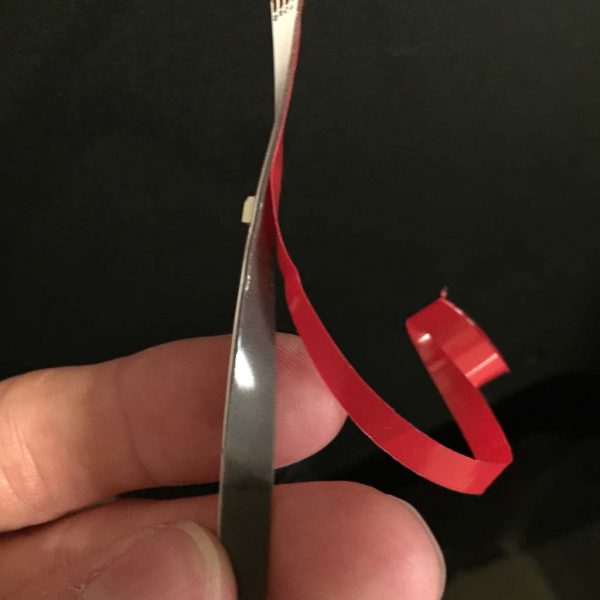 Once I was happy with the Luminoodle’s placement, I began peeling the red backing from the 3M tape, exposing its adhesive side, as shown above. I quickly realized that this particular tape was actually a double-stick type and very grippy, which I saw as a good thing—I wouldn’t have to worry about the Luminoodle spontaneously falling off of my TV. Also, it took me a few minutes to be able to peel the backing off without pulling the tape itself off of the ribbon cable, but once I got it started, it was fine.
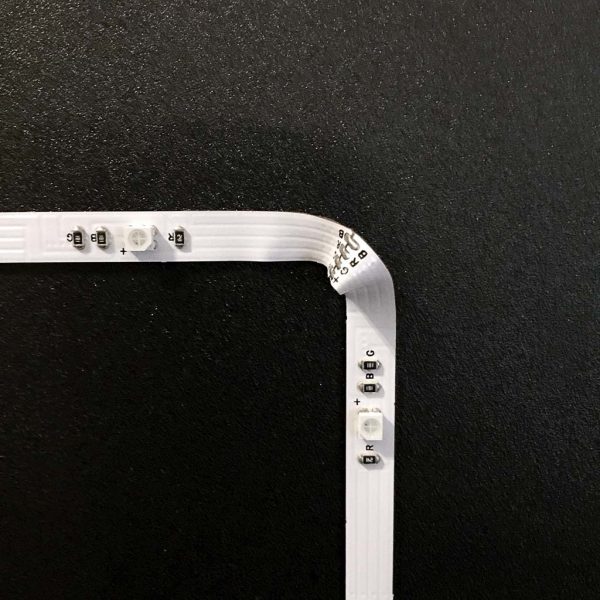 The only challenging part about attaching the Luminoodle was the corners. Because the Luminoodle is basically a flat ribbon cable, it was impossible to get it to form a curve shape. Therefore, I had to improvise by putting a small fold or crimp in each of the two corners, as seen in the images above and below. NOTE: In re-reviewing the instructions, maybe I didn’t do this correctly, but it seemed to work for me.
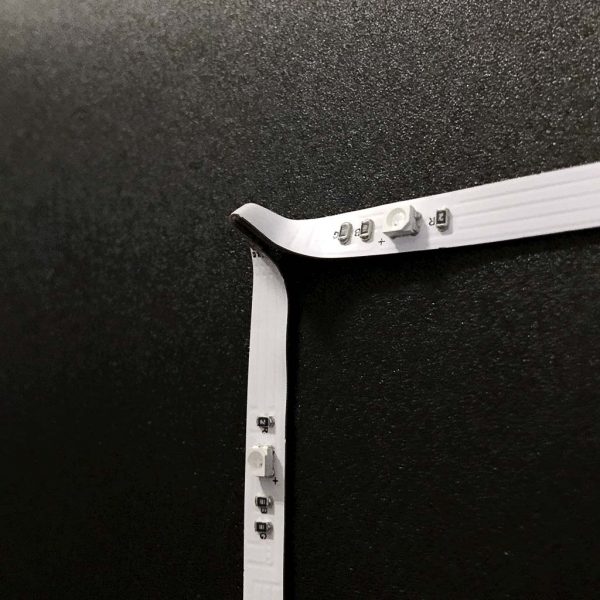 I am still a bit concerned that these corner crimps may result in a short-circuit over time, but considering that the Luminoodle on either side of the crimps is stationary and well-fixed as a result of the 3M adhesive tape, I don’t expect this to become an issue.
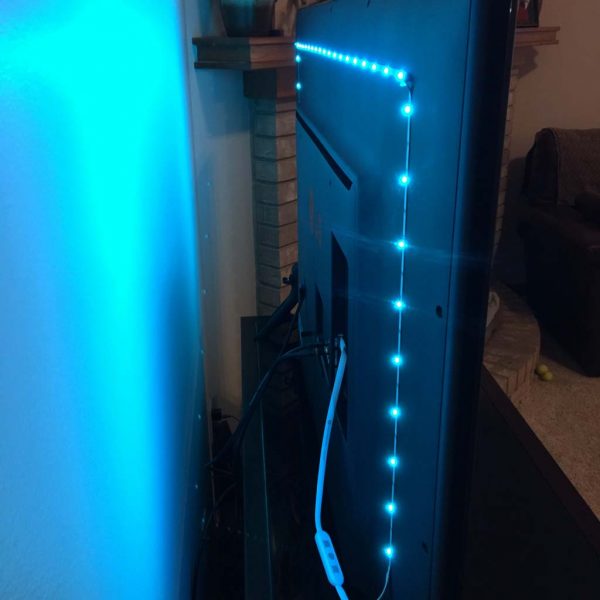
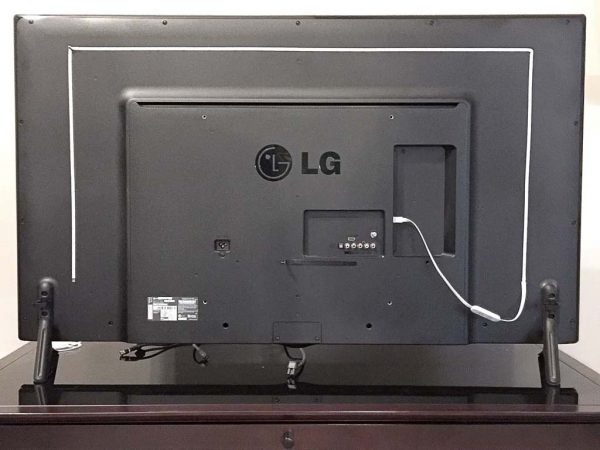 Above is a photo of the fully-installed Luminoodle. This 2-meter long Luminoodle model ended up covering around 2/3 of the perimeter of the rear of my 55-inch diagonal TV, which I was happy with. For TVs of different sizes, Luminoodle offers different lengths.
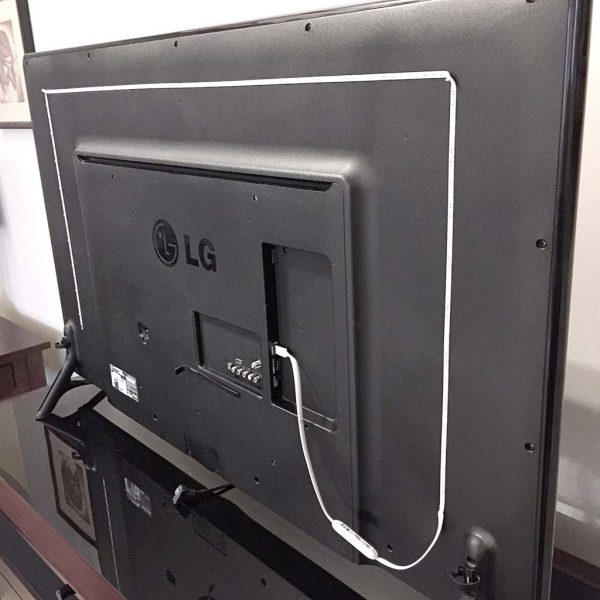 Above, another view of the installed Luminoodle. I should note that taking the time to mock up the location with the masking tape actually made the final installation go very quickly.
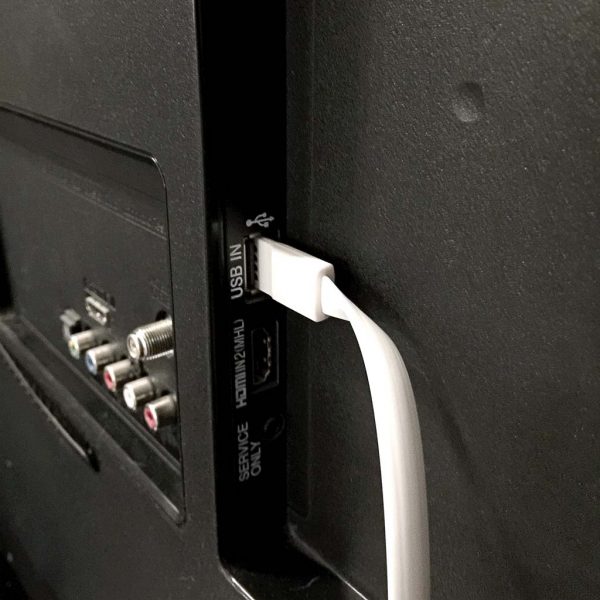 Above, a photo of the Luminoodle’s reversible USB power connector plugged into the USB port on the back of my TV. Because it is USB-powered, the Luminoodle can be plugged into not only a TV, as I’ve done here, but a USB port on a monitor, computer or even a wall USB adapter as I showed up above. However, plugging the Luminoodle into a TV, monitor or computer allows it to power on and off whenever you use these devices.
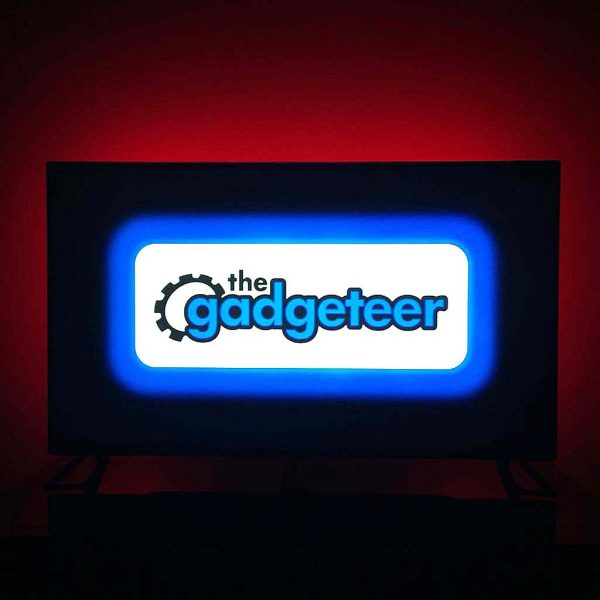
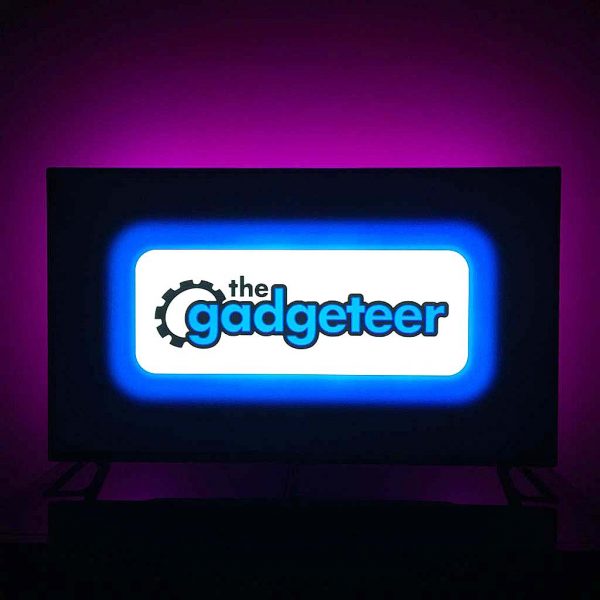
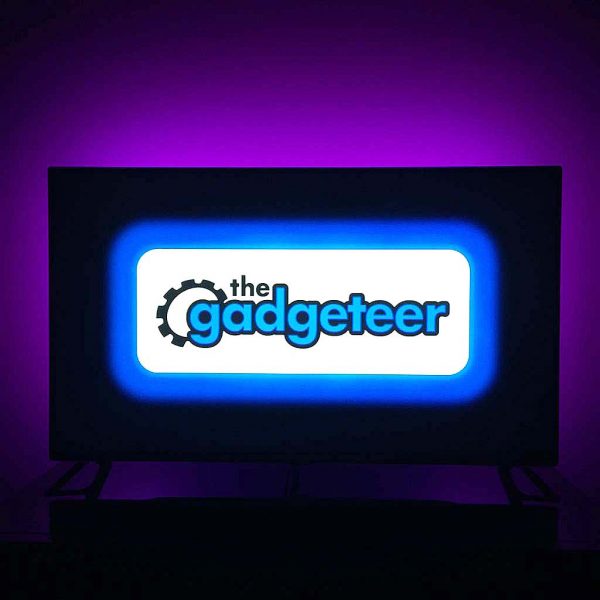
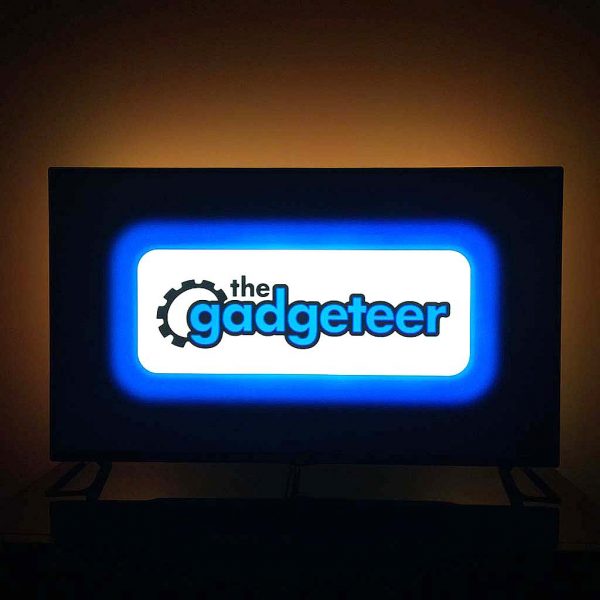
 Above and in the next several pics are a teaser to give an idea of just how much illumination the Luminoodle can output.
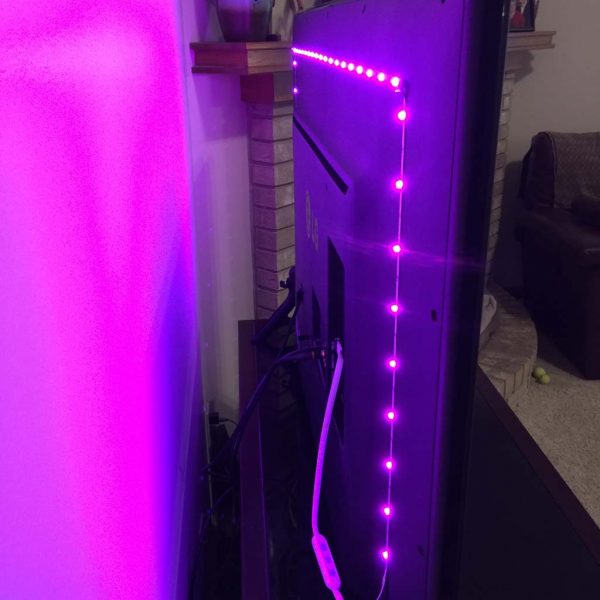
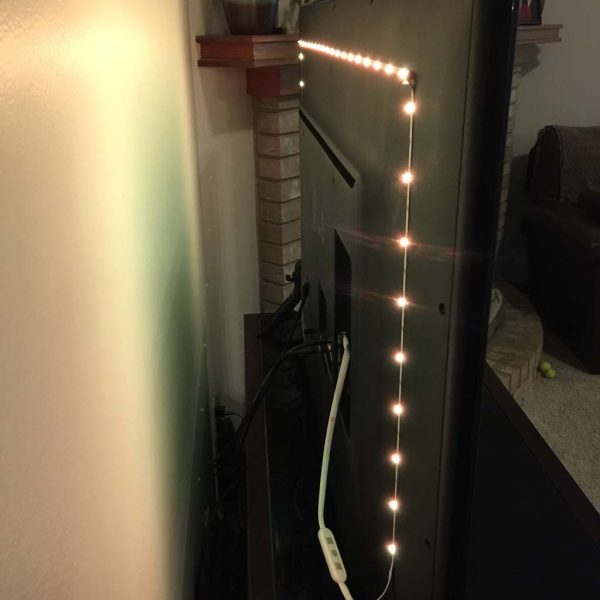
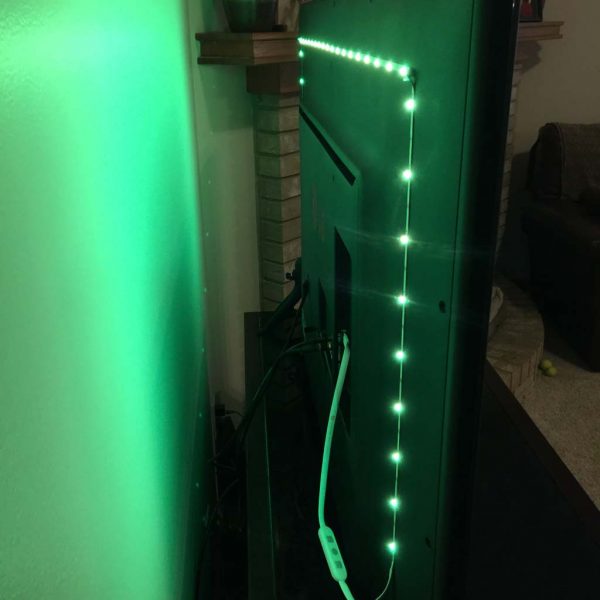
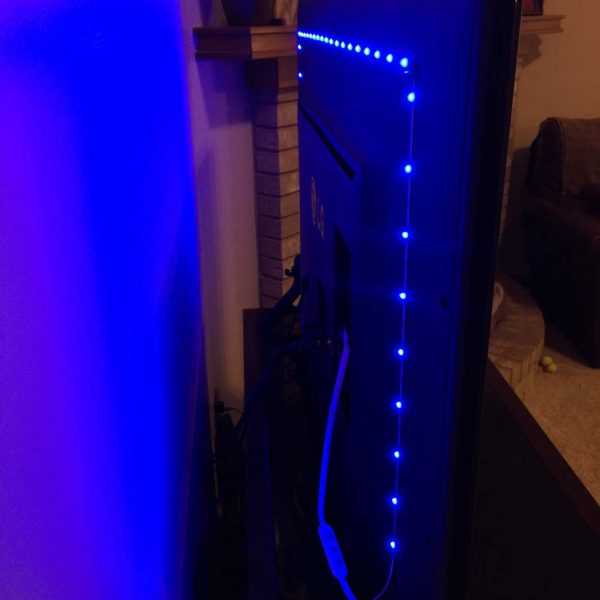
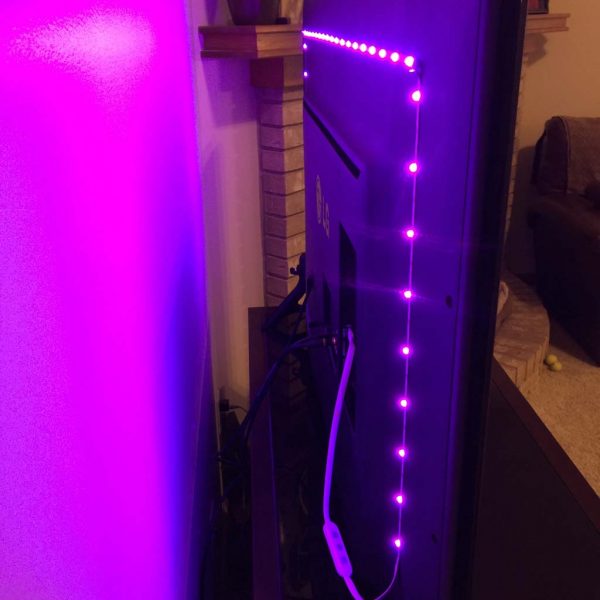

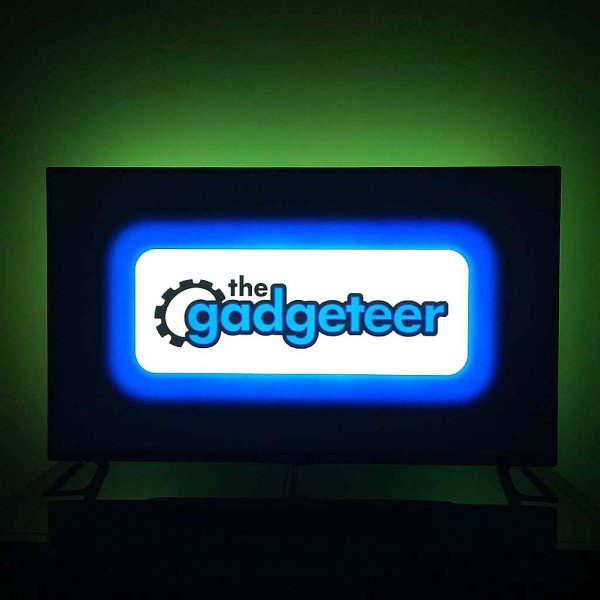
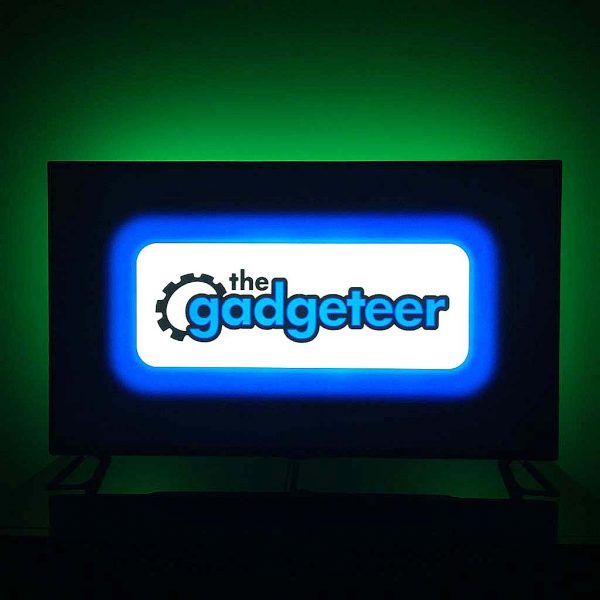
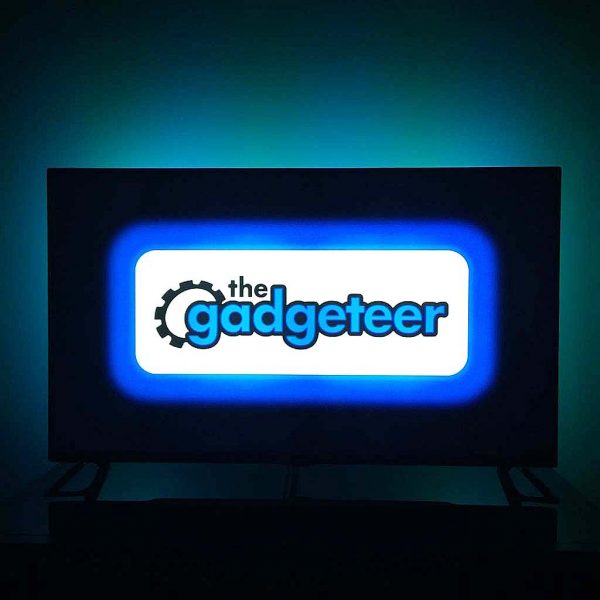
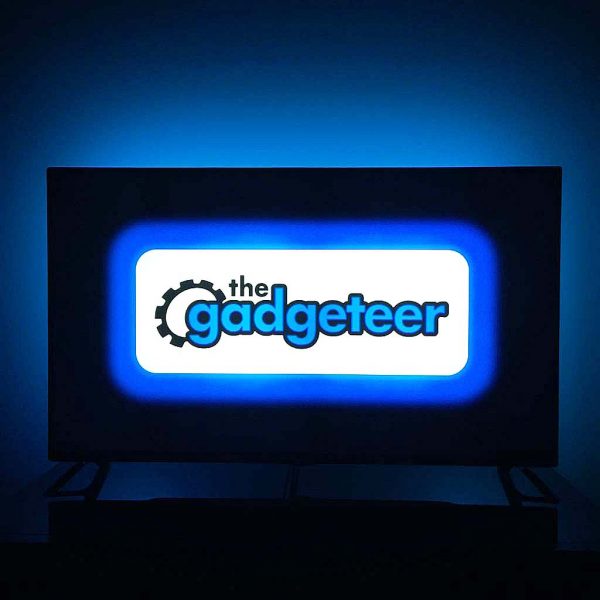
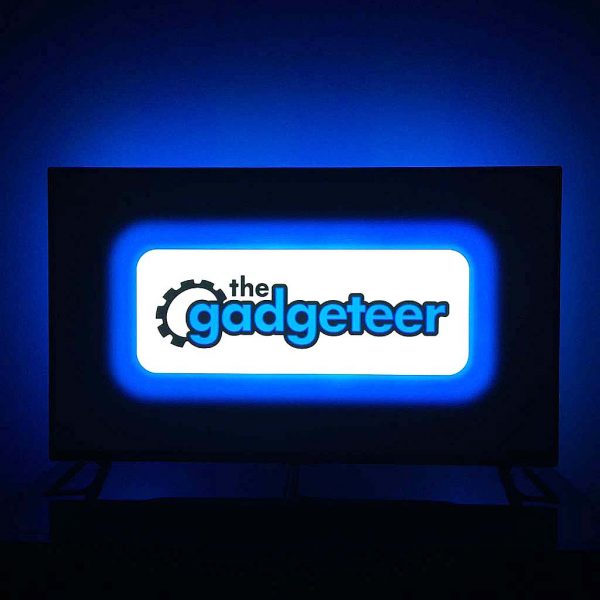
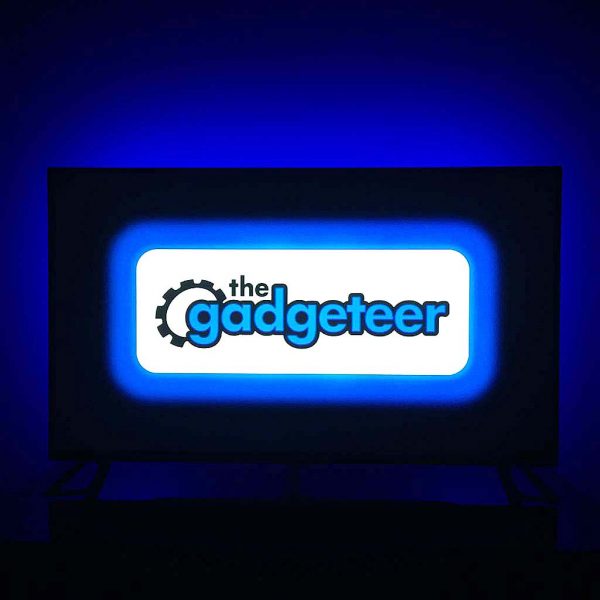
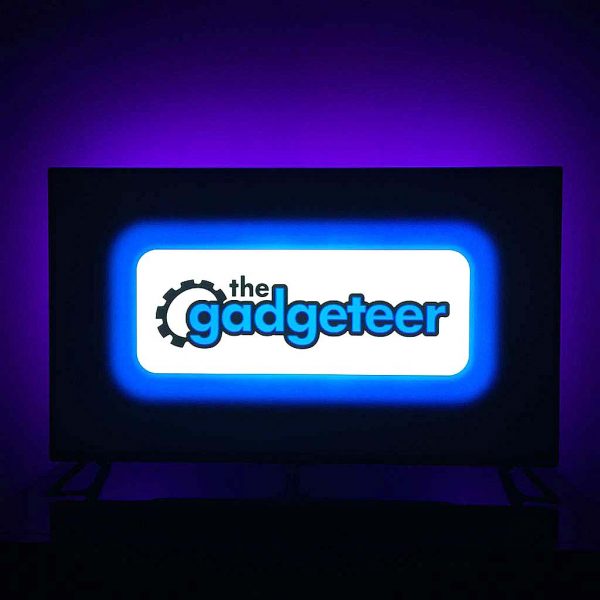
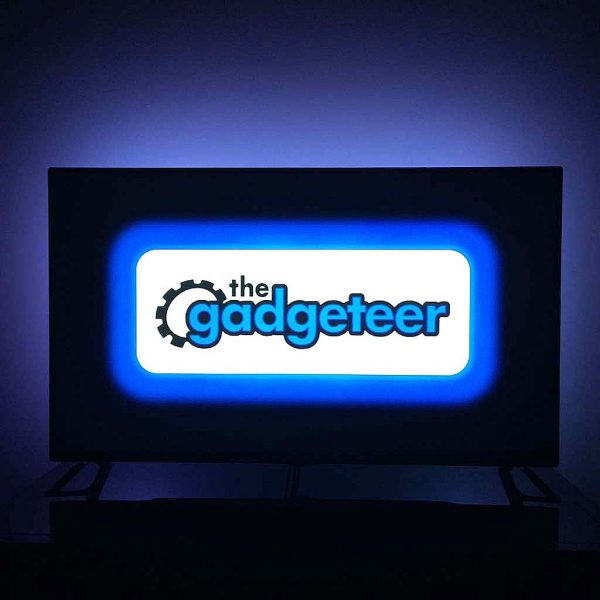
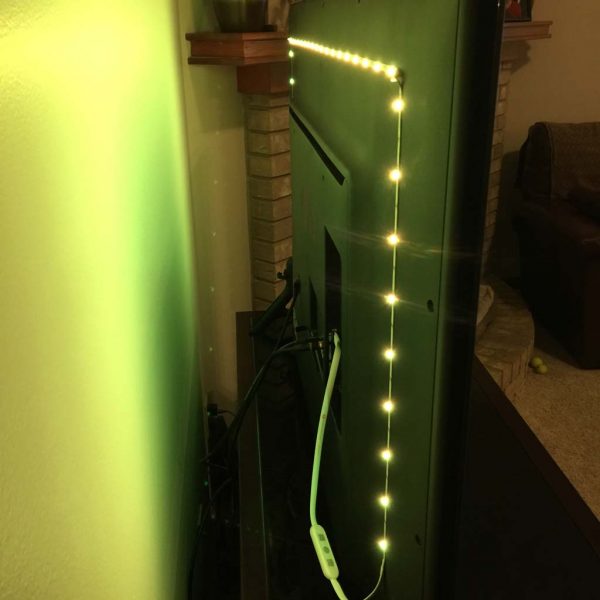
 The Luminoodle has 14 different color modes plus white, warm white and cool white, and I’ve attempted to show a pic of each of them here (though I may have missed a few!). In addition to being able to change colors, Luminoodle also has 10 dimmer levels, and I’ve shown the brightest of them here because the lowest level didn’t come through well on photos. And finally, the Luminoodle also has 4 modes. You can manually switch from color to color, you can have Luminoodle slowly cycle from color to color (or “Crossfade,” the mode I like best while watching TV), or you can have Luminoodle pulsate rapidly from color to color like a strobe light (party mode!), either in a single or all colors, and you can even control the speed. The Power Practical folks tout Luminoodle’s ability to help reduce eye strain and dryness by providing a gentle ambient backlighting. To me, this is at least a plausible concept but I have to say that I wasn’t really able to prove it either way.