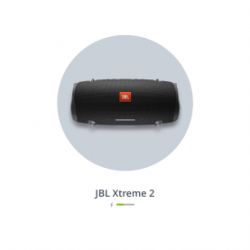
JBL Xtreme 2 Waterproof Bluetooth Speaker review


REVIEW – Over the past 2 years, I have tested and reviewed a few Bluetooth speakers. I love the portability and convenience they provide. The previous Bluetooth speaker that I reviewed was made by JBL, and I really like it. However, I wanted a speaker from JBL that is lighter to be portable and waterproof so that I could take it to the beach and not worry about it getting wet and therefore damaged by the water. I was very thrilled when JBL sent me their Xtreme 2 Waterproof Bluetooth Speaker to test and review.

What is it?

The JBL Xtreme 2 is a portable IPX7 rated waterproof Bluetooth speaker that uses four drivers and two JBL Bass Radiators to produce a dynamic sound. It also has a built-in rechargeable 10,000mAh Li-ion battery that provides up to 15 hours of playtime. It features a USB charge out port, integrated hooks and a detachable strap with a bottle opener. There is an accompanying JBL Connect+ app and feature that allows you to connect more than 100 JBL Connect+ enabled speakers for additional volume.

What’s in the box
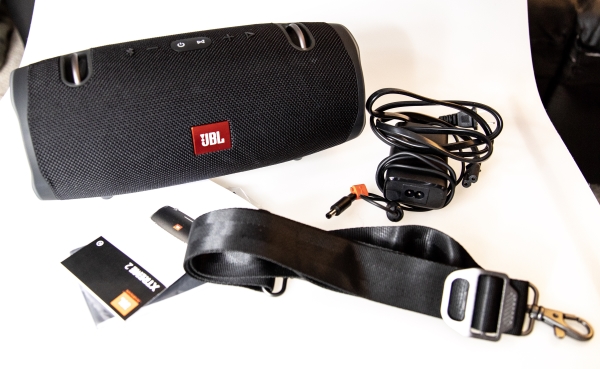

1 x JBL Xtreme 2 Speaker
1 x AC Power Adapter
1 x Carrying Strap
1 x User Guide

Design and features

Specifications
Output power: 2 x 20 Watts
Music playing time: 15 Hours
Bluetooth version: 4.2
Battery capacity: 10,000 mAh
Charging time: 3.5 Hours
Waterproof: Yes
Power Bank: Yes
Voice Assistant Integration: Yes
JBL Connect+: Yes
Speakerphone: Yes
Audio Input: 3.5 mm
Auto Power Off: Yes
Dimensions: 5.35” x 11.33” x 5.19”
Weight: 5.27 lbs., 2.39 kg

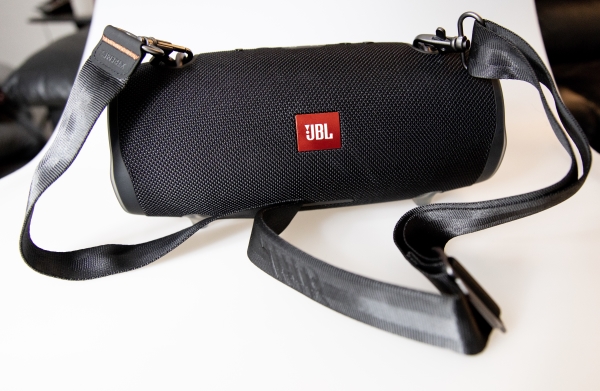
This JBL speaker is sort of oval-shaped and wrapped in a waterproof speaker grille. There is a prominent JBL branding plate in red on one side.
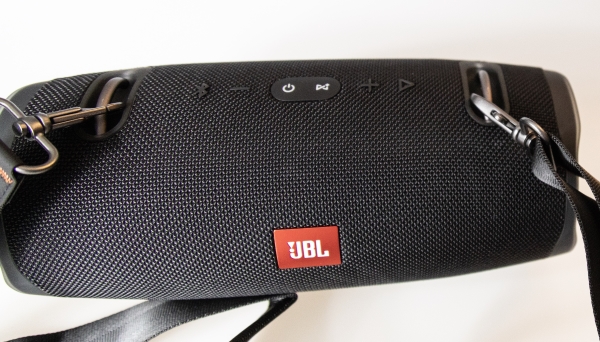
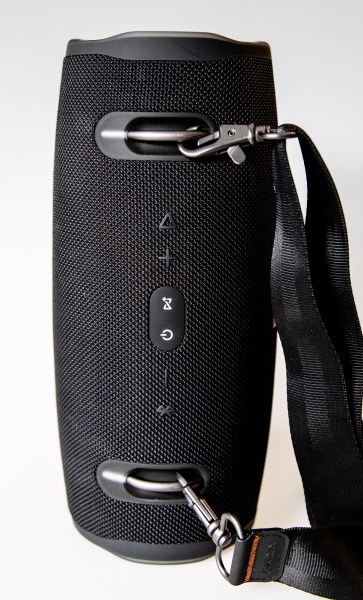
On another side of the speaker, there are 2 built-in metal bars on each side that allow you to attach the carrying strap. In between the metal bars, are the touch controls. As shown in the following picture from the top down there is the play/pause/forward/answer/hangup control, the volume up control, the JBL Connect + control, the on/off power control, the volume down control and the Bluetooth control.
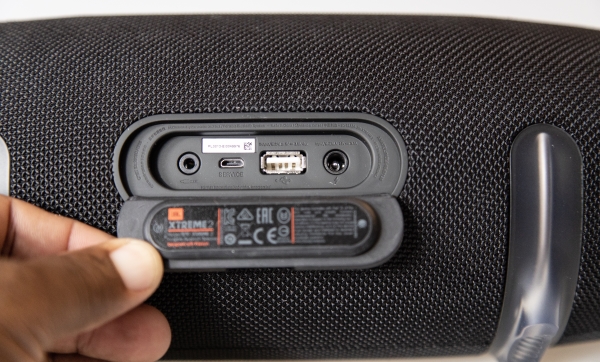
On the side of the speaker opposite to the controls, there is a waterproof rubber door/cover that protects the ports. The ports as shown below from left to right are the 1/8″ auxiliary jack, a non-user service port, a USB output port for charging accessories and the power port.
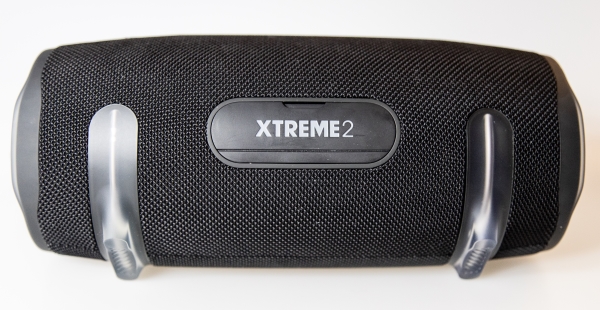
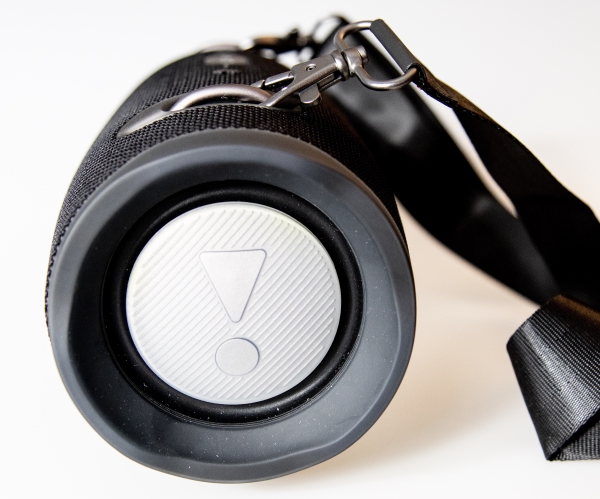
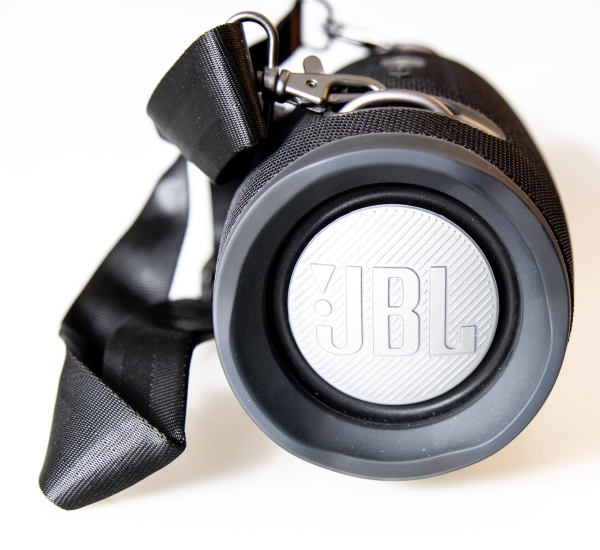
On each of the two ends of the speaker body, there is a speaker covered by a flexible waterproof membrane. These areas should not be handled and should be protected from sharp objects and/or impact.
Performance

This JBL Bluetooth speaker is attractive right out of the box. It is wrapped in a black hard waterproof grille with speakers on each end. Once I took it out of the box, I plugged in the included AC adapter to charge it. One of the first things I noticed is that there is no charging indicator light to let you know that the speaker is charging and when the charging is completed. I let it charge for a few hours and then I was ready to start testing. Once you power it on and press the Bluetooth button, it is the usual simple process tho connect to your mobile device, and it does so easily. After that, playing music is straightforward. Indoors it sounds like the volume is adequate, but outdoors like on the beach, it is only loud enough for people within approximately 10 feet of the speaker to easily hear the music. The regular ambient sounds on the beach drown it out after that distance. The speakers on the side are covered in a waterproof material, but not a hard grille. This is a major concern for me since they are vulnerable to being accidentally punctured/damaged.

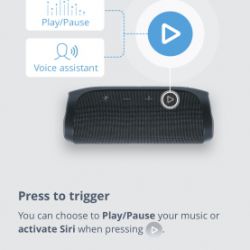
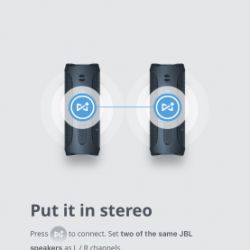
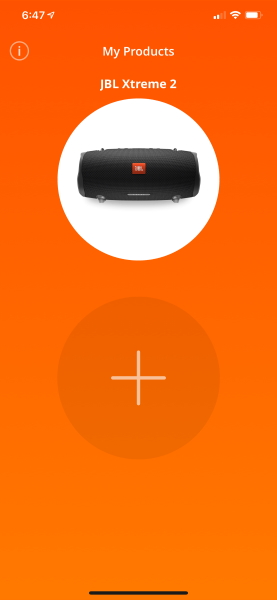
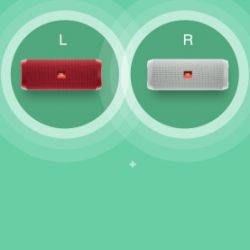
JBL also includes the JBL Connect+ feature on this speaker. This feature allows you to connect to 100 plus additional JBL speakers that have a similar built-in feature. You have the option of adding them in stereo or party mode. In stereo mode, one speaker is added as the left channel and the other as the right. See more about the JBL Connect+ functions in the following app screenshots:


Here is a short video all about this speaker:

What I like

  • Build quality
  • Waterproof feature
  • Overall sound produced
  • Connectivity
  • Carry strap option

What I’d change

  • Needs a charging indicator LED
  • Needs more volume
  • Hard grill protection over the speakers
  • Better user guide

Final thoughts

I am a fan of JBL Bluetooth speakers and the sound they produce as well as the build quality. In terms of build quality, this speaker is well built with the exception of the vulnerable speakers on each end that are covered by a soft membrane.

I have used it on multiple occasions at the beach, and the battery was still going strong after over 7 hours of non-stop playing. I have also had water splash on it with no problem.

In terms of sound, it produces quality sound but lacks the expected power, especially based on its size and weight. Indoors the sound is adequate, and on a quiet day outdoors, it would likely be loud enough. However, any place where there is relatively normal ambient noise, it lacks the power to be the “life of the party”. Don’t get me wrong, I like the speaker, and if I had 2 of them and used them together with the JBL Connect +, they would likely be adequate. But as a stand-alone speaker, its versatility is limited.

Price: $299
Where to buy: Amazon, JBL Website
Sample: The sample for this review was provided by JBL

Filed in categories: Reviews

Tagged:

JBL Xtreme 2 Waterproof Bluetooth Speaker review originally appeared on The Gadgeteer on July 31, 2019 at 11:00 am.

Note: If you are subscribed to this feed through FeedBurner, please switch to our native feed URL http://the-gadgeteer.com/feed/ in order to ensure continuous delivery.

PurePort promises clean and clear Lightning plugs and ports

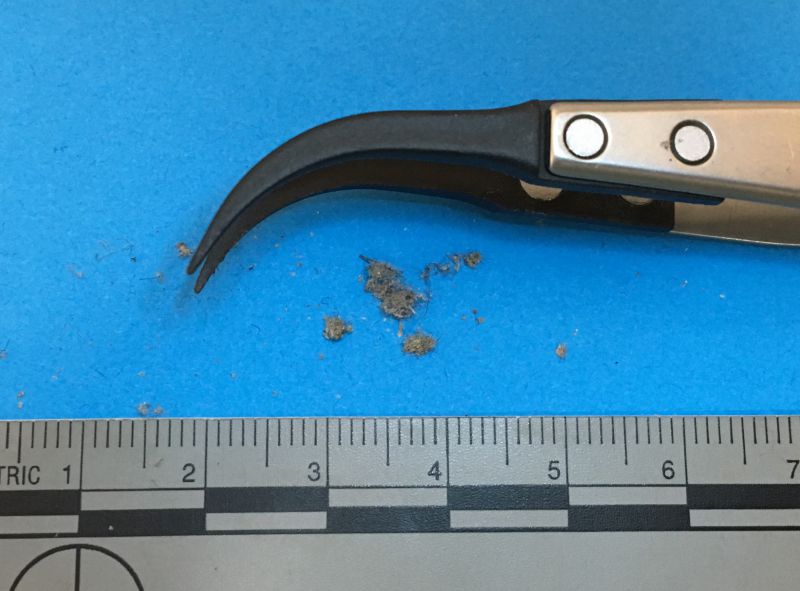
CROWDFUNDING NEWS – For iPhone users, especially the ones who put their iPhones in a pocket (isn’t that everyone?), the curse of pocket lint and random moisture tends to fill the ports of those devices with a substance that refuses to be extricated, especially once you’ve jammed the plug into it a few times when it wasn’t connecting. I can’t tell you how many times I saw this when I was working at an Apple Store. It was always such a surprise to the customer – I’d usually take the lint out to show how much had accumulated because they’d not believe it otherwise. (Photo from @DrDrang’s blog “And Now It’s All This” – highly recommended!)

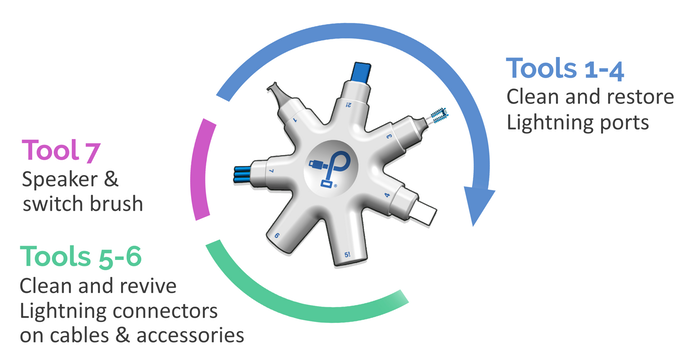
We used soft bristle brushes and non-conductive tools, which prevented damage, but short of a toothpick and an old toothbrush, most folks don’t have access to this. Enter a new KickStarter campaign called PurePort. It’s a set of 7 tools that are designed to safely maintain your ports and the cable plugs as well. Even with less than 50 supporters, they are already past six times their funding goal, so there must be a LOT of folks who put in more than the $20 EarlyBird special!

Apple’s Lightning port was introduced in the fall of 2012 and caused gnashing of teeth as well as rejoicing. The gnashing of teeth was due to the huge investment customers and manufacturers had made in 30-pin connector cables and accessories. (Fast-forward seven years and the specter of change is visible with the advent of USB-C, but Apple seems relatively certain to stay on this train for the iPhones and lower-end non-Pro iPads.) The rejoicing was due to being able to plug in the cable either way, which is also part of the joy of USB-C. The small deep port is much more difficult to see into, so getting little bits of stuff in there is much more of a problem than it was with the 30-pin connector, which was wider and more open. If you’re not worried that Apple will abandon their proprietary port soon, you may want to get a set like this to protect yourself. Just be aware that you can void your warranty with aggressive poking into the ports!

Filed in categories: Reviews

Tagged: ,

PurePort promises clean and clear Lightning plugs and ports originally appeared on The Gadgeteer on July 31, 2019 at 10:00 am.

Note: If you are subscribed to this feed through FeedBurner, please switch to our native feed URL http://the-gadgeteer.com/feed/ in order to ensure continuous delivery.

DEENKEE Cordless Vacuum Cleaner Stick review

REVIEW – As an industry leader and design innovator, Dyson, maker of vacuums, fans, and all things air-related, has always inspired other companies to emulate (read: rip off) their style and features. This is of great benefit to consumers who’d love to own a Dyson product but can’t quite afford the often ridiculous price tags. The DEENKEE Cordless Vacuum Cleaner Stick is one such Dyson “inspired” device. The design, feel, and even the coloring of the DEENKEE vacuum all ape Dyson’s well-known brand but at a somewhat affordable $169.99. For the price, the DEENKEE performs well, but it might not work as the sole vacuum for larger households.

What is it?

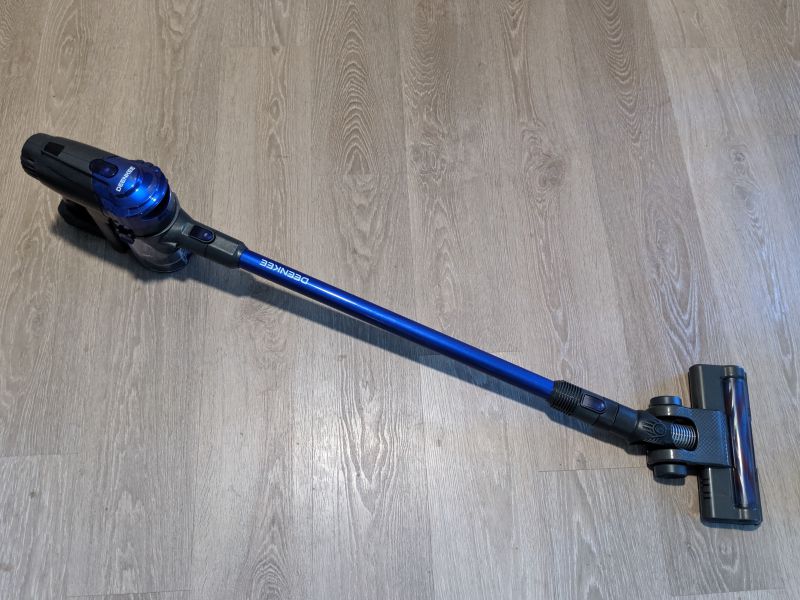
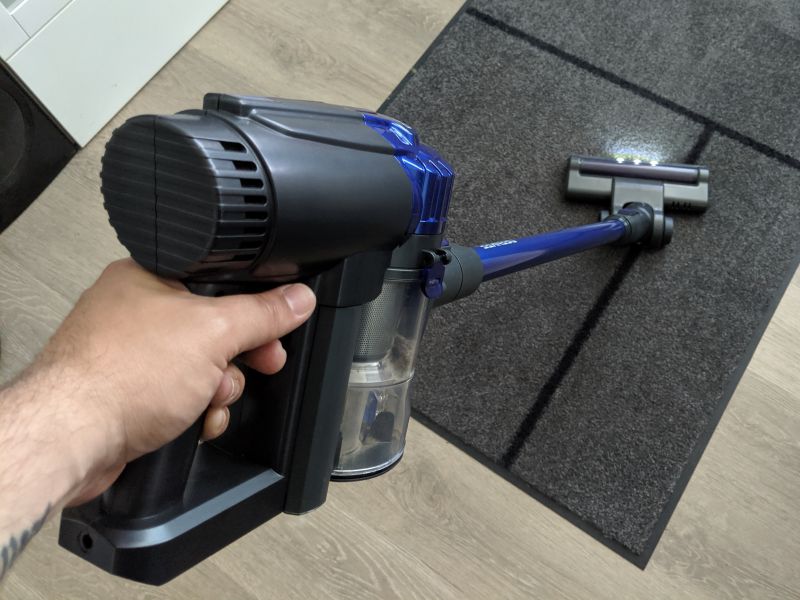
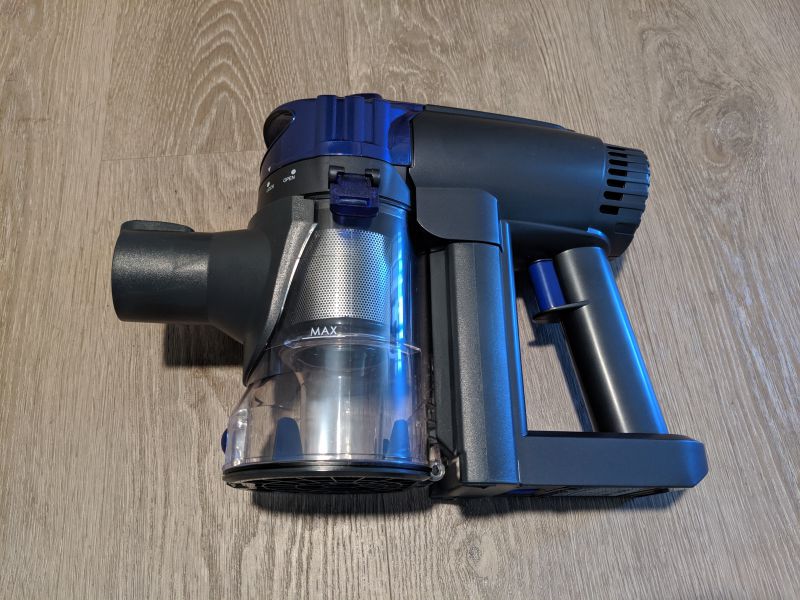
The DEENKEE Cordless Vacuum Cleaner Stick is a rechargeable handheld vacuum cleaner. The unit is lightweight, modular and has removable, washable filters. Even though it’s a handheld, the DEENKEE is powerful enough to work much like a traditional standup vacuum, albeit for a shorter time because it’s battery powered.

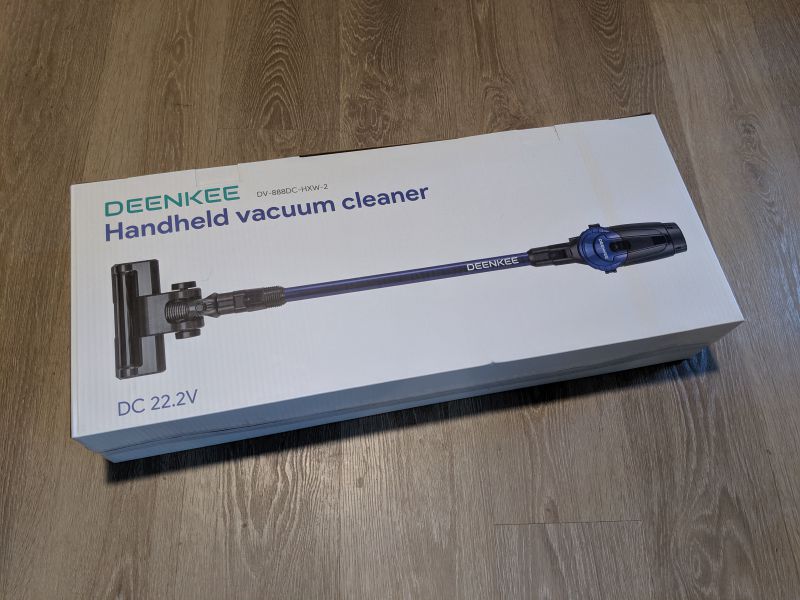
The DEENKEE arrives in a white box with only a picture of the unit and its name featured on the front.

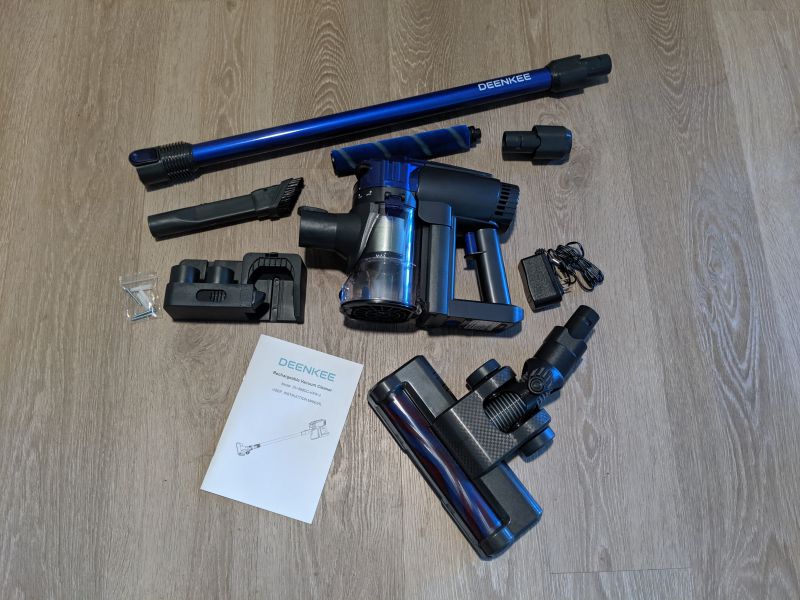
What’s in the box?

  • Portable cordless vacuum unit
  • Removable Li-ion battery
  • AC adapter
  • Aluminum extension tube
  • Wall mount
  • Connecting joint
  • Electric floor brush attachment
  • 2-in-1 dusting brush attachment
  • Replacement roller brush
  • User manual

Hardware specs

  • Rated power: 180-200W
  • Battery: Li-ion 2200mAh, 22.2V
  • Charging period: 5-6 hours
  • Handheld vacuum degree: 17KPA (max)

Design and features

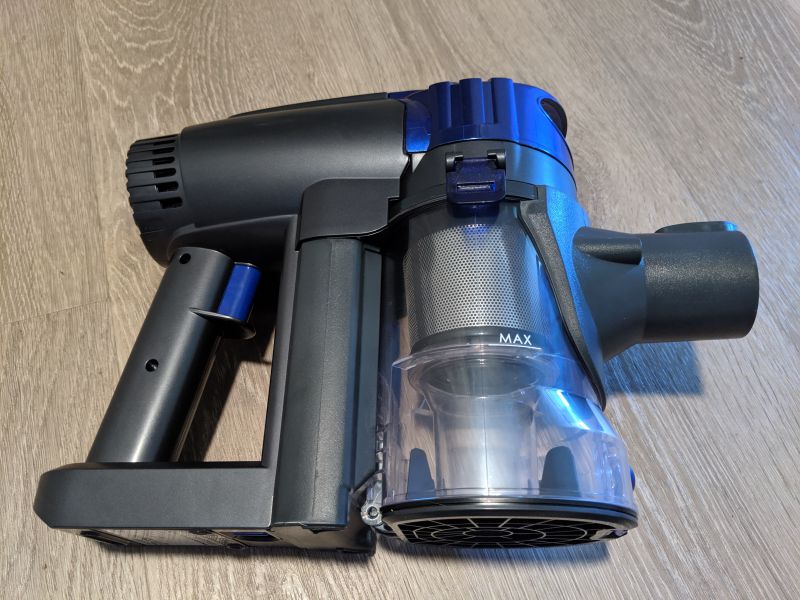
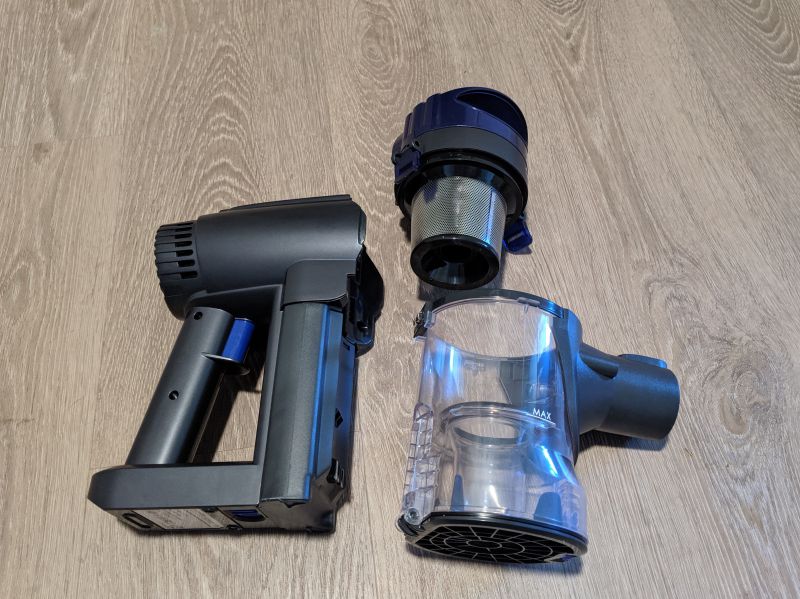
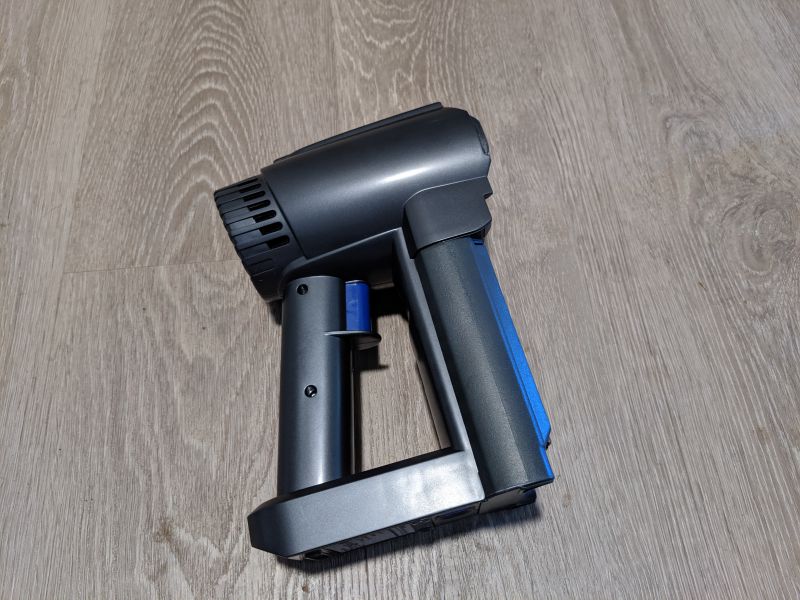
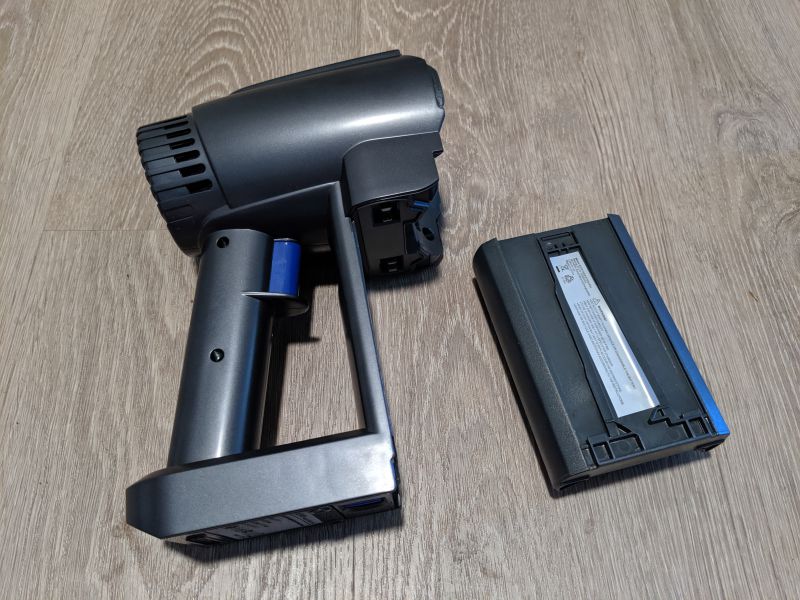
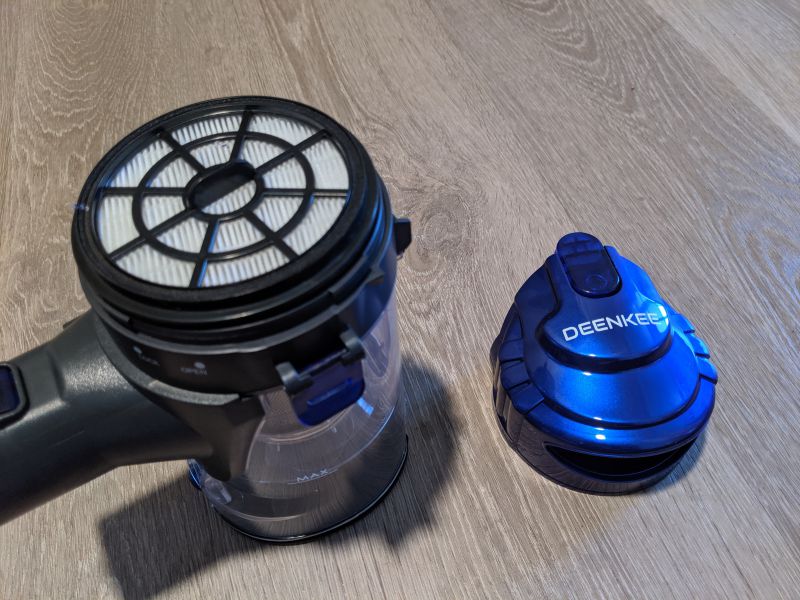
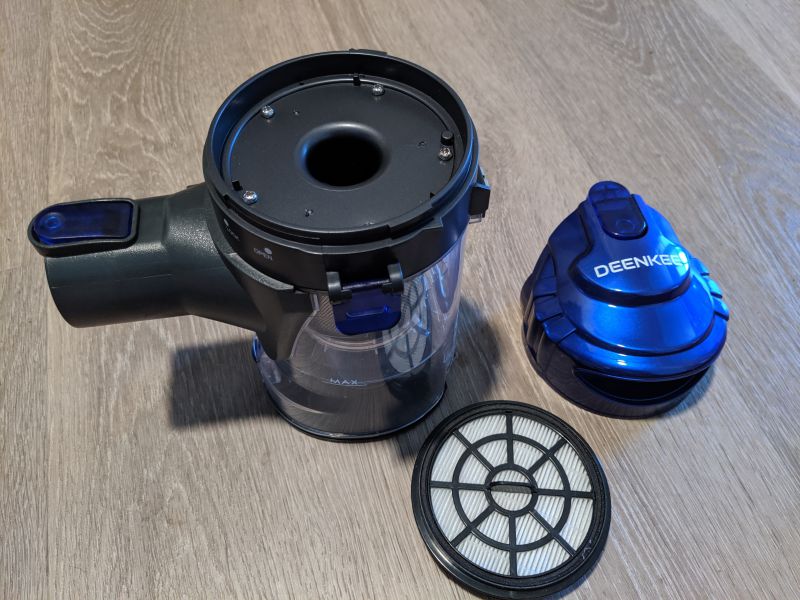
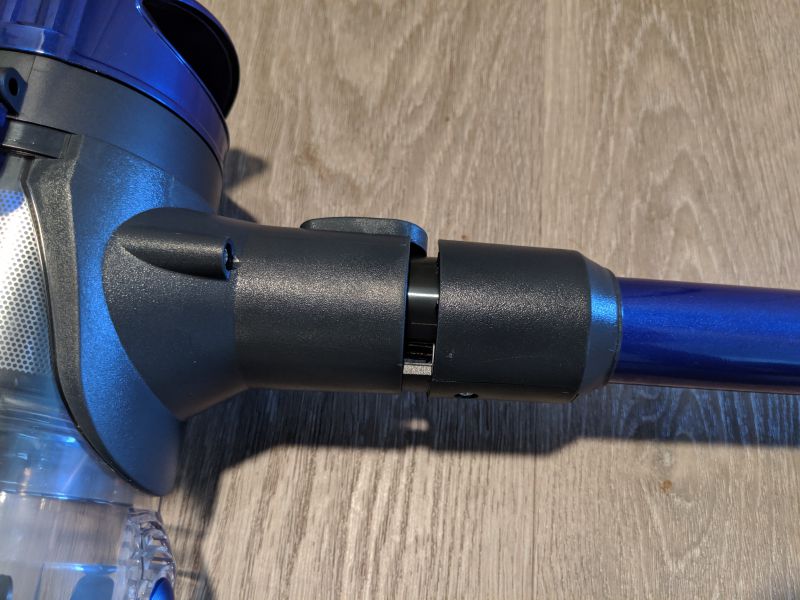
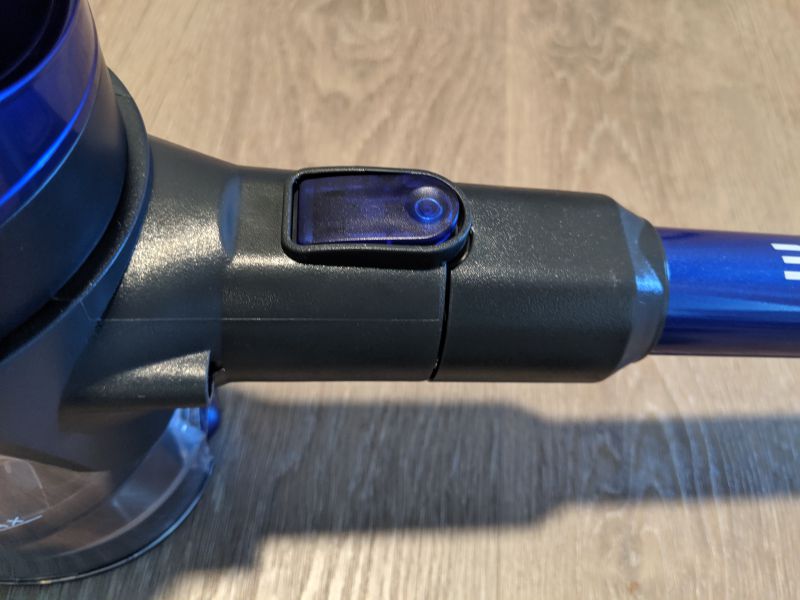
The DEENKEE is well designed, which is understandable since it’s following Dyson’s award winning design playbook. The powerhouse of the unit is the handheld section which contains the rechargeable battery and motor. Latches attach the motor and battery section to the container which houses the DEENKEE’s filtration system.

Almost every part of the DEENKEE breaks apart via these plastic latches for cleaning and easy access.

I definitely appreciate the modular nature of the DEENKEE but I often found myself latching and unlatching parts of the unit in a frustrating attempt to disconnect the one section I was hoping to remove.

Once the container unit is removed, you can see that the main section of the DEENKEE is little more than a small electric motor attached to a battery.

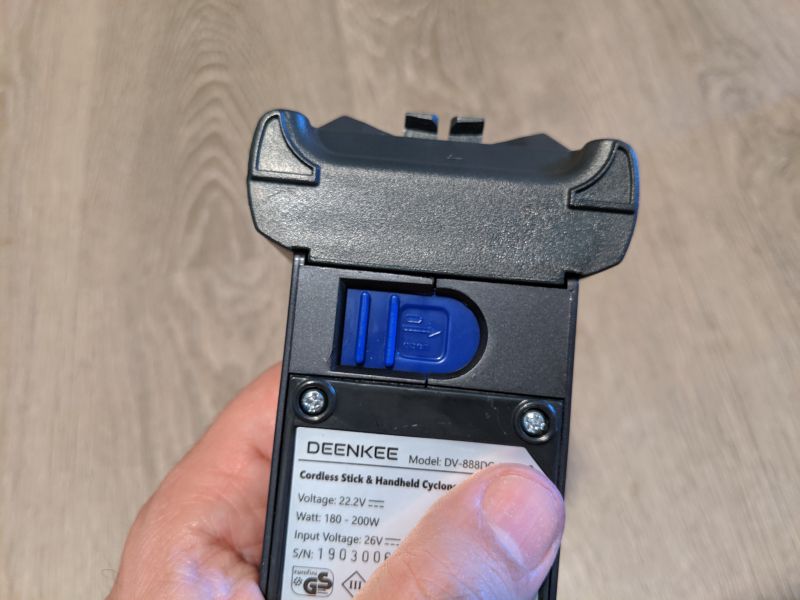
The Li-ion battery disengages from the motor via a small latch on the underside of the unit.

The battery doesn’t really need to be removed except for cleaning the unit or replacing the battery itself.

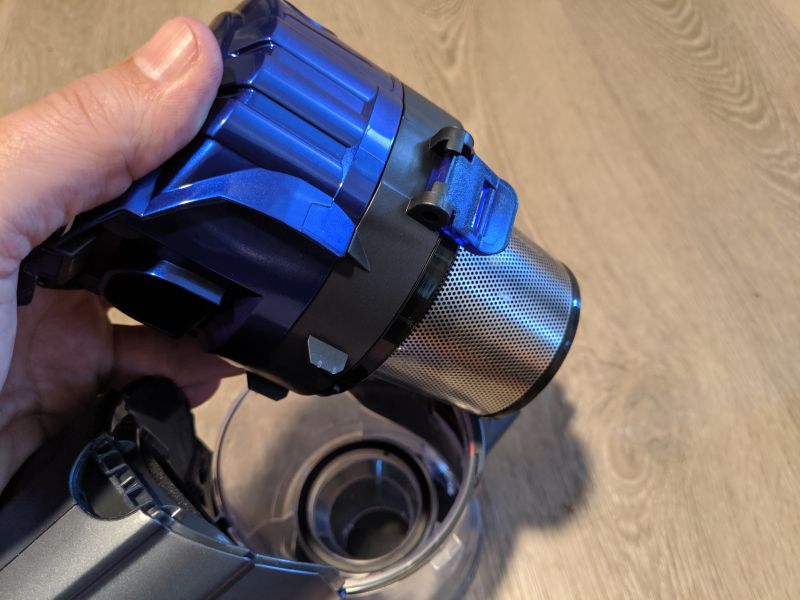
The filters are easily removed from the container unit by yet more latches.

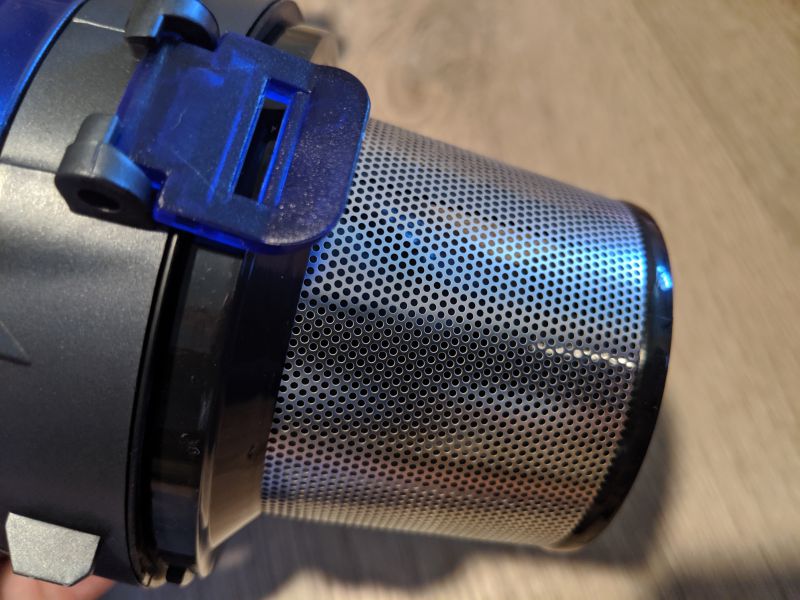
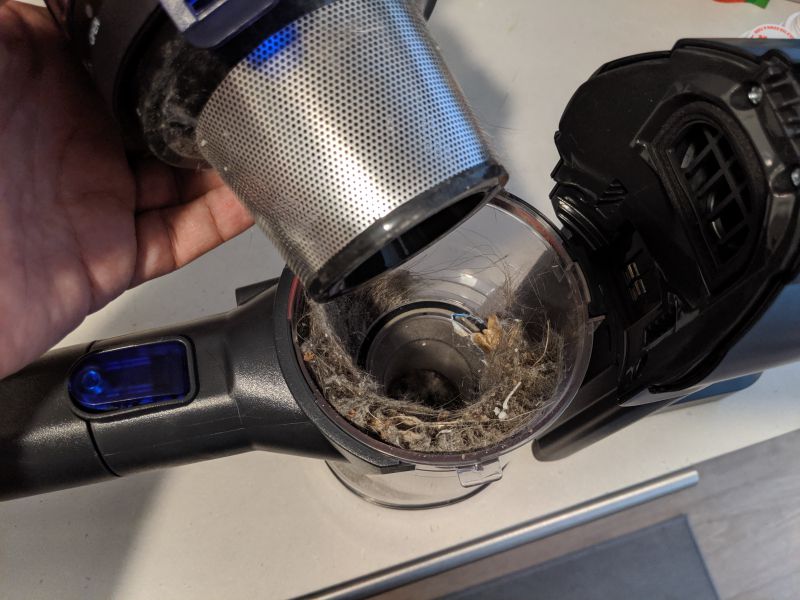
The outer foil filter separates out larger pieces of debris. As with all filters on the DEENKEE, this filter is washable.

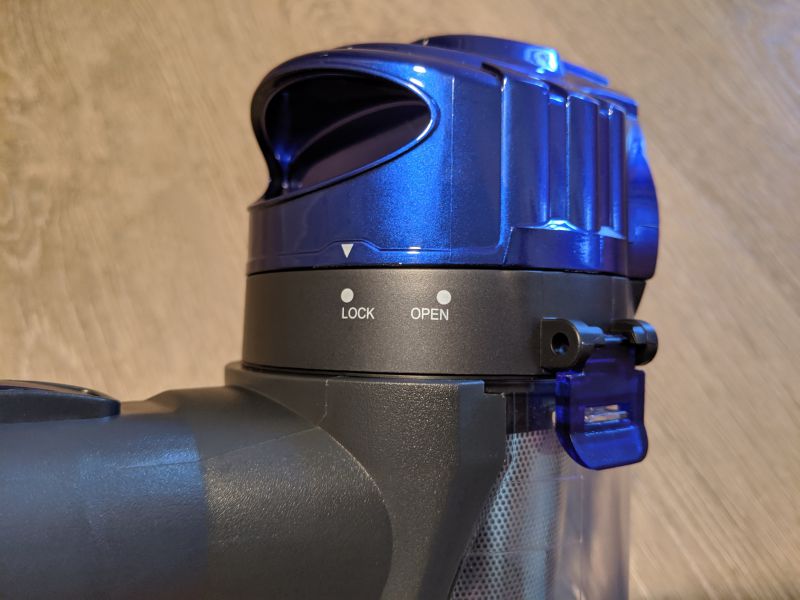
The top of the filter section unlocks to provide access to the inner filters.

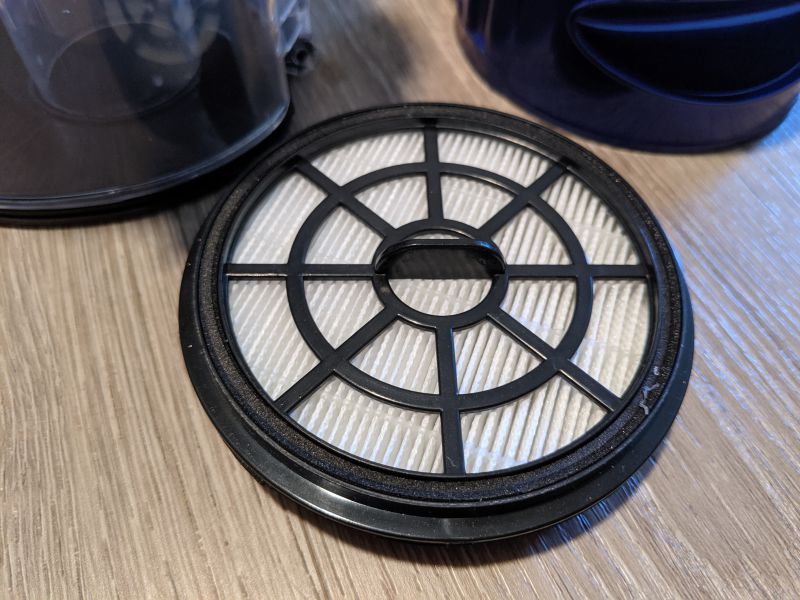
One internal filter sits on top of the container section just inside the cap.

Once that filter is removed you can flip it over to remove a third smaller foam filter.

Again, all of these filters are washable which I really appreciate since nobody misses the days of forever having to purchase new vacuum bags and filters.

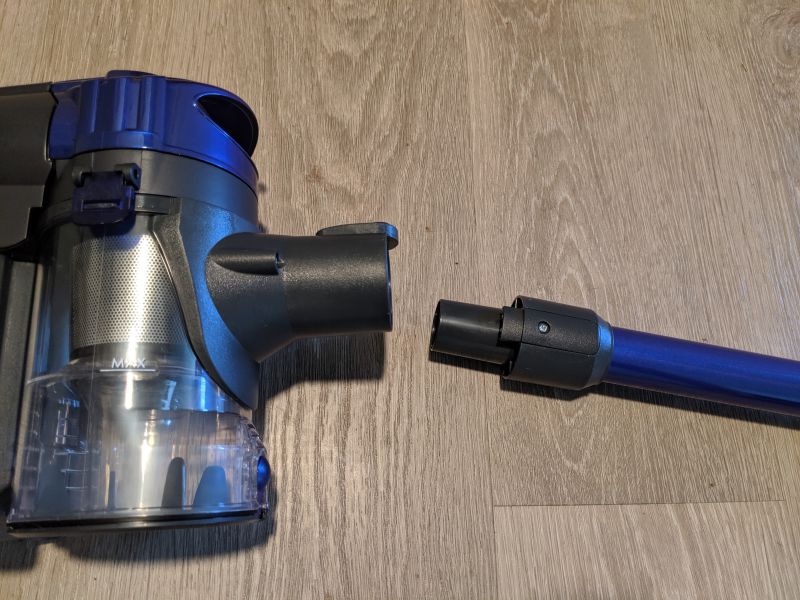
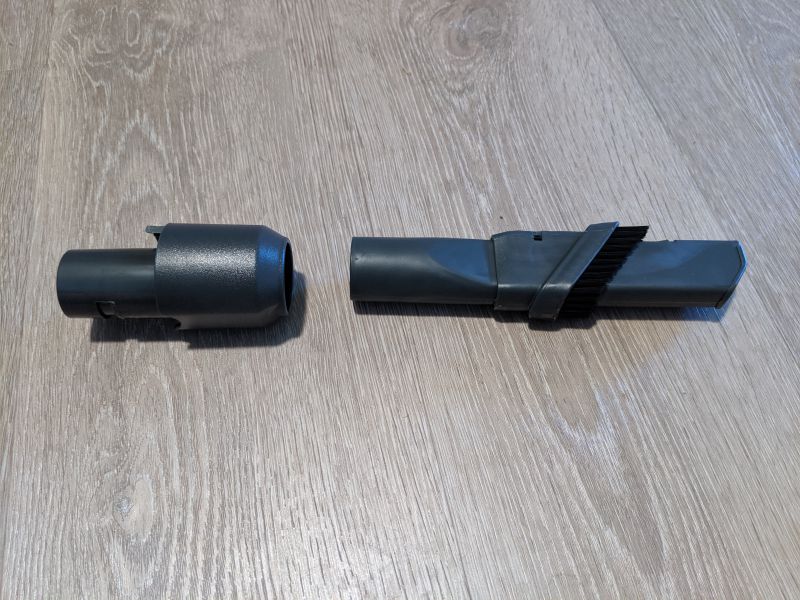
The DEENKEE comes with several attachments that connect in a number or ways.

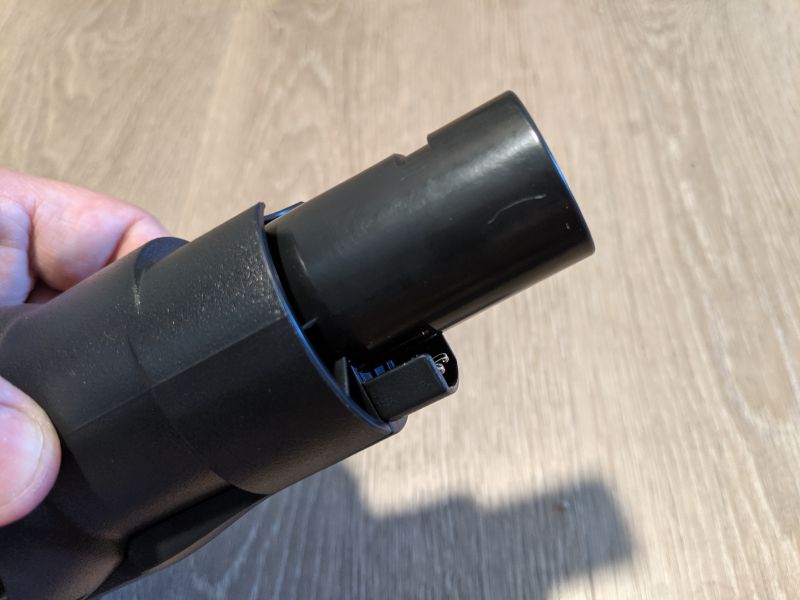
Each attachment connects via a plug and latch on its end.

The attachments can only connect one way, which makes it easy to do correctly.

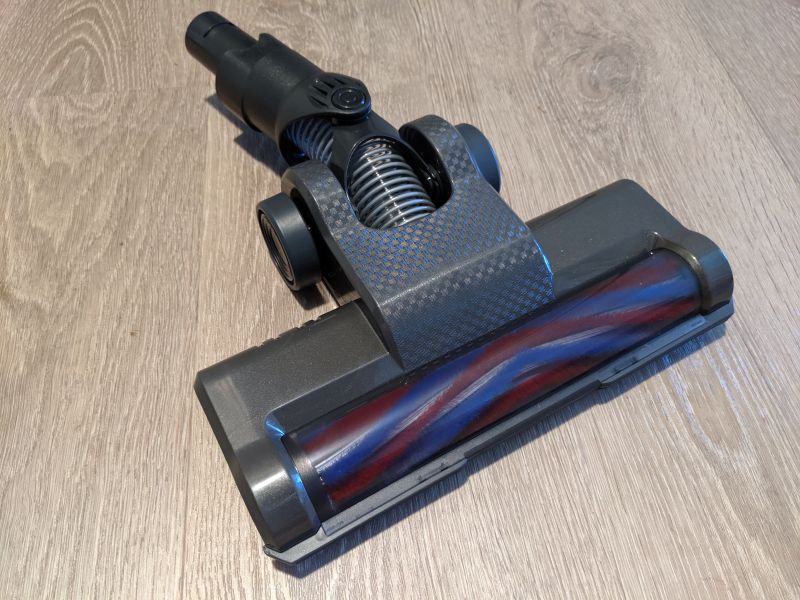
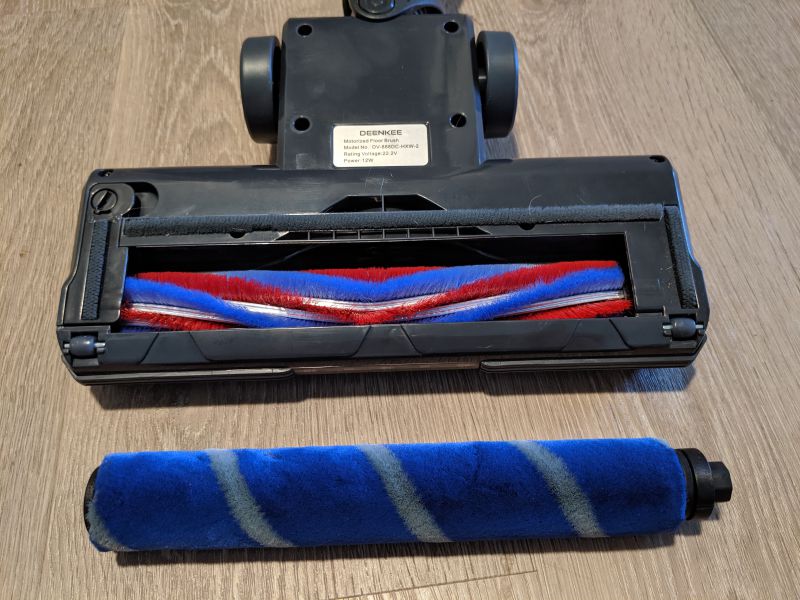
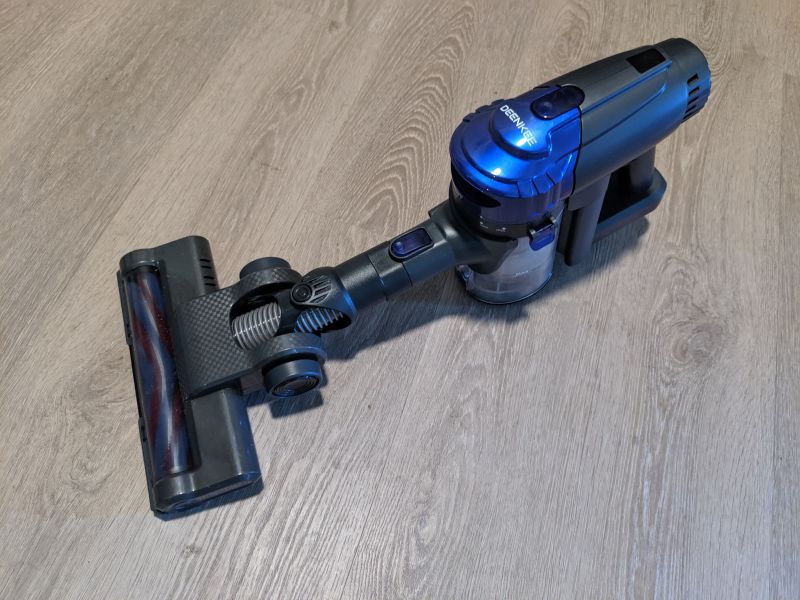
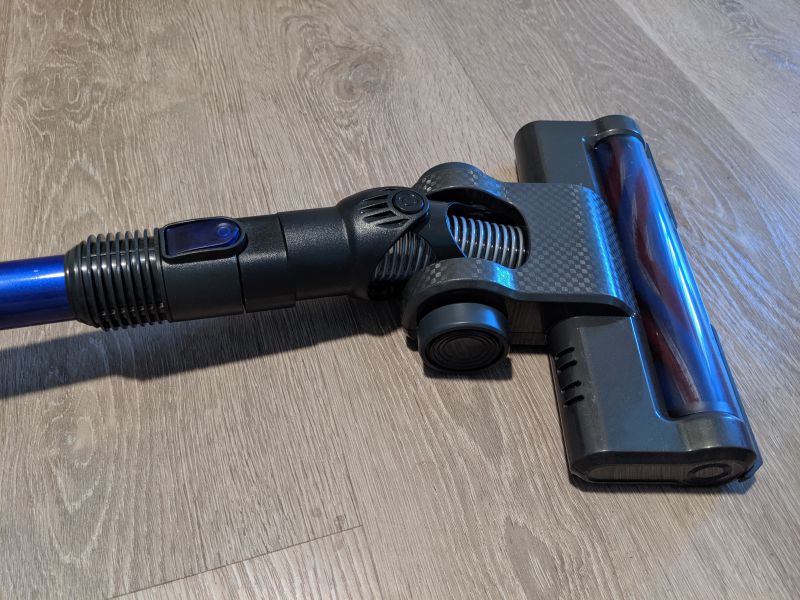
I found that the most useful attachment is the floor brush attachment.

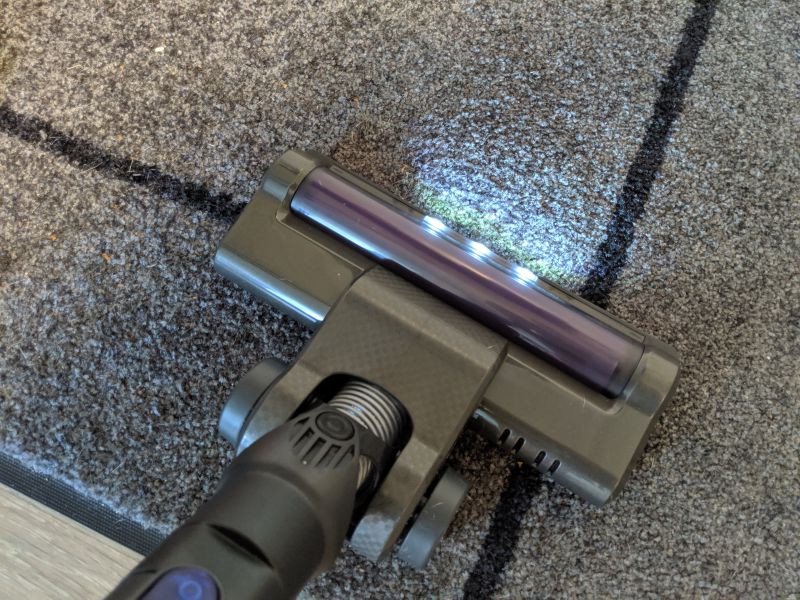
The bottom plug on the attachment connections conducts power, which means that the brush in the floor brush attachment spins just like in a traditional standup vacuum.

A roller with long bristles comes attached to the unit and an extra roller with shorter bristles is included as well.

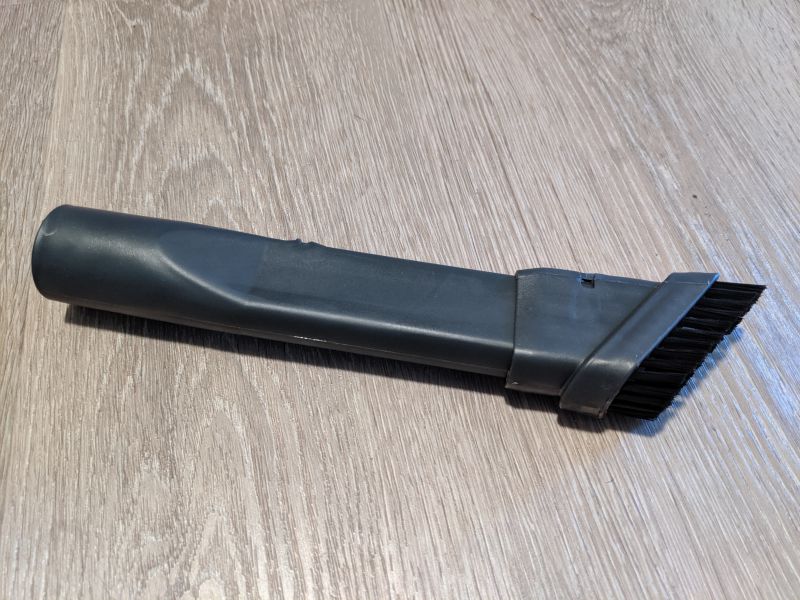
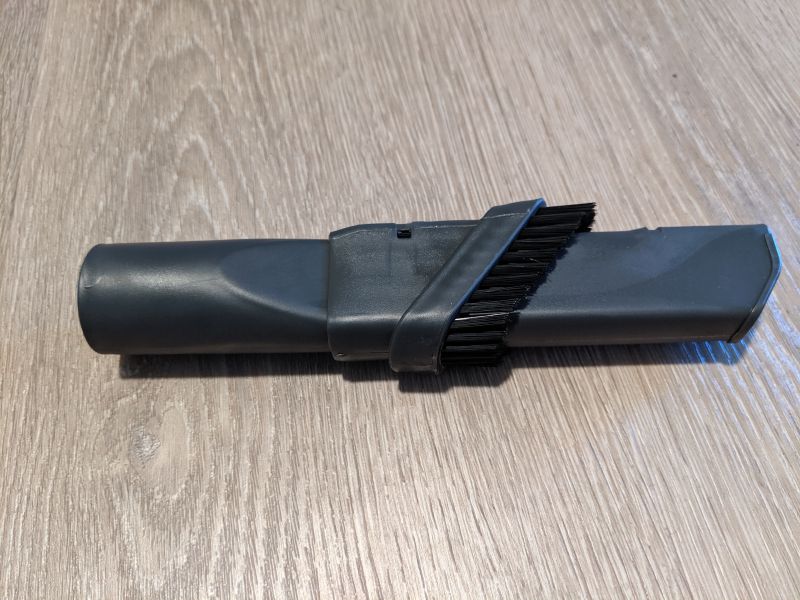
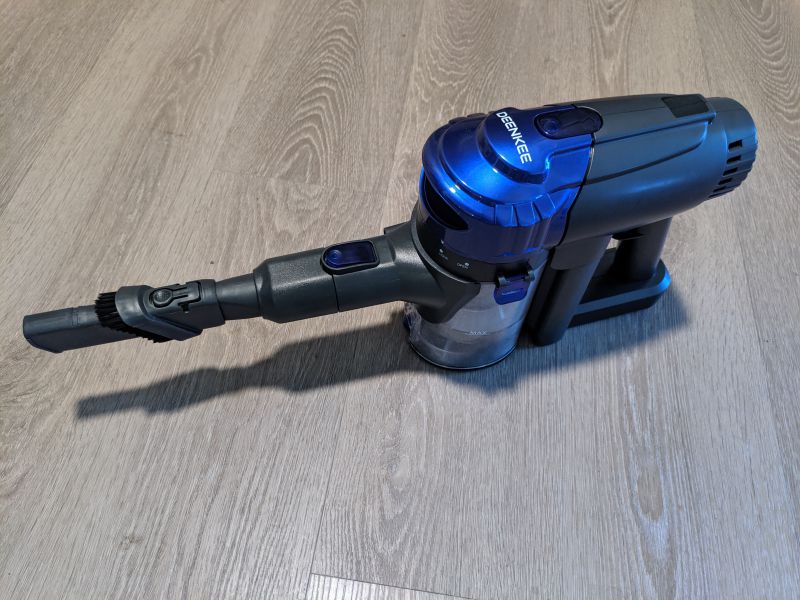
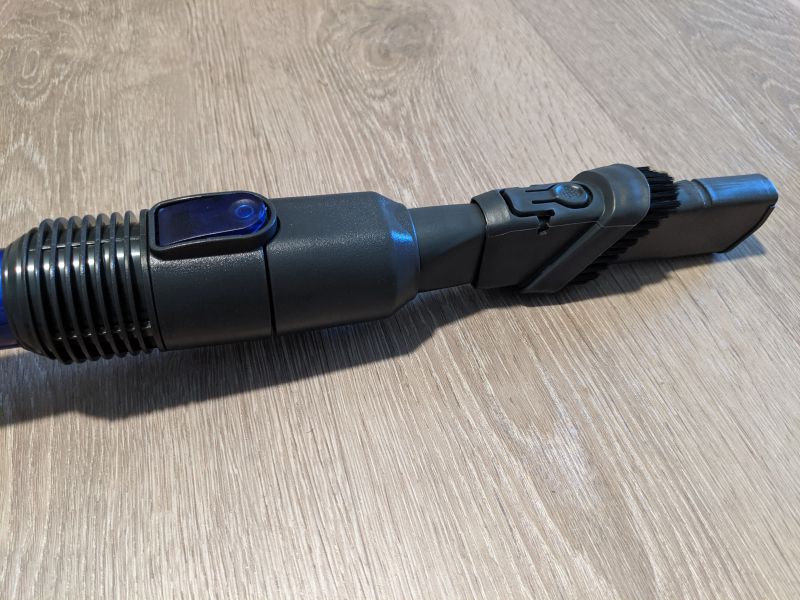
The DEENKEE also comes with a 2-in-1 dusting brush attachment.

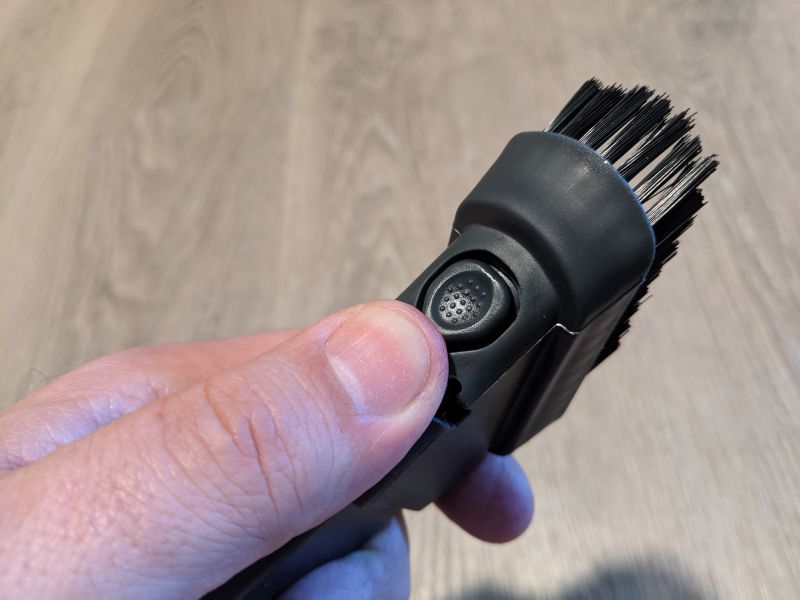
By pushing down on a small button at the end of the brush attachment the brush head can be moved into or out of position.

This is great because it cuts down on the number of attachments you have to manage for the vacuum without sacrificing functionality.

Both the 2-in-1 dusting brush attachment and the floor brush attachment connect either directly to the unit or to the extension tube via an included connecting joint.

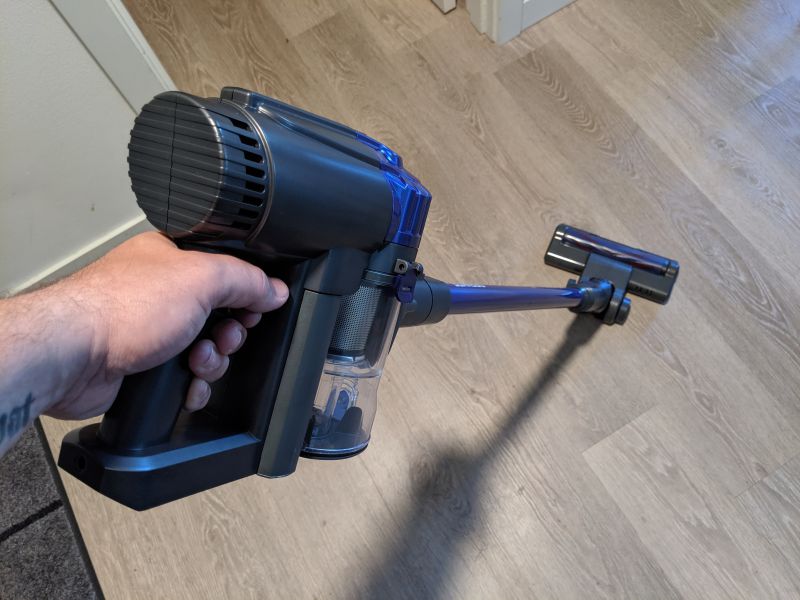
The extension tube is convenient for using the DEENKEE like a traditional vacuum.

But, you can create various configurations based on the cleaning task.

This versatility is something I really appreciated as I tackled tasks such as vacuuming underneath my couch cushions and cleaning out my car.

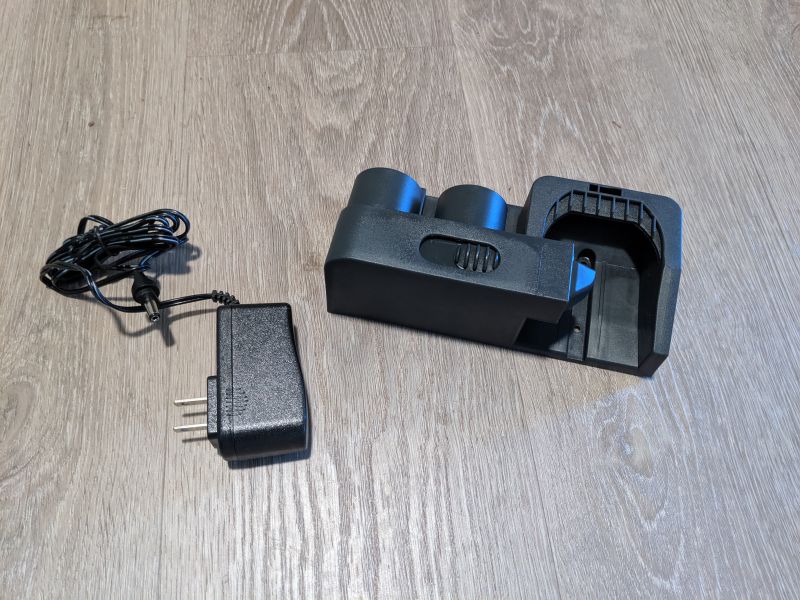
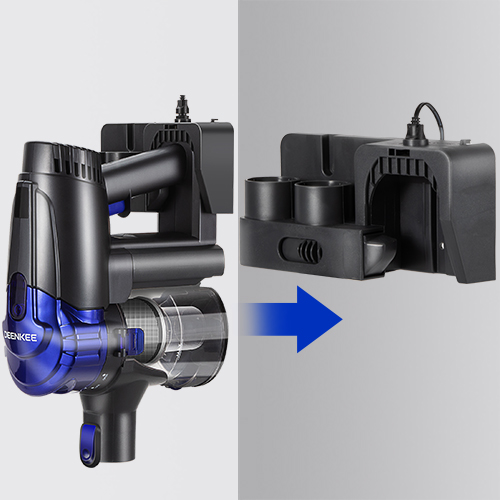
The DEENKEE also comes with a mounting bracket that allows you to charge the unit while in storage.

The unit snaps easily into the bracket and there are two slots for storing the connecting joint and 2-in-1 dusting brush attachment as well.

Setup

Before first use, the DEENKEE has to be fully charged which takes around five to six hours.

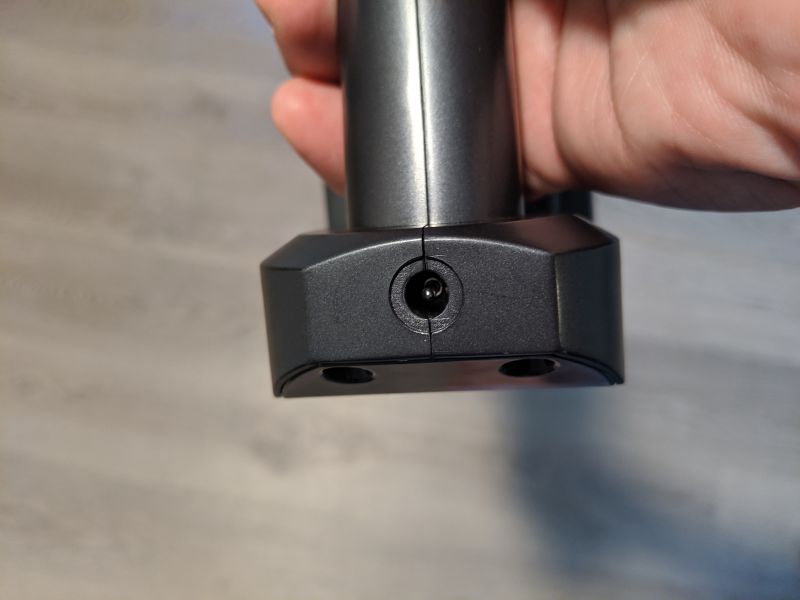
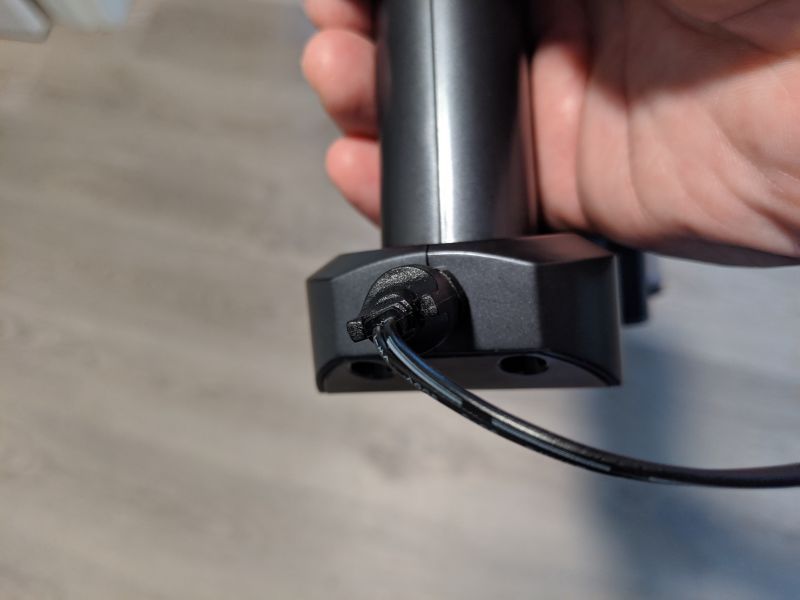
There’s a small power port on the back of the handheld unit where the AC adapter plugs in.

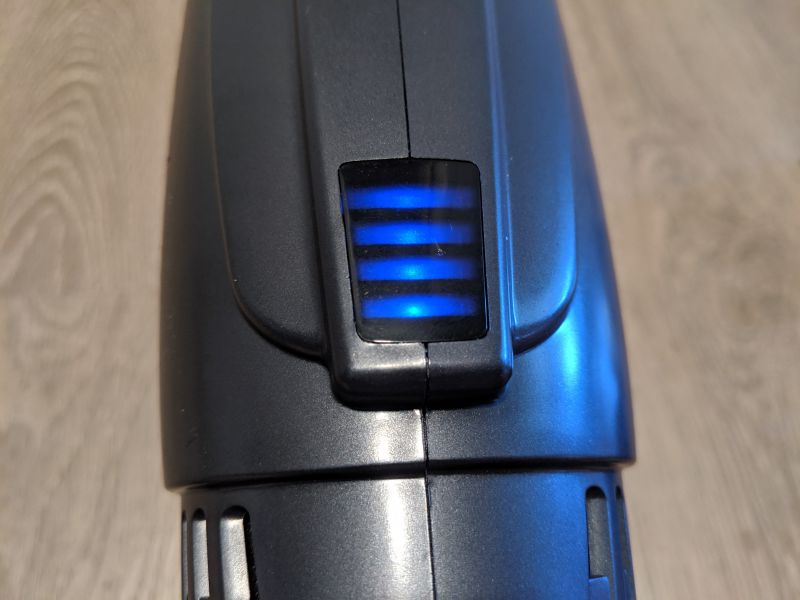
There are four LED bars on the top of the unit that blink while the unit is charging.

These LEDS also display the current power level of the DEENKEE during use and because you’re on a tight power budget, it’s really important to monitor them.

Performance

Once the battery is charged and you’ve snapped on your desired attachments, the DEENKEE is ready to work.

The DEENKEE motor is rated at 17 kpa which is a unit of pressure equal to about 2.5 psi. It may not sound like much, but I was thoroughly impressed by the suction of this little handheld.

I also really liked the three LEDS mounted on the head of the floor brush attachment. I found them super useful in the dark corners of my small apartment.

The DEENKEE worked great on both the hard floors and few carpets I have in my 500 square foot apartment. The battery lasted about 25 minutes for me, mainly because I was switching back and forth between the DEENKEE’s two power modes. I found the usefulness of two power modes confusing though, since I kept switching to high mode after vacuuming a section in low mode.

While not exactly silent, the DEENKEE operates at lower frequencies, so the sound it emits during use isn’t quite as high pitched and annoying as regular vacuums.

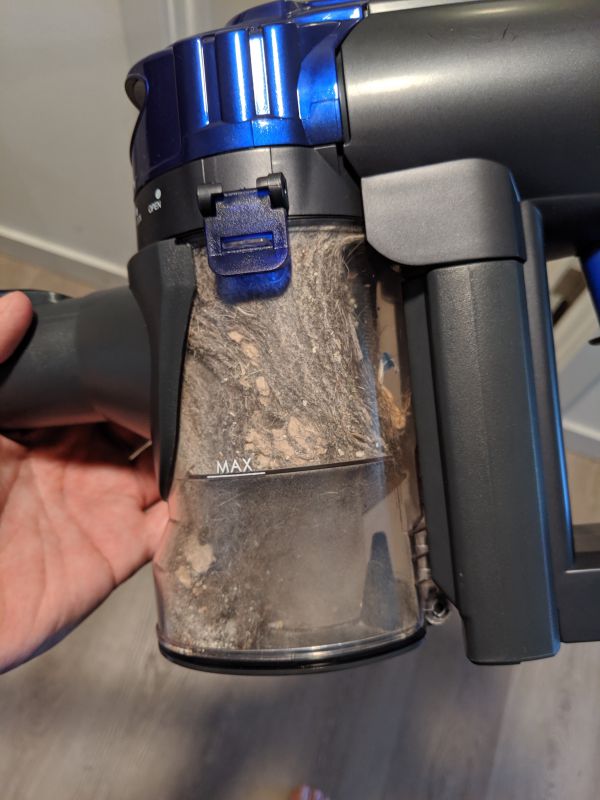
After about 25 minutes, the DEENKEE picked up an impressive amount of dust and pet hair in my supposedly clean apartment.

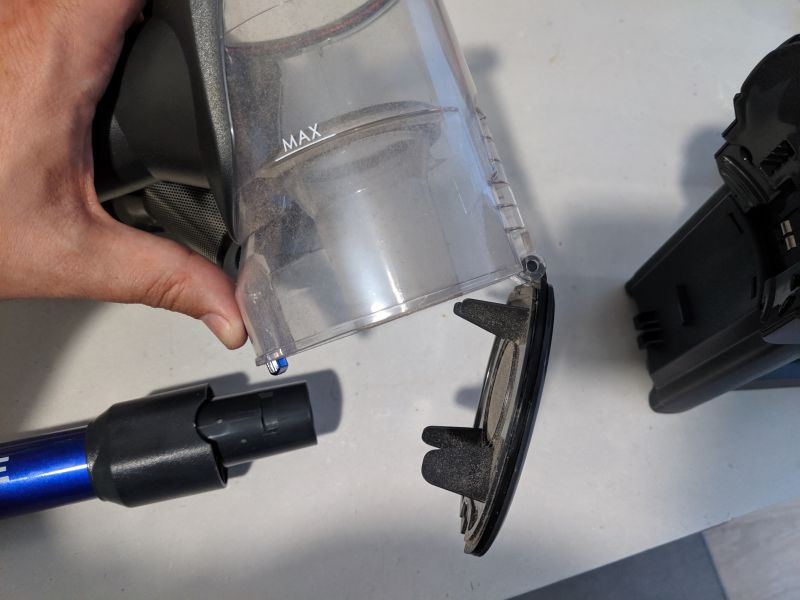
You can pop the top off the container unit to remove debris that may have gotten wedge into the container. Or you can just pop the lower latch on the container to dump the contents out.

The DEENKEE was really easy to use and maneuver around my furniture and since the battery lasted just under a half an hour, its weight never really became an issue. The suction was strong and consistent and my rugs and floors looked noticeably cleaner after passing the DEENKEE over them.

What I like

  • Washable filters
  • Easy to maneuver
  • Powerful suction for the size

What I’d change

  • Battery life could be better
  • Two power modes seems unnecessary
  • Main unit made of plastic and seems like it would break easily if dropped

Final thoughts

The DEENKEE Cordless Vacuum Cleaner Stick is an affordable alternative to the very expensive Dyson vacuums that it so obviously is trying to emulate. The DEENKEE won’t work as a main vacuum for large or midsize homes or apartments, but as a backup it works great. For small apartments, this might be all the vacuum you need though, granted you can clean your entire apartment in the under 30 minutes of battery time the DEENKEE provides you. Still, $169.99 for a vacuum on par with Dyson’s similar models is a pretty good deal.

Price: $169.99
Where to buy: Amazon and DEENKEE.
Source: The sample of this product was provided by DEENKEE.

Filed in categories: Reviews

Tagged:

DEENKEE Cordless Vacuum Cleaner Stick review originally appeared on The Gadgeteer on July 31, 2019 at 9:00 am.

Note: If you are subscribed to this feed through FeedBurner, please switch to our native feed URL http://the-gadgeteer.com/feed/ in order to ensure continuous delivery.
Sztrokia Sleep Sound Machine white noise generator review

REVIEW – If you enjoy the soothing sounds of rain, a fan, the ocean, or perhaps the gentle quiet sound of nature at night, then the Sztrokia Sleep Sound Machine would be a great device for you to have. Whether you like to listen to these sounds while you sleep, study, or just need some kind of distraction in the background, then this sound machine is a perfect companion to achieving that white noise you are looking for.

What is it?

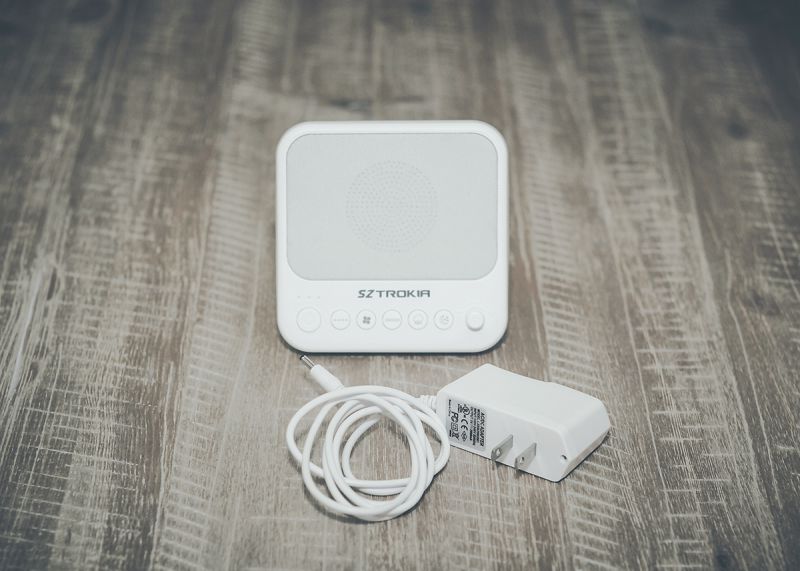
The Sztrokia Sleep Machine is a sound maker that features 10 different sounds from rain to ocean waves to fans to white noise to nature night sounds to help you rest, relax, sleep, study, or meditate. This sound machine also features a USB port on the back of the unit so you can plug in your phone’s USB charging cable. Since you have to plug in the sound machine’s AC adapter into the wall plug you will still have a way to charge your phone or other devices should you need to. Whichever sound you choose, that sound is intended to block out any unwanted noise or just to keep your mind relaxed and focused.

What’s in the box?

  • Sound Machine
  • Wall plug adapter

Design and features

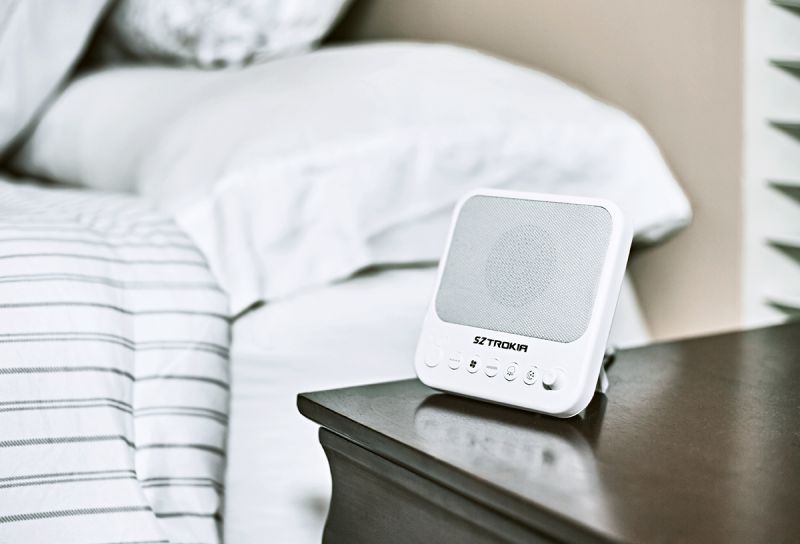
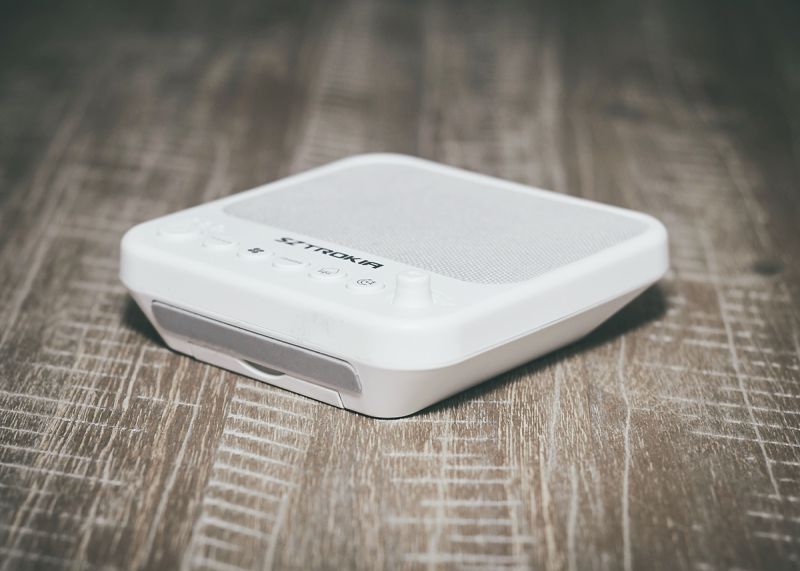
The Sztrokia Sleep Machine is a small sound maker that allows the listener to choose between ten recorded soothing sounds to help you relax, meditate, or focus. This little sound machine is perfect for when you need a little ambient atmosphere to help drown out any unwanted sound or noise while you study, while you read, put a baby down to sleep, meditate, paint, work on the computer, or any other activity that you would want some white noise sound in the background. The sounds that this machine produces is meant to help you block out unwanted or distracting noise. Even if your environment doesn’t have these unwanted noises, this device can be used just as a standalone peaceful sound maker. The dimensions for this machine is 4.6 x 1.2 x 4.6 inches and weighs 5.6 ounces.

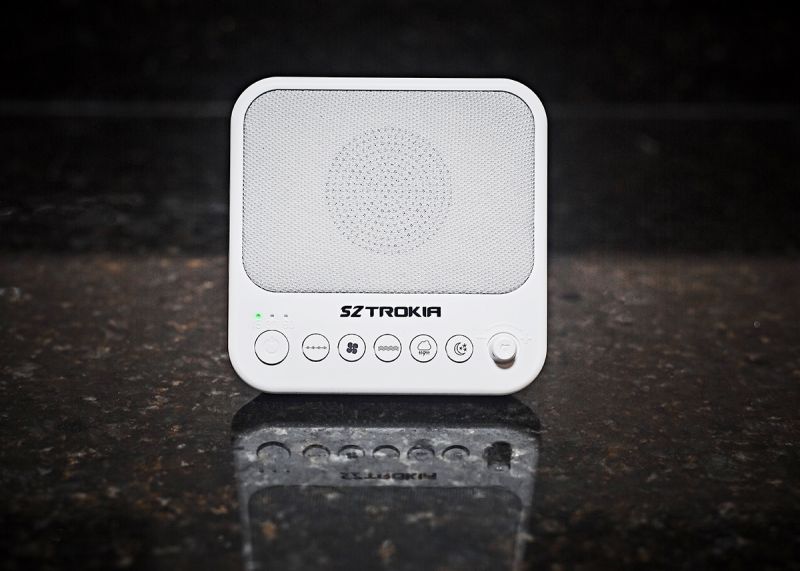
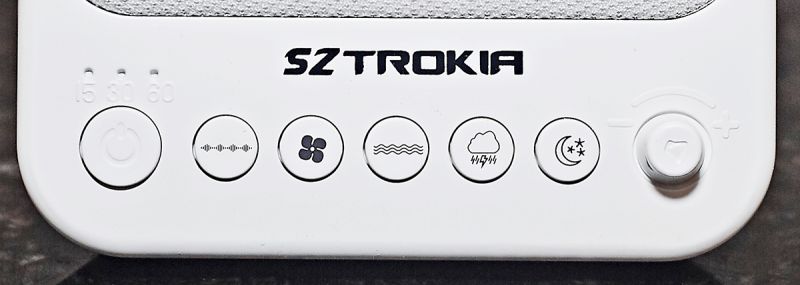
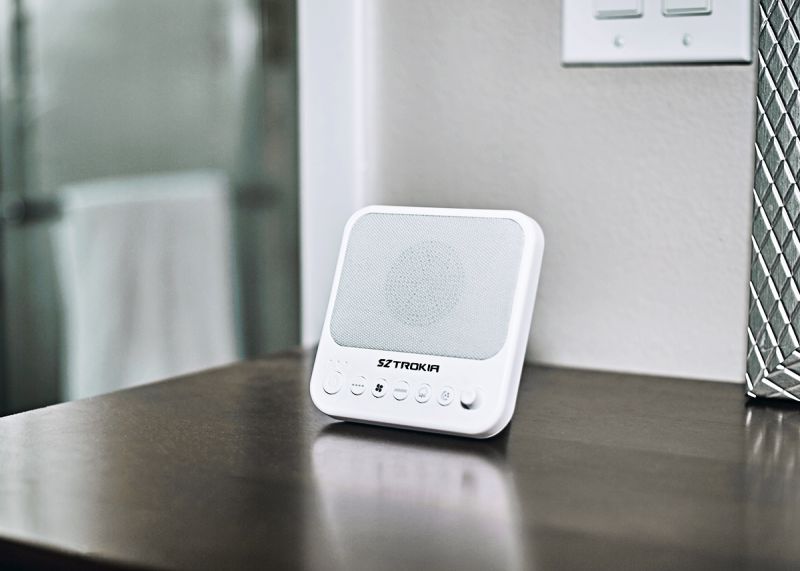
There are five types of sounds to choose from and every sound has two versions each so there are ten sounds in all. The available sounds are rain, fan, night, ocean, and white noise. You can make your selections using the buttons on the front of the sound maker. For each button, you can press it to cycle through the two choices of each sound. It’s nice that the buttons on the front are raised so they are easy to operate. Plus, they have a nice bounce back and sturdy click when you press them. So, you should not have any problems making your sound selection with these buttons. There are also small icons of the corresponding sound on the front of each button so you can tell which button is for which sound.

On the left of the sound buttons is the Power button. The Power button allows you to cycle through three Timer options, 15 minutes, 30 minutes, and 60 minutes. However, the first press of the Power button puts the Sound Machine into an All Night option, meaning that the Sound machine will stay on until you turn it off. Since I like to listen to the Rain sounds for extended times, the All Night setting is best for me. Just so you know which Timer setting the Sound Machine is on, a convenient green light is illuminated directly above the chosen Timer setting.  Keep in mind that the All Night option doesn’t have any lights illuminated.

On the right of the sound buttons is your typical Volume knob. Turning it to the left lowers the volume and turning it to the raises the volume. Simple. The thing that I noticed about this sound machine is that it only has one speaker. Although the sound quality isn’t bad, I feel that this sound machine could benefit from a second speaker.  It’s hard to get a good sound quality when you only have a mono speaker. I think a second speaker would give more depth and dynamic resulting in a more realistic natural stereo sound.


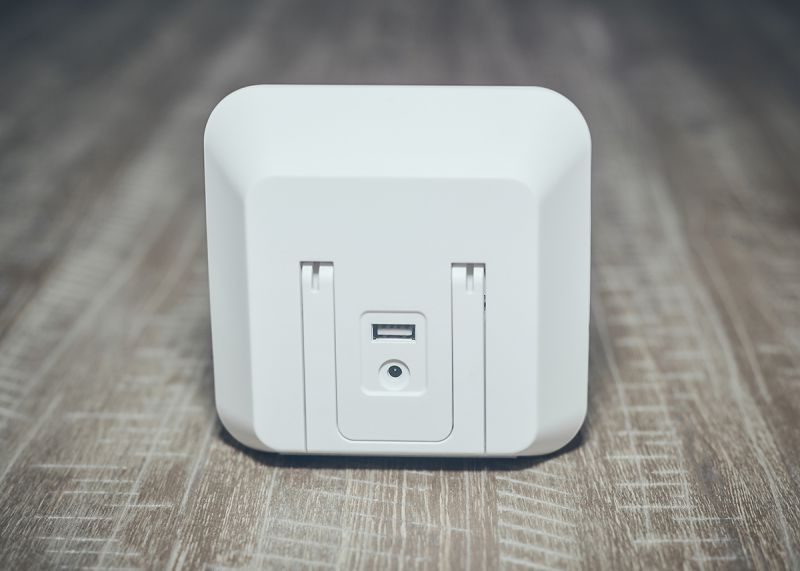
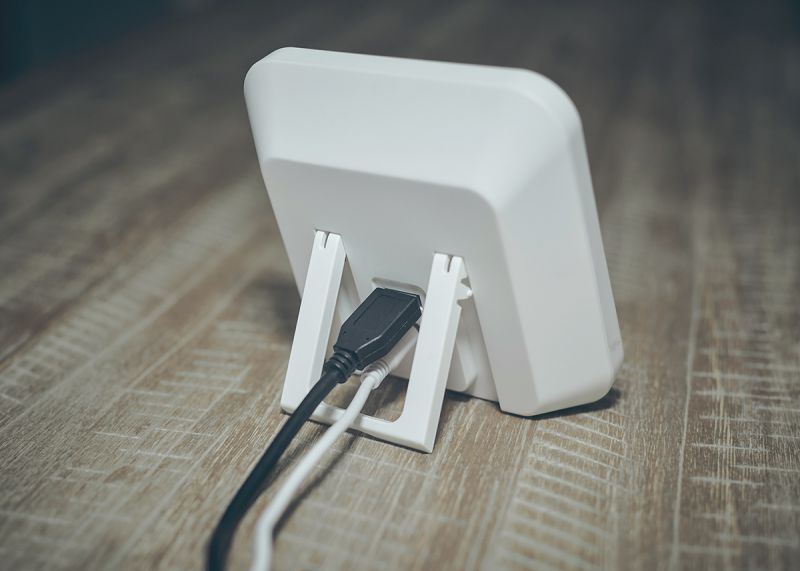
On the back side is a USB port just above the power plug. The USB port is convenient to have so you can connect the charging cable for your phone or another device that may benefit from the USB port. A bonus to plugging your phones charging cable to the sound machine is that you get extra length added to your charging cable should you need it. Plus, since this sound machine is very light and compact, it is perfect to bring along with you when you travel. It doesn’t take up much space and it’s not bulky at all. In fact, its narrow square shape makes it easy to slip into a small bag or small luggage. And speaking of travel, this would be a perfect companion traveling and you’re staying at a hotel and need to get some sleep or take a nice restful nap. You could skip turning on the TV for the background noise and just turn on this sound machine, select the sound of your choice, and get some peaceful rest.

On the back is a small kickstand to prop up the sound machine so you can position it to the desired angle. The kickstand retracts flushed onto the sound machine for maximum storage and portability. On the bottom of the sound machine is a rubber strip pad to help prevent the sound machine from sliding on smooth surfaces. Plus, the rubber pad helps from scuffing those surfaces as well.

Performance

Although the ten pre-programmed sounds are pleasant to listen to, I found that because there is only one speaker this dulls the clarity of the sounds because after all, the sounds are coming out from a single speaker. I think having two speakers will give the sounds more dynamic range and clarity because it seems that the tone of the speaker is low. So, as a result, you would have to turn the volume up to get a cleaner and crisper sound. The downside on that is that maybe you don’t want the volume too loud because then the sound would become distracting rather than welcoming.

For example, say you want to have the sound of a fan in your baby’s room but the sound is soft because the tone is low, so to get a clearer sound you have to turn it up. But then turning up the volume may get too loud for the baby to sleep to. Although it’s a personal preference to have the crisper cleaner sound, the sounds aren’t half bad considering the single speaker.

What I like

  • Pre-set settings of 15, 30, and 60 minutes and all night timer.
  • USB port on the back.
  • Small in size.
  • Convenient sound buttons on front.
  • Portable for travel.

What I’d change

  • I would add another speaker to produce stereo sound.
  • I would make the nature sounds such as the rain, waves, and night noises more natural and realistic.
  • Include a rechargeable long life battery.

Final thoughts

If listening to relaxing sounds like rain, beach waves, fan noise, or other white noise sounds makes you feel at ease, helps you sleep better, or if you just need some background noise to replace the environmental noise that you’re in, then a sound machine is a great tool to achieve this. There are times when you need some artificial aide to help combat those unwanted background noises or times when you just want some familiar sounds to help you sleep, Having a sound machine like this one is a good companion to keep in your bedroom, baby’s room, office, studio, or even to bring with you while you travel, thanks to the sound machine’s small and compact design.

I really like the Sztrokia Sleep Sound Machine from Sztrokia. Although there are only ten pre-programmed sounds, I do find that the rain and the beach waves are sounds that I generally like to listen to the most so those are sounds are enough for me. However, having the other sounds available could come in handy and maybe a nice change to listen to.

Price: $17.99
Where to buywww.sztrokia.com and Amazon
Source: The sample of this product was provided by www.sztrokia.com.

Filed in categories: Reviews

Tagged:

Sztrokia Sleep Sound Machine white noise generator review originally appeared on The Gadgeteer on July 30, 2019 at 9:00 am.

Note: If you are subscribed to this feed through FeedBurner, please switch to our native feed URL http://the-gadgeteer.com/feed/ in order to ensure continuous delivery.

Homever Slow Masticating Juicer review


REVIEW – In today’s world, eating and drinking healthy are popular efforts that have become a sought after lifestyle. In response to this demand, thousands of appliances have flooded the market, all offering to take your healthy ingredients and turn them into even healthier dishes or juices. I love fruit, but I can never seem to get into the rhythm of eating all of the fruit I purchase. However, since I do drink a lot of liquids, the idea of turning the fruit and vegetables into tasty and healthy juices is very appealing to me. There are tons of Juicers that promise to do the job of producing the most juice, in an easy way, and with minimal cleanup. Let’s see how the Homever Slow Masticating Juicer handles the task.

What is it?

The Homever Slow Masticating Juicer is a slow masticating juicer for fruits and vegetables, with a quiet motor and reverse function. It has also been designed to be easy to clean and it is BPA-Free

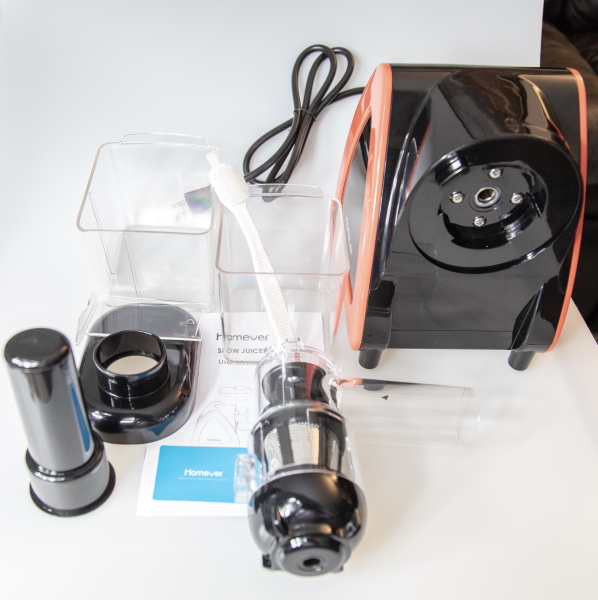
What’s in the box


1 x Homever Slow Masticating Juicer
1 x Juice Container
1 x Residue Container
1 x Propelling Rod
1 x Tray
1 x Extractor
1 x Juice Filter
1 x Extractor Cover
1 x Cleaning Brush
1 x User Guide

Design and features

Features:

  • 80 Rpm Slow Masticating & Grinding: Homever masticating juicer works in slow speed 80 rpm /minute, producing less foaming or clogging.
  • 7 Segment Spiral System: The 7 segment spiral masticating extraction can fully squeeze the fruits and vegetables.
  • 60 Low Decibel Moter Running: The Homever juice machine produces less than 60db of noise when working, and it is easy to assemble, operate and clean.

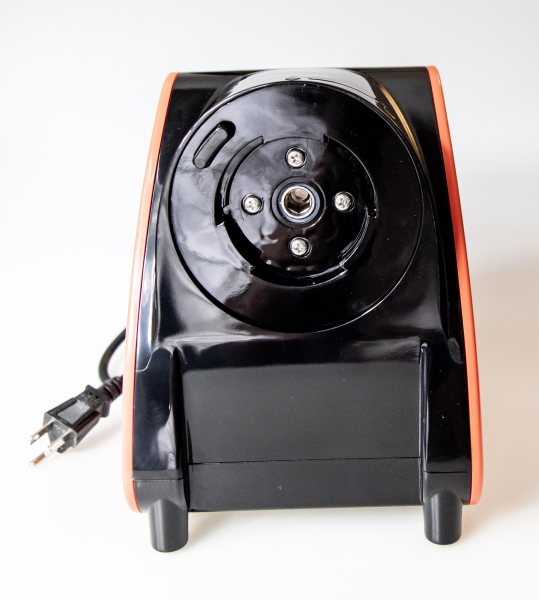
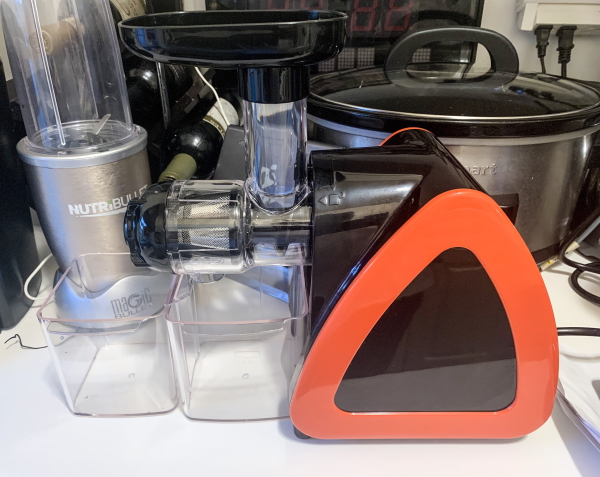
On the front side of the base, there is the receptacle that the juicing extractor mechanism connects to.
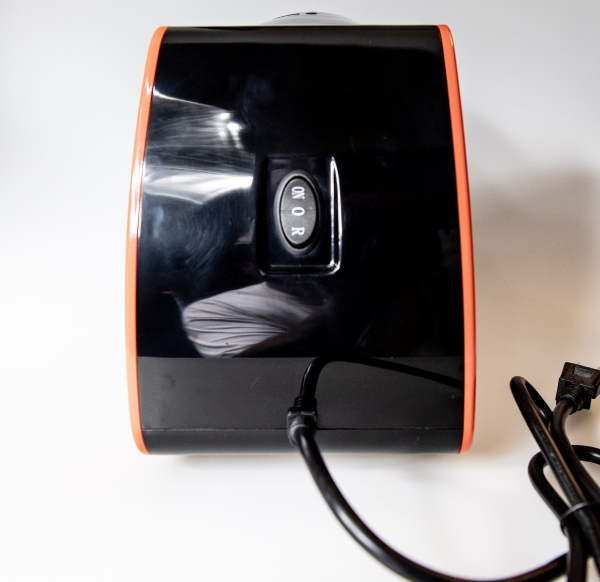
On the opposite side of the base is the power switch. It includes the on, off and the reverse functions. Below the power switch at the bottom is the built-in power cord.

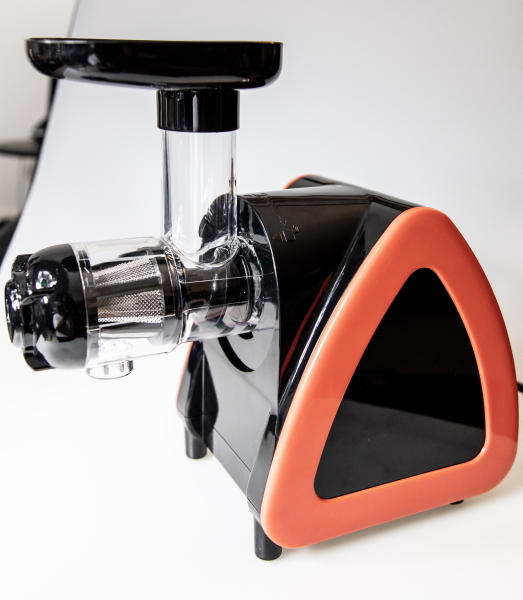
The juicing extractor mechanism that includes the filter, propelling rod and extractor connects to the base.

Performance

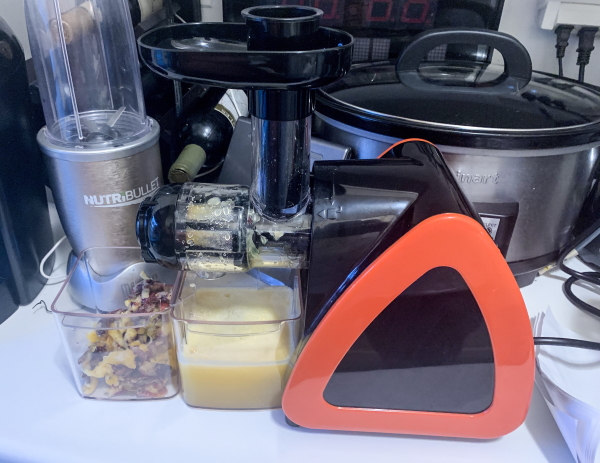
The Juicer is very easy to assemble, and I was able to put the few parts together in seconds. Then, I set it up on my crowded testing counter in the kitchen and I was ready to go., The only challenge I faced was where and how to place the container baffle, but I think I figured it out correctly.
For this test, I decided to use an apple, three clementines, a peach and a bunch of red seedless grapes. The ingredients are shown below.
I started putting the fruit in the feeding tube and very lightly pressed down on the propelling rod.

When I was done with feeding the fruit through the extractor, I had one container with all of the pulp and about 2 glasses of great tasting juice. Maybe I did not place the Container Baffle correctly because I did have some foam in the glass, but I have no problem with the foam. Not sure why some folks do, but for me, it was just great.
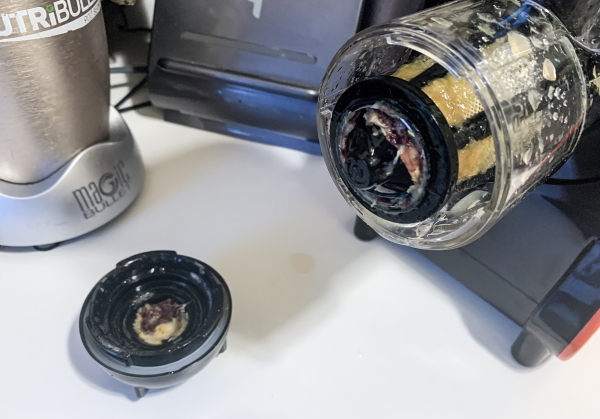
The picture below shows the resulting pulp. Everything processed easily so I did not have to use the reverse function. However, I did test it and it works by reversing the direction of the spiraling system.

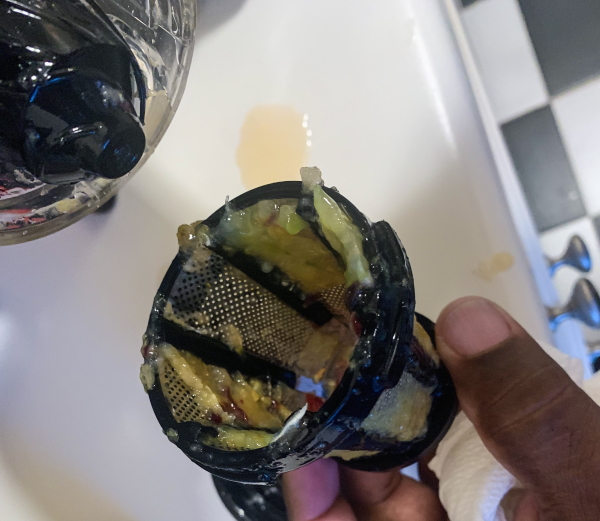
As shown below, taking the juicer apart is simple and that makes it easy to clean. I did not even have to use the Cleaning Brush. I just ran the filter and other parts under hot tap water and everything cleaned up great.

What I like

  • Simple and effective operation
  • It works with very little effort
  • Produces really nice pure juice
  • It is easy to clean
  • The build quality is good and it is lightweight

What I’d change

  • A more detailed User Guide that is also easier to read. (Larger print and diagrams)

Final thoughts

I have tried several juicers prior to this one. The ones I previously tried were ok, but they always seemed to produce less juice than I expected, required quite a bit of effort to “push” the ingredients through the blades, and were not that easy to clean up afterward. While some of them seemed a bit more robust, this juicer not only really gets the juice out of the ingredients, but it also does so producing pure juice with no reside, and the clean up is quick and easy. So far, I give it 2 thumbs up!!

Price: $102.99 plus 12% coupon = $96.79 (Amazon), $98.99 (Homever)
Where to buy: Amazon and Homever website
Source: The sample for this review was provided by Homever

Filed in categories: Reviews

Tagged: , ,

Homever Slow Masticating Juicer review originally appeared on The Gadgeteer on July 29, 2019 at 10:00 am.

Note: If you are subscribed to this feed through FeedBurner, please switch to our native feed URL http://the-gadgeteer.com/feed/ in order to ensure continuous delivery.