Thinkware Q800 PRO dash cam review

REVIEW – The past few years I’ve had the opportunity to review both of Thinkware’s flagship dash cams: the F800 and F800 PRO. With many other brands to choose from, the 800 series continues to be my dash cam of choice. I’ve even had the Thinkware 12v power cable hardwired into my vehicles enabling all of their features to be fully functional. That said, the only negative/criticism I had in those reviews was the F800’s HD resolution. In today’s high-res world, 1920 x 1080 is a bit meager IMO. Well, Thinkware has finally addressed this shortcoming in the new Q variant of the series, bumping the resolution to 2K QHD (2560 x 1440)…a welcome upgrade. Let’s see if it lives up to the anticipation 😉 .

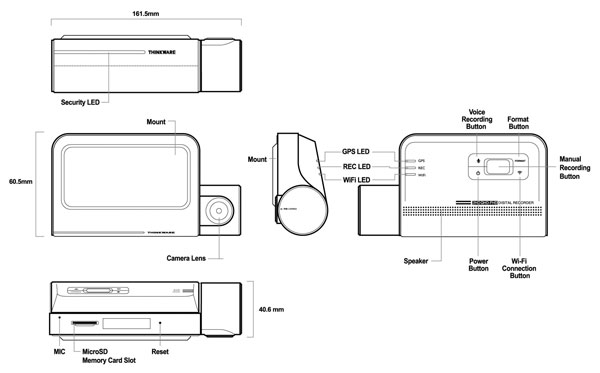
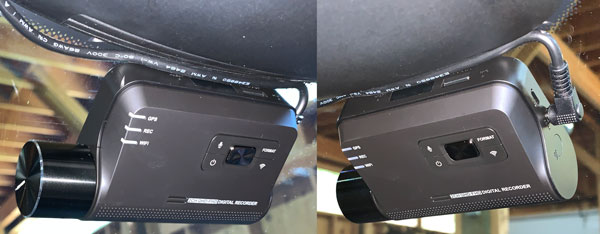
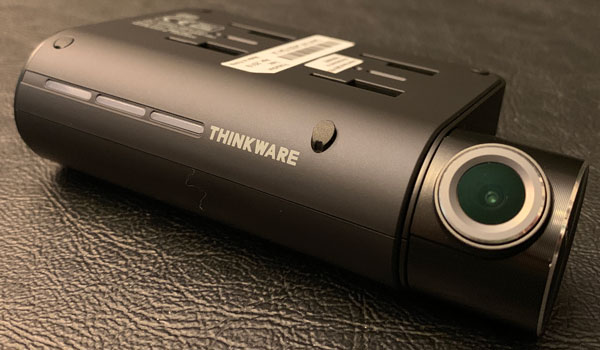
Since the F800, F800 PRO and Q800 PRO are nearly identical in form and function, I will be plagiarizing myself while describing the Q800’s shape, ports, and shared features but dive into what differences there are. Here you can see, that other than lens/camera assembly the F800 PRO and Q800 PRO are identical.

What is it?

The Q800 PRO is a screen-less dash cam, shaped more or less like a thick deck of cards with a growth on its side to house the lens assembly. Like it’s predecessors, I love the minimalistic, non-distracting form factor of the Q800 PRO. Other than verbal/audio notifications, you can hardly tell it’s installed in your vehicle being tucked behind my rearview mirror. The Q800 PRO is even more stealthy than the original F800, housed in all-black (vs gray) plastic and packed full of the latest tech, features, and Sony’s 2K/high resolution 5.14MP Sony STARVIS camera sensor.

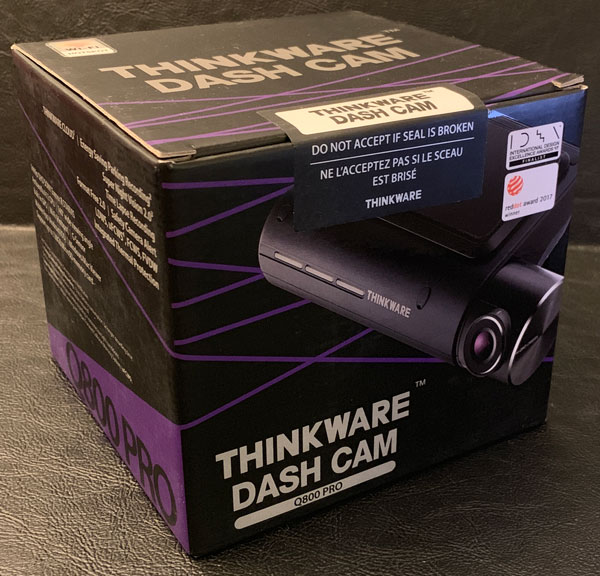
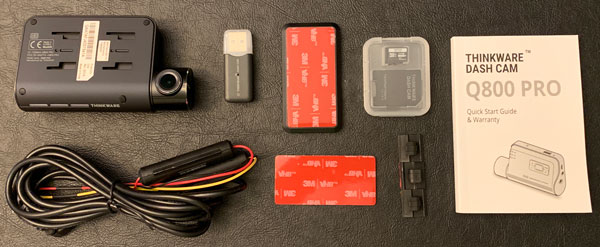
What’s in the box?

  • Main dash cam unit
  • Mount with 3M tape (1ea)
  • 12v power cable
  • Adhesive cable holders
  • 16gb microSD memory card with adapter (consumable)
  • Quick start guide/warranty card

Hardware specs

• Resolution: Front – 2K QHD (2560 x 1440) / Rear – Full HD (1920 x 1080) [Optional]
• Camera: Front – 5.14MP Sony STARVIS  / Rear – 2.13MP Sony STARVIS [Optional]
• Frame Rate: 30 fps
• Viewing Angle: 140° (Diagonal)
• Dimensions (WxDxH): 4.2 x 1.3 X 2.4 inch
• Weight: 107.5g (0.237 lb)
• Storage Temperature:   -4°~ 158°F / -20°~ 70°C
• Operating Temperature:   14°~ 140°F / -10°~ 60°C
• Capacity:  MicroSD card 32/64/128GB (UHS-I)
• Input Power:  DC 12/24V, Built-in Super Capacitor
• GPS:  Built-in GPS Antenna

Design and features

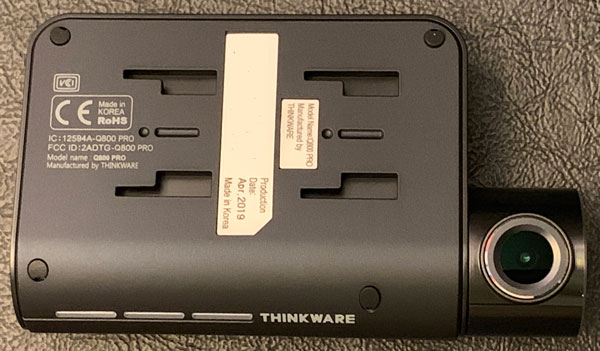
The top of the Q800 PRO has four slots that slide onto the mounting plate which allows for easy installation and removal of the device. The mounting plate is securely held to the windshield by a 3M adhesive strip (vs suction cup mount). The dash cam locks onto the mounting plate with a secure, wiggle-free connection.

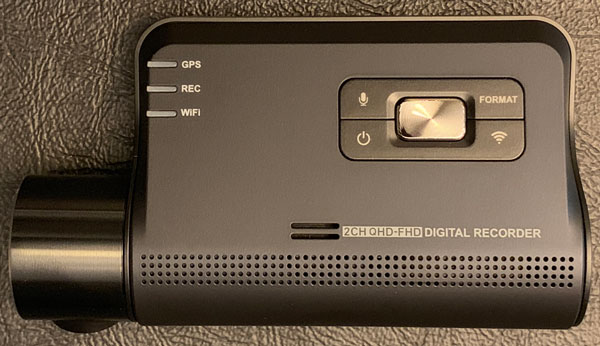
The main face of the Q800 PRO has the mic mute, SD card format, WiFi, and power buttons in addition to the GPS, recording, and WiFi status LEDs located on the left. The Q800 PRO’s speaker is also located on the front of the device. Like the F800 and F800PRO, the Q800 PRO’s speaker impressed me just like its brethren, definitely the clearest and loudest dash cam I have experienced to date.

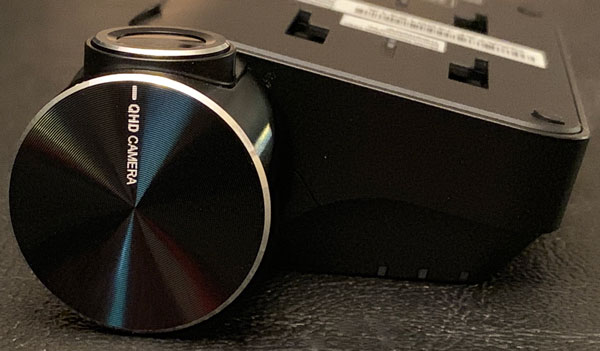
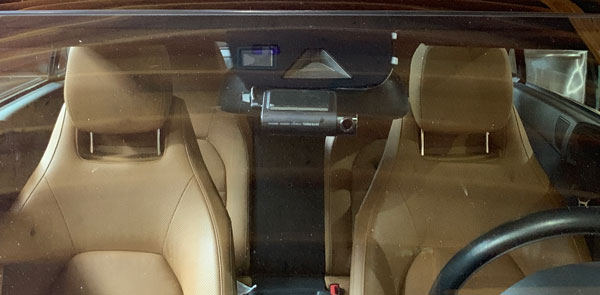
The Q800 PRO’s camera is on the left side of the device, engineered to sit very close to the windshield to reduce distortion and glare. The camera housing is able to rotate vertically approximately 90 degrees to accommodate nearly any windshield angle and vehicle design.

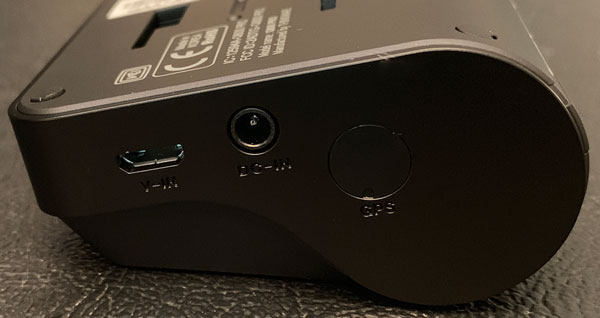
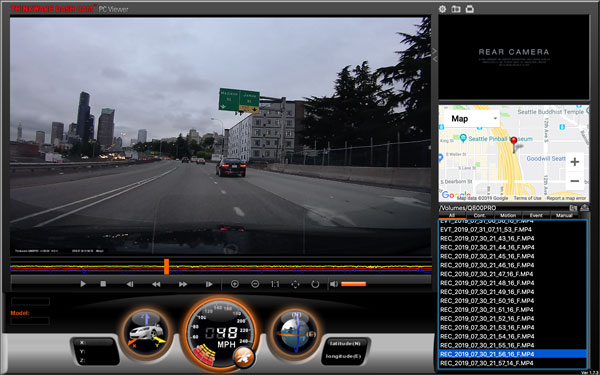
The right side of the Q800 PRO has its video-in, power, and external GPS ports. The video-in port is for the rear, second channel camera. The Thinkware Rear View Camera is an optional accessory that connects to the Q800 PRO via microUSB cable providing HD quality video with a 2.13MP Sony STARVIS sensor and 140 degree viewing angle. The rear video feed can be viewed concurrently with the main, front-facing video on the PC Viewer.

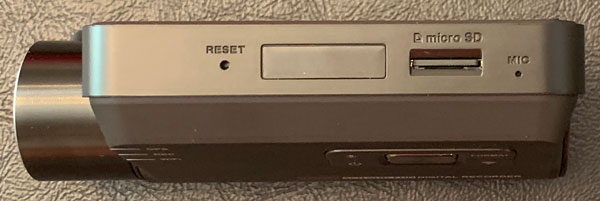
The top of the Q800 PRO has a recessed reset button, microSD card slot, and microphone. Thinkware includes a 16gb microSD card. The Q800 PRO can accommodate up to a 128gb card. Considering the Q800 PRO records in 2K with video taking up twice the space/capacity of standard HD, seems like Thinkware could have included a 32 or better yet 64gb microSD card with their premium device.

Installation

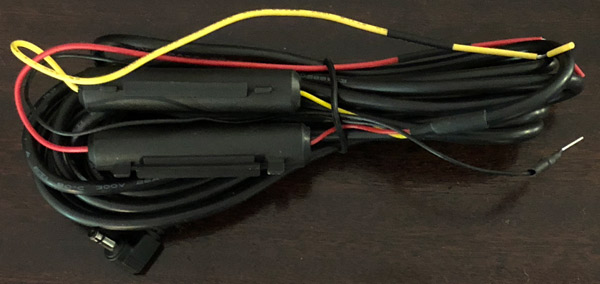
Instead of sending a standard 12v power cable that plugs into your cigarette lighter, Thinkware includes their TWA-SH hardwiring cable with the Q800 PRO. I had the hardwiring cable professionally installed during the F800 PRO review and it has performed perfectly. In addition to looking cleaner and more polished, the hardware kit enables you to use all of the Q800 PRO’s Parking Mode features/capabilities.

Once installed a majority of the configuring, managing and viewing/downloading video is all done via the Thinkware app available for iOS and Android devices.

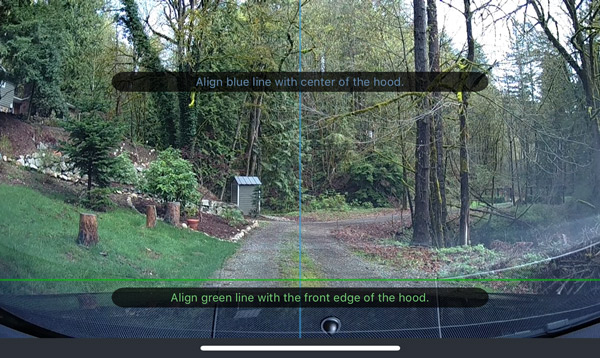
The Thinkware app even helps you align the dash cam when first setting the 3M mounting plate as you can see here with the blue & green lines.

Setup and management

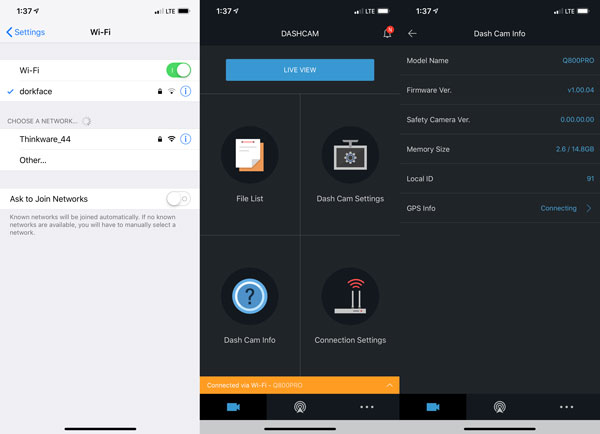
Setting up the Q800 PRO’s involves connecting your smartphone to the dash cam via WiFi and using the mobile app to tweak things as you like. The process requires you to press the WiFi button on the front of the dash cam, directly connect to its WiFi (for me it is Thinkware_44), then start up the app.

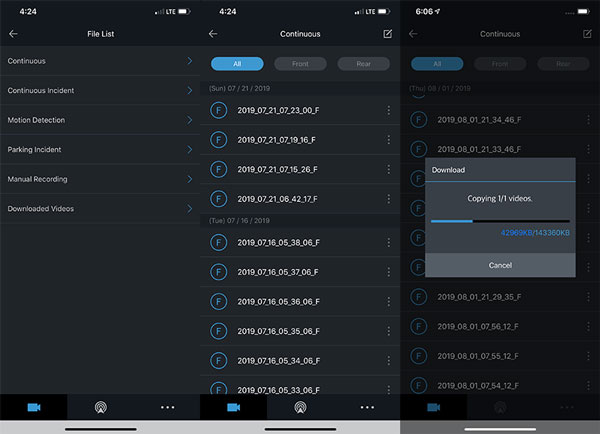
In addition to accessing the Q800 PRO’s camera (memory card/camera/recording/road safety/system) settings, the app also provides a listing of recordings and enables you to download these files from the microSD card to your smartphone wirelessly. Each 146mb file takes several minutes to download. Viewing videos are definitely easier by removing the microSD card and watching them on the Thinkware viewer on your computer.

Noteworthy Features

  • Built-in GPS sensor  – the 800 PRO series has the FASTEST built-in GPS I have ever tested.
  • Driver assistance – Includes lane departure, forward collision avoidance, and forward vehicle departure warning.
  • Speed camera alerts – the Q800 PRO has an internal database that warns you when you’re coming up to an intersection or location with a known speed camera standing watch.
  • High-temperature protection system – a built-in thermal sensor protects the Q800 PRO hardware and data against intense heat by automatically turning it off to prevent overheating.
  • Dual channel capable (aka second camera) – Thinkware also offers a rear camera that captures HD video @30fps.
  • Geo-Fencing – allows drivers or parents to stay alert of the vehicle location.
  • Locate Vehicle – enables drivers to find the vehicle’s current location.
  • Driving Impact Notification – will notify owners when their vehicle has sustained a significant impact.
  • Energy Saving Parking Mode – reduces power consumption by 1/3 less and gives 3x longer video recording than typical parking mode.

Performance

Thinkware’s new optical lens and improved 5.14MP Sony STARVIS image sensor combine to deliver impressively crisp and clear video quality in 2K QHD. The Q800 PRO just works…once installed, it blends into your car only needing to be accessed when something bad happens or an alien spaceship zips across the horizon.

Video Quality

As I mentioned above, the Q800 PRO uses a Sony 5.14MP STARVIS QHD (2560 x 1440) sensor that captures 2K video at 30fps. The clarity and detail in all lighting condition is excellent. Like the rest of the Thinkware’s 800 series dash-cams, the Q800 PRO gives you a relatively wide viewing angle with a 140-degree view of the road.

With its better lens and greater resolution, the Q800 PRO’s daytime video is excellent. The detail, color, and clarity make for a much improved image quality over its predecessors.

Thinkware’s Super Night Vision 2.0 and Sony improved Exmor CMOS image sensor are very good at capturing light, producing low-light and nighttime video.

Here is an example of the Park Mode video. Even though my parking garage is dimly lit with shadows and bright lighting, the lights are not overexposed and the detail is very clear and detailed.

Thinkware Viewer

The Thinkware PC viewer is one of the best features of using their dash cams, very well polished and intuitive. Other dash cam manufactures either create a half-baked viewer or do not offer one at all.  The Thinkware viewer is an excellent integrated tool for viewing not only your driving video but speed, lat/long, Google map location, and three-dimensional G-forces the car is experiencing at any particular moment. These G-forces are illustrated in the bar graph under the video and the dial with a car in it with X- Y- and Z- axis in the lower left corner of the window. Like the F800 and F800 PRO, the Q800 PRO records in 1:00 minute blocks but its 2K resolution bumps the file size from approximately 85 to 146mb in size. So, I swapped out the 16gb microSD card Thinkware provides with a 64gb one I had laying around, to (obviously) hold more video at one time before the dash cam overwrites itself.

F800 PRO vs Q800 PRO:

As I mentioned above…other than the lens assembly, there is no outward/physical difference between the F800 PRO and the Q800 PRO. The Q800 PRO’s improved resolution and video are the only things that truly set it apart from the F800 PRO, the features are the same.

What I like

  • Great build quality
  • 2K QHD (2560 x 1440) resolution
  • Additional features and functions
  • Stealthy/minimalistic form factor
  • Very good video quality (especially Night Vision)
  • TWA-SH hardwiring cable included
  • Dual channel/camera capable
  • Quick GPS lock
  • Excellent PC viewer
  • Solid companion smartphone app
  • Easy to install/use

What I’d change

  • Included microSD needs to be higher capacity

Final thoughts

I really like Thinkware’s 800 series of dash cams…so much so, I have had them hardwired into several of my vehicles. I have always prefer their screen-less, minimalistic form factor. The Q800 PRO raises the bar by bumping up the camera’s resolution from 1080p to 2K. As I have said in past reviews, I prefer a higher resolution sensor and Thinkware has delivered with their latest & greatest. The Q800 PRO is jam-packed with features you would expect from a high-end dash cam (tho I can see many not using some of its more advanced capabilities). I love the all-black PRO’s stealthy look and vibe. Bottomline: I recommend the Q800 PRO for its video quality, design, features, and polished ecosystem. If you’re thinking of buying or upgrading your dash cam, I definitely recommend the Q800 PRO be on the top of your list.

Price: $299.99
Where to buy: Amazon or Thinkware.
Source: The sample of this product was provided by Thinkware.com.

Filed in categories: Reviews

Tagged: ,

Thinkware Q800 PRO dash cam review originally appeared on The Gadgeteer on August 9, 2019 at 9:00 am.

Note: If you are subscribed to this feed through FeedBurner, please switch to our native feed URL http://the-gadgeteer.com/feed/ in order to ensure continuous delivery.

Brightech Maxwell Floor Lamp with Wireless Charging Pad review

REVIEW – When our family first started buying mobile devices several years ago, I purchased an Anker USB charging hub and put it on our pie safe.  This created one central location in the house where everyone could put their gadgets for high-speed charging.  These days, however, it seems that we always want to keep our devices handy. We have this compulsion to respond quickly to text messages, check the weather, or play music via a Bluetooth speaker. Whether or not such dependency upon our gadgets is a good thing I’ll leave for you to decide, but it certainly leaves us wanting to have more than one charger in the house and even to have more than one type of charger, as our tablets still require a USB cable but our phones support the Qi wireless charging standard.  I could purchase a handful of charging stations and scatter them around the house, but it would be nice to have a solution that fits more naturally into our living spaces.  This is where Brightech comes in.  As the name of this company suggests, many of their products integrate charging technologies into light fixtures.  This is an elegant way to solve my problem, so I’m hoping that the Brightech Maxwell floor lamp will fit nicely into our living room.

What is it?

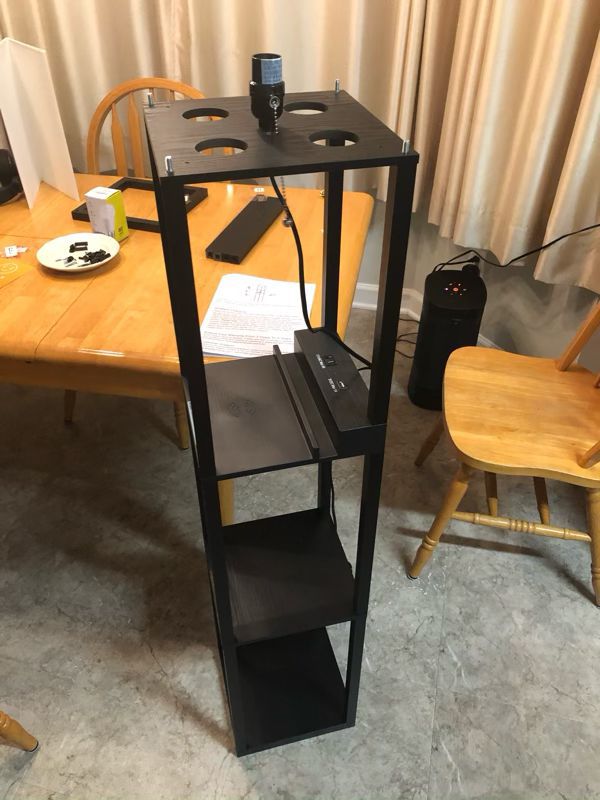
The Brightech Maxwell (Wireless Charging Edition) is a floor lamp that has three shelves, one of which has a power outlet, a USB port, and a Qi wireless charger.  It’s designed for the living room, and I think it would probably work best next to a couch or a chair, thus providing easy access to devices being charged.

What’s in the box?

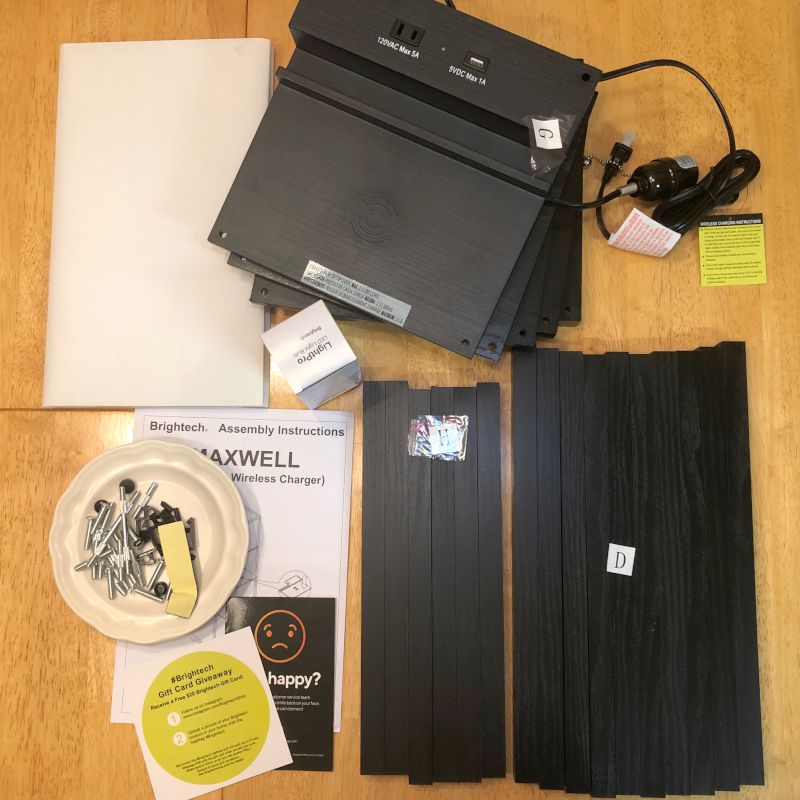
The Maxwell comes with:

  • All the parts necessary to assemble the floor lamp (shelves, poles, sundry hardware, and a light socket with cord)
  • A light bulb
  • A rectangular, off-white lamp shade
  • A manual with 3 pages of assembly instructions, a customer care card, and a giveaway card

You’ll need to have a large Phillips screwdriver and a rubber mallet to assemble the lamp, as these tools are not included.  (A regular hammer will work in a pinch, though it might crack the plastic pieces, if you’re not careful.)

Hardware specs

  • 1 LED lightbulb, 9.5 watts at 800 lumens
  • 1 Qi wireless charger
  • 1 USB port (the website says there are 2 ports, but there’s only 1)
  • 1 US electrical outlet
  • Weight:  13 pounds
  • Height:  63 inches
  • Shelves:  10.25 x 10.25 inches

Design and features

Brightech describes the Maxwell lamp as both Asian and modern.  When we lived in Thailand, we saw a lot of rectangular lamp shades, though often with images.  When a shade like this is combined with the austere style and black color of our lamp then a fusion of Asian and modern is a pretty good summary of its style.

Installation and setup

I hope you’re comfortable with the phrase “some assembly required,” because that’s a requirement for this gadget.  One evening after dinner, my wife and I set out to assemble the floor lamp.  The manual walked us through the process using a combination of pictures and textual instructions.  For the most part, it was well-written.  There were a couple places that were slightly confusing, but as this lamp is reasonably straightforward to assemble, we were able to figure it out without any snafus.

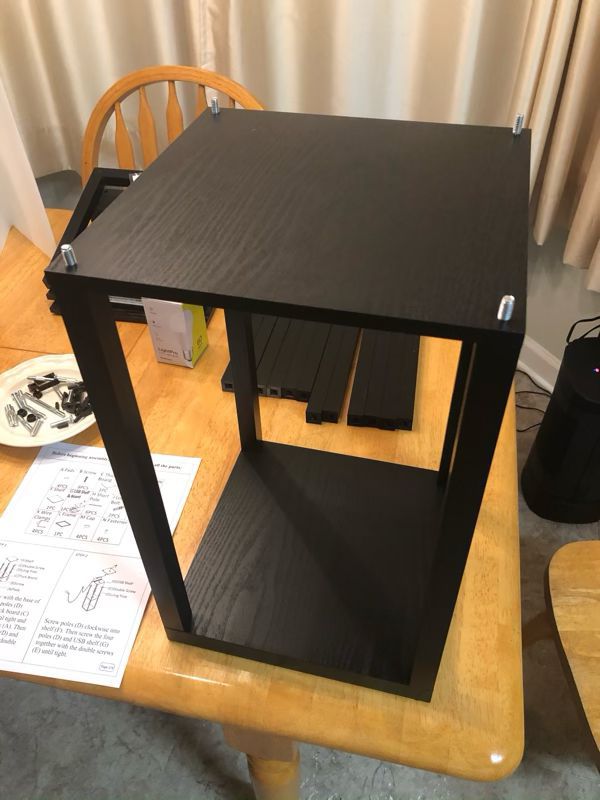
We started with the base and connected the poles with screws.  It uses a set of interesting two-sided screws that connect the poles under each shelf with the corresponding poles over it.  This is a nice solution for keeping everything together nice and tight.

The lamp quickly grew until it was too large to assemble on the table, so we moved it down to the floor. There are three shelves:  the base shelf, the middle shelf, and the charging shelf.  Two power cords are built into the back of the charging shelf; one goes down and plugs into the wall, and the other goes up and connects to the lamp.

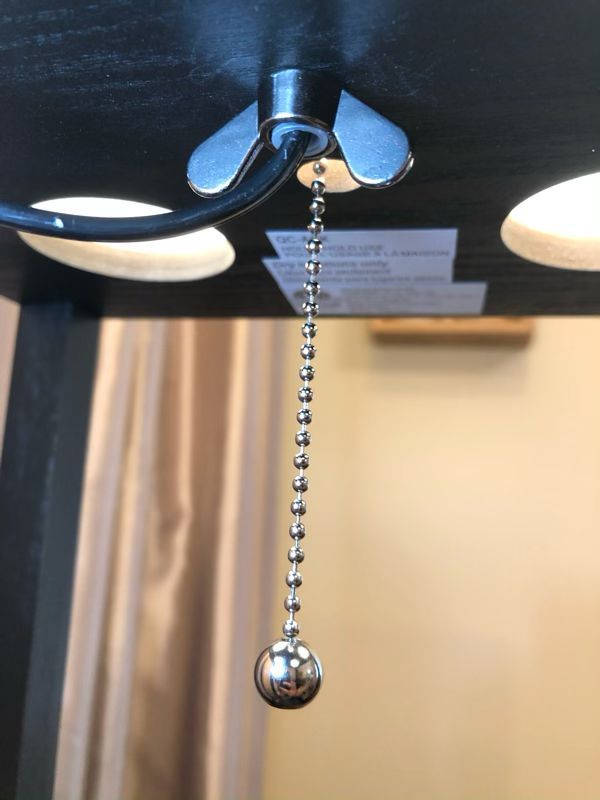
The socket is held firmly in place with a wingnut, and a small chain hangs down under it and turns the light on and off.  There also four holes in the board that holds the socket, allowing some light to shine done onto the charging shelf below, a nice touch.

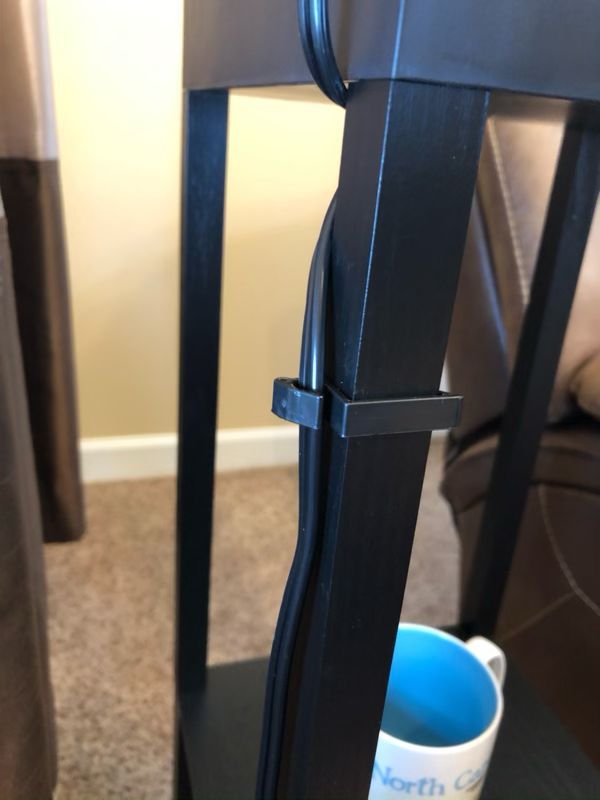
Once we added the final piece to the top, we opened up the lamp shade and slid it down into its spot. The somewhat rigid material feels very similar to a standard lampshade.  Four plastic fasteners keep it from moving around.   The final step was to attach the four plastic clips used to hold the cord against the poles, thus keeping it out of sight.

It took us about 30 minutes to assemble the Maxwell.

Performance

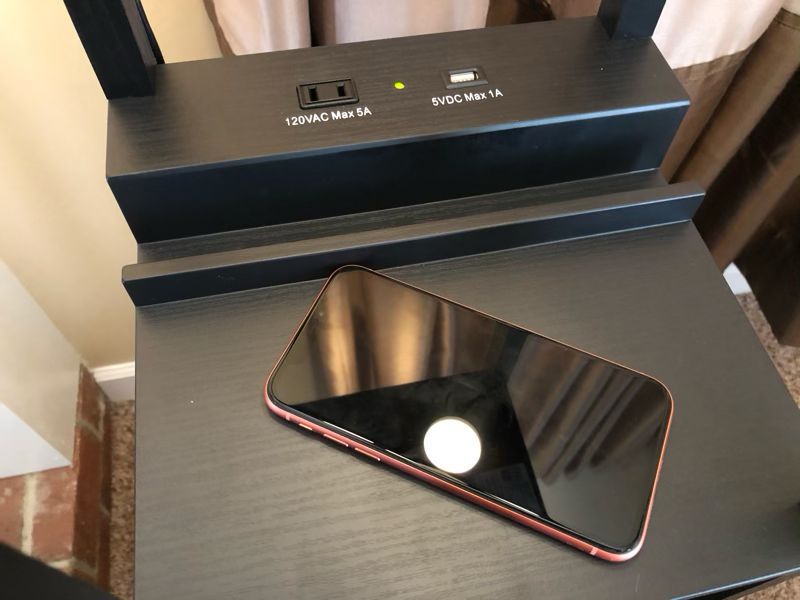
The charging shelf has a Qi wireless charger built into it.  When an Qi-enabled phone is set on the shelf, it begins charging, and it works just as expected.  There’s a small LED between the plug and the USB port that is normally red but turns green when a phone is charging.  I’m not a big fan of the LED; it doesn’t really fit into the soft ambiance of our living room, but it is handy to know at a glance when my phone is being charged.

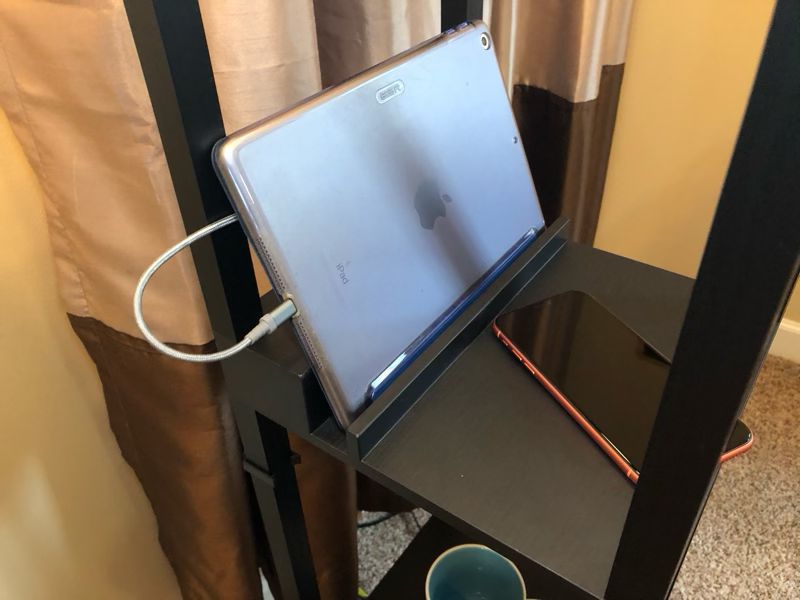
There is also a USB port for charging other gadgets, and you’ll need to supply your own cable for this. When charging my tablet, I can prop it up using the built-in stand, thus keeping the shelf free for charging a phone. This is a nice little addition to keep things neat.

The included lightbulb is a warm white LED that uses only 9.5w.  It’s bright enough to read by, though not so bright as to blind everyone in the room.  The top of the lamp shade is open, making it easy to change bulbs.

Location

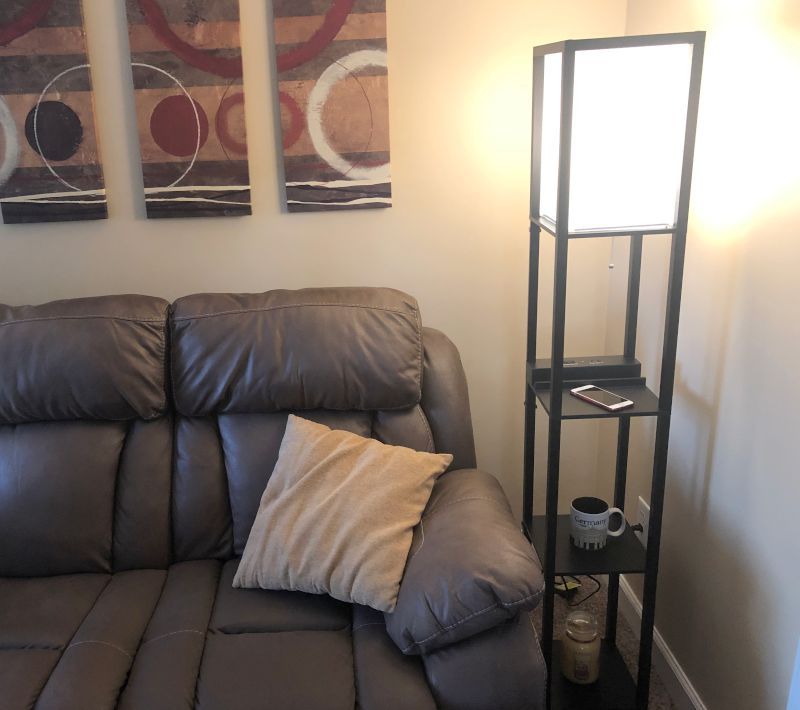
Once the lamp was assembled, we needed to find a home for it.  For our family, we decided that the best location would probably be in our living room, so we removed the end table and lamp beside our sofa and put the Maxwell in its place.  The first thing that we noticed was that it was a bit wobbly on the carpet due to the small base.  Most new homes these days in our part of the country are built with hardwood floors in the living room, so this won’t be an issue for everyone.  Although the lamp looks great here, it didn’t really function too well for us.  Unlike the end table, the charging shelf is too high above the couch arm and felt awkward, plus it was not quite steady enough to safely hold a glass of ice tea while watching TV.  (As an alternative, it’s worth noting that Brightech makes the Madison, which is an end table with a built-in wireless charger; that probably would have worked better here.)

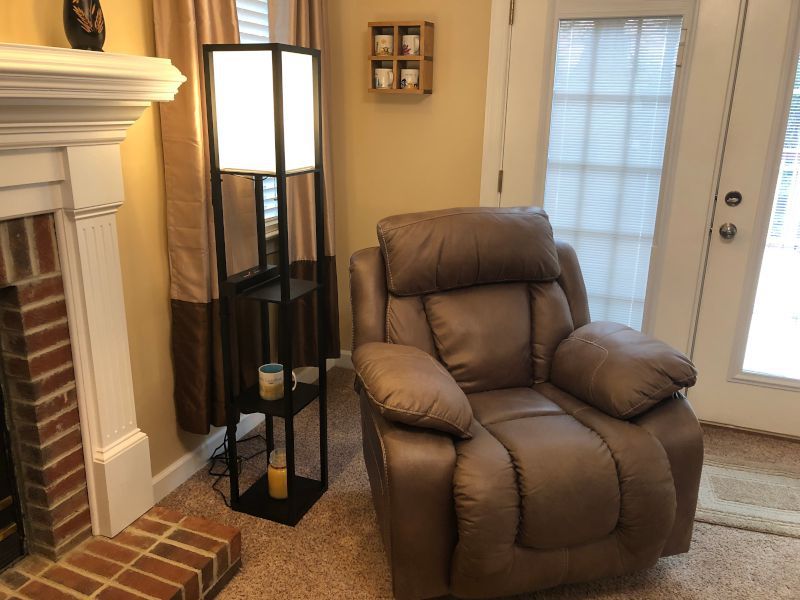
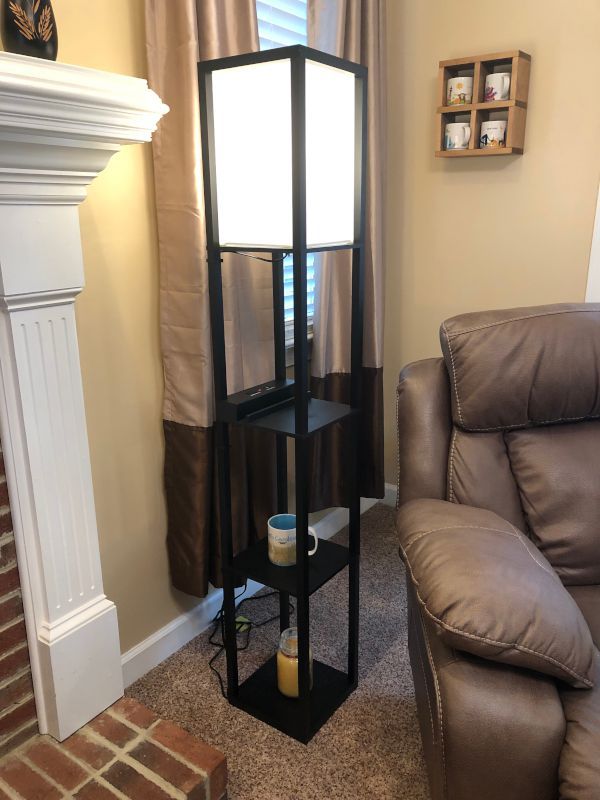
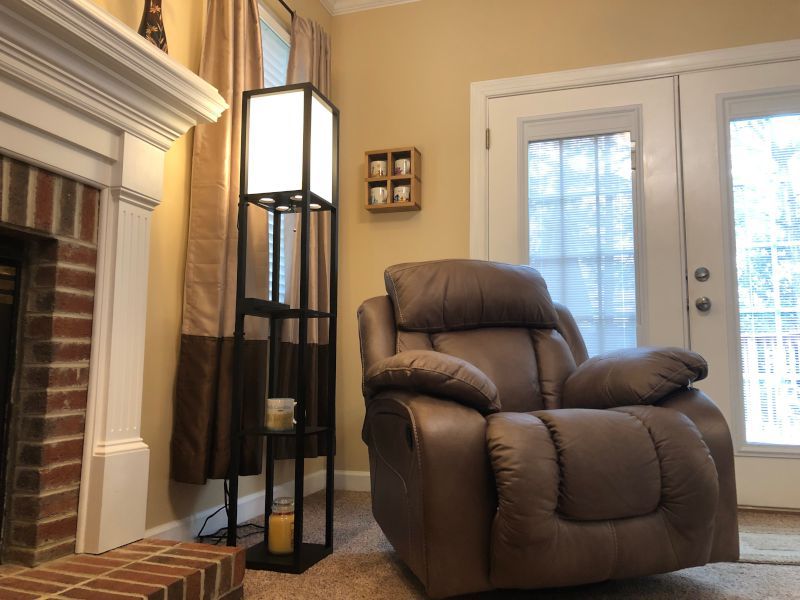
We decided to try the spot beside our recliner, and we’re much happier with it here. It fits nicely into the niche between the recliner and the fireplace, provides light for reading, and it’s perfect for charging a phone.

I think the lamp could also work well in a study or den and maybe even in a master bedroom if there’s a chair to put it by.

Materials

Brightech’s website says that the Maxwell is a “floor lamp in an all-wood frame.”  I was immensely disappointed when I opened the box and found that this lamp is not made of solid wood but of MDF.  If you’re not familiar with MDF, it’s basically sawdust mixed with resin and wax and compressed with heat and high pressure.  It’s a manufactured product, and while it’s made from wood byproducts, it’s not wood.  It’s neither as durable nor as strong as real wood, and it completely lacks its warmth and beauty.  To hide the MDF, Brightech covers the poles and shelves of the Maxwell with a plastic veneer that has a wood-like pattern.  The only advantage of MDF is that it’s less expensive than real wood.  I hope that Brightech chooses to be completely transparent and change it website to say “MDF” or “engineered wood product” instead of “all-wood.”

What I like

  • Asian, modern design
  • Wired and wireless capabilities
  • Chargers built into the lamp

What I’d change

  • Be transparent about using MDF (or use real wood)

Final thoughts

The Maxwell has found a nice home in our living room, and I’m super happy with the functionality that it provides.  I really like the way that Brightech has integrated charging capabilities into a floor lamp, and I’m hoping that this concept finds its way into other furniture in our house.  Whether or not you should consider buying the Maxwell largely depends on upon your views of wood.  If you don’t really care about wood, or if you’re looking to save some money, then you should definitely take a look at the Maxwell.  If, however, you prefer real wood furniture, then you should probably pass.

Price:  $59.99
Where to buyAmazon
Source: The sample for this review was provided by Brightech.

Filed in categories: Reviews

Tagged: , ,

Brightech Maxwell Floor Lamp with Wireless Charging Pad review originally appeared on The Gadgeteer on August 8, 2019 at 10:00 am.

Note: If you are subscribed to this feed through FeedBurner, please switch to our native feed URL http://the-gadgeteer.com/feed/ in order to ensure continuous delivery.

Honeywell TurboForce Tower Fan Review

REVIEW – I’ve got quite a few fans around my house, mainly because my wife has asthma and likes the air to circulate – all of the time. The Honeywell TurboForce Tower Fan looked like it might be able to finally make her happy.

What is it?

The Honeywell TurboForce Tower Fan is an oscillating dual tower fan that has separate controls for each fan.

What’s in the box?

List contents – you can remove this heading and section if it doesn’t apply to your review.

  • Honeywell TurboForce Tower Fan
  • Base


Design and features

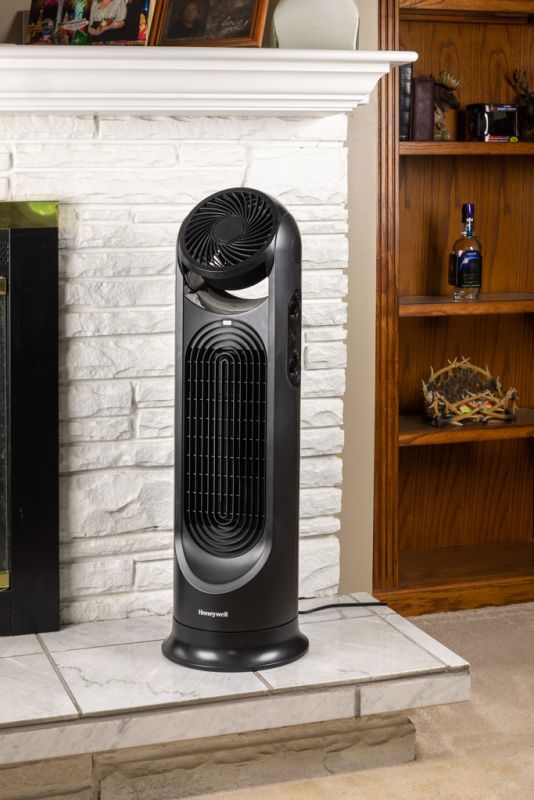
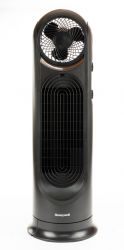
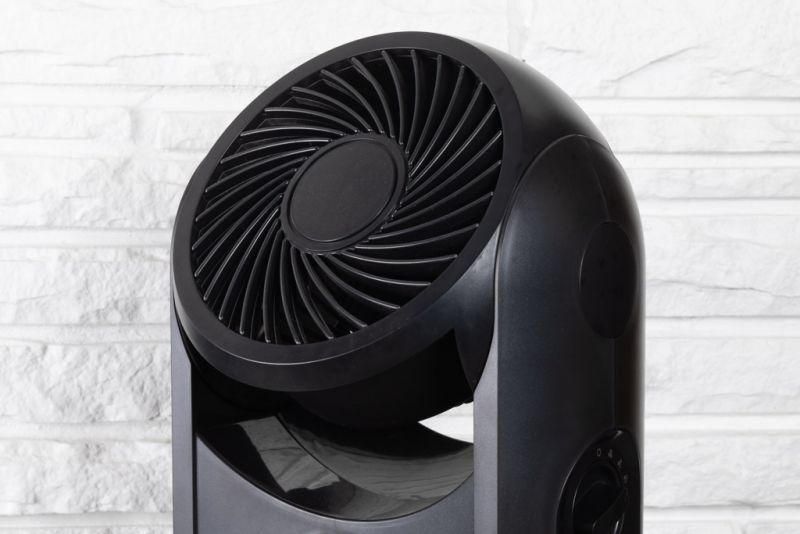
The Honeywell TurboForce Tower Fan is a pretty simple design that incorporates two fans with an oscillating base. A top and a bottom fan ensure a very wide range of air movement. At 32″ tall it stands tall enough to be a bit off of the floor, but not so tall that it will get in the way.

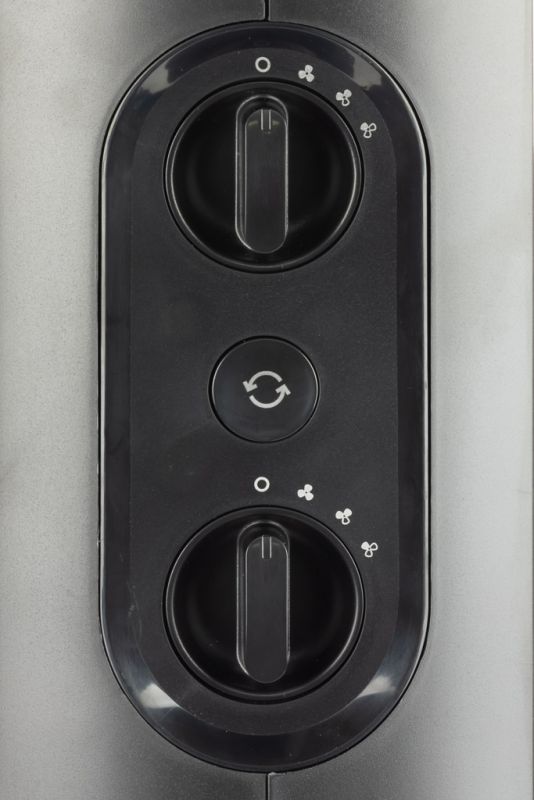
The smaller top fan unit has a tilt-adjustable head that tilts up to 90 degrees upward which helps circulate the air from the ceiling area of a room. The top fan is a standard circular style 6″ fan. The bottom fan is a 12″ drum style fan that blows air directly forward. It really moves the air!

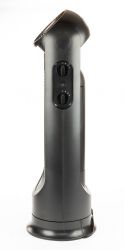
Each fan has a separate, easy to operate, 3-speed control knob. The unit has a separate on/off push switch for the oscillation feature instead of a rotating knob like some fans have.

This fan really moves a lot of air. My living room is 14’x20′ and this fan is plenty strong enough to not only move the air around, but I actually get chilled from it.

The oscillating tower design is nice in that it does not swing widely from side to side like other oscillating fans. This makes it not only operate in less space, but it does not have any distracting motion that you can see out of the corner of your eye.

What I like

  • The top tilt-adjustable fan is great
  •  4 position knobs (Off-Low-Medium-High)

What I’d change

  • Nothing I can think of

Final thoughts

Overall both my wife and I both love this fan. It moves the air around very nicely and it’s not very loud. It also eliminates the need for several fans. I like the fact that it’s a pretty standard design without any cryptic push-button features that are difficult to figure out. Simply plug it in, turn a knob and enjoy!

Price: $79.99
Where to buy: BestBuy and Amazon
Source: The sample of this product was provided by Honeywell.

Filed in categories: Reviews

Tagged: ,

Honeywell TurboForce Tower Fan Review originally appeared on The Gadgeteer on August 8, 2019 at 8:00 am.

Note: If you are subscribed to this feed through FeedBurner, please switch to our native feed URL http://the-gadgeteer.com/feed/ in order to ensure continuous delivery.
Ecovacs DEEBOT 500 robot vacuum review

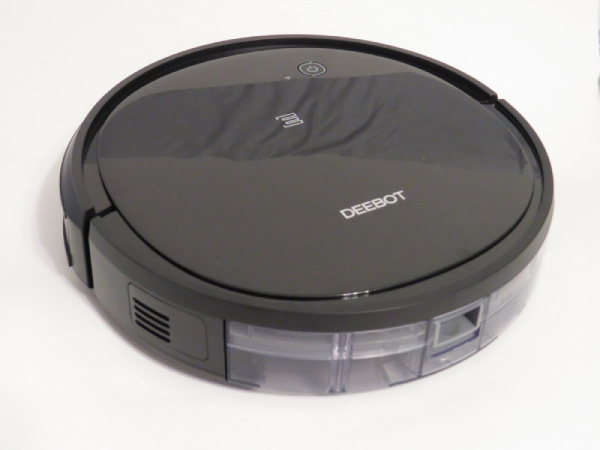
REVIEW – Ever watch the videos of the cat riding around on a vacuum? Those cute little automated vacuums have been around for years, but I’ve stuck with my tried and true push vacuum. I had the opportunity to try the Ecovacs DEEBOT 500 robotic vacuum cleaner, and while my cats won’t sit on it for internet points, it did roam around sucking up all in its path.

What is it?

The Ecovacs DEEBOT 500 robotic vacuum cleaner is a cordless, hands-free vacuum. With the accompanying app, it can be remotely started or scheduled to clean the floors.

Hardware specs

  • Anti-Drop/Collision Sensors
  • Auto, Edge, and Spot Modes
  • Scheduled Cleanings
  • Automatic Charging
  • Up to 110 minutes run time and 520 mL dust bin
  • Works with Amazon Alexa and Google Assistant

What’s in the box?

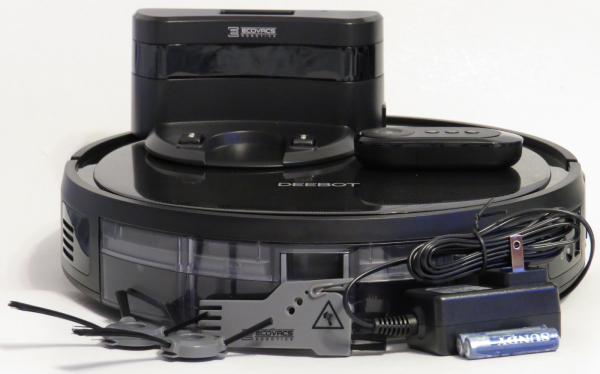
  • DEEBOT 500 robot
  • Charging Dock + Power Adapter
  • Side Brushes
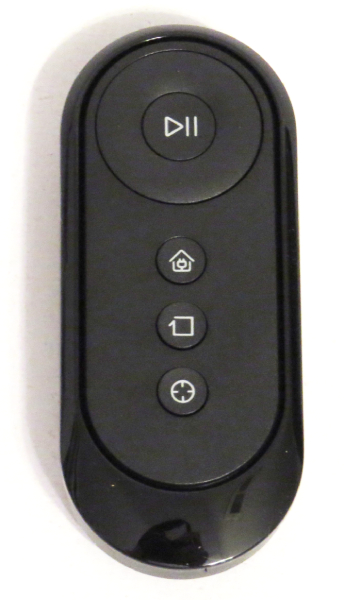
  • Remote Control w/ batteries
  • Cleaning Tool
  • Instruction Manual
  • Quick Start Guide

Design and features

With the included quick start guide, setup for the DEEBOT was a breeze. I sat it on the base and let it charge overnight while I got the app ready. While I couldn’t find the QR code to scan to easily identify my device, I was able to search it up on the app and pick it out via the picture/model. I then connected it to my Wifi on the app, which was easy, and I was ready to start scheduling cleanings.

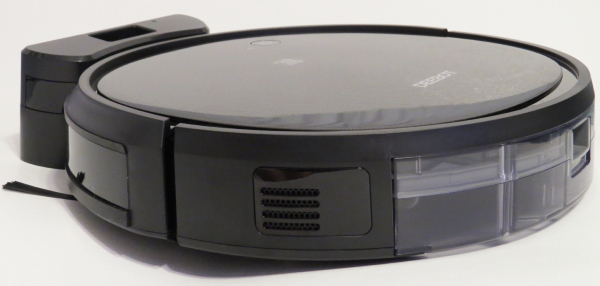
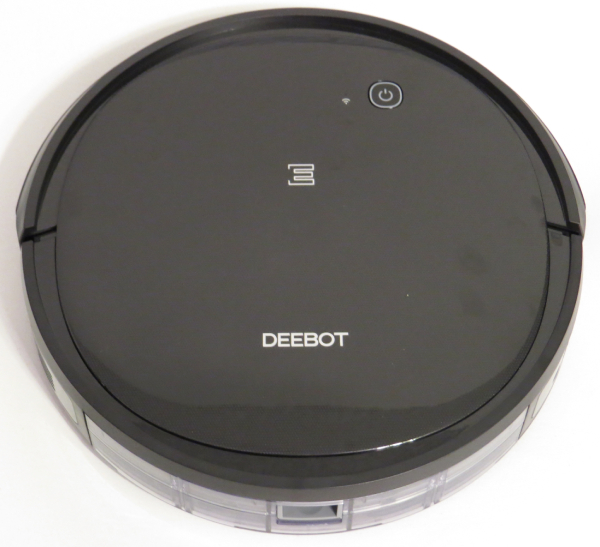
Before we start cleaning, let’s talk about the DEEBOT itself. It seems to be a pretty standard-sized, non-obtrusive looking vacuum, with minimal buttons. On top, you’ll find the main button, which will start a cleaning session, bring the DEEBOT out of standby, and is also used to indicate the vacuum status.

There is an on/off switch and a reset button on the side, and that’s all the buttons the vacuum has. The rest of the controls are on the app or remote control.

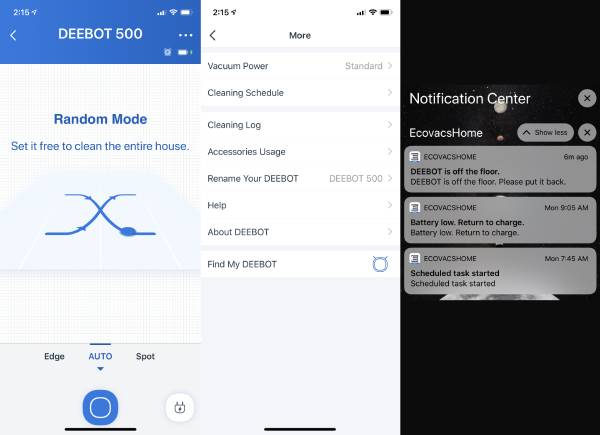
On the Ecovacs Home app you can control the mode you want the vacuum to run in; Edge, Auto (random), and Spot. Edge will just go around the edges of your room, Auto is the standard mode, and Spot will run in a spiral in a certain area that you place it. You can also check the battery level, schedule cleaning times, and change the suction power. Lastly, if you ever lose your DEEBOT in the house, you can press the Find my DEEBOT button and it will cause the DEEBOT to beep. You can also set up notifications to alert you when something is going on with the vacuum.

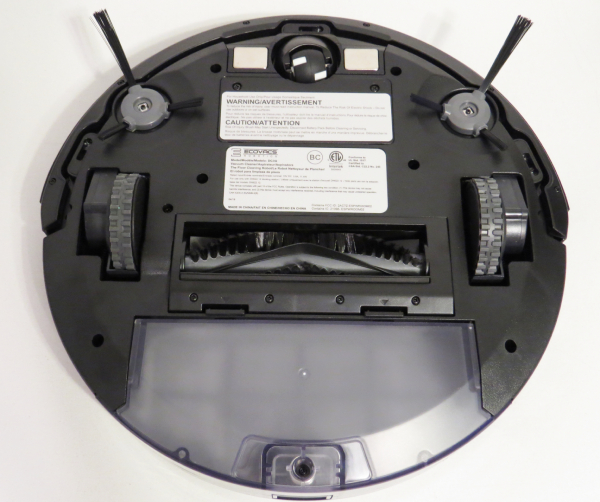
There are two side brushes and one main brush for vacuuming. The side brushes push the dirt towards the center where the main brush is. I noticed the side brushes tended to get tangled with hair, though it didn’t seem to affect the performance. The main brush stayed pretty clean.

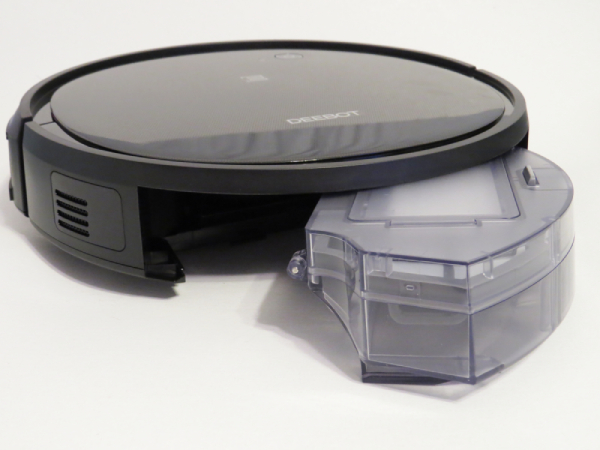
The back of the vacuum has a pretty decent sized dust bin with built-in filters. I can’t tell if the air quality is better, but the big filter gets dusty pretty fast. It is really easy to remove, empty, and replace the dust bin. One thing I wish with the dust bin is that it would send a notification when the bin is full.

Before

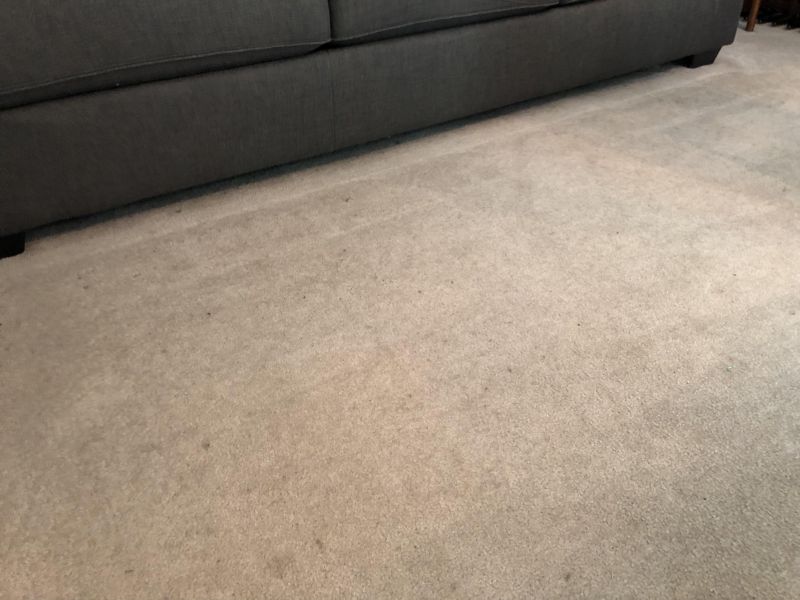
Now, how much does this thing pick up? The first go around, it did a fantastic job navigating all around my small dining room area, except it missed one two foot square of carpet space. Since then, however, even if I clear out the area of all chairs and obstacles, it still misses the area to the right of the base. It’s a bit annoying, since the left side and in front of the unit gets very, very clean. Above and below are before and after pictures of a cleaning. As you can see, it cleaned up the dirt and cat hair very well.

After

The DEEBOT would run for a good 90-110 minutes before heading back to the charger. A few times it got ‘stuck’ going back to the charger, which baffled me. At one point it spent five minutes going around the leg of my kitchen table with nothing around it trying to get back to the base. It made it back before it ran out of juice, however. It took about 4-6 hours for the DEEBOT to fully charge after returning to the dock.

Since this is the standard model, there is no set pattern for how the DEEBOT scoots around on the floor. It will bump into things and turn to find another way. It does have stair detection, and will even stop and turn around when it finds a lip on the flooring, such as going from carpet to linoleum in my kitchen.

What I like

  • Easy to set-up/use
  • Scheduled cleanings
  • Seems sturdy

What I’d change

  • Will completely miss areas of carpet
  • Doesn’t inform when dust bin is full

Final thoughts

Overall, I had a difficult time figuring out whether or not I liked the DEEBOT 500 robot. Where it cleaned, it cleaned well, but despite moving around and clearing furniture, it would barely go over certain areas. This vacuum has a good start, but for the price, I would expect it to do a little better.

Price: $279.99
Where to buy: Amazon
Source: The sample of this product was provided by Ecovacs.

Filed in categories: Reviews

Tagged:

Ecovacs DEEBOT 500 robot vacuum review originally appeared on The Gadgeteer on August 7, 2019 at 9:00 am.

Note: If you are subscribed to this feed through FeedBurner, please switch to our native feed URL http://the-gadgeteer.com/feed/ in order to ensure continuous delivery.
EverlyWell at home lab tests review

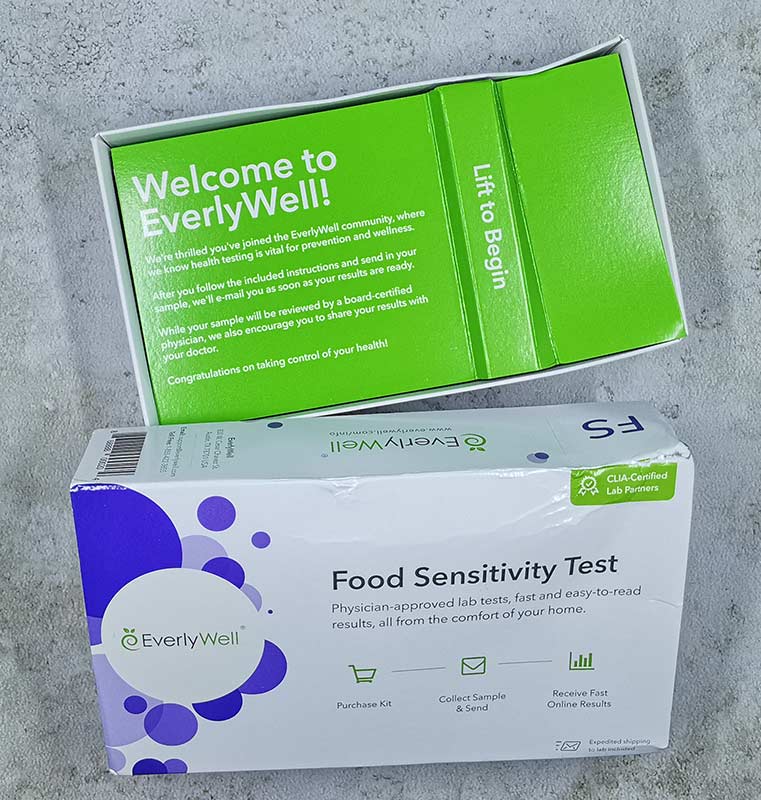
REVIEW – Do you have questions about your health? Maybe you wonder how your body reacts to stress or if you’re sensitive to certain foods. Maybe you want to check your levels of vitamin D or even take an HIV test. Going through your family doctor for a variety of lab tests can be very expensive especially if they are not covered under you your health insurance plan. Is there another way to get health tests done quickly and without a huge expense? EverlyWell thinks so. To try their service, they sent me two of their at home lab tests to try, let’s check out the tests, the experience, and the results.

What is it?

EverlyWell is a company that offers physician-approved lab tests that you can do yourself in the privacy of your home without requiring a visit to your doctor’s office.

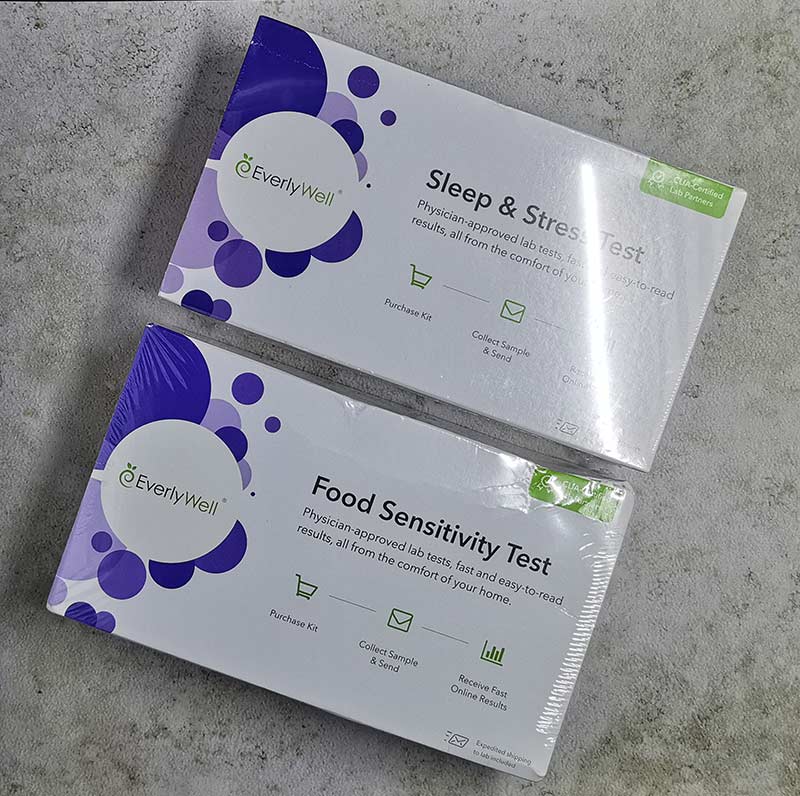
EverlyWell offers a wide variety of health tests like an HIV test, cholesterol test, Vitamin D test, Lyme disease test, and many more. I was sent a stress/sleep test and a food sensitivity test.

Sleep & Stress Test

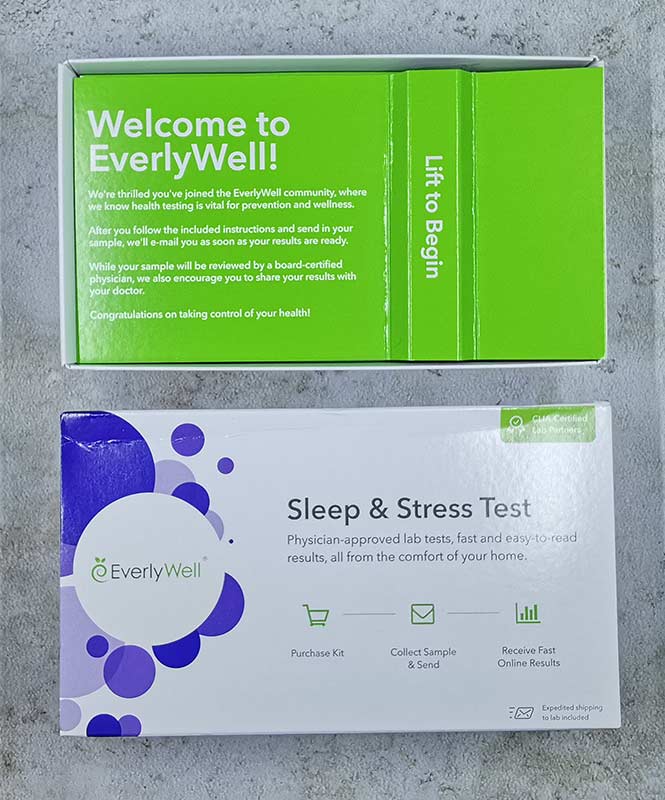
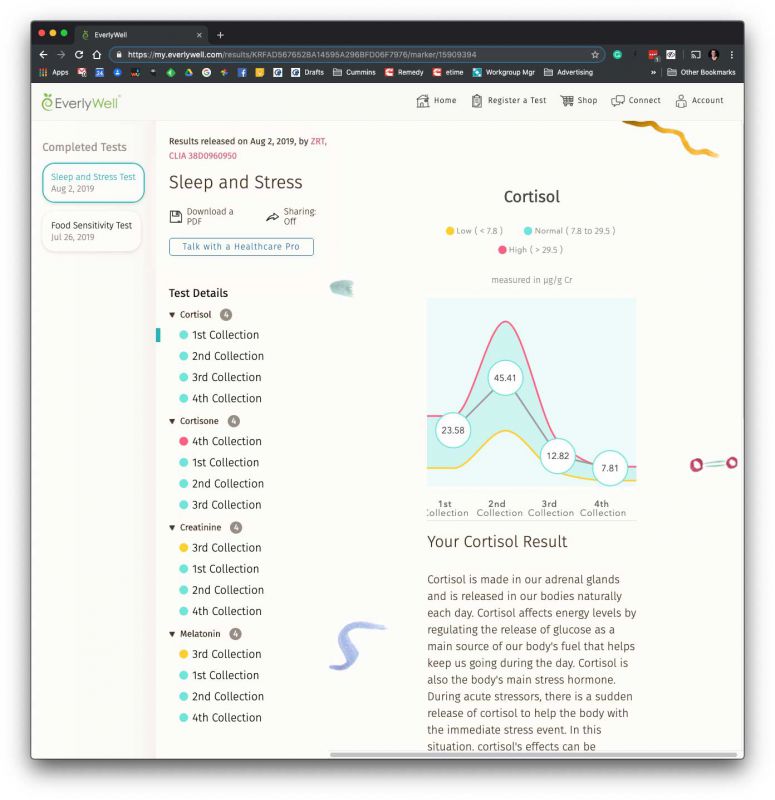
EverlyWell sent me their Sleep & Stress Test which provides some guidance on how four hormones that deal with stress and sleep change throughout the day and can affect your sleep.

This test requires that 4 urine samples be collected throughout the day. Oh boy, I get to pee in a cup! Basically, you collect urine first thing after you wake up, again in 2hrs, again at dinner time in the evening, and one last time before going to bed.
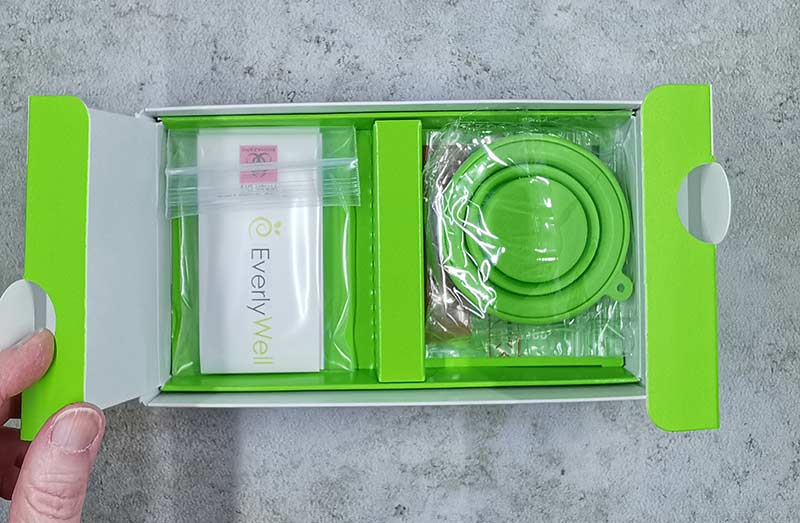
Special filter paper is included with this test kit along with a collapsible cup. So you pee in the cup, place the paper in the cup, remove the paper, let it dry, and place all the dated/timed sample collection papers in a biohazard bag and ship them back to EverlyWell for testing.

Results

I mailed the completed test kit to Everlywell on a Monday and received the results four days later on Friday.  The sleep and stress test results provided levels info on the hormones Cortisol, Cortisone, Melatonin, and Creatinine (not a hormone) for each of the 4 collections. Although the results showed the levels, I was confused about what I should do with the info. Luckily, EverlyWell provides free help to understand the test results. They have online chat or one on one phone calls from a health professional who can answer questions and provide insight into the results.

I was able to schedule a call at a time that worked best for me and was called promptly at the scheduled time. I was able to ask all the questions I needed to ask to understand the results. It was interesting that she was asked if I watch a lot of screens before I go to bed because she could tell that one of the hormones was low at the before bedtime reading and suggested that I try to stop screen use 1-2hrs before bedtime. I don’t really have sleep issues, but I may try that tip just to see if my sleep can be improved even more.

Food Sensitivity test

First of all, it’s important that you understand that this test does not tell you if you are allergic to a food. Unlike food allergies, food sensitivities aren’t life-threatening, but they can cause a body immune response like skin problems, GI problems, headaches, body aches, bloating, etc hours, and even days after the food is consumed.  For example, if you are lactose intolerant, you won’t die if you drink a glass of milk or eat some ice cream, but doing so might leave you feeling bloated or cause other GI issues.

The EverlyWell Food Sensitivity Test tests the IgG reactivity to 96 foods that are commonly found in western diets. IgG stands for Immunoglobulin G which is an antibody which circulates our immune system and can trigger to show sensitivity to certain foods that we eat.

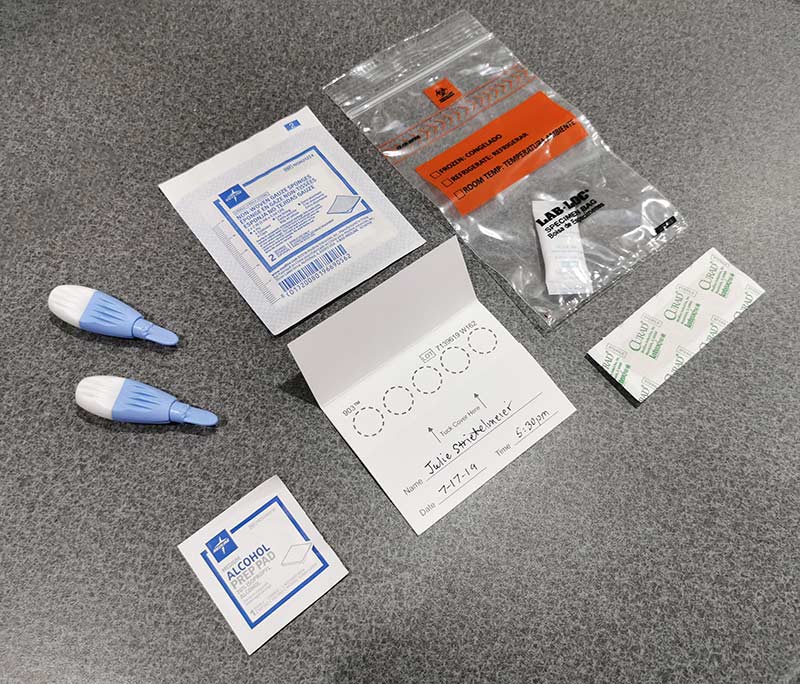
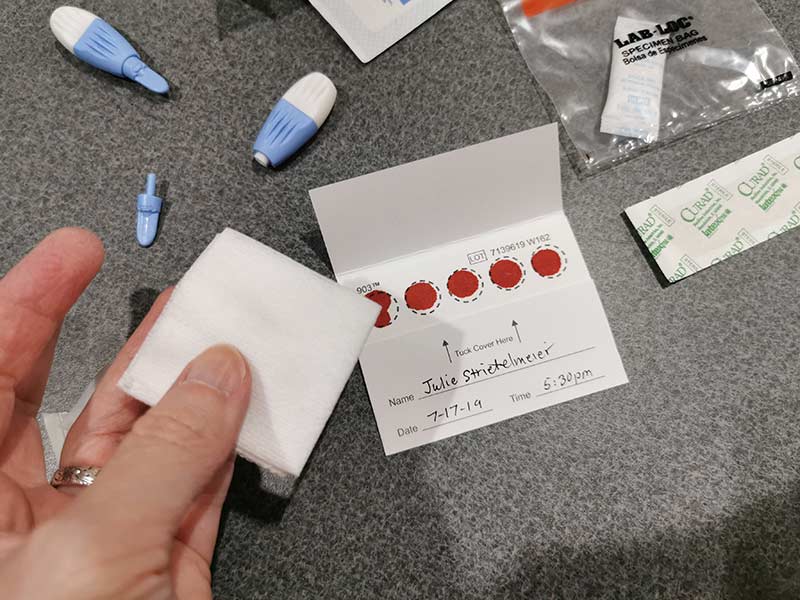
Each kit contains everything you need to collect the bio samples needed for the test and then mail them back to EverlyWell. Depending on the test, the package contains different items. The food sensitivity test includes:

  • Alcohol prep pad
  • Collection card
  • 2 lancets
  • Bandaid
  • Gauze pad
  • Biohazard bag
  • Return envelope and a paid return label
  • Instructions

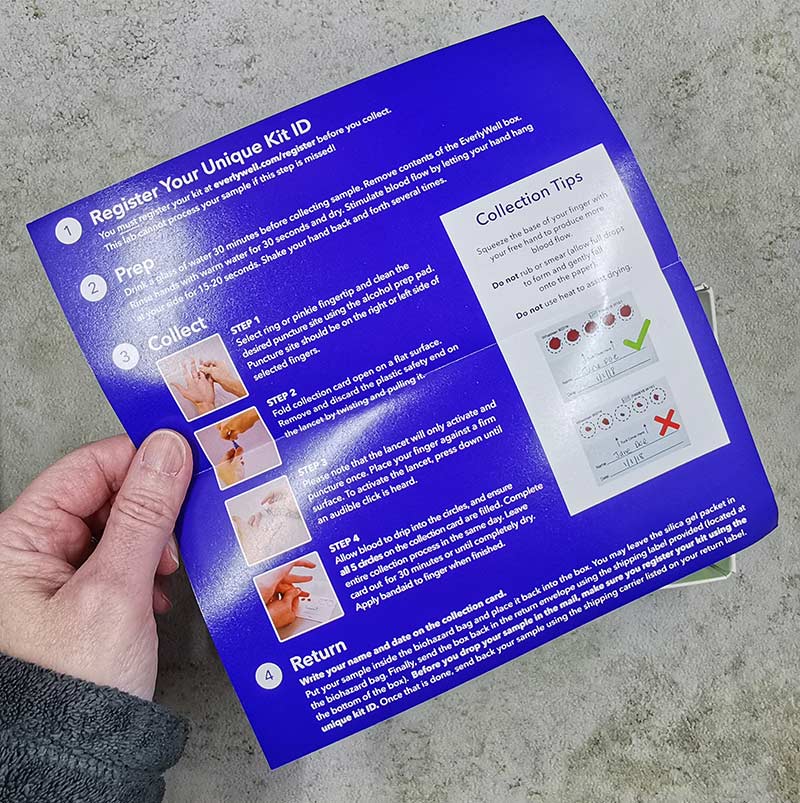
The tests also include easy to understand step by step instructions for collecting the samples.

The Food Sensitivity test requires that you collect blood samples by using a lancet which is a small plastic device that has a tiny spring-loaded blade which pricks your finger so you can place 5 drops of blood on a special collection card.

Once the samples are collected, the card needs the patient’s name, date, and time written on it. Then the card is placed in the included biohazard bag and the bag is placed back in the box. The box is then placed in the included bag and the paid shipping label can be pasted on it. All that’s left to do at this point is to mail the test via USPS back to the lab and wait for the results which only takes 1-2 weeks give or take.

Results

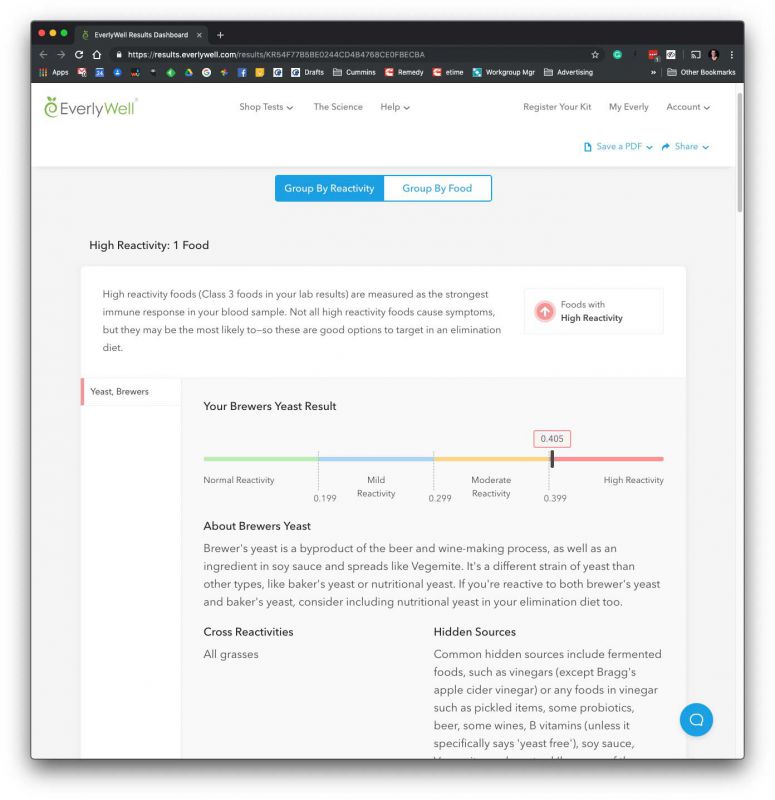
The results are provided on EverlyWell’s website in an easy to read format. It should be obvious that results for any medical test will be different for each person. My results for the Food Sensitivity test surprised me quite a bit.

The test showed that I have a high reactivity/sensitivity to Brewers Yeast. Good thing that I don’t drink beer, eat much soy sauce, or vegemite which contain a lot of Brewers Yeast. I do however take B vitamin supplements which contain this substance.


Another food item that I’m supposed to be moderately sensitive to is oats. This really concerned me because I eat oats like… well, a horse! I have oatmeal many times a week and drink a lot of meal replacement shakes which use oats as a protein source.

Should I be concerned? It’s not like these eating these foods will kill me, but could they be causing some of the minor problems that I have taken for granted like sinus issues, and minor aches and pains?

Everlywell suggests that the best way to see if high and moderately reactive foods in the test results are causing you issues is to do a 2-part elimination diet where you stop eating the foods for 30 days and then reintroduce one food at a time to see if any symptoms are noticed.

You can also do a quick test where you eliminate the foods for just 4 days and then on the 5th day reintroduce one food, wait for 3-4 days to see if any symptoms are noticed and then add the next food back for 1 day and again wait 3-4 days for symptoms.

I’ll post an update to this review after my elimination diet time is completed. Right now I’m just doing the quick test because going 30 days without oats sounds terrible to me because I enjoy them so much. 😉

What I like

  • Easy tests that can be done at home
  • Relatively inexpensive
  • Fast results

What I’d change

  • Unsure of the usefulness of some test results

Final thoughts

I went into this review with a healthy dose of skepticism especially about food sensitivity test and after doing some research, I find that I’m not alone. While there are many people who rave about IgG tests and finding foods that have caused them many problems, I found articles from others, including doctors that say tests like the one I’ve reviewed here are unproven and controversial and can show many false positives. Here are a few articles that I found on the subject.

The myth of IgG food panel tests from the American Academy of Allergy, Asthma & Immunology

A ‘Shark Tank’-funded test for food sensitivity is medically dubious, experts say

IgG Food Intolerance Tests: What does the science say?

While tests from EverlyWell that test for things like Vitamin D levels, and sexually transmitted diseases seem like they should be accurate, tests like the Food Sensitivity test could actually be harmful if someone sees a bunch of foods that are so-called reactive and eliminate them from their diet. On the other hand, it’s possible that the IgG test can help a person find a culprit for chronic health problems. Can you tell that I’m on the fence on this one? For that reason, I’m trying the elimination diet just to see what happens. If my sinus issues and aches/pains disappear, by cutting out oats and vitamin B, you all will be the first to know. In the meantime, be careful with tests like the Food Sensitivity test. If you’re having health issues, it’s always best to consult your family doctor first before trying at home health tests.

Price: $49.99 and up. Varies depending on the test
Where to buy: EverlyWell and Amazon
Source: The sample for this review was provided by Everlywell.

Filed in categories: Reviews

Tagged:

EverlyWell at home lab tests review originally appeared on The Gadgeteer on August 6, 2019 at 9:32 am.

Note: If you are subscribed to this feed through FeedBurner, please switch to our native feed URL http://the-gadgeteer.com/feed/ in order to ensure continuous delivery.