Visionect Joan meeting room management device review

REVIEW – If you have more than 1 conference room and more than 1 employee, you’ve most likely run into overbooked meeting space syndrome.  Sure, most corporate calendar systems will help broker online room bookings, but how can you effectively manage the unwashed hoard of conference room squatters?  The Joan system from Visionect takes a run at solving this problem as well as seeking to provide tools that will help your overall communication strategy.  Let’s see how well Joan works…

What is it?

The Visionect Joan system consists of 2 sizes of e-ink tablets managed by a web platform.  There is a 13 inch tablet which is intended to give a complete view of your meeting rooms (probably deployed at a reception desk or other common area) and a 6 inch tablet designed to be a marquee for an individual meeting space.  The displays are e-ink so they are very low power and will last up to a year on a single charge.  The web platform drives all of the devices.
What’s in the box?

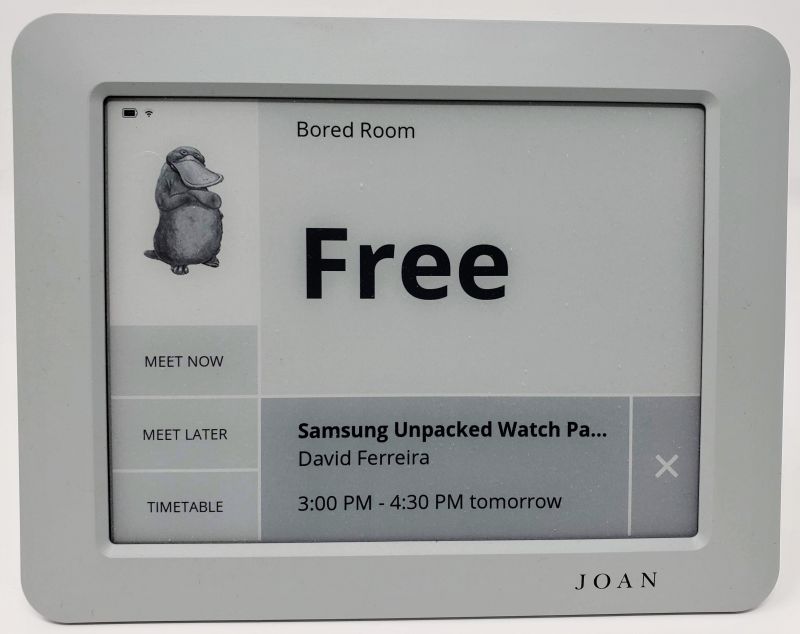
  • One tablet (your choice of size)
  • A very brief instruction sheet
  • A micro-USB charging cable

Design and Features

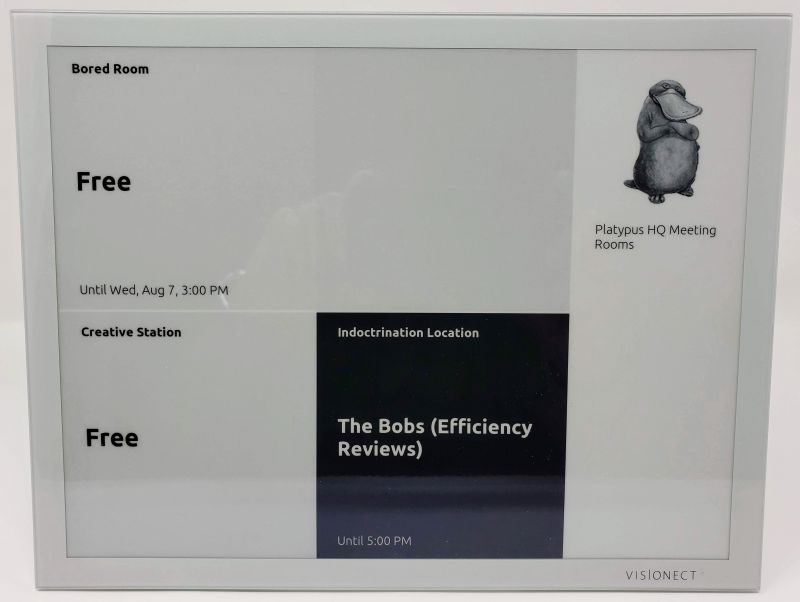
In order to fully take advantage of the Joan system, you need at least 1 each of the 6 and 13 inch tablets.  The 13 inch tablet can serve in a number of capacities, but not more than one at a time.  The larger tablet can act as a single room schedule board, showing current, next and upcoming events in a single room.  The tablet is not a touch screen, though, so it can only display this information and will not allow a user to interact.  There is a room grid view (first picture above) which shows you the current state of up to 9 rooms.  And finally there is a team view – this allows you to select 9 team members and show their current status (in a meeting, available, out of office, etc.).  Buried in the portal is another display mode, a “custom content” display (available only with the Premium subscription – more on this later).  This mode allows you to upload your own images and text to the tablet and can serve as a communications hub.  For example, you can give details about the company picnic, and set that to display Monday through Friday from 9-11 AM on as many devices as you would like.  When active, this custom content will supersede the base function of the tablet – if set to the room grid, the custom content will display from 9-11 AM instead of the room grid.

The 6 inch tablet is intended as a single room display and so it has a capability the larger tablet does not – it is a touch screen that allows you to control the room bookings remotely.  In addition to real time booking, the smaller tablet also supports “hoteling”, a concept which is gaining a lot of traction for larger companies with a geographically dispersed team.  When a team member is going to be in the office, that team member can book a desk to work at for the length of time he/she will be on site.  This type of booking is generally longer than a conference room event, so although the concepts are at the core somewhat the same, how companies approach the booking will differ, and so this smaller tablet will support those differences.

Mounting the tables is relatively simple – the 13 inch tablet has VESA mounting holes but also comes with a heavy-duty magnetic pad that attaches to the wall.
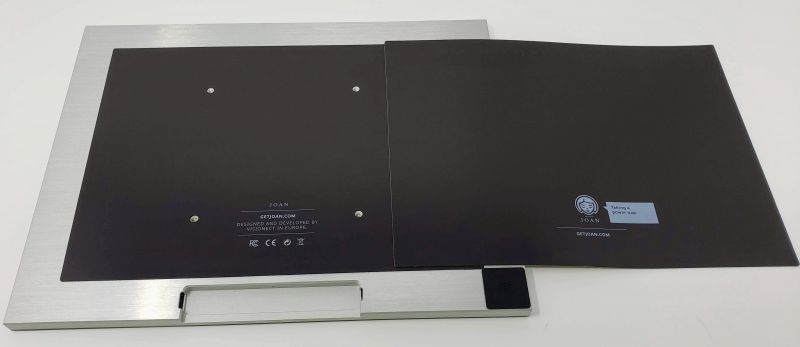
The 6 inch tablet does not have a VESA mount.  Out of the box it supports only the magnetic pad.  Visionect also sells other types of mounts separately, although there are generic 3rd party mounts that will work as effectively for less money.

Joan will also work on an existing display like a TV or large monitor.  As long as you have access to a web browser, your own display can show a status grid of all rooms.  The display is not interactive, though, so you are unable to book or get details on a booking beyond the meeting name, meeting organizer, the number of confirmed attendees, and day/date/time/length of the meeting.  You also need to have a premium subscription to bring your own display – more on pricing and such later.

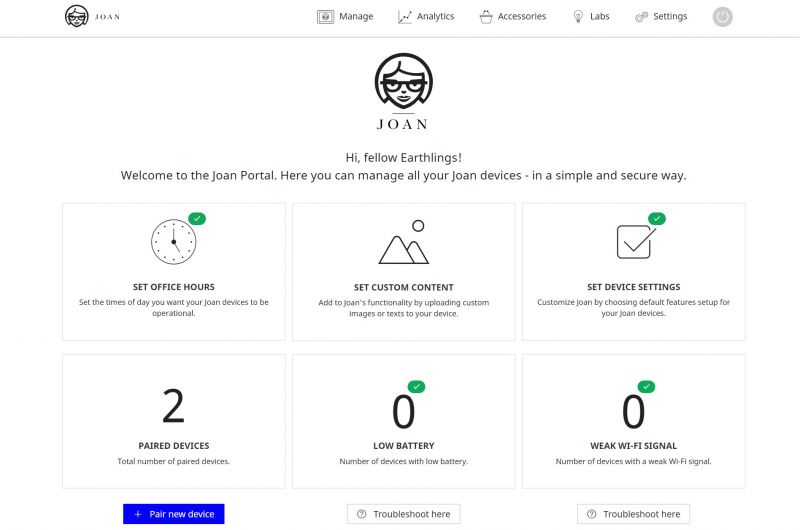
Setting the system up is not a terribly complicated affair.  To begin, you create an account on the Joan portal.  During the account creation process, you can select from Microsoft Exchange, Office 365, Google G-Suite or CollegeNET 25Live systems.  If your particular calendar system is not directly supported but it can generate iCalendar files, Joan will work with that as well.  For any of the systems you simply provide the credentials Joan will use to retrieve and manage bookings, and Joan will return a list of rooms that you have previously defined.  Select the rooms you want, and you are ready to go (at least, from the portal perspective).

Next you have to pair a device.  In order to do this, you have to download a utility that runs on either Windows or a Mac.  This utility connects to a tablet (6 or 13) via the charging cable and will help you set up the local network.  There is an important gotcha awaiting you here, though.  Because the displays on these tablets are e-ink, they will continue to show information on screen long after there is enough juice in the battery to actually boot up.  When the utility attempts to connect, it does not tell you the device is unable to boot nor does it report on the current battery charge – it simply sits on the “connecting” screen waiting for something to happen.  If your tablet is connected to your computer, odds are it is “trickle-charging”, so it might actually sit on this screen for hours before the battery has enough to power the unit.

Once you get past this issue, it should be smooth sailing.  The device will connect to your wireless network (both 2.4 and 5 mHz networks are supported) and will register with Joan.  Back in the portal, name your device and decide which mode it will operate in.  If in a multi-room display, choose your rooms.  Single room?  Pick the room.  Within minutes the display will pick up the data and you will be live.
Here’s where it gets interesting.  On the 6 inch tablet, you can manage a room directly from the tablet.  For example, you can hit the Meet Now button to automatically book the room for up to 30 minutes (if another scheduled meeting is less than 30 minutes away, the Meet Now button will only allow you to book up to the next meeting).  Almost instantly the meeting is reflected online, so others can double-book.
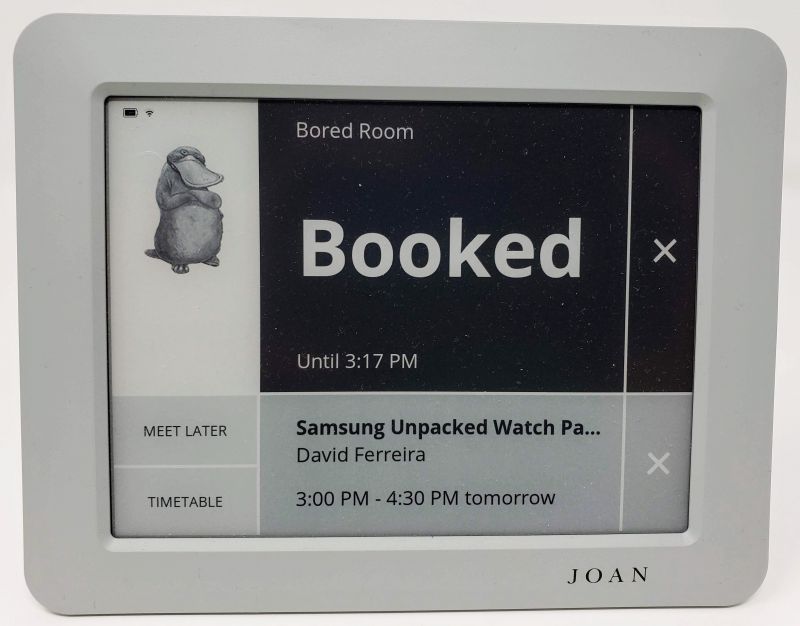
You can also extend a meeting while the meeting is in progress, but only as long as there is until the next booking or the end of the business day.

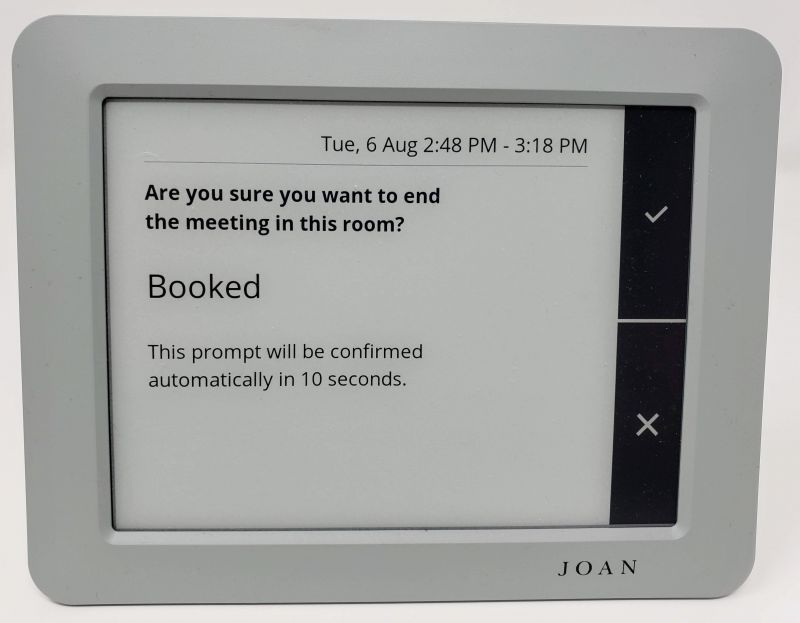
Tapping the X on your booking allows you to end a meeting early and free up the room.  This does not end the meeting online, though – your system will continue to show the room as booked online, but the tablet will show the room as free.
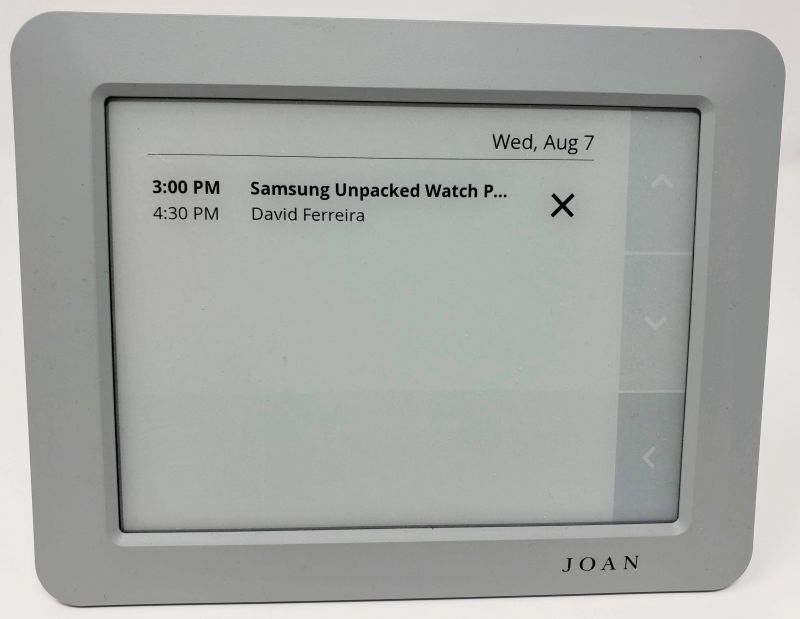
You can also review the room bookings by selecting the Timetable button.
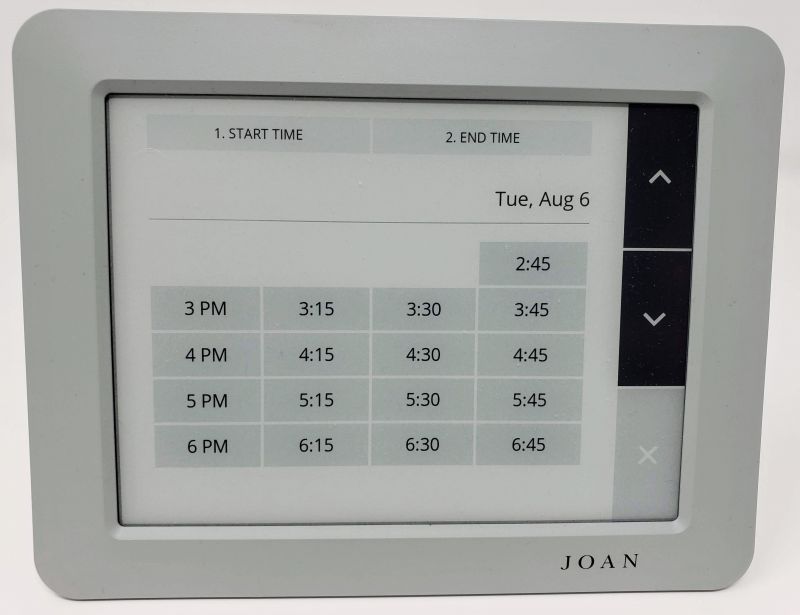
Armed with this information, select the Meet Later button to book the room directly from the tablet.
And that’s all it takes to manage your rooms!  The system will even send you email to let you know your battery needs to be charged.  The system is easy to use and has all the right checks and balances to ensure no armed hostilities break out between teams over a double-booked room.

This is where the other shoe drops, though.  Sure, Joan is simple to use but very powerful – and that power comes at a high price tag.  Let’s take my company as an example and price out the system.

First, we want a single master display, so we need a Joan 13 (it comes in either graphite black or slate gray).  That display is $899.  Next, we have 3 conference rooms so that is 3 Joan 6 units (also available in either graphite black or slate gray) at $549 per unit.  Just to get started, we have spent $2,546.  Specialized mounts (secured wall mounts, desk or floor stands), extended device warranties and additional magnetic pads are all extra costs.

Next, there is the subscription cost.  Visionect bills by the device, not by the number of rooms you have to manage as other similar services do.  If you have an Ubuntu virtual machine, you can opt into a self-hosted plan that is essentially free.  The Joan portal manages the devices but the actual scheduling and device display data comes from your hosted instance.  This is a free option up to the point where you have to run your own server – definitely not a “free” choice, but perhaps an acceptable one if you already manage your own IT infrastructure.

Assuming you don’t want this responsibility, Joan also acts as a SaaS provider (Software as a Service).  There are 2 plans available: Standard ($11/month or $119/year per device) and Premium ($21/month or $229/year per device).  It is not entirely clear from the price guide whether the “bring your own display” option counts as a device, but I would assume it does.  The Premium plan gives more integration options (like WebEx meeting rooms and Amazon Alexa management) and additional features (parking management, custom content).

There are some savings in going with annual billing, so for our example we will chose that option.  With 3 devices, our cost is $687, bringing our total cost to start to $3,233.  Not horrific pricing, but not trivial either.

Is it worth it?  If you have room management issues, if your team uses hoteling or if you just want to stay on top of space management, then yes.  If your current system is working for you, probably not.  I will say this, though – if you go with the Joan system, you will be getting one of the best technical support operations around.  I had a few minor issues setting things up for this review, and the Joan team was all over my concerns each time I contacted them.  You won’t feel like you flushed a pile of good money down the drain – they will help quickly and efficiently, and get you back to full operation in short order.

What I Like

  • Pretty much everything: devices, options for integration, support, how well the system works end to end

What I’d Change

  • Price – if you are a startup, this might be a very high cost.  And while both tablets are very well built, it feels like an e-ink display should cost less than this.

Final Thoughts

Visionect’s Joan platform and devices are well thought out and pretty much flawlessly executed.  This would be a life saver at larger companies I have worked for and can scale down to help even the smallest of companies.  If you have the cash and a compatible scheduling system, this could very well be a worthwhile purchase.

Price: Depends on device and configuration
Where to buy: Visionect Joan
Source: A 6 and 13 inch Joan device and a month of Premium service provided by Visionect Joan.

Filed in categories: Reviews

Tagged:

Visionect Joan meeting room management device review originally appeared on The Gadgeteer on August 19, 2019 at 11:00 am.

Note: If you are subscribed to this feed through FeedBurner, please switch to our native feed URL http://the-gadgeteer.com/feed/ in order to ensure continuous delivery.

Fobo Bike2 TPMS (tire pressure management system) for motorcycles review

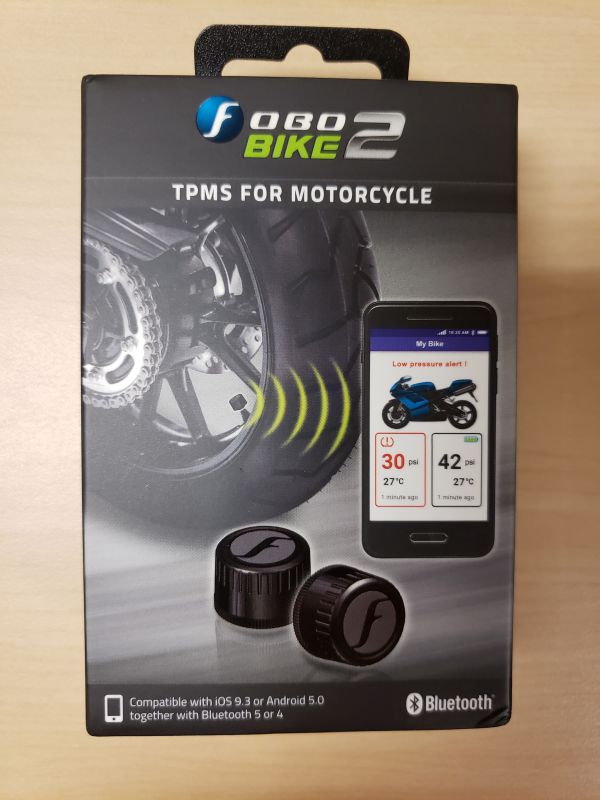
REVIEW – One of the first things I always do before going out on a ride on my motorcycle is to check the tire pressure.  This means rolling the bike forward or backward to make sure the tire valves are accessible, getting down on my hands and knees, rolling out the compressor hose, and checking the tire pressure.  What if I had an app on my phone that would let me see the tire pressure on my bike without having to do all of that?  It sounds like an awesome proposition!  It could even save me the time of having to start up the compressor if the tire pressure is where it should be.  Let’s see if the new Fobo Bike2 TPMS system lets me skip some of my ride make ready process.

What is it?

The Fobo Bike2 TPMS system is a tire pressure monitoring system for motorcycles.  I have had several bikes in my past that came with built-in TPMS systems.  The problem with those systems is that they would not register a tire pressure until the wheels were rolling along at 5mph or faster.  This did me no good if I wanted to know if I had good tire pressure before I started my ride.  The Fobo Bike2 TPMS comes with an app for Apple or Android that lets you see your tire pressure instantly when you are within Bluetooth 5 range of the bike.  It is supposed to monitor the tire pressure throughout the ride and send notifications to your phone if the tire pressure exceeds the maximum or goes below the minimum amounts you set for the tires.  It is even supposed to have a feature where it will allow friends and family to track you on your ride.

What’s in the box?

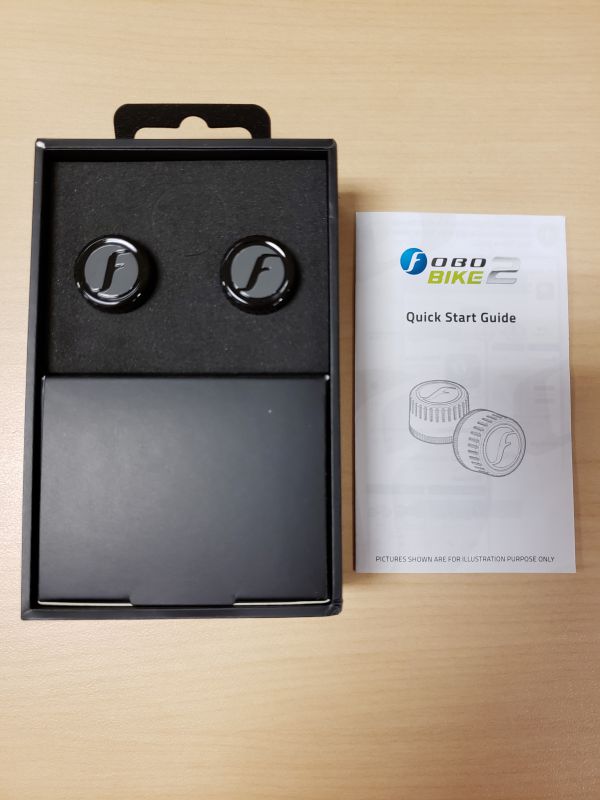
When you slide open the box you are presented with the manual and two tire pressure monitoring modules.  They are inserted very nicely into foam pockets.  The black part below the foam is a box containing the rest of the accessories.

The following items were inside the black box.

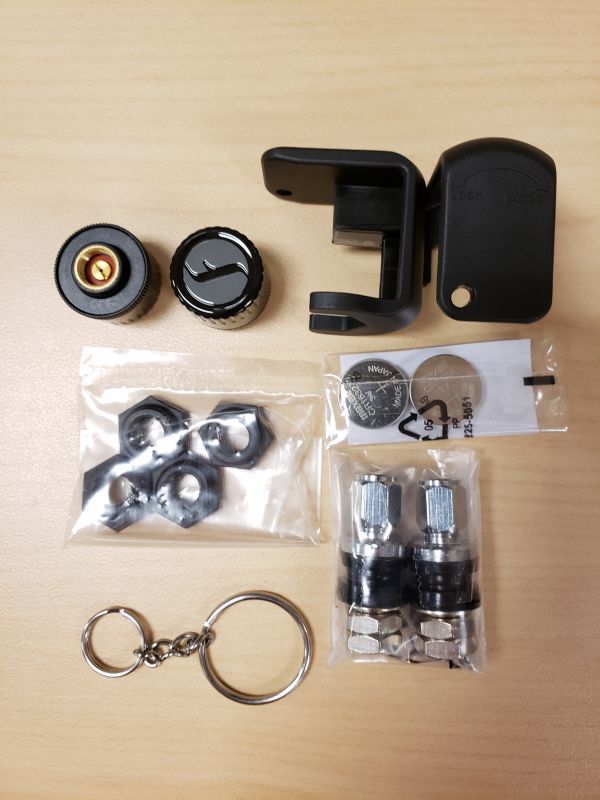
  • Two tire pressure monitors
  • Two of the same tool used to tighten and release the locking nuts
  • Two pairs of locking nuts.  You only need one pair to install on a motorcycle so the other is a spare
  • Two extra batteries.  Batteries were already installed inside the TPMS
  • A key chain to hold the tool
  • Two short valve stems.  Some bikes have really long stems and depending on where they sit on the rim, they can cause the Fobo to hit brake calipers or brake rotors.

Hardware specs

  •  Bluetooth: v5.0
  •  Transmit Conducted Power: +5.0dBm (sensor)
  •  Receiver Sensitivity: Conducted Sensitivity -97dBm @ 0.1%BER
  •  Antenna Return Loss: Typical -9dB
  •  Operating Frequency: 2.402~2.480 GHz
  •  Battery Type: CR1632 (sensor). Operating life up to 1 year. (NOTE: The battery operating life varies according to usage and climate temperature)
  •  Operating Temperature: -40°C to +85°C (sensor), -20°C to +60°C (sensor with common CR1632 batteries)
  •  Weight: 7.6g (sensor –with battery)
  •  Sensor Dimension H x D: 13.8mm x 20.2mm
  •  Maximum Pressure800kPa (116psi)
  •  ESD: 8kV air discharge & 4kV direct contact discharge according to CE standard
  •  Operating Humidity: up to 90% non-condensing at 40oC
  •  Dust and Water Proof: IEC60529 compliant to IP57(sensor)
  •  Sensor structural threshold: 100N ball pressure intensity test
  •  Mechanical & Environmental Reliability Testing Standards: IEC 60068-2-2, IEC 60068-2-1, ISO 21750, IEC 60068-2-29, IEC 60068-2-5, IEC 60068-2-32, ISO 15184, ISO 2409, SAE J2657, SAEJ113/13

Design and features

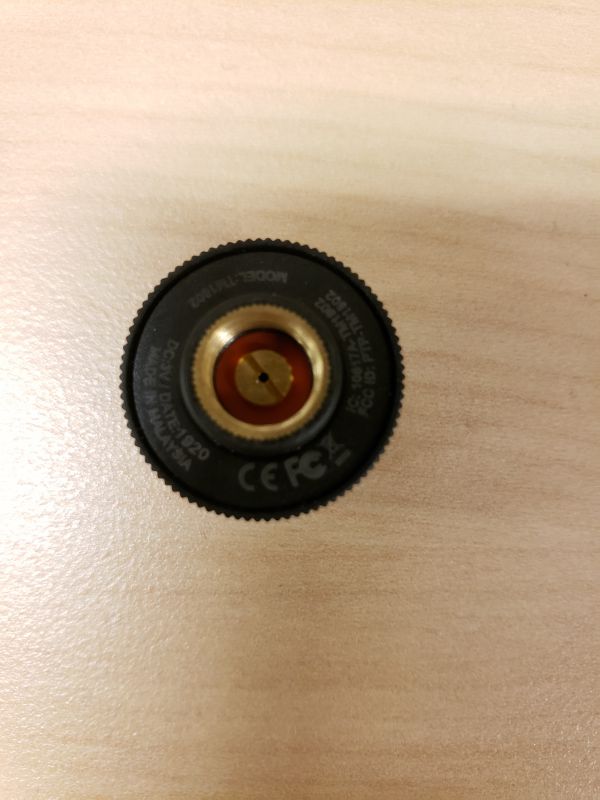
The above picture shows the bottom of the TPMS sensor. The manual states that after you screw the locking nut on the valve, you must have at least five threads available for the TPMS to thread onto the valve.

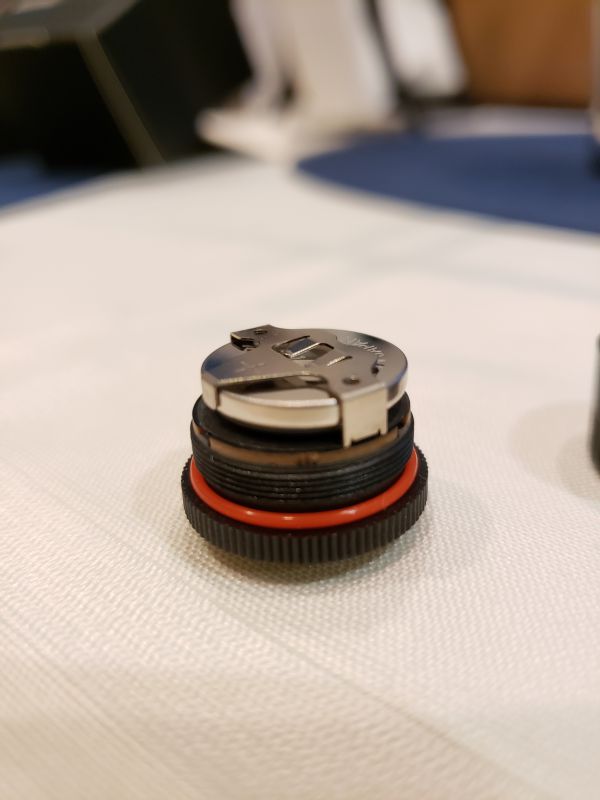
The above picture shows the inside of the TPMS with the cover unscrewed from it.  You can see the battery that is installed and the red rubber grommet around the base to keep the dust and water out.

Setup

The first thing the manual tells you is to install the app on your phone.  The app will work with iOS 9.3 or higher and Android 5.0 or higher.  I installed it on my Samsung Galaxy S9.  The first screen presents you with multiple ways to create an account.  I chose Google.

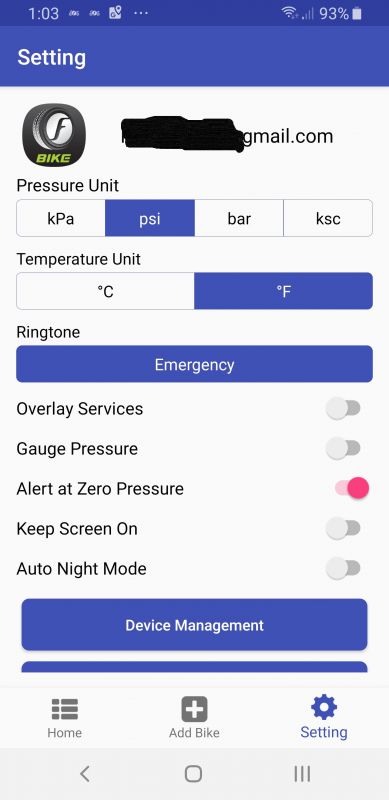
Once signed in, I went to user settings and made sure I was set for Fahrenheit and PSI for pressure.  There are several other features in the settings that are available.

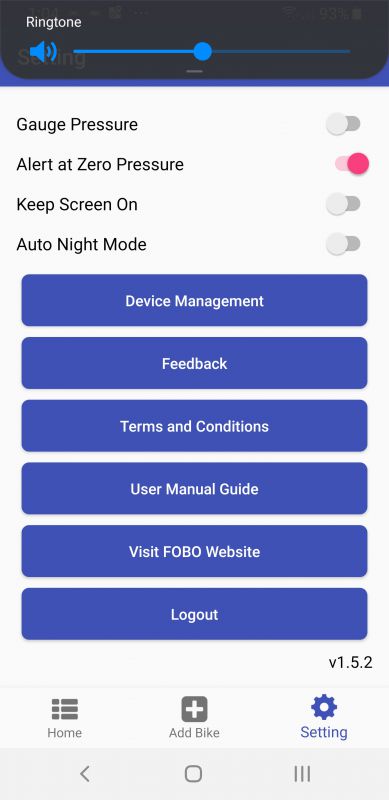
This next screenshot shows you the rest of the options on the app.

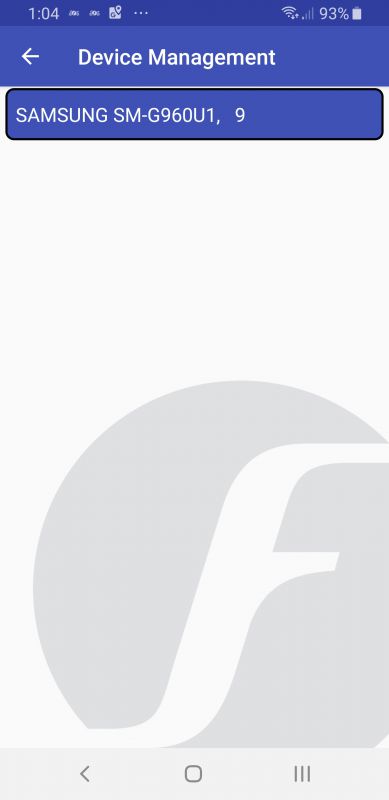
Clicking on device management is pretty worthless.  It shows you your phone type, but you can’t do anything else on the screen.

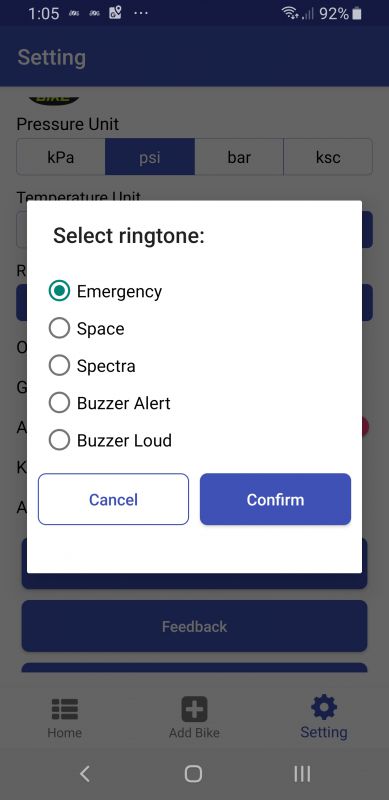
They give several ringtone options.  Choosing different ringtones lets you hear the different sounds.  I ended up picking ‘buzzer alert’ because it sounds exactly like the claxon from Star Trek TNG.  (yes I am a huge Trekkie!).

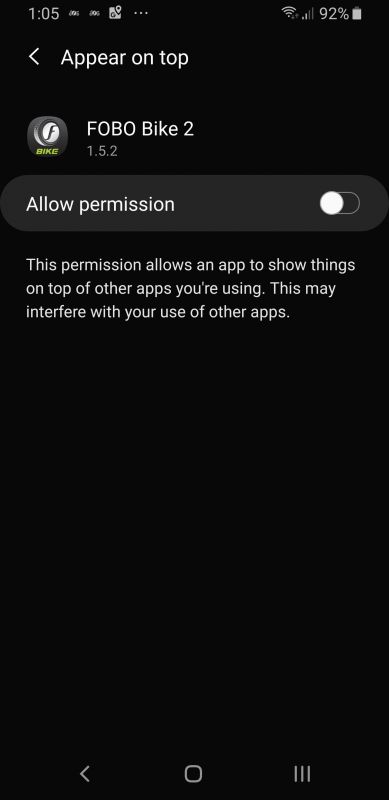
This is the screen for the ‘Appear on Top’ option.  I left it off.

The next thing I did was to click the Add Bike option at the bottom of the screen.  I was presented with several options.  The screen above shows the first two choices.  I find it interesting that anyone would want to put it on a bicycle.  Even after one day, a bicycle will lose enough pressure for you to need to put more air into the tires.  Any kind of loss of pressure on a bicycle is also pretty noticeable right away.  Other choices included trikes with the two wheels in front or back, trikes with airbag suspension, a bike with a sidecar, a single axle trailer, and a unicycle.  I, of course, picked Motobike.

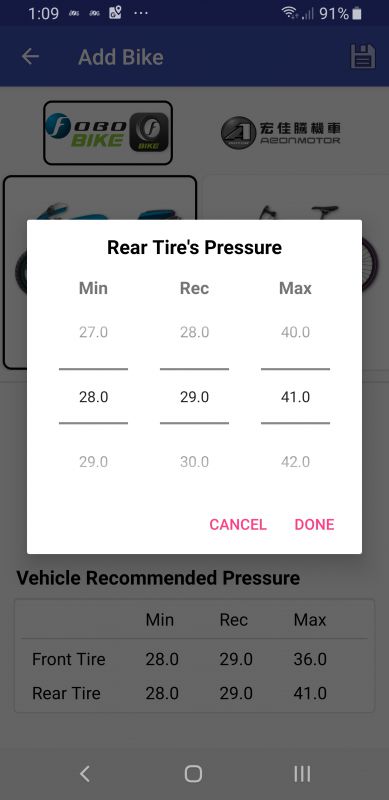
I was immediately presented with a screen where I could add a picture of my bike and then set the minimum and maximum tire pressure settings on my front and rear tires.  You will notice on the left side of the tire pressure popup that there is an option to scroll from 27 to 29 PSI.  I could never set it any higher than 28 PSI as a minimum.  I think that is a flaw in the application.  If my rear tire was down to 28 PSI I would be having some serious issues.  My rear tire has a recommended cold pressure setting of 41.  So technically I should be able to set it at 39 as a minimum.

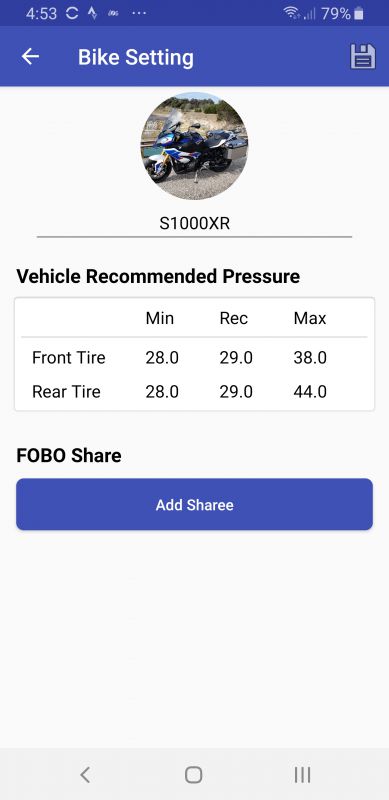
The above pictures show my final settings for the front and rear tires.  I really had to guess at the max pressure.  The cold pressure settings for front and rear on my bike are 31.6 and 41 PSI.   Once the tires heat up, the pressure will rise and I was not really sure what the max pressure should be.  I did not want to get a false alert on high tire pressure.

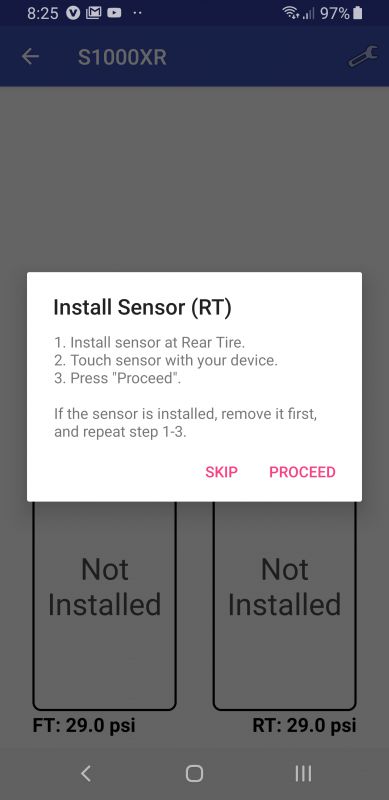
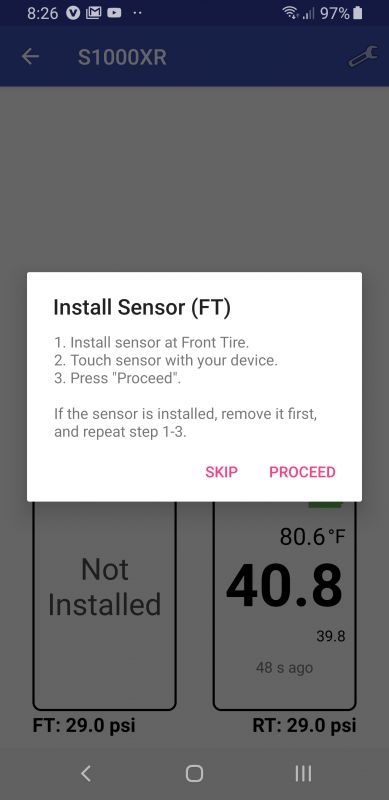
Once I pressed save, I was then asked to install the sensors on the bike.  I started with the rear tire first.

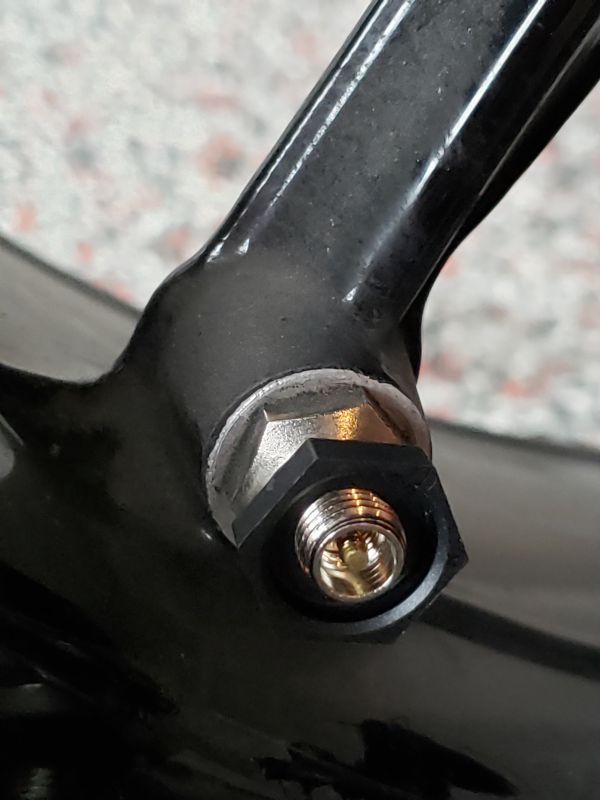
Setup on my bike was fairly simple.  I ride a BMW S1000XR.  This bike has the valves coming off the side of the spoke and they were already very short.   I first screwed the locking nut onto the valve with the bump on the locking nut face down towards the rim.

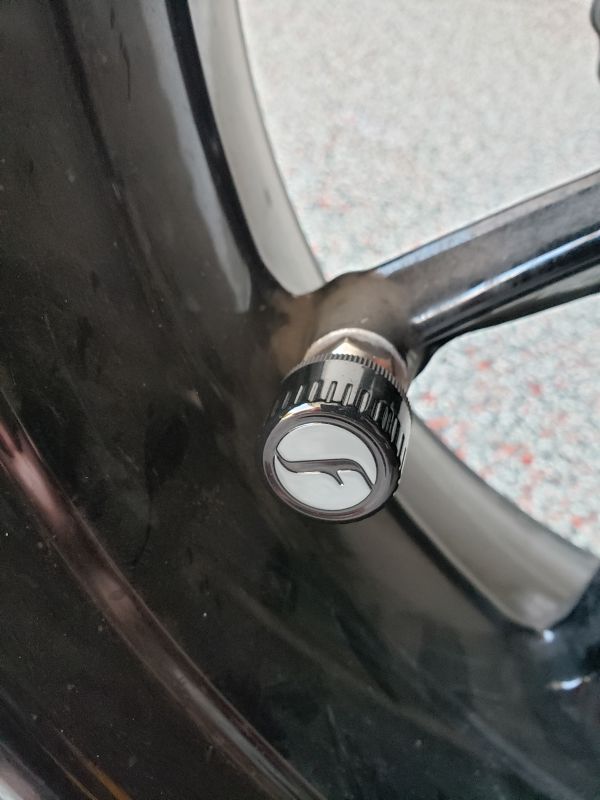
Next, I screwed the TPMS on top of the nut.  When I had it as far down as it goes, I used the locking tool to tighten the locking nut up against the TPMS.     I then touched my phone to the sensor as directed.

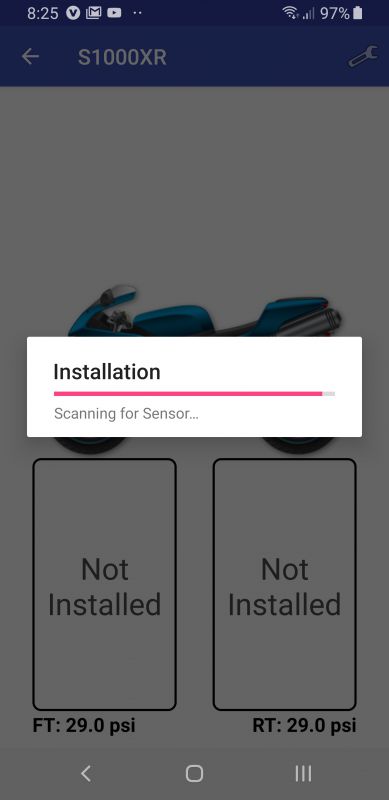
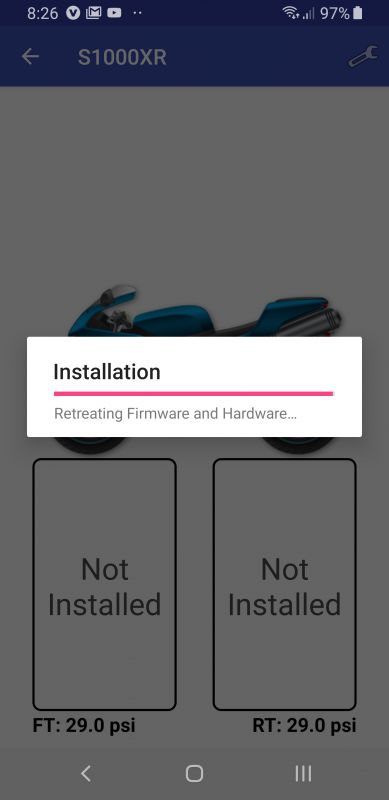
I then clicked ‘Proceed’ in the popup box and got the first response above as it scanned for the sensor.

The next screen said it found the sensor and showed the following information.  I think there is a bit of a Chinese to English translation issue going on in this screen.  I have never retreated firmware and hardware before.

I was then asked to follow the same process on the front tire.  Which I did.


After installation of the sensors, I was taken back to this screen showing a green checkmark next to my bike.

Performance

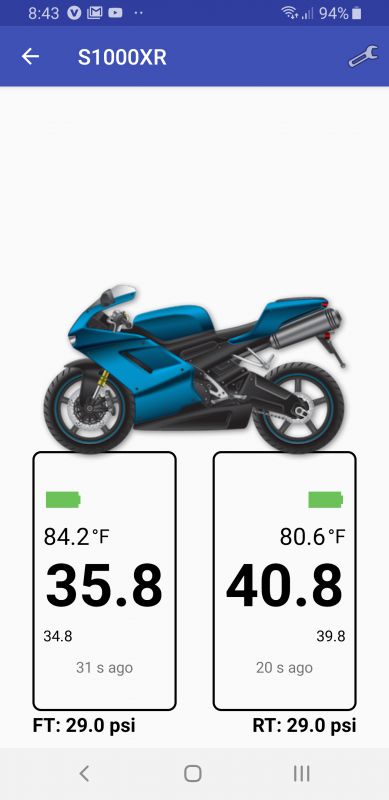
I was a bit leary of trusting the tire pressure presented by the application.  The above screenshot shows the tire pressure for both of my tires.  I find it interesting that there is almost a four degree difference between my front and rear tire.  My bike was in the garage and it was not like I had a fan or a block of ice sitting next to one wheel.  I then used a highly accurate tire gauge that I owned and took a manual reading of both tires.

The Fobo said my front tire was at 35.8 PSI but my gauge showed about 36.5.  The front TPMS said 40.8 and the gauge was right at 41.  That is relatively close.

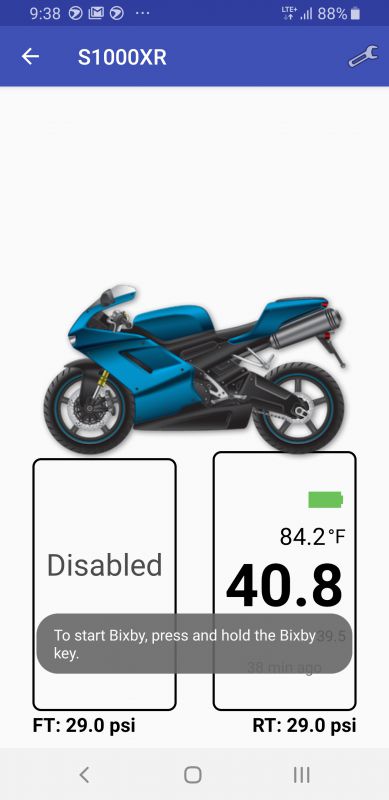
I started to roll my bike out of the garage for a ride when I ran into an issue.  The front-wheel TPMS  hit the back of my brake caliper.  I ended up having to take it off and disable it.  I was really bummed.  The short stem that came with the Fobo won’t help as the stem on the rim is already short.  They offer a T-Valve option, but I do not want to go with that as I think that may not fit either, and I just would not like how it would look.

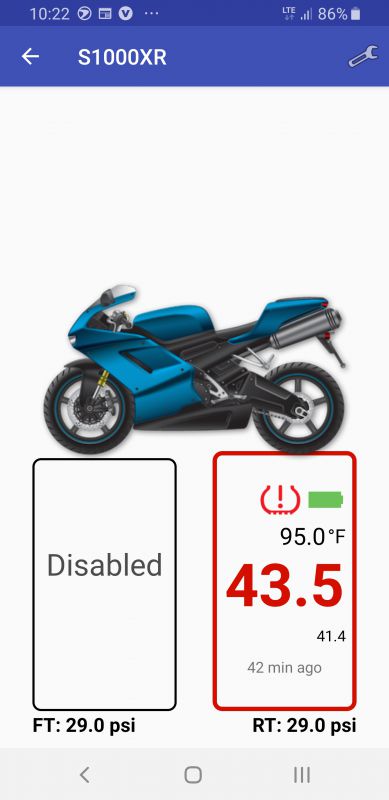
I took the bike out for a 160-mile ride.  I like how the app shows the ambient temp along with the tire pressure reading.   Notice in the screenshot above that the pressure reading is in red.  This was because initially, I had the max pressure set to 43.  Remember when I said I had no clue how high to set it?  I bumped it up to 44 and it went back to normal colors.  The main thing I noticed was the lack of real-time monitoring during the ride.  When I was in my garage, the app was updated around every 10 seconds or so.  I did have the phone in an aluminum side case, so that was most likely blocking the signal.   However, when I stopped for gas, I took the phone out and set it on the seat as I got gas.  I spent a good 15 minutes and the app never updated the reading.  I even put my phone down by the sensor and tapped the sensor with my phone to see if I could force an update.  Two days later, I walked out in the garage with my phone and it gets an instant reading.  I am not sure why it would not read while on the road.   UPDATE – I took my bike out again this weekend, but this time I left my phone in the pocket of my riding jacket.  I am happy to report that when I got off my bike to get gas, the app was showing an updated pressure as of 11 seconds ago.  It updated a couple of times during the time it took me to get some gas.

The app also offers a feature where you can send a link to a friend or family member to track you while on your ride.  I sent an email to my husband, but when he clicked on the link it just got a ‘page not found’ error message.

What I like

  • Pretty easy to set up
  • An almost instantaneous PSI reading on my phone when I step into the garage.  No having to have the bike roll at 5mph.
  • They provide short valve stems as a part of the kit if you need them.
  • The Fobo TPMS is pretty secure.  To steal it, someone would have to have the tool.  Even if they got it off, it would not work for them unless I released the device from my app.

What I’d change

  • The app needs a bit more fine-tuning.  Some wording as mentioned earlier needs to be corrected.  Also being able to set a higher than 28 PSI minimum tire pressure reading would be beneficial.
  • I could not get it to fit on my front wheel.  Maybe a t-valve would work, but it would really look funky. If they could make it just a little less thick, I am sure it would fit on the bike.
  • To actually put more air in the wheel I have to take the Fobo completely off the valve, including the locking nut, which makes it kind of a pain.

Final thoughts

Overall, I would say the Fobo Bike2 TPMS system works well if you can get it to fit on your bike.  I want to blame the lack of monitoring during the ride on me having my phone in an aluminum side case since it worked just fine when I kept it in my jacket pocket.  I would think for someone with a trike, or someone who has issues getting down on their hands and knees to check tire pressure before every ride, this system would provide them a reading really easily.  Lots of bikes have bags and exhausts in the way that make it very difficult to check tire pressure.  For $99 this is a fairly easy way to add it to your motorcycle.

Price: $99
Where to buyAmazon
Source: The sample of this product was provided by Fobo

Filed in categories: Reviews

Tagged:

Fobo Bike2 TPMS (tire pressure management system) for motorcycles review originally appeared on The Gadgeteer on August 19, 2019 at 9:00 am.

Note: If you are subscribed to this feed through FeedBurner, please switch to our native feed URL http://the-gadgeteer.com/feed/ in order to ensure continuous delivery.
Nuheara IQstream TV review

REVIEW – As I’ve gotten older, my hearing isn’t what it used to be. Maybe my parents yelling at me to turn my music down when I was younger was for a good reason. Too late now! Anyway, while watching TV with my family, I tend to crank up the volume causing others to (not so) nicely ask me to turn it down. It’s like my parents yelling all over again. If this sounds familiar to you, there may be a solution—the Nuheara IQstream TV.

What is it?

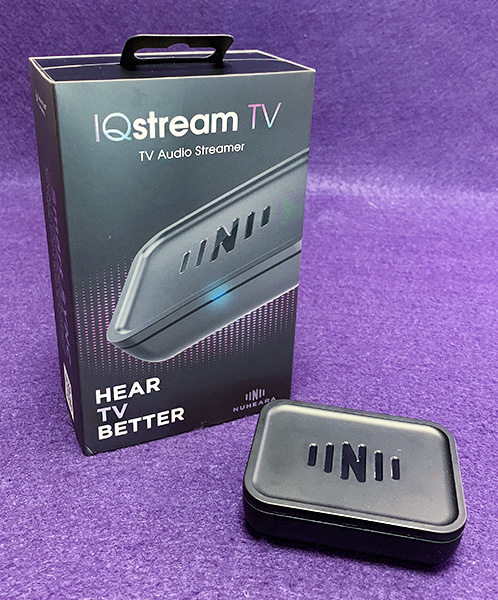
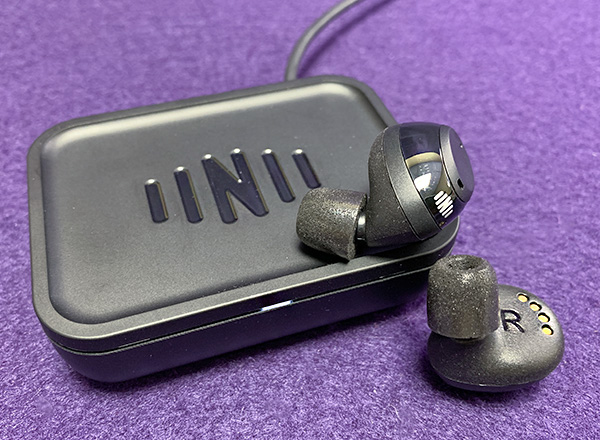
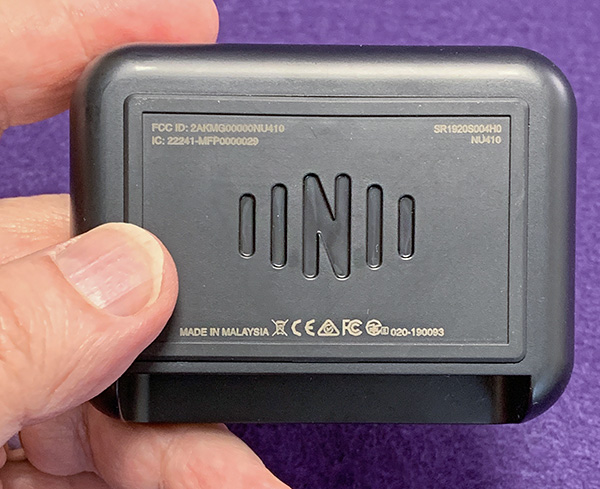
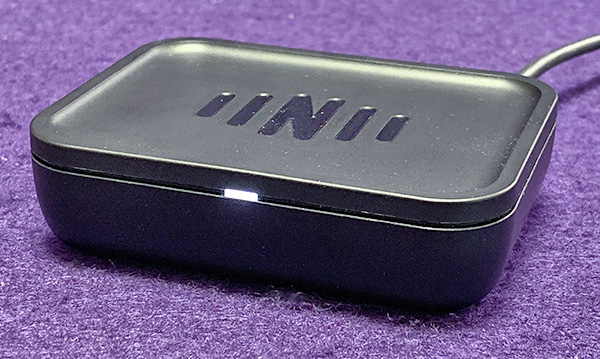
The Nuheara IQstream TV is a small table-top device that connects to your TV audio out port. Once connected, the TV’s volume can be independently adjusted for Nuheara’s IQbuds BOOST earphones using the IQbuds smartphone app. So, no matter how low or how high the volume for the TV is set, the volume setting for the IQbuds BOOST can be as low or high as the wearer desires without disturbing anyone close by. 

Specs

  • aptX Bluetooth
  • Bluetooth range: 90 ft.
  • Compatible earphones: IQbuds BOOST
  • Digital Input: Mini-Toslink
  • Analog Input: Mini plug
  • Sounder output: mini plug to RCA
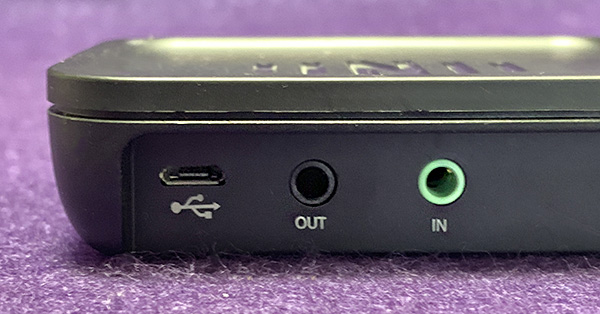
  • Ports: Combo optical/analog in, combo optical/analog out and USB
  • Weight: 3.2 oz.

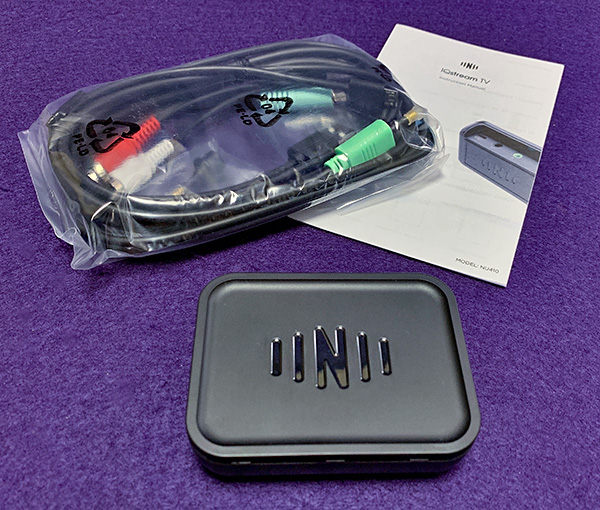
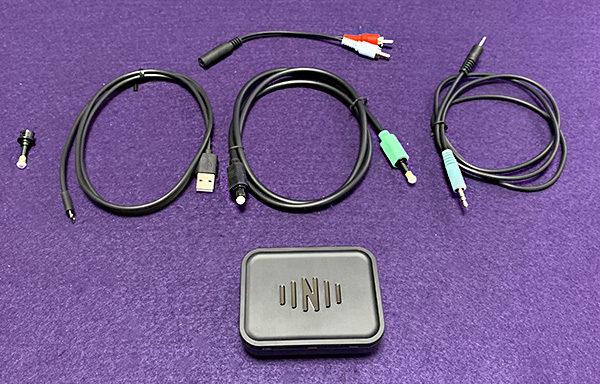
In the box

  • USB cable for connection to power
  • SPDIF to mini-TOSLINK cable for digital audio
  • 3.5mm to 3.5mmcable  for analog audio
  • 3.5mm to Stereo RCA cable
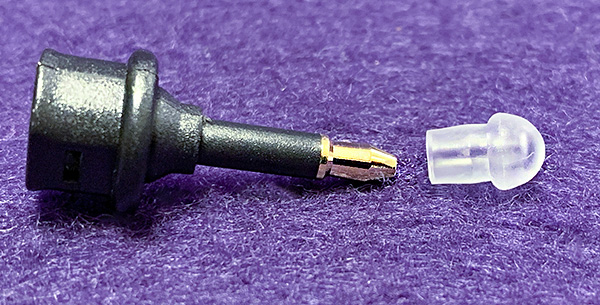
  • TOSLINK to mini-TOSLINK dongle

(TOSLINK is also known as SPDIF)

Design and features

The Nuheara IQstream TV is basically a one-trick pony. At less than an inch tall, it’s small enough to fit under any flat-screen TV. Yet for such a small package, it packs a bit of a punch, delivering quality audio at a volume that should satisfy anyone. 

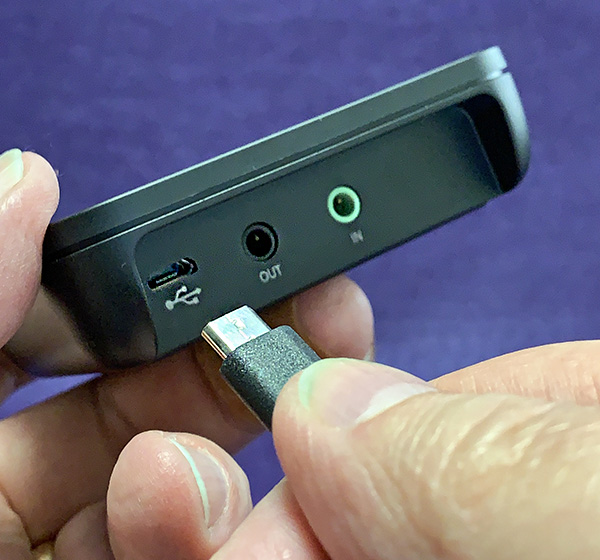
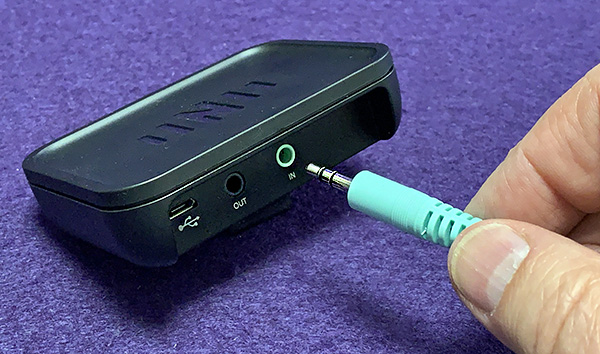
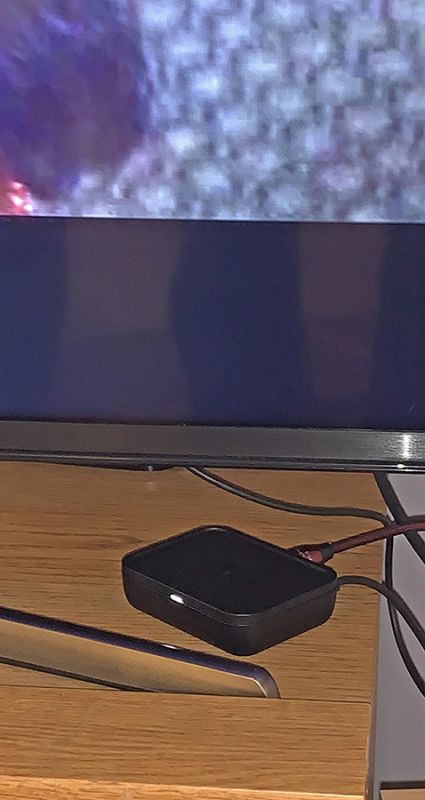
IQstream TV comes with all the wiring you should need as long as you can find USB power (a powered USB port on a tv will do) and audio out sources. The IQstream TV has three ports at the rear—audio in, audio out and USB. The audio in and out ports are both digital and analog. Included is an adapter if your digital port is not the mini plug shape. This means that the IQstream TV can use the far better digital signal if your source uses TOSLINK (SPDIF). But if your audio source is old school, those same ports can handle analog mini plug or RCA-mini plug connections—cables included. Because of its light weight, the base of the unit has a non-slip rubberized surface that helps keep it in place on a tv stand.

There are different setups for the IQstream TV. The most common is a direct connection from the audio out port on the back of your TV (if there is one) to the audio in port on the IQstream TV. Just my luck that this didn’t work for me—usually. Sometimes it did and sometimes not. I would get no audio even though a solid blue light indicating that the IQstream TV was streaming. 

After repeated emails to Nuheara support and getting nowhere (not their fault), I decided to connect the IQstream TV to the audio out port of my cable box rather than the tv. Voila—it worked! Who knew that if you have cable TV, that the audio out on the TV would not work? I didn’t know that. The manual doesn’t deal with a cable box connection.

A word about Nuheara’s support. They were knowledgable. They were attentive. They were supportive. They’re in Australia. So, since the time zone is about 12 hours difference, it would take a day for each question to be asked and answered. It took a while to get anywhere. I kept wishing there was a support phone number to call, but no. There is an online chat on the Nuheara site, but it wasn’t available when I had my questions.

The IQstream TV also has an audio out port for connecting to a sound bar. The idea for this is so the IQstream TV can be a pass-through for one audio port at the source. Since I do not own a soundbar, I haven’t tried this method.

Once the IQstream TV’s connection woes were fixed, everything worked great! There was no Bluetooth lag in the audio, so syncing was never an issue. Only if I turned down the IQbuds BOOST earphones and turned up the TV, did I notice a slight echo effect. 

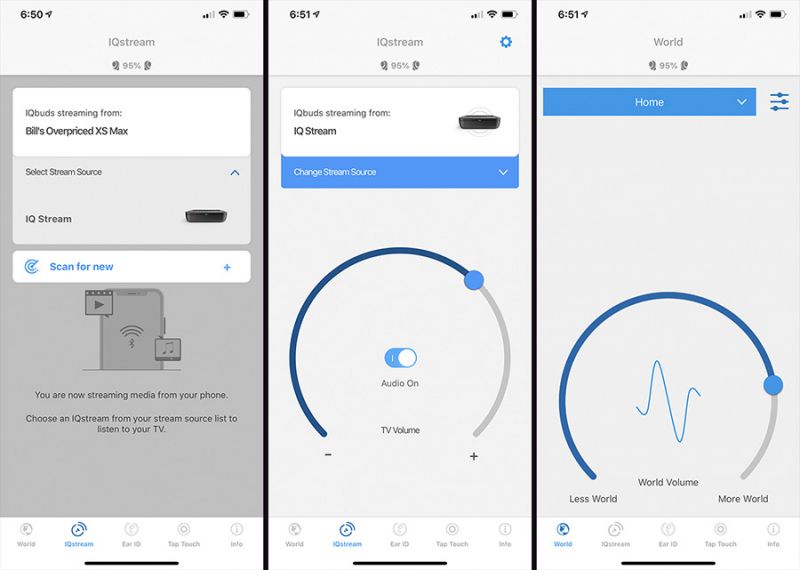
The Nuheara IQbuds smartphone app is required to use the IQstream TV. The app may need to be updated to see the IQstream TV. Once paired, you can control volume and how much outside noise you want to allow. That way, a normal conversation can be had without removing the buds.

Because I use the proprietary Nuheara’s IQbuds BOOST earphones, audio quality is quite good, so music, dialog and sound effects ring true. Stereo separation is great—as long as the audio source is stereo. In other words, what is broadcast or played is what you hear.

Note that the IQstream TV only works with the IQbuds BOOST earphones and nothing else—not even the Nuheara’s original IQ earphones. So you should already own the IQbuds BOOST earphones or will need to purchase them for the IQstream TV to work. This will be a huge dealbreaker for many. The IQbuds BOOST earphones retail for $500, so it’s a major purchase. However, the IQbuds BOOST earphones are not your typical earphones. They can test your hearing and adjust themselves accordingly. It’s pretty amazing audio tech. You can read my review here.

What I like

  • Simple to use
  • Sounds great
  • No audio syncing issues

What I’d change

  • Make it work with any earphone
  • Include cable box instructions in the manual

Final Thoughts

Nuheara is on to something with the IQstream TV. It’s incredibly simple to use—once it’s set up properly. It sounds great and the ability to independently control TV volume without disturbing others can be a godsend. If Nuheara can figure out a way for the IQstream TV to work with any Bluetooth earphone or offer a less expensive earbud, it could be a near perfect product.

Price: $99 US (Sometimes on sale for $69)
Where to buy: Nuheara
Source: The sample for this product was provided by Nuheara.

Filed in categories: Reviews

Tagged: , ,

Nuheara IQstream TV review originally appeared on The Gadgeteer on August 18, 2019 at 12:01 pm.

Note: If you are subscribed to this feed through FeedBurner, please switch to our native feed URL http://the-gadgeteer.com/feed/ in order to ensure continuous delivery.
Wallaroo Hat Company Seaside women’s sun hat review

REVIEW – We live in Florida. Florida is known as the sunshine state. Let me tell you, after living in Michigan for most of my life, and in my wife’s case, her entire life, the sun down here is a different kind of intense.  We both wear hats nearly all the time when we are outside. Finding a good hat is essential for both comfort and the health of the skin on your head. Wallaroo Hat Company has a large offering of hats for men, women, and children that include UPV 50+ hats.  These hats block more than 97.5% of the sun’s UV radiation.  We were sent the Seaside hat for review.  Should it be in your sights as an option for UV protection and stylish looks?  Let’s get into it and find out!

What is it?

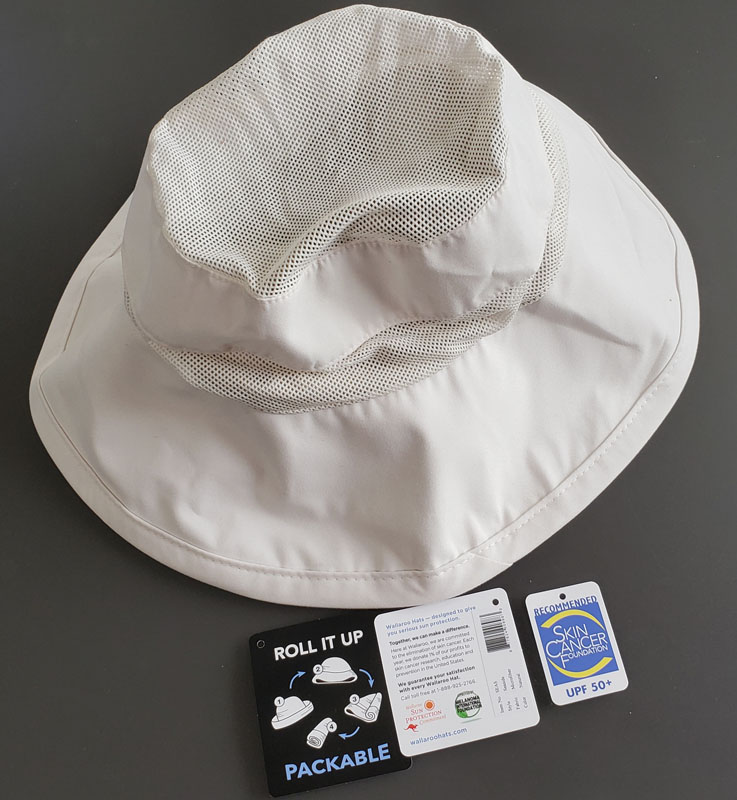
The Seaside hat is one of Wallaroo’s hats designed specifically for women that provides UPF 50+ UV protection.  We were sent the natural version which is an off-white.  It is also available in camel – more of a light brown, or perhaps dark tan.

Specs

  • Fabric: 100% microfiber with ventilated mesh
  • Ultraviolet protection factor (UPF): 50+ (fabric blocks 97.5% of ultraviolet rays)
  • Weight: 2.9oz
  • Crown size: 58mm
  • Bill width: 4″ and adjustable

Design and features

First off, the hat is incredibly soft.  When I opened the box, the first thought on my mind was how soft the hat felt.  The 100% microfiber construction feels great with nothing stiff or abrasive. Then, I noticed how light it is.

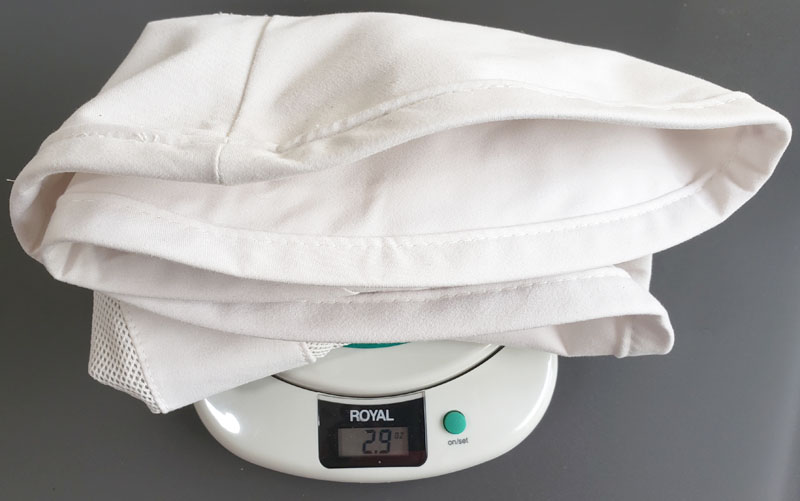
My trusty postal scale shows that it weighs in at a next-to-nothing 2.9 ounces.  That should mean all-day comfort as almost nothing is on your head. But, that next to nothing provides a UPF rating of 50+ so only 2%-2.5% of the sun’s UV radiation will hit your noggin. With the 4″ wide brim, your ears and neck will also be protected.

Wallaroo includes a cinch cord in the hat to help you get that perfect fit.

The above photo shows the cinch cord near the label as well as the chin strap with a slider to tighten under your chin in windy conditions.

The only exterior branding is a small Wallaroo tag on the back of the hat.

Inside, we find another brand tag.

Washing instructions on the back show that hand washing in cold water is recommended.

Wallaroo promotes that they are Colorado-based but we see that the hat was made in China.

The hat ships with three tags attached.

One demonstrates how to pack your hat by rolling it so you avoid wrinkles.  The second shows that they are recommended for their UPF 50+ protection by the Skin Cancer Foundation.  The third has product information and also explains that 1% of company profits are donated to skin cancer research, education, and prevention in the United States.  That’s an admirable mission.

Take another look at the photos above and this close-up.

We see a good amount of ventilated mesh integrated into the hat.  A UV protection layer is under each mesh area. This promotes airflow to help keep you cool in the sun while still providing full UV protection.

Performance

I can like this hat all I want to but it is designed for women.  Whether it is worthy of your consideration will rest solely on the opinion of my lovely wife who will be modeling and testing out the hat.

To test the hat, we went and played golf – central Florida style.  That means 93 degrees, 66% humidity and a feels-like of 105 degrees. She liked wearing the hat and used words like “soft” and “comfortable”.  In addition, she felt that the hat, with its extensive ventilated mesh, did a good job of helping her feel relatively cool in the blazing Florida sun.

She tried the hat in its two brim modes.  You can roll the brim edge up for a sportier look, or fold it down for more extensive sun coverage and a more relaxed look.  She preferred the rolled-up look, and I had to agree that she looked pretty darn cute, although I might be biased.

For excessively windy conditions, there is a chin strap, which she modeled for me as well.

I’m not sure when you would use the chin strap. In a hurricane, perhaps? After golf, we rode home in our golf cart. We live in a huge retirement community and that’s how we get around most of the time. Since it was so hot, we left the windshield folded down. I had her drive so I could shoot video of the hat’s performance in the wind.  She had just put the hat on and did not even pull the cinch straps tight.  Take a look at the following 10-second video.

We were cruising at about 25MPH and the hat held firm.

Here’s another view from the side.  You can really get a sense of how hard the wind was blowing in our faces.

We both were quite impressed.  Cinching the hat will offer even more hold, and the chin strap is there for those times when you’re skydiving or running an Indy car with no windscreen.

What we like

  • Super light and soft
  • Attractive design
  • Very good fit and hold, even in windy conditions
  • Great UV protection

What we’d change

  • A way to store the chin strap, perhaps a pocket in the inside top of the hat, would be nice

Final thoughts

We were both very impressed with the Wallaroo Seaside hat.  My wife went golfing again the next morning when the temps were in the high 80s and the feels like temps were again well over 100 degrees.  When she came home, she again commented on the softness and comfort of the hat and how well it shielded her from the sun and helped keep her cool. With its great fit, great comfort and terrific UV protection, it is a perfect hat for our Florida active lifestyle.

Price: $50
Where to buy: Direct from Wallaroo and Amazon along with many other retailers.
Source: The sample of this product was provided by Wallaroo Hat Company.

Filed in categories: Reviews

Tagged:

Wallaroo Hat Company Seaside women’s sun hat review originally appeared on The Gadgeteer on August 18, 2019 at 9:45 am.

Note: If you are subscribed to this feed through FeedBurner, please switch to our native feed URL http://the-gadgeteer.com/feed/ in order to ensure continuous delivery.
Govee Wifi Smart Outdoor LED String Light review

REVIEW – This is my second opportunity to review a Govee product, with my most recent review being their smart LED strip lighting that I used behind my TV. This time, I’m getting to show off the Wifi Smart Outdoor LED String Lights! As much as a fan as I was about the strip lighting, I will say it upfront that I really love these string lights!

What is it?

These are a 6 bulb, remote controlled, LED string light that is rated for outdoor use.

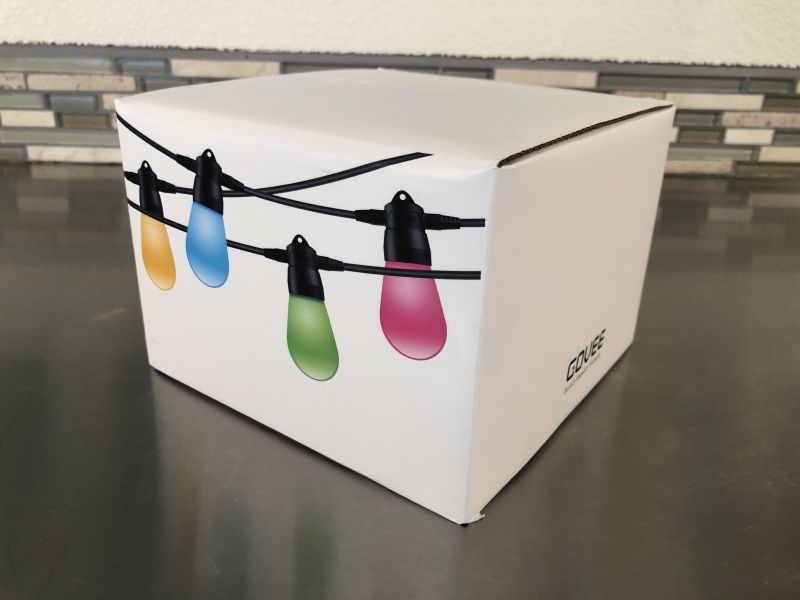
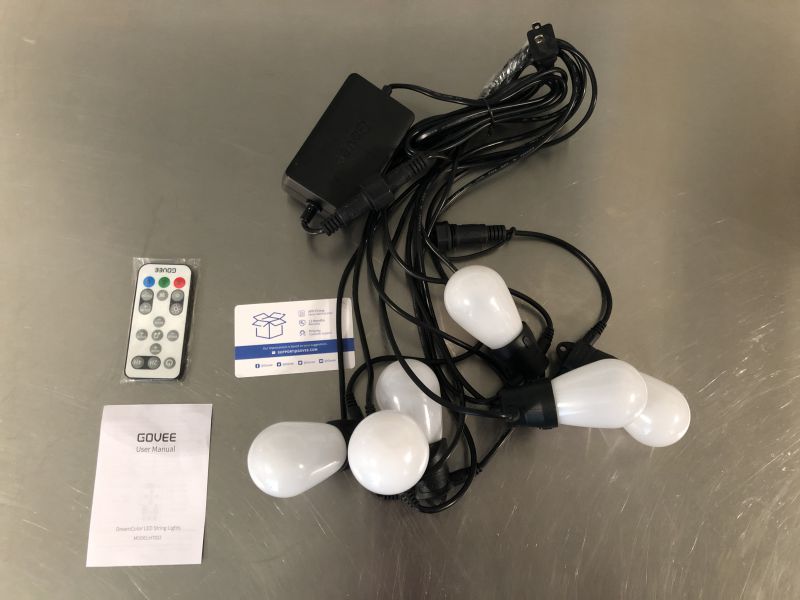
What’s in the box?

  • String Lights
  • Remote Control
  • Instruction Book & Govee brochure

Design and features

These lights are on a 24′ long string with 6 total bulbs. There is a standard electrical plug. Each bulb can be controlled individually, selected lights can be controlled together or all lights can be controlled at once via the Govee app – which was easy to set up this additional unit into my existing setup of lights from Govee. While it can be controlled via the app, the unit also comes with a remote control that comes in very handy. Since these are multi-color LED’s you can adjust the lights to any tone or color that you choose that best fits your situation or preference. Additionally, since it is rated for outdoor use, they can be kept up year-round as well.
Setup

Simply remove from the box, plugin and string them up as you desire. Follow the step-by-step instructions in the app to get it completely set up for Wifi use.

Performance

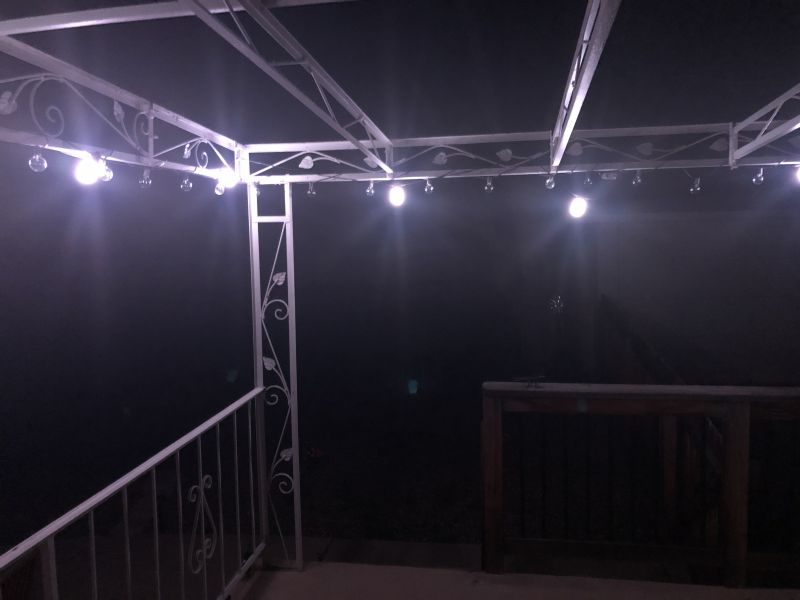
These lights put off a surprising intensity of light for their size and space between each bulb. They illuminate our back patio well, although I will be buying a second strand to connect to it in order to get the rest of the way around our railing. We use these nightly when we let our dogs out for the evening and they provide enough light that we can see them wherever they are at in the back yard as well as on evenings that we are out eating dinner or enjoying some wine. The remote and app make them easy to turn on/off as well as make any color adjustments that we would like. Finally, there is a setting that will allow the lights to “dance” to music that is being played so if you like that sort of thing while having a party, these lights are perfect for you!

What I like

  • Bright illuminating bulbs – that are still adjustable to lower brightness levels as needed.
  • Easy install and set-up
  • Can daisy-chain these together with additional units (up to 4 total) to accommodate larger areas.

What I Would Change

  • 24′ and 6 bulbs sound like a lot, but once installed, it does feel a little short – I would like a couple more bulbs and maybe 30′ for optimal usage – but since you can chain 4 together, this detraction is negated a bit.
  • Price feels a little bit high at $50 per strand in my opinion, but the quality and functionality are there to balance out the price.

Final thoughts

Overall, I’m two thumbs on these lights, Govee is really doing a great job on these lights and I really like the ease of changing the colors, brightness and various modes/scenes that are pre-programmed in the smartphone app. And as I stated above, we will definitely be adding a second string to get it completely around the patio. For those looking for a quality outdoor LED lighting solution, I’d definitely recommend picking up a string or two or three of these lights!

Price: $49.99
Where to buy: Amazon (20% OFF code: HUC6522O + extra 20% Coupon on Amazon page expires: 08/20/2019 11:59 PM)
Source: The sample of this product was provided by Govee.

Filed in categories: Reviews

Tagged:

Govee Wifi Smart Outdoor LED String Light review originally appeared on The Gadgeteer on August 18, 2019 at 8:36 am.

Note: If you are subscribed to this feed through FeedBurner, please switch to our native feed URL http://the-gadgeteer.com/feed/ in order to ensure continuous delivery.