SANDMARC iPhone X camera lenses review

SANDMARC offers camera products for GoPro, DJI drones, the iPhone 7, 8 (both standard and plus models), and the iPhone X.  The lenses I will be talking about are the iPhone X versions.

What is it?

The SANDMARC Lenses for iPhone are easily attachable lenses, each serving a specific purpose for the kind of photograph you are wanting to take.  Installation is quick and easy and the lenses produce a high-quality image that takes your photos to the next level through the use of the macro, fisheye or wide lenses.  Later in the review, I will show you some photos taken with and without the SANDMARC lenses to show the difference that they make.
Hardware specs

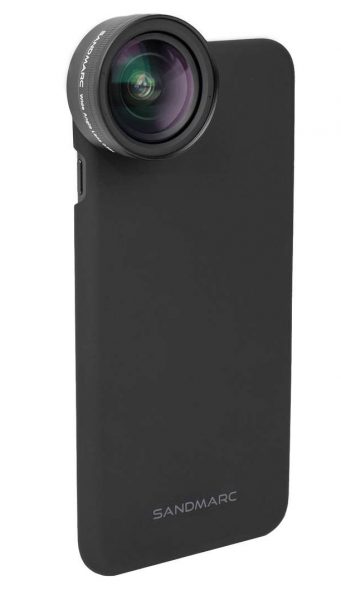
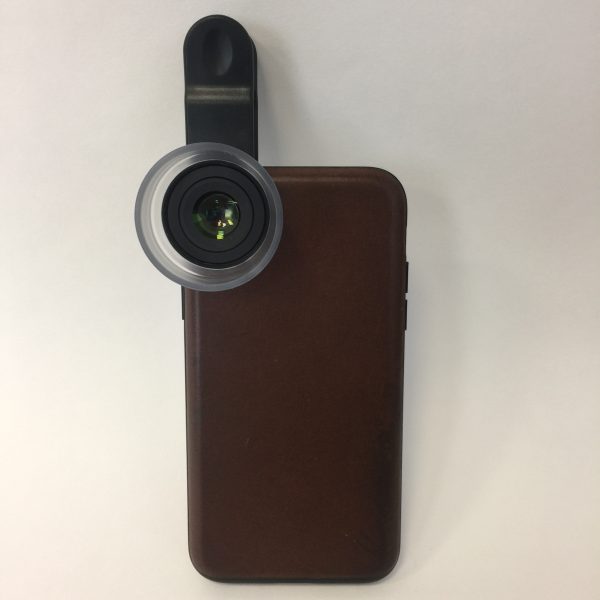
Lets first talk about attachment to your phone.  Each lens comes with its own iPhone case that allows for simple attachment of your lens.  when not using a lens, the case will work to protect your phone but is not the most rugged case out there, but that’s not the intended purpose.  The attachment point on the case protrudes quite a bit from the body of the phone so if you don’t plan on using the lens(es) often, you might find the clip attachment an easier solution.  Also included with each lens is a clip that attaches to the lens and clips onto your phone, whether or not you are using another kind of iPhone case.  This flexibility is a really nice feature to of these products.  If I was going to be spending a day shooting pictures I would just use the case provided for quick attachment of whichever lens I needed.  For the one off occasions I use the clip so I don’t have to remove my regular iPhone case.
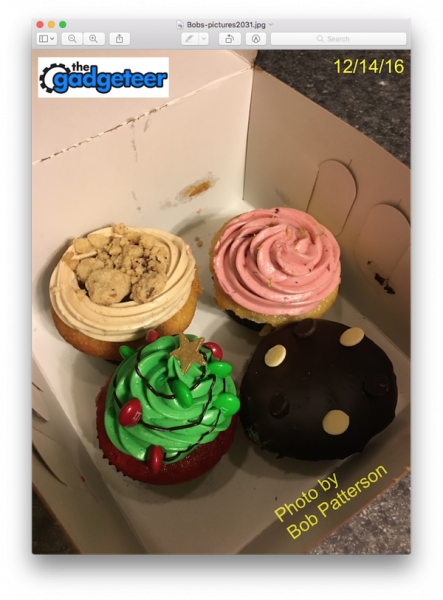
Picture below was taken without a SANDMARC Lens

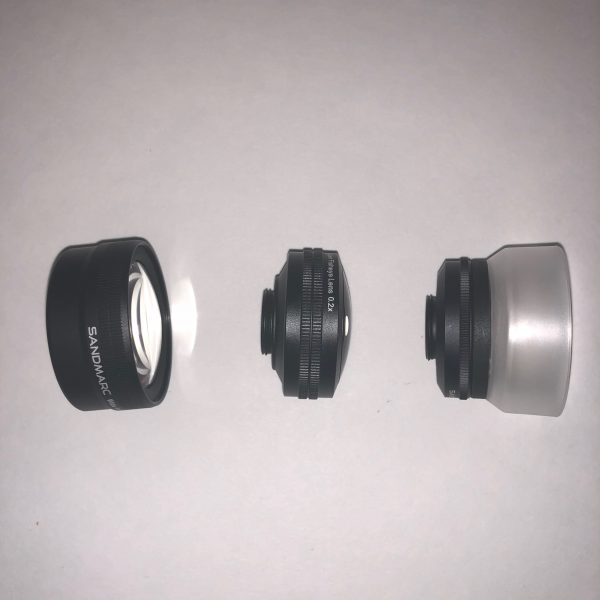
Wide lens: this lens gives you 2 times more field of view; 16mm lens; 0.56X magnification; 71g; 24.2 mm height and 42 mm diameter.  This is a great lens for action shots, outdoor/landscape photography and travel.

The picture below is the same shot as above using the wide lens.

Fisheye lens: this lens gives you 5 times more field of view; 10 mm lens; 55 g, 23 mm height; 38 mm diameter.  This lens is perfect for large landscape shots, sporting events and anything else that a very wide field of view would make for a more stunning photograph.

The picture below is the same shot using the fisheye lens

Macro lens: designed to capture details not seen by the naked eye you will be very impressed by the vivid details that are uncovered with this lens.  Ideal for photographing small objects at very close range the macro lens is ideal for photographing flowers, insects, snowflakes and other detailed still subjects that we don’t often get to see the details of.  25 mm lens; 10X magnification; 25.4 g; 15 mm height; 38 mm diameter.

What’s in the box?

Each lens comes packaged with an iPhone case, a clip on attachment, lens covers, a soft carrying pouch and a microfiber cloth.
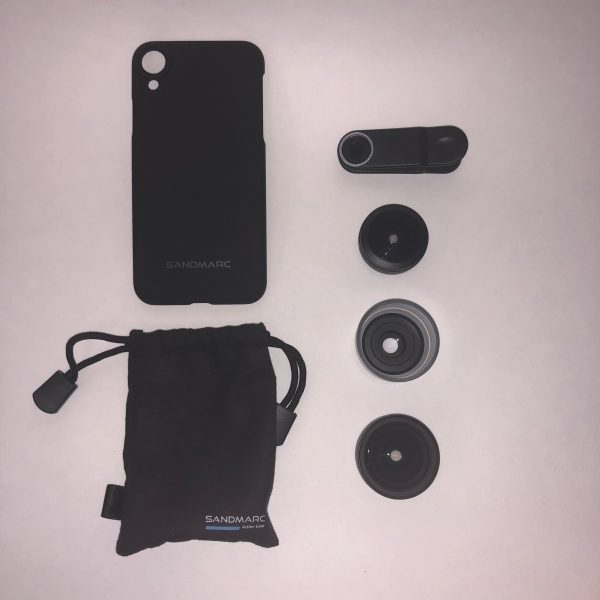
Designs and features

The thoughtful design of how these lenses seem to be a natural extension of the iPhone makes for a very easy and enjoyable user experience.  If it was a pain or a process to attach them I don’t think I would be using them as much as I am.  When you use the clip to attach it to the phone, it is easy to line it up with the lens on the phone because you can easily see the placement and alignment on the screen.  The weight of the lenses are definitely noticeable and make your phone feel a lot more like a regular camera.  You won’t likely be slipping your phone with the lens attached into your pocket because to produce the effects you get with each lens, they are not small but that is to be expected.

Positives

High quality and sturdy lenses and housings that feel like high grade camera equipment; stunning images that elevate the already great camera on the iPhone X to the next level; cases and clips that are designed to work interchangeably if you own more than one of their lenses; available for iPhones models 7 and up; can be purchased individually or as a set including all three lenses I have discussed.

Negatives

The case probably isn’t something you would want to use as your everyday iPhone case but to be fair, I’m not sure that is the intent of it.  Honestly, I haven’t found a real negative concerning this set of lenses.

Final thoughts

I have always been intrigued by the lens attachments for mobile phones that I have seen over the past couple of years.  To say that I was skeptical about the functionality, quality and difference they would make would be putting it mildly.  Recently I was sent a set of lenses from SANDMARC (wide angle, macro and fisheye) and after quickly attaching them to my phone and snapping some photos, I was thoroughly impressed.  The design of the lenses and how they attach/clip to your phone is very well thought out.  I really enjoyed using the included iPhone case for quick installation of a lens or changing them when needed but I have found myself using the clip on function even more as I quickly grab a lens to take a shot.  Each case is the same so if you buy multiple lenses, you can use one case to attach all the lenses, which makes for a very convenient platform to elevate your photography by quickly snapping in a new lens.

After using these for the last few weeks I couldn’t be happier with them and have been really impressed with the difference they have made with my photographs.  If you enjoy taking high quality pictures and going beyond what your phone is capable of, I wholeheartedly recommend checking these lenses out.

Price: Macro: $69.99, Wide angle: $89.99, Fisheye: $79.99, Set of all 3: $189.99
Where to buySANDMARC
Source: The samples for this review were provided by SANDMARC.

KODAK Photo Printer Mini review

Back in the day, the only way you could see a picture that you had taken with your camera, was to have the film processed and prints made. Today, most images that we take are passed around digitally via email, and social media sites like Instagram, Facebook, and Pinterest. Is there still a place in this digital world for physical prints? KODAK sure hopes so and have created the Photo Printer Mini to get the job done fast and easy. Let’s see how well they’ve done.

What is it?

The KODAK Photo Printer Mini is a portable wireless color photo printer for Android and iOS devices that uses a WiFi connection instead of a Bluetooth connection.

Design and features

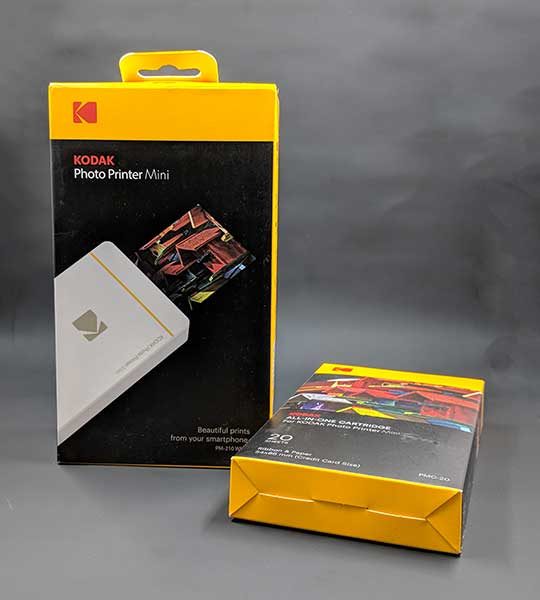
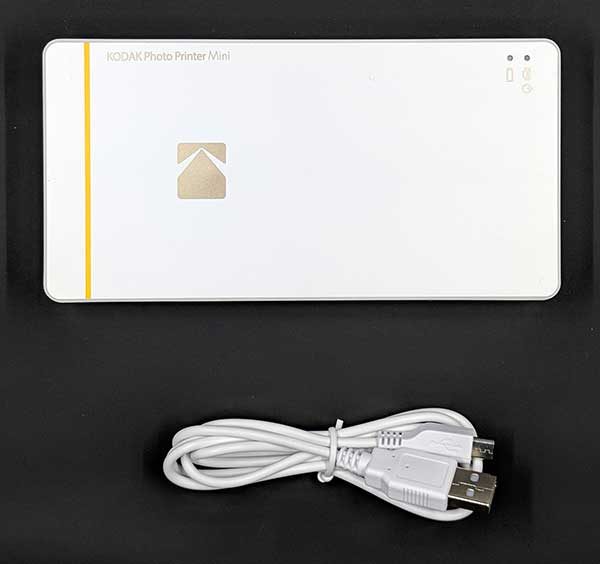
The Photo Printer Mini is about the same size as a large backup battery at 6 x 3 x 1 inch. Included in the box is an all-in-one print cartridge and a micro USB charging cable. The printer is available in white, black, and gold. As you can see, I was sent the white version.

There are 2 status LEDs on the top of the printer. One status LED is for power and printing, and the other one is a battery status LED.

On one side of the KODAK Photo Printer Mini, you’ll find a power button.

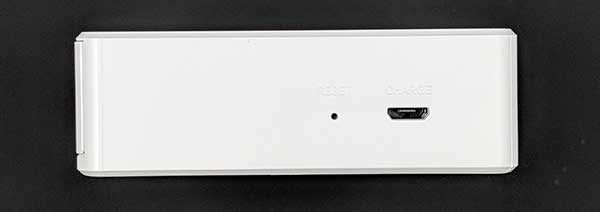
The micro USB charging port is located on one end of the printer along with a reset switch.

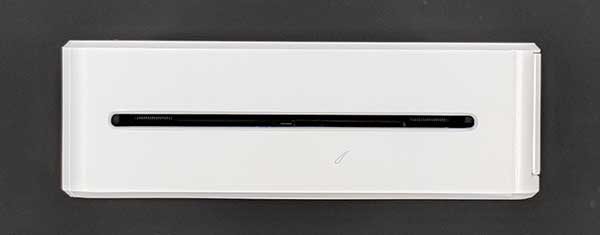
On the opposite end, you’ll find the print eject slot.

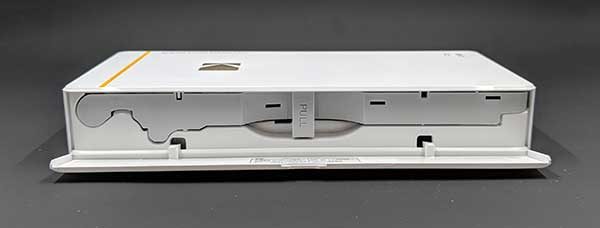
And on the other side is the print cartridge door.

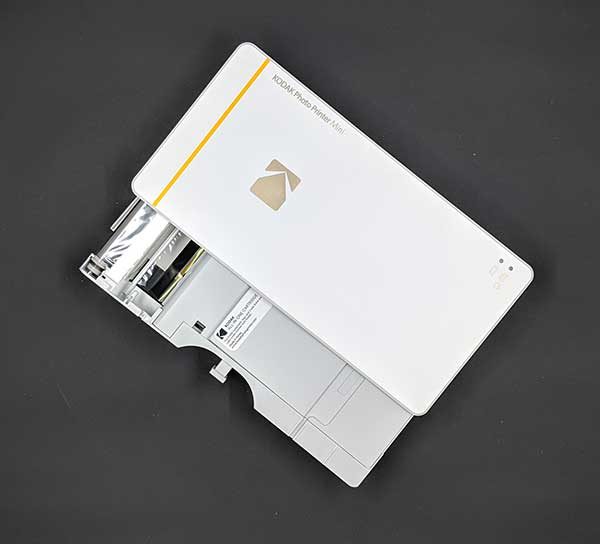
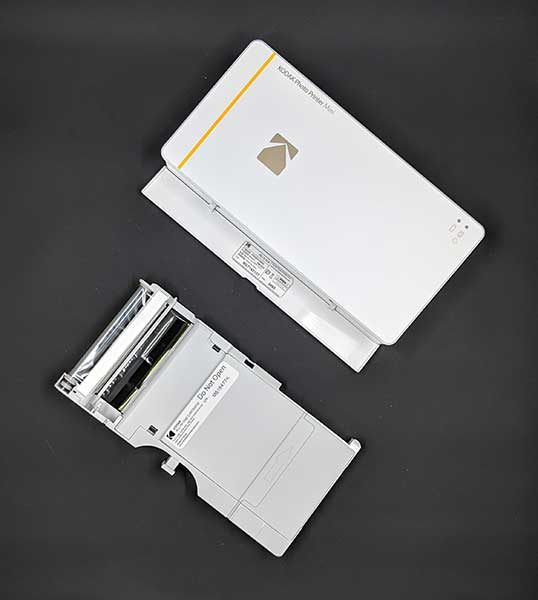
The door opens to provide access to the all-in-one print cartridge. The cartridges combine paper and ribbon in one package and come in 20, 30 or 50 prints per cartridge.

The cartridges are easy to insert and remove.

An 8-print cartridge is included with the Photo Printer Mini. This is the only consumable that you need to worry about with this printer. I think KODAK cheaped out by only giving you a cartridge with 8 prints instead of a 20-print cartridge. You can find refills on Amazon where the price ranges from $19.99 each for the 20-print cartridge, up to $35.73 for the 50-print cartridge. The 20-print cartridge is also available with sticky backed prints so you can use them as stickers.

The app


Before you can print your first picture, you’ll need to install the app on an iOS or Android device. I did my testing with a Google Pixel 2 XL. This printer uses a WiFi connection instead of Bluetooth, so you will have set up the WiFi connection including the password.

If you have an Android smartphone, you can also tap the phone on top of the printer to quickly launch the app. But I still had to manually connect the printer to my phone each time by going into the WiFi network list.

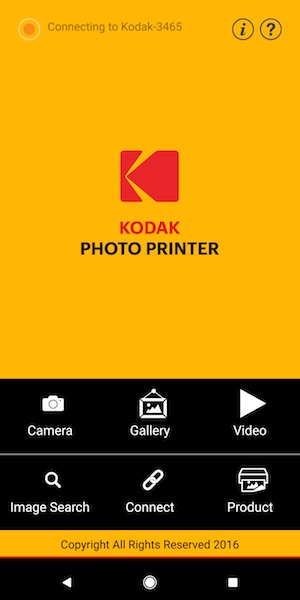
If you look at the two images above, you can see that the app is trying to connect to the printer. I saw this message quite often and found the connection between my phone and the printer to be very fiddly.

Once connected, you can access photos from your phone’s camera roll, Facebook, Instagram and a couple other social media platforms, Google images, or even screen grabs from your videos.


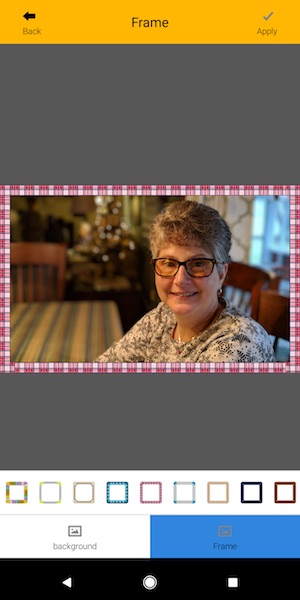
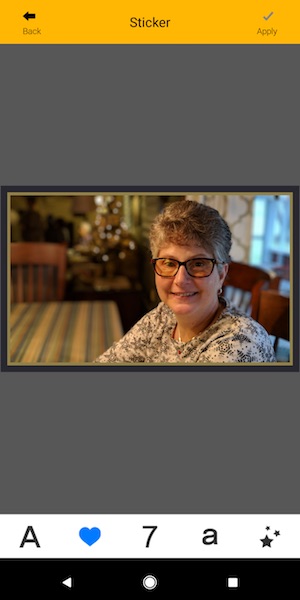
The KODAK Printer app has some built-in editing features that allow you to crop, rotate, add frames, stickers, and do other rudimentary adjustments to the image before printing.

After you have chosen and edited the image, all that is left to do is print it. Printing is relatively quick and the print is dry and ready to handle immediately after printing is finished.

See it in action

As you can see, the print time is pretty quick.

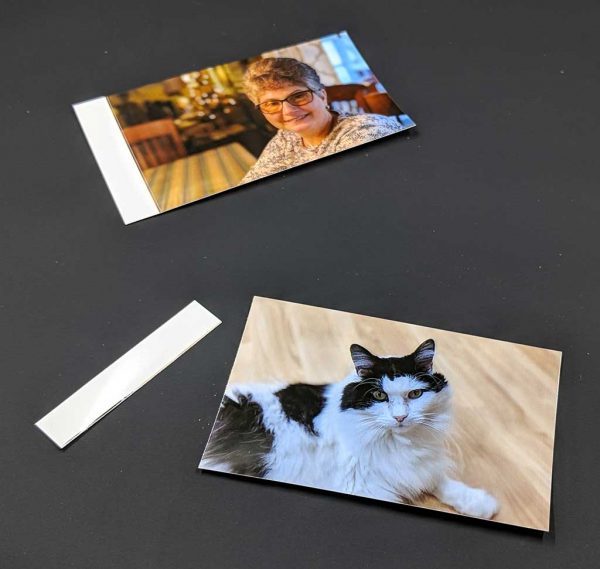
The credit card sized 2.1 x 3.4 inch (54 x 86 mm) photos are printed in seconds and dry instantly.

I don’t quite understand the purpose of the small perforated tab that tears off the image though. It leaves one side of the print with a fine serration.

I’ve reviewed other wireless printers over the years like the Polaroid ZIP which use dye-incorporating paper (ZINK) and I find the KODAK Photo Printer Mini’s image quality to be superior in sharpness and color. That’s because the KODAK printer uses dye sublimation thermal transfer with 256 gradations and 16.7 million colors. It also puts a laminated protection layer over the print that is fingerprint and water resistant.

What I like

  • Sharper and more colorful prints compared to other small printers that use ZINK paper
  • Quick and easy to use when the WiFi connection is behaving
  • Fingerprint and water resistant prints

What needs to be improved

  • WiFi connection is too fiddly
  • Only comes with an 8-print cartridge

Final thoughts

Except for the problems that I had with the WiFi connection dropping between the printer and my phone, I would say that this is the easiest portable wireless printer to use and prints the best-looking prints. As long as you remember that you’ll need to buy extra printer cartridges, the KODAK Photo Printer Mini will let you have fun bringing your favorite digital prints into the physical world.

Price: $99.99
Where to buy: Amazon
Source: The sample for this review was provided by KODAK.

Lensball review

If you’ve been searching for a way to bring a unique element to your photography, I have an accessory to show you that you can use with any camera and any smartphone. It’s the Lensball. It doesn’t need an app, doesn’t run on batteries and is a simple to use. Let’s take a look.

What is it?

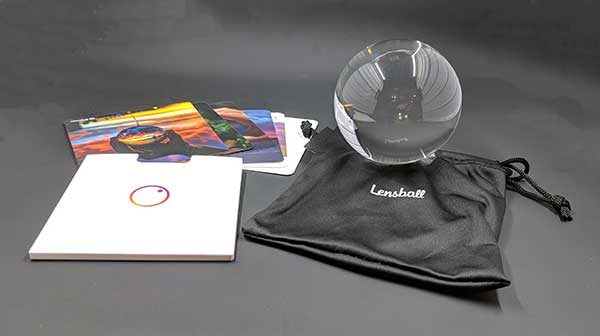
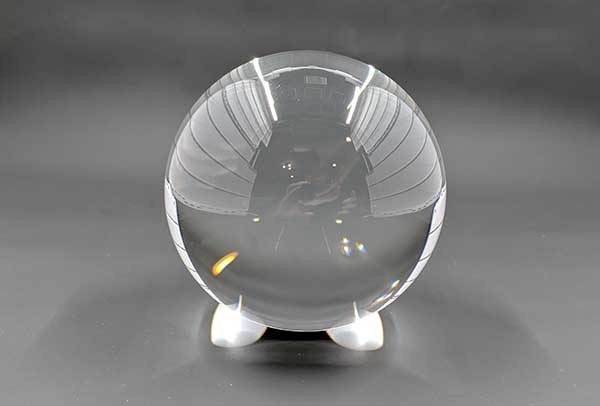
The Lensball is a sphere made of brilliantly clear crystal. Lensballs are available in 60mm and 80mm sizes. I was sent the larger 80mm size.

What is in the box?

Lensball
Drawstring cloth pouch
Example image cards
Lensball logo sticker

The Lensball is a crystal ball, but not the type of crystal ball that will show you your future. Lensballs are made of K9 crystal which is best described by the Marquis by Waterford site.

K9 is a Chinese Optical Borosilicate Crown Crystal (Optically Clear) with low inclusions and imperfections ideal for use in lenses and prisms, optics and decorative crystal lighting. … Lead crystal is the type that is most commonly used for wine glasses and other decorative ornaments around the home.

So now that we know what it is, why would we want one and what the heck can we do with a single Lensball?

The ball is so perfectly clear that you can shoot pictures through the ball with any camera or any smartphone to create interesting images.

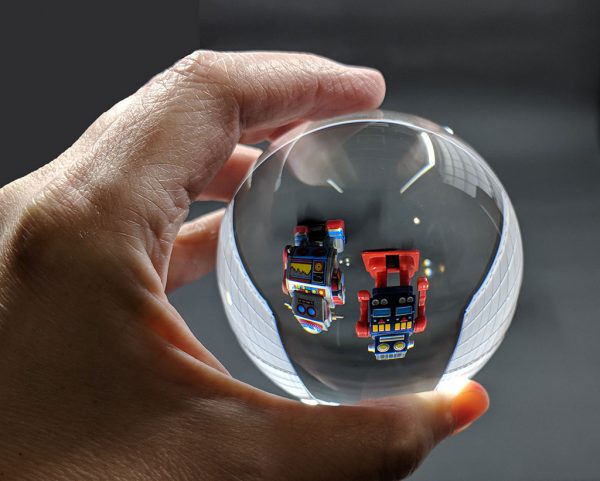
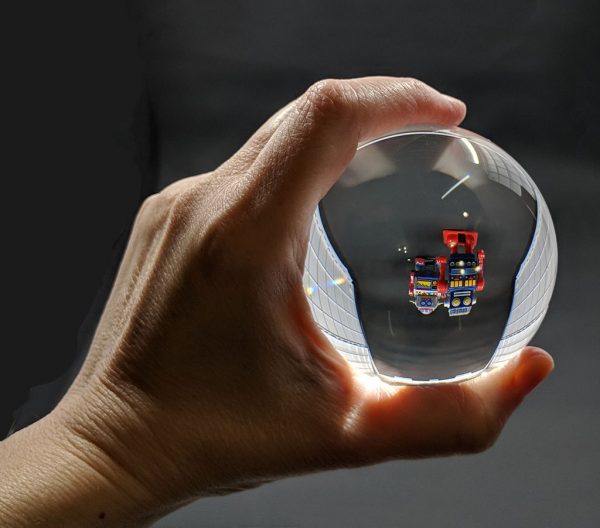
To use it, you just hold up the ball in front of your subject and then shoot through the ball with your camera.

The result is a perfectly clear 180° degree view of the subject. Yes, it’s upside down and I realize that my subject matter isn’t the most exciting, but imagine taking the Lensball with you to the beach, a forest, a famous monument, etc. The options are endless. You can check out some examples by visiting Lensball on Instagram.

Things to keep in mind when using the Lensball are the fact that this crystal orb is heavy. You’ll feel the weight in your hand and your bag. The 60mm Lensball weighs 0.55lb (250g) and the 80mm Lensball weighs 1.45lbs (650g).

Unless you set the Lensball on a surface that prevents it from rolling away, you’ll need to hold the ball in one hand while holding a camera in your other hand which can feel a little awkward.

You should also be careful not to leave the Lensball unattended outdoors on a bright sunny day. It can act like a magnifying glass and in the right environment, it’s possible that it could accidentally start a fire if the sun shines through it on to dry flammable material. It’s best to always put the Lensball back in the included drawstring pouch when you’re not using it.

What I like about it

You don’t need a manual to figure out how to use it, you don’t need to keep a battery charged to use it, and it will work with any camera.

What needs to be improved

Nothing.

Final thoughts

The first time I saw the Lensball, I imagined all the interesting photos that I could capture using it. Now that I’ve had one, I haven’t captured any truly epic pics, but I’m still thinking about where I can take it. If you don’t mind a little extra weight in your camera bag, the Lensball is a unique accessory that might just take your ordinary snapshots to the next level.

Source: The sample for this review was provided by Lensball. Please visit their site for more info and Amazon to order.


Product Information

Price: $24.95 – $34.95
Manufacturer: Lensball
Retailer: Amazon
Pros:
  • Perfectly round
  • Perfectly clear
  • No batteries
  • Works with any camera
Cons:
  • None

Filed in categories: Reviews

Tagged:

Lensball review originally appeared on The Gadgeteer on December 6, 2017 at 11:00 am.

Note: If you are subscribed to this feed through FeedBurner, please switch to our native feed URL http://the-gadgeteer.com/feed/ in order to ensure continuous delivery.

Scan photos without removing them from the photo album

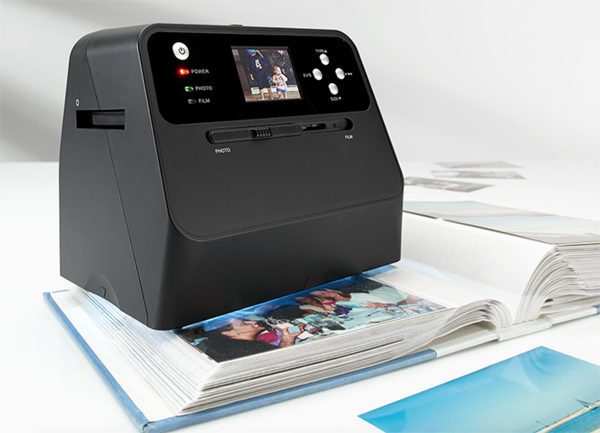
A few years ago, everyone seemed to be scrapbooking – taking old and new photos out of existing photo albums and creating new photo books filled with more decorations than photos.  I remember the bane of everyone’s existence then was those old “magnetic” photo albums.  Seems those adhesive strips that held the photos in place welded themselves to the photos over time.  Removing photos from those albums often resulted in wrinkled (at best) or torn (at worst) photos.  With the Rapid Photo Album Scanner, you can get a digital scan of photos in those books, or any other album, without removing the photo or without having to disassemble the album.  The scanner can copy any paper image (up to 4″X6″) on a flat surface, plus 35mm negatives and slides. 

The scanner has a built-in 14MP CMOS sensor, LED lights to illuminate the subject, holders for negatives and for slides, and a 2.4″ color screen so you can see how to position the scanner.  Scans of black-and-white or color photos, negatives, or slides are converted to JPEG format and stored on the included memory card.  You can connect the device to a PC or Mac computer via USB to transfer scanned images.

The Rapid Photo Album Scanner is $199.99 at Sharper Image.  Right now, use code SHIP99 for free shipping and 20% off purchases over $99.00.

Filed in categories: News

Tagged:

Scan photos without removing them from the photo album originally appeared on The Gadgeteer on December 1, 2017 at 8:00 am.

Note: If you are subscribed to this feed through FeedBurner, please switch to our native feed URL http://the-gadgeteer.com/feed/ in order to ensure continuous delivery.

PhotoBulk 2 image editing software for macOS review

So there you are, staring at that big batch of beautiful images on your desktop that needs to be prepped for publishing and/or distribution. Image editing can be a time-intensive task when done manually, especially if you’re dealing with a lot of content. You could be in for a long night. Enter PhotoBulk 2 for the macOS, an app that enables you to batch process common image editing tasks like resizing, converting formats, optimizing, and renaming. You can even create custom watermarks that include both text and graphics.

How does it work? Will it save you some precious sleep? Let’s go find out!

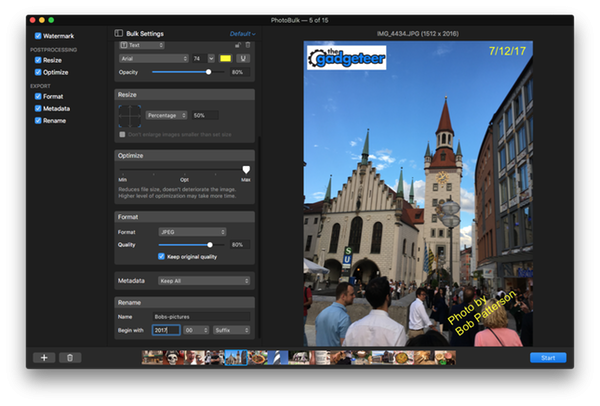
PhotoBulk 2 is the latest update to Eltima Software’s well-received bulk image editor, with a bunch of new enhancements and features. The interface is wonderfully simple. Select the batch of images you want to edit, which will then appear in a carousel at the bottom of the app window. Then you can select from a menu of 6 processing functions to apply to the batch, which can be toggled independently.

Watermarking

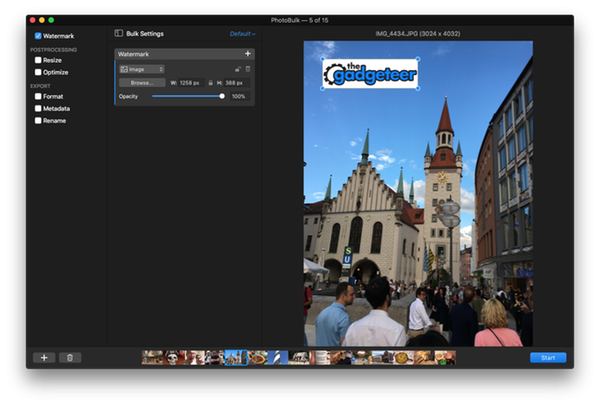
You have four watermark options to choose from, each of which is customizable to your specifications. Check the “Watermark” box to set your options, at which point you can any combination of watermarks you like.

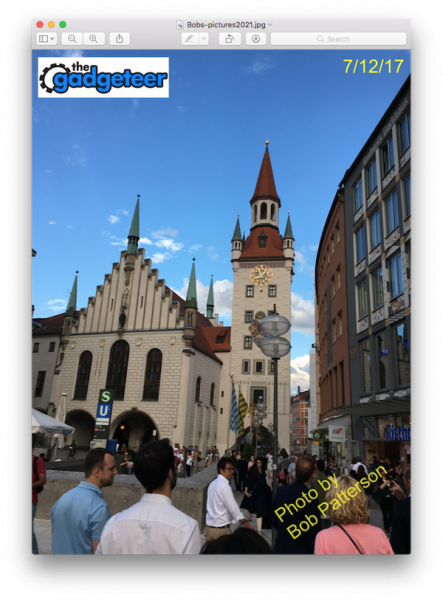
You can import an image (like your logo) which can be resized, rotated, and set to the opacity of your preference.

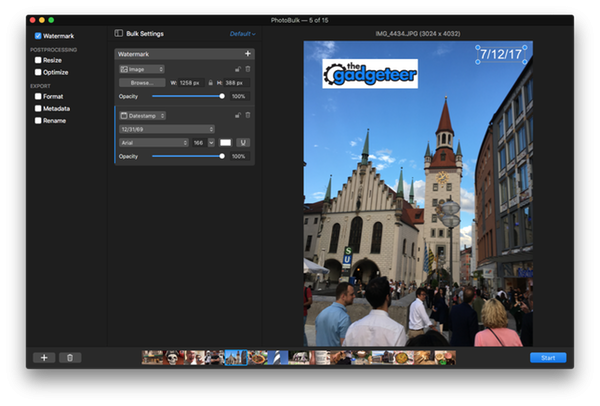
You can also add a date stamp for the image, with complete control over the font, size, color, positioning, and opacity. The date is automatically pulled from the photo metadata. You can also rotate the text placement if desired.

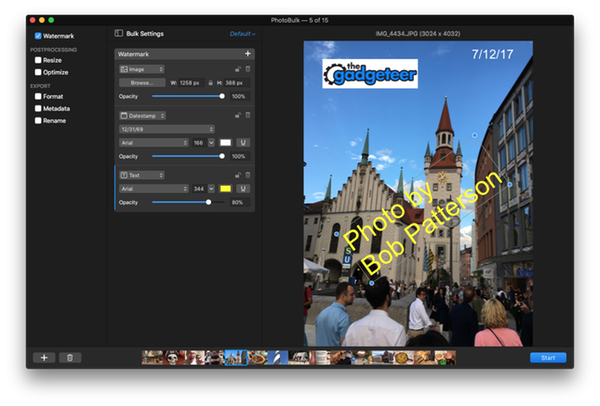
Additional text (like a byline or web site address) can also be added. As with the date stamp, you can customize all aspects of the text presentation (font, size, color, position, opacity, and rotation). Double-click on the text window to type your text, which can include multiple lines if desired.

Finally, there’s a “script” watermark (not shown here) that will automatically wash the formatted text across the entire image in a repeating pattern. This is especially useful if you want to embed a copyright tag, and can be formatted like the other text options (except for rotation).

The chosen options appear in the preview window, and you can toggle through images in the carousel to see the final results.

Post processing options

You have two post-processing options you can toggle: resizing and optimization.

The resizing process has 5 options that enable some pretty sophisticated flexibility. You can resize each image to a fixed height, a fixed width, a specific height & width for a “max size” to resize everything up to the largest possible size specified. Any of these choices also have a toggle that prevents the batch from enlarging images that are smaller than the set size. You can also set a generic “percentage” resizing that applies to every image in the batch.

Optimizing is an automated process that reduces the file size without deterioration. You can set your options on a sliding scale.

As with watermarks, you can use the preview window (and the carousel) to see how the selected options will impact your final images.

Export options

After you’ve set your desired watermark and post-processing options, you can set up the details for the final file exports. Note that PhotoBulk 2 enables you to choose your destination folder (or create a new one), retaining your original images if you want to process them again.

The “format” option allows you to export your final images to JPEG, PNG, GIF, BMP or TIFF format. You can also select the quality level for JPEGs if desired. You can also use the “metadata” option to keep or discard GPS data, camera info data, and copyright/contact info data embedded in the image. You can edit these options, but you can choose to keep or discard the data.

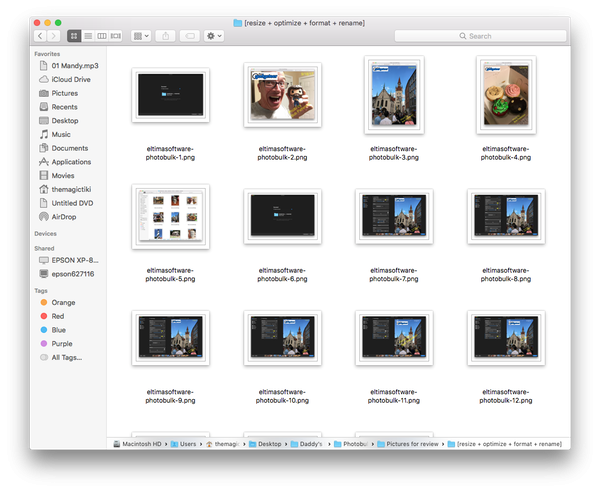
Finally, you can set your renaming options for the images if desired. You can pick a generic image name and append a common prefix or suffix to the file name, including sequential numbering with up to 4 digits (such as 1, 01, 001, or 0001). When I set up the processing for this review, this made it a snap to standardize my file naming. Here’s a screenshot of the output folder. No selecting and renaming for every picture!

Processing and saving your preferences

Once you have all of your options set, you press “start” to begin the processing. PhotoBulk 2 lets you choose your destination folder, and off you go!

You have the ability to save your presets for future use, including the watermarking options. We use a standard image sizing and naming convention for our work here at The Gadgeteer, which I now have set for bulk processing of my review photos. I also do illustration work as a hobby, and I can save a different batch setting for managing the images I put up on my website or in social media. I can also change preset options and save them for future processing (like changing copyright dates with the new year). It’s a nice option that saves a bunch of time.

General notes on use

I really like the PhotoBulk 2 package. The user interface is intuitive and easy to use, enabling you to be up and running with a few minutes of orientation. Eltima also does a nice job with tutorials and support to help you along the way if needed. The app is also very fast, significantly faster than the previous edition based on my research.

You should note that the same watermark settings are applied the same way to all photos in the batch, regardless of the image size. It looks like PhotoBulk defaults to a standard xy measurement for positioning from the image edges, and uses the same size specifications for watermark options. I tested three photos here to show this. The first two are the same vertical orientation and size, while the third image is horizontal in orientation and 50% smaller. Check it out:

See the difference? If you’re processing a bunch of images that are the same (or close to the same) dimensions, this probably won’t be an issue for you. If you have dramatically different sized images in your collection, however, you may want to set up two different batches. Again, you can check all the images in the preview screen before you run them out.

Finally, please note that this app is designed specifically for use on the Mac desktop. If you’re on a windows device or an iPhone or iPad, you’ll need to look elsewhere for a batch processing solution.

Conclusions and Pricing

If you need a simple batch processing app with robust watermarking, formatting and export features, you can’t go wrong with PhotoBulk 2. With a clean, easy-to-use interface and intuitive functionality, I really like it as a massive time saver. It’s also bargain priced at $9.99. Check it out at the PhotoBulk web site or buy it at the macOS app store!

Source: the sample for this test was provided by Eltima Software. Please visit their site for more information.


Product Information

Price: $9.99
Manufacturer: Eltima Software
Retailer: macOS app store
Pros:
  • Intuitive, easy to use interface
  • Robust processing capabilities
  • Versatile watermarking options
  • Great value for under $10
Cons:
  • Only works on the macOS… no support for iPhone or iPad use

Filed in categories: Reviews

Tagged: ,

PhotoBulk 2 image editing software for macOS review originally appeared on The Gadgeteer on November 28, 2017 at 9:00 am.

Note: If you are subscribed to this feed through FeedBurner, please switch to our native feed URL http://the-gadgeteer.com/feed/ in order to ensure continuous delivery.