Updated type experience coming to Adobe InDesign CC and Illustrator CC

NEWS – Anyone who has used the latest Adobe Creative Cloud versions of InDesign or Illustrator has probably noticed that font selection is a little unwieldy. I use InDesign every day and whenever I’m looking for a specific sort of typeface to use, like a nice handwritten font, I find myself squinting at the tiny font sample next to the name. But fear not, Adobe has heard your cries!

In the upcoming version of InDesign and Illustrator, a vastly improved type menu will allow for customized sample display text and integrated access to the 9,000 TypeKit fonts that are included with a Creative Cloud subscription. You will be able to browse this font library in the app and quickly preview your chosen text in any font of your choice.

Check out the video on Adobe’s blog for a closer look. I’m very much looking forward to this small but potent improvement!

Filed in categories: News

Tagged: ,

Updated type experience coming to Adobe InDesign CC and Illustrator CC originally appeared on The Gadgeteer on August 10, 2018 at 2:19 pm.

Note: If you are subscribed to this feed through FeedBurner, please switch to our native feed URL http://the-gadgeteer.com/feed/ in order to ensure continuous delivery.

BatchPhoto software review

If you work much with digital photos, sooner or later you’ll probably come across the need to edit a batch of photos, applying some form of edit to all of them. Regardless of whether or not you use something like Photoshop, Lightroom, or another image editor, sometimes the right tool for this job is one specifically designed for batch operations – like BatchPhoto from Bits&Coffee.

What is it?

BatchPhoto is a batch photo editing software program for Windows and Mac that can process multiple photos in an automated or semi-automated manner, applying specified actions to each one. There are 50 edit actions that can be applied. BatchPhoto calls them filters, but they’re more than just an Instagram-like filter. These filters include things like applying text, watermarks, resizing, rotating, image touch-up, and many more. Each filter has settings so that you can customize each filter to do exactly what you want it to.

What’s in the box?

The download for BatchPhoto is 34.5MB for Windows and 56.2MB for Mac. The download includes all available versions and has the ability to unlock the full (paid) version with a product key so there’s no re-downloading and installing the paid version if you decide to buy a license.

The installation was pretty much a standard installation, nothing unusual to mention.

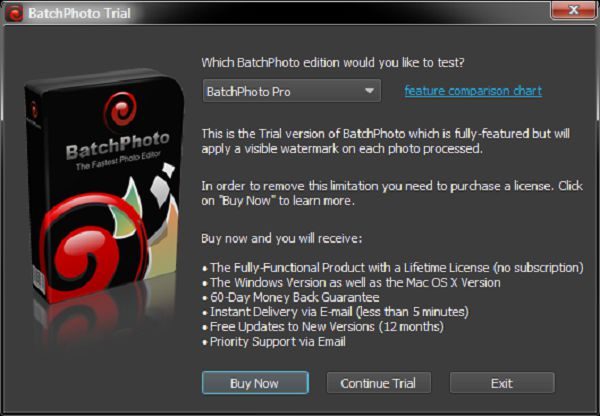
When you first start the program you’re presented with a dialog where you can choose which version to evaluate. There are three versions to choose from, Home, Pro, and EEnterprise.This review covers the enterprise version. For a comparison of features included in each version, see the comparison chart.

BatchPhoto is available in the following languages: English, German, French, Spanish, Italian, and Japanese.

Design and features

The program uses a simple wizard-like three-step approach:

  • Step 1: Add photos.
  • Step 2: Edit Photos.
  • Step 3: Setup.

Clicking the “Process” button starts the real action of the program, processing each image with the settings you have specified.

Although the program is wizard-like, you can jump between steps at will. You can even skip step one if you’re going to be using a profile to automate the processing of images at a later time (more on profiles later).
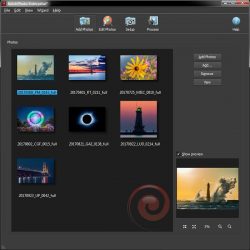
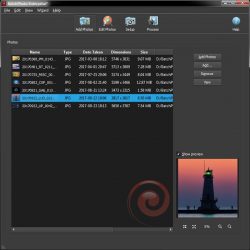
Step 1 – Add Photos

BatchPhoto handles just about every image format there is. It can process over 170 image formats, including quite a few RAW formats (including Canon, Sony, Nikon, Olympus, Fuji, Kodak, Pentax) that photographers use. It can also output to almost all of these formats as well. Some formats can’t be output to, like RAW files that are specific to digital cameras.

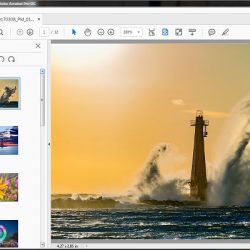
You can add photos via drag and drop or browsing for specific files, or adding files from a folder or multiple folders. The photos list also includes multiple view modes such as detail list, small icons, medium icons, and large icons (icon meaning thumbnails). A Preview window is also in this step and supports zooming.
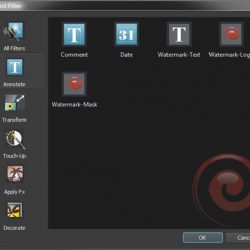
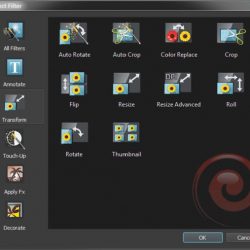
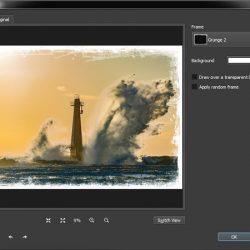
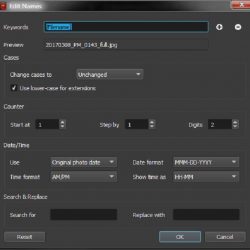

Step 2: Edit Photos

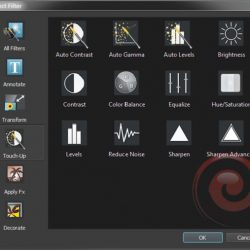
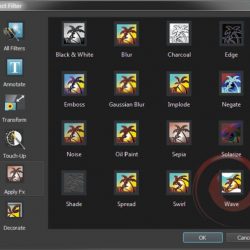
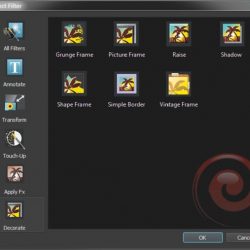
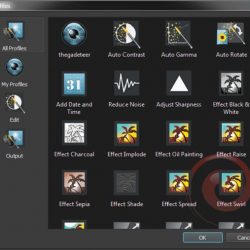
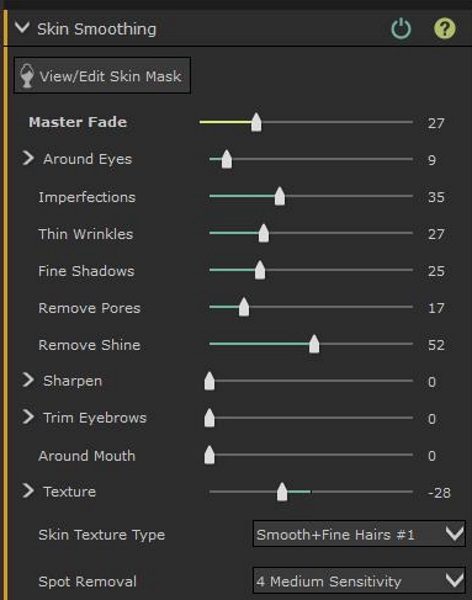
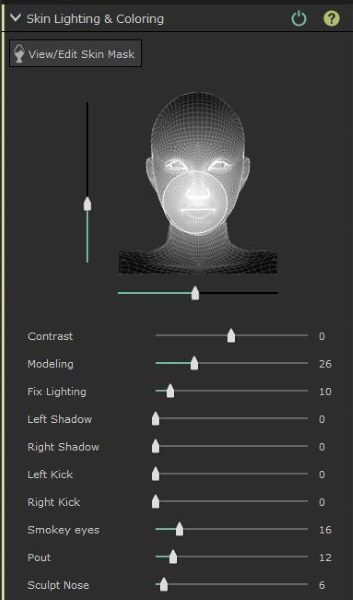
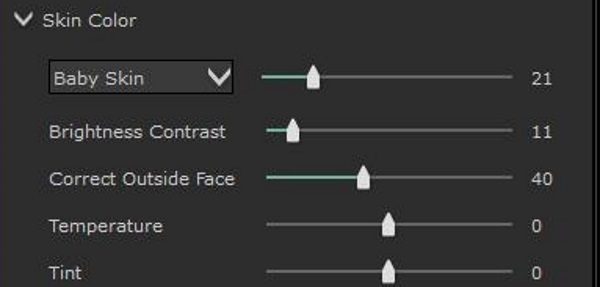
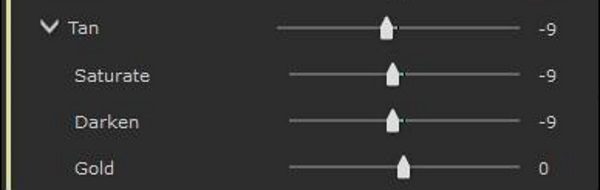
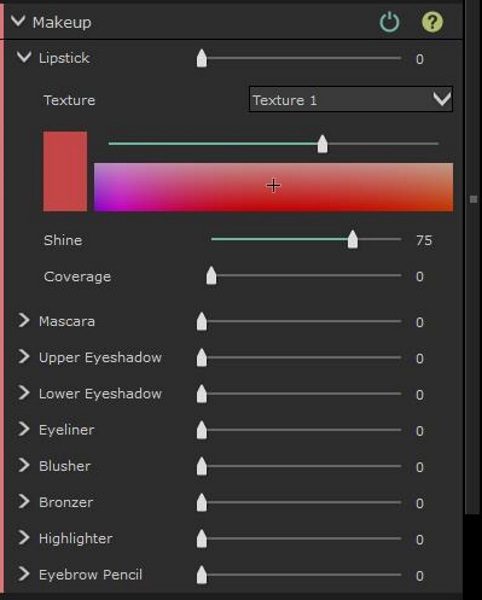
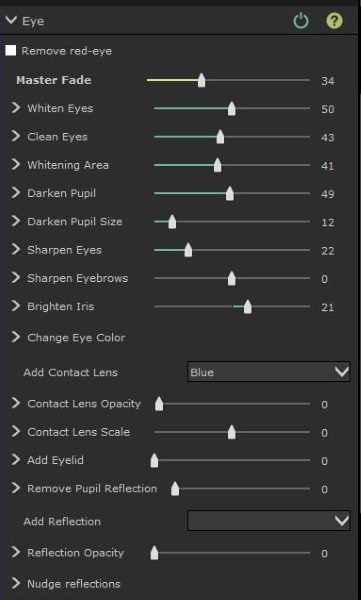
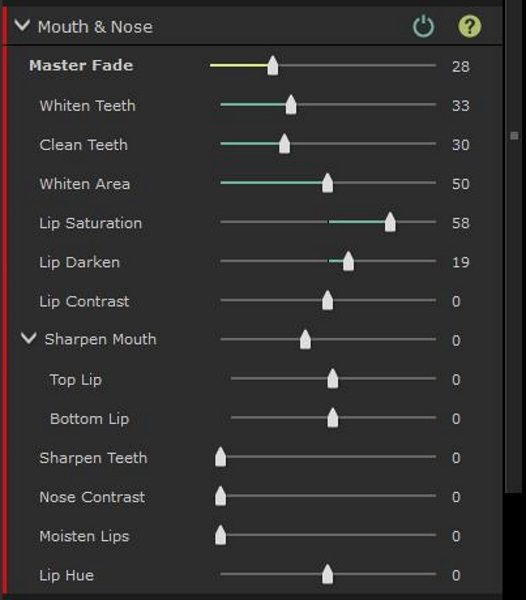
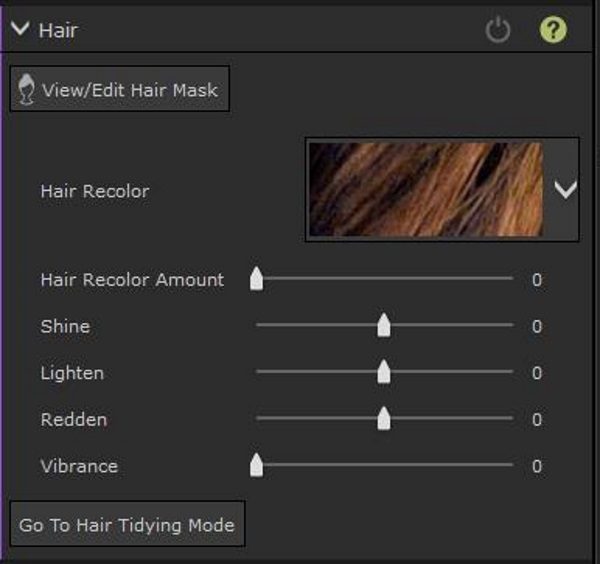
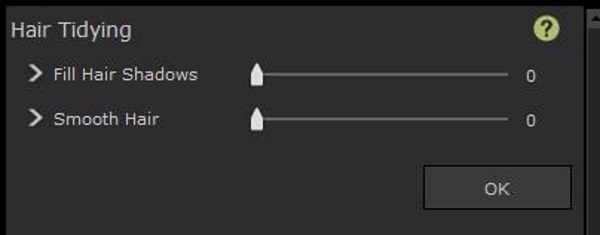
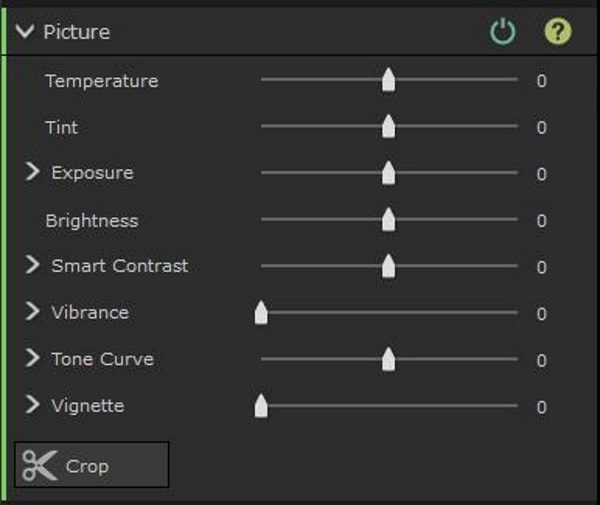
In this step, you specify filters and file renaming options. This is the heart of the program. There are 50 filters, each with its own customizable settings. You can do just about anything that you would want to automate.

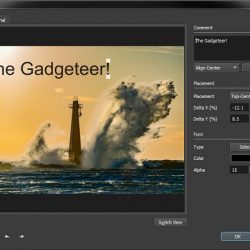
There are far too many filters here to cover each one individually, but I’ll include screenshots of the filters here, along with a couple of their edit dialogs as well.
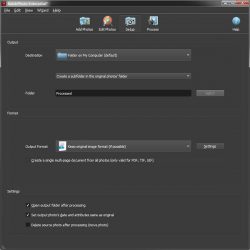


Step 3: Setup

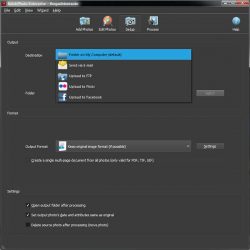
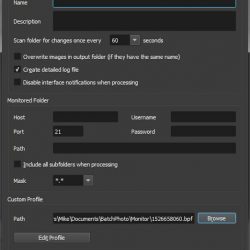
This is where you setup the output options. You can specify the output folder, output format, and other miscellaneous options.

The output options are:

  • Folder on your computer
  • Send via E-mail
  • Upload to FTP
  • Upload to Flickr
  • Upload to Facebook

PDF, TIF, and GIF output formats can create multi-page files where all of the images are included in a single file.

There are also settings for setting the output photo’s date and attributes to match the original file, as well as an option to delete the source file after processing.


Processing

One of the key features of BatchPhoto is its ability to process multiple photos at the same time, greatly reducing the time it takes to process photos. For those who are into technical stuff, this means it will use multiple threads to process the photos. There’s also an option to turn this off if you want.

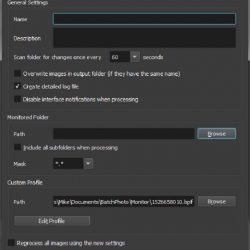
One of the things I really like is that you can save your settings as a profile for easily loading those settings later, and applying them to batch operations using the “watch folder” feature of the included monitor program. For example, you might have one profile for processing “proof” images, and another profile to process “final” images or one for outputting small images and one for outputting large images.

One thing I did note is that you save the profile via the file menu, but you load them via the wizard menu. BatchPhoto includes many pre-defined profiles for your convenience including a “Convert to PDF Album” that will output your photos to a PDF file and a “Send via E-mail” profile.


Automated processing

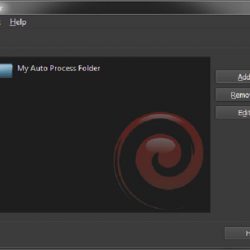
BatchPhoto includes a utility program called Monitor. It can be launched and will run separately from the main program. It can be configured to watch a local or FTP folder for new files. When the new files are detected, it will process them automatically based on a specified profile.

This is a very powerful feature for users that want to automate the processing of files. An example use would be to automatically process and upload files simply by copying or moving them to a watched folder. As soon as that folder is checked (at an interval that you specify), the new files are automatically processed.


Semi-Automated processing

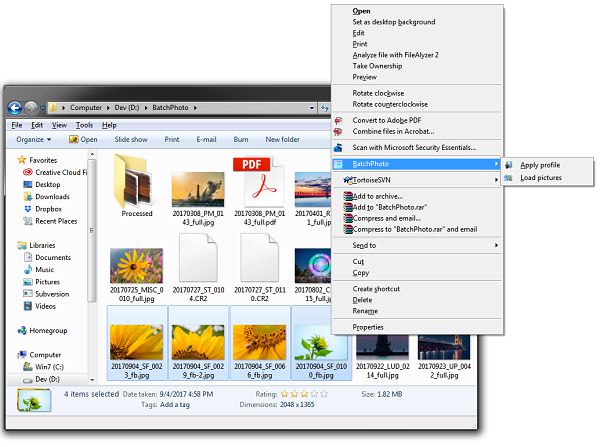
BatchPhoto also includes the option to integrate into the Windows Explorer shell. You can simply select your images, then right click and choose BatchPhoto then Apply Profile and the program will prompt you to select a profile and the selected images will be processed with that profile.

What I like

  • Very versatile in input and output formats
  • Video tutorials on the BatchPhoto website.
  • Profiles for quickly specifying options
  • Output option for processing the files to a subfolder of the original folder.
  • Configurable file renaming options.
  • Multiple thread output. 7 threads on an 8 CPU (4 Core) system.

What needs to be improved

  • I would like to see a ZIP output format where all the files would be created and then moved into a zip file.
  • I saw errors outputting files using the grunge frame with multiple files while using multi-processing. The error did not occur when the setting was turned off.

Final thoughts

BatchPhoto is an excellent batch photo processing solution. It provides powerful editing features, superb configuration options, as well as great output formats and destinations. Whether you’re an amateur or a professional, you’ll probably find that this program will meet most, if not all, of your needs.

Price: $29.95 – $129.95
Where to buy: BatchPhoto
Source: The sample of this product was provided by Bits&Coffee

The post BatchPhoto software review appeared first on The Gadgeteer.

Filed in categories: Reviews

Tagged: , ,

BatchPhoto software review originally appeared on The Gadgeteer on May 29, 2018 at 10:00 am.

Note: If you are subscribed to this feed through FeedBurner, please switch to our native feed URL http://the-gadgeteer.com/feed/ in order to ensure continuous delivery.

PortraitPro 17 Studio Max photo editing software review

What is it?

PortraitPro 17 Studio Max is a very intuitive and easy to use photo editing software that allows even the most novice of users to quickly learn and edit photos for a truly professional look. It provides a set of tools that is able to fix just about every defect in a photo, and it also works as a plugin for Adobe Lightroom and Adobe Photoshop to ensure that it fits into a complete professional workflow.

Design and features

When you first run the PortraitPro Studio Max application, the first screen is a splash screen with 2 choices that allow you to open a single image to edit or to open a batch of images for editing.

If you select to open a single image, the file manager will open and allow you to navigate and select a photo. Once the photo is selected, it will appear in the background with a selection dialogue box over it asking you to select if the picture is male, female or child. I do believe that the software uses this information for the face detection algorithm. This screen also has the option to rotate the picture to the correct or desired orientation.

Once the selection is made, and in this case, I chose child since I used my son’s picture for this review, a split screen appears with a left and right pane. It is important for me to explain that I bought this photo of my son’s graduation to support his school. However, it was painfully obvious that it was overexposed and taken in such harsh light that it just about ruined the photo. This made it the perfect photo to test PortraitPro.

On the left pane, there is the picture with the face detection mask outline with nodes, that allow you to change the shape to define the facial area as you would like. On the right pane is the same picture without any masking. The picture on the right pane reflects the changes that you make on the left throughout the process. The toolbar on the right shows the original picture on the top and the available editing categories and tools below. There is also a floating “tips” box that can be hidden as desired.


There are 3 main tabs for the editing tools which are Controls, Presets, and Snapshots. The Controls tabs contain all of the tools that you use for original editing. The Presets tab contains presets for the controls, and the Snapshots tab is for saved snapshots. Under the “Controls” tab there are 9 editing categories:

Face Sculpt


As depicted by the tool selection, the face Sculpt toolset allows you to reshape all the aspects of the face to either correct them to be true or to enhance them for the required look.

Skin Smoothing

Skin smoothing allows you to smooth out the normal skin imperfections like bags under the eyes, wrinkles, bushy eyebrows, skin texture, spot removal, etc. It really does a great job in this category as well.

Skin Lighting and coloring

Skin lighting and coloring is made up of two sections. There is the main section that allows you to edit all of the lighting properties of the portrait. There is also a second section that includes two categories that are Skin Color and Tan. Skin color allows you to edit contrast, temperature, and tint along with brightness and color correction of the skin immediately outside of the mask area.

The Tan section allows you to saturate and darken the skin color, and tweak the level of “gold” in the skin color to get the desired skin shade.

Makeup

The Makeup category is another section that really shines in this software. The ability to not only fix makeup imperfections highlighted by the lighting when the picture was taken is an amazing tool. You are also able to add makeup effects to enhance the photo.

Eye

The “eye” tool is another amazing capability of this software. As I played around with the tools I was really impressed by the effects that can be added and how much you can actually alter the mood and/or facial expression by altering the appearance of the eyes.

Mouth and Nose

This is simple but effective set of tools that allows you to enhance the appearance of the mouth and lips and remove some of those unwanted digital artifacts that can be the result of bad lighting or an unprepared subject.

Hair

The hair tools are a simple set of tools that allow you to get the correct look and smooth appearance of hair which is key to a good portrait. Smoothing and tidying hair that may have been a bit ruffled from movement or from wind is a great ability. Being able to alter the color of the hair is also nice.

Picture

The picture tools allow you to change the overall lighting and other attributes of the picture including vibrance, exposure, temperature, tint, etc.

Background

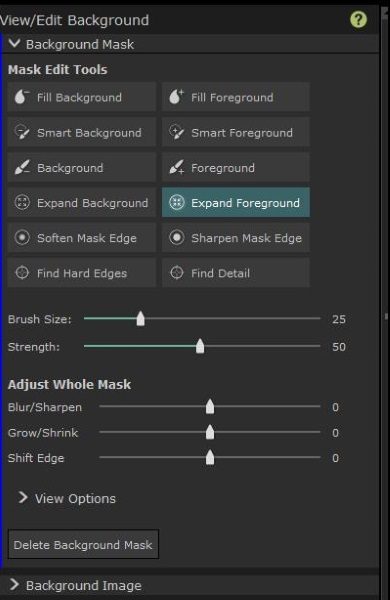
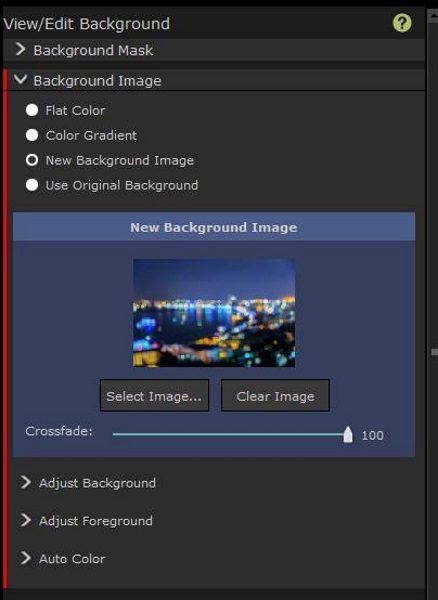
I had a really enjoyable time playing around with the background tools. This category offers two sub-categories.


The Background Mask tools allow you to fill the foreground and the background along with several other adjustments. I am sure that once these tools become familiar, that replacing backgrounds is easy and very well done.

The Background Image category allows you to add background images or colors, and to adjust the background and foreground to blend as desired. The color gradient can also be tweaked to satisfaction. There is also an Auto Color category that allows you to blend the colors.

 What I like

There are so many really great things to like about this software. It includes a really great set of tools that are in my opinion, a great asset to any level of photographer or editor. I was very impressed with what I was able to do to fix and enhance the photo. I really like the numerous specific tools and tweaks that are included that allow you to get a picture just right. I was able to edit what I considered to be a horribly taken photo of my son, albeit that it was taken by a supposed professional photographer, and I was able to fix almost everything that was very wrong. Whatever I was unable to fix was due to my lack of knowledge of how to manipulate all of the great tools, and I am very sure that the more I work with this software, that perfection will be obtainable.

I also like that compared to the many other available software packages, PortraitPro is a great bang for the buck. Its ability to be added as a plugin to Adobe Lightroom and Photoshop makes it a permanent part of my workflow.

What needs to be improved?

While the PortraitPro software is a simply excellent photo editing set of tools, there are a few improvements that can be made to make it the obvious “go to” application. I feel that the face masking could be slightly more accurate in its initial detection, and could include more nodes on the lines of the masked areas, for more precise adjustments to the facial contours. I also think that the background detection can be more accurate by possibly doing a better job at detecting the edges of the subject so that a basic mouse can do the job as opposed to the Wacom Tablet that I had to use to get more precise edges of the photo. While the brush size can be adjusted, using the mouse for this did not feel as comfortable.

I also think that this software can be the perfect tool if a hardware controller is designed to precisely adjust the sliders, much like the Loupedeck does for Lightroom.

Final thoughts

Before

After

I am very impressed by what PortraitPro offers and what I was able to accomplish with my first try with the software. As you can see from the photo above, my initial attempt while not perfect has yielded very nice results. I have no doubt that as I continue to work with the software that I will not only get better at using all of its editing tools, but I am sure that it will continue to be an integral part of my workflow, especially if PortraitPro continues its current trend and releases updates and new versions to add to its already great set of tools.

PortraitPro is available in three editions: Standard, Studio and Studio Max which is the version used for this review.

Price: Starts at $39.95 for the standard edition.
Where to buyPortraitPro
Source: The free software license for this review was provided by PortraitPro

The post PortraitPro 17 Studio Max photo editing software review appeared first on The Gadgeteer.

Filed in categories: Reviews

Tagged: ,

PortraitPro 17 Studio Max photo editing software review originally appeared on The Gadgeteer on March 28, 2018 at 4:52 pm.

Note: If you are subscribed to this feed through FeedBurner, please switch to our native feed URL http://the-gadgeteer.com/feed/ in order to ensure continuous delivery.

PhotoLemur v2.2 Spectre photo software review

Back in May, I reviewed the first version of PhotoLemur, a Mac app that lets you computationally enhance photos for better colors, light, skies, and faces.  Well, here in this holiday time of year, the elves have been busily applying their digital hammers and saws to the code and have offered a significant upgrade. I was given an opportunity to test the new program and want to share my findings with you. I started this review working with version 2, but it’s been recently upgraded to 2.2 Spectre, and it’s quite a bit improved!

Note: Photos may be tapped or clicked for a larger image. Images may take some time to load.

What is it?

The first version of PhotoLemur was a one-trick, one-shot, stand-alone deal: Here’s your photo, or here’s your photo with our program applied. Take it or leave it. In version 2.2, they have the same singleness of purpose and application (you can’t select a single area and change just it – it’s still all-or-nothing on the photo itself), but the level of change and enhancement can now be modulated. Also, in addition to stand-alone, there are plug-ins for the two largest photo-editing programs: Adobe LightRoom and Apple Photos.

Design and features

The interface is almost identical: open an image, and you’ll see a partition with your original photo on the left, and the enhanced version on the right. But in the right corner beside the “Export” button, there is a new button with a paintbrush. When you click on this, you are able to view the entire altered photo. There is a slider at the bottom where you can basically choose the amount of processing you want to use. Rather than the 100%, all the way to the right (which was the original version’s only setting), there is now an infinite slider where you can say “For this photo, I only need 40% Lemur, but for this other one, it needs maybe 70% Lemur.” (And, yes, I am officially verbifying a noun, and you can’t stop me! It’s the 21st century, and making up new words is a cottage industry these days.)

I ran a couple dozen photos through PhotoLemur during the first review, mainly from my back-catalog of early digital photos, and there were some really nice changes that were made to these images. For this next version, I decided to up the challenge. I have been using quite nice computational cameras for the last few years: an iPhone 6s Plus and recently an iPhone 8 Plus. In spite of this, there are some photos that need to be “fixed” – the sky is wrong, or the grass is wrong or the skin tones are wrong or whatever. No matter the finesse of the algorithm, the final judgment is always the viewer’s eyeballs. Here are a few representing varying levels of Lemur. Above, a night scene, just as it’s begun to snow. Note the details in the building to the right under the software’s effects, as well as the patterns in the sidewalk where the snow was drifting.

The finish of the process has changed as well. The initial version was pretty cut-and-dried – hit export, choose a filename and location, and your freshly Lemured photo is ready to go, and the program is ready to start on another. Now, there are sharing options for email, online storage, social media, other programs to move the photo to… It’s a whole new world!

If you’re in the plug-in version, it will save to your camera roll. In standalone, you can also add a group of photos and work through them, rather than having to hunt down each one individually.

The second photo was taken with normal room lighting (all digital) of a broken part I had to return. Note the noise created by the bead-blasted finish on the MacBook Pro’s palm rest in the 100% correction.

 Tech Requirements

  • Windows

    • Intel® Core i3 or AMD Athlon® 64 processor; 2 GHz or faster processor
    • 4 GB of RAM (8 GB recommended)
    • 1024 x 768 display (1280×800 recommended)
    • 4 GB of available hard-disk space
    • DirectX 10-capable video adapter
    • Microsoft Windows 7, 8,10 (64-bit)
    • Internet connection and registration are necessary for required software activation, validation of subscriptions, and access to online services.
  • MacOS

    • Multicore Intel processor with 64-bit support*
    • 10.11 (El Capitan), 10.12 (Sierra)
    • 2 GB of RAM (8 GB recommended) 1024 x 768 display
    • 1 GB of Video RAM (VRAM).
    • 4 GB of available hard-disk space
    • Internet connection and registration are necessary for required software activation, validation of subscriptions, and access to online services.

Performance

The photos load fast, and once it is loaded, the changes are all updated instantly. You only have to swipe the dividing line to see before and after or the paintbrush to decide how much effect you’d like.

What I Like

  • Easy interface – two sliders
  • Solid upgrade with great user-oriented enhancements.
  • Much better pricing strategy
  • no confusing tools or masks
  • Integration into existing photo software is amazing!

What could be Improved

  • Limited – full frame editing only
  • No way to know what will be changed or enhanced – it’s a black box

Final thoughts

The bottom line is this: How much do you want to post-process your photos? When I first started in digital photography 20 years ago, I had to run every photo through some sort of software, originally because I knew little about the mechanics of how the process worked and was just shooting things and expecting that to fix my lack of knowledge and preparation, as well as the shortcomings of my beginner-level equipment. Over time, as I started to learn how to adjust settings to prevent some of the things I had to correct post-capture, I was able to edit less, but also to move into less intrusive tools.

Now, with hardware tools at a level where you really don’t have to worry about all those mechanics, the software options have come down to tiny tweaks that you may or may not care about. Many look at a photo and say to themselves, “Yeah, that’s how I remember it.” A few will want to change how those memories are stored. If you’re one that wants to fix certain things in photos “just so,” you may want to consider PhotoLemur. At $30, for me, I’d probably have bought it after trying the free version. Let me show you a photo that sold me, which I took just last spring. Just another day on the Salisbury Plains, right?

At 40% Lemur, the difference in the grass, the sky, the colors of the stones all were amazingly more real.

But at 100% Lemur, it pops your eyes out!

If you’re not one who wants to tweak, it may help with your back-catalog, but then, your current photo software may do more than you will ever use. Know it’s out here, and, if the need presents itself, grab it. You may find you are a tweaker more than you realized. You are, after all, reading a gadget website. ;-).

Price: $29 for one device/$49 for 5 devices
Where to buy: The software is available through the company website.
Source: The sample of this product was provided by PhotoLemur.

Other Gadgeteer posts that you might like…

Photolemur photo editing software review


We are in the middle of a popular photo explosion, in case you’ve been hiding under a rock for the past decade. Not since the introduction of the Brownie camera in 1900 has there been such interest in photography by the general public. For $1 (about $30 in today’s money), normal everyday people could make this new thing called a “snapshot” and share it with friends. Today, with no processing and printing needed, this happens instantly, rather than in a few days when the roll is finished, sent off, and returned. With this amazing power comes tools to make our photos even better than the smart lens systems and photo software built into our cameras already does. I was offered a copy of a program called Photolemur that is able to clean up rough camera shots and bring out the data that is there.

Note: Photos may be tapped or clicked for a larger image.

I came to photography late in life. When my Lovely Bride and I went on one of our first real vacations sans-kids in 2001 to the Berkshires, I bought a Kodak DC3400 Zoom. It inspired me to walk around with a camera, and soon I was moving up to better and better hardware, learning all the little bits of info I could about lenses, fstops, aperture, depth-of-field, bokeh, filters (the glass kind, not the software kind), and photo-editing software. Much of the hardware we use today automates much of that manual adjustment into a half-press on the shutter or a tap on the touch screen to activate auto-exposure and autofocus. The framing and composition of the photo still takes a good eye, or, at least, an attention to the craft. But the post-processing is still a maze of adjustments and exposure curves. I can do it if I have a particular shot that I want to go deeper with than the simple “enhance” button on most software, but Photolemur takes this to a new level.
The app itself brings up a single window with the directions: “Drop photo here or Import.” The “Import” button just pulls up a file picker dialog box.
Once you drag/drop or import an image, some type of software magic happens, and soon, your image shows up with a “Before/After” bar that you can drag from left to right to see all the changes that the software will do. There’s a button on the right lower corner that lets you export (rename, move to other drives, etc.)

That’s it. You either like the transformed photo or you don’t. I choose some of my first photos to show here, since they were taken with a very old camera, by a newbie photographer, and just to revisit some nostalgia on my part. I’ve got a few of these framed around the house, and have even sold prints of one.

The round stone barn above is from a Shaker Village in Western MA. Note the vibrancy of the grass and the better definition of the stones on the After side. I like the improvement here. But full sun with large blocks of color is pretty easy. Let’s walk inside.

The back stairs out of the kitchen were behind a partially closed door. The wood grain attracted me, as did the light. I like how Photolemur brightened the wood without losing the crispness of that grain. The newel post on the left was helped immensely, but it’s easier to see the difference in the floor.

Bright sun again, and, being one of the first dozen or so shots I had taken, I really over-exposed that middle post. But I caught the dragonfly sitting on it, and that was my goal. The green of the background flowers of this “After” shot is too artificial to me. Those leaves are soft and fuzzy, and the software makes them out to be slicker.

A few months after this, my job sent me to New York City to lead a software launch. (This was August of 2001 – before 9/11.) This was the view outside my room.

That building on the right that is split shows how well the software pulls the details out of the shadows. I’m happy with this improvement. (This is from the New Yorker hotel looking out across 8th Avenue if I recall correctly. If I stuck my head out the window and looked right, I could see Madison Square Gardens.)

We went up to Times Square and walked around after dinner. Three guys with an iguana passed by on Broadway as my group was standing on the curb, and I fired off a shot. Photolemur really helps pull out colors here. (It was about midnight, with loads of neon, motion, and shadows.) Check out that look on the driver’s face. I never saw that before.

Further down the block, things were a little quieter, and I captured this charcoal artist at work. The software over-compensates in this shot, to me. The roadway and even the artist’s arm have a bit of a green cast.

Next night, I walked over to Rockefeller Plaza, as one does. It was late summer, so the ice rink was replaced with a restaurant and dance floor.

This shot from behind the iconic statue of Prometheus has a few better highlights, but the background detail is far improved. There is another band member to the left of the trumpet player, and those little globs floating above Prometheus’ left hand are cymbals from a drum set. You can see them clearly in the After shot!

So, as you can see, Photolemur can pull some amazing data out of what may be a pretty decent shot to start with. It combines color saturation, brightness, and contrast based on how it’s algorithm interprets your photo subject. Sometimes it’s spot on, but sometimes, it goes a little overboard.

If you’re not “into” photography, or just want to run through a batch of photos, you may really like having a simple drag and drop solution to processing your pics. If you’ve spent a lot of time learning Photoshop, Aperture, LightRoom, or The GIMP, or even Graphic Convertor, you may feel you can do as good or almost as good a job as this. With the subscription pricing, you could sign up for a month or so after a vacation, run through your photos, then unsub. At $36 a year, it’s still cheap by the standards of normal boxed software, even if it is a one-trick pony. If you’ve migrated to iOS or Android for more of your photo and post-processing, moving it over to an actual computer just to tweak details may be more than you care to do.

Source: The sample for this review was provided by Photolemur. Please their site for more info.


Product Information

Price: Sold as a subscription. Currently $4/month billed monthly, or $3/month billed annually.
Manufacturer: Photolemur
Requirements:
  • Mac or Windows, a supported camera (most are supported), and photos over 800×600 pixels.
Pros:
  • Great automatic processing of almost any image!
  • No twiddly settings to learn!
  • Simple yes/no processing!
Cons:
  • If you don't like what it does, there's no way to only go part-way.
  • Sometimes, lighting can play tricks on the algorithm.

Filed in categories: Reviews

Tagged: , ,

Photolemur photo editing software review originally appeared on on May 25, 2017 at 9:02 am.

Note: If you are subscribed to this feed through FeedBurner, please switch to our native feed URL http://the-gadgeteer.com/feed/ in order to ensure continuous delivery.