Roland R-07 High Resolution Audio Recorder review

REVIEW – Mobile phones have put so much at our fingertips and have changed the way we interact with the world around us. All kinds of content is created every day directly on phones. When it comes to audio, sometimes you’re looking to capture more than just the concept or idea, you want a high quality recording that you can directly use. Roland’s R-07 is built for that purpose whether you are capturing music, general sounds or conversation.

What is it?

The R-07 is a high quality, pocketable stereo recorder with a bunch of great features.

Hardware specs

Tracks: 2 (stereo), 4 (stereo x2) * WAV x 2 recording mode only
Signal Processing: AD/DA conversion -24bits 44.1/48/88.2/96 kHz

Data Type:
[For Recording] *Stereo only
WAVE: Sampling Rate: 44.1/48/88.2/96 kHz • Bit Depth: 16/24 bits
MP3 (MPEG-1 Audio Layer 3): Sampling Rate: 44.1/48 kHz • Bit Rates: 64/96/128/160/192/224/320 kbps
WAVE + MP3: Sampling Rate: 44.1/48 kHz • Bit Depth: 16 bits • Bit Rates: 128 kbps
WAVE x 2: Sampling Rate: 44.1/48 kHz • Bit Depth: 16/24 bits

[For Playback]
WAVE: Sampling Rate: 32/44.1/48/88.2/96 kHz • Bit Depth: 16/24 bits
MP3 (MPEG-1 Audio Layer 3):Sampling Rate: 32/44.1/48 kHz • Bit Rates: 32–320 kbps or VBR (Variable Bit Rate)

Memory Card  Compatibility: microSD Card • SDHC format compatible

Inputs/Outputs:
Audio Inputs: Internal stereo microphone, MIC/AUX IN 3.5mm plug-in powered mic (cancels internal stereo mic)
Audio Outputs: Internal speaker (monaural playback), 3.5mm plug-in jack (cancels internal speaker)
Nominal Input Level (Variable): MIC/AUX IN: -31 dBu (Default input level) • * 0 dBu = 0.775 Vrms
Input Impedance: MIC/AUX IN: 4.5 k ohms
Output Level: 3 mW + 3 mW (In case 16 ohms load)
Recommended Load Impedance: 16 ohms or greater
Frequency Response: 20 Hz – 40 kHz (+-3 dB)
USB Interface: USB port: USB Micro-B type • support USB 2.0/1.1 mass storage device class

Bluetooth:
R-07 Remote: Bluetooth technology: Bluetooth Ver 4.0
Audio transmission: Bluetooth technology: Bluetooth Ver 3.0
Transmitting Power: Specification Power Class 2 (Line of sight range 10 m (30 ft))
Profile Support: A2DP, AVRCP
CODEC Support: SBC, Qualcomm aptX Qualcomm aptX low latency

EffectsPlayback only. Excludes playback in 88.2 kHz or 96 kHz. Reverb and Speed Change can’t be used at the same time.
Reverb
: 4 types (Hall1, Hall2, Room, Plate)
Speed Change: 50 – 150 % of playback speed

Other:
Display: Graphic LCD 128 x 64 dots (white backlit)
Power Supply: Alkaline AA battery x 2 (included), or Rechargeable AA Ni-MH battery x 2, or computer via USB
Current Draw: 350 mA (MAX)
Playback Duration: (Alkaline AAs) Playback: Approximately 15 hours • Recording: Approximately 15 hours

Dimensions: 61 x 103 x 26mm and 150g (including batteries)

What’s in the box?

  • R-07 Recorder
  • 8GB microSD Card (installed in R-07)
  • AA Batteries (2)
  • Owner’s Manual
  • “Using the unit safely” Leaflet

Design and features

The Roland R-07 is remarkably small.

Barely bigger than a deck of playing cards, it really is possible to have it in your daily carry kit and on hand when you need it.

Visually, it hits the technical checkboxes as well as providing some style as it’s available in three different colors.

All the controls (other than the power switch) are on the top surface and very clearly labeled. On the back is the battery door, a 1/4 20 threaded insert for use with a stand and the door for accessing the Micro SD Card where you’ll find an 8gb one that  Roland graciously included.

The right side has the power switch and micro-USB port. The top end has the two onboard mics and a jack for connecting an external mic or auxiliary source. The left side has a jack for connecting wired headphones.

Setup

Out of the gate, Roland nailed this because the setup is as simple as installing the two AA batteries and powering the unit on. The power switch is a slider, that you need to hold for about 3 seconds to turn on. This is a great feature preventing accidental powering on for a device you’re likely to pocket frequently. Follow the same steps to power off.

At this point, you can literally start recording right away, or read the instructions and learn about the many functions and different things you can do.

You’ll need to supply a micro-USB cable if you want to connect to a computer to transfer files or update the firmware.

To connect a mobile phone as a remote, you’ll need to download the R-07 Remote app first. To connect the R-07, you’ll want to power it up, choose Menu / 5) Bluetooth / 5) Remote Control. In that settings menu change the Remote: setting to ON. Make sure your phone is close and launch the app. You may need to hit the (Search) pop up button or hit the R-07(—) in the lower right corner and select Roland R-07 MIDI from the device list. You’ll now be able to control R-07 directly from your phone.

To connect Bluetooth headphones or speaker for wireless listening, put them in pairing mode and on the R-07, choose Menu / 5) Bluetooth / 2) Pairing Audio and after a few seconds you’ll have a new connection.

The R-07 remembers the last paired device so you may need to go into the menu to disconnect if you switch things up regularly.

Performance

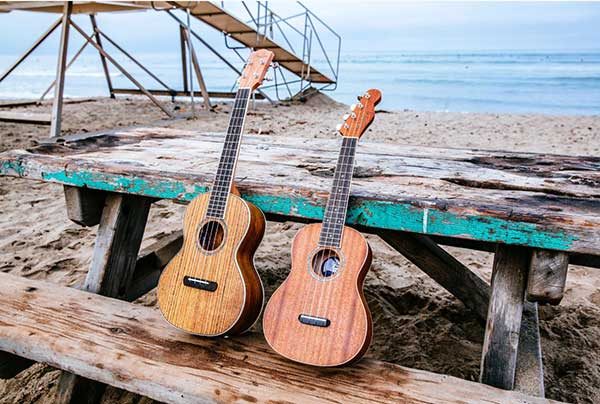
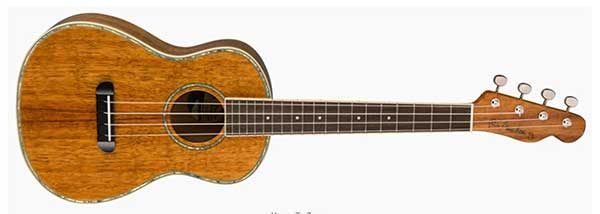
The best way to describe the R-07 is that you may not realize how much you needed this device until it’s in your hands. My son had it in his pack the first weekend and ended up recording some ocean sounds while out at the beach. Satch is always humming or drumming around but he hadn’t really captured environmental sounds before to my knowledge. That night he sat on the deck for an hour and recorded the acoustic guitar with the R-07 as well and then dragged the audio files to his mac and finished this up.

While the controls are all well marked, there’s a lot to learn about how to use the device. Depending on your own experience with recording devices and your needs, there may well be features on the R-07 that you never use.

The rehearsal button isn’t one of those. A single press of this button and R-07 listens to your environment for 60 seconds and automatically adjusts the levels to optimize recording. The result is that you can get right to recording and know that what you capture is going to sound good.

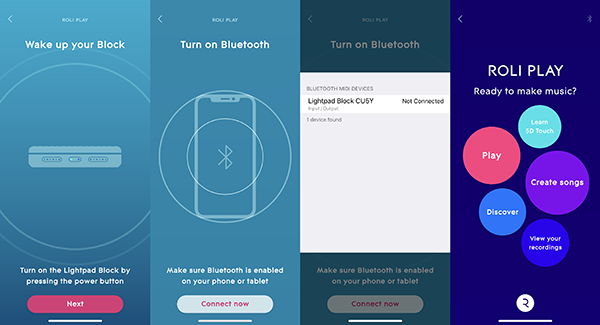
The remote function is super cool as it let’s you optimally position the R-07 while being able to start/stop and make some adjustments without needing it right at your fingertips. Here’s what the app looks like on iOS.

Even cooler is the Apple Watch app.

Here’s a shot where you can see how easy it can fit into your session.

There’s a couple of key things you’ll want to know. Playback through the internal speaker is over-ridden if you plug headphones into the phones jack. Similarly, the onboard stereo mic is canceled out if you plug an external mic into the mic/aux jack.

As for the right way to use it, there’s really no wrong way so experiment. The Scene button sets recording modes for Music Hi Res, Music CD, Music Long, Loud Live, Loud Practice, Instrument, Vocal, Voice Memo, Field or off. Roland has a Practical Guide that is likely to cover most of your recording scenarios and offers numerous tips to get the best recording results.

What I like

  • Pocketable size
  • High quality recording without additional mics
  • Auto level settings with Rehearsal button
  • Remote control function with phone or Apple Watch
  • MicroSD card (8gb) included (some bundles available with larger cards)

What needs to be improved

  • Practical Guide (website) should front and center in the included material as it provides much-needed starting points

Final thoughts

The R-07 is one of those products where there’s always more to uncover. It feels a little complicated at first glance, but Roland’s website has a lot of help and it really is easy to use once you’re familiar with the controls and navigation. The audio quality is stellar and I can’t imagine something this feature rich being much smaller.

Price: $229.99
Where to buy: Amazon
Source: The sample of this product was provided by Roland.

Filed in categories: Reviews

Tagged: ,

Roland R-07 High Resolution Audio Recorder review originally appeared on The Gadgeteer on January 19, 2019 at 9:05 am.

Note: If you are subscribed to this feed through FeedBurner, please switch to our native feed URL http://the-gadgeteer.com/feed/ in order to ensure continuous delivery.

iZotope Spire Studio review

REVIEW – There’s no right or wrong way to record music. In fact, taking you out of the zone is the main thing that should be universally avoided. Spire Studio from iZotope is a new product that seems to have been developed specifically to make sure that doesn’t happen.

What is it?

Spire Studio is a recording interface that harnesses the power of your phone touchscreen while minimizing the typical interactions to let you focus on your music. They’ve also packed in a bunch of cool features and portability to boot. Sound good? We agree, so together with my son Satchel, we gave it a run through to see if it lives up to its claims.

Hardware specs

Weight: 1.6lbs
Dimensions: ~4.8 x 4.4 x 3.4″
Inputs: 2 XLR/TS combo jacks, 48v phantom power
Outputs: 2.5mm headphone jacks
Sample Rate/Bit Depth: 48kHz/24-bit
Wifi: 802.11 b/g/n w/ 2.4GHz
Power Supply: Universal power adapter
Battery: Internal rechargeable lithium ion
Battery Life: 4+ hours
OS Support: Android, iOS

What’s in the box?

  • Spire Studio
  • Power supply
  • Quickstart guide

Design and features

Straight out of the box, the quality is evident. Spire Studio is cylindrical design with a metal construction and some significant heft. The combination of materials and surfaces feels balanced and intriguing at the same time. The rubber feet give it a solid stance on any surface.

The top or face has a circular, segmented LED panel that’s angled toward you, along with five physical buttons. Record and Play buttons are most prominent, being evenly split in the center of the device. At the bottom, you’ll find buttons for New Song, Soundcheck and Volume easily accessible and still easy to press.

On the front, a built-in microphone is behind a protective metal grill with a 3.5mm jack just below for easily connecting a pair of headphones.

The back panel sports a pair of combo inputs that combine XLR and 1/4 inputs expanding your connection possibilities. Input 1 disables the front mic if you connect a microphone and there’s a corresponding push button for toggling 48v phantom power should you need it. An additional headphone jack at the top, power supply jack and power button round out the panel at the bottom.

The built-in battery is an excellent addition as it means you can record for up to 4 hours, even if you’re nowhere near an outlet. Now creativity really can strike whenever it wants. Possibly the coolest and most useful feature is the Soundcheck button. A single press and Spire Studio listens to your surroundings and optimizes the microphone settings to your surroundings for the best possible recording parameters. Very cool. Here’s a video of that.

Setup

Getting started is pretty easy. Download the app from the requisite store for the OS on your phone or tablet and follow the prompts. It will ask you to power on Spire Studio (Make sure the Studio is fully charged or at least plugged in) and then go into settings on your device to connect to the Wifi broadcast by Spire.

Bounce back to the app and give it the permissions it requires. You’re now set up. If you need to adjust anything you can make adjustments within the app settings shown here on the left, or the device settings on the right.

Performance

Spire Studio is pretty fun to use and also very visual as the LEDs provide visual feedback as to what’s going on. Take a look.

Powering Up

Powering Down

At startup you will be dropped right into recording mode. You’ll want to connect any electrical instruments to the combo jacks on the back of the unit or just rely on the built-in mic if you’re singing or playing acoustic. Hit record and the onboard mic does its magic and the input jacks do the same. When you’re finished hit record again to stop. Here’s how that looks, with a demonstration of the New Song button which also starts recording mode.

If you hit record again, it will create a new track which you can then later mix within the app. To listen, make sure your project is selected in the app and then hit play on the app or on the device. You will need to connect headphones to one to be able to hear playback.

If you’re looking for some help keeping time, there’s a built-in metronome that is loud enough to hear through while playing and yet magically does not get captured in the recording. Here’s how it works.

When it comes time to mix some tracks together, the trim function is pretty key. Here’s how the app handles that.

Spire Studio recognizes different devices, or at least different accounts. When I connected there were no songs in the project library, but my first recording showed up as Project 6 which makes sense later as Satchel said he saved a handful of things. Your recordings are tied to your account, so you can switch back and forth between a tablet and a phone if that’s your thing. Just know that on the second device you’ll need to “register” with the same account info as you did your first device since there’s not a “login” option.

Satch was able to feel comfortable with the system pretty quickly and worked up this little Sandman mix complete with eight tracks. It’s cool that in the video you can see the segmented LED display correspond to the different tracks.

As for listening to what you’ve recorded, you ideally want balanced audio playback. Headphones are best for this and it makes sense that Spire provided 3.5mm jacks for connecting them. However, the circumference of the Studio is large enough where some extra height could have accounted for a down-firing speaker to provide some kind of on-device playback. You can definitely plug in an aux cable to a portable speaker as I did in the above video, but a built-in option would have been nice.

What I like

  • Quality and precision build of the device
  • Easy to use controls
  • Battery for recording on the go

What needs to be improved

  • Printed manual – Felt missing at this price
  • Speaker option for playback

Final thoughts

There’s a lot more to discover with the iZotope Spire Studio. It’s a powerful tool and really does streamline the recording experience, letting you just get down to the creative task of recording. It’s solidly built and I can see this outlasting other options out there by a good bit. Satch will continue using it over the next few weeks and we’ll update this post with some additional thoughts and sounds soon. In the meantime, here’s a parting vid I wasn’t expecting to see that had me laughing.

Price: $349
Where to buy: Spire and Amazon
Source: The sample of this product was provided by iZotope.

Filed in categories: Reviews

Tagged: ,

iZotope Spire Studio review originally appeared on The Gadgeteer on December 29, 2018 at 9:30 am.

Note: If you are subscribed to this feed through FeedBurner, please switch to our native feed URL http://the-gadgeteer.com/feed/ in order to ensure continuous delivery.

Fender Player Series Jaguar guitar review


REVIEW – Fender’s new Player Series Jaguar guitar is begging to be picked up and played.

What is it?

The Jaguar body style is a classic offset-body design that moves some of the mass towards the tail resulting in a very comfortable playing position. Clearly a descendent of the legendary Jazzmaster, the Jaguar has as impressive artist roster including Bob Dylan, Joe Pass, Johnny Marr, John Frusciante, Kurt Cobain and Thurston Moore. The new Player Series takes the heritage of the Fender brand, the authentic Fender sound, and adds accessibility and playability for this generation. In our house, there’s a bit of a role reversal as I’m into punk/metal/alternative and he regularly schools me in music that was clearly influenced or was created by musicians of my dad’s era. Funnily enough, the last guitar I purchased for myself (’95?) was a Fender Jag-Stang, a hybrid of Jaguar and Mustang bodies, so I was excited to see what’s new in a 2018 Jaguar.

Hardware specs

Body – Material / Shape / Finish / Color:
Alder / Jaguar® / Gloss polyester / Tidepool
Neck – Material / Shape / Finish:
Maple / Modern C / Satin urethane on back of neck
Fingerboard – Material / Scale / Fret count / Radius:
Pau Ferro / 24″ / 22 / 9.5″
Nut – Material / Width
Synthetic bone / 1.65″
Position inlays
White dots
Electronics
Bridge pickup – Player Series Alnico 3 Jaguar Humbucking
Neck pickup – Player Series Alnico 2 Jaguar Single-Coil
Controls – Master Volume, Master Tone
Pickup Switching – 3-Position blade: 1) Bridge pickup, 2) Bridge and neck pickups, 3) Neck pickup
Coil Switch – Slide switch to coil split humbucker
Hardware
Bridge – 6-Saddle vintage-style adjustable with “floating” tremolo tailpiece
Tuning machines – Standard cast/sealed
Neck plate – 4-Bolt “F” stamped
Control knobs – Skirted amp knobs
Pickguard – 3-Ply black/white/black
Switch tip – Barrel style
Strings
Fender® USA, NPS, (.009-.042 Gauges)

What’s in the box?

  • Fender Player Jaguar Guitar
  • Tremolo arm
  • Allen keys
  • Assorted hangtags and a sticker

A quick public service announcement. Most guitars in the sub-$1000 range ship in a box well padded, but without a case. If you’re purchasing a guitar online without playing it first, make sure you carefully inspect the guitar upon receipt and notify the shipper right away if there’s any damage… And then get a good case or gig bag to keep it safe!

Design and features

It would be hard to write a review about a Fender Jaguar and not to mention the body shape, so I’m going to start there. A lot of guitar bodies are symmetrical or have a lone cutaway below the neck for easier high fret access. The offset body style of the Jaguar accomplishes the same thing in regards to the high frets, but visually shifts some of the body mass as well.

The back of the neck is a modern “C” shape which is very hand friendly. The fingerboard has 9.5″ radius which is flatter than their 7.25″ radius which is a more vintage shape down to about a 1/3 of the guitars they make. The shape and radius they’ve chosen make this guitar very playable. The classic oversized headstock balances the body perfectly.

Another very visual aspect of the Jaguar is the floating tremolo which allows you to modulate all six strings at once for some very cool effects. The tremolo arm pushes into place and stays where you leave it; a great improvement over the older style that required screwing the arm into place or using an Allen key to lock it down.

The humbucking bridge and single coil neck pickup give you a wide variety of tone to play with and the 3-position slider makes it really easy to switch between them or run them both. There’s also a slide switch up high above the neck pickup. This effectively lets you split the bridge humbucker if you want to get more of a single coil sound out of it.

Setup

The Jaguar effectively comes ready to use out of the box. A quick look-over confirmed everything was adjusted well with action set neutrally without any fret buzz. All that was left was to remove the plastic film from the pickguard, a bit of string stretching and a final tune. Ready to roll.

Performance

There’s a bit of a role reversal as I’m into punk/metal/alternative and he regularly schools me in music that was clearly influenced or was created by musicians of my dad’s era. Funnily enough, the last guitar I purchased for myself (’95?) was a Fender Jag-Stang, a hybrid of Jaguar and Mustang bodies, so I was excited to see what a 2018 Jaguar would be.

My son has been playing jazz guitar for a good number of years now. His guitars have all been arch-tops and semi-hollow designs which lend themselves well to his music. He’d been eyeing a Telecaster recently and when the opportunity came up to review a Fender and to select between a Stratocaster, Telecaster and a Jaguar, I was a little surprised that it was the Jaguar he was drawn to. A buddy he plays in a band with gave him a bit of grief when he found out he passed up a Tele “Ugh, I hate that guitar. It’s so hipster”. On seeing the Jaguar in person a week or so later; “I completely change my mind, that is sick!”

Let’s jump into some videos so you can listen to how the Jaguar plays. The audio on these is recorded through the Roland Go-Mixer directly to an iPhone 8 with no effects. This first video is of some quick scales and arpeggios.

Here’s the tonal difference between the neck pickup, neck/bridge combined and the bridge pickup positions using the 3-position switch and ‘Black Dog’ by Led Zeppelin.

Having a little fun with ‘Back & Forth’ by Foo Fighters

And now for something a bit funkier

Here’s the tremolo in action and some of the sustain abilities of the Jaguar

What I like

  • Playability – Stays in tune even with tremolo
  • Comfort – Neck and fingerboard shape is friendly
  • Build quality – Solid feel, nothing feels wimpy or fragile
  • Color and finish – The tidepool is beautiful

What needs to be improved

  • Rear strap mount angle – If you push the body of the guitar left too far it can work itself right out of your strap.

Final thoughts

Guitars are personal. From body shape to neck feel to color to materials and sound, there’s someone out there for everyone. Fender’s Jaguar was instantly comfortable to play for both my son and myself. It’s not a light guitar, but with the right strap, long stretches of playing time should not be an issue. The tremolo is easy to use and just as easy to avoid if it’s not your thing. Overall this is a great guitar from a heritage brand, at a great price. If the way it looks piques your interest, please go play one and see for yourself.

Price: $675
Where to buy: Fender
Source: The sample of this product was provided by Fender

Filed in categories: Reviews

Tagged:

Fender Player Series Jaguar guitar review originally appeared on The Gadgeteer on August 9, 2018 at 11:00 am.

Note: If you are subscribed to this feed through FeedBurner, please switch to our native feed URL http://the-gadgeteer.com/feed/ in order to ensure continuous delivery.

Roli Lightpad Block M review

What is it?

Roli’s Lightpad Block M is a touchpad for musicians that attempts to and mostly succeeds in removing restrictions and enabling musical discovery. With their Lightpad, all you need is a mobile phone or tablet and your fingers. What you do or create beyond that is completely up to you.

Hardware specs

Dimensions: 94 x 94 x 21.8mm
Weight: 260g
Connectivity: USB-C, Bluetooth LE, 8 DNA connectors
Battery: 4 hour battery life / 2 hour charge time
Bluetooth: 15 meter range
System Requirements: iPhone 6, 6 Plus or newer | iPad Air 2 or newer | iOS 9.0 or above |Google Pixel or Pixel 2 | Mac OSX 10.10+ / Windows 7 / Windows 10

What’s in the box?

  • Lightpad Block
  • USB-C to USB-A cable
  • Quick start guide
  • Software through registration: Ableton Lite, Equator Player, Strobe2 Player, Tracktion Waveform 8, Blocks Dashboard, Max MSP (3mo. license)

Design and features

The design of the Roli Lightpad Block M is relatively unassuming at first. It’s square with gently rounded corners and a little under an inch thick. Looking closely at the top surface however you start to uncover what makes the unit (and a lot of Roli’s products) special. It has a dimpled grid formed into the top of a silicon material with a silky texture that your fingers want to slide across.

It almost has a memory foam kind of feel to it but satisfyingly firmer. It’s this surface that allows Roli to not only tell where you are touching the block, but also how hard and with what velocity. But, I’m getting ahead of myself. Let’s look at some of the other features.

All four sides of the LightPad have a pair of their DNA connectors that allows you to connect other modules from Roli including another Lightpad, their Live or Loop blocks or their Seaboard which applies that same top surface to piano keys. Three of the sides have an additional feature between the DNA connectors. They are a USB-C port for charging or connecting to a computer, a battery status button, and a power/BT pairing button. The bottom of the device has a non-slip foot with identifying logos for each of those features.

As with most connected devices, the Lightpad requires the use of an app, or a computer. The app is the easiest entry point, but also one of the most flexible. The packaging and manuals that came with the Lightpad all refer to their Noise app. Roli has another app called Play which I’d recommend starting with as it has a great introduction to the different movements you can employ while playing. They are Strike, Glide, Slide, Press and Lift. The Noise app is super fun and really gives you a huge sandbox to start creating but it can feel a little overwhelming if you aren’t yet familiar with the surface mechanics of playing. In this review I have not explored much beyond use with an iPhone, so look for an update in the near future with some additional info on use with a computer including some of their other software. All that said, there’s really no wrong way to play this thing. Let’s set it up.

Setup

Getting started is pretty easy.

  • Plug the USB-C end of the cable into the Block and the other end into a USB power adapter or computer to charge the battery fully. This block had almost a full charge on receipt.
  • Download and install the App on your device. I’ll use the Play App for this walkthrough.
  • Launch the app and it will tell you to press the power button which is the first time you’ll see the lights fly across the surface.
  • On the app, press Connect now and then choose Lightpad Block XXXX from the list. This one said CU5Y instead of XXXX. I’m assuming that changes per block.
  • From there, your Block and phone should connect and you’ll see the Block change to a 3×3 grid of color and the app will give you 5 options where you’ll want to start with Learn 5D Touch.

Performance

As I mentioned before, there’s no right or wrong way to use the Lightpad Block. The app will walk you through learning the gestures and how it’s quite different than striking a key on a piano or even a drum pad. You can strike and hold, and wiggle, and slide or glide as well as use multiple fingers. It gets really fun as you get into using the Noise app as that lets you create loops and melodies and layer tracks. Their Learn section has short videos on how to use all those functions which will help your learning curve significantly. Additionally, there’s the main area for your projects, an area for discovering what other users have created and a store where you can purchase additional bundles and packs of sounds and effects.

The learning curve is actually pretty quick and the hardest part is just getting past that your first couple experiments won’t sound that great. Using the Noise app I was able to quickly lay down a beat and then start layering sounds. I’d get a couple then botch something, but it’s super easy to go back in and remove a layer. The app shows you where you are in the count and helps you align your next layer’s start and stop. You can literally lose an hour to messing around and then find that there’s a whole additional section of sounds or features you didn’t see on first glance.

Tapping and sliding on the surface is really fun. If you’ve ever messed around with a guitar you know that your fingers can hurt a lot until you get used to the pressure of strings and fret positions. Similarly, if you’ve played an action game on your phone for too long, your thumbs or fingers can get pretty sore. It’s possible that can happen here too, but the silicon surface feels wonderful and the interaction with lights showing you where you’re pressing and how you’re moving is really quite something.

Here’s a video of my son using the Lightblock without layering sounds, just having fun with the Happy Drum Kit that’s available for free through the integrated store in the app. As you’ll see the interaction between the Lightblock and the app is pretty important. It shows what you’re doing on the Lightpad but also provides additional controls and settings.

Now here’s a series of videos where he’s exploring layering. You’ll see that it’s easy to get something looping and then experiment on top of that while you find something you like. Then you can record and repeat until you’re happy with the output.

In that second video, he’s layering on top of what he did in the prior vid. There’s also a subtle reminder in this one that you want to turn off alerts and notices when you’re recording as it can totally disrupt the flow. It won’t affect the actual music you’re recording but certainly can knock you off your groove. You can also see that he starts messing with the levels on each layer to help balance and get to the feel he’s looking for.

In this third video, he records another layer, messes with the levels and then changes the layer he just recorded from Darkmass Bass to Guitar Overdrive Lead to get something that stands out more. We both liked that you aren’t stuck with the sound that you recorded. You’re able to go to those individual loops and switch the sound to something new and Roli just makes it work. From that layers screen, you can then turn them on or off one at a time and play the song the way you want to hear it.

What I like

  • The solid build quality and inviting nature of the product
  • Flexibility of what you can do with it
  • Portability. It can go anywhere you want to take it
  • Creative potential. Liberating and malleable in its playability

What needs to be improved

  • Better compatibility with other music programs (like Reason for example)
  • Some areas of the pad seemed to be less consistent than others
  • Interesting and fun, but not precise enough as a midi controller

Final thoughts

As a tool for creation and developing musical ideas it’s a great piece of equipment. It packs a huge punch in terms of it’s size and capability. As a recording tool, the precision can be frustrating as it doesn’t always register touches the way you expect. I do think that Roli has a gateway product here as we both want to see how it works in conjunction with the other blocks that Roli makes. If you’re looking for something that can help with rhythmic and musical discovery, this may be the very thing you’re looking for.

Price: $199
Where to buy: roli.com and Amazon
Source: The sample of this product was provided by Roli.

The post Roli Lightpad Block M review appeared first on The Gadgeteer.

Filed in categories: Reviews

Tagged: ,

Roli Lightpad Block M review originally appeared on The Gadgeteer on June 9, 2018 at 11:30 am.

Note: If you are subscribed to this feed through FeedBurner, please switch to our native feed URL http://the-gadgeteer.com/feed/ in order to ensure continuous delivery.

Grab a Fender ukulele and make the world a happier place

The world seems pretty screwed up right now and you can’t help but get a little depressed when you are reading your news feeds, social media, watching TV news, etc. One remedy is to put down your phone, laptop, and TV, and pick up a ukulele. It’s tough to be sad when you’re strumming one of these tiny 4-stringed instruments and the California Coast series ukes from Fender will put a big smile on your heart.

The California Coast series of ukuleles from Fender include 5 models with sizes from Soprano which is the smallest standard uke, up to the larger Tenor sized instrument. The prices for these instruments start out small at $59.99 for the Venice Soprano and go up to $249.99 for the Montecito Tenor uke.

And the best news is if you don’t already know how to play the ukulele, Fender has you covered there too with their Fender Play app for iOS, Android, and desktops. Fender Play is their digital learning software that they’ve been offering for guitar, but now starting on May 3rd, they will be offering step-by-step digital lessons for ukulele too.

If you’re interested in learning more about Fender’s California Coast line of ukuleles, head over to shop.fender.com

The post Grab a Fender ukulele and make the world a happier place appeared first on The Gadgeteer.

Filed in categories: News

Tagged: ,

Grab a Fender ukulele and make the world a happier place originally appeared on The Gadgeteer on April 14, 2018 at 10:59 am.

Note: If you are subscribed to this feed through FeedBurner, please switch to our native feed URL http://the-gadgeteer.com/feed/ in order to ensure continuous delivery.