BOSS Katana-Air claims to be the first truly wireless portable guitar amp

NEWS – I don’t know if it’s truly the first, but the BOSS Katana-Air 30W Stereo Combo Amplifier comes with a proprietary wireless transmitter to connect to your guitar to the amp.  The Katana-Air is a true stereo amplifier with two custom-tuned speakers.  You’re ready to play anywhere with this BOSS.  It provides 30W of audio power when plugged into a power outlet or 20W when running off battery.  The amp uses “low-latency digital-wireless guitar technology developed by BOSS to provide transparent sound without any lag or dropouts.”

The guitar transmitter provides up to 12 hours of playing time.  It recharges with a dock on the amp itself.  It maximizes playing time by entering standby mode for both the transmitter and amp when you aren’t playing.  When you pick up the guitar, the transmitter senses motion and turns on the amp.  The Katana-Air also has a headphone jack for silent practicing.

To be sure I don’t miss anything, I’ll let BOSS tell you about their effects and an associated app in their own words:

Equipped with the same tones and sound-shaping controls found in larger Katana amplifiers, the Katana-Air offers timbres for any style. Five amp characters provide a wide range of tones, from sparkling clean to a custom, high-gain Brown sound evocative of a Marshall stack. There’s even an Acoustic character optimized for playing acoustic/electric guitar. The amp also provides integrated access to over 50 BOSS effects, including modulations, delays, and reverb effects optimized for the Katana-Air’s stereo speaker system. With six onboard memories, you can store and recall your favorite amp and effects setups at any time.

Available for both iOS and Android devices, a dedicated BOSS Tone Studio app gives you complete control of the Katana-Air right from your smartphone or tablet. You’re able to adjust all the amp’s panel controls, as well as access effects types and routings solely available from the app. You can also save setups to the amp’s memories, organize sound libraries on your device, and download free patch collections directly from BOSS Tone Central. The app corresponds with the amp over Bluetooth.”

When you aren’t using the BOSS Katana-Air as a practice amp, it’s a Bluetooth speaker for music playback from your computer or mobile devices.

The BOSS Katana-Air 30W Stereo Combo Amplifier with wireless transmitter is $399.99 at B&H.

Filed in categories: News

Tagged:

BOSS Katana-Air claims to be the first truly wireless portable guitar amp originally appeared on The Gadgeteer on August 6, 2018 at 10:00 am.

Note: If you are subscribed to this feed through FeedBurner, please switch to our native feed URL http://the-gadgeteer.com/feed/ in order to ensure continuous delivery.

Roli Lightpad Block M review

What is it?

Roli’s Lightpad Block M is a touchpad for musicians that attempts to and mostly succeeds in removing restrictions and enabling musical discovery. With their Lightpad, all you need is a mobile phone or tablet and your fingers. What you do or create beyond that is completely up to you.

Hardware specs

Dimensions: 94 x 94 x 21.8mm
Weight: 260g
Connectivity: USB-C, Bluetooth LE, 8 DNA connectors
Battery: 4 hour battery life / 2 hour charge time
Bluetooth: 15 meter range
System Requirements: iPhone 6, 6 Plus or newer | iPad Air 2 or newer | iOS 9.0 or above |Google Pixel or Pixel 2 | Mac OSX 10.10+ / Windows 7 / Windows 10

What’s in the box?

  • Lightpad Block
  • USB-C to USB-A cable
  • Quick start guide
  • Software through registration: Ableton Lite, Equator Player, Strobe2 Player, Tracktion Waveform 8, Blocks Dashboard, Max MSP (3mo. license)

Design and features

The design of the Roli Lightpad Block M is relatively unassuming at first. It’s square with gently rounded corners and a little under an inch thick. Looking closely at the top surface however you start to uncover what makes the unit (and a lot of Roli’s products) special. It has a dimpled grid formed into the top of a silicon material with a silky texture that your fingers want to slide across.

It almost has a memory foam kind of feel to it but satisfyingly firmer. It’s this surface that allows Roli to not only tell where you are touching the block, but also how hard and with what velocity. But, I’m getting ahead of myself. Let’s look at some of the other features.

All four sides of the LightPad have a pair of their DNA connectors that allows you to connect other modules from Roli including another Lightpad, their Live or Loop blocks or their Seaboard which applies that same top surface to piano keys. Three of the sides have an additional feature between the DNA connectors. They are a USB-C port for charging or connecting to a computer, a battery status button, and a power/BT pairing button. The bottom of the device has a non-slip foot with identifying logos for each of those features.

As with most connected devices, the Lightpad requires the use of an app, or a computer. The app is the easiest entry point, but also one of the most flexible. The packaging and manuals that came with the Lightpad all refer to their Noise app. Roli has another app called Play which I’d recommend starting with as it has a great introduction to the different movements you can employ while playing. They are Strike, Glide, Slide, Press and Lift. The Noise app is super fun and really gives you a huge sandbox to start creating but it can feel a little overwhelming if you aren’t yet familiar with the surface mechanics of playing. In this review I have not explored much beyond use with an iPhone, so look for an update in the near future with some additional info on use with a computer including some of their other software. All that said, there’s really no wrong way to play this thing. Let’s set it up.

Setup

Getting started is pretty easy.

  • Plug the USB-C end of the cable into the Block and the other end into a USB power adapter or computer to charge the battery fully. This block had almost a full charge on receipt.
  • Download and install the App on your device. I’ll use the Play App for this walkthrough.
  • Launch the app and it will tell you to press the power button which is the first time you’ll see the lights fly across the surface.
  • On the app, press Connect now and then choose Lightpad Block XXXX from the list. This one said CU5Y instead of XXXX. I’m assuming that changes per block.
  • From there, your Block and phone should connect and you’ll see the Block change to a 3×3 grid of color and the app will give you 5 options where you’ll want to start with Learn 5D Touch.

Performance

As I mentioned before, there’s no right or wrong way to use the Lightpad Block. The app will walk you through learning the gestures and how it’s quite different than striking a key on a piano or even a drum pad. You can strike and hold, and wiggle, and slide or glide as well as use multiple fingers. It gets really fun as you get into using the Noise app as that lets you create loops and melodies and layer tracks. Their Learn section has short videos on how to use all those functions which will help your learning curve significantly. Additionally, there’s the main area for your projects, an area for discovering what other users have created and a store where you can purchase additional bundles and packs of sounds and effects.

The learning curve is actually pretty quick and the hardest part is just getting past that your first couple experiments won’t sound that great. Using the Noise app I was able to quickly lay down a beat and then start layering sounds. I’d get a couple then botch something, but it’s super easy to go back in and remove a layer. The app shows you where you are in the count and helps you align your next layer’s start and stop. You can literally lose an hour to messing around and then find that there’s a whole additional section of sounds or features you didn’t see on first glance.

Tapping and sliding on the surface is really fun. If you’ve ever messed around with a guitar you know that your fingers can hurt a lot until you get used to the pressure of strings and fret positions. Similarly, if you’ve played an action game on your phone for too long, your thumbs or fingers can get pretty sore. It’s possible that can happen here too, but the silicon surface feels wonderful and the interaction with lights showing you where you’re pressing and how you’re moving is really quite something.

Here’s a video of my son using the Lightblock without layering sounds, just having fun with the Happy Drum Kit that’s available for free through the integrated store in the app. As you’ll see the interaction between the Lightblock and the app is pretty important. It shows what you’re doing on the Lightpad but also provides additional controls and settings.

Now here’s a series of videos where he’s exploring layering. You’ll see that it’s easy to get something looping and then experiment on top of that while you find something you like. Then you can record and repeat until you’re happy with the output.

In that second video, he’s layering on top of what he did in the prior vid. There’s also a subtle reminder in this one that you want to turn off alerts and notices when you’re recording as it can totally disrupt the flow. It won’t affect the actual music you’re recording but certainly can knock you off your groove. You can also see that he starts messing with the levels on each layer to help balance and get to the feel he’s looking for.

In this third video, he records another layer, messes with the levels and then changes the layer he just recorded from Darkmass Bass to Guitar Overdrive Lead to get something that stands out more. We both liked that you aren’t stuck with the sound that you recorded. You’re able to go to those individual loops and switch the sound to something new and Roli just makes it work. From that layers screen, you can then turn them on or off one at a time and play the song the way you want to hear it.

What I like

  • The solid build quality and inviting nature of the product
  • Flexibility of what you can do with it
  • Portability. It can go anywhere you want to take it
  • Creative potential. Liberating and malleable in its playability

What needs to be improved

  • Better compatibility with other music programs (like Reason for example)
  • Some areas of the pad seemed to be less consistent than others
  • Interesting and fun, but not precise enough as a midi controller

Final thoughts

As a tool for creation and developing musical ideas it’s a great piece of equipment. It packs a huge punch in terms of it’s size and capability. As a recording tool, the precision can be frustrating as it doesn’t always register touches the way you expect. I do think that Roli has a gateway product here as we both want to see how it works in conjunction with the other blocks that Roli makes. If you’re looking for something that can help with rhythmic and musical discovery, this may be the very thing you’re looking for.

Price: $199
Where to buy: roli.com and Amazon
Source: The sample of this product was provided by Roli.

The post Roli Lightpad Block M review appeared first on The Gadgeteer.

Filed in categories: Reviews

Tagged: ,

Roli Lightpad Block M review originally appeared on The Gadgeteer on June 9, 2018 at 11:30 am.

Note: If you are subscribed to this feed through FeedBurner, please switch to our native feed URL http://the-gadgeteer.com/feed/ in order to ensure continuous delivery.

Get “inspiration insurance” with the Gibson GC-R05 Memory Cable

Whether you’re an amateur or a professional musician, you probably have been inspired by something you’re noodling around with, but you’ve lost it before you can get it down.  You’ll never lose your ideas again if you replace your current audio cables with the GC-R05 memory cable designed by TASCAM for Gibson.  In addition to being a high-quality 16′ audio cable, the GC-R05 cable has an in-line solid-state microSD recorder built right in.

With a push of a button, you’ll be able to save a file to the included 4GB microSD card for later reference.  There are two recording modes: continual or recording triggered only when you play.  You can record 13 hours of music with uncompressed WAV-format 16-bit, 44.1kHz CD-quality files on the microSD card.  Transferring your files to a computer is easy with the included microSD-to-SD card adapter.  Gibson says “thanks to the studio-quality A/D converters, if you record a ‘keeper’, you can bring the file into any recording software, then build the song from there.”

The in-line recorder is powered by one AAA battery.  The audio cable is compatible with guitar, keyboards, bass, and electronic drums or even a mixer bus output.  You can expand the storage capacity by replacing the microSD card.

The Gibson GC-R05 Memory Cable is $51.00 at Amazon.

The post Get “inspiration insurance” with the Gibson GC-R05 Memory Cable appeared first on The Gadgeteer.

Filed in categories: News

Tagged:

Get “inspiration insurance” with the Gibson GC-R05 Memory Cable originally appeared on The Gadgeteer on June 2, 2018 at 11:30 am.

Note: If you are subscribed to this feed through FeedBurner, please switch to our native feed URL http://the-gadgeteer.com/feed/ in order to ensure continuous delivery.

Roland GO:MIXER audio mixer review

The GO:MIXER from Roland is a palm-sized audio mixer aimed at today’s content creators whether their taste is music, podcasts or video.

What is it?

It’s a small format mixer that lets you blend multiple input sources for a seamless output to a USB connected smartphone, tablet or laptop.

Hardware specs

Audio Channels: 8 input channels, 2 output channels
Connectors: Instrument (L/Mono, R) 1/4”
Line-in 1&2: 3.5mm stereo audio jacks
Mic-in: 1/4” (no phantom power)
Guitar/Bass: 1/4” (high-impedance)
Monitor out: 3.5mm stereo audio jacks
USB: USB Micro-B
Power supply: USB bus power
Current draw: 40 mA
Accessories:
     Lightning to USB Micro-B cable (~50cm / 1.5’)
USB OTG Micro-B to Micro-B cable (~50cm / 1.5’)
Size & weight: 95mm x 95mm x 28mm and 100gm (without cables)

What’s in the box?

Roland GO:MIXER
Lightning to USB Micro-B cable
USB OTG Micro-B to Micro-B cable

Design and features

YouTube, Instagram and other video sharing sites continue to grow and the success of a clip can just as easily depend on production quality as it does on the content itself. It’s clear that Roland aimed this product squarely at these creators. Let’s dive in a bit further…

Setup

The GO:MIXER is really its own instruction manual. As with most traditional audio products all the inputs, outputs and knobs are clearly labeled with their intended use and function. There are input level knobs for each of the three inputs as well as a knob for master output volume. Depending on what you’re trying to do, all that’s left is to connect your instruments, mic and/or auxiliary audio with the appropriate cables. In this review we’ll be connecting a microphone and an acoustic electric guitar via 1/4″ cables.

Performance

My son is a guitar player and I’ve enlisted his help with this review. Over the years, he’s created a number of videos for social channels and quickly got frustrated with audio quality when relying on his phone to capture audio with the onboard mic. The solution was to record audio separately (he prefers Reason) and then use iMovie to sync them up after the fact. That process worked well but required a lot of time.

The GO:MIXER solves for this exact scenario. With it’s included lightning cable (Micro-USB for Android) any audio sources coming through the GO:MIXER are piped straight to the phone in lieu of the iPhone mic. Playing an instrument, a vocal take with a microphone, or any combination of sources all come through pristinely. It’s important to note all sources are live feed so they need to be simultaneous. If you want to layer multiple takes, you’ll still need to use editing software.

I’ve created A and B videos with an iPhone X for comparisons. I didn’t worry about getting the video perfect for these as it’s the audio we’re focusing on for this review. The videos in this case are to help provide visual reference for what you’re hearing.

Video A

This video is shot with an iPhone X in the standard camera app using the built-in mic. The phone is set up on a tripod using a Glif smartphone holder from Studio Neat.

Overall, it sounds pretty good for a video recording on a mobile phone. What you don’t hear or experience is the multiple takes necessary to avoid the barking dog or the truck rumbling by. The bottom line is you’re going to get whatever audio is happening around you.

Video B

This is the same guitar / iPhone / tripod setup, but with some direct connections. The GO:MIXER is connected to the phone with the lightning cable. The acoustic/electric guitar to the guitar input. An Audio Technica M8000 microphone to the mic line-in. (The mic is actually not a Sennheiser as described in the video; bad cues on my part there.)

In the video, you’ll notice that he voice is clearer (holding a mic obviously). The guitar is crisp with more of the many subtleties present (fingers sliding on strings, fretting, etc.) While the audio levels may not be perfect in this video, a little experimentation will land on the best settings for each sound source.

Observations

  • The included cables are pretty short; only about 18”. They work well with smartphones and tablets if you’re using the selfie or front facing camera. If you want to use the (usually better) rear-facing camera, the short cables put the GO:MIXER further away from you and out of reach which means you’ll need to have your settings figured out ahead of time, as well as a way to start your recording remotely. Not a deal breaker by any means, but something you’ll want to consider. Micro-USB to Lighting cables are not readily available, so finding one will be a bit tricky should you need one.
  • The USB-bus power is a cool feature and it means one less thing to charge. Connect the GO:MIXER to your phone and it’s powered. The only catch here is that if your phone turns off / times out, the power to the GO:MIXER is also cut. It’s not an issue if you’re actively recording or have an app set to keep the phone from sleeping, but if you’re just practicing and the phone times out, the audio drops. Setting your phone to never sleep is a quick fix but you’ll obviously drain your battery faster.
  • The GO:MIXER also works well with a computer. Just supply your own USB Micro-B to USB A cable and connect it. Make sure to select it as the source in whatever application you choose to use.
  • There’s also a karaoke feature called “center cancel”. This should knock vocals down on audio source connected to Line-in 1 or 2. This function does not work if you’re playing audio from the USB connected phone. Makes sense, but unfortunate given the phone is where most of us keep our music these days.
  • There is a note on their website that some Android smartphones may convert the stereo USB audio output to mono on receipt. This was something I was unable to verify with the equipment I had on hand.

What I like

  • No batteries or power supply
  • Lightweight and small
  • Simple, understandable controls
  • App agnostic
  • Relatively low cost

What needs to be improved

  • Length of the included cables
  • Center-cancel function doesn’t work on a USB connected music source

Final thoughts

The GO:MIXER is intuitive and does what they claim it will. For capturing clean signals from simultaneous sources Roland has made it very easy to record a video without a lot of setup or post editing. There are more expensive solutions out there that are dedicated to source input for editing software, but for a multipurpose solution with a focus on one-and-done, Roland’s got a winner here. If you need to know more, Roland’s GO:MIXER webpage has a lot of detail.

Price: $99.99
Where to buy: Amazon
Source: The sample of this product was provided by Roland

The post Roland GO:MIXER audio mixer review appeared first on The Gadgeteer.

Filed in categories: Reviews

Tagged:

Roland GO:MIXER audio mixer review originally appeared on The Gadgeteer on May 7, 2018 at 10:00 am.

Note: If you are subscribed to this feed through FeedBurner, please switch to our native feed URL http://the-gadgeteer.com/feed/ in order to ensure continuous delivery.

Soundbrenner Pulse smart vibrating wearable metronome review

Growing up a band geek and being married to a professional visual designer for marching bands I have been around metronomes pretty much all my life.  I thought I had seen them all including the plethora of apps available for Android and Apple.  That was until I got the chance to review the Soundbrenner Pulse.  The Pulse is a metronome you can wear on your body that lets you feel the pulse of the beat.

What is it?

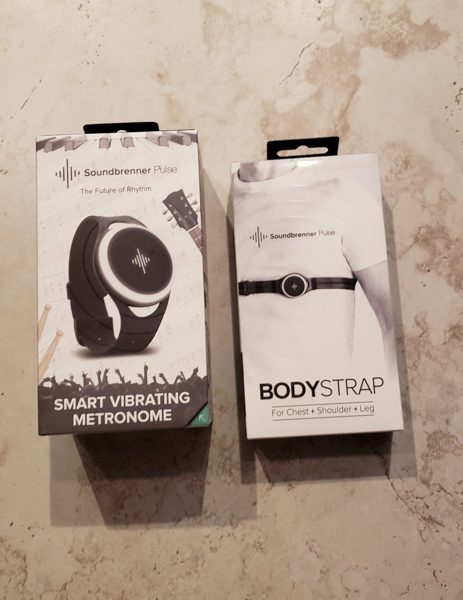
It is a device you can fit into multiple bands and wear on your body.  It comes with two different sized wrist/ankle straps and you can order a separate body strap if you wish to wear it around your chest or upper leg.  This metronome comes with a ton of options for configuration and is really a cool device if you are a musician or someone involved in teaching music.  It allows you to adjust the speed, time signature and subdivision of the beats as you wish.  You can even set up play lists if you have sets you wish to call up for each individual song.

Hardware Specs

  • Has over 6 hours of battery life
  • Works with IPhone 4S or later
  • Works with IPad 3 or later
  • Works with modern Android phones
  • Any Mac with support for Bluetooth 4 – Additional DAW software required

What’s in the box?

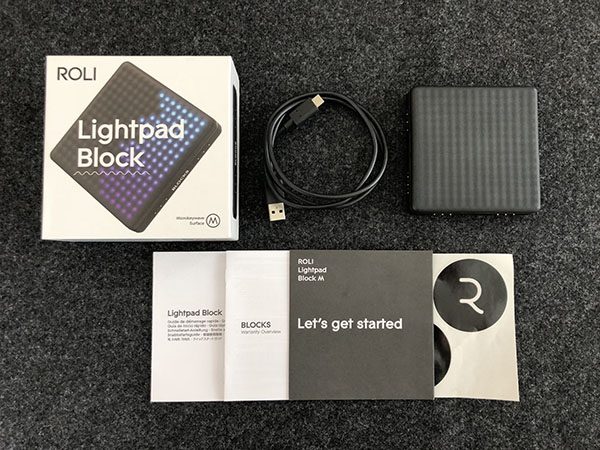
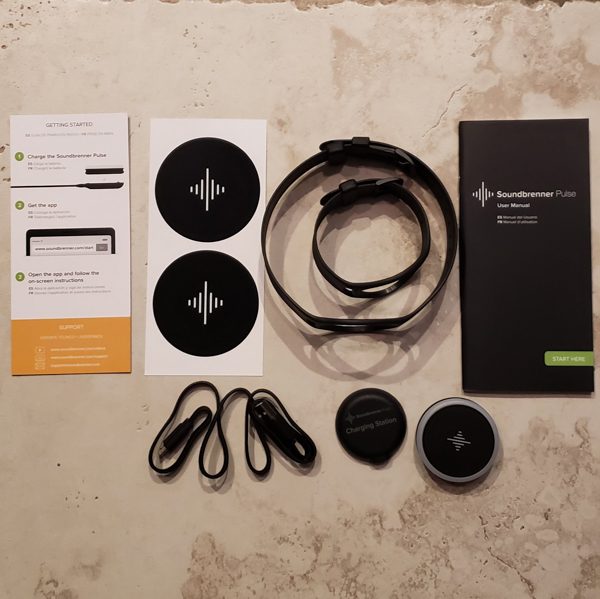
The top picture above is showing what is in the main Soundbrenner Pulse box:

  • Soundbrenner Pulse
  • Long band
  • Short band
  • Charging station
  • Charging cable – actual plug not included just a USB
  • Quick start flyer
  • User manual
  • Some stickers

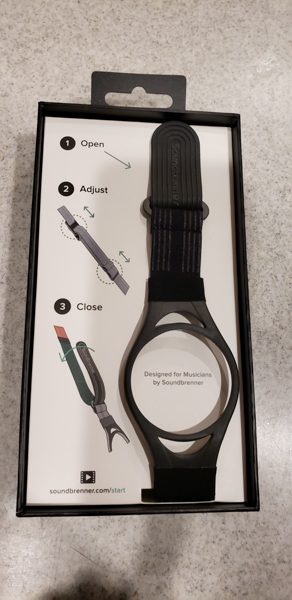
The second picture shows the body strap in its box.  It states it is for use on the chest, shoulder or leg.

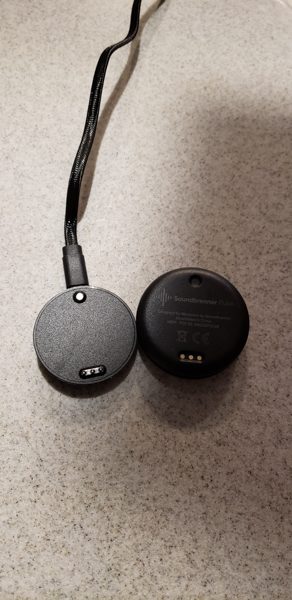
Before I did anything else after opening the boxes I hooked the Pulse up to the charging station.  The above picture shows the charging station.  You simply plug one end of the USB cable into the flat disk.  On the flat disk you need to keep the side with the electrodes facing up and then plug the other USB end into a USB port on your computer or in my case, a USB port in my wall socket.

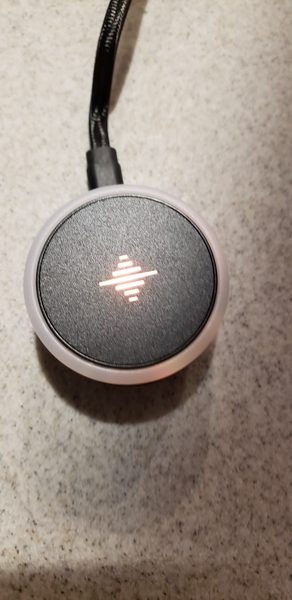
You then place the Pulse directly on the docking station lining up the electrodes.  The first time you use it and every time you go to recharge, the display on the Pulse will glow an orange/red color to indicate that it is charging.

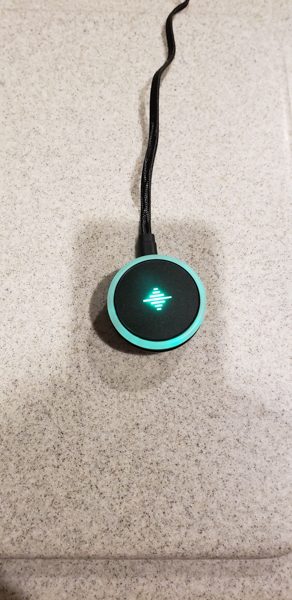
When the Pulse is fully charged it will glow green.

Design and features

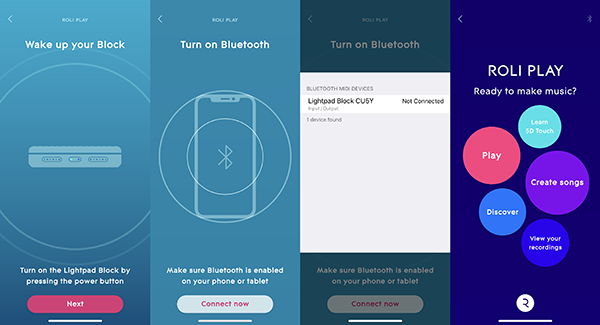
Registering in the app.

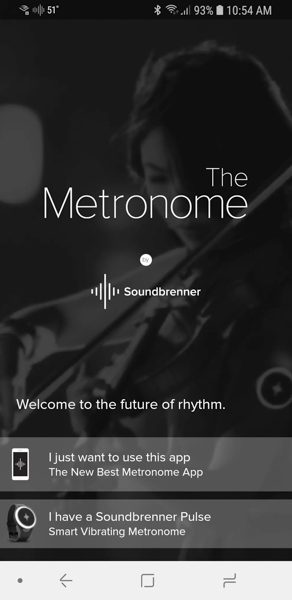
I downloaded the SoundBrenner Metronome app onto my Samsung Galaxy S9.   I am happy to report that the app worked flawlessly with my phone and I never had any issues with it operating or any issues with the app connecting with the Pulse.  The above picture shows the opening screenshot of the app.  I chose the second option since I had a Pulse.  I found it interesting and very cool that they also let you use this app without a Pulse.  Your phone would work as the actual metronome with sound on/off and a display showing the beats.  The app was free to download and install and never prompted me for any additional funds.  There was also no extra advertising on the app.

After indicating that I had a Pulse, the next screen gave me the option to login if I had an existing account or to register.  I chose the register button.

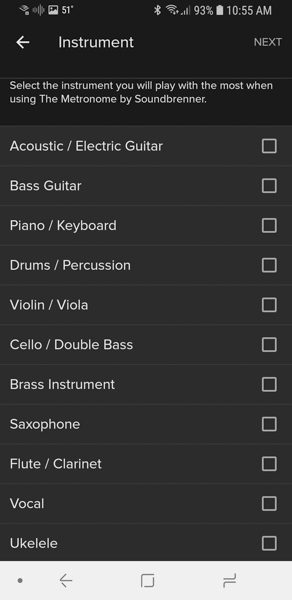
Before allowing me to actually register, the app asked several questions. The next screen asked me to select the instrument that I will be using the most.  I chose vocal.  I could not see how this really impacted the application and once chosen, I never found a way to change this setting again.

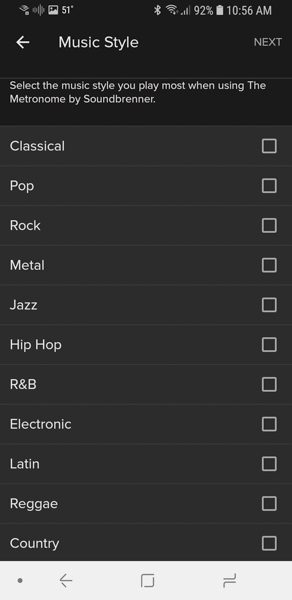
The next screen asked me to choose the music style I play the most.  Just like the musical instrument option above, once chosen and I was finished registering, I could not find a way to change it.  I also was not sure how it impacted the application.  I chose the classical option.

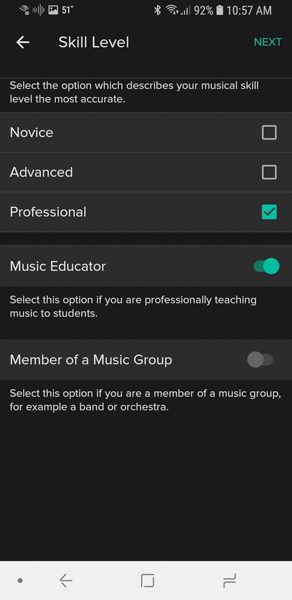
The next screen of the registration process was asking about my skill level.  Since this app would be used by my husband I picked professional and turned on the Music Educator switch.

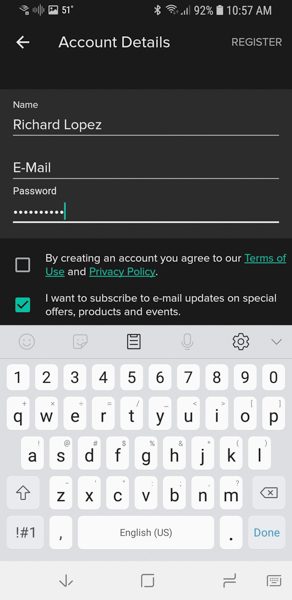
Finally, I came to the actual registration screen.   It asked for my name, email and a password.  I found it unusual that it did not ask me to type the password twice or have an option to display the password I was typing in.  I had to be especially careful when typing in that password so I would remember what I typed.   When the ‘Done’ button was clicked, I did get an email confirmation to the email address I had entered.  It gave me a link where I had to confirm the email address to finalize the registration process.

Using the app.

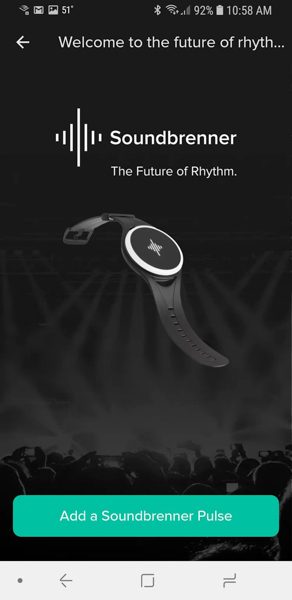
After registering I was now allowed to link up the Pulse to the application.  On this next screen, I clicked on the button to ‘Add a Soundbrenner Pulse’.

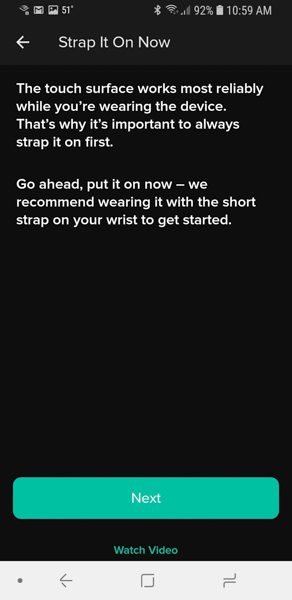
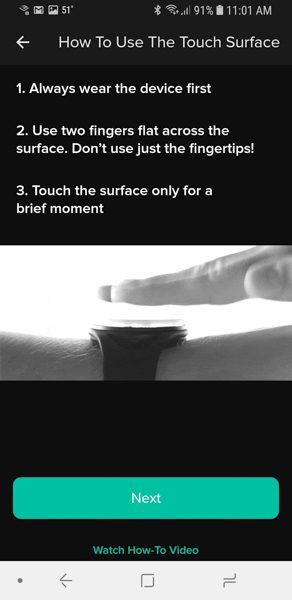
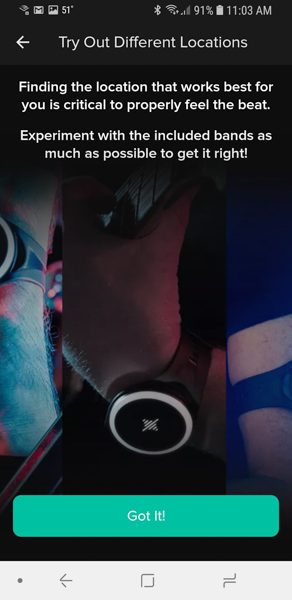
The first thing you are told to do is to make sure the Pulse is on your body.  Holding the device in your hand and trying to interact with it is hit or miss.  Once I had it strapped to my arm it recognized every tap I gave.

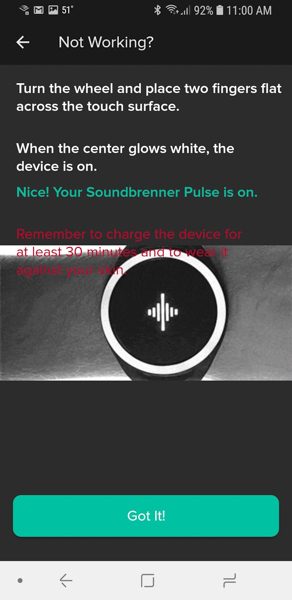
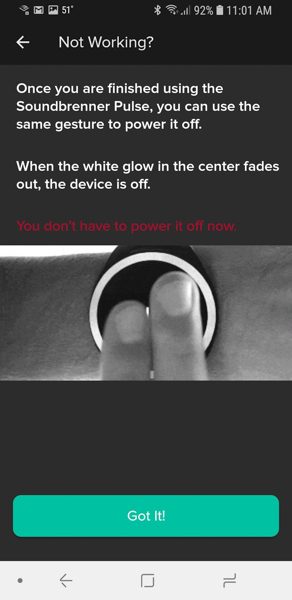
The next two screens had you go through the motions of turning the Pulse on and off.  Once on your wrist, you can turn the Pulse dial either direction to activate it.  Then you simply place two fingers flat over the device.  When it turns on you do get a long extended vibration and it will glow white.  When turning off you get a shorter vibration and the white color fades out.

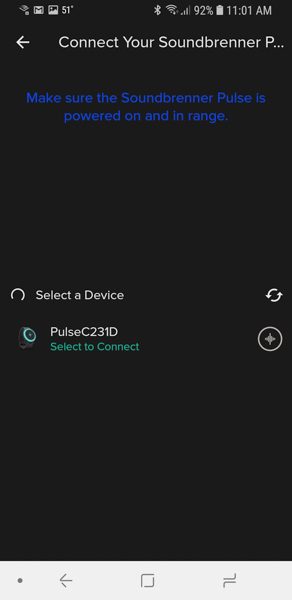
Once the device was on, I selected the PulseC231D from the screen above and the app was connected to it.

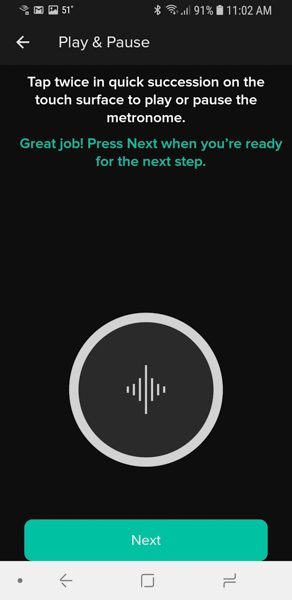
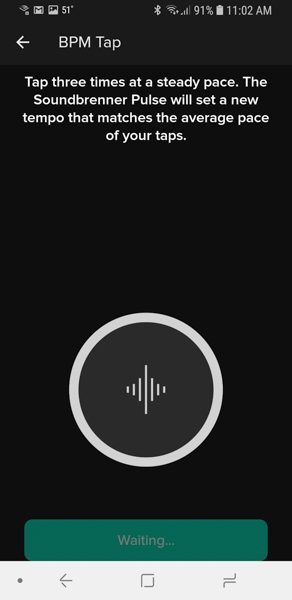
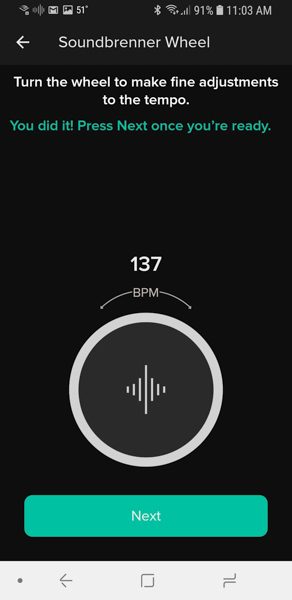
The next few screens were a tutorial on how to use the Pulse.  You can set your own tempo by tapping two fingers flat on the device.  Doing that it starts to repeat the tempo you set.  Once the metronome is running you can tap twice with two fingers to turn it off or turn it back on.  Another cool thing is once the metronome is running you can turn the dial right to increase the tempo or left to slow it down.

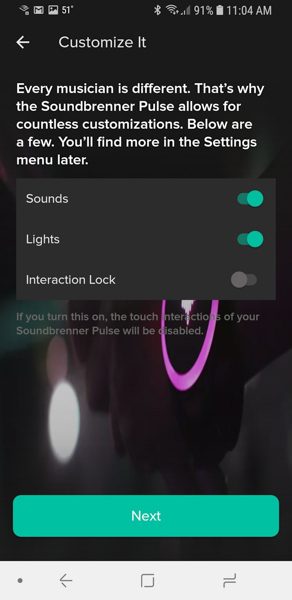
The last two setup screens let you adjust how the app interacts with the Pulse.  If you turn the sound on that is really turning the metronome sounds on in the app and not the Pulse itself.  The Pulse only vibrates the tempo.

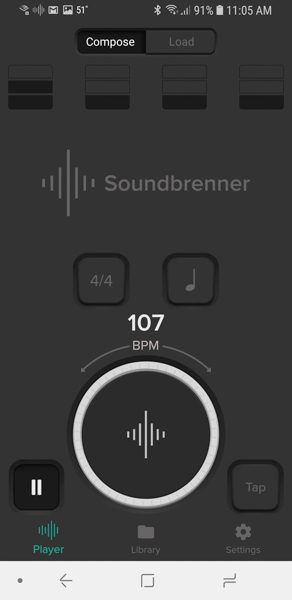
This next screen above is the main screen of the application.  You can adjust a lot of different settings from this page.  The button with the quarter note on it (top right above the 107) is how you adjust the subdivision of the beats.   The button with the 4/4 is how you adjust the time signature for the beats.  You can configure the app to beat slightly stronger on the first count of each measure.   So for example with 4/4 and a quarter note the app will have 4 beats per measure.

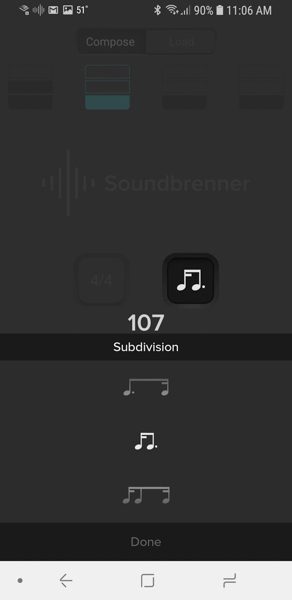
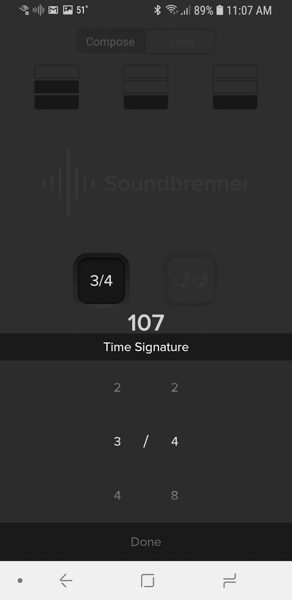
The two screens above show the subscreens for subdivision and time signature.  There are really a ton of very cool options here.

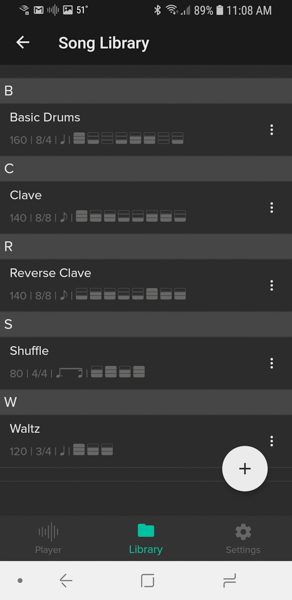
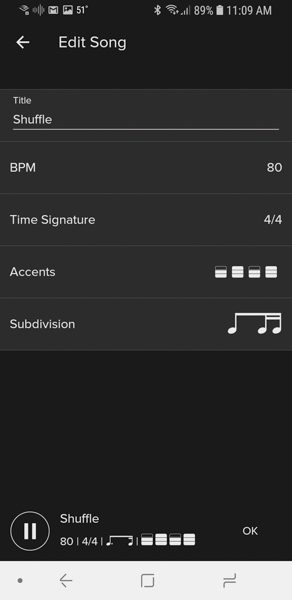
The app comes with a set song library of set rhythms and time signatures.  You have the option of creating new songs in the library and even editing existing songs.  You set the beats per minute, the time signature, what beats are the accent beats and the subdivision of the notes.

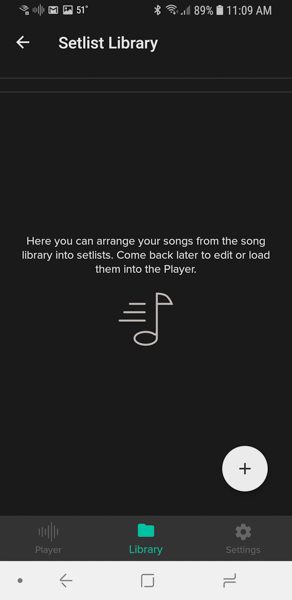
Once you have all of your songs set, you can then build yourself a setlist.  This is a pretty cool option.   You can have all of the songs in the order you will play them.  Then as you play the setlist it will work its way through your songs in the order you put them in.

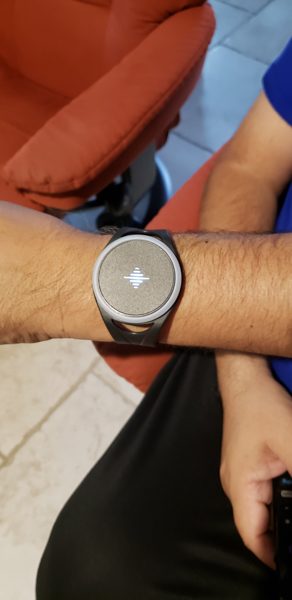
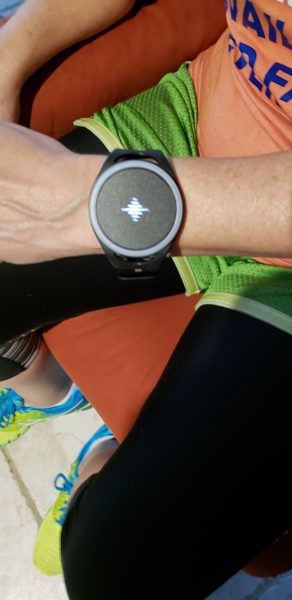
The last two pictures above show the Pulse on my husband’s wrist then on my much smaller wrist.  I have to admit that for me the Pulse is a rather large device.  If I were a musician using the device, I would build a setlist and then put the device on my upper arm under my sleeve.  I could then double tap my way through the setlist without having the large Pulse out on my wrist in the open.  My husband did not feel that it was too big for him and it did not appear that much larger on him than a lot of watches would that are out there for men.

What I like

  • I love the customization of this device.
  • It comes with two different sized straps that would fit my upper and lower arms along with my ankles, I can also buy a larger body strap to wear in other places.
  • It was very easy to interact with.  I loved how easy it was to set a tempo by just tapping on the device and it was simple to start and stop.
  • The app itself offered so many options in the subdivision and time signatures.  It also allowed you to set what beats were the accent beat or set no accent beat at all.

What needs improvement

I think if they offered a smaller version of the Pulse it might attract more female users who might want to keep the device on their wrist.

Final thoughts

My husband took this to work with him and had several of the band directors play around with it.  One director who was very percussion oriented mentioned how this would be a great device for individuals to practice at home with.  Practicing at the proper tempo really helps you to be prepared for the actual performance.  The directors also thought it would possibly be a cool device for the drum majors to use.  Often times I see drum majors with small metronomes in the stand at a marching contest getting the beat just before a song.  With the Pulse, they could be wearing the device and have the setlist all ready to go.  If the band gets off tempo, a quick double tap on the device will turn it off.   I would think this device is would be great for anyone who sets the tempo for their own small bands.   I would not recommend that it be worn by anyone who has to follow someone else’s lead in a band.  For example, if you are the guitar player and there is a drummer setting the tempo, listen to the drummer and don’t try to follow your own beat.  I am sure my husband will be using this device at future marching band rehearsals next fall.

Price: $99.00
Where to buy:   Amazon
Source: The sample for this review was provided by Soundbrenner.

The post Soundbrenner Pulse smart vibrating wearable metronome review appeared first on The Gadgeteer.

Filed in categories: Reviews

Tagged:

Soundbrenner Pulse smart vibrating wearable metronome review originally appeared on The Gadgeteer on April 19, 2018 at 9:00 am.

Note: If you are subscribed to this feed through FeedBurner, please switch to our native feed URL http://the-gadgeteer.com/feed/ in order to ensure continuous delivery.