Power Practical Luminoodle Color Bias Lighting review

Every once in a while, a gadget comes along that, at first glance at least, appears to be basically superfluous and unnecessary…but cool and fun, nonetheless. That was exactly what I thought when I first saw the Power Practical Luminoodle Color Bias Lighting. Heck, just the name “Luminoodle” had my attention. Truth be told, I’d actually been seeing these LED strips for a while and thought I might like to try one, so when Julie offered the Luminoodle to review, I was gleefully all over it. Let’s check it out! Gadget on!

Specs

  • LED rating: 50,000 hours
  • Light output: 450 Lumens
  • USB input: 5 Watts (5 Volts, 1 Amp)
  • 3M adhesive backing
  • 15 colors
  • Warranty: 1 year

Options

  • Small (1 meter) – $19.99
  • Medium (2 meters) – $24.99 (reviewed here)
  • Large (3 meters) – $29.99

Packaging

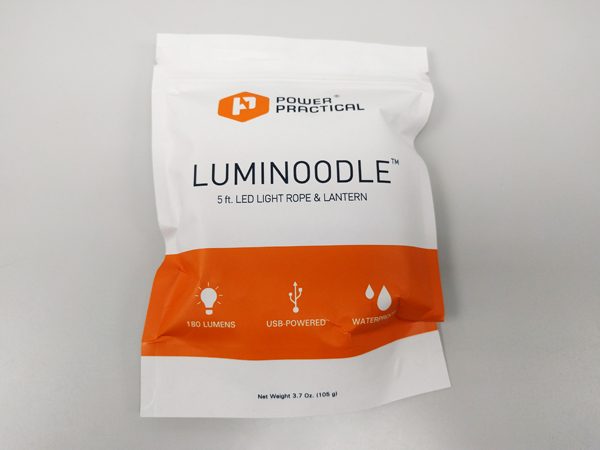
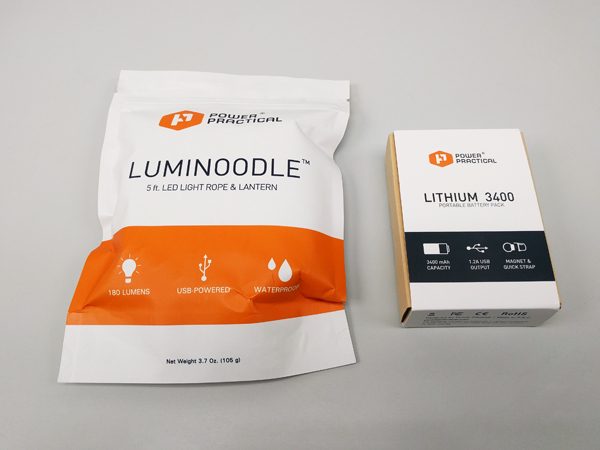
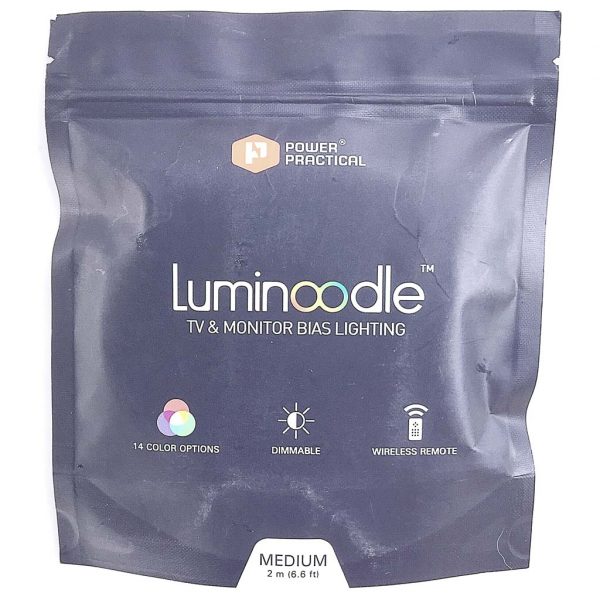
The Luminoodle arrived in a slim plastic zip-closure pouch with a tear-off opening.
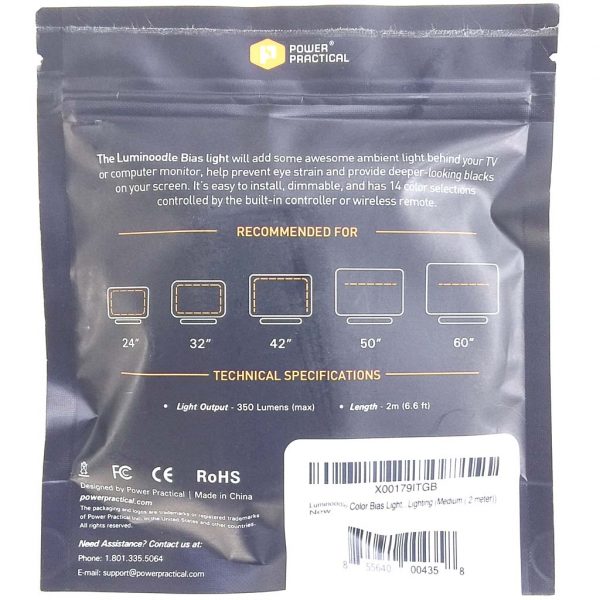
The back of the pouch depicted a brief explanation of installation configurations for the product inside.
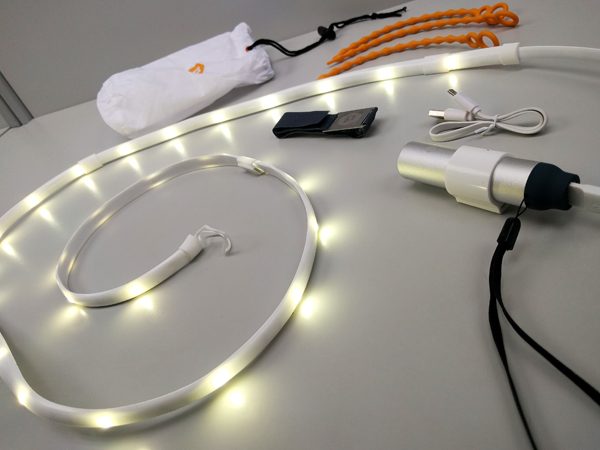
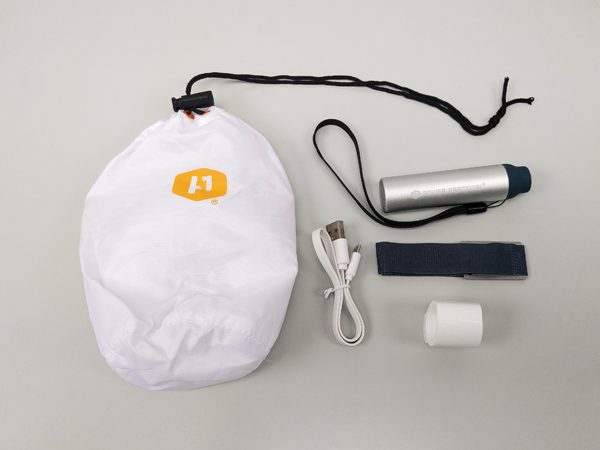
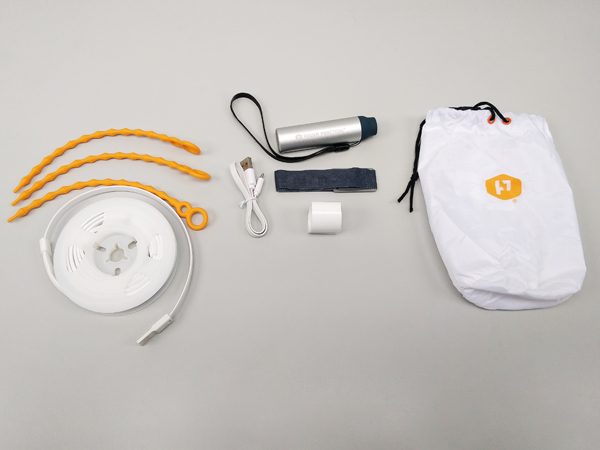
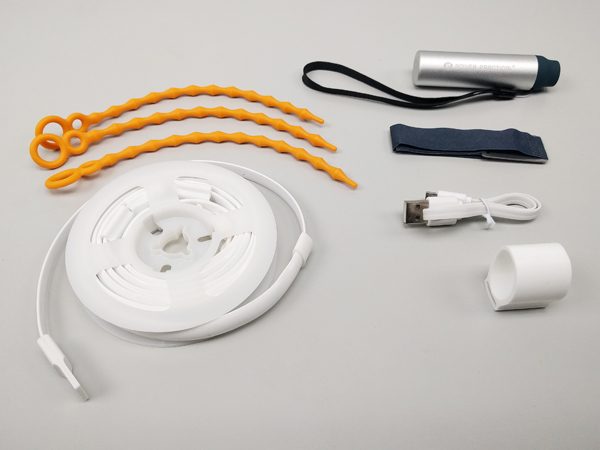
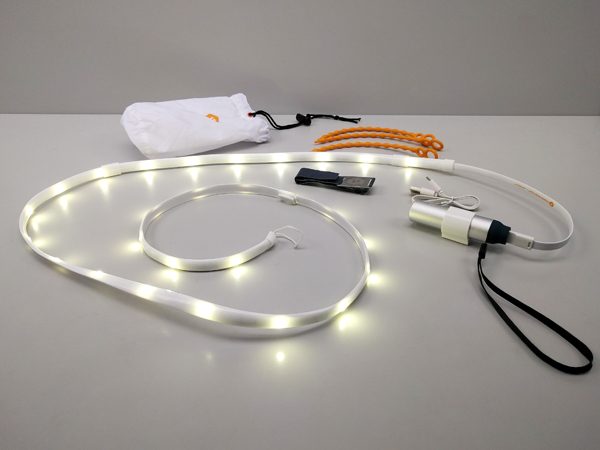
Contents

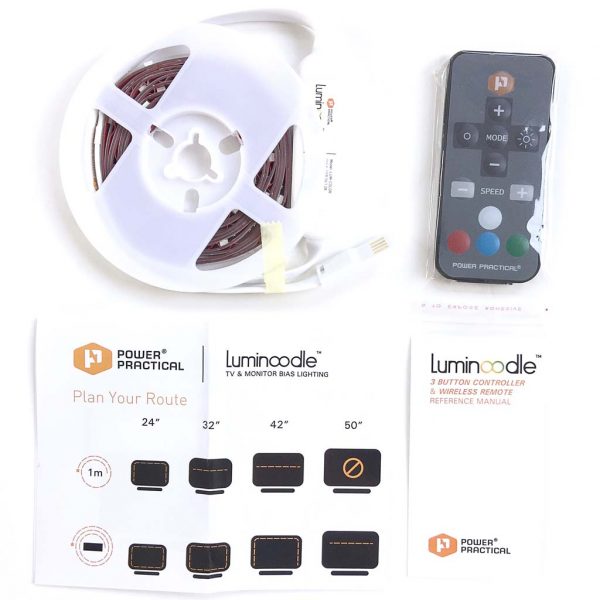
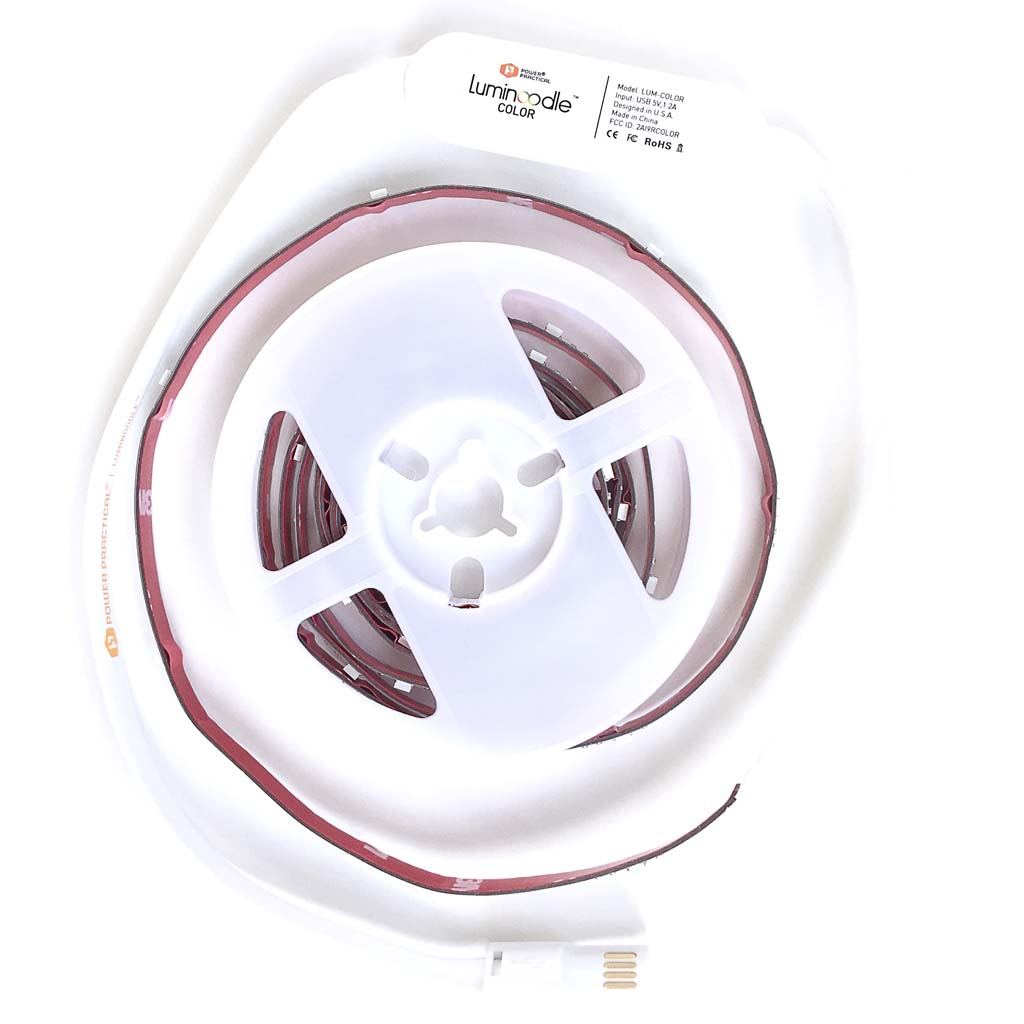
  • 2-meter Luminoodle on a spool
  • Wireless remote
  • Luminoodle instruction booklet
  • Remote instruction booklet

Features & Functions

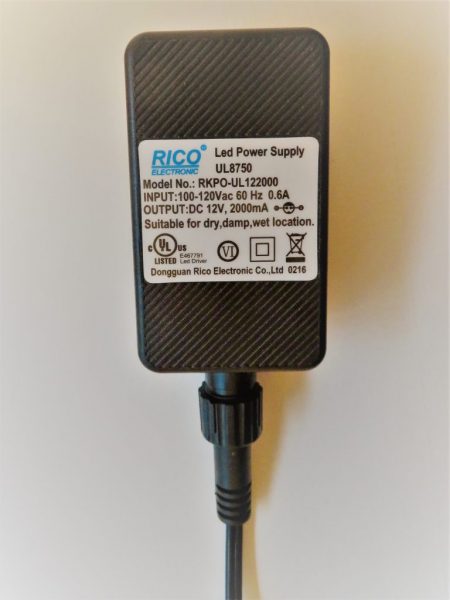
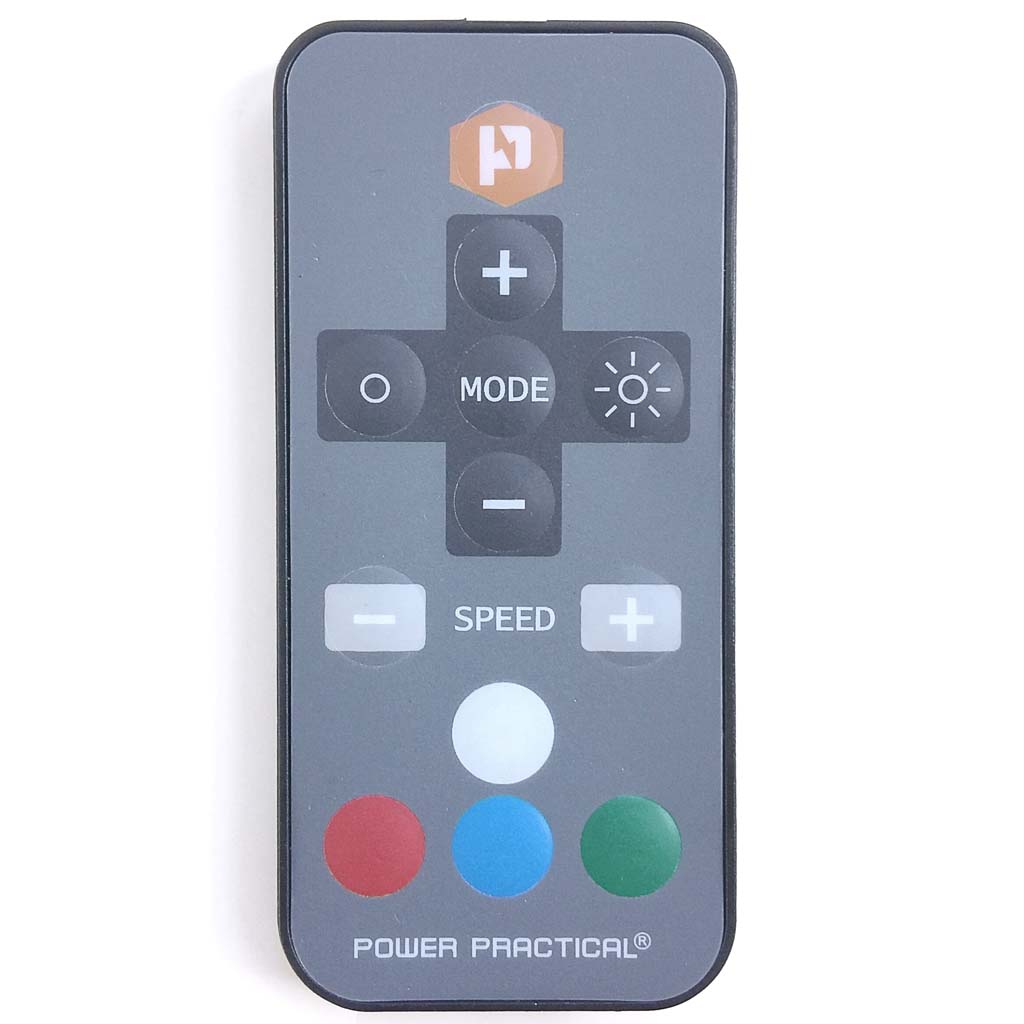
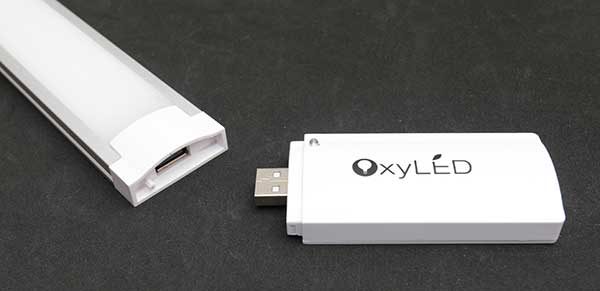
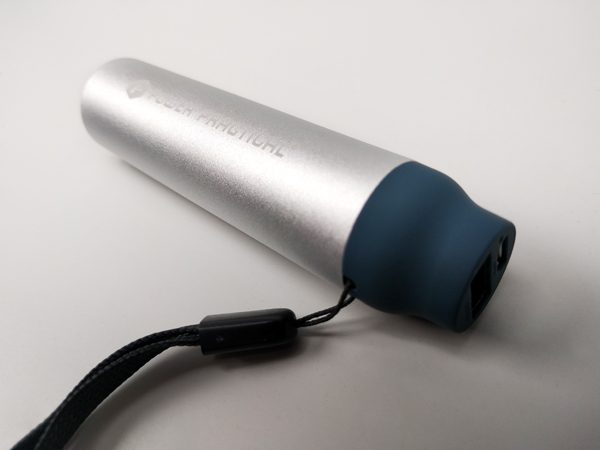
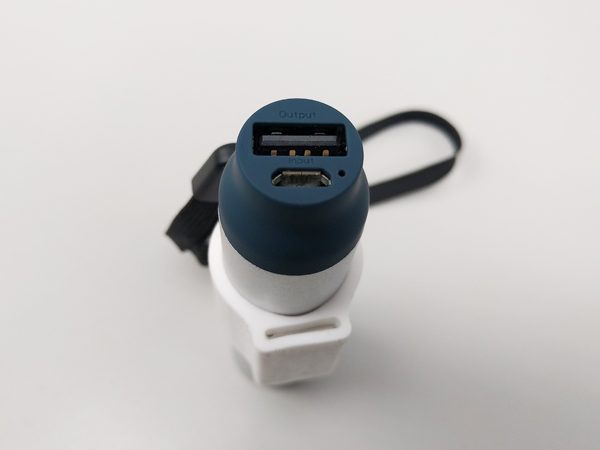
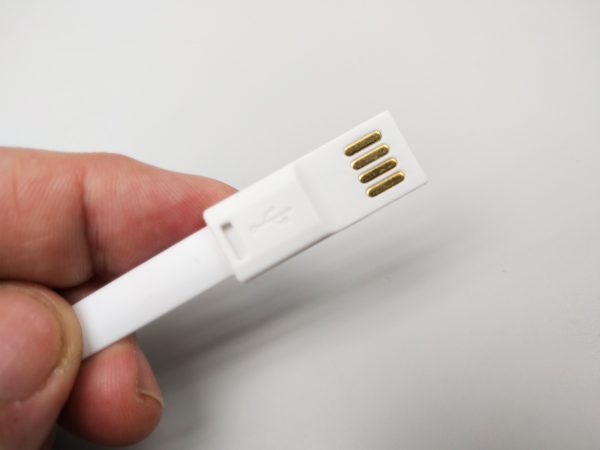
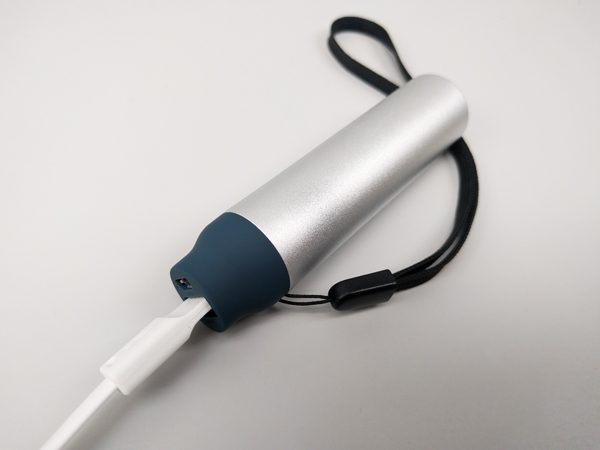
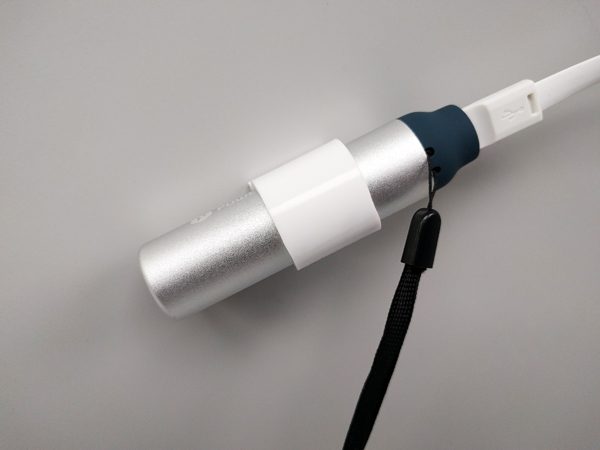
The Luminoodle wireless remote has multiple buttons used to control its various functions. 
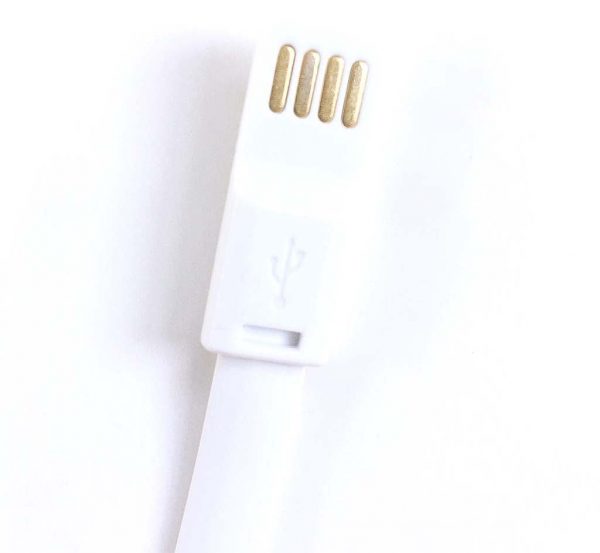
The Luminoodle is powered by plugging it into a standard USB port.  Bonus: this is a reversible USB plug!
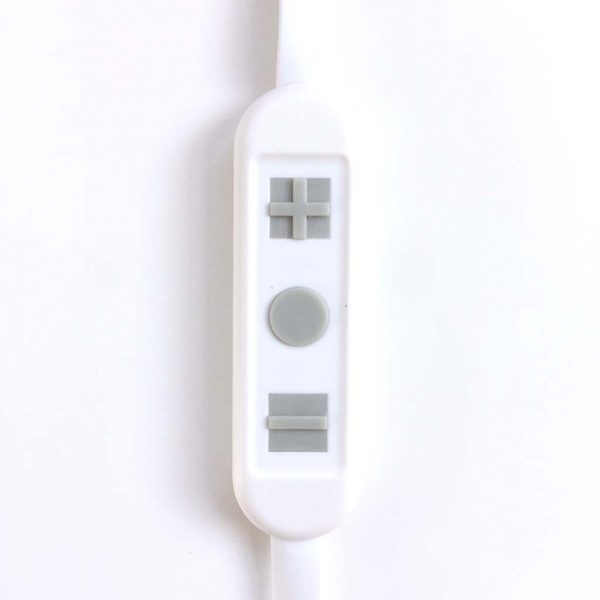
The Luminoodle can be controlled with a simple in-line remote that includes three buttons, as shown above.  
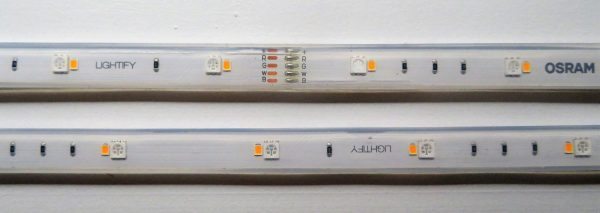
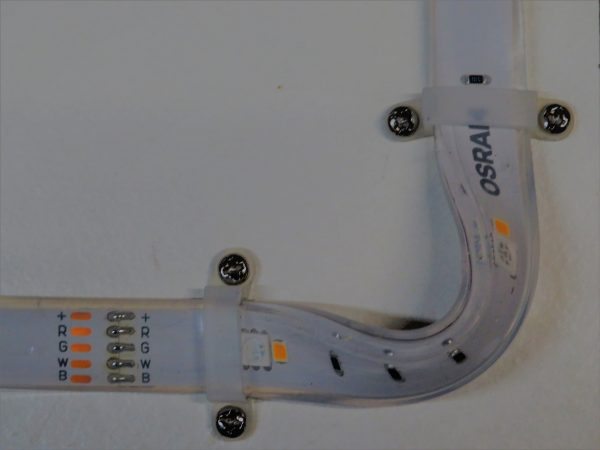
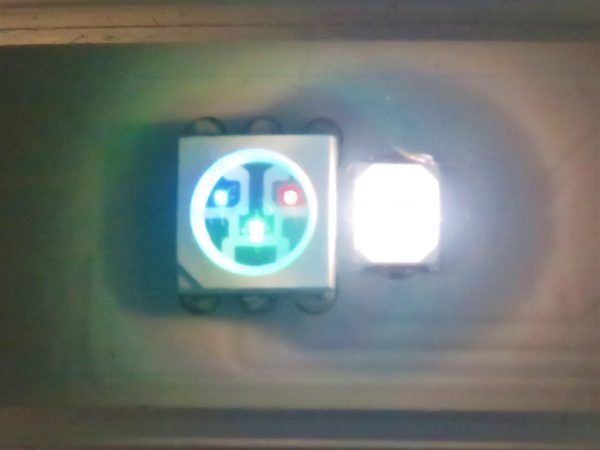
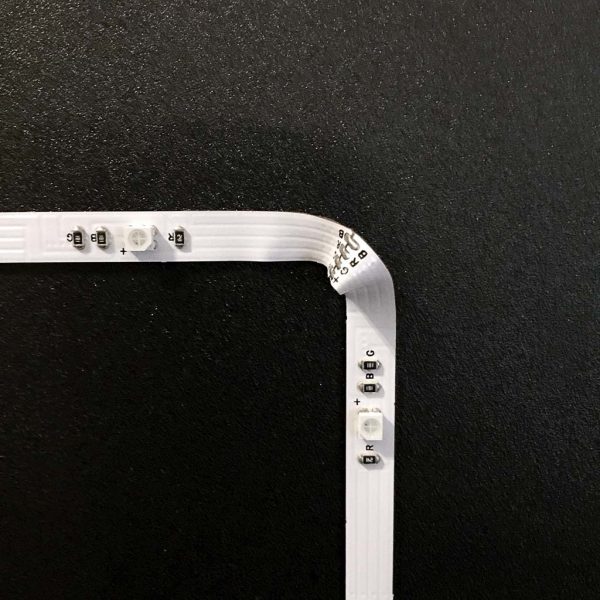
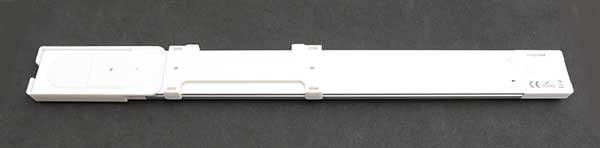
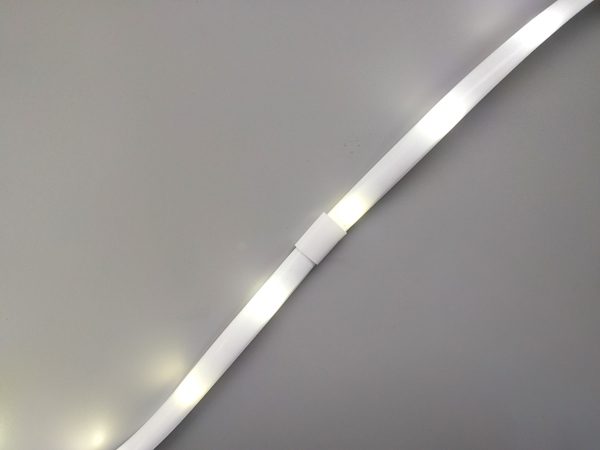
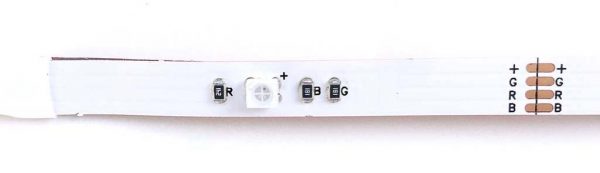
Above is a closeup of a segment of the Luminoodle’s ribbon cable.  The Luminoodle’s color illumination is driven by sets of RGB (Red Green Blue) LEDs.  NOTE: If for some reason you need to trim off the excess length of cable, the Luminoodle can be cut at any of the points where the “+GRB” copper connectors are located, as seen on the right side of the image above.
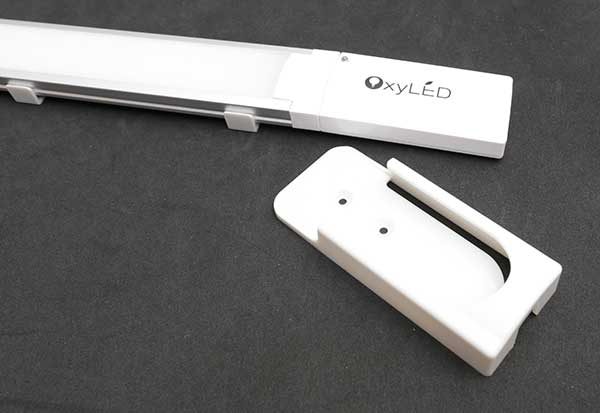
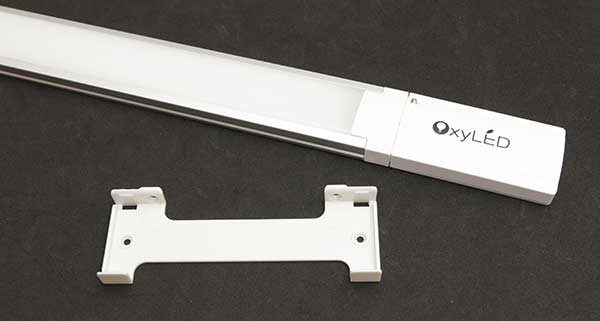
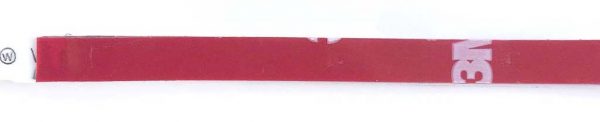
As shown above, the Luminoodle utilizes some high-strength 3D tape to attach to the back of a TV, computer monitor or any other surface.


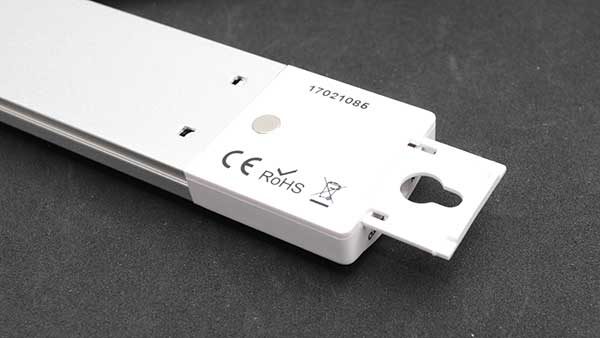
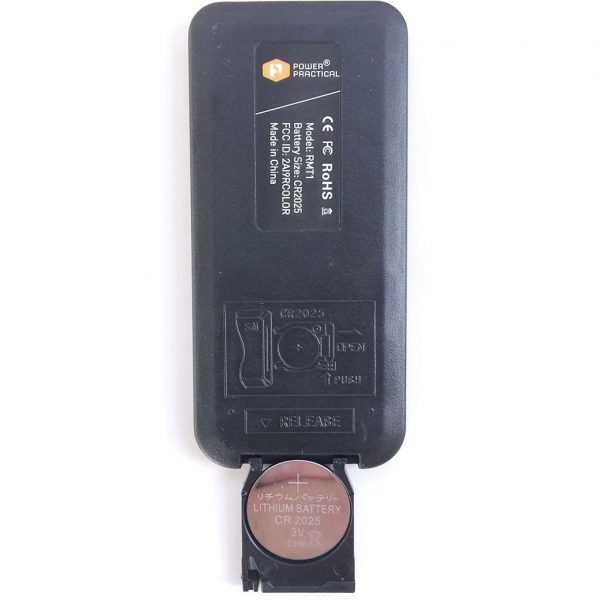
The wireless remote is powered by a single CR 2025 3V lithium battery.  The battery is simple to change; it fits into a small tray that slides into the bottom of the remote.The wireless remote is quite small and thin and very lightweight.
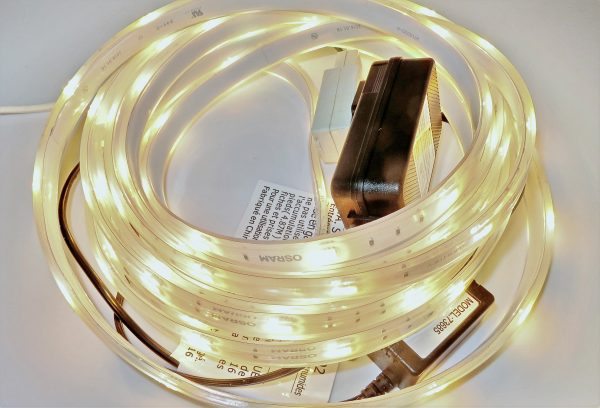
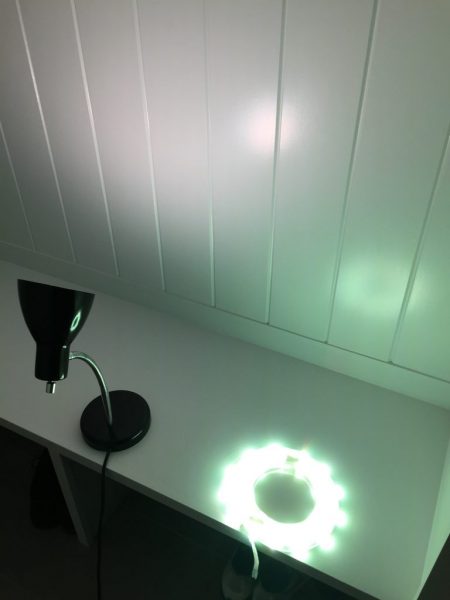
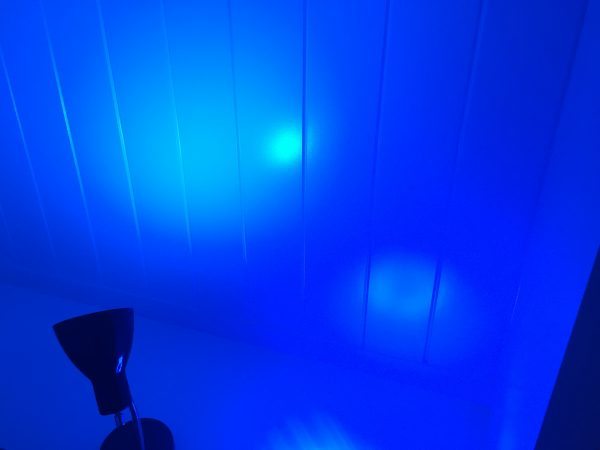
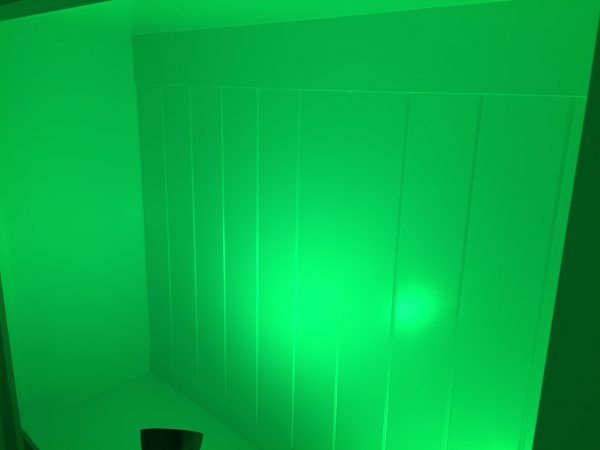
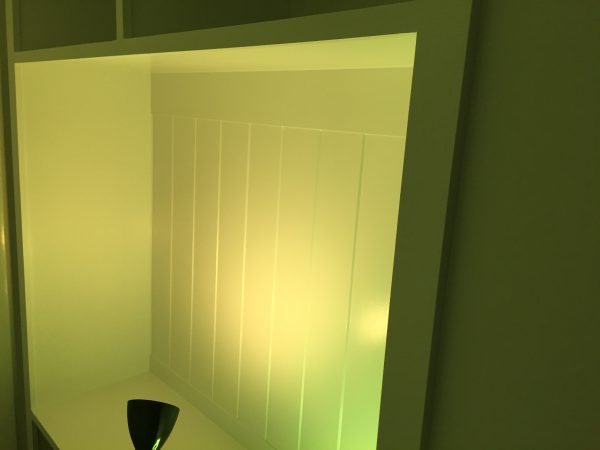
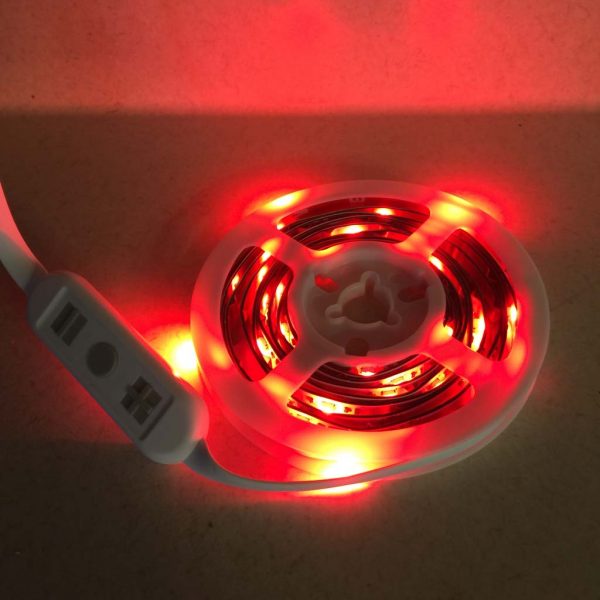
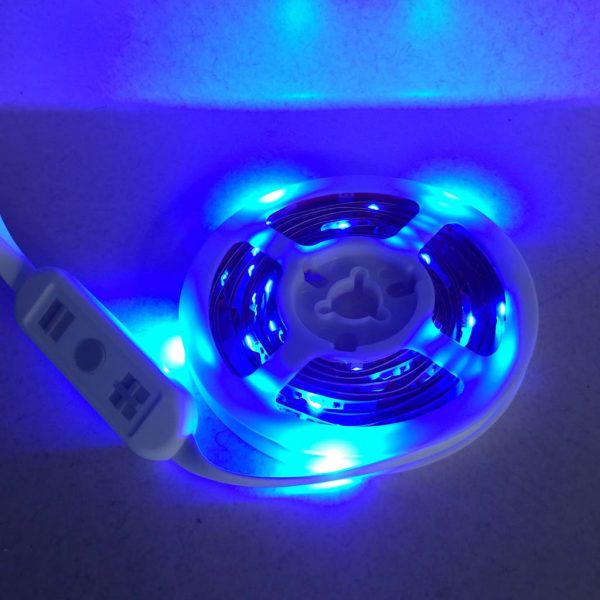
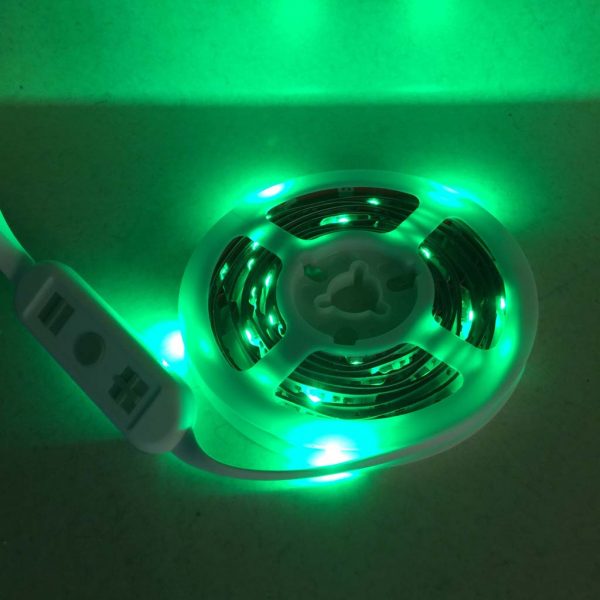
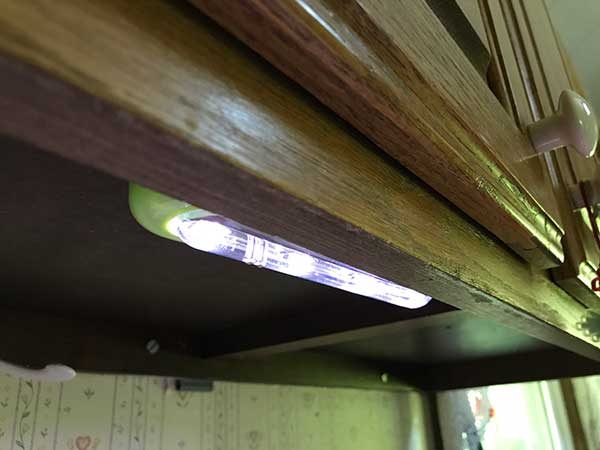
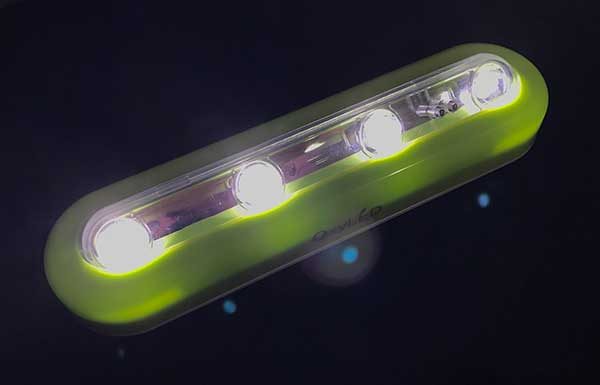
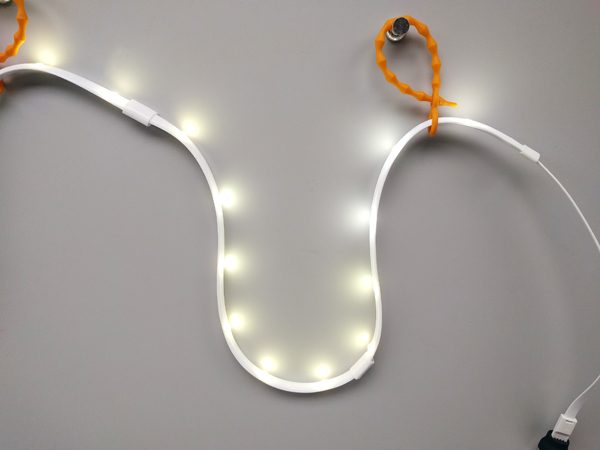
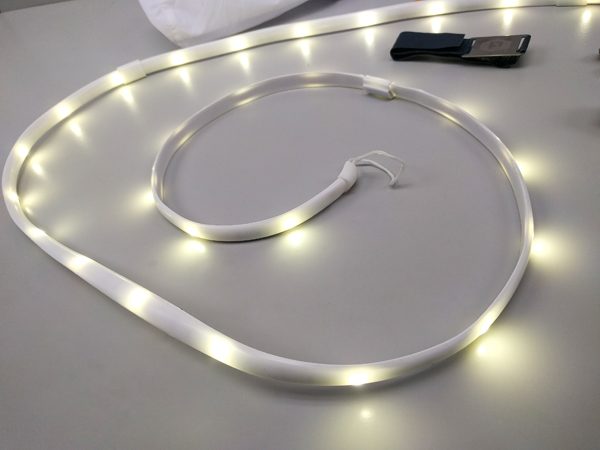
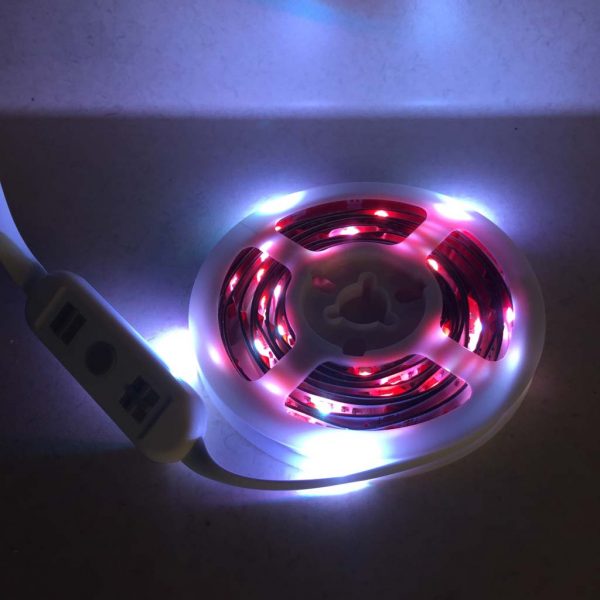
Almost immediately upon opening the pouch, I just had to power up the Luminoodle.  Without even removing it from the spool, I plugged the Luminoodle into an iPad power adapter and cycled through its four primary colors: white (above) and red, blue and green (all below).  I literally giggled to myself—it was already pretty fun, and I hadn’t even installed it yet.


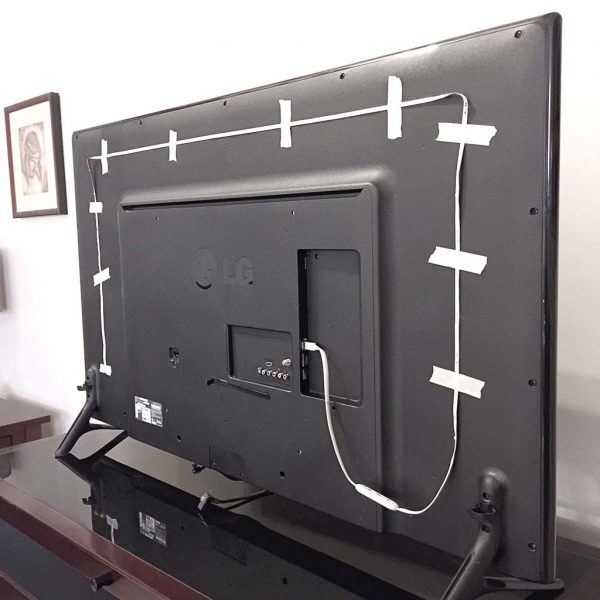
I began the installation process by turning my TV around so that I could access its rear.  My TV measures 55 inches diagonally, and the Luminoodle I was sent was 2 meters in length, so I figured it would wrap around most of the back of my TV, but probably not in a full loop.  Next, I carefully dusted the back of the TV to help the adhesive backing adhere better.  Then I used some masking tape to mock up where I would ultimately place the Luminoodle (see above image).  After a few adjustments to make it as symmetrical as I could, I was satisfied.

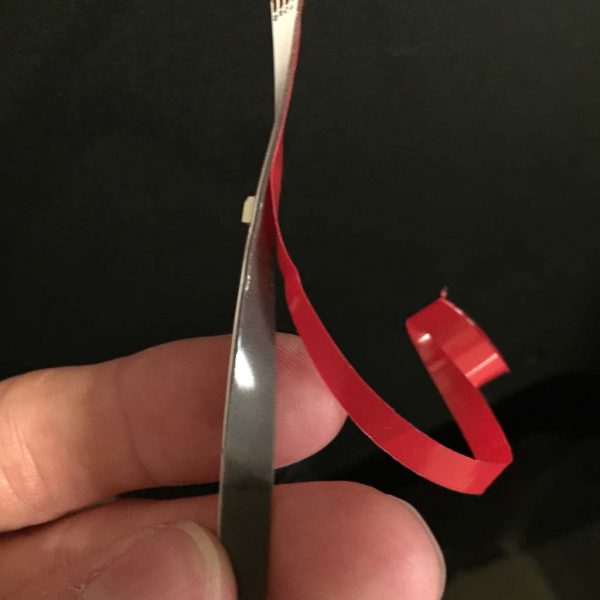
Once I was happy with the Luminoodle’s placement, I began peeling the red backing from the 3M tape, exposing its adhesive side, as shown above.  I quickly realized that this particular tape was actually a double-stick type and very grippy, which I saw as a good thing—I wouldn’t have to worry about the Luminoodle spontaneously falling off of my TV.  Also, it took me a few minutes to be able to peel the backing off without pulling the tape itself off of the ribbon cable, but once I got it started, it was fine.

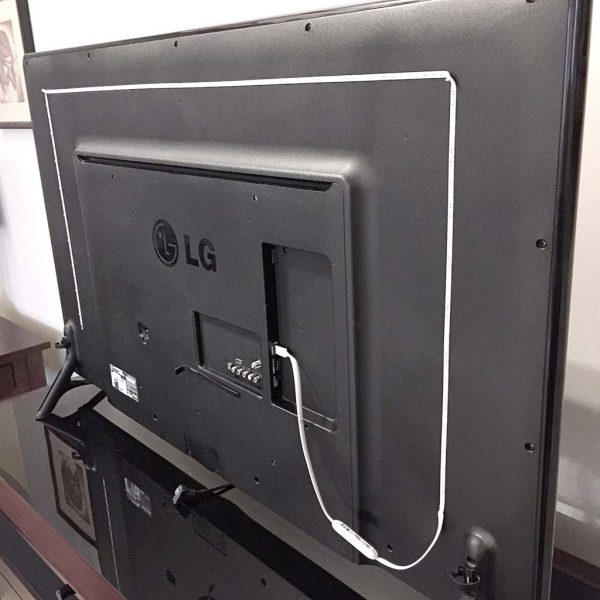
The only challenging part about attaching the Luminoodle was the corners.  Because the Luminoodle is basically a flat ribbon cable, it was impossible to get it to form a curve shape.  Therefore, I had to improvise by putting a small fold or crimp in each of the two corners, as seen in the images above and below.  NOTE: In re-reviewing the instructions, maybe I didn’t do this correctly, but it seemed to work for me.

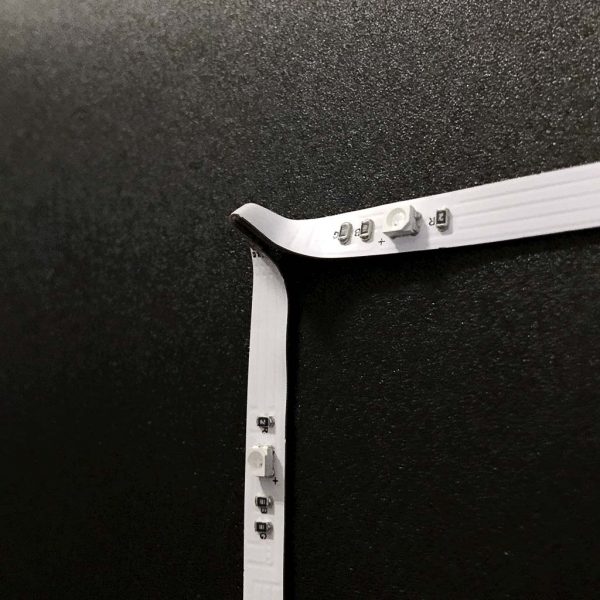
I am still a bit concerned that these corner crimps may result in a short-circuit over time, but considering that the Luminoodle on either side of the crimps is stationary and well-fixed as a result of the 3M adhesive tape, I don’t expect this to become an issue.
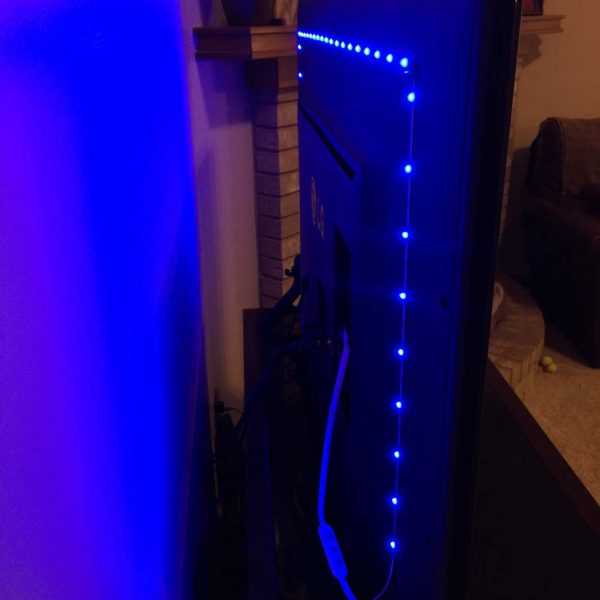
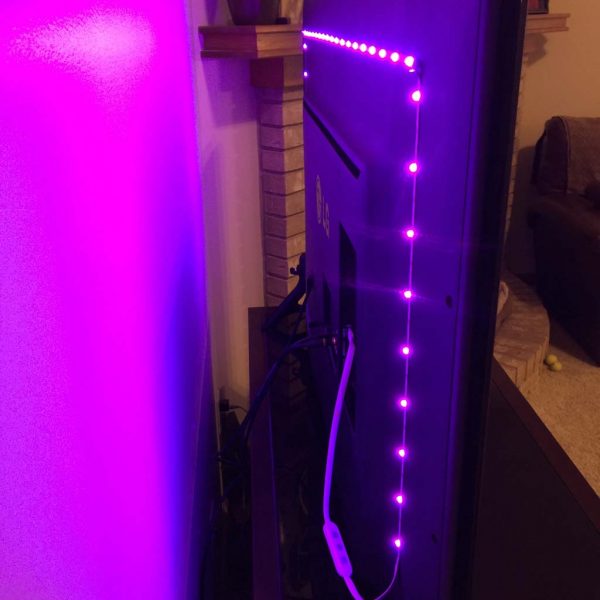
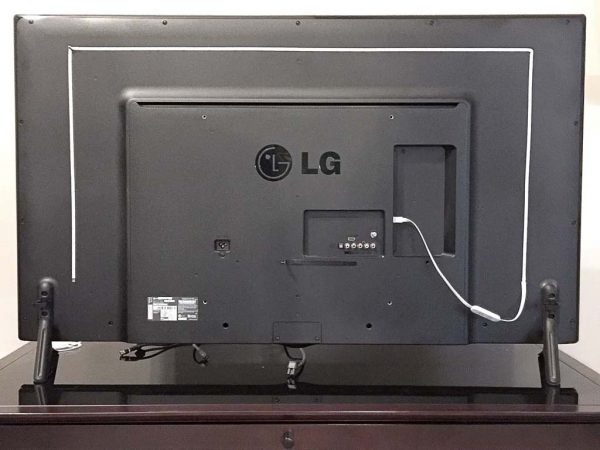
Above is a photo of the fully-installed Luminoodle.  This 2-meter long Luminoodle model ended up covering around 2/3 of the perimeter of the rear of my 55-inch diagonal TV, which I was happy with.  For TVs of different sizes, Luminoodle offers different lengths.

Above, another view of the installed Luminoodle.  I should note that taking the time to mock up the location with the masking tape actually made the final installation go very quickly.

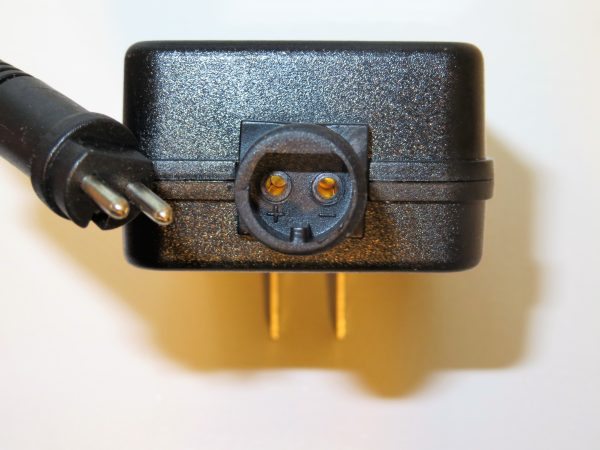
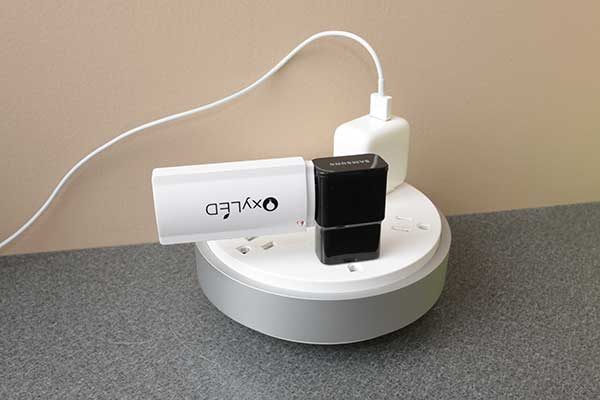
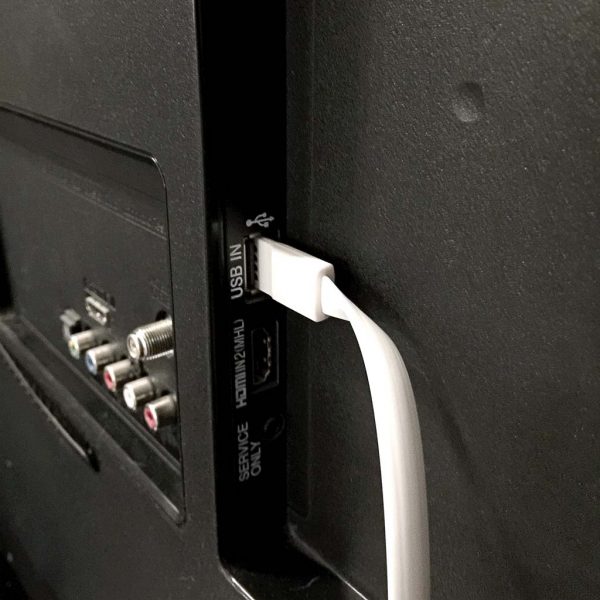
Above, a photo of the Luminoodle’s reversible USB power connector plugged into the USB port on the back of my TV.  Because it is USB-powered, the Luminoodle can be plugged into not only a TV, as I’ve done here, but a USB port on a monitor, computer or even a wall USB adapter as I showed up above.  However, plugging the Luminoodle into a TV, monitor or computer allows it to power on and off whenever you use these devices.

Above, one more shot of the installed Luminoodle before I spun it back around.  Even BB-8 is anxious to see the Luminoodle in action.

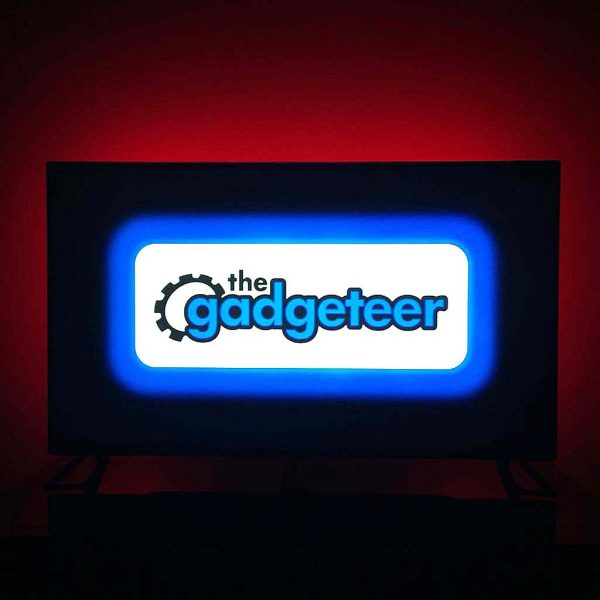
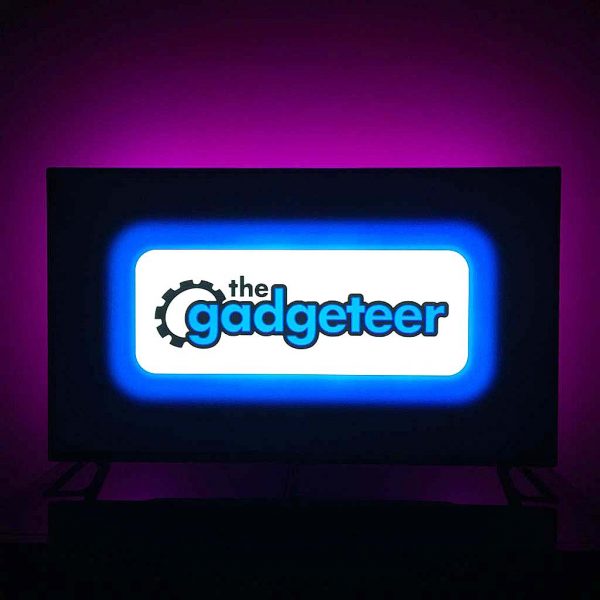
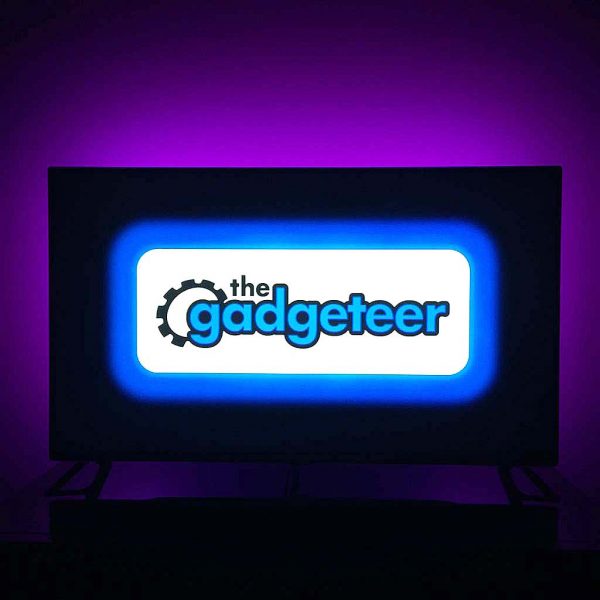
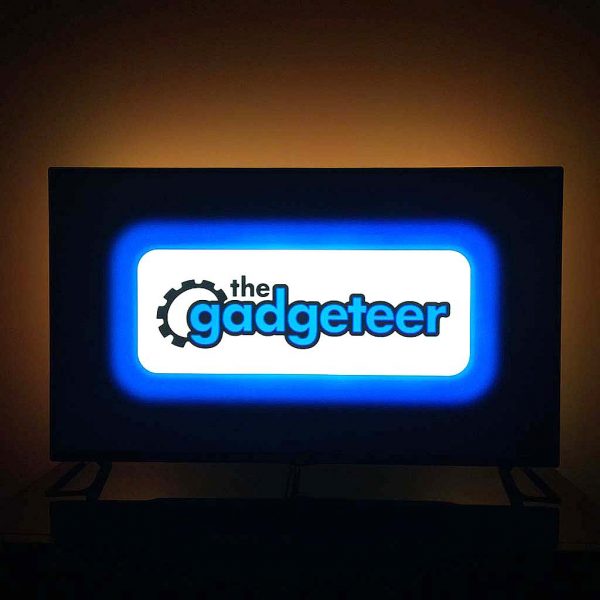
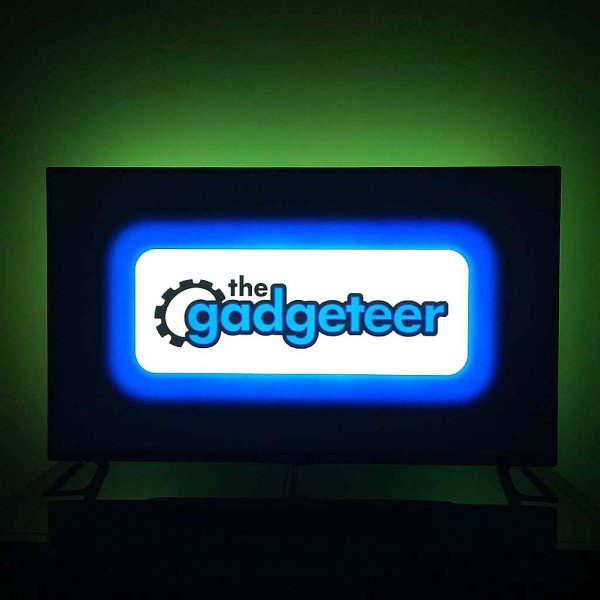
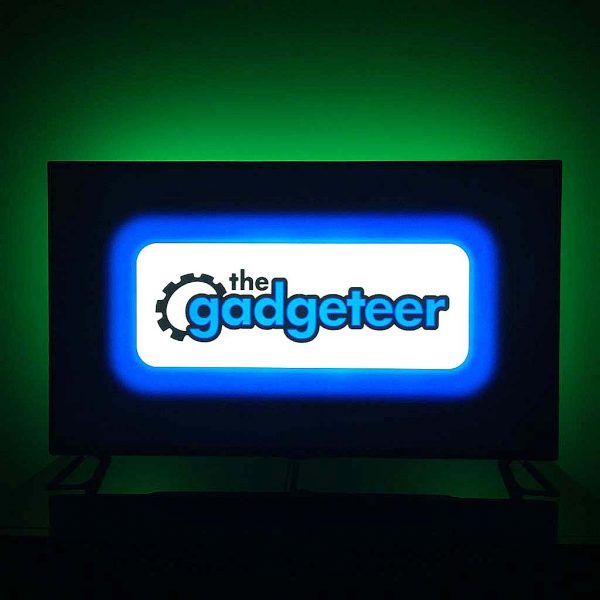
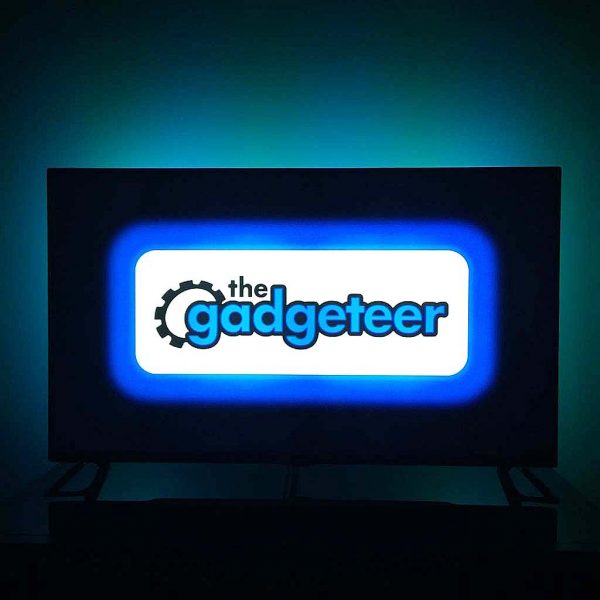
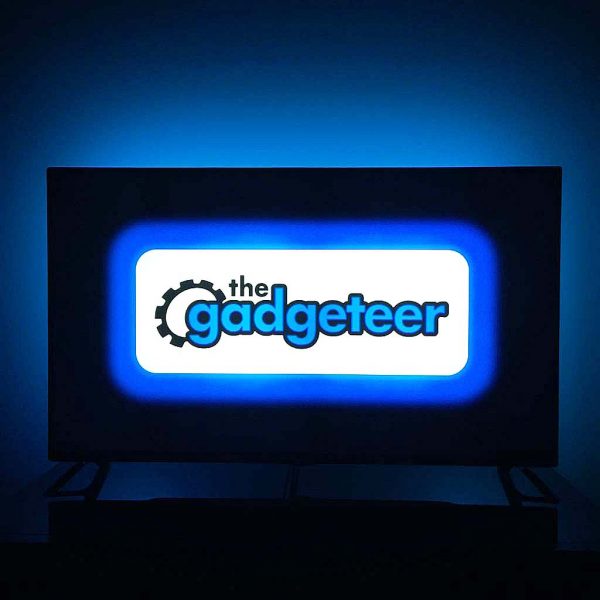
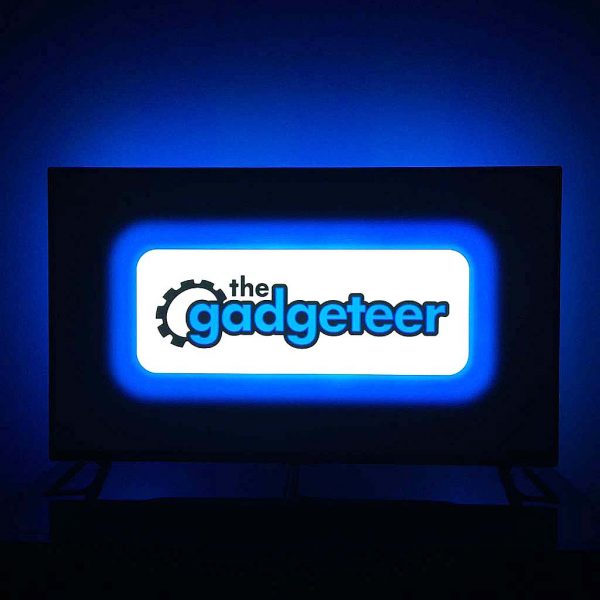
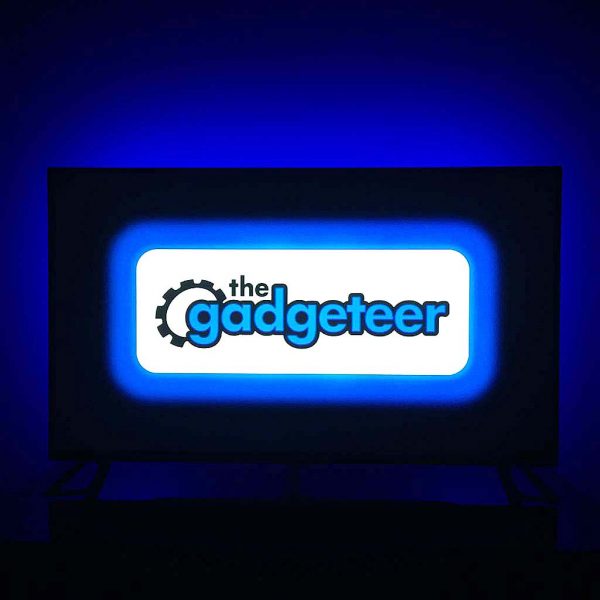
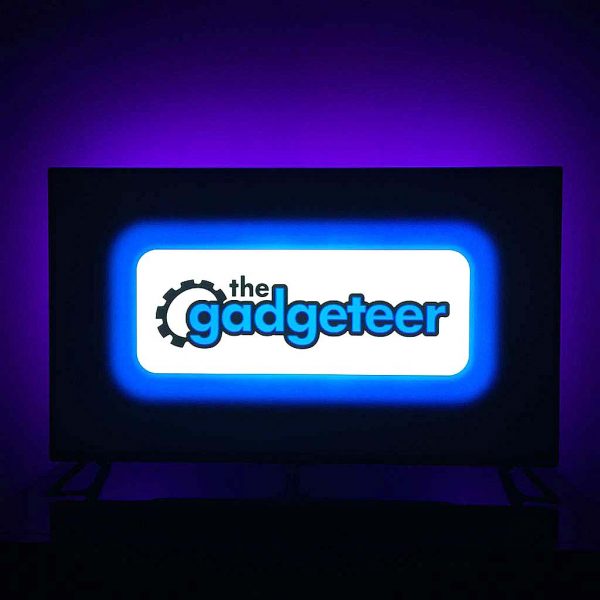
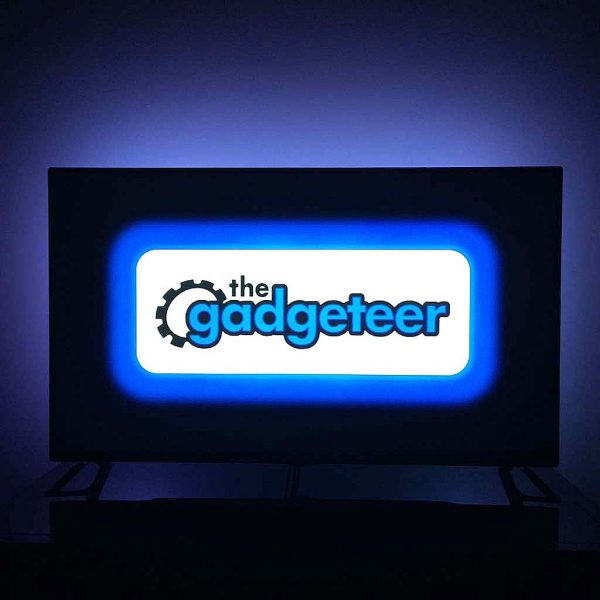
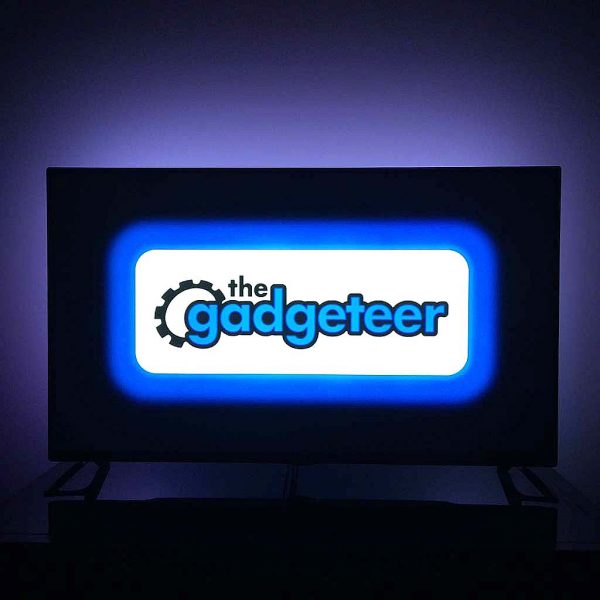
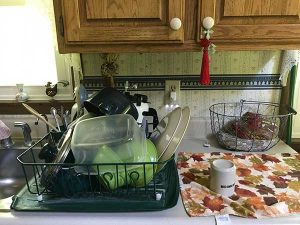
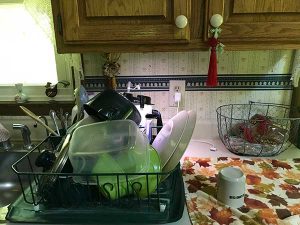
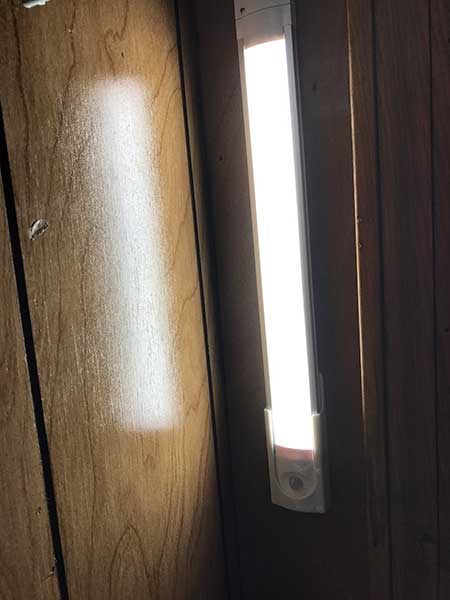
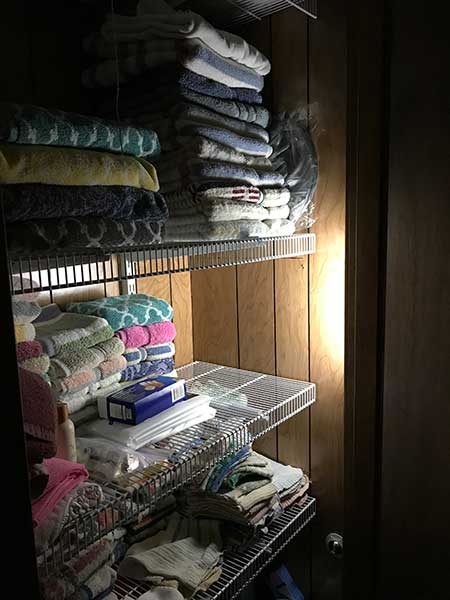
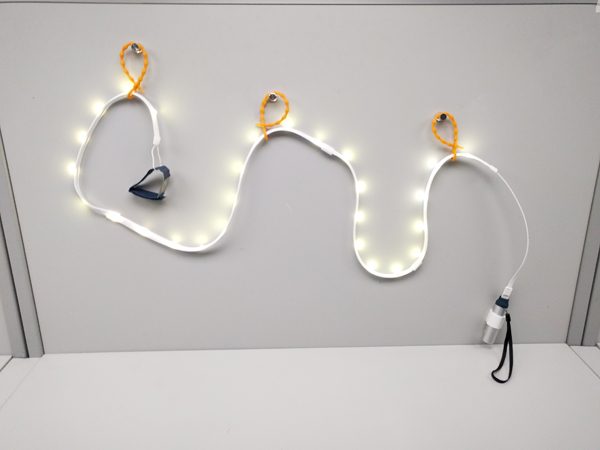
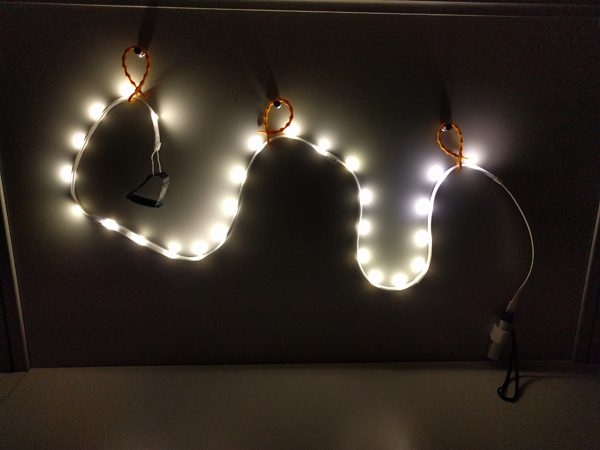
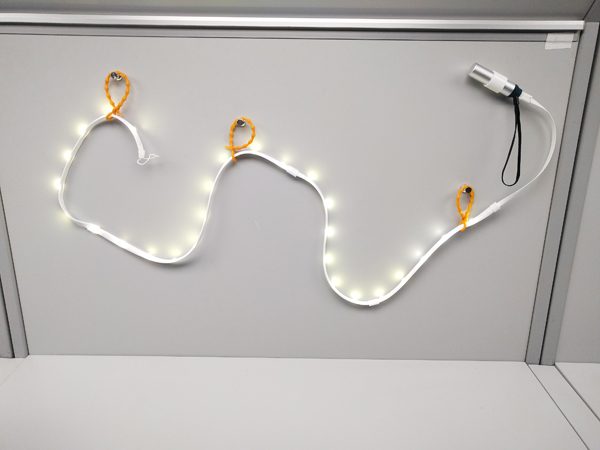
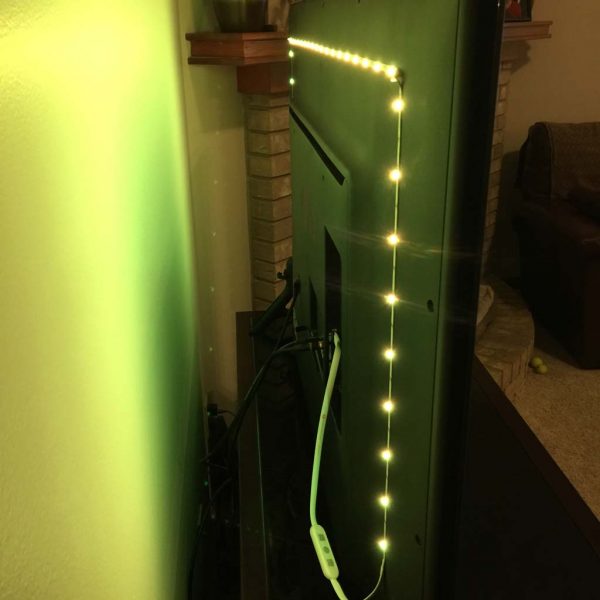
Above and in the next several pics are a teaser to give an idea of just how much illumination the Luminoodle can output.


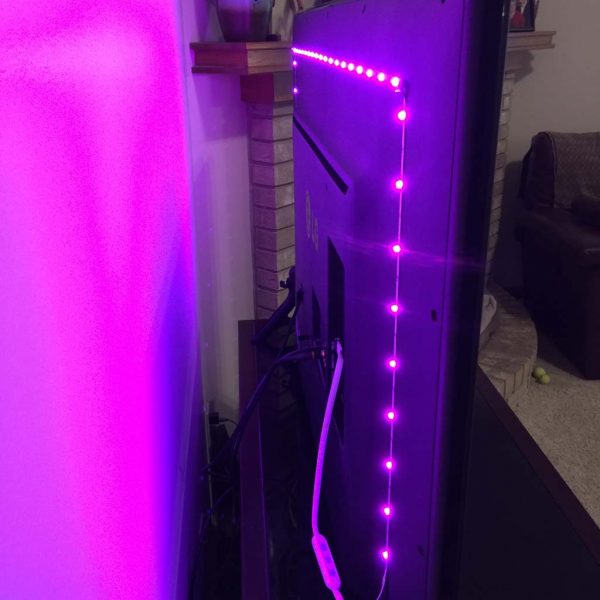
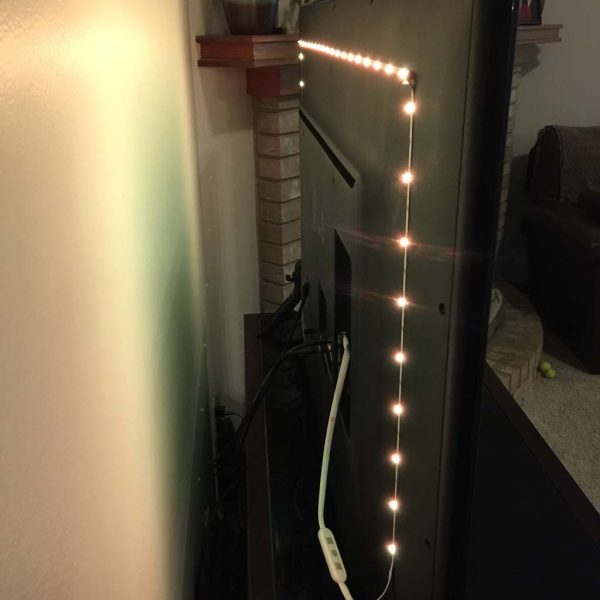
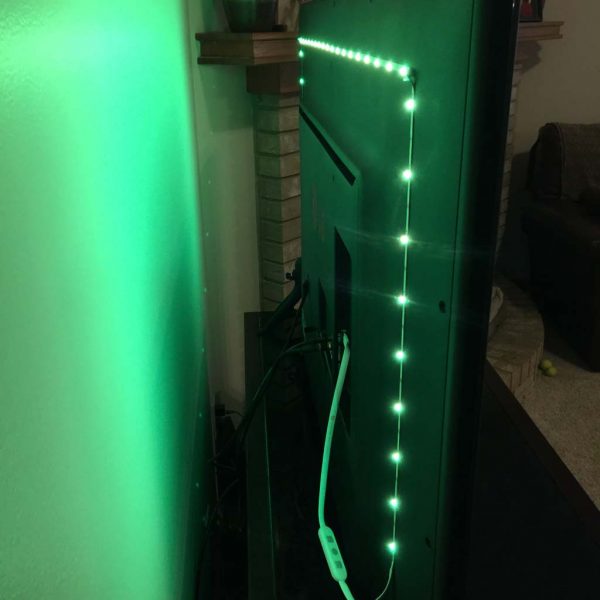
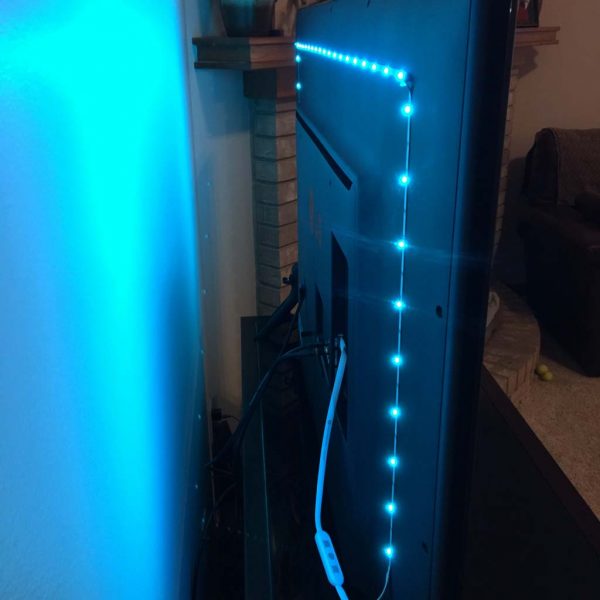
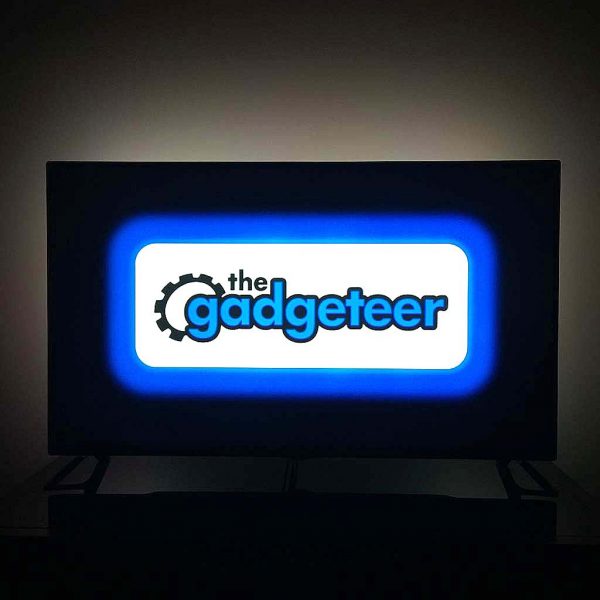
The Luminoodle has 14 different color modes plus white, warm white and cool white, and I’ve attempted to show a pic of each of them here (though I may have missed a few!).  In addition to being able to change colors, Luminoodle also has 10 dimmer levels, and I’ve shown the brightest of them here because the lowest level didn’t come through well on photos.  And finally, the Luminoodle also has 4 modes.  You can manually switch from color to color, you can have Luminoodle slowly cycle from color to color (or “Crossfade,” the mode I like best while watching TV), or you can have Luminoodle pulsate rapidly from color to color like a strobe light (party mode!), either in a single or all colors, and you can even control the speed.  The Power Practical folks tout Luminoodle’s ability to help reduce eye strain and dryness by providing a gentle ambient backlighting.  To me, this is at least a plausible concept but I have to say that I wasn’t really able to prove it either way.


Conclusion

OK, the Power Practical Luminoodle Color Bias Lighting is just plain fun.  It was easier to install than I expected (and even installation was kind of fun), and the wireless remote made it even more fun to cycle through its many colors, brightness levels, and modes.  I’m not completely sure about the claim of making my TV’s picture’s darks darker to reduce eye strain and dryness.  Maybe Luminoodle can help with that, maybe not.  All I know is, Luminoodle is easy to install and fun to use.

Source: The sample for this review was provided by Power Practical. Please visit powerpractical.com for more info and Amazon to order.


Product Information

Price: $19.99 (1 meter), $24.99 (2 meters), $29.99 (3 meters)
Manufacturer: Power Practical
Retailer: Amazon
Requirements:
  • A USB port to power the Luminoodle itself
  • A single CR 2025 3V lithium battery to power the wireless remote
Pros:
  • FUN
  • Easy to install
  • Lots of colors and modes
Cons:
  • Can only be installed once

Filed in categories: Reviews

Tagged: ,

Power Practical Luminoodle Color Bias Lighting review originally appeared on The Gadgeteer on November 2, 2017 at 10:00 am.

Note: If you are subscribed to this feed through FeedBurner, please switch to our native feed URL http://the-gadgeteer.com/feed/ in order to ensure continuous delivery.

OxyLED stick-on lights review

Adding extra light where none exists can be a huge hassle and expense when wiring, and new electrical work is concerned. An easier way is to add easy to install stick up lights like the OxySense T-01 DIY Stick-On Anywhere 4-LED Touch Tap Light and the Motion Sensor Night Light from OxyLED. Let’s check them out.

What is it?

OxyLED lights are easy to install stick up lights that don’t require you to call an electrician or your friend who works construction. Anyone can install these lights including me. All you need is a place that needs some extra light and a flat surface to stick them.

OxyLED sent me two lights. One runs on regular batteries and the other one has a rechargeable battery. Let’s take a look at the OxySense T-01 first.

OxyLED OxySense T-01 DIY Stick-on Anywhere 4-LED Touch Tap Light

The OxySense T-01 DIY Stick-On Anywhere 4-LED Touch Tap Light which I’ll just call the OxySense from here on out, is a simple light that has 4 LEDs arranged in a horizontal line.

This light has a plastic 6.89 x 1.77in case which is available in a few different colors like the green that you see here.

If you flip the light over, you’ll see two 3M adhesive pads which you’ll use to mount this light on a flat clean surface.

The back slides off to reveal the battery compartment. The OxySense runs on 3 AAA batteries which are not included. There’s also no info on the OxyLED site about how long the batteries should last.

The light bar can rotate 180 degrees so you can direct the light to the right angle. Notice the two small “pegs” that protrude from the light bar on the right side. That’s the touch switch. When you touch that switch with your finger, it will toggle the light on or off.

To install the OxySense, you insert 3 AAA batteries in the battery compartment, replace the battery cover, peel the covering off the 3M stickers and then press the light to a flat surface. As you can see from the image above, I’ve mounted the light under a cabinet in my kitchen.


How bright are the LEDs? Check out the photos above. The photo on the left shows the OxySense turned off and the photo on the right shows the OxySense with the light turned on. Drastic difference? I don’t think so. Actually, the only reason you can tell that the light is on in the images above is that it was a gloomy day when I took them. If I turn on the overhead light in the kitchen and then turn on the OxySense light, you can barely tell it’s on.

This light is only good for really dark areas. It’s not going to offer much in the way of additional lighting for an area that already has medium bright lighting.

Price: $8.99 from Amazon.

OxyLED T-04 Motion Sensor Night Light

I was more interested in reviewing the T-04 Motion Sensor Night Light than the OxySense T-01 because the Motion Sensor Night Light has a rechargeable battery, multiple ways to mount it and it’s motion activated, which means you don’t have to flip a switch to turn on the light.

The bar shaped light is 15.8 x 1.5 x 0.7 inches and comes in white.

The light comes with several ways to mount it. One way to mount it is with the small magnets on the back that will let you stick the light to a flat steel surface.

There’s also a vertical plastic clip that you can attach with screws on the included adhesive strip.

There’s also a horizontal bracket that you can also mount using screws or the adhesive strips.

Another way to mount the OxyLED T-04 Motion Sensor Light is with the slide out hang tab.

You won’t need to search around for batteries to power this stick-up light because it has a built-in rechargeable battery.  To charge it, you detach the battery pack from the end of the light and then plug it into a USB port on your computer or into a USB charging adapter.

It can take up to 3hrs to fully charge the 900mAh battery pack. An LED on the front will glow red while charging and will turn off once charging has finished.

A full charge will provide up to 4 hours of light. Take into consideration that you’ll probably not turn the light on for that full time… although you can.

Most people will probably use the light’s motion switch and only light it when motion is detected like when the door to a dark closet is opened.

The switch on the end of the light has 3 settings that you can use to control the behavior of the light. Of means it won’t light at all. On means it’s always on and Auto means it will light up when it detects motion and will turn off after 20 seconds of inactivity.

A dark closet is where I decided to mount the OxyLED Motion Sensor Light using the vertical clip.

The light has 25 cool white LEDs that put out a decent amount of light. How much light?

Here’s my hall closet with the T-04 turned off.

And here it is with the light turned on.

Although it’s twice as expensive, I like the OxyLED T-04 Motion Sensor Night Light a lot more than the OxySense T-01 light. With the T-04 you don’t have to worry about feeding it batteries and it turns off and on automatically.

Price: $19.99 from Amazon.

Final thoughts

OxyLED stick up lights are easy to install and use. I recommend the T-04 Motion Sensor Night Light. But the T-01 OxySense would work fine in a dark closet as long as you don’t forget to turn it off when you’re done.

Source: The sample for this review was provided by OxyLED. Please visit their site for more info and Amazon to order.


Product Information

Price: $8.99 – $19.99
Manufacturer: Oxyled
Retailer: Amazon
Pros:
  • Both: Easy to install
  • T-01: Easy on/off with a tap
  • T-04: Multiple mounting options
  • T-04: Motion activation
  • T-04: Rechargeable battery
Cons:
  • T-01: Doesn't come with batteries
  • T-01: Isn't very bright

Filed in categories: Reviews

Tagged:

OxyLED stick-on lights review originally appeared on The Gadgeteer on July 18, 2017 at 5:21 pm.

Note: If you are subscribed to this feed through FeedBurner, please switch to our native feed URL http://the-gadgeteer.com/feed/ in order to ensure continuous delivery.

Luminoodle LED Light Rope review


The Luminoodle Light Rope is a versatile, interesting approach to multi-use outdoor lighting. With bright output, long battery life, a number of mounting options and waterproof housing, the Luminoodle works well in most situations. Some design elements, like the lack of an on/off switch, do cause it to fall a bit short in the field. But, at $19.99 for the Light Rope alone, it makes for a fun purchase.

The Luminoodle LED Light Rope comes sealed in a brightly colored foil bag.

I tested the 5 ft. Luminoodle, it also comes in a longer 10 ft. version. I was provided a Power Practical Lithium 3400 battery pack for my tests. It’s important to note that the Luminoodle doesn’t come with a battery pack unless you order them together. The unit does work with any USB port or universal battery pack. As far as I can tell, Power Practical no longer sells the Lithium 3400 battery pack separately but does offer the Lithium 4400 battery pack, which I did not test, on their website for $29.99.

The included nylon ripstop bag is incredibly useful, not only for holding the Light Rope, mounting ties, utility loop and battery pack but also for acting as a lantern when the Light Rope is powered and stuffed inside. The strong, thin fabric of the bag diffuses the light allowing it to cast a powerful lantern-like glow.

The Light Rope itself comes with few accessories, just a reel to roll it up with and three mounting ties. There are magnetic sliders built on to the unit that helps in some mounting situations, but the ties are the primary mounting option.

The Lithium 3400 Battery Pack comes with a micro-USB charging cable, a magnetic sleeve and a utility loop. The battery pack has an attached lanyard as well.

The battery pack has a textured aluminum housing and a rubberized tip.

There are two ports on the battery pack, a standard USB output port and a micro-USB input port for charging. There is a small indicator light next to the input port. A blinking red light indicates the battery is charging, a solid red light means the battery is fully charged, and a solid blue light shows that the unit is powering something else.

The Luminoodle Light Rope has a reversible USB plug which was a handy addition and was really appreciated when I needed to connect it to the power source in the dark.

As soon as the Luminoodle is connected to a USB power source, it turns on. This made using the unit a bit problematic at times, which I will get to shortly.

The battery pack’s magnetic sleeve allows you to attach the pack to any metallic surface along with the Light Rope.

This magnetic sleeve is similar to the ones on the Light Rope itself. The magnets were not as strong as I would’ve liked. I can’t see using this attached the inside of a car’s hood as is suggested on the website.

A more effective way to attach the Light Rope to anything is with the unique mounting ties. Although, this mounting option has its own challenges.

The ties are bright orange with nubs that allow you to adjust the length by pulling them through a small loop at the end of the tie. There is a larger loop to pull the Light Rope through.

The silicone casing of the Light Rope makes it a little difficult to handle and pulling the unit through the ties and then spacing the ties properly with the magnetic sleeves on the rope was frustrating, especially in the confines of a backpacking tent in the middle of the woods.

As I mentioned, the unit powers on as soon as it is connected to a power source. The Light Rope is very bright, which is great for some uses, but not all. On the unit I tested, there is no dimmer or on/off switch.

The only way to turn off the unit is to disconnect it from the power source.

So after much difficulty hanging the Light Rope exactly how I wanted it, I realized that once I turned it off by unplugging it, the USB end of the rope and battery pack would just be dangling there, difficult to find in the dark.

I found myself reaching for my trusty EDC flashlight a lot while trying to use the Luminoodle, which kind of defeats the purpose, but it may just be that I need a few more field tests or I have yet to have a problem that the Light Rope will solve.

The Luminoodle Light Rope is definitely fun to use and I’m sure there are more effective uses for it, I just didn’t find it incredibly useful on this particular outing. The fact that it’s waterproof is great, up to 1 meter for 30 minutes, although that doesn’t apply to the battery pack, so the usage there is again limited to just being weatherproof, which is still a great feature. At $19.99 for the Light Rope without a power source, it is definitely worth picking up.

Light Rope Specifications

  • Length: 5 ft. (1.5 m)
  • Light Output 180 Lumens
  • USB Input 2.5W (5V,0.5A)
  • Weight 133 g (4.7 oz)

Lithium 3400 Battery Pack Specifications

  • Capacity: 12.5Wh (3350 mAh @ 3.7V)
  • Input: Micro-USB 5W (5V,1A)
  • Output: 6W (5V,1.2A)
  • Weight: 4.2 oz
  • Dimensions: 3.25 in x 0.9 in

Source: The sample for this review was provided by Power Practical. Please visit their website for more info and Amazon.


Product Information

Price: $19.99 for 5 ft. Luminoodle Light Rope Only, $34.99 for 5 ft. Luminoodle Light Rope and 4400 Battery Pack
Manufacturer: Power Practical
Retailer: Amazon
Requirements:
  • USB Battery Pack or Power Source
Pros:
  • Long battery life
  • Many uses
  • Waterproof/Weatherproof
Cons:
  • No On/Off switch
  • Weak magnets
  • Unwieldy

Filed in categories: Reviews

Tagged:

Luminoodle LED Light Rope review originally appeared on on July 3, 2017 at 8:29 am.

Note: If you are subscribed to this feed through FeedBurner, please switch to our native feed URL http://the-gadgeteer.com/feed/ in order to ensure continuous delivery.

LEDVANCE’s Sylvania Lightify Gateway review

The LEDVANCE Gateway is a smart hub that interprets commands from a Wi-Fi network and transmits them to devices on its ZigBee network, and also monitors the status of those devices and reports it to authorized users. It is metaphorically the jam that holds all of the intelligent LEDVANCE products together. But, like the jam that holds your sandwich together, there are competing brands to choose from and different qualities of each. What you choose depends on your preferences and, to some extent, budget. Ok, enough of this metaphor, I’m getting hungry and want to check out this hub. Let’s see how it works and what it has to offer.

You may have noticed that the manufacturer listed in the title of this post is LEDVANCE but the device is branded with the Osram trademark. This is because in January 2016, Osram GmbH spun-out some of its business units into a new company named LEDVANCE. The portfolio of the new company includes, amongst other units, connected and intelligent lighting solutions for smart homes and smart buildings. The app on the iTunes store and the Google Play site are still branded as Osram, even though the iTunes app has been revised 6 times and the Android app 7 times since the rebranding.

The actual product is a 60 mm wide, 60 mm high, and 41 mm deep (not including the outlet prong) box. The plug is a 15 amp non-polarized design so it permits the most flexibility when installing it into your chosen receptacle. When installed and configured correctly the symbol on the front (which I think looks like the alphabet used by the Predator) glows green with just enough brightness that it is easy to tell it is functioning during the day but isn’t obtrusive at night. When the hub is offline the symbol glows orange/amber and when it is logging into the WI-FI it blinks orange/amber. The gateway requires 5 watts, so that’s 3.65kWh/month, or less than a dollar.

The set up process is easy but sort of lengthy, the video that they send to you in the sign-up email is not found on YouTube, and the only other YouTube videos are in German. So, I’ll describe the setup here and provide some pictures to go along with it for those of you who don’t sprechen Deutsch. These are iPhone screenshots but the process on the iPhone and Android is very similar. I’ve covered the MAC addresses, SSID’s and passwords used with The Gadgeteer logo for security. Download and install the companion app before plugging in the hub. Current versions are 32 MB for iOS and 27 MB for Android. The first step is to scan a QR code on the back of the hub. This allows the app to look up the SSID and password of the hub’s built in ad hoc Wi-Fi network. Alternatively, you can type in the 13 character alphanumeric serial number. (If you plan to integrate this into Amazon Alexa, write down the serial number; you’ll need it later, but you’ll also need to keep the hub plugged into the wall.)

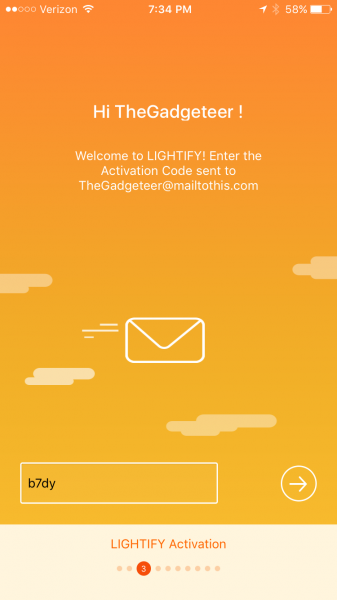
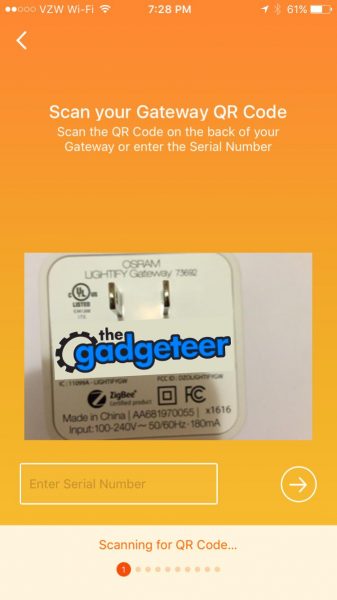
Assuming you don’t have an existing account you must create an account here and verify that it is a real account. I just used a throw-away Mailinator account for this demo. The account will be verified so you need to use an account that you can actually access. You may share this account login information with up to four other devices to permit shared operation of the hub. App settings will be synchronized across each device through the internet.

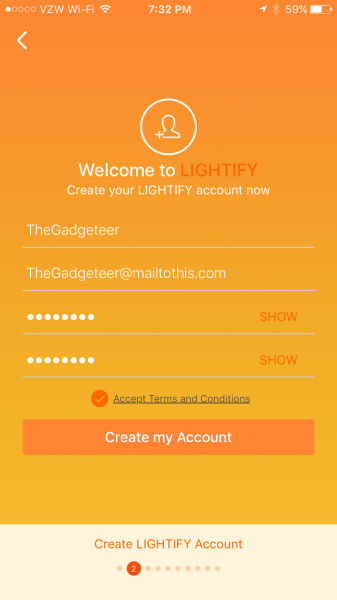
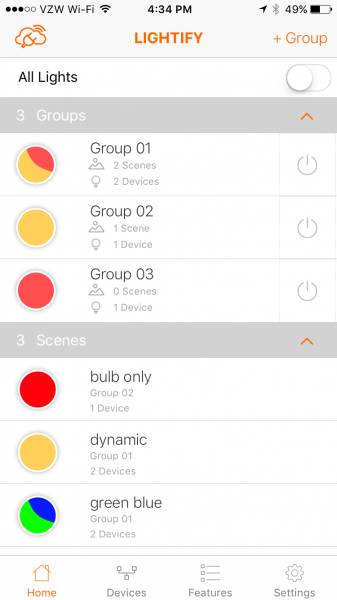
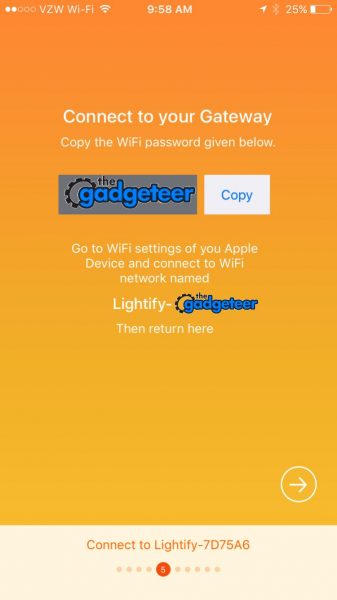
 After creating the account you can finally install your hub. The unit will power up and start an ad-hoc Wi-Fi network. The app will conveniently display the password to the network and display the name of the SSID you need to join. Task switch to the settings screen and join the provisional Wi-Fi network.

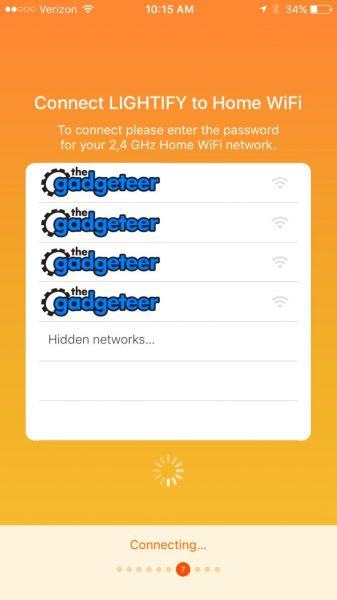
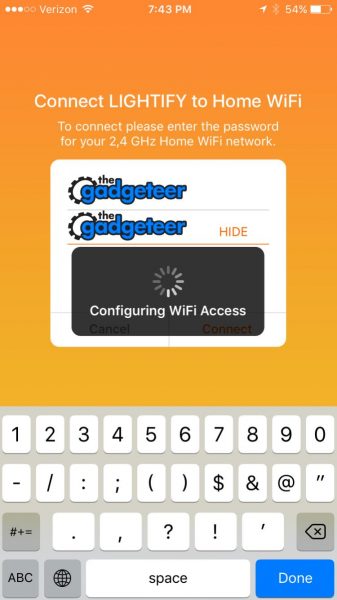
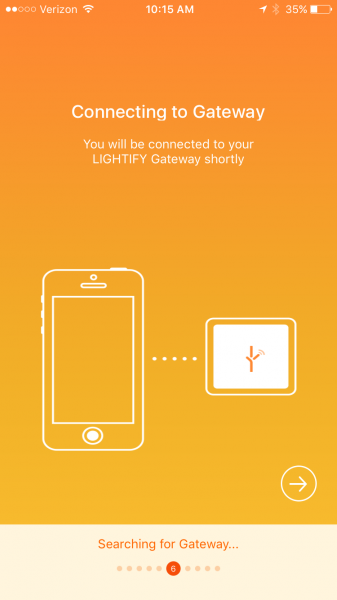
  After task switching back to the app, and after the phone is connected to the hub, it will search for 2.4 GHz Wi-Fi hotspots (or 2,4 GHz in Europe) and display the detected SSID’s on the next screen. If you don’t broadcast your SSID you can still type it in by selecting “Hidden Networks”.

Here you will provide the password to your SSID and the hub will associate itself with your home Wi-Fi network. Mid last year, this article was published on how there were security flaws in the Osram app and how the home Wi-Fi password was not encrypted in the app. The app has since been patched and this security flaw has been fixed. Also, unlike SmartThings, there is no option to run the hub off of a wired connection and there doesn’t appear to be a battery backup to the AC power.

Once the hub has associated itself with your network it will ask you to plug in your devices. Turning them on, off, and on again should signal the controller within each to join the newly established network. ZigBee devices can only be part of one network at a time. If the lamp is not responding then you may need to turn it on for 5 seconds and off for 1 second 6 times in order to reset the controller. Other devices may have a hard reset button.


After the devices are found you are brought to the home screen.  This will show two empty categories: group and scene. Groups are collections of devices that you can turn on or off at the same time and apply dynamic lighting presets to all at once (more about this later). Scenes are groups of devices that have preset settings, but not each device in a scene has to have the same settings. Each device in a scene may have independent or shared correlated color temperature, brightness, or hue. Think of a scene in a theatrical production: there may be some bright lamps with red filters and some dim lamps with blue filters. This arrangement could be set by selecting one scene button on the Lightify app.

The cloud with a plug on top of it means that the hub is communicating with the smartphone/tablet using a local Wi-Fi router and also an internet connection. If the smartphone/tablet is not using the same router (if Wi-Fi is turned off on the phone) then the plug disappears. In this case there is about a 0.2 sec delay between pressing the on button on the phone and the light turning on/off. If communication through the router is used then the response time to the button press is almost instantaneous.

To create a group press the + group in the upper right. it will take you to a screen where you can enter an group name and select which device, from amongst all the devices on the network, belong to the group. Once the group is created return to the Home screen. On the home screen the switch to the right of each group looks like a Decora switch that is pressed in when active and flat when switched off. Pressing the circle to the left of the group name will take you to a device settings screen where the settings for each or every device in the group may be set. (More about this in the next paragraph).   On the device setting screen there will be a + Scene button on the top left which you may use to save the current condition of the devices within the group. Pressing the name on the home screen will allow you change the name and set the members of the group. Once a scene is created the color of the button on the home screen will roughly match the colors of the devices in the scene.

On the devices screen, each device is listed in a separate category. The color of the icon roughly matches the selected hue of the bulb. Pushing either the icon or the name brings you to the device settings screen.

The device settings screen has a main light control wheel that features rotary sliders around a central on/off pushbutton. Adjusting the correlated color temperature sets the hue to the correct color, from cool blue to warm orange. The intensity may be adjusted independently of the hue. Using the outermost slider turns the display into a color wheel which allows the user to specify the hue and saturation. If the Lightify lamp is lit while you are adjusting these settings it changes color according to your selection. The lamp is very responsive to your color and brightness selections which makes finding a lamp color an easy experience. Unfortunately, there is no record of actual RGBW values. Pressing the device name at the top of the screen allows the user to edit the name of the device. Pushing the rocker switch icon at the top left allows the user to change the default appearance of the device. There are three more buttons at the bottom of the screen: Presets, Favorites, and Camera.

The presets screen shows 14 different color presets. There are three presets that are static color settings: plant light, active, and relax. There are two long-period dynamic lighting presets called day light and good night light. The good night light will fade to off in a user-set amount of time and the day light will simulate the color of sunlight throughout the day. The other light patterns are short-period dynamic lighting presets and include Fireplace, Ocean, Evening, LIGHTIFY Loop, Candy, Polar light, White and White, Activate, and Chill Down. The speed of the color change may be set for each dynamic preset and the brightness may be changed for all of these except for Activate and Chill Down.

The color loops and the dynamic lighting are unique features of the Lightify gateway. I was unable to create this with the SmartThings hub CoRE programming, but it may be duplicated if the actual header information is programmed into a SmartThings program. Still, this would take some above average programming knowledge. The main differentiator is the speed at which colors may change. Note that the presets may not be saved as favorites, may not be saved as scenes, and will not resume if the bulb is turned off. They may only be set from the device screen or the group screen.

The favorites button lists the 16 favorite user settings for each device. The favorites may be saved by pressing the circle inscribed heart to the top right of the setting wheel. Note that when I added my Android phone account to the iPhone account that the existing favorites disappeared. The favorites show the approximate hue and brightness, but there is no way to name the favorite.

The camera icon allows the user to match the hue of the light to a grouping of pixels in a stored image or a captured photo. This is a neat trick but I believe it is mostly a tool to demonstrate the range of the RGBW lighting capabilities.

There are six more capabilities of the gateway. Four of them are under the Features menu: Scheduler, Wake-up light, Vacation Modes, TV Simulation. The scheduler will simply turn on the light for a predetermined period every weekday the scheduler is selected. Any number of schedules may be set, so more than one on-off cycle may be scheduled per day. The wake up alarm will dim the selected light from a low brightness to bright daylight and then switch off at a desired time. The smartphone/tablet that created the wake-up event will signal an alarm (alarm and tickling [sic], digital alarm clock, fog horn, old alarm clock and ringing, seagulls on beach, whistle, or wild birds). The acoustic alarm won’t sound if the smartphone/tablet is in silent mode. The vacation mode will turn on and off the lights between every 5 minutes and every 2 hours (user-selectable) in the time period selected. Finally, there is a TV simulator that uses the color loops to simulate a TV being watched within a user-selected time period.

The settings menu allows the lights to work with Nest home and away profiles so that different lighting can be set to each mode. The settings screen on the iPhone allows customization of the today screen widget, and a widget is also available on Android, that allows the user to set group and scene lighting from outside of the app.

Lastly, the gateway can be integrated with Amazon Alexa smart home automation to permit devices to be turned on and off and set to a percent intensity. Sadly, Alexa doesn’t allow the setting of color or correlated color temperature. Alexa only controls devices through the gateway; if you want to control groups you need to define them within the Amazon smart home settings. Also, since you will have to speak the name of your device, make sure it is one that you will be able to roll off your tongue. In the images above I have FlexOut RGBW 01 listed as a device but I renamed this to Strip for use with Alexa.

In conclusion, the LEDVANCE Lightify Gateway provides flexibility and creativity in the operation of lights and plugs. The gateway provides limited automation in the form of turning on and off lights and plugs using ZigBee switches and sensors, programming lights and plugs using timers and alarms, and coordinating modes with a Nest thermostat.  The gateway also allows limited control with Amazon Alexa. More advanced automation, such as integration with IFTTT, Stringify, or other home automation devices is not supported. However, this gateway is available for $32.59 alone, and is often packaged with LEDVANCE lamps for even larger savings. If you want to explore home automation without breaking the bank, and if you want flexible, responsive, and creative lighting capabilities from the palm of your hand, then the LEDVANCE Lightify Gateway may be just what you’re looking for.

Source: The sample for this review was provided by LEDVANCE Sylvania. Please visit their site for more info and Amazon to order.


Product Information

Price: $32.59
Manufacturer: LEDVANCE Sylvania
Retailer: Amazon
Requirements:
  • Requires active WiFi Network and LIGHTIFY Compatible ZigBee Products
  • Free LIGHTIFY App runs on Apple iOS7 or above and Android 4.1 or above
Pros:
  • Inexpensive
  • saves favorite settings
  • color looping
  • scheduler
  • Nest and Amazon Alexa enabled
Cons:
  • No IFTTT or Stringify

Filed in categories: Home and Kitchen, Reviews

Tagged: ,

LEDVANCE’s Sylvania Lightify Gateway review originally appeared on on April 3, 2017 at 10:03 am.

Note: If you are subscribed to this feed through FeedBurner, please switch to our native feed URL http://the-gadgeteer.com/feed/ in order to ensure continuous delivery.

Sylvania LEDVANCE LED Flexible Strip RGBW review

This is the second in a three part review on LEDVANCE lighting and home automation products. The first review was for LEDVANCE’s Sylvania Lightify A19 LED bulb review. This review focuses on the LEDVANCE LED Flexible Strip RGBW. It is a 16-foot flexible strip that can be laid out to fit a variety of locations. The strips can be set to any color and can also tune white, changing from a correlated color temperature (CCT) of a warm 1900K all the way up to a daylight simulating 6500K. While people have been decorating their houses with white LED string lights for years, this product has some unique advantages if you control it with an IFTTT/Stringify integrated hub. Read on to see what I think…

Parts of the system

The light strip is powered by a 12 VDC transformer and controlled by a logic circuit. Both these parts are external to the light strip so the complete unit is made of 3 distinct parts: the transformer, the control module, and the light strip.

The transformer is a rather large unit at 4 3/16″ long, 2″ wide and 1 5/16″ deep (not including the ungrounded prongs). It has a circular threaded 2 contact connector on the bottom to which the cable to the lamp connects.

Because of the length of the connection and strain relief on the cable, after connecting the transformer, about 5 1/2″ will be positioned straight down from the top of the transformer. this may be a challenge for most weatherproof enclosures. While the cord does not need to be installed within the enclosure you may find that it prevents plastic shrouds and weatherproof doors from fully closing. The transformer output is rated for 12 VDC and 2 amps, which equals 24 watts, but even though the packaging and product code indicate 24 watts, the warning label attached to the light strip says that the lamp draws 29 watts.

There is about 2 feet of power cord between the transformer and the control module for the light strip. The control module is 2″ long, 1 3/8″ wide and 7/8″ high black plastic box that is DC powered and outputs the correct voltage and current for the red, green, blue, and white LEDs in the light strip. I suppose that the ZigBee radio is in this box too, so it should be mounted where it will be free to communicate with the ZigBee hub.

The light strip connects to the control module with 10″ of cable. The light strip is comprised of 16′ of rectangular silicone that contains a flexible copper strip with resistors and surface mounted LEDs. Due to the wiring connections and the extra length of the ribbon on each end, the overall length of the light strip is 16′ 1 1/2″ and it measures 9/16″ wide by 3/16″ deep.  The electronics of the unit are composed of eight 2′ sections. Each section contains 12 resistors and 24 LEDs: 12 RGB LEDs and 12 white LEDs. The LEDs are arranged with a RGB LED adjacent to a white LED and each grouping is spaced 2″ apart. All the LEDs are mounted on one side of the strip, which also acts as a heat sink for the components. The picture above shows the light strip bent back on itself and includes details of how the LEDs are grouped together, the resistors, and the soldering of 2 of the 2′ sections (the solder from the tip of the section on the top left connects and contacts the section adjacent to the letters on the top right.)

Installation

The kit comes with 16 plastic brackets and 34 wood screws to mount the light strip and control box to most surfaces. The installation instructions recommend not using staples or other fasteners that can potentially puncture the outside of the strip or damage the components inside. Because of the flexibility of the fasteners and the average installation offset of 1 foot, it is difficult to get a good tight fit in corners, even though the strip will bend as tightly as ½”. Also, because of the flat strip inside, the layout of the light strip should ideally follow a two-dimensional path as much as possible. It is possible to make left and right turns of the strip if you make a brief excursion into 3D, like so:

Also, while cutting the strip will leave the non-powered end useless, and at the same time expose the internals to the environment, it should be possible and permissible if the strip will be used indoors. In this case, the strip should be cut at one of the 7 internal junctions. A junction is shown in the picture above at the lower left. However, the packaging insert indicates that the strip should not be cut to length. This is especially true of outdoor installations. So, if you are planning to use this outside, the 16’ design will have to be a hard constraint.

Operation

The LEDVANCE LED Flexible Strip RGBW is designed to be operated through the ZigBee network. It is optimally plugged into a receptacle that is always powered. Most ZigBee hubs will recognize this as a RGBW light and will allow turning the light on and off, changing the color of the light, and tuning the correlated color temperature. The Lightify hub will also allow you to set the default on and off dim rate so that the turning on and off of the light is not abrupt.

Based upon the desired color temperature, level, saturation, and hue the controller will illuminate the RGB and/or white LED to a particular setting. The picture below illustrates all four LEDs illuminated at a low setting and photographed at 1/800 sec, F8 using an ISO1600 setting.

Note that all of the LEDs are controlled on the same circuit. Therefore, this light cannot perform chase or multi-color displays. The benefit of this product is that it can turn on and off and change color, color temperature, hue, level and saturation based on external criteria through IFTTT, Stringy, SmartThings, or other ZigBee enabled hub. Note that the Lightify hub does not have connectivity to IFTTT or Stringify, so using this hub will only allow you to control the lights through the app on a phone and also using Amazon Alexa. Also, although this can be programmed to change color, hue, level and saturation at fixed intervals, because of the latency in the ZigBee signals, it is unlikely that this can be synced to music or video.

Performance

One of the things that I thought was important for this light strip was for to match the other LEDVANCE Light bulb that I have in color temperature, intensity and color hue across a range of settings. That way the two products can be used to color a room consistently. In order to achieve these comparisons, I bound both bulb and light strip to my SmartThings hub and I created a program to set the various settings to the same value for both devices.  As far as the color temperature correlation between the two devices. I placed the bulb in a desk lamp fixture and lay the strip, coiled on a white painted bench in our mud room. I focused my comparison on the color and intensity reflected off of the rear of the bench.

As indicated above, color temperature performance seemed to be a little off between the bulb and the strip. However the disparity I observed first-hand does not seem as bad as what is shown above. The 2700K color seems a little bit too green and the higher temperature colors seem too blue. As discussed below, the strip has some issues displaying green when it should be displaying yellow. I have a feeling this may be due to the silicone casing.

The brightness level also seemed a little bit different from the A19 bulb, but this should be expected since the bulb has a translucent cover and the strip has the bare LEDs exposed. Also the illuminance per sq. ft.  may be the same but because the strip is larger it appears brighter. In the end, they both dim down to what must be only a few candelas.

The color performance of the strip seemed to be very close to the bulb, with the exception of yellow. The yellow from the bulb seemed to be a little bit green hued. You can see a little green in the corner of the picture that is mostly yellow. The light was washing out the picture so I needed to adjust my shot to avoid the lamp completely.

Conclusion

The LEDVANCE LED Flexible Strip RGBW is a unique product to allow programmatic or automatic control of weather proof light strips. While other light strips are available that are weatherproof, allow chase, and/or sync to music, they do not allow automation. Other light strips are available that permit automation but they are not weatherproof. The light strip retail price is roughly four times higher than a waterproof color-changing and color-selectable strip with IR remote. But if you want to ask Alexa to on/off and adjust the colors of the light strip around your hot tub (probably the killer app for this item) then the LEDVANCE LED Flexible Strip is the way to go!

Source: The sample for this review was provided by LEDVANCE Sylvania. Please visit their site for more info and Amazon to order.


Product Information

Price: $99.99
Manufacturer: LEDVANCE Sylvania
Retailer: Amazon
Requirements:
  • requires ZigBee Certified Gateway (sold separately)
  • GFCI outlet if mounting outdoors
  • Should not be submerged or installed less than 10 feet from open water.
Pros:
  • With the proper hub and programming, permits Alexa control of operation and scenes
  • Waterproof
Cons:
  • Should not be cut
  • Costly
  • Does not permit chase or color changing

Filed in categories: Home and Kitchen, Reviews

Tagged:

Sylvania LEDVANCE LED Flexible Strip RGBW review originally appeared on on March 18, 2017 at 8:57 am.

Note: If you are subscribed to this feed through FeedBurner, please switch to our native feed URL http://the-gadgeteer.com/feed/ in order to ensure continuous delivery.