The Currant AI Powered Smart Outlet review


REVIEW – On a few occasions over the past few years, I have questioned the power company about the amount I am charged each month for electricity. I know people with way more square footage than my home paying much less. I have even had the power company monitor my home, and they always tell me that I am being charged the correct amount. They have stated this enough times, that I eventually just accepted that the numerous gadgets that I have connected 24/7 must be the culprits, albeit that many of them are very small gadgets that theoretically draw very little power, especially when idle. The Currant AI-powered Smart Outlet promises to be able to give me better insight into the energy usage of the devices I have plugged in. Can it? Let’s see!!

What is it?

The Currant AI Smart Outlet analyzes the electricity power usage for the devices that you have plugged into it. With the use of the associated app, you can monitor how much energy the devices are using and therefore make better decisions about saving energy and money. It is also Alexa enabled.

What’s in the box


1 x Currant AI Smart Outlet

Design and features

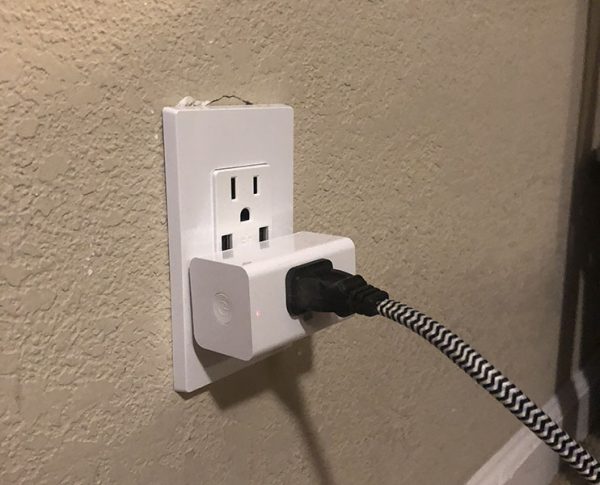
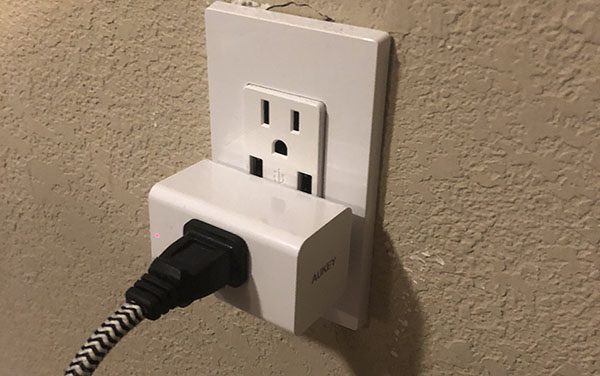
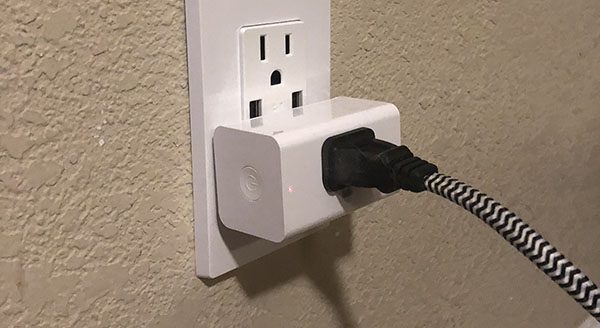
On one side of the Currant Smart Outlet there are two AC receptacles, and on the back, there is a 3-prong AC plug.

The front of the outlet is covered with a shiny mirror-like plate, the name branding, and if you look closely, two embedded touch power buttons, one for each outlet. You will see these better in the next set of pictures in this review.

As shown below, there are two lighted arrows that are touch sensitive and control the power on/off for each outlet.

Performance

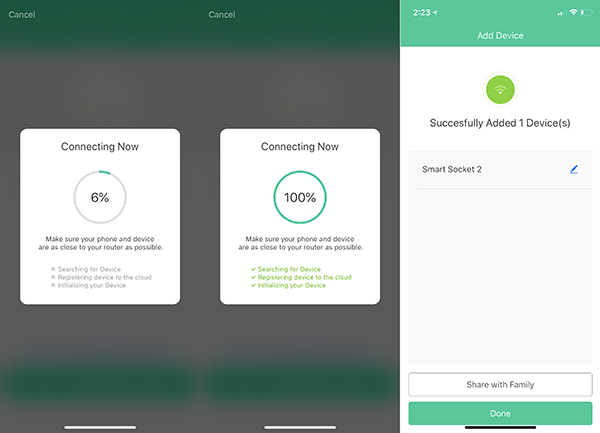
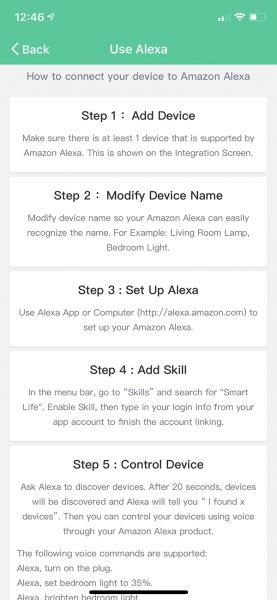
When I opened the box, I was surprised to see just the device and instructions printed on the inside of the box to download the app. At first, I thought this was strange but after experiencing the simplicity of setting up this device, I understood the choice which in my opinion is not only good enough to operate this device but environmentally friendly since I feel that a paper manual would have been a waste of paper. I followed the instructions and downloaded the app and after it was installed I followed the very simple process to add the device to my home network and it was good to go. Since I have an Alexa device, I also followed the instructions that are provided by the Alexa app to add the Currant to the Alexa skills which in turn allows it to be voice controlled via Alexa. I decided to use my Christmas tree as the first testing device. I initially had ten strings of lights daisy chained and plugged into a wall outlet. This proved to be too many and the fuse in the first string kept blowing after a few hours. I decided to separate the chain into 2 sets of 5, and I plugged one set into the Currant Smart outlet to see how it worked and to use it to generate input for the app. The app immediately began to show the usage of the outlet I used as compared to the second outlet that I did not initially connect.  I then connected the second set of lights to the second Currant outlet so that both were monitored. The Currant Smart Outlet maintains its connection to my wifi network without issue and it continues to provide data that I will use for comparison and analysis once I move it to other devices.

App

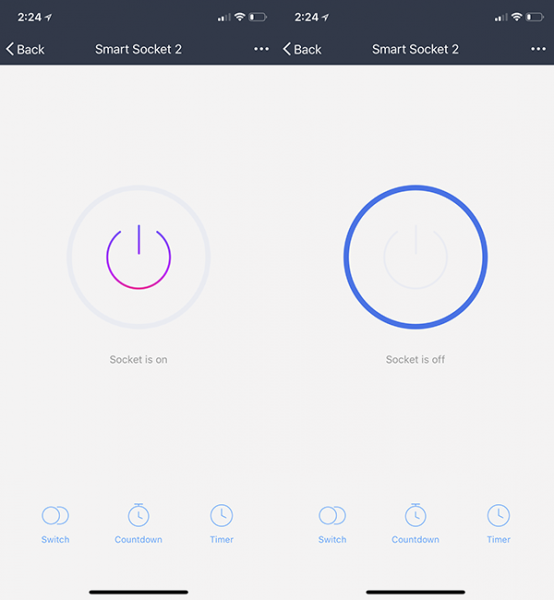
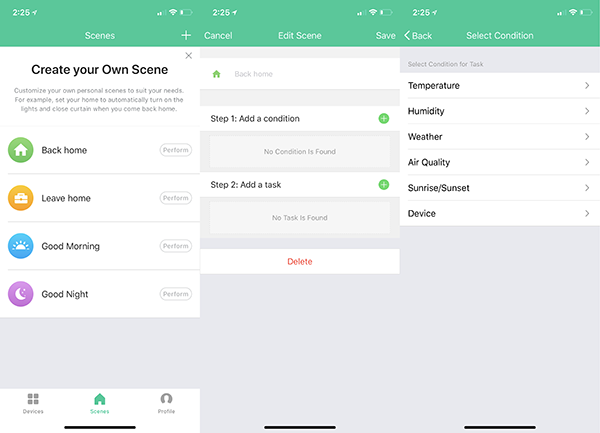
The following are screenshots from the app that not only showcase the app but also some of the information that the Currant Smart Outlet provides:


What I like

  • The build quality
  • The function
  • The nice clean design of the app and the information it provides

What can be improved

  • The unnecessary shiny and fingerprint magnet cover. It looks nice but serves no real purpose even for a flashy design since it is quickly covered with fingerprints

Final thoughts

The Currant Smart Outlet may not appeal to everyone, but for a gadget nerd like me, it allows me to see which of my gadgets or even household appliances is the culprit for my relatively large monthly electricity bill. My plan is to move it around to various devices every couple of weeks and make note of the usage. Maybe I will get lucky and there will be a few devices that I can go without being plugged in 24/7 and that if unplugged can actually make a dent in my electricity bill. For me, this device is a nice tool. As I mentioned previously, I currently have the Christmas tree with about 10 strings of lights plugged into it at 5 strings per outlet. While Christmas lights are only temporary, for now, I am getting a better understanding of energy usage and enjoying saying “Alexa, turn on the Christmas tree”.

Price: $59.99
Where to buy: Currant and Amazon
Source: The sample for this review was provided by Currant

Filed in categories: Reviews

Tagged:

The Currant AI Powered Smart Outlet review originally appeared on The Gadgeteer on December 10, 2018 at 9:00 am.

Note: If you are subscribed to this feed through FeedBurner, please switch to our native feed URL http://the-gadgeteer.com/feed/ in order to ensure continuous delivery.

Venstar ColorTouch T7900 thermostat review


REVIEW – I’ve wanted a WiFi controllable thermostat for quite a while now, so when the opportunity to review the Venstar ColorTouch T7900 thermostat came along I thought this might just be the answer to my temperature war with my wife.

What is it?

The Venstar ColorTouch T7900 thermostat is a color touchscreen WiFi controllable thermostat.

What’s in the box?

  • Venstar ColorTouch T7900 thermostat
  • Instruction Manual
  • Mounting Screws


Design and features

The design of the Venstar ColorTouch T7900 thermostat is simple. There are no external switches or dials, everything is controlled via the color touchscreen.

Installation was pretty straightforward for anyone that has done thermostat wiring before, but I would recommend having someone install it for you if your wiring doesn’t exactly match up with one of the possible configurations listed in the instruction book. Thermostat wiring can be a bit frustrating depending on how good the installer was and how old the home is. Newer homes probably have the correct wiring. The Venstar website also has some videos on installation and operation that are quite helpful and a support staff that can help you out.

The ColorTouch T7900 has a beautiful screen. It’s easy to read and looks great. The touch response is nice and the user interface is pretty decent. There are a lot of things you can do with this thermostat, but there are only a couple of steps to get up and running quickly.

On the main screen there is a current temperature display, heat to and cool to indicators so you know what you have it set to, “buttons” to change the current temp setting, and a status bar/menu where you can choose home or away, mode, or menu. Mode simply offers the options of Heat, Cool, Auto, or Off.

The menu contains most of the configuration items such as schedule, screensaver, themes, WiFi, etc. More on that later.

The mobile app was disappointing. It has limited functionality. The app has three sections: Control, Info, and Configure. Control allows you to set the mode (Heat, Cool, Auto, or Off), change the current temp, and displays a weather forecast (after you configure your location via the Skyport website).

The Info section has icons for Alerts, Messages, Sensors, and Energy use. The Alerts is kind of self-explanatory. The Messages icon allows you to send a text message to the thermostat display. The Sensors icon shows inside and outside temperature and humidity, although it will hang if you haven’t set your location via the website. The Energy use icon will show you energy use for today, this week, and last week. It doesn’t really show energy consumption but rather how long the heating or cooling was running.

The Configure section of the mobile app allows you to set Home/Away, Schedule on/off (but not edit the actual schedule), and set fan control to On or Auto.

I was disappointed that I could not edit the schedule or upload images via the mobile app.

The mobile app is best used for checking or changing the temperature and turning on and off your schedule.


I found the scheduling feature to be perfect. You can edit individual days, or all of the days at once. You can set a morning, day, evening, and night temperature. This is so much easier to do with a smart device like this than a standard LCD display thermostat.


There is also the free Skyport website that you sign up for to connect via WiFi and also change the settings. The website has all of the features of the mobile app, and additionally has most of the features that the thermostat itself has, such as being able to edit schedules, set screensaver options, etc. This was really impressive because I was not expecting to be able to do all of the things you can do from the website!

The thermostat has built-in background images (themes) for several locations and holidays, but the feature I like the most is being able to put my own images on the device. There’s a background image and screensaver images that basically turn your thermostat into a digital picture frame. You must use their desktop app to configure that though. After importing the images, you export them to an SD card and then on the thermostat you can import settings and/or images. The screensaver can display an analog clock, digital clock, or your images.


The thermostat also has a security feature which may come in handy if you have kids. With the security feature enabled you can lock down all the functions and adjustments with a passcode and to restrict the temperature range. This allows you to let people change the temperature, but only to the minimum and maximum that you set.

One thing I really like is the ability to set a notification for a low temperature. If the temperature goes below the value I set, you get an email. This is reassuring in the winter time.

What I like

  • Website can be used to control and configure the thermostat
  • Screensaver/wallpaper feature is really cool
  • Thermostat/App/Website show not only the temp but if the heating or cooling is actively running

What needs to be improved

  • Mobile app needs more features

Final thoughts

Overall I really like the Venstar ColorTouch T7900 thermostat. It’s nice looking, performs well, and has features that a non-WiFi thermostat just doesn’t have. I like the peace of mind that the mobile app gives me when I’m away from home for long periods during the winter.

Price: $268.68
Where to buy: Amazon
Source: The sample of this product was provided by Venstar.

Filed in categories: Reviews

Tagged: ,

Venstar ColorTouch T7900 thermostat review originally appeared on The Gadgeteer on December 2, 2018 at 8:32 am.

Note: If you are subscribed to this feed through FeedBurner, please switch to our native feed URL http://the-gadgeteer.com/feed/ in order to ensure continuous delivery.

Control your Philips Hue lights by simply entering a room

NEWS – Most of the bulbs in my house are Philips Hue bulbs or light strips.  I have a lot of Hue Tap switches scattered around to operate my lights, and they work well, but a couple of them require you to walk down a dark hallway to reach the switch.  I need to add a Hue Motion sensor at each end of the hall to automatically trigger the lights so I’m not wandering around in the dark.

The Motion sensor is battery-powered, so it can be installed anywhere.  You can set it on a table or shelf, mount it to the wall or ceiling with a screw, or attach it to an appliance or other metal surface with the included magnet.  Once mounted, you can adjust its viewing angle.  When it detects motion, the sensor can trigger your selected Hue scene or light setting to turn the lights on.  Lights will go off after it no longer senses motion.  The sensor also has a daylight detector, so it can adjust the light for a dim nightlight when the room is dark or for bright white light during the daytime.  Of course, the Hue Motion sensor requires a connection to the Hue bridge to operate your Hue lights.

The Hue Motion sensor is $39.99 at the Philips Hue website.

Filed in categories: News

Tagged: ,

Control your Philips Hue lights by simply entering a room originally appeared on The Gadgeteer on October 18, 2018 at 8:00 am.

Note: If you are subscribed to this feed through FeedBurner, please switch to our native feed URL http://the-gadgeteer.com/feed/ in order to ensure continuous delivery.

The latest Roomba i7+ robot vacuum has a new game changing feature

I’ve been using Neato Botvac robot vacuums in my home for several years now and can’t imagine going back to manually sweeping the floors in my home. Having a robot to do my bidding on a set schedule is awesome. It means I don’t have to drag out the vacuum several times a week and it means I can come home to a clean home (at least the floors) every day. The only “bad” thing about robot vacuums is that a human (me) has to empty the dirt bins every few days into the trash can. This isn’t a hard thing to do, but it’s kind of gross when the dirt and dust fall into the trash can and a cloud of dirt billows upward towards my face. I always try to hold my breath so I won’t breathe it.

I’m happy to report that the days of manually cleaning your robot vac’s dirt bin are almost over. The geniuses over at iRobot have created the new Roomba i7+ robot vacuum that can empty its own dirt bin. No, I’m not kidding! The i7+ works with a new charging base that has a built-in receptacle that can hold up to 30 days worth of collected debris. Now when the Roomba i7+ finishes a cleaning session, it will go back to the Clean Base where the crud in the dirt bin is sucked into a bag in the Clean Base. When the bag is full, an app on your phone will notify you so you can replace it.

The only downside to this robo awesomeness is that you’ll have to buy specialized dirt disposal bags for the Clean Base. The price for the bags is $15 for a pack of 3. Ugh. But that’s 3 months worth of bags and 3 months of not holding your breath while emptying dirt in a trash can, so the price doesn’t seem too bad. Yes, I know, expensive solutions for first world problems. If you’re excited about the new Roomba i7+, start saving your pennies because it’s going to set you back almost a grand at $949.99. The Roomba i7+ will be available on 9/12 and you can head over to irobot.com to pre-order now.

Filed in categories: News

Tagged: ,

The latest Roomba i7+ robot vacuum has a new game changing feature originally appeared on The Gadgeteer on September 6, 2018 at 1:56 pm.

Note: If you are subscribed to this feed through FeedBurner, please switch to our native feed URL http://the-gadgeteer.com/feed/ in order to ensure continuous delivery.

Aukey WiFi Smart plug review


REVIEW – Aukey has entered the home automation market with its new WiFi smart plug. Let’s take a look at how it works and why it might be the entry point you’ve been looking for.

What is it?

Aukey’s smart plug is basically a WiFi enabled switch that you place in between your wall outlet and the device that you want to be able to control. As far as home automation goes, it’s a very easy first step and when paired with a home assistant like Amazon Alexa or Google Assistant can be quite powerful.

Hardware specs

  • Input / Output: AC 110–125V 15A
  • Maximum Power Output: 1800W
  • Dimensions: 63 x 37 x 33mm / 2.48” x 1.46” x 1.3”
  • Weight: 79g / 2.78oz

What’s in the box?

The review sample was actually their dual pack which makes a lot of sense as you start kitting out your home, and it’s nice to see the minimal packaging. Here’s what’s included…

  • 2 WiFi smart plugs
  • User Manual

Design and features

From an aesthetic point of view the smart plugs are minimalistic and are meant to not draw your attention. Their minimal width keeps them inside the dimensions of most wall plates. Keeping the height down allows you to place one above another on one double wall outlet. This particular outlet I’ve connected it to has USB ports which are now blocked by the unit, but that’s an outlet problem, as connecting USB cables frequently interferes with any AC plug.

Staying consistent with the minimal approach, There’s very little else on the smart plug. On the left end, there’s a power button and a simple LED light on the front edge next to it.

Setup

Getting started is a similar process to most WiFi enabled, app-controlled accessories. Download and launch the AUKEY Home app from the app store for your device. Bounce over to your WiFi settings and connect to the WiFi that the device is broadcasting, and then back to the app to enter your home network information. The app then does the connection for you which in my case took maybe 30 seconds. It was really fast and worked first try on both smart plugs which is something I cannot say for some other smart plugs that I’ve tried.

So at this point, the smart plugs are set up and you will see them (and any others you may have set up) in the app as seen here. If all you want to do is launch an app and turn things on and off, you can read the next paragraph and then skip ahead to performance.

The power button icon on the right of each smart plug lets you toggle power to whatever device you have plugged in. You can see above the language changes ‘Turned on’ vs. ‘Turned off’ as well as the icon on the left is highlighted in blue when a device is on. Clicking into the device also lets you toggle power with the center icon or the bottom ‘switch’ icon (redundancy) and the visual is even more clear as to its status.

You’ll also see the two other icons across the bottom of the screen where you can start to customize further. Countdown lets you set an expiration time in case you might fall asleep while reading as an example. Timer lets you set an event to turn on or off at a specific time and have it recur or be a one time need.

Creating ‘Scenes’ lets you activate multiple smart plugs (and of course the devices connected to them) and set conditions that trigger them. There are four scenes built in as you see above, but you can choose a condition and have it perform a task which is typically toggling a smart plug.

So want your floor lamp to come on at sunset? Choose sunset and the smart plug connected to your floor lamp, and then give the scene a distinctive name. This is important as if you connect an assistant like Alexa you want it to easily understand.

That brings us to the last part of setup if you want to connect it to your Alexa device should you have one. In the profile section (icon in the leftmost image above) you’ll see a selection called integration. Once there, you’ll see these three options.

Amazon and Google are pretty self-explanatory, but if you haven’t heard of IFTTT (IF This, Then That) you should definitely check it out. That may be your solution when you wish you were able to automate something that otherwise doesn’t look to be supported by whatever system you’re using. As for connecting your Amazon Echo, here are the instructions that Aukey provides in app and while this crowded screen may make it look time-consuming, it’s super fast and works first try.

Okay, enough with the setup already. How does it work?

Performance

As I’ve mentioned a couple of times above, Aukey’s smart plugs just plain worked. It’s something that I’ve come to be surprised by in today’s ‘ship it and fix it with firmware later’ mentality. I have 10 (yes ten) smart plugs and switches from an established brand and every time I add a new switch the app forgets some of the earlier ones and let’s not even get into updating wifi passwords (ugh). Aukey’s app is clean, simple and controls devices in a logical way. The integration with Alexa is great with Amazon taking the naming convention directly from Aukey without a problem.

So what’s the catch? None really, just a couple of things to keep in mind.

First, choose distinctive device and scene names. If you’re using Alexa and all your devices are ‘something lights’ there’s a good chance background noise will cause Alexa to only hear ‘lights’ and you’ll get a ‘there are multiple devices with that name’ response which is annoying. You can double this issue when you add scene names as well. The second part of this is just making sure that they’re memorable and not too lengthy. This is an ‘assistant’ problem and not a flaw of Aukey or their device.

Second, the smart plug like all the others on the market, are toggling power only. This means you can’t connect just any device and have it work. Lamps and any other lighting with an AC cord work great (remember the lamp itself needs to be on). A coffee maker, on the other hand, would only work if said coffee maker automatically starts brewing when the power switches on. Similarly, a computer that needs a password after startup, or a TV that always defaults to the input you don’t use won’t work so well.

Lastly, please be careful automating something that could be dangerous, like a space heater. Asking Alexa to turn something on while you’re home is one thing, but if it’s set to come on at 6am to warm up the house and the dog has dropped a toy or pushed their dog bed too close, nothing is going to catch that and decide maybe it’s not a good idea to turn on right now.

What I like

  • Small and compact
  • Two unit bundle
  • They just work
  • Integration with assistants like Amazon and Google
  • The low cost

What needs to be improved

  • Would like to see native Apple HomeKit support

Final thoughts

I’m going to sound like a broken record here, but again, these just work. I’ve spent a few hours mucking around with products like this only to get frustrated or resort to full WiFi reset up. This was as simple as it gets and again I found myself surprised. If you’re looking to have control of a few lights or other compatible devices and want a low-cost way to do it then look no further. The other players in the space are twice this cost and don’t function this well.

Price: $27.99
Where to buy: Amazon
Source: The sample of this product was provided by Aukey.

Filed in categories: Reviews

Tagged:

Aukey WiFi Smart plug review originally appeared on The Gadgeteer on July 23, 2018 at 9:00 am.

Note: If you are subscribed to this feed through FeedBurner, please switch to our native feed URL http://the-gadgeteer.com/feed/ in order to ensure continuous delivery.