Lexip Mo42 Ceramic Glide Feet review

REVIEW – While I’m a HUGE fan of the Trackpoint navigation device–to the point of not buying laptops without it and having used TrackPoint-equiped keyboards for the past 25 years, navigating 2K and 4K displays using a TrackPoint is an exercise in frustration and loss of patience, and I’ve resorted to using a mouse when using my big screens. I’ve been happy with the general performance of my Logitech Anywhere MX (on my second one currently), but, after 5 years, it was starting to feel long in the tooth, so for the past year or so, I’ve been auditioning new mice for my daily-driver computer.  I haven’t found any that I like well enough to spend the money to upgrade from my trusty MX, including the new MX Anywhere 2. Each model that I tested was either just a bit off in the way it felt, way more expensive than what I wanted to spend, or worst of all, corded. So when Lexip offered the chance to upgrade my current mouse with some new shoes, I decided that I would give them a try.

What is it?

Lexip Mo42 Ceramic Glide Feet are add-on upgrades for your existing mouse which provide a more precise mousing experience.

What’s in the box?

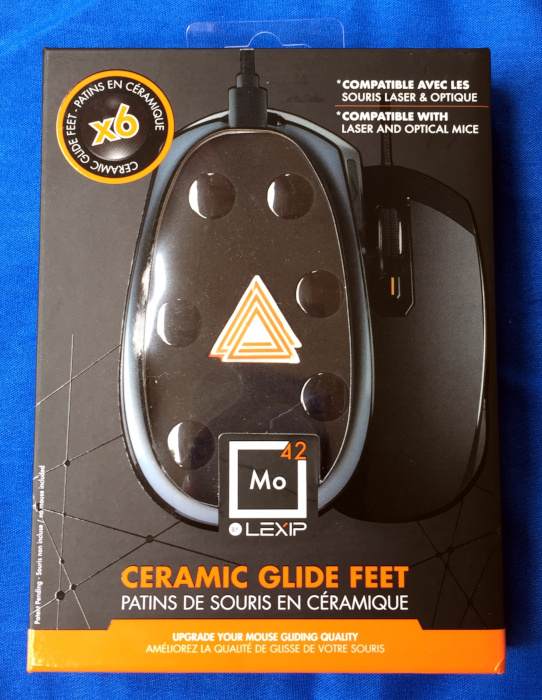
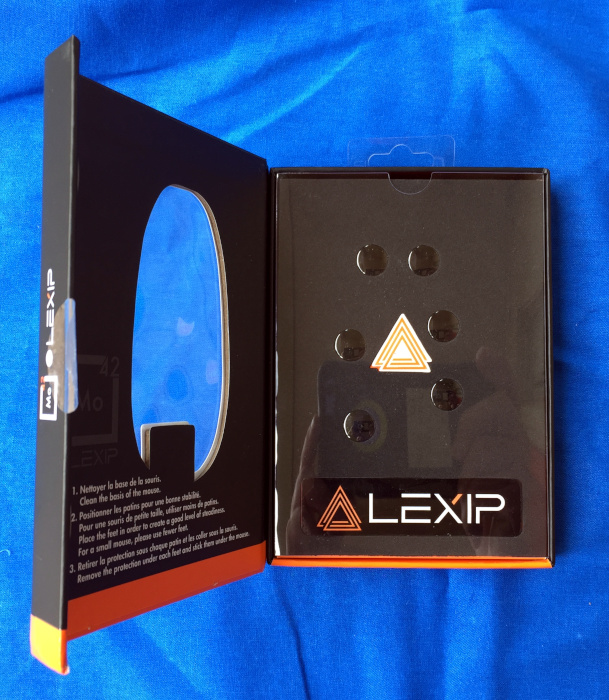
The Mo42 Ceramic Glide Feet, like beer, come in a 6-pack in a colorful container. This is where the libation simile will stop.

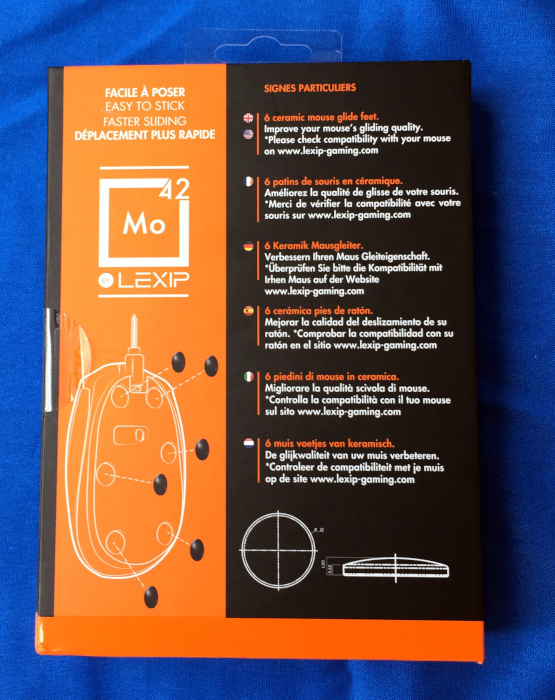
The full-color packaging shows off the mouse feet via transparent window and cutout on the front of the package. The rear of the package provides some basic sales information in a variety of European languages, including English. Lifting the magnetic side latch allows access to the package contents which are housed in a plastic sleeved foam and cardboard holder.

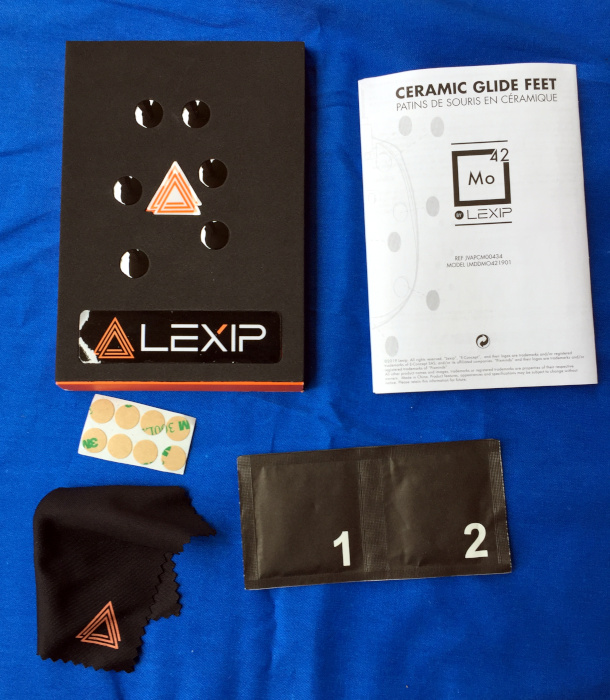
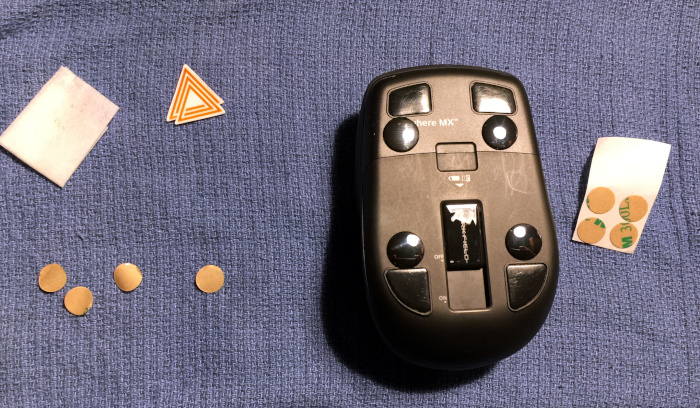
The package includes

  • 6 ceramic mouse feet
  • 8 3M adhesive dots
  • 2 cleaning wipes (alcohol swabs)
  • 1 cleaning cloth
  • 2 Lexip sticker
  • Instruction booklet

Hardware specs

Each of the individual Mo42 Ceramic Glide Feet is 12 mm in diameter and approximately 1.2 mm thick. The adhesive pad holding the foot to the mouse adds less than 1 mm to the overall height.

Design and features

In-depth description of the product and what it can do. This is the meat of your review. If there are additional sub-headings that you want to add in the main part of your review, use H3 titles (use the drop-down menu that is set to paragraph by default). Here are some examples that you might want to use but can remove if you don’t need them.

Setup

Installing the feet involves

  • cleaning the bottom of the mouse with one of the included wipes
  • drying in / removing lint and debris with the included cloth
  • removing one of the feet from the package
  • removing one of the adhesive dots from the sheet and adhering it to the foot
  • carefully removing the backer paper from the other side of the adhesive dot
  • placing the mouse foot on your mouse
  • repeat 2-5 times (3-6 feet / mouse)

By far the most difficult part was getting the mouse-side adhesive exposed once the dot was adhered to the feet. I had to fall back on my model decal placing skills to get the round backer paper loose from the identically sized adhesive disk.

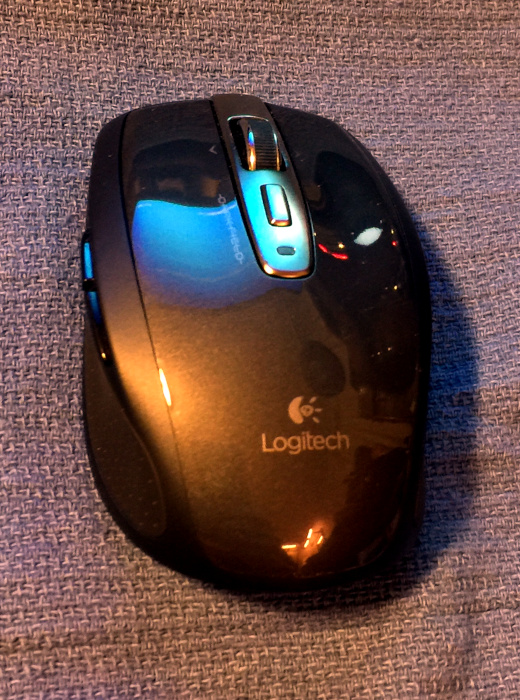
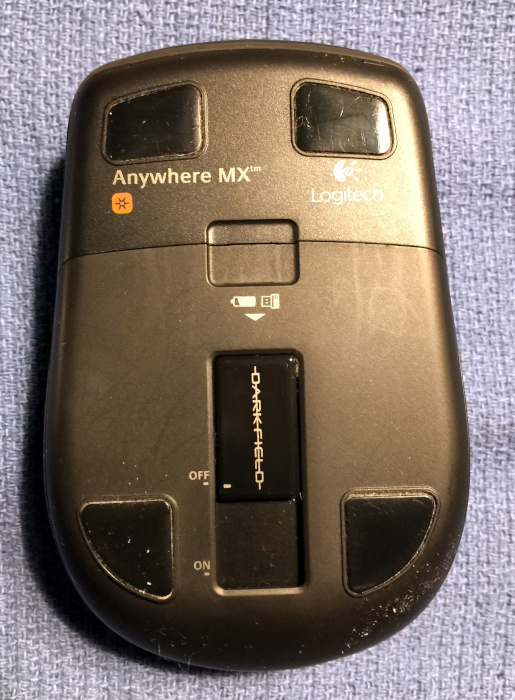
Here is the patient waiting for pre-op

Peri-operative cleaning

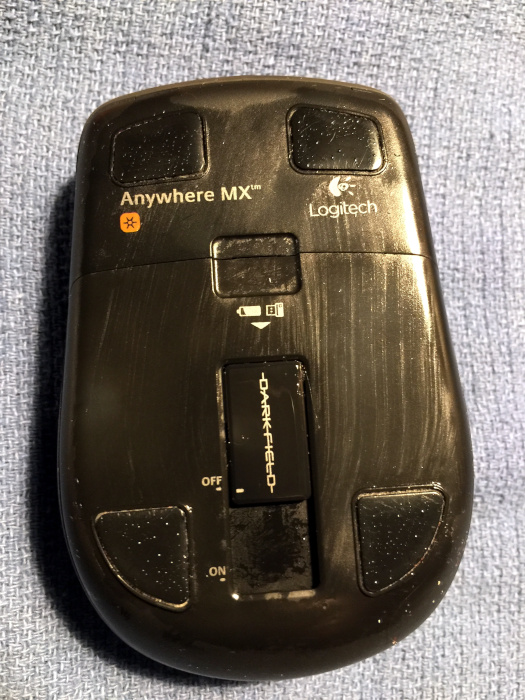
Post-operative recovery

I chose to only install 4 of the 6 feet as this matched up with the number of original pads on the mouse.

Performance

I would love to provide a detailed specifications about the coefficients of static and dynamic friction, but I sadly do not have access to force gauges that have fine enough resolution to measure the movement of the mouse. However, I did perform some surrogate testing by building an a-frame and swing arm from LEGO Technic pieces and used a large novelty eraser as both the swinging weight and striker to measure how far my mouse traveled when given an impulse from test rig. The mouse was not constrained as to travel direction. Measurements were made perpendicular to the axis of the swing arm.

The raw results were not as impressive as I had hoped based on the sales material, but showed a both a practical difference and a statistically significant difference between the two groups. The increased standard deviation in the Mo42 data is due to the mouse traveling at an angle to the the perpendicular measurement axis. All distances are in cm.

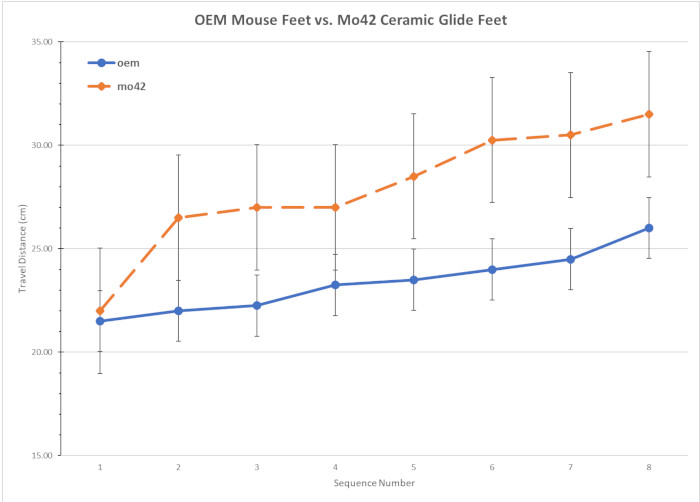
OEM Mouse Pads: 21.5, 22, 22.25, 23.25, 23.5, 24,  24.5, 26    mean:   23.38   standard deviation: 1.48
Mo42 Ceramic Feet: 22, 26.5, 27, 27, 28.5, 30.25, 30.5, 31.5    mean:  27.91    standard deviation: 3.02
Student’s T Test: p = 0.003


From a purely subjective standpoint, I will say that the Mo42 Ceramic Glide Feet feel like they have a smaller difference between the coefficient of static friction and the coefficient of dynamic friction. The practical upshot of this is that it takes less effort to get the mouse to start moving and keep it moving than it did with the OEM mouse pads. With the OEM pads, it took a bit more effort to get the mouse moving and then less to keep it moving.

The Mo42 Ceramic Glide Feet also seem to provide a better “road sense.” By this I mean that I can feel the texture (including debris) of my mousing surface which I think give me better control of the mouse.

What I like

  • Easy to install
  • Upgrade any mouse to move like a more expensive mouse

What needs to be improved

  • Nothing

Final thoughts

While I’m still not 100% happy with my Logitech Anywhere MX mouse, I’m much happier with my post-upgrade mouse. I’ll probably stick with my upgraded mouse for the foreseeable future, but will, like all Gadgeteers, be on the lookout for the next cool mouse.

Price: $19.99 MSRP
Where to buy: Lexip’s US store front and Amazon.
Source: The sample of this product was provided by Lexip.

Filed in categories: Reviews

Tagged: ,

Lexip Mo42 Ceramic Glide Feet review originally appeared on The Gadgeteer on April 30, 2019 at 9:00 am.

Note: If you are subscribed to this feed through FeedBurner, please switch to our native feed URL http://the-gadgeteer.com/feed/ in order to ensure continuous delivery.

KontrolFreek FPS Freek Battle Royale Performance Thumbsticks review

REVIEW – Online gaming is a red-hot commodity, especially with the emergence of the popular “battle royale” last-man-standing genre of shooters. KontrolFreek is here to boost your killstreak with their FPS Freek Battle Royale performance thumbsticks. How do they stack up? Read on to find out!

What is it?

KontrolFreek’s FPS Freek Battle Royale Nightfall Thumbsticks (whew) are small, rubber grips that attach to the top of your Playstation or Xbox controller’s analog sticks, extending the height of them by nearly double. They are meant to offer more range of motion and better shooting accuracy for “battle royale” type games like Fortnite, Apex Legends and PUBG.

The FPS Freek Battle Royale thumbsticks double the height of the PS4 controller joysticks.

What’s in the box?

  • One pair of thumbsticks

Hardware specs

  • 11.7mm height
  • convex rubber tops
  • laser-etched design for comfort and grip

Design and features

I’ve been playing video games since the old Atari days, and they’ve sure come a long way since Pac-Man and Pole Position. The latest trend is the “battle royale” genre of last-man-standing shooters. It seems as though nearly every major publisher is hopping on this multiplayer online bandwagon.

The rubber caps are rather comfortable, and if you look closely, they’re tiny compasses.

For a skilled player, battle royale matches can last up to 25 minutes, requiring stamina and accurate, high-sensitivity controls. That’s precisely the type of action that the FPS Freek Battle Royale thumbsticks were designed for.

Basically, these thumbsticks, which are the tallest offered by KontrolFreek, attach to the existing analog joysticks, acting as extension caps. They offer extended height and grip, allowing for better control and comfort in extended play sessions.

They have a very basic construction. Easy to place and remove.

In many modern first person shooters, you can set the controller sensitivity to very high levels, allowing your character to turn and look around the screen very quickly. This is useful for fast aiming and split-second decisions, but it makes fine aiming at long and middle distance targets relatively difficult. With the thumbsticks installed, the range of motion is increased due to the extra leverage.

The extra height allows for better leverage and fine-tuned accuracy.

I found it much easier for accurate aiming at faraway targets, whether looking down the sights of an assault rifle or through a sniper scope.

And while I don’t find the Playstation controller uncomfortable, I very much like the position of my thumbs on these thumbstick extensions. It feels more natural to me, for some reason. It felt stranger going back to the default height than it did when I had first installed the extensions.

I also liked the added texture of the thumbsticks vs. the roughened rubber feel of the regular Playstation controller. If you look close, the design is actually little compasses. Cute.

I’ve got to admit, being 39 and not having loads of time to practice, I’m not sure if these thumbsticks actually did very much for my bottom line, so to speak. No Victory Royales or Apex Champion screens for me, today. But I definitely liked how the FPS Freek thumbsticks felt, and my accuracy was much better. I’d say that alone is worth the investment.

After several hours, my thumbs felt just fine.

Speaking of which, the price is about the only thing I could knock… $15 for a couple plastic and rubber caps is about $5 more than I’d expect. Very minor quibble.

I think I’ll keep the FPS Freek thumbsticks installed, and I’ll keep practicing. And with luck, perhaps someday I’ll not be such an embarrassment to my squad!

What I like

  • much more comfortable to play for extended time
  • easier for fine controls on high sensitivity settings

What needs to be improved

  • maybe a bit overpriced, for what they are

Final thoughts

After an initial brief adjustment period, I very much enjoyed the improved control these thumbsticks offered. They felt more natural than the default controller thumbsticks and boosted accuracy as promised. I would consider them a worthy investment.

Price: $14.99
Where to buy: You can pick up a pair of KontrolFreek thumb sticks in various heights for specific types of games on their website and Amazon
Source: The sample of this product was provided by KontrolFreek.

Filed in categories: Reviews

Tagged: ,

KontrolFreek FPS Freek Battle Royale Performance Thumbsticks review originally appeared on The Gadgeteer on April 17, 2019 at 9:00 am.

Note: If you are subscribed to this feed through FeedBurner, please switch to our native feed URL http://the-gadgeteer.com/feed/ in order to ensure continuous delivery.

Logitech’s G935 is a wireless headset for serious gamers

NEWS – Though Logitech may be best-known for making general-purpose mice and keyboards, they recently announced a couple of products designed for hardcore video gamers.  The G935 is a top-of-the-line wireless gaming headset, and the G635 is its younger brother, a wired version of the G935.  This is the first headset that feature’s Logitech’s exclusive Pro-G 50mm Audio driver, which is designed to deliver “deep bass and a round sound profile for highly cinematic audio.”  It also features 2.0 surround sound, which simulates the 3D environments found in video games.

This headset is no mere headset.  Gamers love lights, and the G935 features Logitech’s LIGHTSYNC technology, which provides dynamic illumination that synchronizes to your games, videos, and music.  The light comes from an LED strip along the back of each headset and an iconic “G” symbol on each side.

The G935 has a 12-hour battery (without the lighting), an extendable, built-in microphone, leatherette earpads, and an on-ear volume control.  It uses 2.4 GHz Wi-Fi to connect to a USB dongle and has an indoor range of 15 meters.  The G635 has all the same features as the G935, sans the wireless capability.

You can pre-order Logitech’s new headsets directly from their online store or Amazon for $169.99 (wireless) or $139.99 (wired).

Filed in categories: News

Tagged: ,

Logitech’s G935 is a wireless headset for serious gamers originally appeared on The Gadgeteer on February 12, 2019 at 10:00 am.

Note: If you are subscribed to this feed through FeedBurner, please switch to our native feed URL http://the-gadgeteer.com/feed/ in order to ensure continuous delivery.

MSI Mystic Knight Gaming Backpack review

REVIEW – Carrying your EDC loadout for work is usually not that much stuff. Laptop, lunch, maybe your meds and a few cables. But if you’re a gamer, and have a full portable rig for setting up shop in another location, you need more space. MSI, a company that makes a lot of gaming gear like mice, laptops, and headphones, now has a way for you to carry those essentials from place to place: The Gaming Backpack. I was sent the Mystic Knight model to test.

Note: Photos may be tapped or clicked for a larger image.

What is it?

The Mystic Knight is a roll-top gaming backpack with a few interesting pocket combinations, reflective safety graphics, and a flexible strap system. You can easily grab your laptop from outside without having to undo the roll-top closure.

Design and features

The MSI Mystic Knight is a stealth black backpack that is water-resistant in fabric choices as well as zipper closures. There’s even a rain shell stored in a hidden pouch on the bottom of the pack if it gets to be more than a drizzle. For organization, there is a massive main compartment that can hold just about anything you can throw at it, short of a kitchen sink. Seriously, it will seal fully at 25” tall by 14” wide and 4.5” thick. The inside is a waterproof dark grey/grey-green camo pattern. The top can be rolled down for easier access if desired.

This main compartment is divided from the laptop compartment by a lightly padded wall which is connected on three sides but is flexible enough to allow space-sharing between the areas. The laptop compartment is accessible from outside the bag through a full-length zipper that runs down the left side, as you’re wearing it. It will easily hold a 17” gaming laptop. Actually, anything smaller rattles around in the space. My 15” MacBook Pro Retina can almost fit in sideways. That’s my poor little 10.5″ iPad in there in the photo below.


On the opposite side of the divider is a single organizational slit pocket about 11” deep that would let you file a magazine, Dungeon Master’s Guide, full-sized keyboard, or tablet. (It’s directly below my fingers in the shot below.) In front of this is all the rest of the space in one large chamber. I use the Tom Bihn Freudian Slip for Medium Café bag for organization inside my bags, and this allows me to use this space well. A Cocoon Grid-it or another organizational tool would be a good investment. In addition, I have two other cases – one for dongles (2” x 3” x 8.5”) and one for my Apple Pencil and charger adapter along with a “real” pen (1” x 2.5” x 8”). I also put my hairbrush in here (8.5” x 1.5” x 1.5”). (Brush it while ya got it, right?) Across the top divider between the laptop sleeve and the main compartment is a headphone strap. This allows you to slip in a large set of headphones without them sinking to the bottom of the bag. The adjustable strap (5” long, doubled) is long enough to clip around really wide headphone bands, along with their cables. This keeps the cable untangled and the headphones from getting snarled into the detritus in the bottom of the bag. If you have a decent case for your headphones, it can hang there as well.

Moving up to the top of the bag is the gusseted rucksack roll-top closure. The two long pieces are reinforced with an internal flexible banding of some sort, and magnets are affixed at each end. This assures that the lip of the main compartment closes with a satisfyingly quiet thewp! You then can roll it down as many turns as you please and secure it with the single hook. Once hooked and cinched, I never had the closing slip or come undone in use. Also, it was very easy to pull the rear side of the clip up to relieve the pressure and unhook it.

On the outside of the bag, across the lower portion that faces out, is an angular silver and black pattern. (It’s reflective. See the shot further down in a darkened room with flash turned on.) On either side of this is a red rubber strip. The left strip is a weather-resistant zipper (detail below) that gives entry into a pocket that is about 75% the size of this entire rear panel. I can fit my 10.5 iPad in there and still have room for gloves, scarf, or a hat.

Across the very top of the graphic is a zipper that opens to reveal another weatherproofed pocket, which has a few organizational pockets added to the rear wall. There are 2 pen silos, a pocket that would hold a full deck of cards easily, and a netting pocket that would hold a gaming mouse or a wad of keys. Helpfully, there is a spring-loaded clip just above this to hold the ring to such a wad.

Moving around to the back of the pack, there is a 4” span haul loop sewn in the same seam as the strap for the main closure hook. It is made from rolled webbing and padding, and it’s comfortable to hold for any weight I was able to fill the bag with.

At this same level up the back is a slash pocket that runs the full width where you can stash the straps, should you wish. There is a snap closure on this, and the removal of the straps is a one-button click from each lower corner. Actually, you can unlock one lower strap, clip it into the opposite corner, and just stash away that other strap and make the bag a sling for either shoulder. The corner “ears” also have snap closures where the corner buckle can be hidden away when that strap is not in use. Across the center horizontally, sporting a silkscreened black-on-black MSI logo, is a trolley passthrough about 4.5” wide.

The straps themselves are 1.5” seatbelt-quality webbing, with pads stitched on after a few inches. The weight is borne by the pads, and there is an adjustable sternum strap, although it seemed to slide upwards during use, so it was always up to my chin after a few minutes. It did a good job of balancing the load, however. The adjustment buckles at the bottom of the strap kept their setting while being adjusted through changes in outerwear during a few weeks of Southern Winter, which ranged from full parka to shirt sleeves.

Above the corner strap connectors on each side is a hidden slash pocket, probably meant for drink bottles or small umbrellas. One is waterproofed.

What I Like

  • Weatherproof zippers and rain cover
  • Huge reflective design on back for safety
  • Dedicated headphone hanging strap

What needs to be improved

  • Little interior organization – maybe a panel insert?
  • Laptop compartment padding is a bit thin.

Final thoughts

As a commuting backpack, this is overkill, yet it can hold everything tightly and doesn’t look like it’s the voluminous pack it is. Carrying my personal iPad and 12” work laptop, headphones, plus my other personal gear rarely makes a dent in the total capacity of this bag. I could add a weekend’s worth of clothes into this, and it wouldn’t look any different. So, if you’re running away from home to join the circus, skipping out of town for a secret weekend, or just heading out to attend an eSports Con, this bag should – um – have your back. (Sorry.) The only thing I’d recommend for MSI is to maybe add a removable organizational panel for the main compartment. Even gamers need cables, USB sticks, sunglasses, and breath mints.

Price: $146.98
Where to buy: Amazon
Source: The sample of this product was provided by MSI.

Filed in categories: Reviews

Tagged: ,

MSI Mystic Knight Gaming Backpack review originally appeared on The Gadgeteer on January 5, 2019 at 9:00 am.

Note: If you are subscribed to this feed through FeedBurner, please switch to our native feed URL http://the-gadgeteer.com/feed/ in order to ensure continuous delivery.