FOLOMOV Tactical Flashlight 18650S review

REVIEW – Lots of folks have an “every day carry” (EDC) kit – things that they take with every day so they are prepared for whatever the day may throw at them.  For many, a flashlight is one of those things that go in the kit. The Folomov 18650S is a new contender for an EDC flashlight.  Is it worth your consideration?  Read on!

What is it?

The Folomov 18650S is a compact flashlight with 15 operational modes.  It carries an IPX8 rating, so it should be impervious to everyday water risks.  With its belt clip and wrist strap, it offers a variety of carrying methods.

What’s in the box?

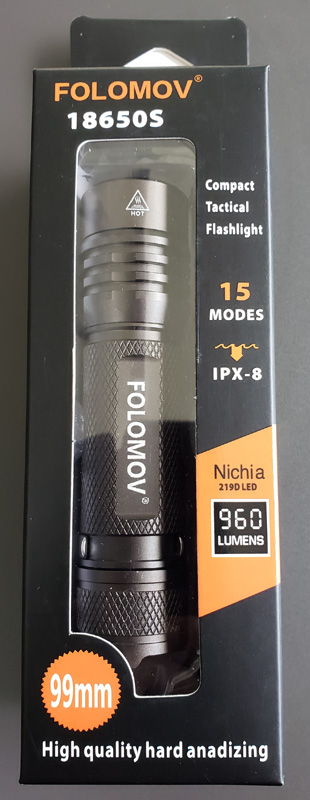
First, I’ll address what’s ON the box.  Right at the bottom, it touts “High quality hard anadizing [sic]”. I think they meant “anodizing” and their proofreader needs to find another daytime gig.

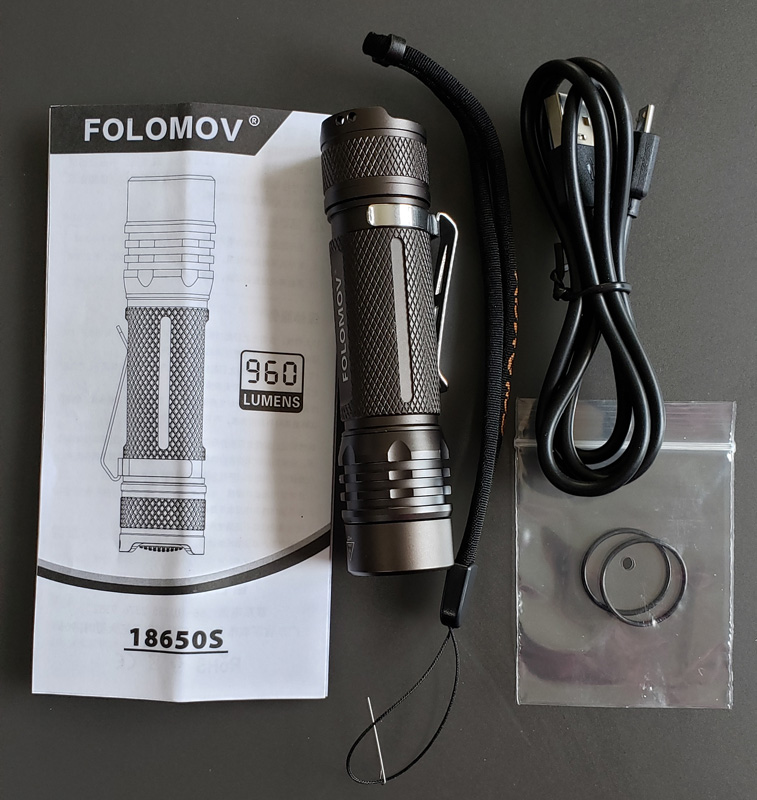
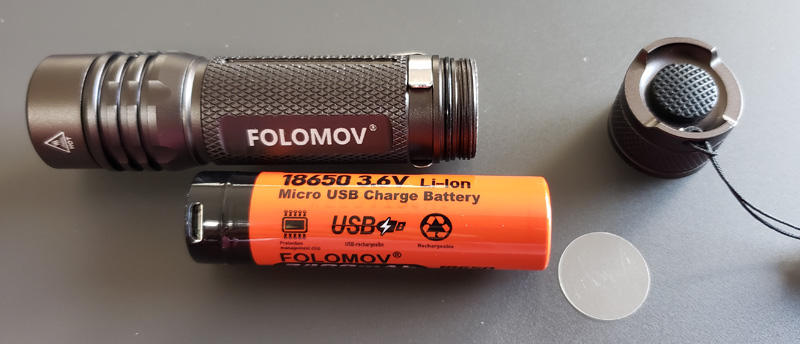
  • 18650S flashlight with battery installed and belt clip attached
  • Wrist strap with feed tool attached
  • Two spare o-rings
  • USB-A to micro USB charging cable
  • Instruction guide

Hardware specs

  • Item Weight: 3.5 ounces including battery
  • Product Dimensions: 3.9 x 0.9 x 0.9 inches
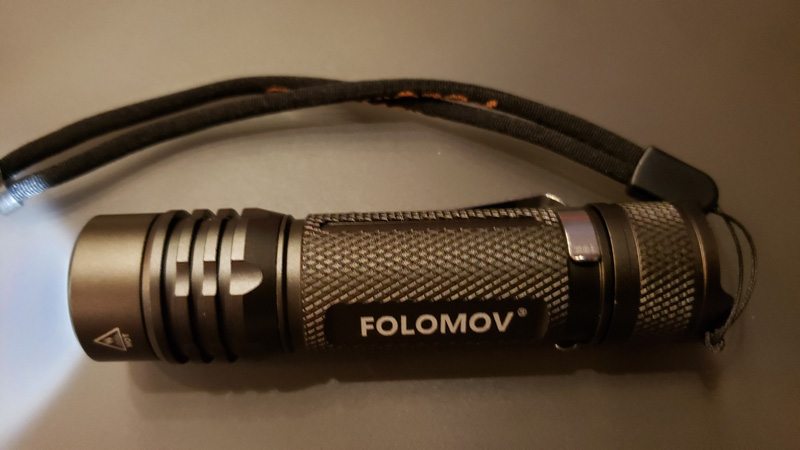
  • Finish: Military gray hard anodized with positive grip texture
  • LED: Nichia 219D
  • Waterproofing: IPX8 rating – full submersion more than one meter
  • Light output: 0.5lm (lumen) to 960lm
  • Control: single button on tail

Design and features

The flashlight is a well-made, lightweight unit. With light output from 0.5lm all the way up to 960lm, it offers the user a wide variety of lighting options.  A multi-function tail cap button provides access to multiple functions: illumination mode (6 brightness levels), tactical mode, SOS, strobe, beacon, countdown, and lockout.

Setup

There really isn’t any required setup, other than attaching the optional wrist strap. But, Folomov added a really nice touch.

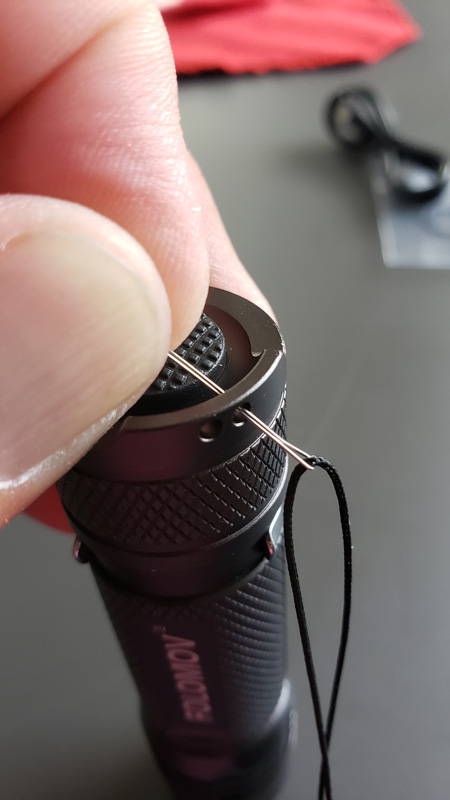
Attaching a wrist strap to most devices usually involves a lot of squinting, pinching, sometimes swearing, and frustration, trying to squeeze the strap into the incredibly small holes. Folomov solved that by attaching what essentially amounts to a very small cotter pin attached to the wrist strap.  This allowed me to easily thread the strap through the holes.  Very nice touch, Folomov!

So, after I attached the strap, I was all set up, or so I thought. I couldn’t get the flashlight to turn on.  I tried all the different button press combos that I will get into later, all to no avail.  I figured that the battery must have shipped dead, so I decided to charge it.  With an IPX8 rating, I guessed there would be a pretty beefy waterproof charge door.  I looked. And looked.  And looked.  I could not find a charge port anywhere.

Finally, I unscrewed the button end of the flashlight.  It was then I learned the following two things.

First, the flashlight shipped with a clear plastic disc covering the bottom of the battery, preventing the flashlight from being turned on during shipping.  That explains why I couldn’t get it to work.  No word about that in the instructions.

The second thing I learned was that the flashlight does not have a recharging port – the battery does.

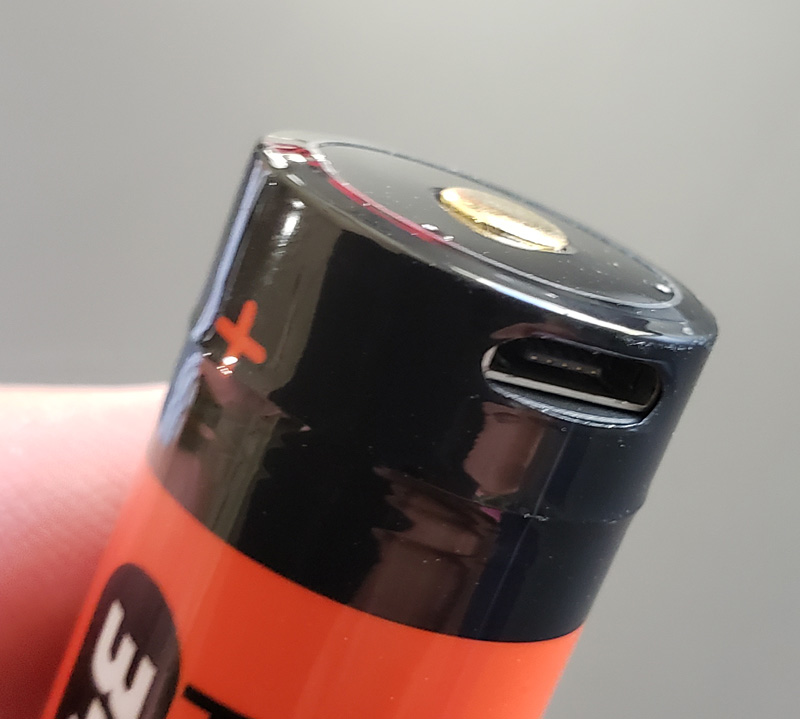
I have never seen this before, but I guess it’s a thing. Since I had it all open, I elected to give the battery a full charge.

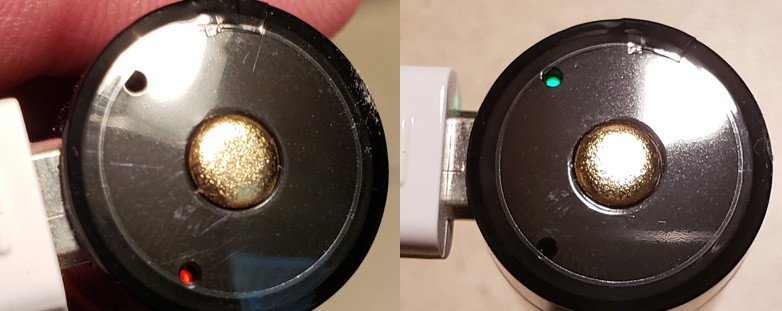
There are two LEDs on top of the battery itself.  The one to the right of the charge port glows red during charging.  Then, one to the left of the charge port glows green once the charge is complete.  Again, nothing in the instructions about any of this.

Performance

I took the flashlight out back at night to demonstrate the different lighting modes.

All photos were taken at f1.5, 0.3-second exposure, 400 ISO, to keep the photos consistent and show the relative difference in lighting. I took two photos at each lighting level, shining the light about 15 feet in front of me, and then at a magnolia tree about 40 feet away. For each mode, I will list the light output and the expected runtime with a full battery charge.

Lighting modes

The lowest mode is Moonlight mode. To access it, hold the button about 0.5 seconds.  The same to turn it off.

When in lighting mode, quick-pressing and releasing the button turns the light on to the last-used mode.  Repeated presses cycle up and down through the modes, lowest, low, medium, high and turbo. A 0.5-second press turns the light off again.

Moonlight mode (it didn’t light the tree enough to even show that photo)

  • 0.5lm
  • 350 hours

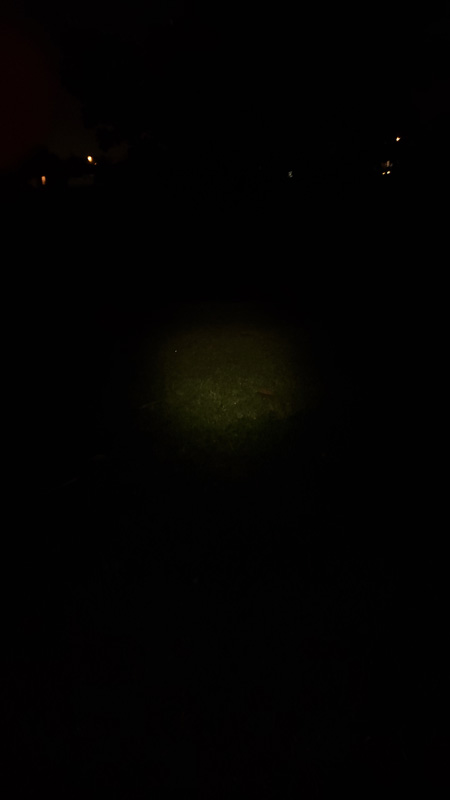
The light was visible at about 15 feet, but just a faint circle. Moonlight mode is essentially a night light.

Lowest mode

  • 10lm
  • 150 hours

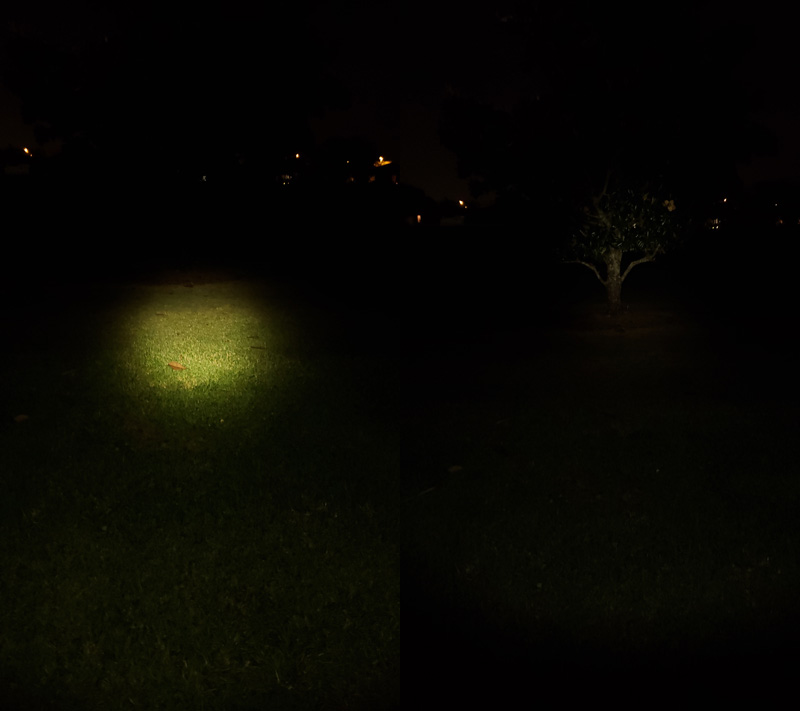
The circle was clearly visible, and I could just make out the trunk of the tree.

Low mode

  • 50lm
  • 22 hours

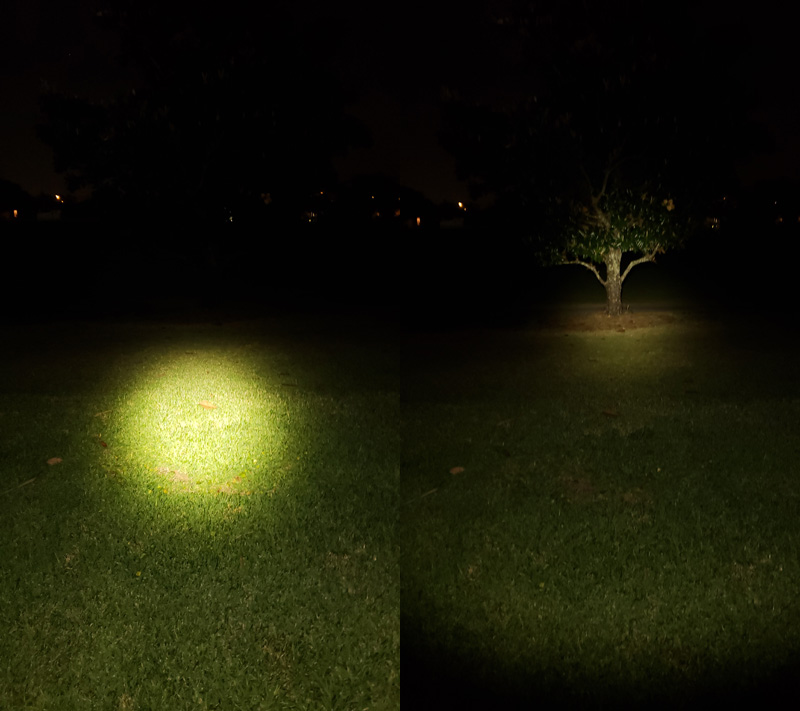
This mode produced a bright circle and illuminated the area around it.  Shining at the tree illuminated branches.

Medium mode

  • 160lm
  • 10 hours

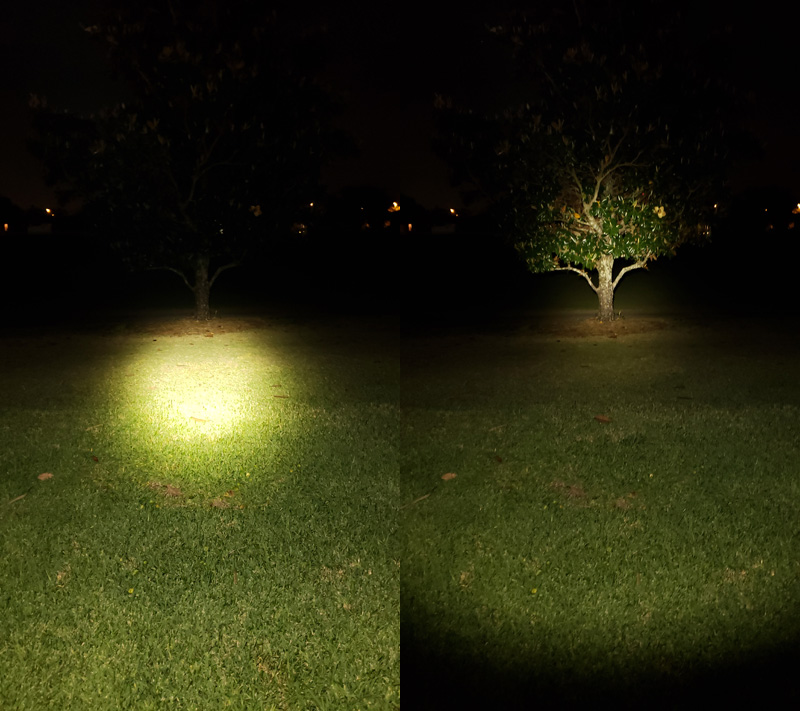
This mode provided good lighting in front of me, and could clearly illuminate the tree and its leaves.

High mode

  • 320lm
  • 4.5 hours

High mode illuminated the entire back yard and clearly lit the tree.
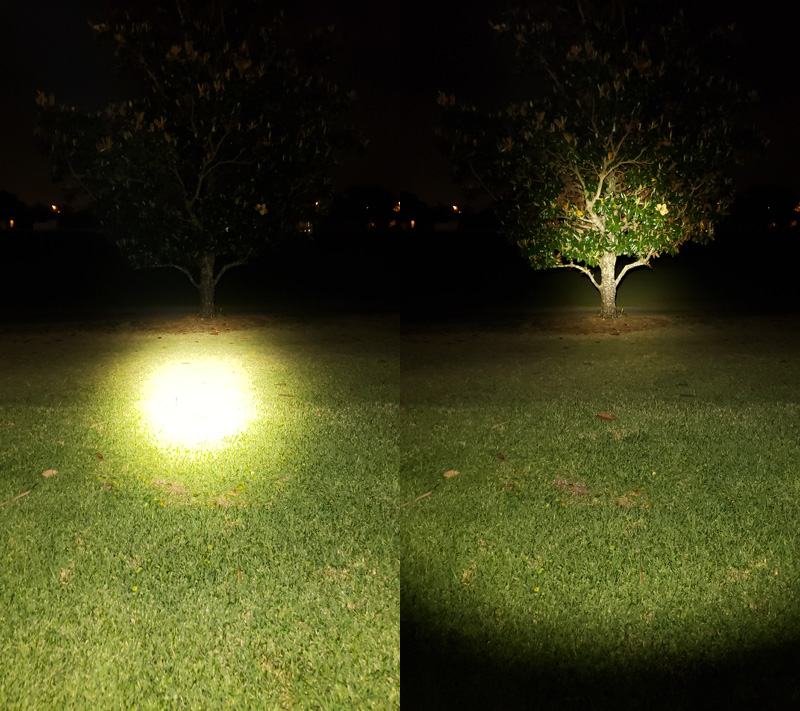
Turbo mode

  • 960lm
  • 4 hours

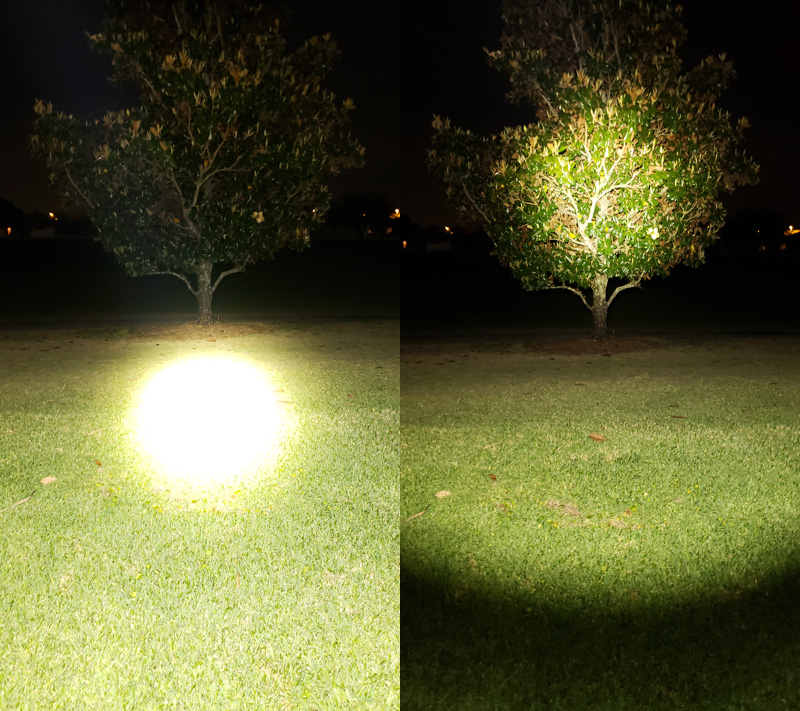
Turbo mode lit the back yard to a crazy bright level. When I shined it at the tree, it lit up the tree and the back yard.

One note – the LED end of the light has this symbol on it:

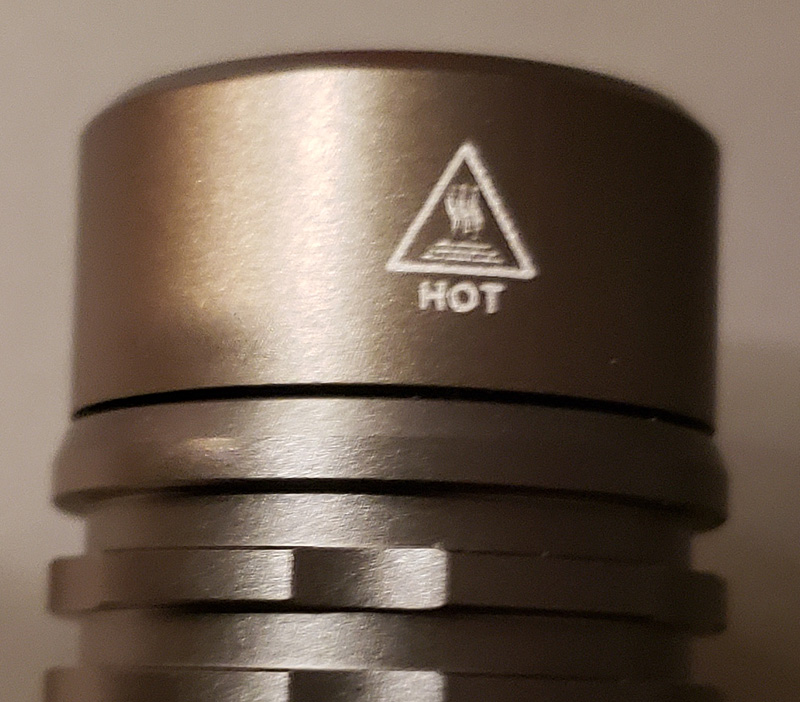
And it does get pretty warm.  I left the light on turbo mode for about ten minutes, and while it was pretty toasty, it didn’t feel dangerously hot, and the body of the light did a good job dissipating the heat.

Other modes

With the light off, a double-click of the button turns on strobe mode. The strobe flashes at the full 960lm brightness and is quite blinding.  This is a tactical mode and can be used to confuse an attacker.  When the strobe is flashing, a double-click flips to SOS mode, where the light pulses to produce an appropriate SOS emergency flash repeatedly.  Another double-click flips to beacon mode, where a 50lm light pulses every five seconds or so as an emergency locator.

Speaking of tactical…quick-clicking seven times toggles from lighting mode to tactical mode.  When you do that, the light flashes to confirm the change. When in tactical mode, the button can be held to for instant and temporary access to turbo mode.  When you release the button, it turns off.  A double-click turns on strobe mode. A long-press turns it back off again.  Seven more clicks flip back to lighting mode, again confirmed with a flash.

The light also supports a countdown timer. With the light on, three quick clicks enables a three-minute timer. The light flashes once to confirm. Once set, the light will turn off automatically at the end of the countdown. Once the timer is set, three more clicks add another three minutes.  You can do this for up to a 30-minute timer before the light automatically turns off.

Finally, with the light off, three quick clicks enables lockout mode, making it so the light cannot be turned on.  Three more quick clicks disables lockout mode, making the light usable again.

What I like

  • Well made and nicely finished
  • Excellent variety of lighting modes
  • Terrific light output for the size
  • Its design includes flat side area, preventing it from rolling away
  • Including the strap-threading tool is a really nice touch

What needs to be improved

  • The English instructions really need to be rewritten as they are a grammatic nightmare, and in some cases, just plain wrong or missing
  • Accessing the wide variety of modes through a single switch, via 1, 2, 3, or 7 clicks is a bit confusing

Final thoughts

In another nod to the proofreader needing to be let go, all the runtimes listed in the instructions showed “M”, not “H”, so if you believe the instructions, it will only run for four MINUTES on turbo. But in my testing, that is more of a typo than anything. The runtime specs on the box itself are correct, even though they differ from the same chart of runtimes in the instructions.

But, I can forgive typos and grammar if the product is good, and this product is good.  The wide variety of lighting levels make this a very flexible flashlight.  The tactical modes make it a good tool for personal protection or emergency use.  It’s light enough to carry every day but sturdy enough to stand up to rugged use.

With up to 960 lumens of blinding light, it’s a good deal at its price point.

Price: $27.65
Where to buy: Amazon
Source: The sample of this product was provided by Folomov.

Filed in categories: Reviews

Tagged:

FOLOMOV Tactical Flashlight 18650S review originally appeared on The Gadgeteer on April 22, 2019 at 10:00 am.

Note: If you are subscribed to this feed through FeedBurner, please switch to our native feed URL http://the-gadgeteer.com/feed/ in order to ensure continuous delivery.

NITECORE TUP 1000 lumen EDC flashlight review

REVIEW – Do you love EDC flashlights but hate feeding them batteries? If so, then I have a flashlight you’ll want to check out. It’s the NITECORE TUP and it packs some nice features into a very pocket-friendly package. Let’s check it out.

What is it?

The NITECORE TUP is a 1000 lumen USB rechargeable flashlight that is the perfect size for EDC/pocket carry.

Specs

LED: CREE XP-L HD V6
Maximum Brightness: 1000 lumens
Peak Beam Distance: 197 yards
Peak Beam Intensity: 8130 cd
IP Rating: IP54
Impact Resistance: 1 m
Battery: 1200 mAh lithium-ion battery
Dimensions: 2.76″L x 1.16″W x 1.16″H
Weight: 1.87oz

What’s in the box?

  • NITECORE TUP flashlight
  • Keyring
  • micro USB charging cable
  • Instructions

Design and features

The NITECORE TUP doesn’t really look like a flashlight when you first take a look at it. First of all, it’s small at not even 3 inches long. Then it has a square shaped aluminum case which isn’t typical of most flashlights. And finally, it has two control buttons and a built-in OLED display that shows you the lumen setting and time left at that setting before the battery needs to be recharged.


The NITECORE TUP flashlight has a strong clip that you can use to clip the NITECORE TUP to your belt, pocket, or even the brim of your cap. If clips aren’t your thing, you can attach the included keyring and use that instead.

The left side of the TUP has a micro USB charging port that is protected by a rubber seal. The flashlight has an intelligent charging system that includes overcharge protection and indicators that alert you when the 4.2V battery needs to be recharged.

While charging, the power and mode buttons will blink Blue. When the battery is fully charged (it can take 3.5hrs to fully recharge), the status LEDs will stop blinking and will glow steadily.

The TUP has 5 brightness modes that you can cycle through with the mode button when the light is powered on. Info about the mode will show up on the display for a couple of seconds.

The display shows the current lumen setting and runtime remaining in that setting. If you press the mode button while the flashlight is off, the TUP’s display will show the real-time voltage level so you can get an idea of how much longer the flashlight will continue providing light or how long it needs to charge if it’s recharging.

Performance

Using the NITECORE TUP is easy. Just make sure it’s fully charged and then press the power button to turn it on and the mode button to cycle through ultralow, low, mid, and high settings which go from 1 lumen up to 200 lumens. The flashlight will remember the brightness setting last used and will use that setting the next time that you power it on.

Here’s a table that gives you an idea of how long you can expect to use the NITECORE TUP before the batteries need to be recharged and how far the beam will shine at that setting and the intensity.

But how do you use the 1000 lumen turbo mode you’re wondering? With the flashlight on or off, just hold down the mode button for a couple of seconds and the flashlight will turn on in turbo/1000 lumen mode for as long as you’re holding down the button. You can’t lock the flashlight on in that mode since it uses a lot of power and the flashlight can overheat in turbo mode.

Here are some images that show the brightness levels in my Gadgeteer HQ office at night with all the lights off.


The room was completely dark with just LEDs from my monitor and some other gadget glowing on the desk. I had my smartphone on a tripod about 10 ft away. Indoors, I find that the 65-lumen setting works fine for most things.

This flashlight works great but the only small issue I had was that it’s a little too easy to toggle on the half lockout mode. The NITECORE TUP has two lockout modes. The half lockout mode just locks the power button and the full lockout mode locks out both the power and mode buttons so that pressing them has no effect. These modes are there to prevent the flashlight from turning on while in a bag or pocket if you run into that issue.

The half lockout mode is turned on by holding down the power button for more than a few seconds while the light is on. I have a habit accidentally of pressing and holding that button instead of the mode button when I want to use the turbo/1000 lumens mode. Luckily turning off the half lockout mode is just a quick press of the power button followed by a longer press. But I do wish that the buttons on the flashlight were reversed so that the power button was on top instead of the other way around.

What I like

  • Bright
  • Small
  • Rechargeable battery
  • The display shows the battery charge level

What needs to be improved

  • Put the power button on top of the mode button instead of the other way around for better ergonomics

Final thoughts

I’ve really enjoyed using the NITECORE TUP. I like the small size and easy user interface. Although I rarely need more than 65 or 200 lumens, I like that I can use 1000 lumens if I need to.

Price: $64.95
Where to buy: Nitecorestore.com
Source: The sample for this review was provided by Nitecore Store.

Filed in categories: Reviews

Tagged: ,

NITECORE TUP 1000 lumen EDC flashlight review originally appeared on The Gadgeteer on March 19, 2019 at 9:00 am.

Note: If you are subscribed to this feed through FeedBurner, please switch to our native feed URL http://the-gadgeteer.com/feed/ in order to ensure continuous delivery.

BioLite HeadLamp 330 review

REVIEW – How many times have you needed extra light, either when working on a close project in a dark area, or, when walking or running in dim conditions? And, how many of those times did you not have an extra hand to hold the light, or, simply didn’t want to carry one with you?  Those are the problems you can solve with the new BioLite HeadLamp 330.  For brevity, I will simply call it the 330 for the reset of the review.

What is it?

The 330 is a wearable, USB rechargeable head-mounted lamp. It is named for its light output, a maximum of 330 lumens (lm), or about the equivalent output of an older 20 watt incandescent bulb. That doesn’t sound like much, with with today’s focused LED technology, it produces a surprising amount of light.

What’s in the box?

  • BioLite HeadLamp 330
  • USB charging cord
  • Quick start guide

Hardware specs

  • Output: 230 lm spot, 100 lm flood, 330 lm total
  • Lamp mount: tilting, approximately 45 degrees down in four steps
  • Battery: 900 mAh, 3.4 Wh Li-on USB rechargeable
  • Input: micro USB – cord included
  • Run time: 3.5 hours on full brightness, 40 hours on dim
  • Water resistance: IPX4 (protects from splashing water, no matter the direction)
  • Weight: 2.4 oz
  • Lighting modes:
    • White flood with dimming
    • White spot with dimming
    • White spot + flood with dimming
    • Red flood
    • White strobe
    • Lock mode
  • Power on memory: Last mode + dimming level
  • Beam effective distance: Flood, 16m; spot, 75m

Design and features

The 330 mounts on your head with its soft and stretchy, adjustable headband.  It comes in four colors, ocean teal, midnight grey (my sample), ember red, and sunrise yellow.

The lamp is mounted up front. The power/mode button is on top, as is the tab to adjust the tilt.

The battery is mounted on the back.

The white stripe is nicely reflective.

The grey tab below the battery covers the micro USB charging port.  There is a four LED charge indicator next to the port. It lights when charging, and also every time the lamp is turned on/off, showing the approximate charge in 25% increments.

The lamp sits flush on your head.

Looking at it from the side, it sure seems like the battery would make it feel back-heavy, but since the whole lamp weighs in at only 2.4 oz, I really didn’t feel it after wearing it for a few minutes.

As the 330 sits on my melon, it points up a bit.  That tab above the power switch allows you to tilt it downward about 45 degrees in a four-step click adjustment. Below shows it flush on the left, one click, which essentially put the light facing forward, and four clicks, pointing the light angled toward the ground.

Setup

Setup is simple and has two steps.

  1. Adjust the strap to fit your noggin. The strap adjusts several inches, so everyone should be able to get a comfortable fit.
  2. The instructions say to hold the power button eight seconds to disengage lock mode, however my unit was shipped unlocked.

Operation

There is one button to control the 330. Lock mode is engaged by holding the power button for eight seconds.  When lock mode engages, the red LEDs flash twice.  In lock mode, when you press the power button, the red LEDs flash twice to indicate it is in lock mode.  At that point, that’s all you can do, until you disengage lock mode. Holding the button again for eight seconds disengages lock mode, indicated by a single red LED flash. With lock mode disengaged, all lighting functions are again available.

With the power off, pressing the button turns the lamp on to the most recently used mode and brightness level, if applicable.  Pressing the button again, turns the lamp off.  With the lamp off, pressing the button repeatedly in rapid succession, cycles through the following modes:

  • red flood
  • white spot with dimming
  • white flood with dimming
  • white spot + flood with dimming
  • white spot strobe
  • off

With the power on, if you are in one of the dimming modes, pressing and holding the button will dim or brighten the lamp, ending with a single flash when it hits max dim or max bright.

Performance

The first thing I decided to try was to verify or disprove their battery claim. I elected not to go for the claimed 40 hour runtime on dim, as I expect that won’t be the mode most folks use. I opted for the high-power, 3.5 hour runtime. I turned it on in flood + spot on full brightness.  Unfortunately, I was out of the room when it died, but, it was somewhere between 3:15 and 3:50, so the claimed 3.5 hour runtime seems pretty plausible. Based on that, I would expect the 40 hour claim on dim to also be plausible.

The 330 is really quite comfortable. As I mentioned, I really didn’t notice it after wearing it for just a few minutes  Because the strap is adjustable, you can get a secure, but not-too-tight fit pretty easily.  The lamp also doesn’t move. which would be a great asset for a runner.  For what it’s worth, that isn’t me.  If you see me running, try to keep up, as there is a reason…

I took the 330 outside after dark and took some photos.  Note that the exposure on all these is exactly the same, so the photos show the relative difference in lighting. I set the exposure to show the light pattern without blowing out the photos too much. What that means is that these photos go dark more so than the light actually did to the naked eye.  But, if I exposed for that dim light, the majority of the photos would just have appeared to be all white, so they wouldn’t have been too useful.

Flood mode produced nice, even light over a wide area.  This is only 100 lumens, and it nicely lit the entire area in front of me for a good 25-30 feet with extended visibility out to 45-50 feet.

I then dimmed the flood light to its lowest setting.  As you can see, it was quite a bit dimmer, but while this doesn’t show it, I could still see some detail in the grass.

I then did the same thing in spot mode.  There is a pronounced bright area in the middle, illuminated with 230 lumens, and a quick fall off to the sides. The bright spot really lit up the area 20 feet or so out. If I looked up more, I could get a good view 50 feet or more out.  They claim a 75m illumination range with the spot, which might be a bit generous, but the spot did a good job sending out the light.  More importantly, it will make you visible to others for a long, long way.

In dimmed spot, we again see the middle illuminated with light fall off to the sides.

Finally, I tried flood + spot.  There was a noticeable increase in lighting to the sides when compared to the spot alone, thanks to the wide diffusion from the flood. But with only 100 lumens of flood and 230 lumens of spot, you have to look closely in the photo to see the additional side lighting.

Of course, in dim mode, the spot is the only thing visible in the photo, but there was a nice, wide spread of the dim light to my eye.

I did not attempt to photograph the red flood.  Red lighting preserves your night vision. I see this as a great tool for darkroom users (are there many of these still out there?), pilots flying at night or doing nighttime aircraft inspections, and backyard astronomers.  Being able to effectively light your workspace while keeping your night vision intact is invaluable.

For obvious reasons, I also didn’t photograph white strobe mode.  The strobe uses the spot, and is terrifically bright at 230 lumens.  For daytime walkers or runners, this would provide a nice attention-getting flash to make you more visible in a high-traffic areas.

What I like

  • Great, comfortable fit
  • Nice selection of lighting modes
  • Powering on brings back the last used mode and brightness
  • Light goes where you look
  • Light doesn’t move or bounce when you’re moving
  • Good battery life

What needs to be improved

  • Personally, I would like to be able to change modes without turning the lamp off, but that’s a minor quibble
  • The tilt tab makes it a little difficult to use the button when wearing the 330, but I expect that will become easier with more use

Final thoughts

I really like the 330.  I can see using this for nighttime walks with my honey, or when working on some of the stuff I have plugged in behind other stuff, where it is always too dark to see what I’m doing.  When I was in college and developing my own black and white film and prints, this would have been an awesome tool.  The same is true back when I was flying for fun.  Doing a pre-flight aircraft check in the dark would have been so much easier with the 330. Still, with its comfortable fit and multiple modes, I expect this will get a lot of use.

Price: $49.95
Where to buy: BioLite.com or Amazon
Source: The sample of this product was provided by BioLite.

Filed in categories: Reviews

Tagged:

BioLite HeadLamp 330 review originally appeared on The Gadgeteer on March 16, 2019 at 11:00 am.

Note: If you are subscribed to this feed through FeedBurner, please switch to our native feed URL http://the-gadgeteer.com/feed/ in order to ensure continuous delivery.

AceBeam H40 headlamp review


REVIEW – Headlamps, or flashlights that are worn on the head, are invaluable when working or traveling in dimly lit areas. They may be judged on their brightness, battery life, beam spread, robustness, size, and weight. The H40 by Acebeam combines several features to make it a useful gadget. Read on to see what I think!

What is it?

The Acebeam H40 is a small lightweight headlamp that features a bright LED. The brightness can be fine tuned between 20 and 230 lumens. The light also features a low-power mode of 5 lumens, a turbo mode of 1050 lumens, and an SOS signaling mode at 1050 lumens. All of these brightness and control options are made using a single rubberized button. The Housing is made of aircraft aluminum and is IP68 rated. The housing opens to allow replacement of the single AA battery.

What’s in the box?


H40
Headband
Spare O ring
User Manual
Warranty card

Design and features

Specifications


The specifications chart is a little confusing and would benefit from an additional column of the color rendering index (CRI). The CREE-HD XP-L HD has a color rendering index (CRI) between 70 and 80, while the SST-20 CRI 95+ has a CRI of 95 or greater. This means that colors appear to be more natural under the SST LED than under the CREE LED. While the SST LED has better color reproduction, it is not as bright as CREE LED. People who work all day under a headlamp would benefit from the SST LED. The light of the lamp is focused into about a 70 degree arc, based on the relationship between candela and lumens.

Unboxing

The headlamp is packaged in a foam-lined matte cardboard telescopic box designed for retail display.

The front of the box shows the projector in perspective and some of the performance characteristics. The sides of the box identify the unit serial number, UPC code, QR codes for the website and Facebook page, and applications: Mountaineering, cycling, camping, first aid, construction, and adventure.

The back of the unit includes the specifications displayed above, description, features, the address of the manufacturer and some compliance codes.

The inside of the box has everything nicely packaged. The unit also contains a silica gel packet.

Design and features

Hardware

The design of the AceBeam H40 is tactically inspired. Batman would be proud to wear this on his head. The design features each serve a function. The knurled grip on the battery cover, the cooling fins on the back of the headlamp, the grooves into which the headband fit, the easy to feel operating button are all designed for functionality.

The design is also backed by a five-year warranty, which attests to the confidence the manufacturer has in its design and construction. As an added bonus, and to make warranty claims easier, the serial number is etched and painted onto the glass lens retainer. There are two improvements I would love to see: adding knurling on the end opposite the battery cover so that it is easier to position the lamp up and down in the headband, and adding a retaining lock on the battery cover so that the cover is not accidentally opened when re-positioning the lamp in the headband.

The reflector does a great job in dispersing the light. The picture below is of the lamp in the lowest power mode.

The headband has two adjustments; one for the circumference and one for across the top of the head. The circumference fits 26″ unstretched, so will fit hard hats and bike helmets.

The inside of the headband is coated in two zig-zag beads of silicone to provide exceptional traction even on slick or sweaty surfaces.

The outside of the headband features 3M reflective paint to enhance the visibility of the wearer at night.

Operation

The operation of the lamp is intricate because all of the functions are accessed by one button but the commands are easy to learn and are intuitive after a short while. The lamp is operated by the sequences below:

Single click – turns the lamp on at the previously set intensity.
Double click – toggles the lamp from high intensity (350 lumens) to turbo intensity (1050 lumens). This mode can be reset by a long press when on or by turning the lamp off and then back on.
triple click – starts the SOS Morse code mode (use single click or double click to exit)

long press when off
1 second – turn on ultra-low mode
3 seconds – toggles button lock mode (acknowledged with three blinks of the light)

long press when on
adjusts the intensity from 20 to 230 lumens.

You can see what the lamp looks like as I’m wearing it in the pictures below. Alas, a headlamp will never be the most glamorous accessory.


Performance

The following video shows the view at a local town park on a moonless night in a slight rain. It’s about the worst-case conditions to test the performance of the lamp.

The video is barely able to detect what the naked eye could see, but there was some of the green painted swing set visible at night, lit up by the lamp. Plugging my location into https://www.gmap-pedometer.com/. I determined that the what I saw is actually very close to the stated beam distance of 106 m (0.106 km).

It is difficult to test the other parameters of the lamp. Fortunately, AceBeam is a member of The Portable Lights American Trade Organization (PLATO), which allows member companies to publish verified specifications and performance ratings of their products. Because AceBeam is a member of PLATO, comparing the lamps parameters with other PLATO member products is straightforward and reliable.

What I like

  • lightweight
  • bright
  • secure fitting

What needs to be improved

  • unintentional loosening of the battery cover
  • the grip on barrel opposite battery cover

Final thoughts

The AceBeam headlamp will effectively and reliably cut through the darkness and still leave two hands-free. I give it two (flashlight-free) thumbs up.

Price: $34.90
Where to buy: Acebeam and Amazon
Source: The sample for this review was provided by Acebeam.

Filed in categories: Reviews

Tagged:

AceBeam H40 headlamp review originally appeared on The Gadgeteer on February 21, 2019 at 9:00 am.

Note: If you are subscribed to this feed through FeedBurner, please switch to our native feed URL http://the-gadgeteer.com/feed/ in order to ensure continuous delivery.

SureFire 2211 WristLight is a wearable flashlight watch

NEWS – They say that the best camera is the one that you have with you, so that has to be the same advice for flashlights as well, right? Most of us reading this post probably have a smartphone that we can use as a flashlight in a pinch, but check out this always at the ready WristLight from SureFire.

The SureFire WristLights are available in versions with or without a watch. The 2211 Luminox version that you see above has a Luminox watch which features a Swiss quartz movement, a unidirectional rotating bezel with timer markings, and self-illuminating tritium hands and markers that glow continuously, for readability in low-light situations.

The built-in LED flashlight will shine for up to 1 hour at 300-lumens and as long as 13 hours on low at 15 lumens. The flashlight is rechargeable through a micro USB connector.

You can get all the details about these wearable flashlights on SureFire’s site and you can buy the high-end SureFire 2211 WristLight shown here for $515 on Amazon.

Filed in categories: News

Tagged: ,

SureFire 2211 WristLight is a wearable flashlight watch originally appeared on The Gadgeteer on December 9, 2018 at 8:54 am.

Note: If you are subscribed to this feed through FeedBurner, please switch to our native feed URL http://the-gadgeteer.com/feed/ in order to ensure continuous delivery.