In my business travels, I’ve been starting to see more standing desks appear in the offices of both large corporations and small startups. As health related studies have recommended periodic standing breaks for workers that are desk-bound, the convenient benefits of a standing desk are obvious. Here, we will be reviewing the SmartDesk 2 from Autonomous.
SMARTDESK 2 OPTIONS
The SmartDesk 2 has several standing desk options to choose from.
Tabletop options include:
- 5 different surface finishes from simple white or black to wood grains.
- 6 different table shapes with different lengths(53″ or 70″), “cutout” styles, and curvatures
Frame options include:
- 3 different colors consisting of white, black, or grey.
- 2 different frame platform options:
- Home Edition consisting of a single motor capable of supporting 220 lbs through a 29″ to 47″ height range
- Business Edition consisting of dual motors capable of supporting 300 lbs through a 24″ to 51″ height range
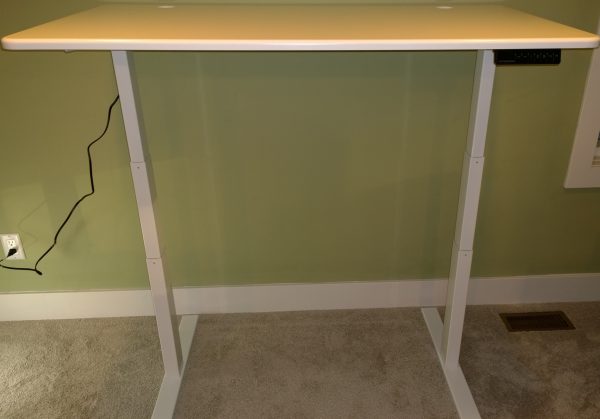
For this review, we have a white rectangular 53″ tabletop with a white Business Edition frame platform.
DELIVERY
Your order comes in two boxes, presumably so they can efficiently send you separate tabletop/frame color options according to your order.
The box containing the frame is the heavier of the two, checking in at 67 pounds. It was laid down horizontally on my porch, and wasn’t the easiest package to handle as the size of the box was slightly unwieldy.
The tabletop package weighs a much more manageable 38 pounds and had outer nylon straps, enabling you to use those as handles to lift the package inside.
Overall, bringing the frame box indoors may require two people, or the box can be opened outside where the individual components can be removed separately.
Since my desk would be installed in a 3rd floor office attic space, it was easier to remove the contents from the frame box and bring each of the components individually upstairs.
UNBOXING
Opening the frame box, each of the components were housed with foam inserts protecting the contents from each other and from external damage.
In fact, my frame box had a sizable gouge on the side, but the foam did its job as all the components were undamaged.
Tucked away inside the foam inserts were a few more accessories. A parts bag included bags of screws, adhesive backed cable organizers, and your standard fare Allen wrench. The screw bags were each labeled with fastener specifications (i.e. Mx12) which removed any doubt for screw selection during assembly.
A few electronics components were stored here including a controller box, a control pad, a power cord, and two cables that connect the actuators to the controller box.
Likewise, there were foam inserts for the box containing the tabletop protecting both its edges and surfaces.
TABLE DESIGN
The frame platform consists of several parts:
The tabletop is supported at each end with an “I” beam shaped configuration. The horizontal pieces are comprised of the “side bracket” on the top, and “feet” at the bottom. The vertical section, the “leg”, feature 3 tiered ‘telescoping’ structures that extend via a linear actuator. The telescoping action is what ultimately gives the standing desk it’s height adjustability.
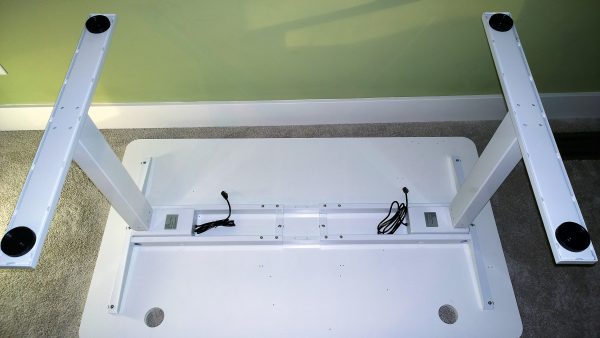
The tabletop is supported by horizontal components consisting mainly by 2 “crossbar ends” at each end of the table. Both “crossbar ends” are joined together with lengthwise adjustable “center rails” that can accommodate all the different length tabletop options.
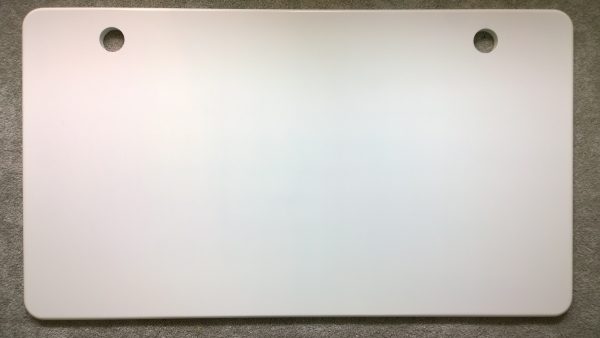
The tabletop itself is a nice semi gloss surface with rounded edges. A “switch” panel at the right front edge controls the height of the table. There are two cable holes at the rear of each side of the table to provide some measure of cable management.
ASSEMBLY
Assembly of the Smartdesk was straightforward and felt similar to putting together a piece of furniture from IKEA when it came to degree of difficulty.
The assembly manual consisted of two sheets with diagrams and instructions on half of a page. The diagrams were small and sometimes it was difficult to discern details like screw placement. I think I would have preferred a full sheet per page to have much larger diagrams to view.
Additionally, λutonomous had an assembly video on their YouTube channel. I personally prefer paper instructions, but the video showed exactly how everything is installed/fastened to make things clear.
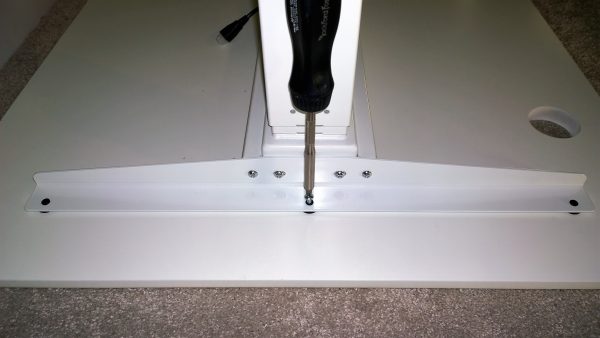
Assembly started with laying the desktop with the finished surface down and with the predrilled holes facing up.
The horizontal frame support for the desktop was initially positioned into place using the specified predrilled hole locations as a guide. The vertical legs were then positioned into receptacles on the frame.
The toughest part of the install was here, where you had to line up the holes of the leg and frame. The leg needed to be raised just about a millimeter or two to line up the holes.
The relative locations of all the holes between the frames, desktop, and legs fit well and you never felt you had to force fit anything. Overall, the Smartdesk felt well manufactured from an assembly standpoint.
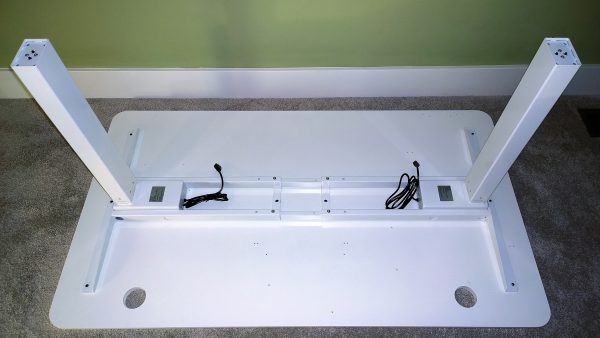
The last part of assembly involved the wiring of the linear actuators and the control panel. A “controller box” serves as the junction between the power cable, and the wiring for the other electric/electronic components. It was unclear where the “controller box” needed to be mounted, despite the paper and video instructions. I suspect that different tabletop options may have different locations for the controller. I assumed it would be located towards the back of tabletop, around the center. I moved the controller into different predrilled screw hole locations until the hole brackets on the controller lined up with them.
The “switch” panel mounting point was in a far more obvious location based on its screw holes. One thing to note, the “switch” sticks out on an angle beyond the perimeter of the tabletop. So, if the table is upside down, care must be exercised to ensure you don’t bend the panel when you attempt to flip the table right side up.
Once all the electronic components were mounted, it was a matter of routing wires from each leg actuator to the “controller box”. There weren’t any instructions in the manual or video to guide you with this. It was a matter of common sense to plumb the wires as neat as possible, and the included adhesive backed cable clips held the wires into their final position.
Finally, a metal flange and cover were inserted into the 2 cable holes of the desk.
I would estimate that it would have taken me 20 minutes to assemble the desk if I wouldn’t have stopped to take notes and pictures for review purposes. It probably could have gone faster if one were to use an impact driver on the fasteners. However, there weren’t that many screws to deal with, and I felt more comfortable in this case using simple hand tools to ensure that I didn’t cross thread the metal holes or over torque the wood holes.
AESTHETIC IMPRESSIONS
I tend to prefer minimalist modern furniture with clean lines and minimal decorative details. So I liked the look of the all white table top/frame combination of my SmartDesk. It blended in well with the mid-century modern style furniture and seating I had in my office space.
USAGE IMPRESSIONS
Operation of the SmartDesk was pretty straightforward via the control switch. There are buttons for “up” and “down” along with four numbered “memory” positions.
Pressing any of the buttons moved the tabletop in a smooth fashion with a satisfying “whirring” sound.
I liked how the actuator attenuated as it reached it’s minimum or maximum heights. It eased into those extremes which prevented jarring of the components and it felt sophisticated.
The “memory” feature was a convenient feature, as you could store positions for multiple sitting and standing heights.
At my height of six feet, I found that a 43-inch tabletop height was the most comfortable setting to type on a keyboard while standing. With an additional potential for 9 more inches of travel, I imagine that this desk could easily accommodate someone well over 6 feet tall.
As far as stability goes, even at it’s highest tabletop height on a carpeted floor, it still took some effort to topple the table over. So the length of the feet of the frame seemed to provide sufficient leverage from easily tipping the table over.
After using the SmartDesk for a few weeks, everything still worked nominally and the table still felt sturdy. All this despite constant everyday abuse from my kids who liked to all sit on the desk and fiddle with the controls to mimic an elevator ride.
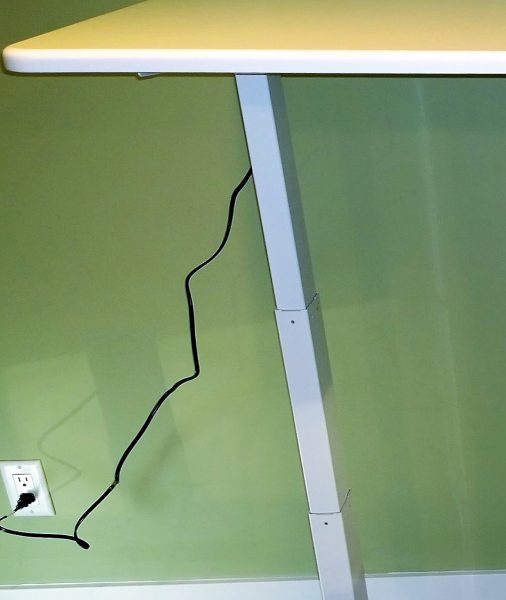
The only critique I had about the SmartDesk was that the power cable could stand to be longer. You will need to have a power outlet within 2 feet outside of one of the legs in order to accommodate a fully raised desk position.
Additionally, once you set various electronics on the table, like a computer, laptop, and/or monitor, you’ll have power cables dangling from the tabletop. You’ll have to exercise care and judgment to ensure that when the tabletop is at its fully extended position, that the power cables are sufficiently long enough and don’t snare on other objects while the table is in motion. It would be nice if there was some sort of cable management system or hardware to make the cables tied in a neat fashion while maintaining freedom of movement. I suspect this is generally an issue with most, if not all, standing desks.
FINAL THOUGHTS
The Autonomous SmartDesk 2 is a welcome addition to my space. The clean lines, sturdy build, and well-executed height adjustability add up to a desk that will stay in my home office for the foreseeable future. I feel far more productive now that I have the ability to periodically work from a standing position.
Source: The SmartDesk 2 was provided by λutonomous for this review. For more information, please visit
Autonomous.ai
Product Information
| Price: |
$299.00 |
| Manufacturer: |
Autonomous |
| Pros: |
- – easy assembly
- – well constructed and manufactured
- – fits in well with modern and contemporary room designs
|
| Cons: |
- – Could use longer power cable
- – Could use some sort of cable management system
|
Filed in categories: Computer Gear, Reviews
Tagged: Computer furniture, Desk
Autonomous SmartDesk 2 standing desk review originally appeared on on April 1, 2017 at 9:00 am.
Note: If you are subscribed to this feed through FeedBurner, please switch to our native feed URL http://the-gadgeteer.com/feed/ in order to ensure continuous delivery.