Lynktec Bolt wireless car charger review


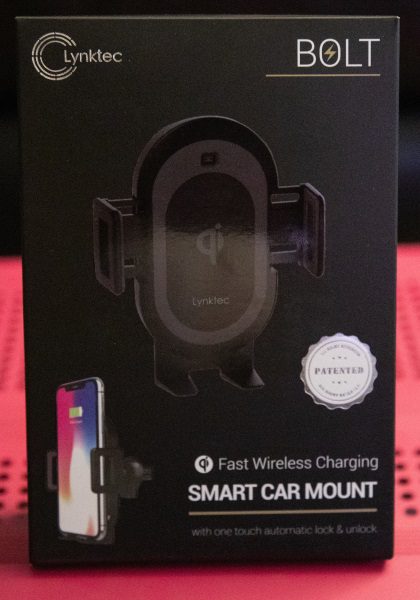
REVIEW – As a self-proclaimed gadget nerd, I surround myself with every possible gadget and embrace every convenience that they offer. These days where the phone is an integral part of our lives, it is very apparent that driving while operating a phone is a very bad idea and against the law at least here in the USA. Phone mounts for cars have almost become a standard accessory in every car, with some offering more convenience than others.  The Lynktec Bolt wireless car charger is a new addition to an already very crowded field of car charger mounts. However, it offers features that I know that I would like. Here is my review.

What is it?

The Lynktec Bolt wireless car charger is a wireless phone charger that can be mounted to the vent louver, windshield or dashboard. It includes a built-in battery that provides operational power even when the car is turned off.

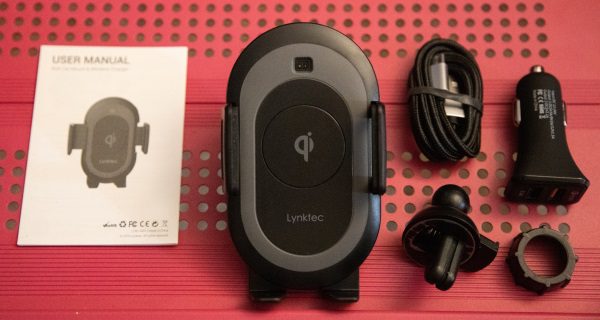
What’s in the box


1 x Bolt Car Mount
1 x Air Vent Holder
1 x USB-C to USB Cable
1 x Dual USB Car Charger (3.0/2.1A)
1 x Instruction Manual

Design and features

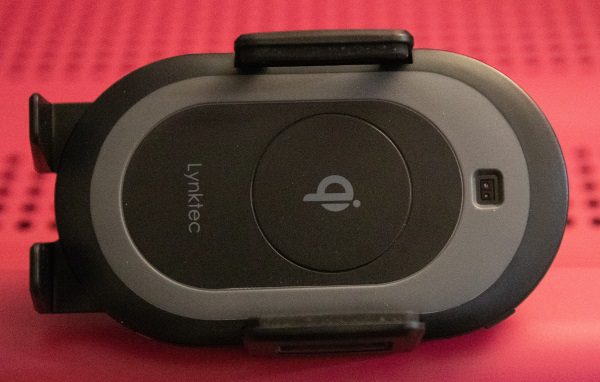
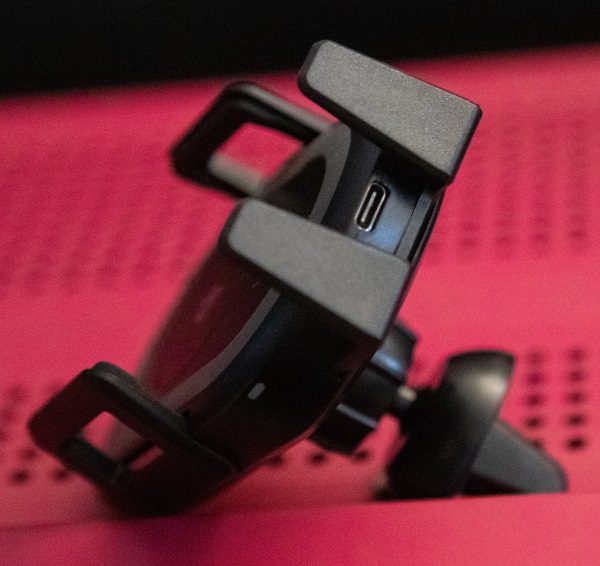
This mount has a bottom rest and two side arms that open and close electronically when the top touchpad is engaged. In the middle where the back of the phone rests is the Qi wireless charger, and above is the Infrared Lock Sensor that senses when a phone is placed into the mount and engages the securing arms to close.


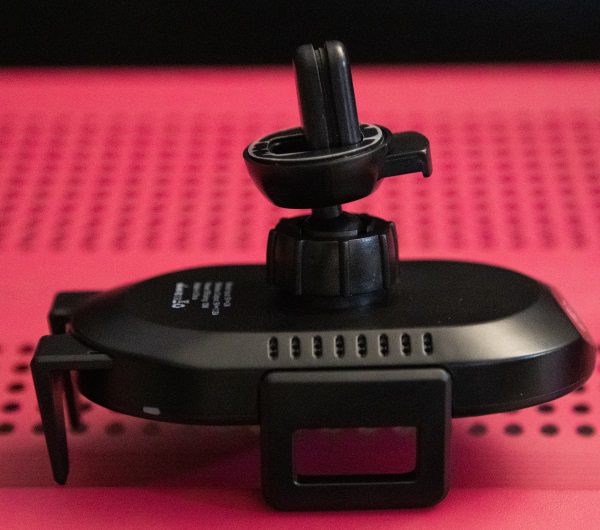
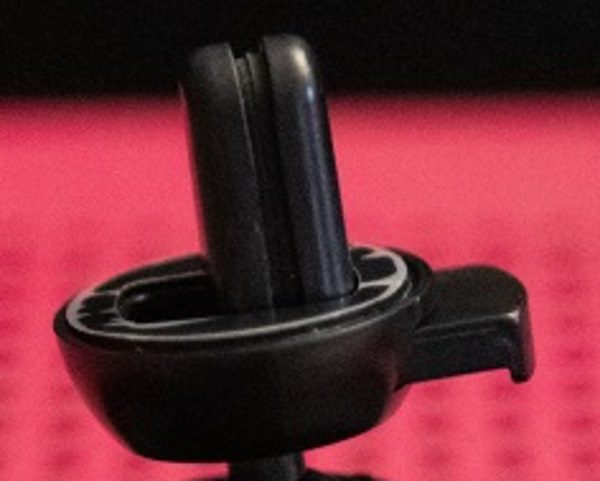
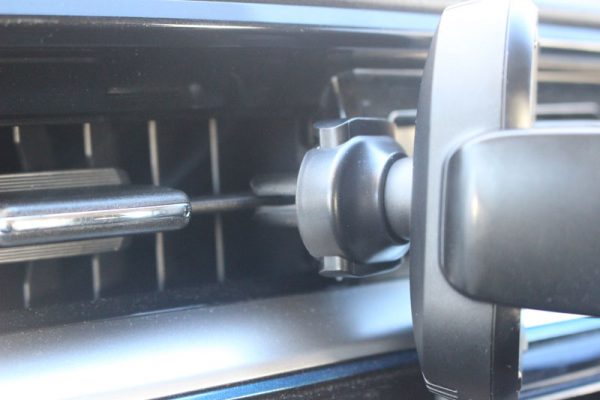
The vent visor clip is connected to the back of the mount via the supplied nut and you press the button above the clip to open the clip and slide it onto the vent louver.


At the bottom of the mount, there is a USB-C power port.


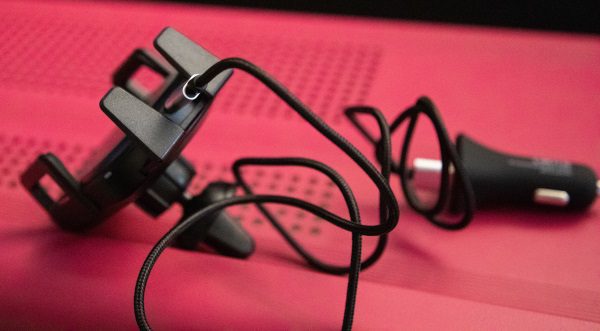
The USB-C to USB cable plugs into the power port on the mount and the other end into the 12V car adapter.

Performance:

Features:

  • Automatic lock & unlock with one touch release
  • Qi-certified fast wireless charger
  • Adjustable stand for 4″ to 6.7″ devices
  • Rotates from portrait to landscape mode
  • 250 mAh backup battery operates mount when disconnected from the power

Below you can see how the mount connects to the vent louver.


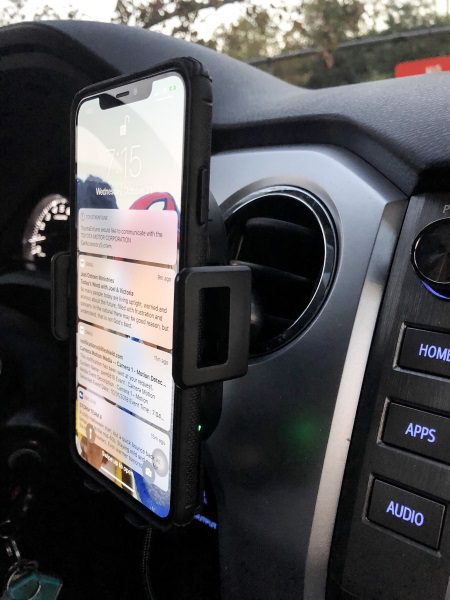
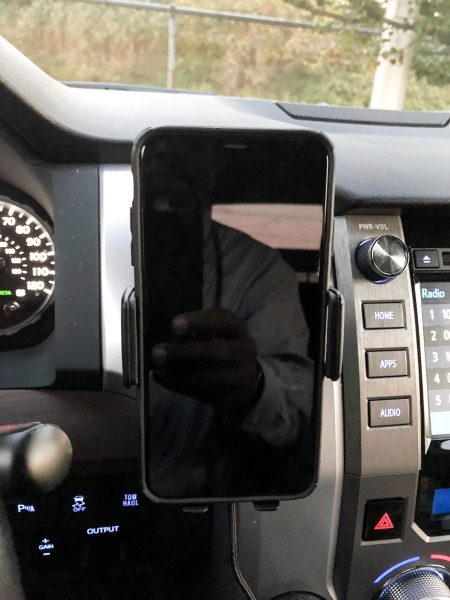
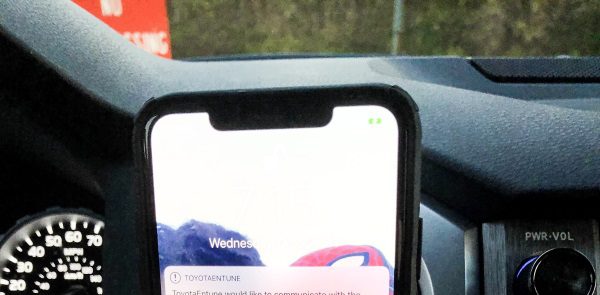
The picture below shows the mount connected to the vent with my iPhone 10XS Max in the mount.


In the upper right-hand corner of the phone screen, you can see the icon that is green indicating that the phone is being charged.


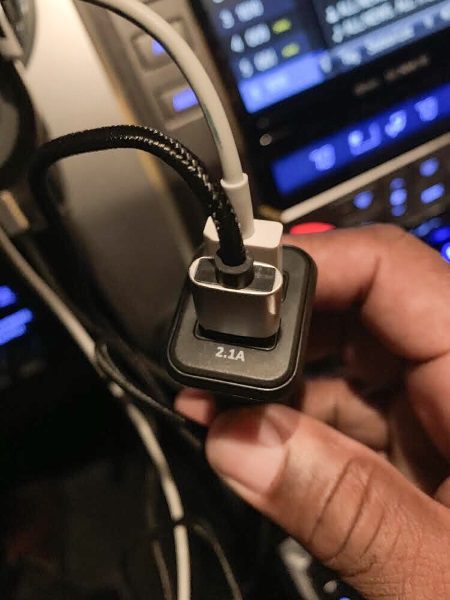
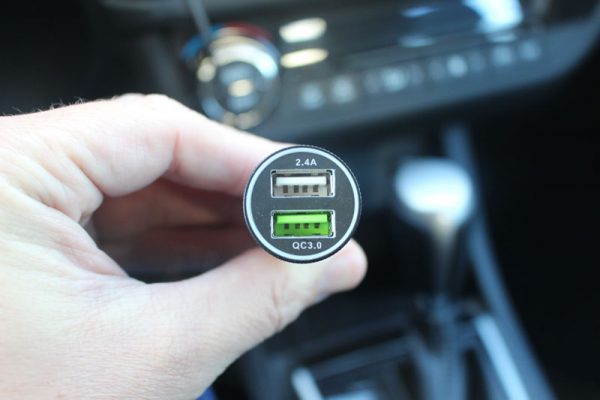
The car adapter power plug has the capacity to accommodate 2 USB cables. Only the one labeled 2.1A will work for the wireless charging feature.


The picture below on the left shows the red wireless charging indicator which is on the bottom right side of the mount. The picture on the right shows the blue power indicator that is on the opposite side.


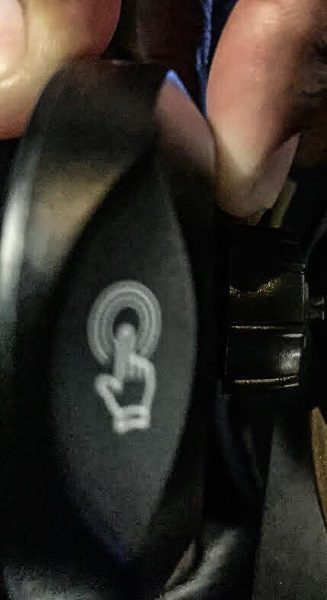
At the top of the mount, there is the touch control that opens and closes the securing arms by touch.

What I like

  • The Qi wireless charging capability
  • Can be used in both portrait and landscape mode
  • The build quality
  • The electronic arms that hold the phone
  • The touch operation

What can be improved

  • Based on the cost of this device, both the air vent mount and the dash/windshield mount should be included

Final thoughts

Not too long ag0, I reviewed a dash mounted phone holder that included arms that operated electronically but did not include Qi wireless charging. While it was a sturdy mount, I had to keep plugging in a separate cable into my iPhone for charging. I remember thinking how great it would be if wireless charging was included. This mount includes that great feature. Since the electronic arms on the mount that I previously reviewed mount began to fail after a few months, time will tell whether this device will do the same or stand up to the daily abuse. While I do think that for the price, the windshield/dash mount should be included, I will still give this Lynktec Bolt wireless car charger two thumbs up for now!!

Price: $49.99 (A telescopic Dash & Windshield suction are sold separately for $9.99)
Where to buy: Lynktec website and Amazon
Source: The sample for this review was provided by Lynktec.

Filed in categories: Reviews

Tagged: ,

Lynktec Bolt wireless car charger review originally appeared on The Gadgeteer on November 5, 2018 at 11:00 am.

Note: If you are subscribed to this feed through FeedBurner, please switch to our native feed URL http://the-gadgeteer.com/feed/ in order to ensure continuous delivery.

Thinkware F200 Dash Cam review

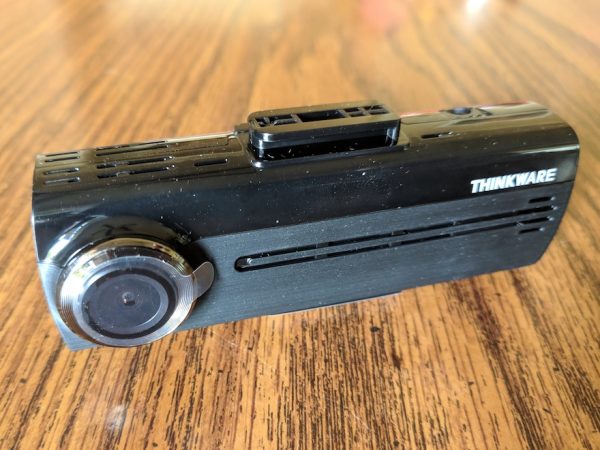
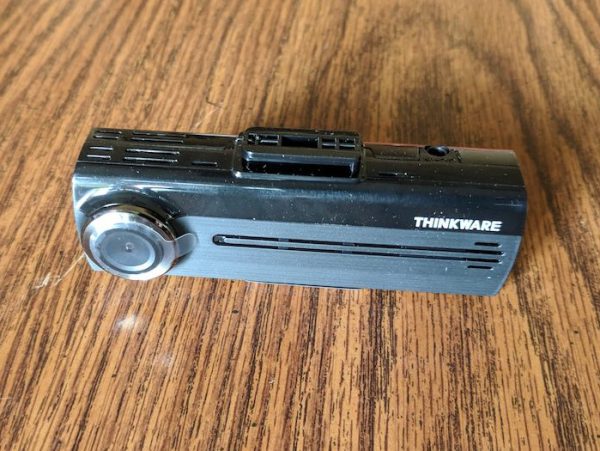
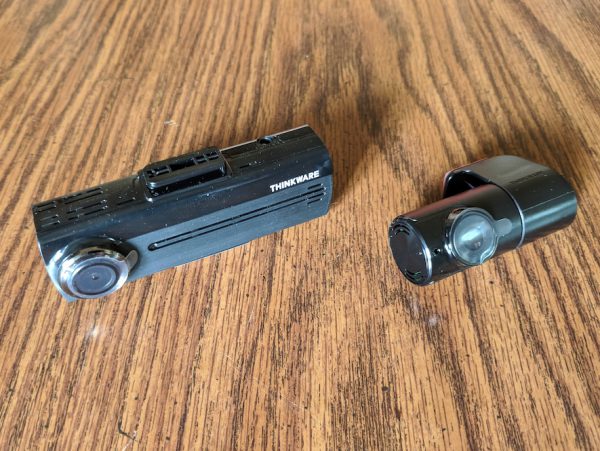
REVIEW – The Thinkware F200 Dash Cam is a reliable, somewhat simple-to-set-up dash cam with a ton of great features at an affordable price. The majority of the really great features are only available after purchasing some accessories and having the camera hard-wired, but the base F200 Dash Cam’s feature set and included companion app are definitely worth the $139.99 price.

What is it?

Dash cams are small cameras placed on your windshield or dashboard that continually record video while you drive and sometimes when you’re parked and away from your car. Dash cams have increased in popularity as the tech behind them has become smaller and more affordable. There are a number of great reasons for having a dash cam in your car; they can help you document accidents for insurance purposes, get you out of a ticket for a traffic violation you didn’t commit, or record something that happened to your car while it was unattended.

Hardware specs

  • Camera: Sony CMOS 2.12M
  • Camera Resolution:
    • Front: 1080p Full HD (1920 x 1080)
    • Rear: 720p HD (1280 x 720)
  • Frame Rate: up to 30 fps
  • Viewing Angle: 140° (Diagonal)
  • Capacity: Micro SD Card 16GB/32GB/64GB/128GB (UHS-I)
  • Recording Modes: Continuous Recording, Incident Recording, Manual Recording, Parking Recording
  • Sensor: Triaxial acceleration sensor (3D, ±3G)
  • GPS External GPS receiver (Optional)
  • Dimensions(WxDxH): 3.9 x 0.9 x 1.3 inch
  • Weight: 55g (0.121 lb)
  • Storage Temperature: -4°~ 158°F / -20°~ 70°C
  • Operating Temperature: 14°~ 140°F / -10°~ 60°C
  • Capacity: MicroSD card 8/16/32/64/128GB (UHS-I)
  • Input Power: DC 12/24V, Built-in Super Capacitor

The Thinkware F200 Dash Cam is a mid-range dash cam with a moderate feature set. Thinkware has about eight different dash cams on the market of varying prices and functionality and the F200 falls around the middle. The front camera records in a beautifully clear 1080p at 30fps and the rear camera records at 720p.

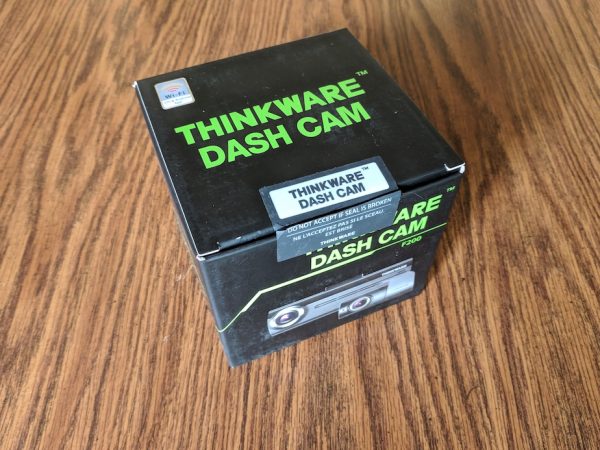
The Thinkware F200 arrives in a great little box with a tamperproof seal on it.

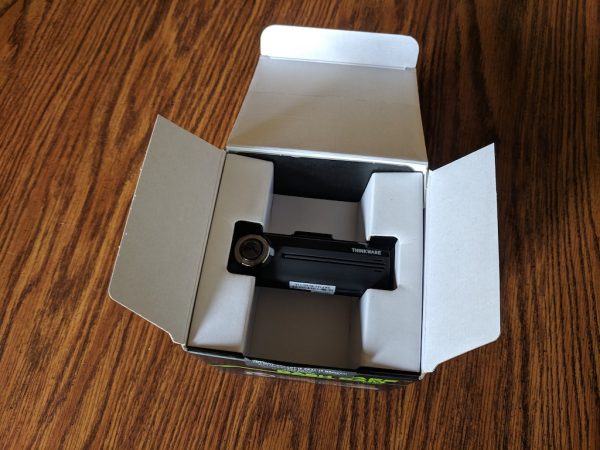
The F200 is nestled nicely into the box to protect it in transit and showcase the dash cam upon opening.

What’s in the box?

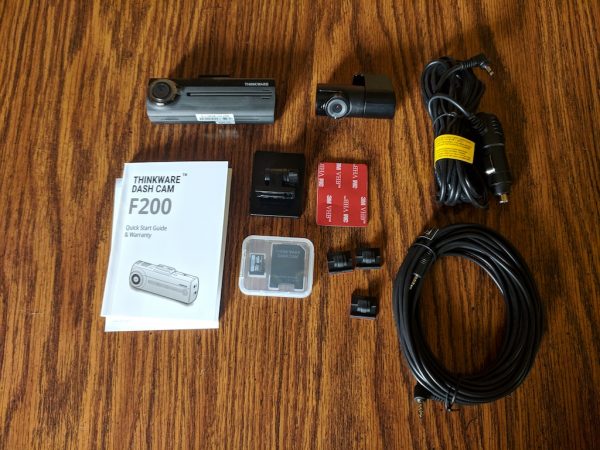
  • Thinkware F200 Dash Cam
  • Thinkware Rear-view Camera (optional, but included with my review unit)
  • Rear-view Camera Cable (optional, but included with my review unit)
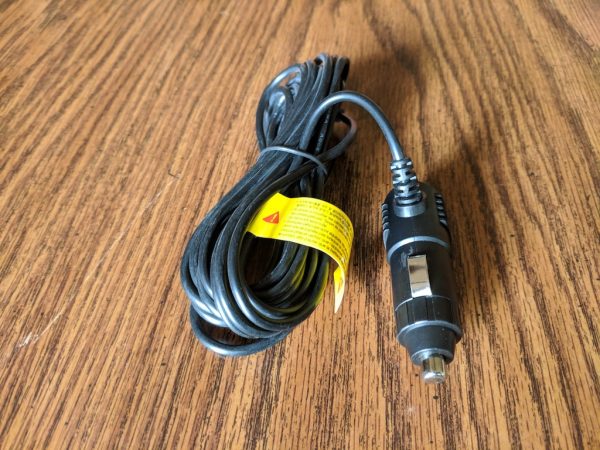
  • 12v Socket Power cable
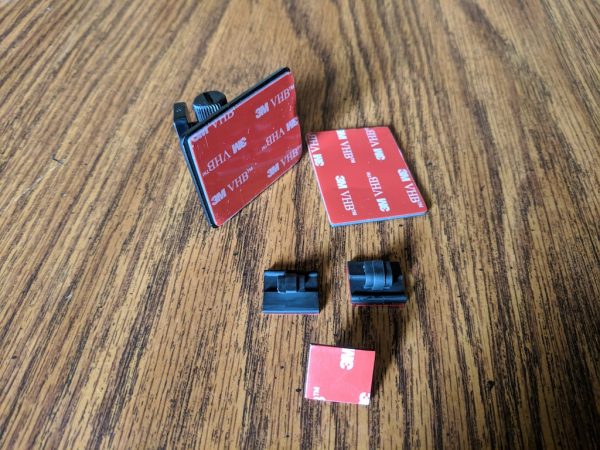
  • Cable mounting clips
  • Dash cam mounting plates
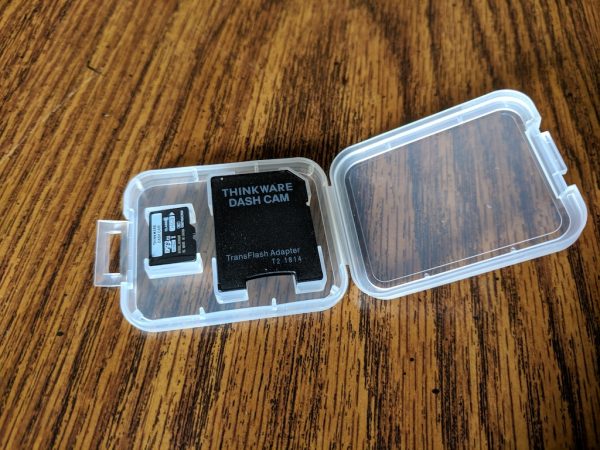
  • 16gb Micro SD Card with Reader
  • Instruction manual

Setup

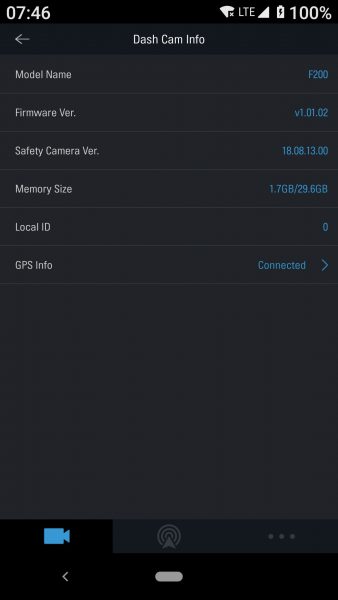
Fortunately, the F200 comes with everything you need to quickly install, set up, and run your dash cam. I reviewed the Thinkware F200 with three optional accessories; a rear-view camera, a GPS module, and a hard-wiring kit. None of these are necessary to run the F200, but they add some cool features such as parking monitoring, speed camera detection, and dual camera recording.

I love that Thinkware includes a preformatted SD card and card adapter with the F200. I haven’t seen this before and it really helps you to get started setting up your dash cam right away.

Along with the F200 dash cam and the SD card, all you need to start using your dash cam is the 12v socket power cable and mounting kit.

Once you find a good mounting spot for the dash cam, center of your windshield preferably near the top, simply peel away the backing on the main mounting clip and press it into place. Slide the F200 into place fitting the mounting notch on top of the camera into the slot on the mounting bracket.

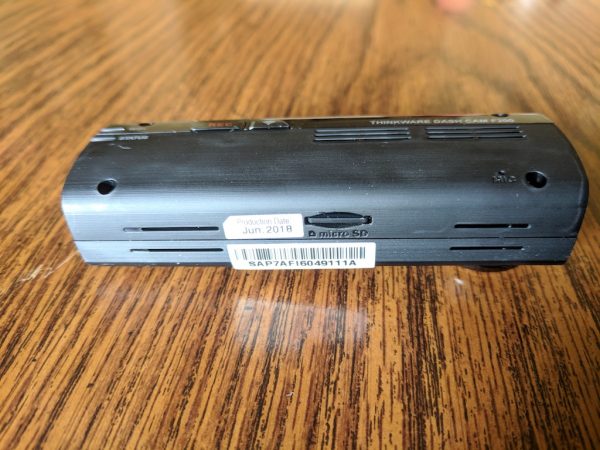
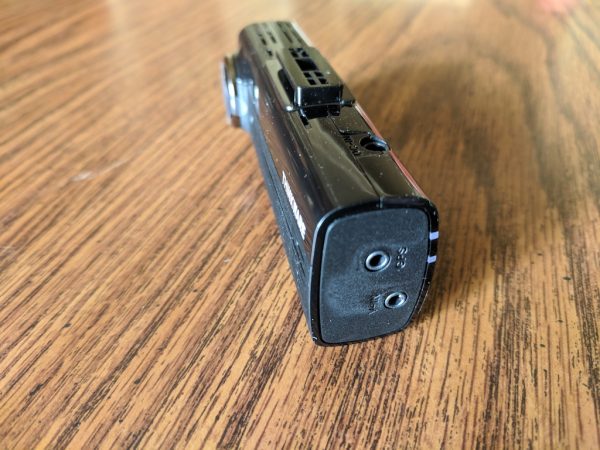
Be sure to insert the included SD card in the slot on the bottom of the F200.

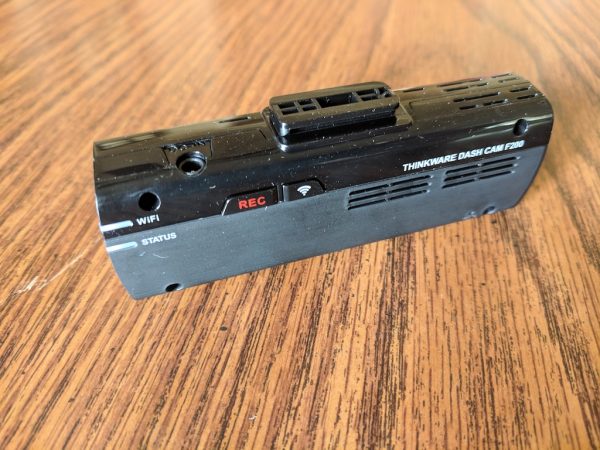
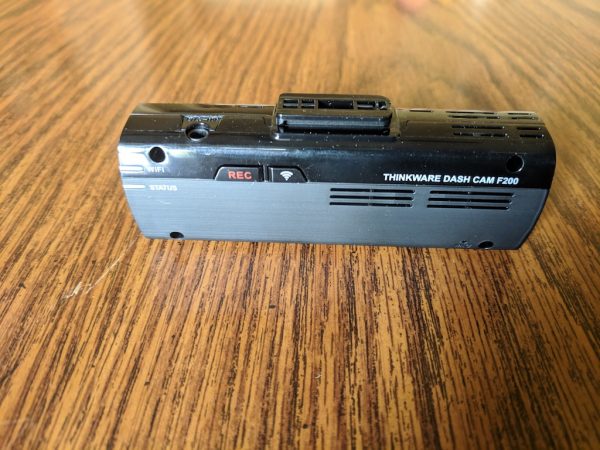
Next, connect the power cable to the open power port on the top of the F200 by the REC button.

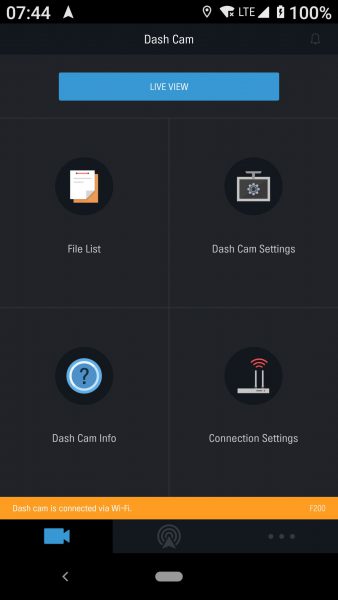
Once everything is plugged in and powered, download the Thinkware Dash Cam MobileViewer app for your device, it works on both Android and IoS. Once downloaded and installed, the app will attempt to walk you through the setup procedure. There’s a WiFi button on the back of the unit that activates a hotspot for your phone to connect to for setup.


This is usually where a lot of car-tech devices lose points with me, and the F200 is no exception. The printed documentation is very vague and difficult to follow. It took me several tries and more than a few internet searches to get everything connected, synced, and functioning. The physical setup was easy, but the technical setup took a bit of finagling. Fortunately, and to Thinkware’s credit, once everything was up and running, the system has worked flawlessly for about a month now.

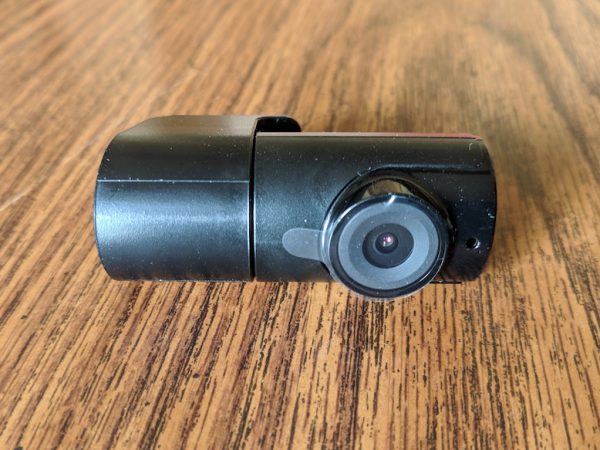
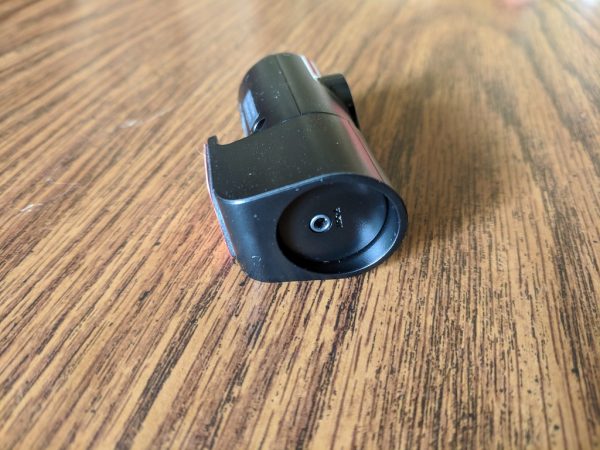
As I mentioned, the unit I’m reviewing included the optional rear-view camera, GPS module, and a hard-wiring kit. The rear view camera is pretty unobtrusive and has only one port on it for a video cable that connects back to the main unit. Wiring the rear-view camera was no easy feat and ideally should be done by a professional.

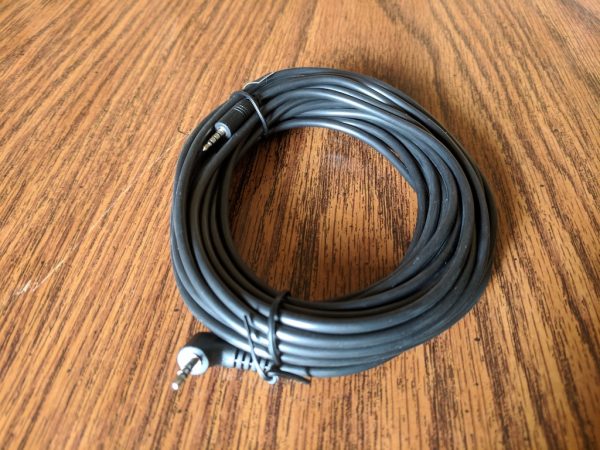
Thinkware provides about 19.6 feet (6 meters) of cable to reach a good spot on your rear-view window and the camera itself has mounting tape attached.

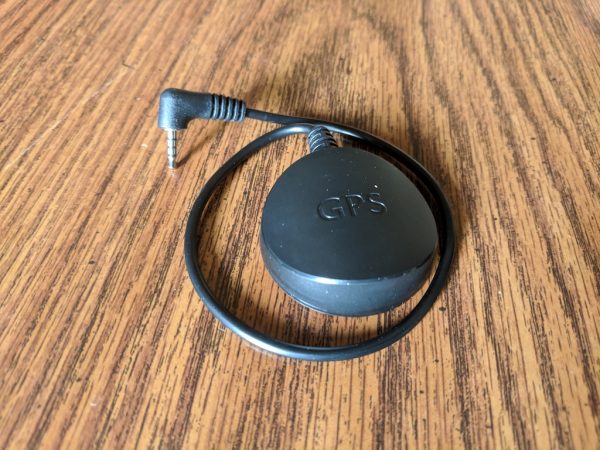
The GPS module is probably the simplest accessory to install.

The little puck has a short cable on it so it must be mounted on the windshield near the F200.

Both the GPS module and the rear-view camera plug into ports on the left side of the F200.

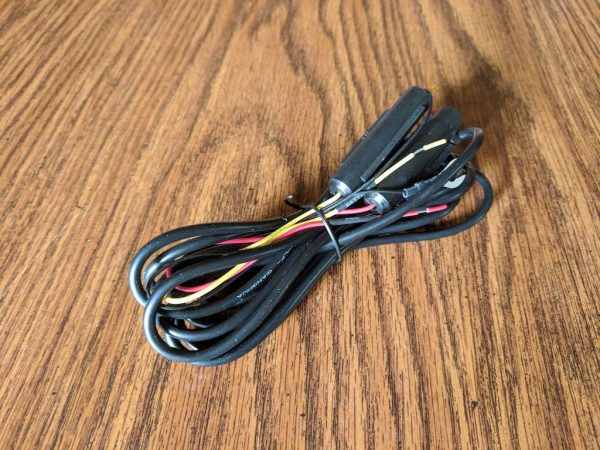
The final optional accessory I installed was the hardwiring kit. This is an included set of wires and inline fuses that allow you to run continuous power to the F200. The benefit of continuous power is that once wired correctly, the unit will power on and off with your automobile. Another great feature made available after hardwiring is parking monitoring. The F200 will monitor for incidents even when the car is powered off. If the F200 detects any movement while parked it will start recording. The best part of this feature is that the unit will monitor your car’s battery life as well, making sure that is never dips below a predetermined voltage. If the battery’s voltage drops to that point, the F200 automatically shuts off.

Performance

Once I had everything mounted, synced, connected, and adjusted to my liking the F200 did what all great technology should do, it disappeared. The unit dutifully powered on every time I started my car, recorded every trip I made, and then shut off when I exited the car.

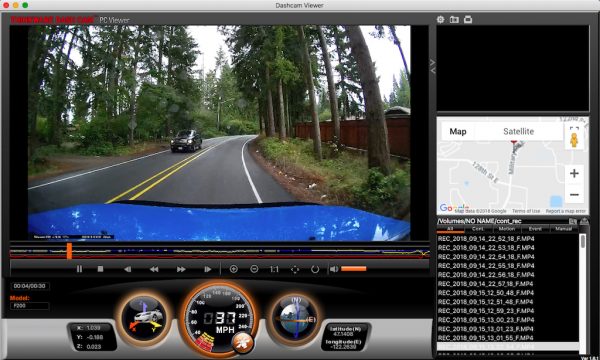
When I downloaded my first few videos to check the camera’s quality, I was really impressed with the amount of information that was recorded as well as the stunning video quality. Because I was using the GPS module, the F200 takes note of my car’s location as well as my speed, marking my trip with a tracking dot on Google Maps during playback. Additionally, the F200 unit itself has a built-in accelerometer recording the X, Y, Z axes of my car during all trips.

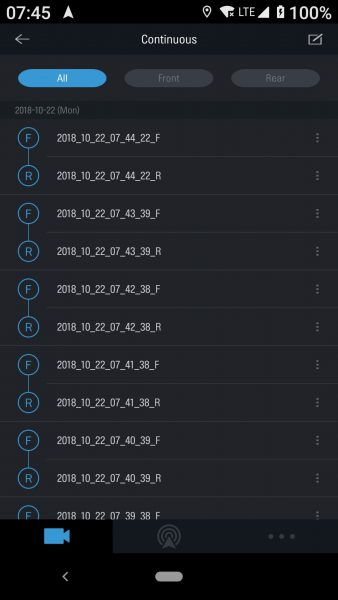
Accessing the videos on the F200 was as easy as connecting my cellphone to the unit as I did in setup and downloading what I needed. The F200 records videos in one minute blocks and then writes over the oldest videos once the SD card is full. You can also access the videos by popping the SD card into your Mac or PC and using Thinkware’s desktop app.

Check out a sample video recorded by my F200. The front facing dash cam mic picks up a lot of wind noise from open windows in addition to whatever is going on in the car’s interior.

What I like

  • Excellent build quality
  • Easy Initial Setup
  • Reliable performance
  • Great, stable companion app
  • 16GB Micro SD Card included

What needs to be improved

  • Documentation confusing and lacking in specifics
  • Some extra features like parking monitor only available if hard-wired
  • Rear-view Camera, GPS, and Hardwiring Kit cost extra

Final thoughts

I really like the Thinkware F200 Dash Cam, especially after adding on all of the accessories needed for it to be fully functional. The base F200 is definitely worth the $139.99 price tag though, and gives you plenty of built-in features. What’s great about the F200 is that you have the option to build it out and add accessories as you need them. As dash cams become more popular and affordable, this would make a great first dashcam for someone just getting their feet wet with this relatively new technology.

Price: $139.99 for the F200 Dash Cam only, $39.99 for External GPS, $49.99 for Rear-view Camera, $29.99 for Hardwiring Kit
Where to buy: Thinkware and Amazon
Source: The sample of this product was provided by Thinkware.

Filed in categories: Reviews

Tagged: ,

Thinkware F200 Dash Cam review originally appeared on The Gadgeteer on October 29, 2018 at 11:00 am.

Note: If you are subscribed to this feed through FeedBurner, please switch to our native feed URL http://the-gadgeteer.com/feed/ in order to ensure continuous delivery.

Kenu Airframe and Airbase Wireless car mounts review

REVIEW – To say I am a fan of Kenu products is an understatement.  Look here, and here, and here.  I give them as gifts, I have them in every vehicle, and they are one of the only gadgets I use literally every day.  So when I saw the Kenu Airframe and Airbase Wireless Car Mounts I didn’t hesitate to jump and get one of each.  I love Kenu.  I love car mounts.  And I love wireless chargers.  So let’s go.

What is it?

The Kenu Airframe maintains the functionality of the Kenu you love that clips to your car vent, and adds in a Qi charger that includes the Qi 3.0 high-speed functionality.  The Kenu Airbase provides the same thing except it utilizes a suction-cup base that attaches to either your dashboard or windshield.  In both cases, the Airframe/Airbase uses a USB-C cable from the Kenu to the 12V DC charging connection in your car because the mounts don’t have built-in batteries like a power bank does.

Product specs

Airframe Dimensions:  H 3.2″ x W 2.8″ x D 3.2″
Airframe Weight:  3.6 oz
Airbase Dimensions:  H 4.2″ x W 2.8″ x D 4.5″
Airbase Weight:  5.0 oz
Output:  9V 1A / 5V 1A
Transmission:  10W/9W/7.5W/5W
Transmission Efficiency:  81%
Operating Temp Range:  40°F-86°F
Spring-loaded clip:  stretches from 2.34 inches to 4.3 inches

12V DC charger specs:
Input: 12V-24V DC
Output: 5V 2.4A + QC3.0 (5V 3A / 9V 2A / 12V 1.5A)
Overload protection

Qi-Compatible phones:

Apple (7.5W)

·         iPhone Xs

·         iPhone Xs Max

·         iPhone XR

·         iPhone 8 Plus

·         iPhone 8


Google

·         Pixel 3 XL

·         Pixel 3

Samsung (9W)

·         Galaxy Note 9

·         Galaxy S9+

·         Galaxy S9

·         Galaxy S8+

·         Galaxy S8 Active

·         Galaxy S8

·         Galaxy Note 8

·         Galaxy S7 Edge+

·         Galaxy S7 Active

·         Galaxy S7

·         Galaxy S6 Edge+

·         Galaxy S6 Edge

·         Galaxy S6+

·         Galaxy S6 Active

·         Galaxy S6

·         Galaxy Note 5

What’s in the box?

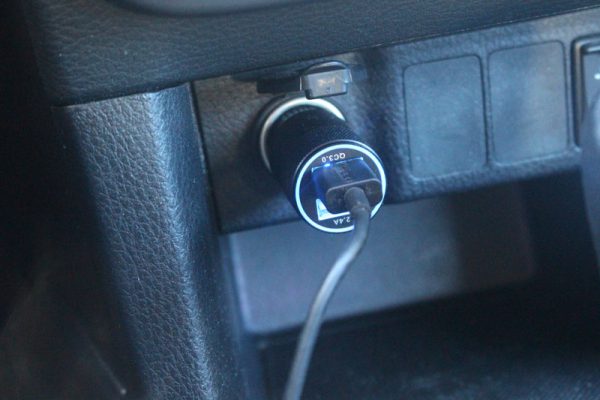
You get the Kenu Airframe or Airbase, a 12V DC car charger that has 2 ports (Qi 3.0 quick charge port & a USB 2.4V port), and a Type-C to Type-A USB cable that is 3.9 ft long.  You also get a simple user’s manual.

Design and function

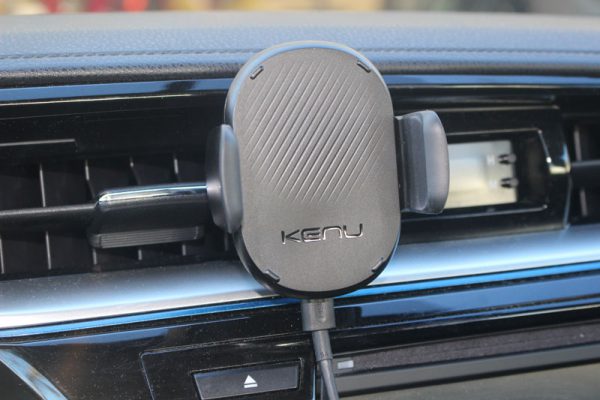
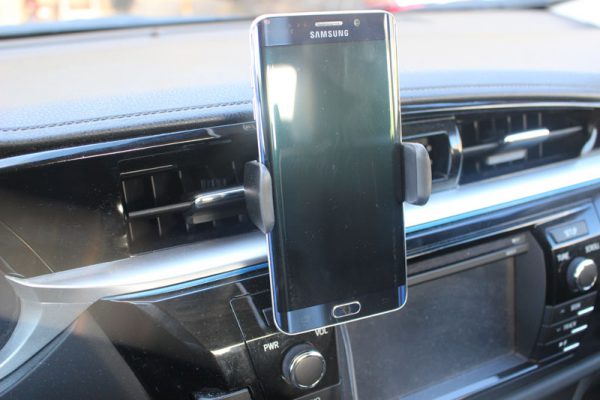
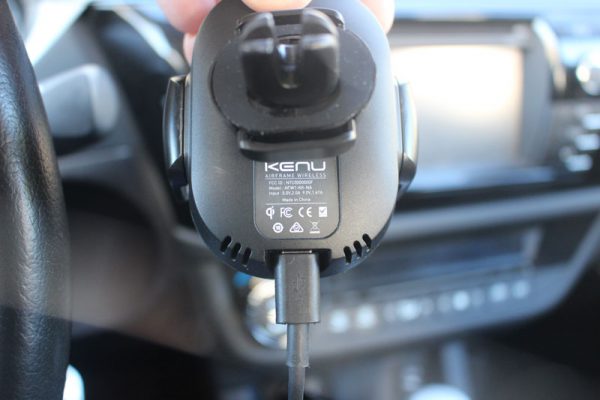
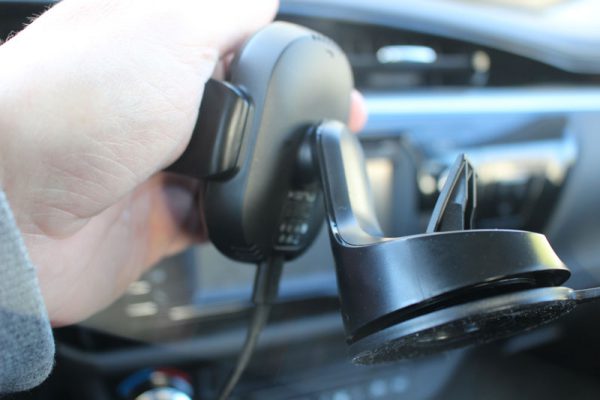
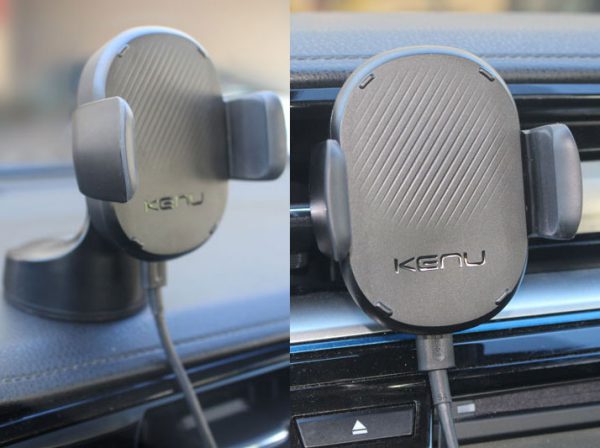
If you are used to the spring-loaded arms that hold your phone on other Kenu products, then you’ll be at home with these car mounts.  In fact, the Airframe Wireless mount has a new mechanism for attaching to the car vent.  Previous Airframes had a rotating set of rubberized fingers that slid onto the car vent slats.  The Airframe Wireless has buttons that you press with your fingers that open up the rubberized fingers that then attach to the vent slat.  It makes for a much more sturdy attachment to the vent clip.  Very sturdy in fact.  You have to put a good amount of effort into removing the Airframe Wireless from the vent without depressing the buttons to release it.  So I never had any issue with the Airframe Wireless falling off the vent.

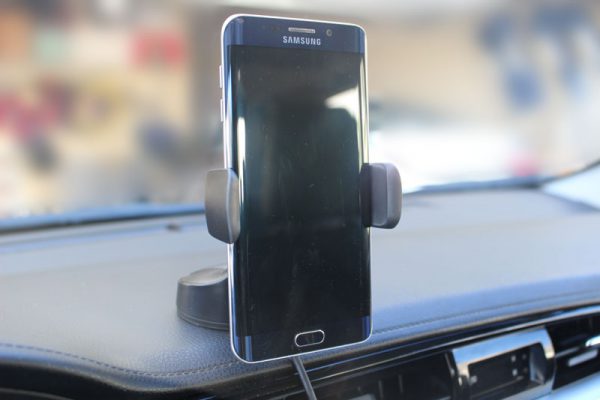
The Airbase Wireless attaches to the dash/windshield via a suction cup that is quite effective.  After attaching it to my dashboard I couldn’t remove it at all without releasing the suction latch on the back and pealing it off the dash.  So again, I never had any issue with the Airbase Wireless falling off my dashboard.  In both cases, sliding my phone into these Wireless mounts was as effortless and fluid as all the other Kenu products I have.  True Kenu functionality!

Also built into both of the mounts are specially placed fan-less vents that help keep the mounts cool while charging.   And like most wireless chargers, you can use your phone with a cover as long as the cover is less than 3 mm thick.

Admittedly, I despise mounts that attach to my dashboard or windshield, but I wanted to give the Airbase Wireless a chance.  I used it daily and exclusively for several weeks in my car, and it functioned as an excellent Qi wireless charger.  But I couldn’t get over it sitting up on my dash, in my view looking out the windshield, which is the main reason I don’t like these kinds of mounts.  So when I switched over to use the Airframe Wireless mount, I decided to not go back to the Airbase mount.

As mentioned, both mounts do not have a battery inside, so you have to plug them up to the power in your car via the USB-C cable that attaches to the back of the mounts and then you plug up the cable to the 12V DC charger that plugs into the DC outlet in your car.  As an added feature, the 12 DC charger has 2 ports… a regular 2.4V USB port and a Qi 3.0 Quick-charge USB port.  So you can charge another device at the same time as using these mounts.

As an aside, in my car I have used a 15,600 mAh Choetech power bank for over 3 years now.  It has 3 ports and it has a Qi quick-charge capability, which is why I love it because I can get a big charge quickly even on short trips across town.  And multiple people can use it at once.  I have used it in conjunction with my old Kenu Airframe pretty much daily.  So I decided to test the charging speed with that setup compared with these Wireless mounts.

Here are the results:

  • My phone was at 60% full and I used my old setup of the Kenu Airframe and the Choetech power bank (using the quick charge port). It showed 52 min until a full charge.
  • Then I used the Kenu Airframe Wireless mount plugged up to the Quick Charge 3.0 USB port in the 12V DC charger plug. It showed 1 hr 16 min until a full charge.
  • Then I left the phone in the Airframe Wireless mount but moved the USB cable to the 2.4V USB port in the 12V DC charger and it showed 1 hr 19 min until a full charge.
  • Then I left the phone in the Airframe Wireless mount and but move the USB cable to the USB port built into my car dash. It showed 1 hr 18 min to a full charge.
  • I got the exact same results using the Kenu Airbase Wireless dashboard mount when I repeated the steps outlined above.

The bottom line:  as expected, using a wireless charger will always provide slower charging than using a wired USB connection.  But I was surprised to learn that there was no significant difference between using the Quick Charge 3.0 port and the 2.4V port in the 12V DC charger, or using the USB port in my car dash.

Final thoughts

I am torn about this product.  I have been so enamored with the products from Kenu that I find it hard to say this, but I don’t think this product is for everyone.  For those folks who simply don’t like the kind of car mounts that hang off the windshield or the dash, there isn’t enough reason here in my opinion to overcome that.  If, like me, you love the car vent functionality of the Kenu Airframe products, or you don’t mind a dashboard mount, then this might be a product for you.  Maybe.  For me, my daily life in the car is a series of short drives around town every day… 10 min here, 20 min there, 8 min over to there.  So because I don’t get that true high-speed charging with the Airframe mounts like I do with my Choetech power bank, I found myself taking the time to plug up the Choetech to my phone.  I would rather go through the hassle of doing that to get a quick charge to fill my phone up than utilize the more convenient Airframe Wireless charging mount.  Now, if I was in my car every day for an hour or two, then yeah, I would probably use the Airframe Wireless car mount because I would have time to fill my phone back up.  And for a long trip in the car I probably will use the Airframe Wireless mount.  But for my daily use now I am going back to my trusty old Kenu Airframe and will use my Choetech as-needed.

Price: $59.95
Where to buy: Buy on Amazon or buy from Kenu.
Source: The sample of this product was provided by Kenu.

Filed in categories: Reviews

Tagged: ,

Kenu Airframe and Airbase Wireless car mounts review originally appeared on The Gadgeteer on October 28, 2018 at 11:00 am.

Note: If you are subscribed to this feed through FeedBurner, please switch to our native feed URL http://the-gadgeteer.com/feed/ in order to ensure continuous delivery.

iRoad X9 front and rear dashcam review

REVIEW – I have been very hesitant about getting a dash-cam that adheres directly to my windshield. The idea that it may be a pain to remove if I don’t like it has kept me from looking into getting one. Well, after watching countless dashcam videos and hearing horror stories from my sister who worked in insurance claims, I finally decided to dive fully into a quality dashcam and hoped the iRoad X9 dashcam, which includes both a front and rear camera, would be all I needed.

What is it?

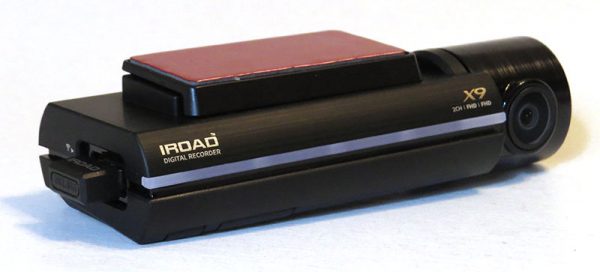
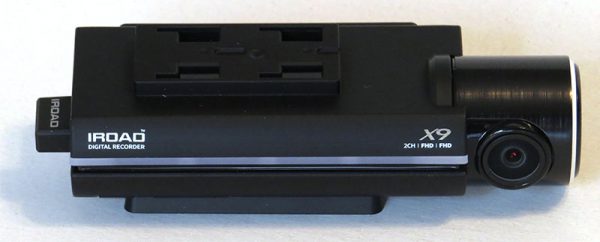
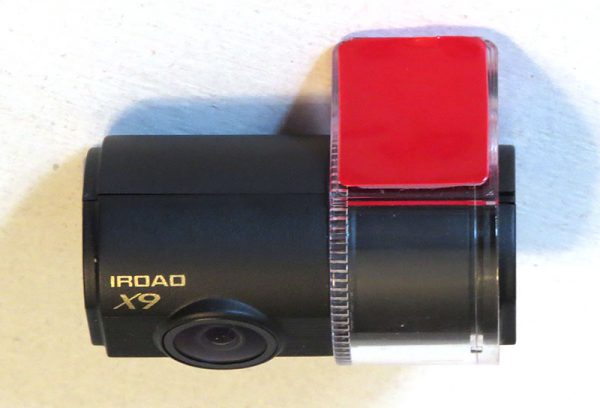
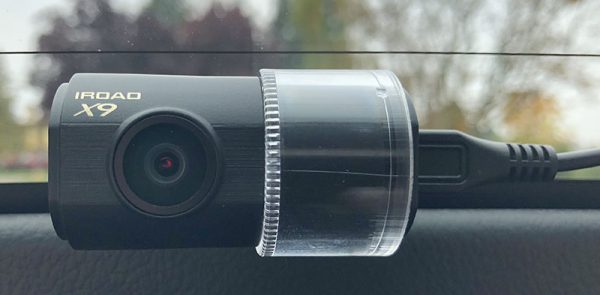
The iRoad X9 dashcam is a front and rear camera that can continuously record while you are driving.

Hardware specs

  • Front Camera:
    -Full HD 1920 x 1080P resolution
    -150 degree wide angle lens
    -30 frames per second
  • Rear Camera:
    -Full HD 1920 x 1080P resolution
    -145 degree wide angle lens
    -30 frames per second
  • ARM Cortex-A7 MP Core Processor V3
  • Lane Departure Warning System
  • Forward Collision Warning System
  • Front Vehicle Departure Warning System
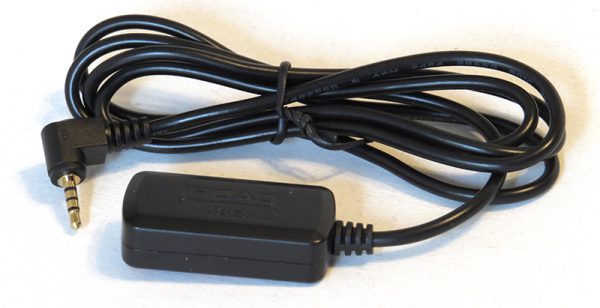
  • GPS Sensor (optional, included in my review)

What’s in the box?

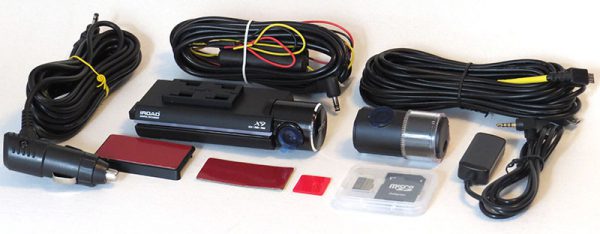
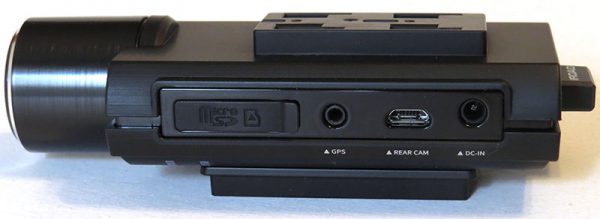
Inside of the box, you’ll find: A front camera, rear camera, Wifi dongle, 32 GB MicroSD card, Uninterrupted fuse cable, rear camera cable, user manual, and extra double sided tape. Mine also came with a power cable that plugs into the lighter as well, but the website says it is optional. I also was sent the optional external GPS antenna, which is sold separately.

Design and features

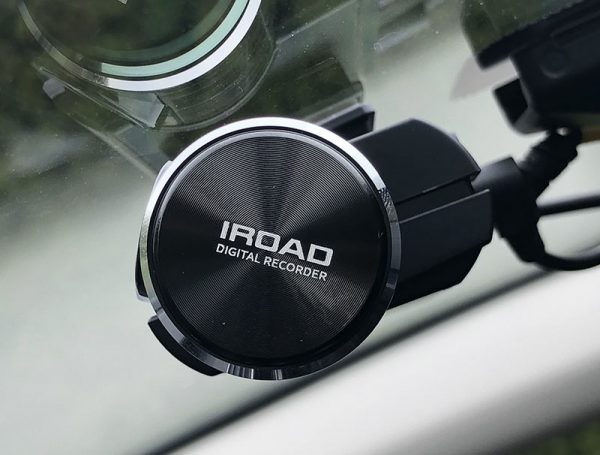
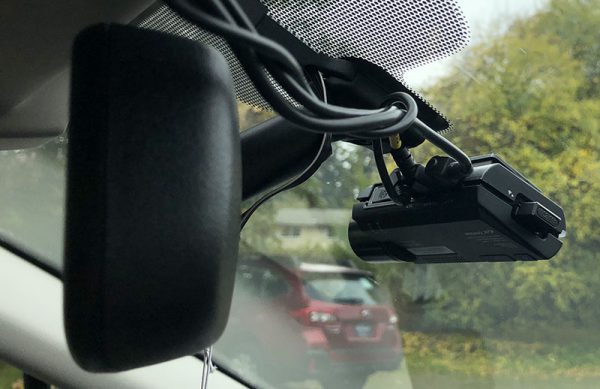
I really liked the look of both the front and rear cameras. They have a sleek, stylish look to them while seeming quite minimalist. Both can be twisted to adjust to the best angle for your car, which was very convenient and made the setup very easy since I could focus on properly adhering the camera rather than making sure the lens was in the proper location the whole time. When attached, I cannot see the front camera at all, since it hides behind my rearview mirror.

When the car is turned on, the camera will tell you when it starts recording, if the MicroSD card is missing, and when the GPS is connected. It sometimes took 1-5 minutes for the GPS to connect to the camera, and most the time I would be driving down the road and hear “GPS connected” from the camera. The GPS unit has to establish contact with the satellites, so I suppose that is why. If you forget to put the MicroSD card in, it will constantly remind you it is missing to the point that I unplugged the camera from the power because it did not stop. A few times to warn me is fine, but the entire time I am driving was quite annoying!

Other than recording video, one thing the iRoad X9 camera boasts is the ability to give lane departure, forward collision, and front vehicle departure warnings. I had the perfect car to test this with since my own comes with all three via the Eyesight camera system. I tried different sensitivity levels, and all three were far too sensitive for me to use on a daily basis. The camera would be beeping constantly that either someone in front of me has moved (while driving down the highway) or that a collision was imminent when the person in front of me does not even have the brakes on. The lane departure warning, however, did a fairly decent job and if I did not have it already in my car, I would have kept that mode activated.

Setup

I had two ways to choose from when setting the camera up. I could hard-wire it, or I could use the lighter port. Since I am not someone who is car savvy, and Subaru would not hard-wire it, I decided to use the lighter port.

First, I cleaned off a nice spot on my window, figured out where I wanted the front camera placed, and carefully applied it to my window. It stuck firmly right away. I threaded the power cable behind my glove box, up inside of my window panel, and, until I figure out a way to adhere it around my Eyesight cameras, up behind my visor. It actually turned out very well. The GPS unit was threaded up and through the visor, and placed around the handle above the passenger’s seat door. I used only the front camera for a week to make sure it was worthy enough to apply the rear camera.


The rear camera was applied in the same way, by centering it at the top of my back windshield and sticking it on firmly. I threaded the power cable up and above the two doors on the passenger side, and then through the visor and into the front camera. One thing I noticed right away when closing the back hatch was that it stretches out some when the hatch is open, so when it is closed, you can see the cord bow outward. This wouldn’t be a problem with a regular sedan. Aesthetically, it looks a little messy, but it isn’t terrible and doesn’t bother me that much.


After inserting the included MicroSD card and Wifi dongle, I followed the instructions on setting up the iRoad app on my iPhone. This was very easy and straightforward.

Performance

After having the rear camera installed for only a few days, I encountered my first tailgater, which gave me my first reason to download video from the camera on to my phone. When I arrived at my destination I opened up the iRoad app, scrolled through and found the video, (which is arranged from most recent to least recent recorded video) and downloaded it onto my phone, which took maybe two minutes at the most in total. I liked doing it this way because I did not have to worry about remembering to bring the MicroSD card in and out of the car.

As you can see, the quality is pretty good. The semi-visible line you see on the top is my window defroster, which is not visible anymore now that I angled the camera slightly more downward.


The video quality during the day was very good. Cars and landmarks are easily visible and are quite clear. I have no complaints about the video quality during the day. When I had my music volume turned up, the bass was definitely overpowering on the recordings, but if I had the volume set at a normal level, it sounded just fine.


In the dark, the video quality is not as good as indicated on the website, but still decent as long as there is light from headlights or streetlights. The rear camera was not as useful on dark rural roads since there was no light coming from the headlights. I can’t really fault the camera for that though since the camera has low light vision, not dark/night vision. It worked better in the city where there was lighting all around.


The performance and quality of the cameras were good, and the app is very useful. iRoad also has a PC viewer application that allows for multiple views at once, GPS tracking, and more. The ability to view the front and rear camera at the same time is a huge plus. Instead of writing a long and boring paragraph about the iRoad viewer application, I simply made a video demonstrating the abilities so you can see how easy it is to use. Enjoy!

I have one last tidbit about the iRoad phone app. If you mount your phone on your dash and connect to the camera while backing up, you can use it as a backup camera, which could be useful if you don’t have one installed in your car. It might be useful for a tight spot if you are in a bind.

What I like

  • The cameras are sleek and look nice from outside of the car.
  • Able to download videos directly onto my phone with relative ease.
  • Good video quality.

What needs to be improved

  • Wifi will sometimes connect while the car is on, which disconnects the data on the phone.
  • Manual could be a little better.

Final thoughts

Overall, I think I really liked the iRoad X9 camera. It is reliable and has excellent video quality, has good software, and it looks nice in my car. The price tag is quite hefty though, and since I would not use any of the added features and will use it solely as a camera to protect myself in case of an accident or incident, this would not fit into my price/value range. However, if you have the money to spend and want a very nice camera, the iRoad X9 is a nice one to look into.

Price: $449.00 – $625.00 (depending on what size MicroSD card you want with it)
Where to buy: BlackboxMyCar.com
Source: The sample of this product was provided by BlackboxMyCar.com.

Filed in categories: Reviews

Tagged: ,

iRoad X9 front and rear dashcam review originally appeared on The Gadgeteer on October 28, 2018 at 9:00 am.

Note: If you are subscribed to this feed through FeedBurner, please switch to our native feed URL http://the-gadgeteer.com/feed/ in order to ensure continuous delivery.

Chamberlain Ultimate Security Bundle smart garage opener review


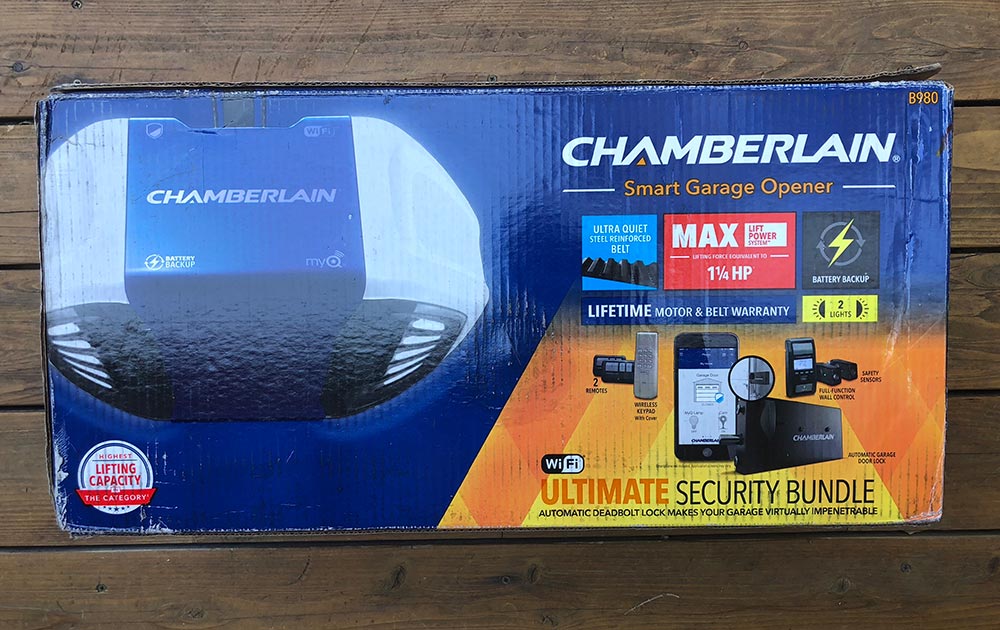
REVIEW – Did the box grab your attention? Hope so. Garage door openers are challenging to shoot for headline photos. Do you need a new garage door opener? You might given how much they’ve improved in the last few years.

What is it?

Chamberlain’s Ultimate Security Bundle is a garage door opener with app connectivity, safety sensors, a backup battery, an internal deadbolt, two car remotes, and an external keypad.

Hardware specs

What’s in the box?
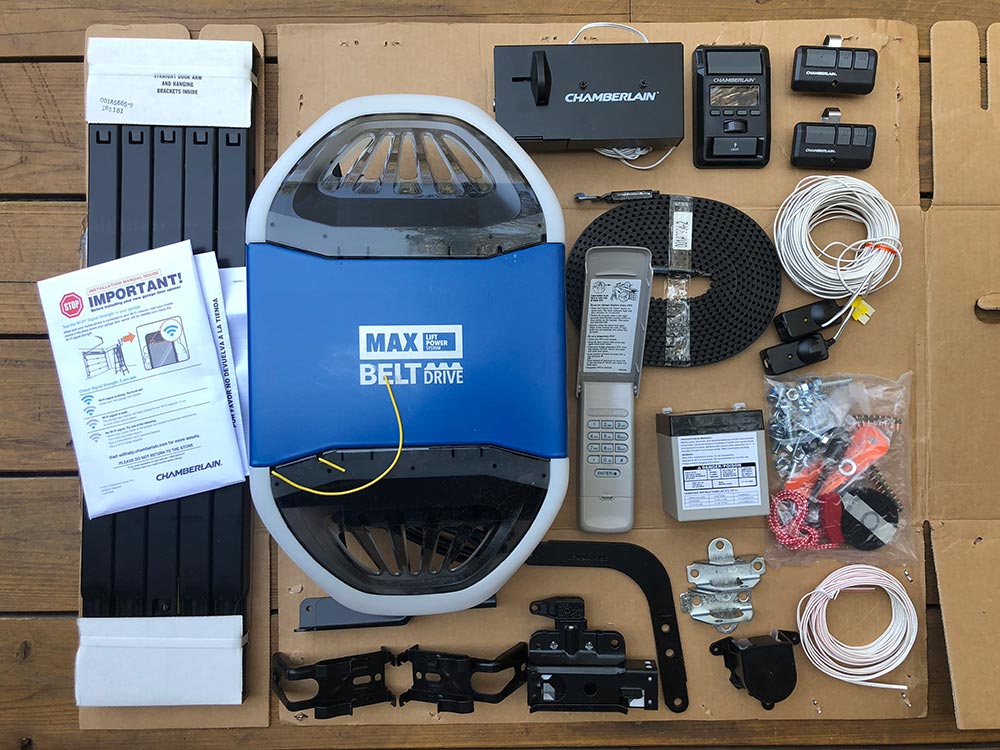
  • Items covered in the next section

Design and features

Design of a garage door opener is all about functionality. It has to work. Chamberlain has clearly done that here, and when installed it looks pretty good too.

The key features here are…

  • Wifi connectivity with App control and status updates
  • Belt drive which makes it quite a bit quieter
  • Back up battery so you can operate the door without power
  • Remotes! – Wall mounted remote, two car remotes, external keypad, App control and Homelink compatibility
  • Safety sensors to avoid accidents
  • Deadbolt for extra security

Setup

The bulk of the review here is actually the install. It took me about 4 hours, with some self-imposed trouble. Here goes…

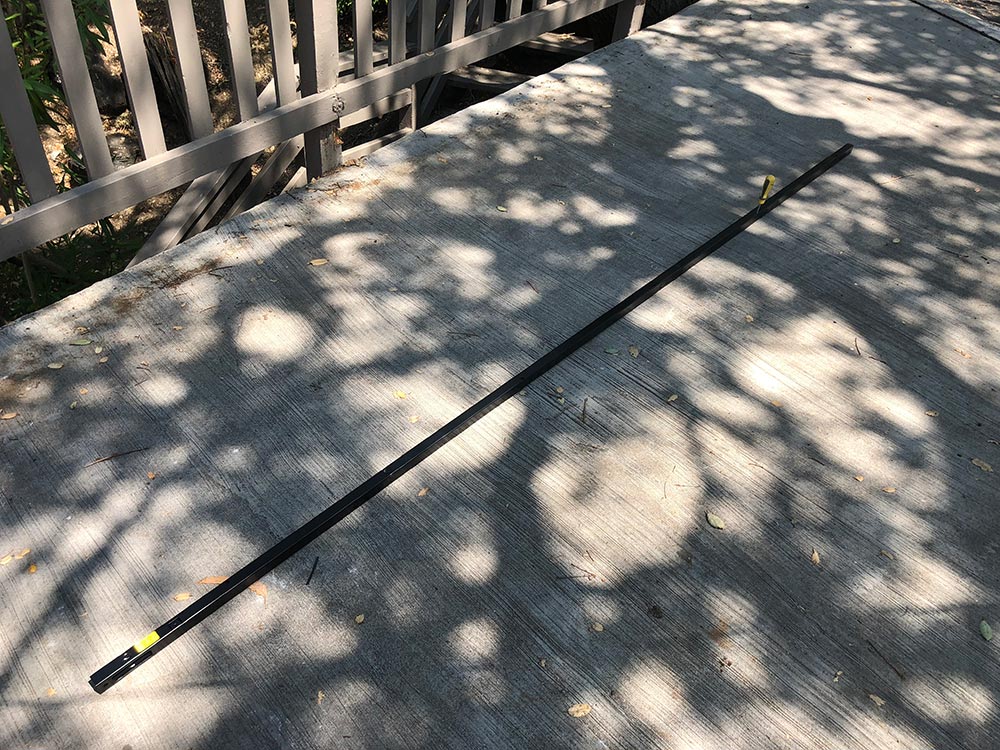
Installation starts by assembling the track that that will run along the ceiling by connecting the different sections.
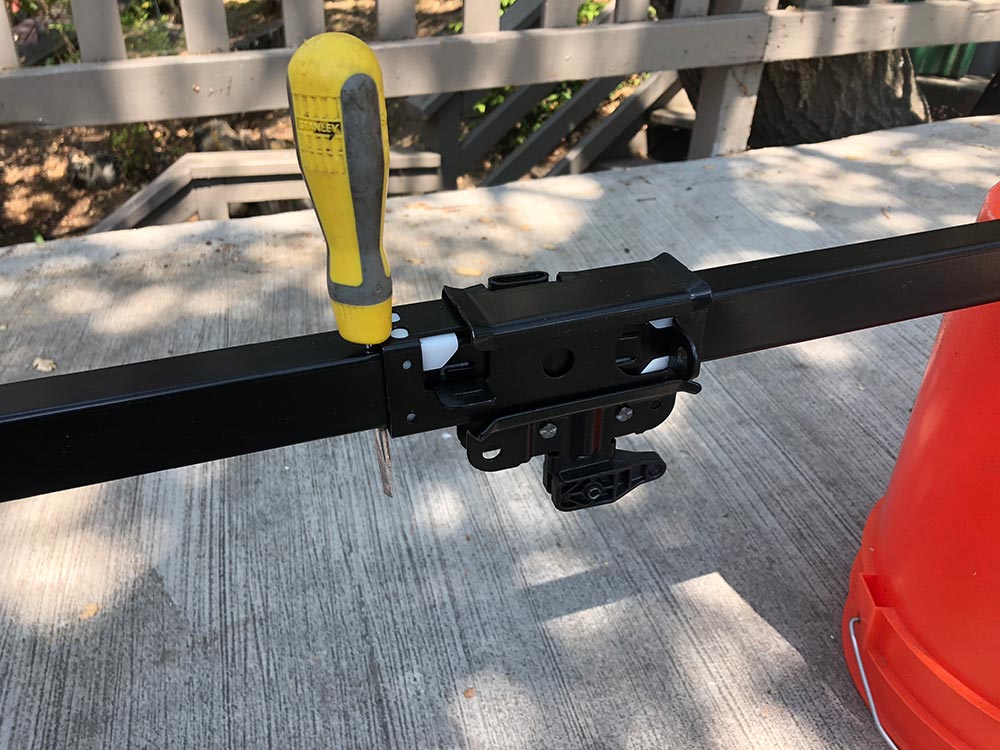
Use a screwdriver to anchor the trolley (during assembly) that will eventually lift and lower your garage door.
Insert the mount for the opener into the end of the track.

Bolt the motor onto the mount with the two black bolts shown in the below photo.
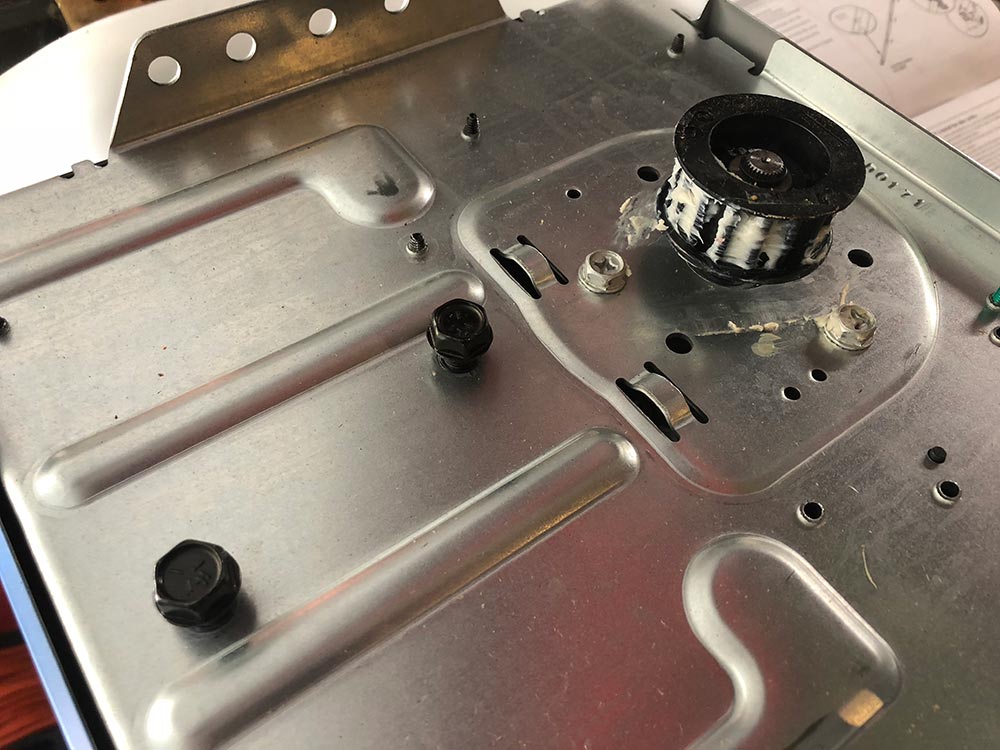
Starting to come together.
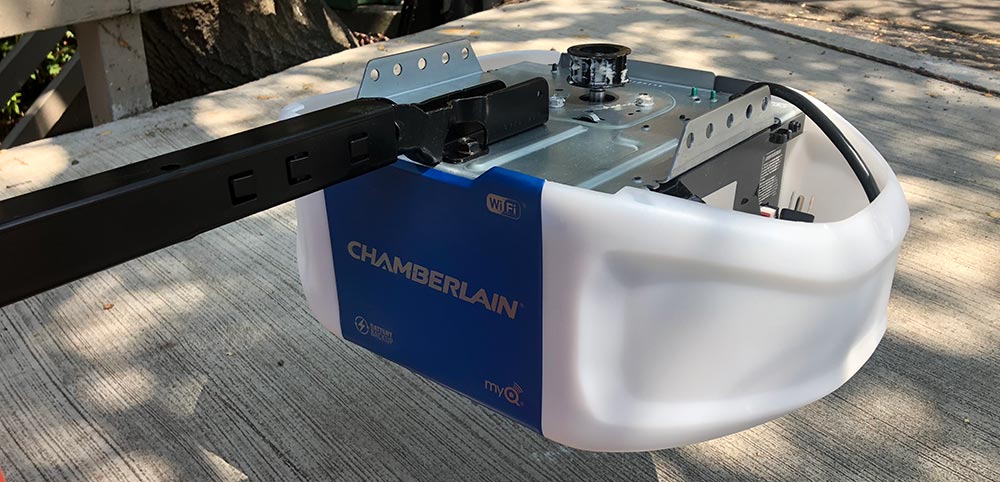
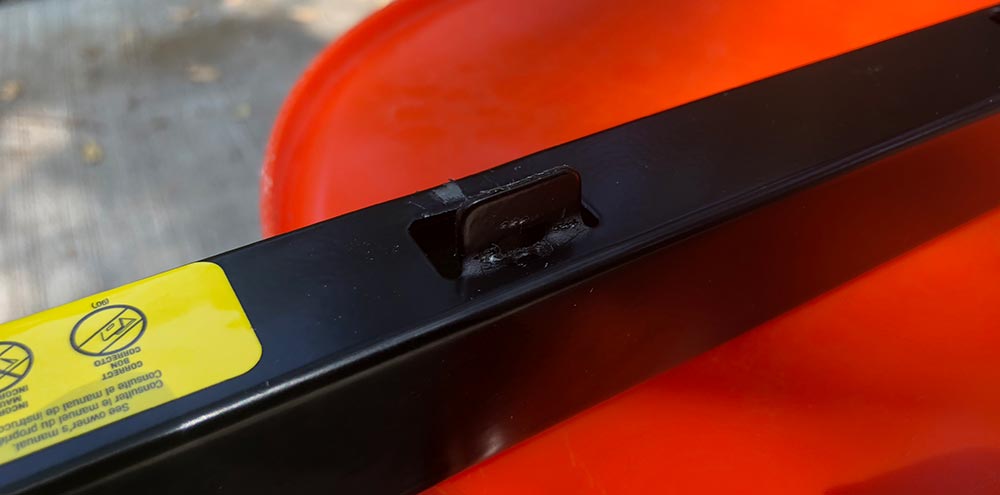
Bend up this little tab to act as a physical stop for the trolley.
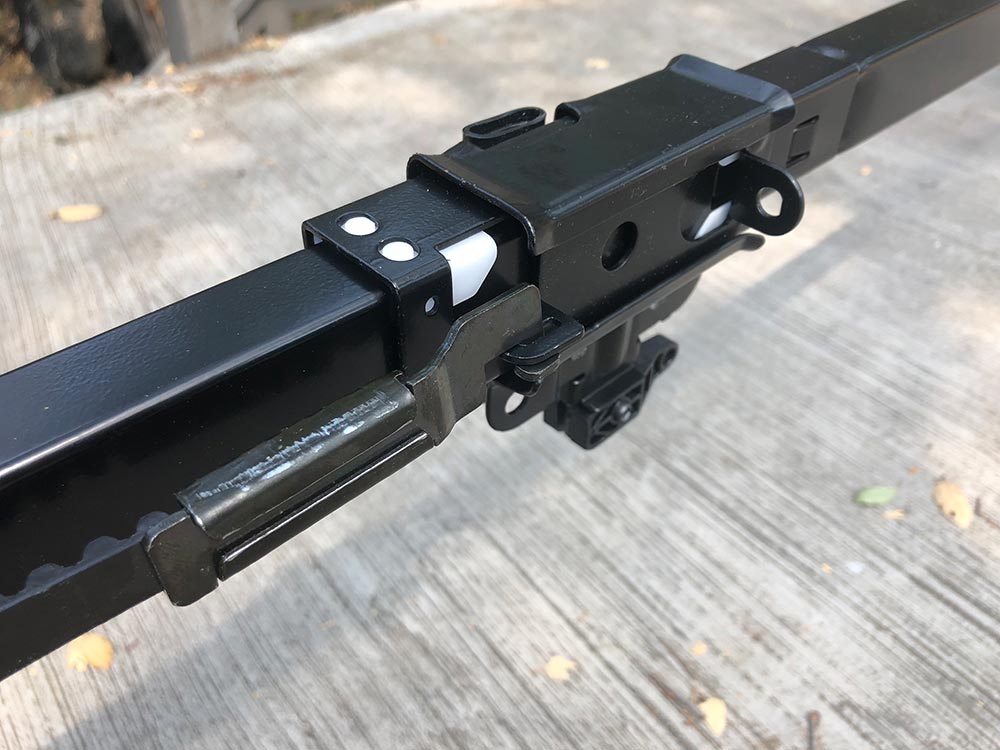
Attach one end of the belt to the trolley with a sideways insert with a 90º twist.
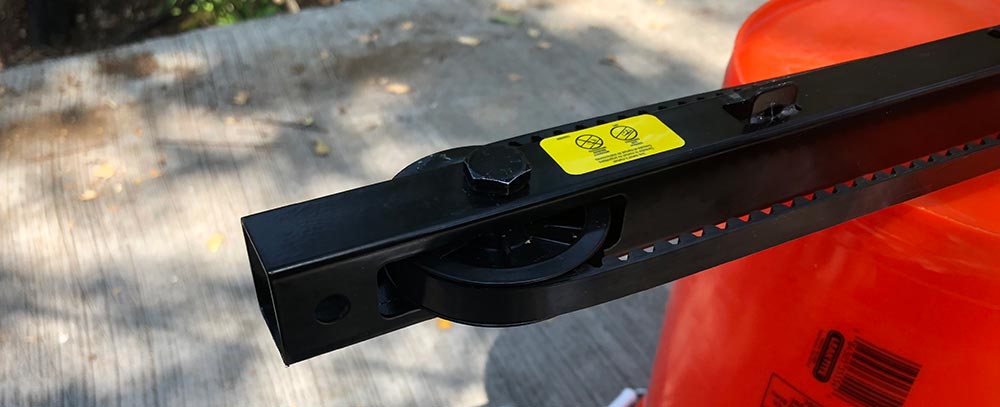
Feed the belt through the slot, then install the pulley.
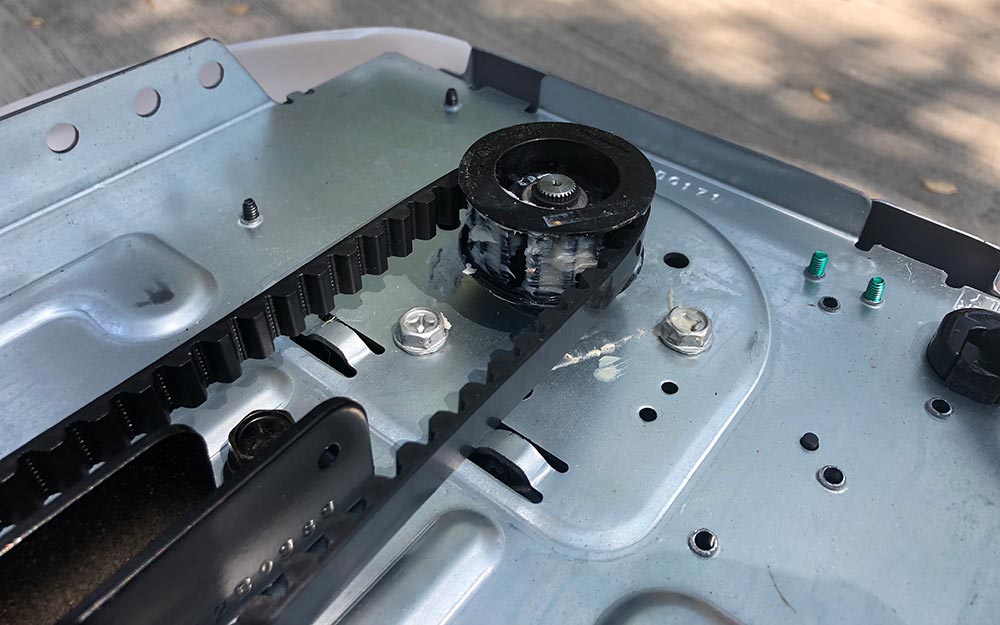
Wrap the belt around the gear on the top of the motor.
Connect the other end of the belt to the threaded rod with the bicycle style chainlink.
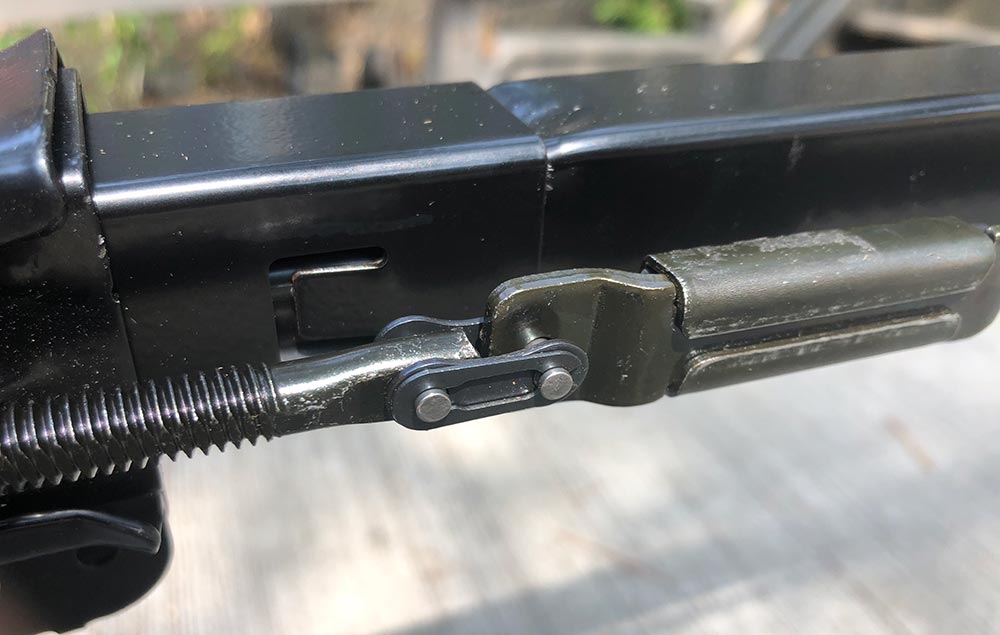
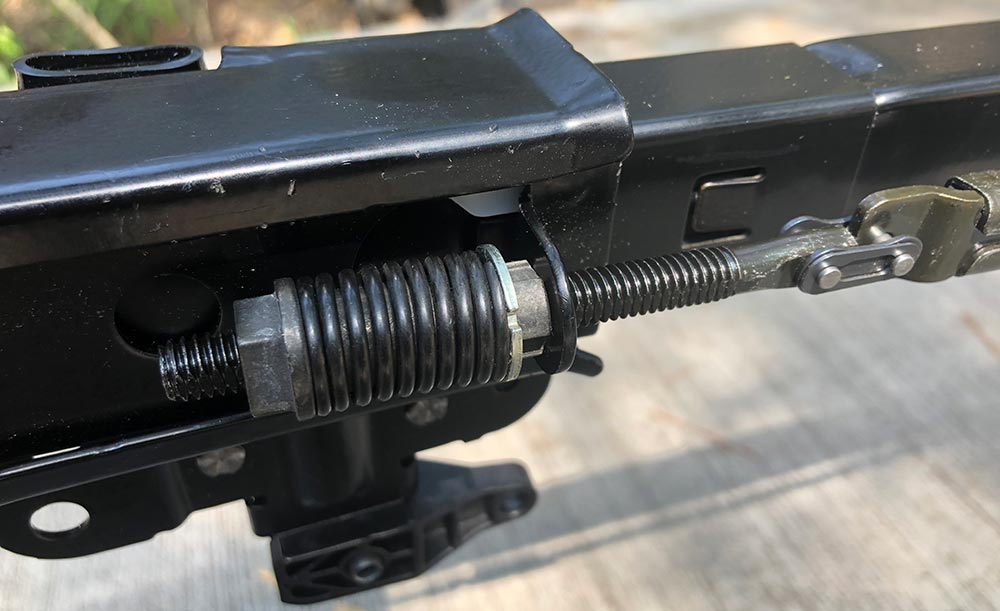
Slide the threaded rod through the trolley and anchor by threading the spring nut on hand tight, then follow the instructions for snapping the ring nut against the trolley.
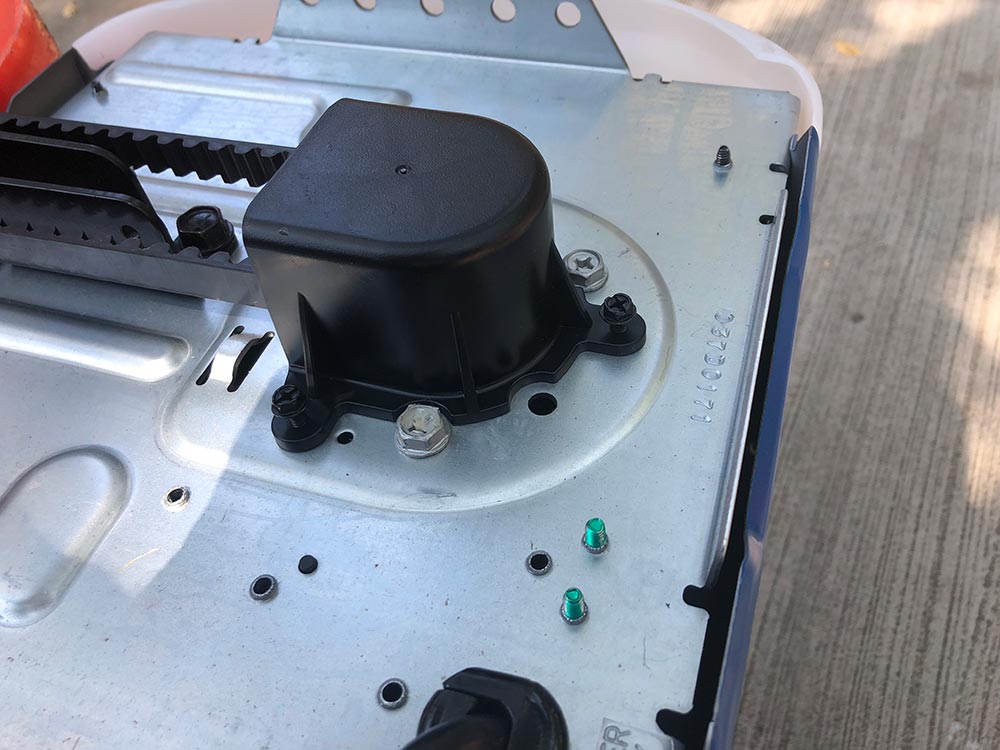
Install the gear cover with the provided screws.
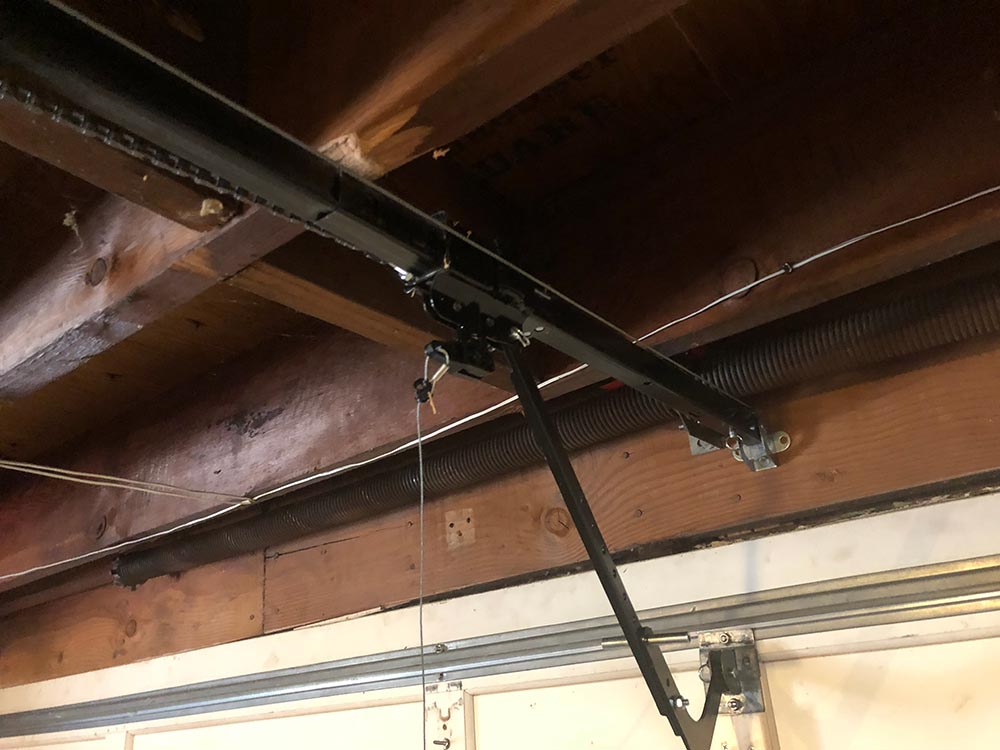
At this point, it’s ready to install, so that means removing the current garage door opener. Incidentally, mine was also a Chamberlain although I’m unclear as to how old. It was starting to get quirky and would reverse direction about a foot before closing 3 out of 5 times. You can see from the photo below that my ceiling is unfinished dark wood. My garage door has a huge coil spring across the top of the door to assist in lifting and lowering which fortunately did not need to be messed with.
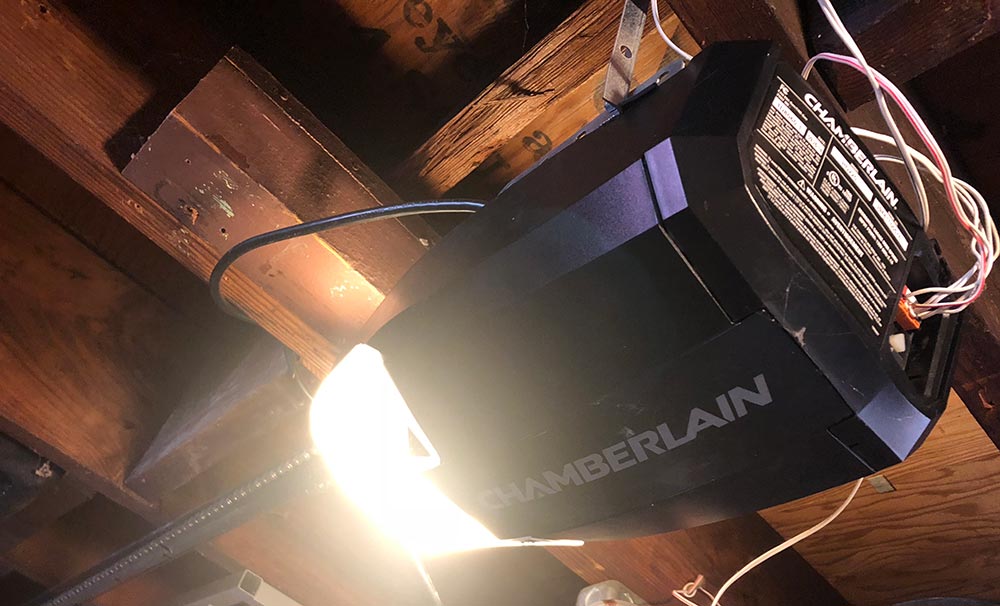
Here’s the old motor unit to be replaced. It had a front facing light which didn’t help visibility towards the back of the garage.
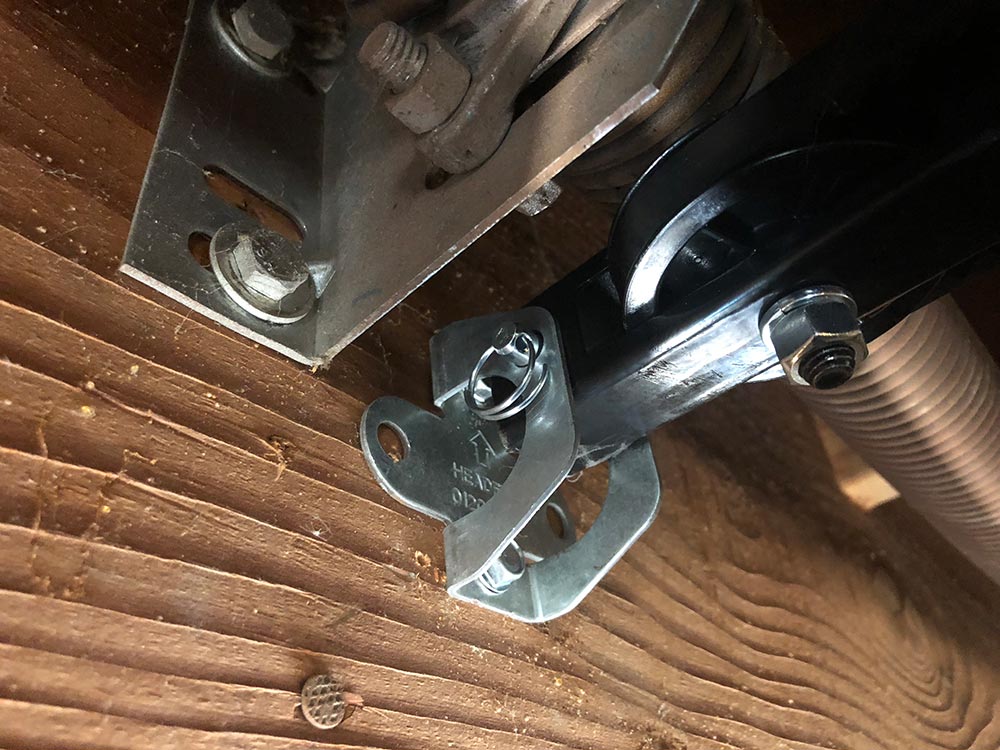
A lot of the hardware was similar or the same, but I reinstalled almost all of it. This anchor for the track I moved closer to centerline of the door to correct some of the issues I was having with the old one suddenly reversing. Mount the track to the anchor with the pin and lock ring. This step makes lifting the heavy motor end of the system much easier.
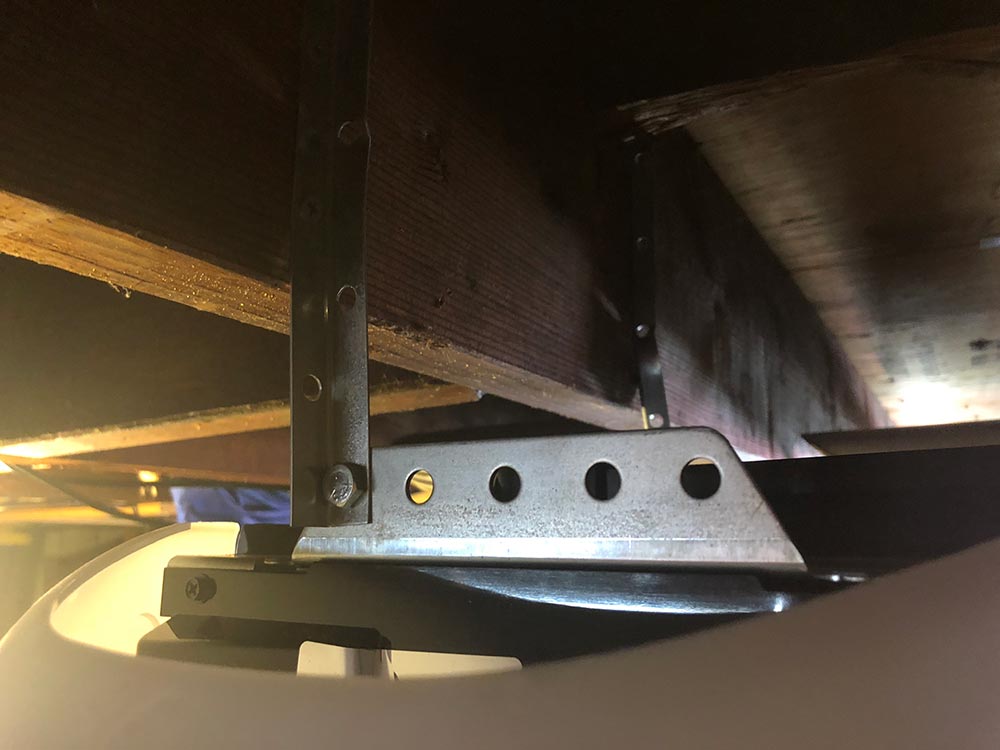
These mount joists are the previous ones, but I did move them up a bit to make sure everything was level. They mount to the side rails on the motor with anchor bolts.
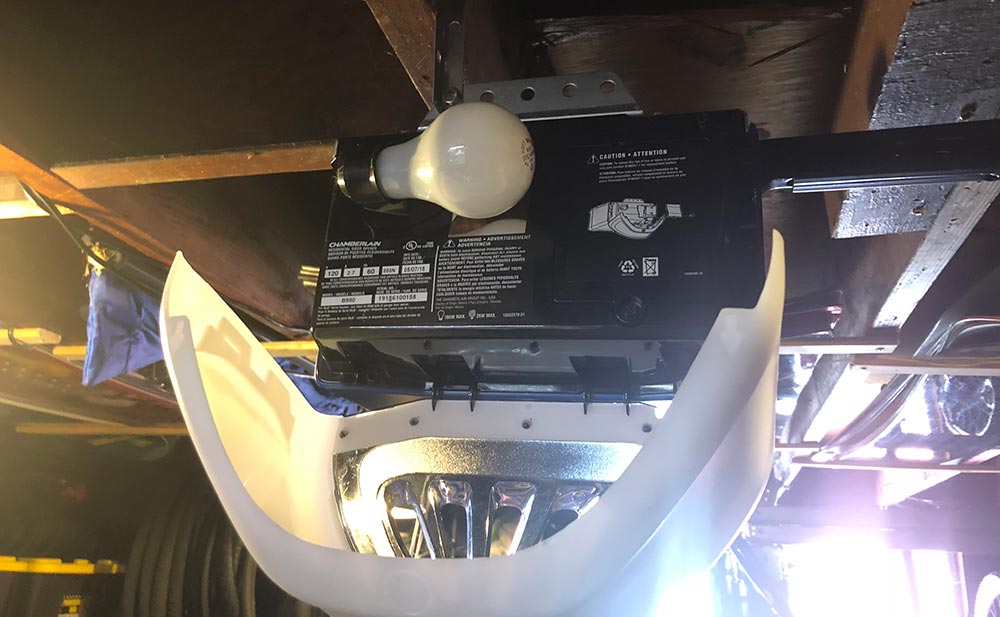
Install the light bulb onto each side.
You now need the door in the up position after installing the lift bracket which has this bent shape to help make the turn. My garage is low enough that I later cut up a tennis ball to mount on that bend as I did manage to crack my head on it once during install.
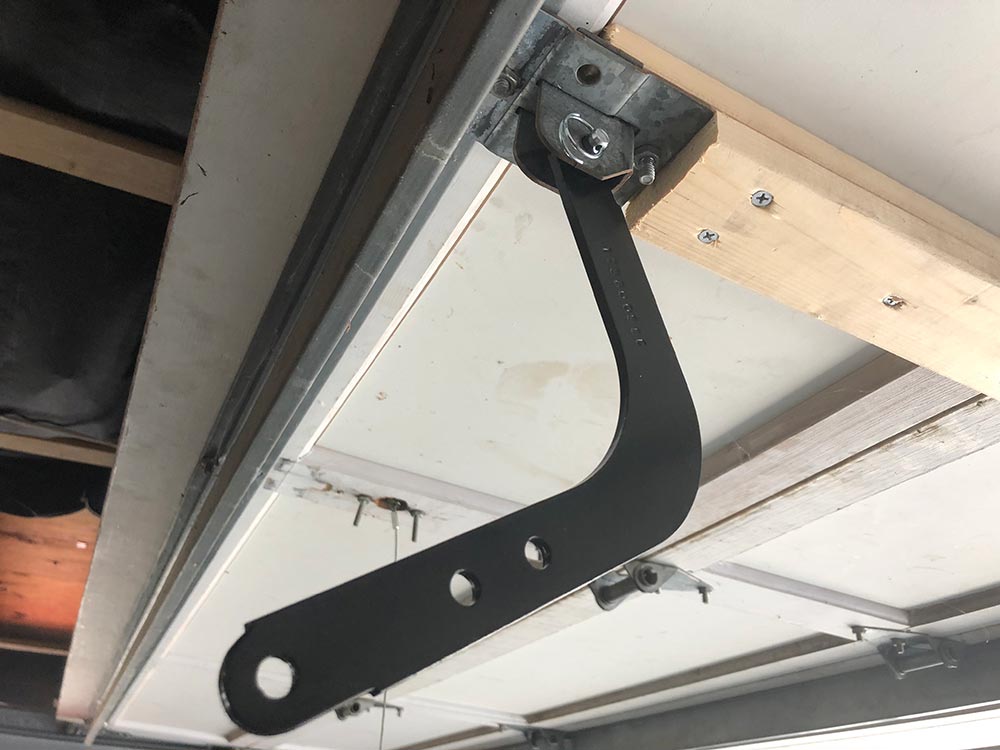
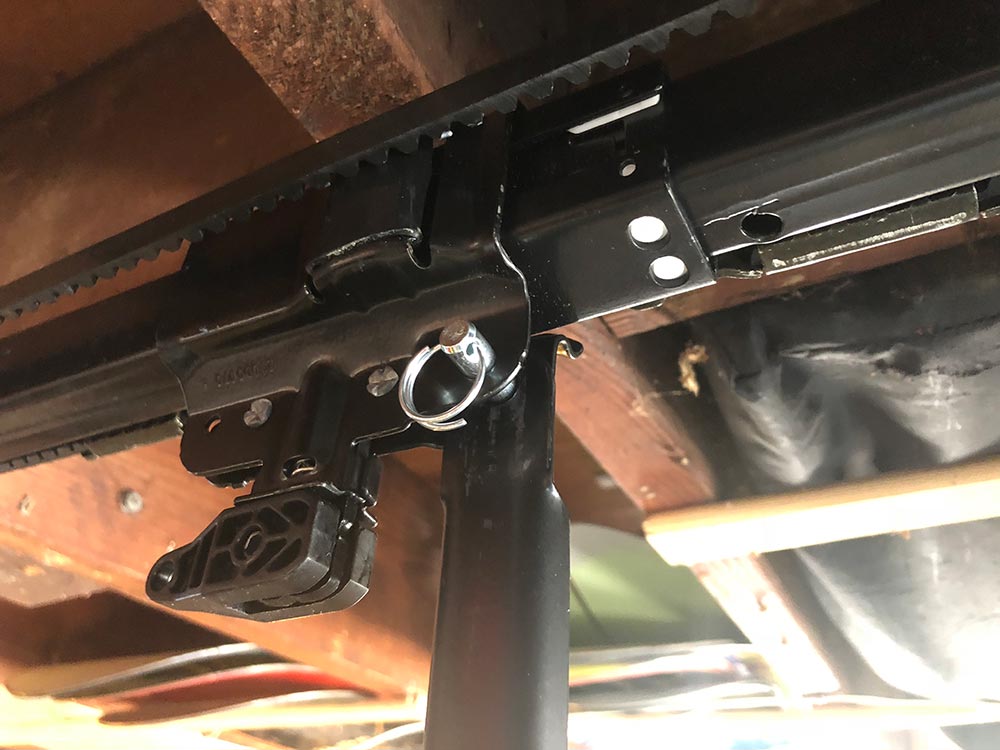
The straight arm mounts to the trolley with a similar cotter pin at which point you both the two sides together.
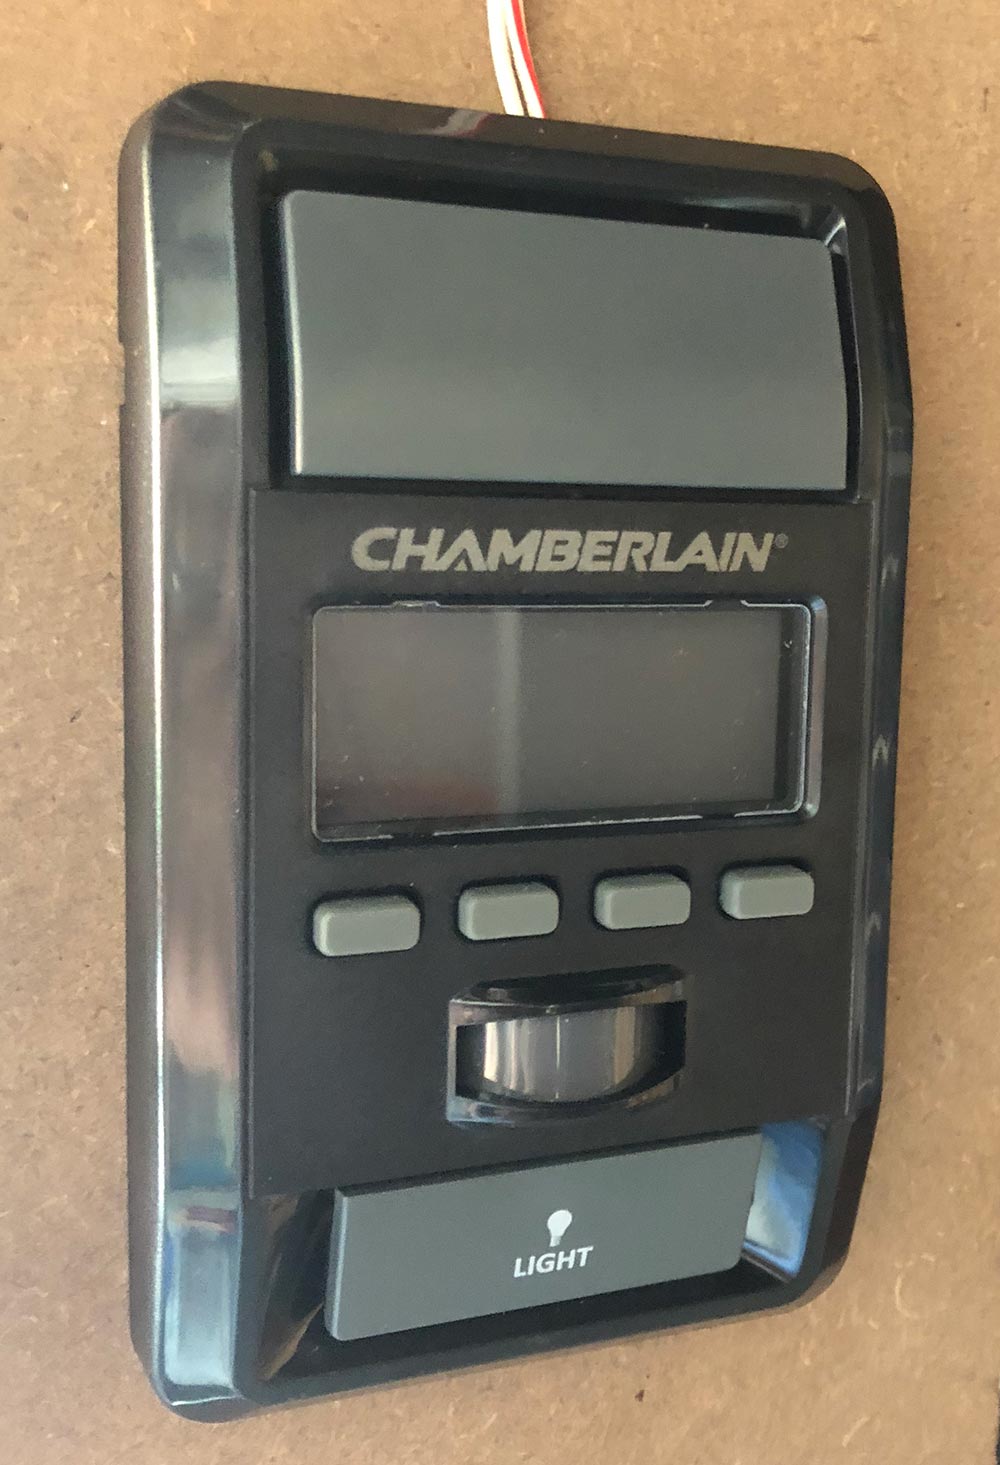
Next you need to run the power lines for the door control. I used the lines that were already there. The mounted panel is shown here.
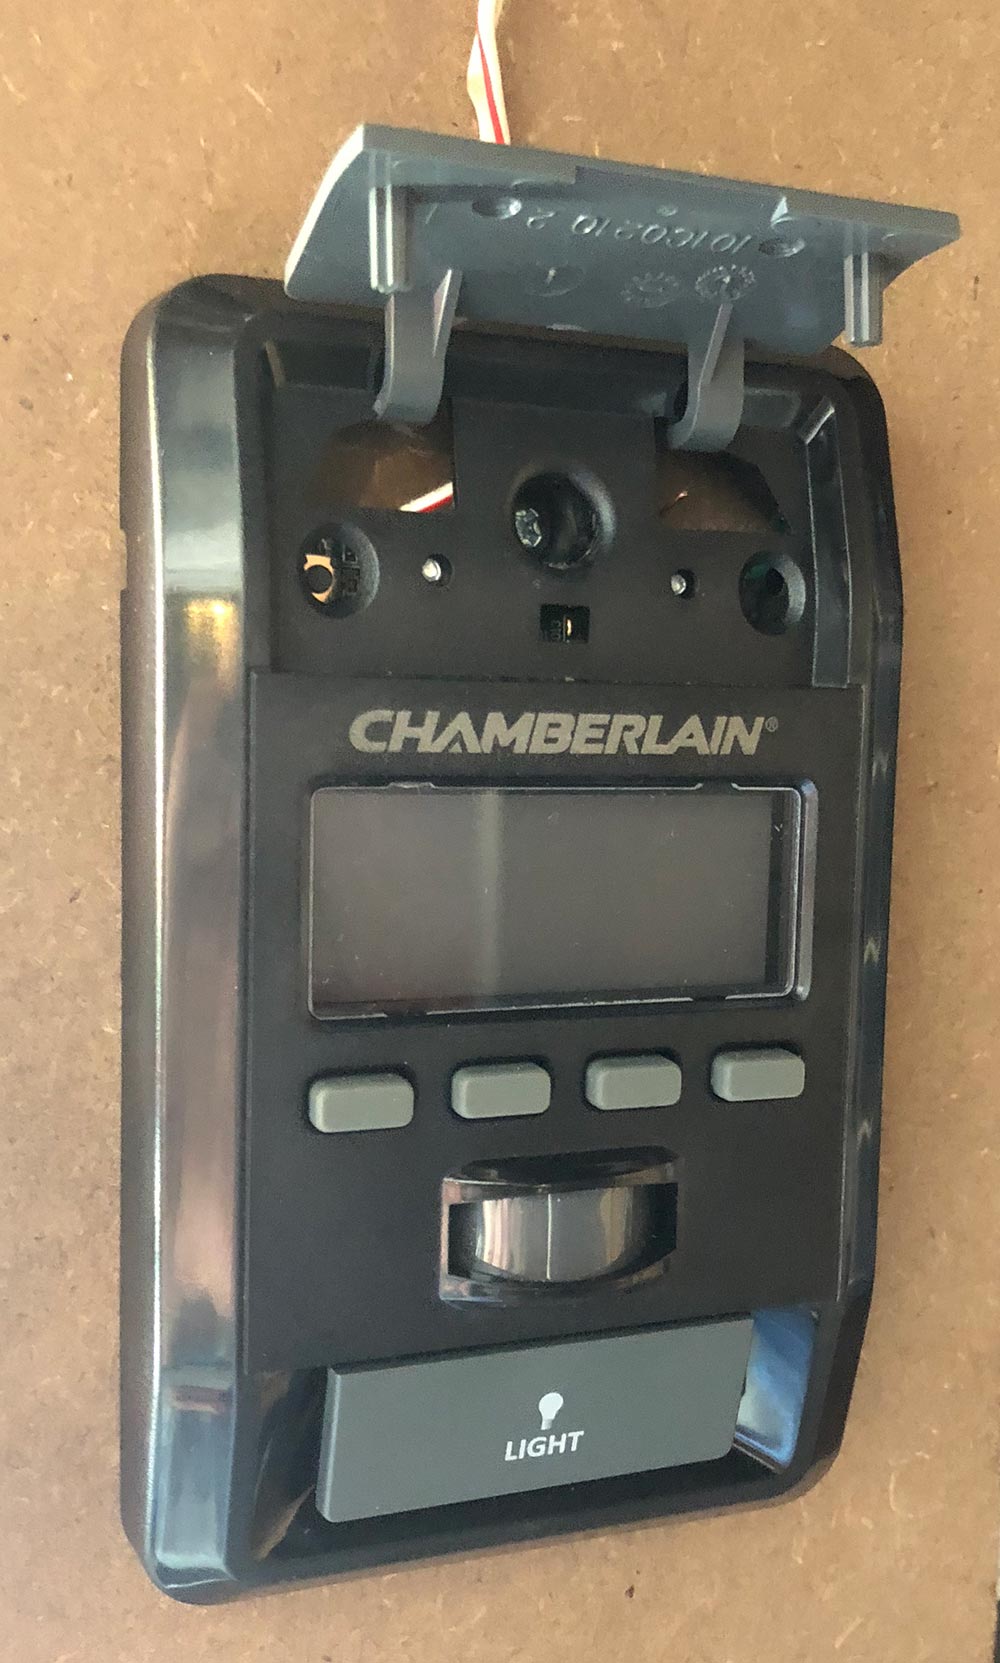
It’s mounted with a screw that you find by lifting the door actuator button.
On the back side are the two contact screws you need to connect the wires to.
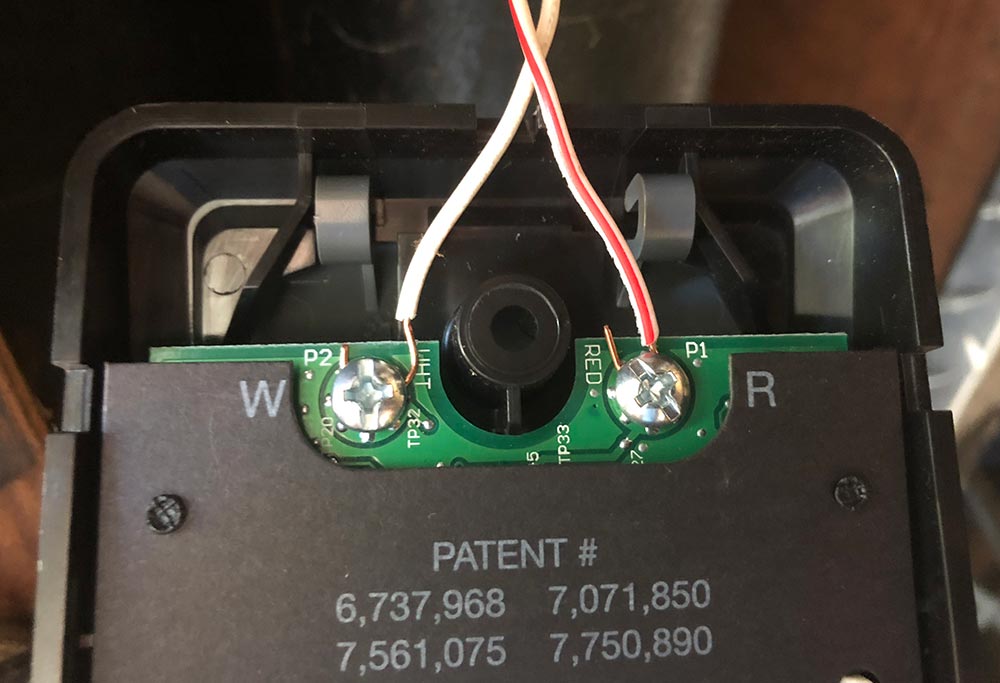
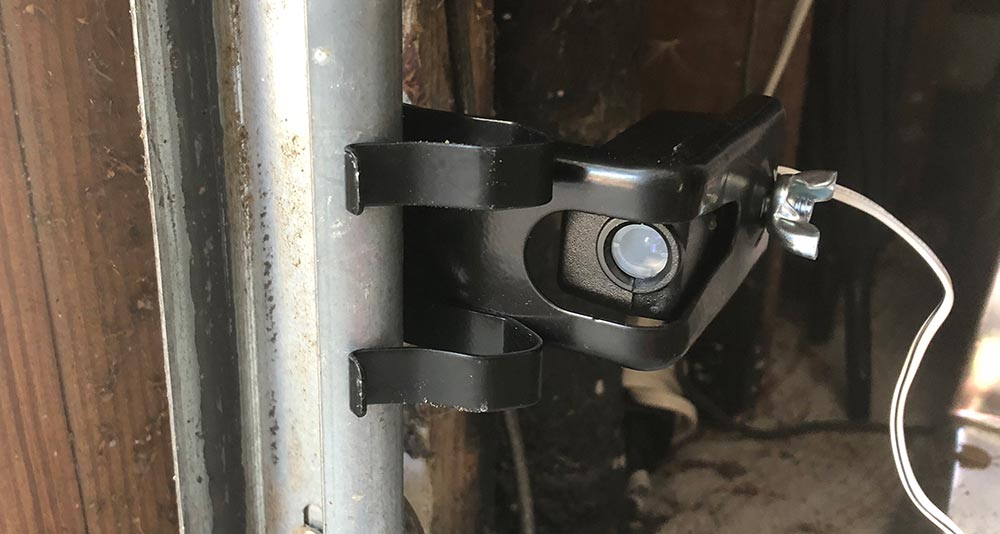
The safety sensors are there to make sure the door doesn’t close on objects or people (or for you to kick a foot at as you realize that one thing you forgot to grab as you left). These can be mounted directly onto the garage door rails or onto the wall next to them. For this part of the install, I reran all the wires and decided to get crafty with my staple gun. I clearly went to fast and pierced the cable a few times and had to pull one of them completely down and replace with the old wire to finally get it working. What’s the saying? “Measure twice, cut once?”
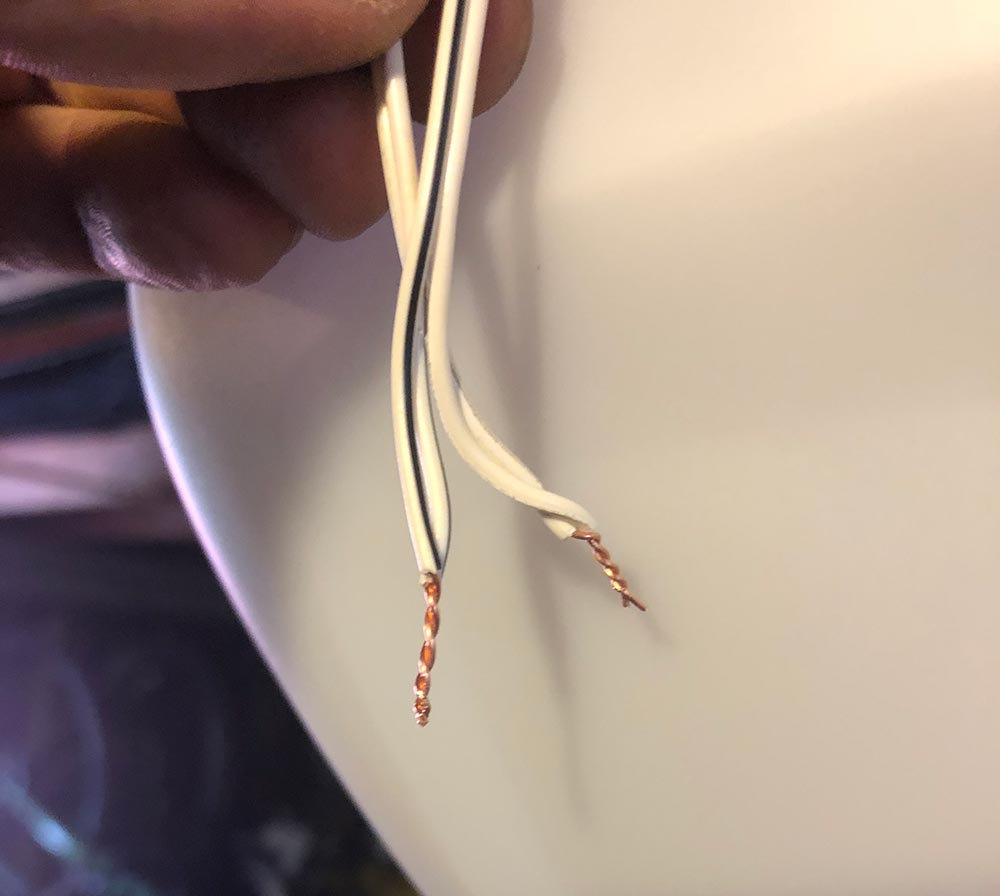
Pair up the leads from the two sensors and twist them into the corresponding pairs before inserting into the proper terminal on the opener.
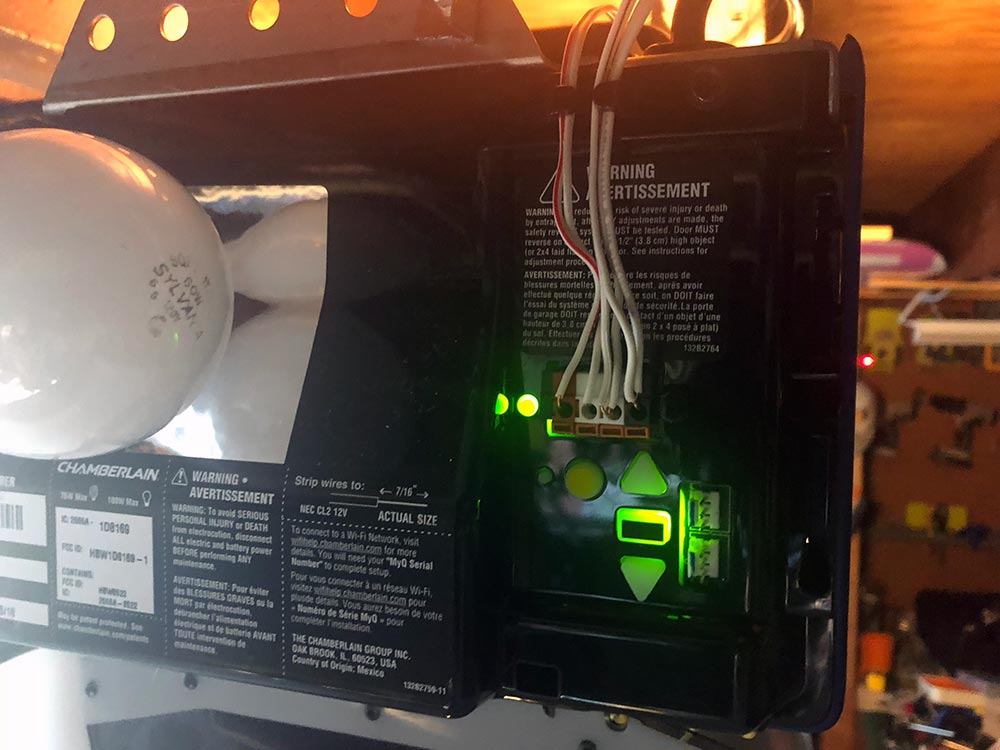
Here you can see those wires in the right two positions next to the ones previously run for the door opener. You can also see the controls you’ll use to set the final open and closed positions of the door.
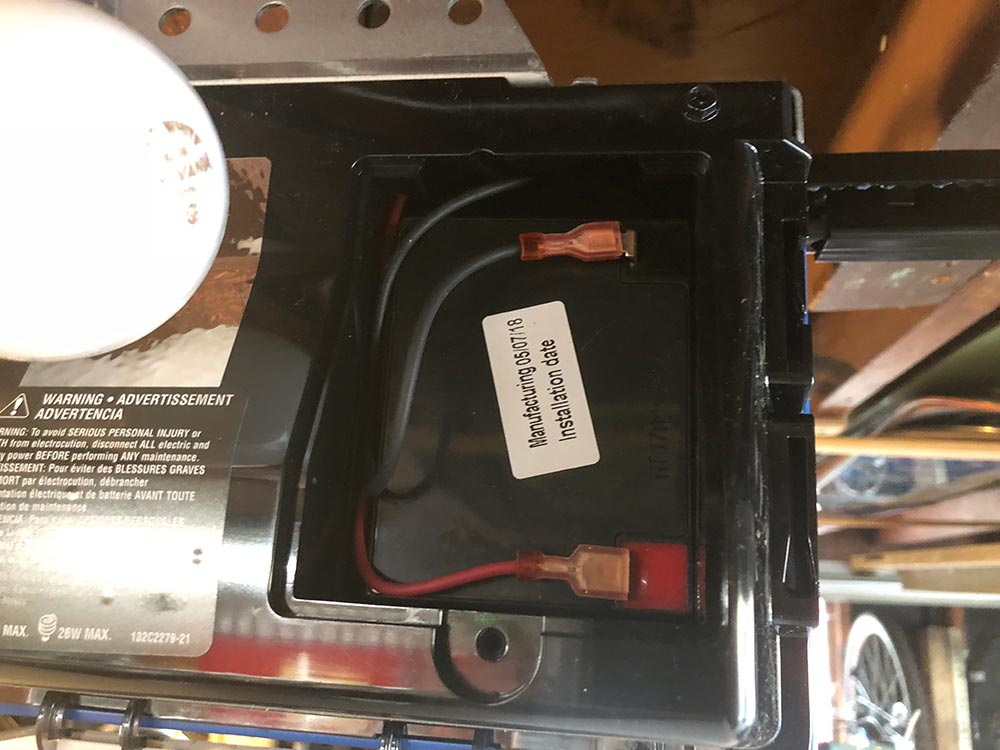
On the other side of the opener, install the large backup battery and connect those terminals. You’ll run a quick test to verify that the opener can now run on auxiliary battery power.
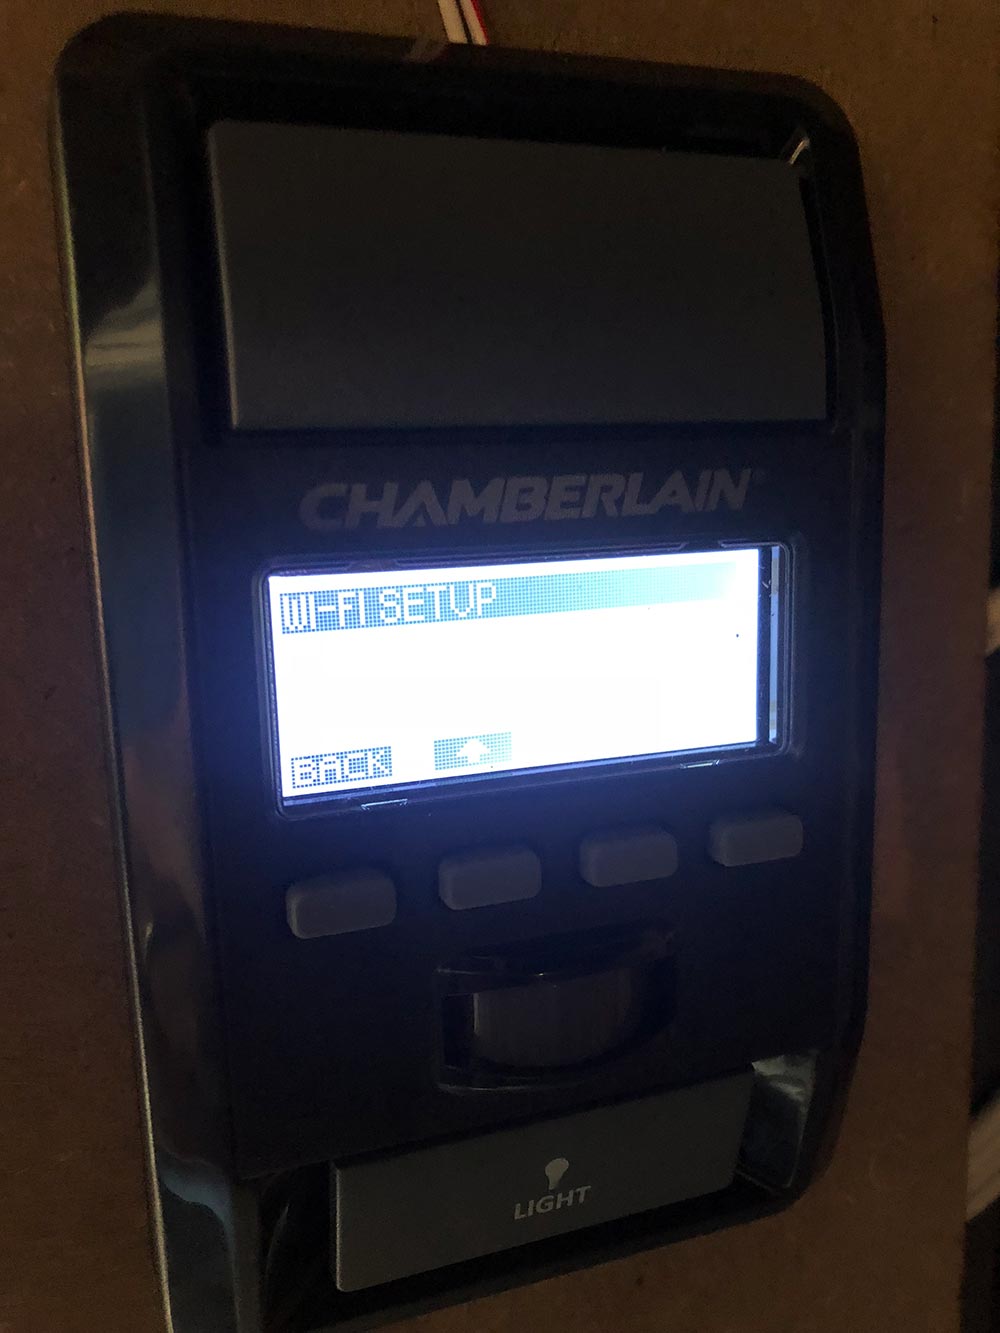
Back on the door opener you’ll connect to wifi and complete the connectivity setup.
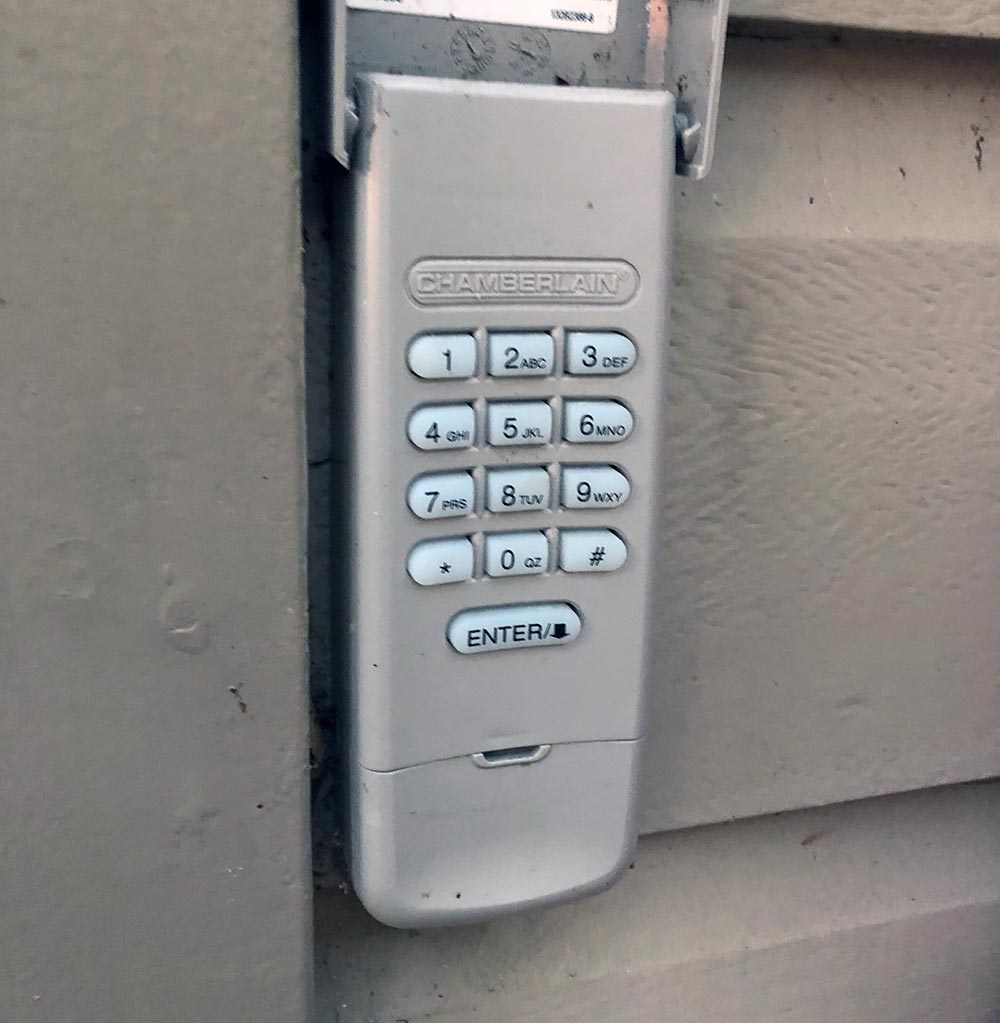
Once that’s done you can use the same menu to set up the pairing for the keypad remote shown here. The two car remotes are already paired and ready to go.
The system also comes with a deadbolt which I haven’t seen on a garage door before. It wires up similarly and mounts to one of the rails to basically deadbolt your door from lifting. Only a quick 3/4″ hole to drill. There was a pretty big disclaimer in the instructions that you must have an entry door to use this feature. My garage does not, so I didn’t feel comfortable testing this out. I actually have an externally mounted quick release key from Chamberlain installed from getting locked out before when we lost the only visor remote shortly after moving in. It’s basically a removable key core that yanks a cable connected to the manual release on the trolley. Pretty handy unless you lose that key.

Okay. The App is as simple as downloading and creating a login. I’ll show some screenshots in the next section. Let’s move on to how it works.

Performance

In short. Huge improvement over the old Chamberlain model I replaced. That one was definitely installed a bit crooked, but I wouldn’t have figured that out without installing a new one. My old model was a chain drive. This belt drive model is significantly quieter, and smoother. It closes completely and in the fully open position, it’s completely out of the doorway. The dual lights are brighter than what I had before which is a huge help in my dark garage.

As for reliability, garage doors are something you don’t really think about until they aren’t working properly or break entirely. I’ve been using this for a full month and it’s doing exactly what it’s supposed to do and then some. The wall mounted opener has the time and the temperature which while not necessary is actually pretty handy.

The App allows me to check if I closed the door, and then actually do it without needing to trudge out to the garage. Here’s what the app looks like, and yes I named my garage Sesame.
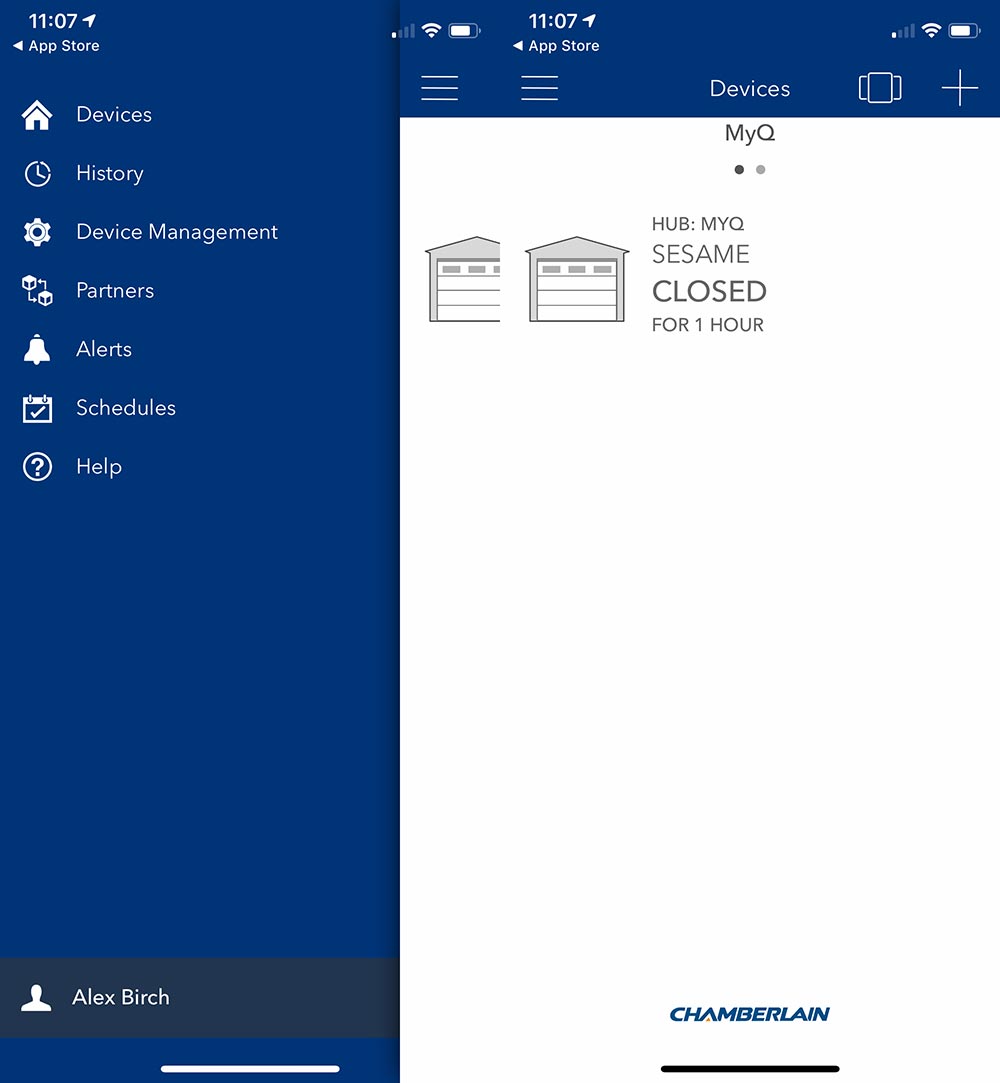
Chamberlain partners with Nest, Wink, Xfinity Home, Google Assistant, IFTTT, Alpine, Clare Controls and Eve Connect for Tesla. I paired mine up with Nest to find the reverse of what I was looking for. Instead of being able to see and control the status of my garage from within the Nest App (which I’m in with some regularity) I can control my garage and see my Nest devices in the Chamberlain app which I’m not sure why I need to do.
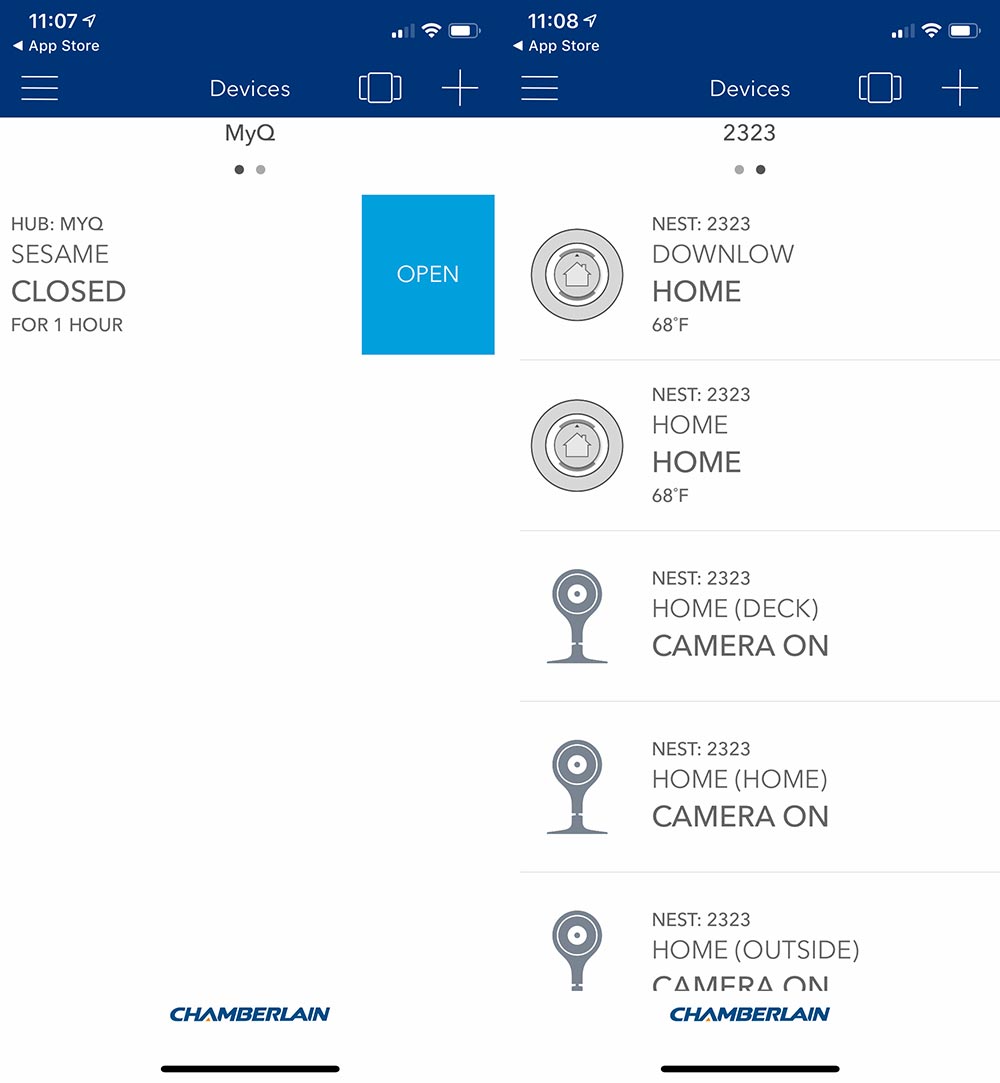
Hmmm. I haven’t played around with IFTTT, but that’s likely next.

We recently got a new car and the plan was to actually park a car in the garage, something that we have not done previously. The new car has Homelink functionality and I was able to train it easily using the visor remote. The car has the ability to auto open and close the garage at a set distance. This seemed amazing and actually was for most instances. I’d open the garage, get in the car, back out and the garage door would close as I pulled away. On returning the garage door would open right as I pulled up. Great, right?
After leaving one morning, we turned around realizing we had forgotten a couple items. Pulled into the driveway and the door started opening, so I stopped it and closed it from the car controls. As we pulled away, we crossed that distance threshold and the door started opening. It’s then I figured out that it was just toggling the open/close and had no knowledge of which position the door was in. Needless to say I turned it off as it’s not to hard to hit the button when you need to. I do think this is an issue on the car side of the equation as the Chamberlain App definitely knows if the door is up or down.

What I like

  • Relatively easy install (clear instructions!)
  • Quiet and smooth operation
  • App integration – Status awareness
  • Automation partnerships

What needs to be improved

  • Nest integration should be bi-directional
  • Bundle option without the deadbolt?

Final thoughts

I’m very happy with Chamberlain’s product here. The instructions were very well written and easy to follow. As long as you aren’t installing a whole garage door for the first time, it’s a pretty easy task to take on. I would feel comfortable telling most people that they could handle the install themselves. As I mentioned previously, this is one of those products that just hangs in the background and does its job. Chamberlain has added some useful additional features and created a product that worth upgrading to. For me, the peace of mind of knowing I can get into the garage if the power is out, and even just knowing the garage door is down is well worth it.

Price: $348
Where to buy: Chamberlain.com and Amazon.
Source: The sample of this product was provided by Chamberlain.

Filed in categories: Reviews

Tagged: ,

Chamberlain Ultimate Security Bundle smart garage opener review originally appeared on The Gadgeteer on September 28, 2018 at 11:00 am.

Note: If you are subscribed to this feed through FeedBurner, please switch to our native feed URL http://the-gadgeteer.com/feed/ in order to ensure continuous delivery.