Raven dashcam and connected car system review


REVIEW – I have tested many different brands of dash cams that offer HD and 4K resolution and a few additional features and they all seem to be close to the same with a few minor exceptions. When I first heard about the Raven Connected Car Device, my thought was, “here we go again”. Was I right? Let’s see!!

What is it?

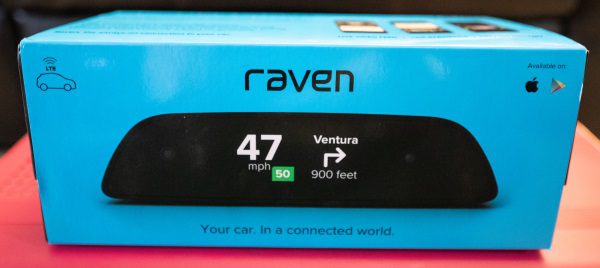
The Raven Connected Car Device is a smart device that connects to your car’s OBD connector and offers access to smart cameras,  sensors, navigation, diagnostics, and data. It works via the built-in LTE cell connection, so it is always connected.

What’s in the box
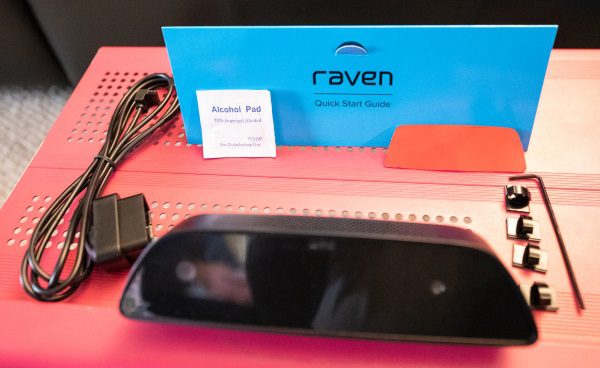

1 x Raven Connected Car Device
1 x Quick Start Guide
1 x Extra Double Sided Adhesive Tape
1 x OBD Connector Power Cable
4 x Cable Clips with Adhesive
1 x Allen Key

Design and features

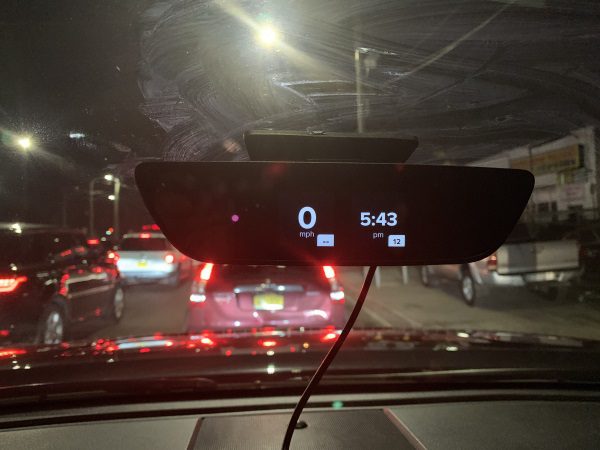
The device itself is a black sleek device, with a single cable connection to your car’s OBD connector. On the front, there is a display screen and an in-cabin camera hidden/embedded behind the clear surface.


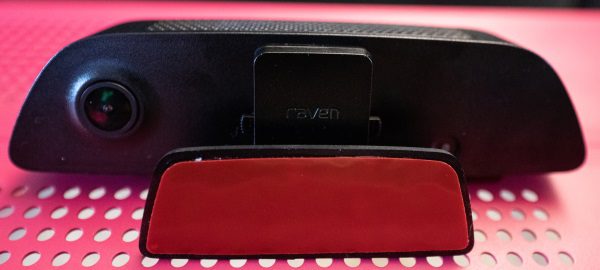
On the back, there is the outward facing camera, and on the bottom of the mount, there is the double-sided tape that does a great job of ticking and staying put on the windshield.

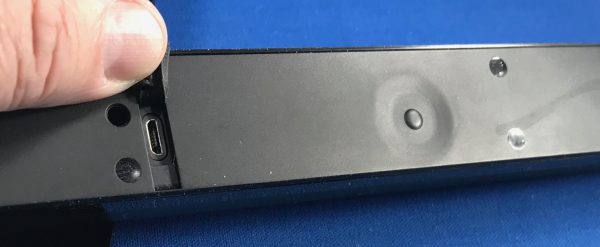
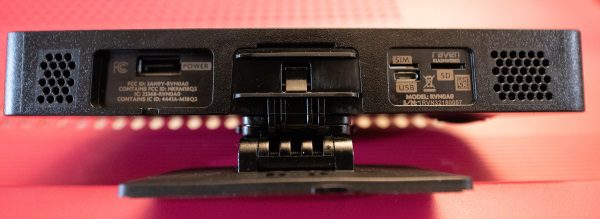
On the bottom, there is the adjustable mount, a micro SD card slot for on-board recording, a micro USB port for direct connection and the ability to download videos from the SD card without removing it from the device, and a “Sim” slot that is not currently used.
Performance

Features:

    • Wi-Fi Hotspot
    • Live preview and streaming from dash outwards and in-cabin
    • Speed alert and threshold settings
    • Next-turn Navigation
    • Video recording triggered by hand gesture
    • Real-time GPS location
    • Easily download and share video
    • Security Alerts and Notifications
    • Access onboard diagnostics and get information about what might be going on with your vehicle
    • Driving alerts and notifications
    • In-App Navigation

Once I connected the Raven and started driving, one of the first things that I noticed was that when viewing the speed of the vehicle on the Raven versus the digital speedometer on my dash, at times there was a +/- 1 MPH difference. This occurred mostly when accelerating or slowing down. Since the Raven is connected to the vehicle’s OBD connector, it would be interesting to find out which one is actually truly correct.

The Raven continuously records video while you are driving so that nothing is missed. The continuously recorded video files are not accessible through Media Manager on the app like the gesture or event generated videos. The continuous video is recorded on the micro SD card (optional), and you can access either by removing the card and viewing via a PC or by connecting the Raven to your PC using a micro USB cable. The raw video files are in the Videos folder. Another great feature of this device is that since it connects via the OBD connector, it always has power and can always provide live views of the cabin and the outside as well as security alerts as long as the cell signal exists.

App
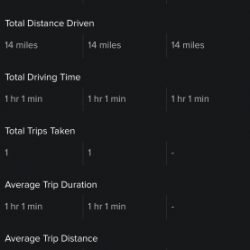
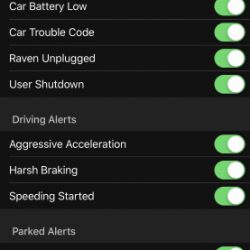
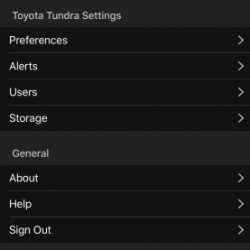
The app provides access to all of the functions and settings of the Raven. Here are some screenshots of the in-App choices and preferences:


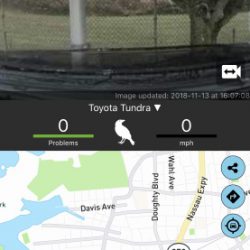
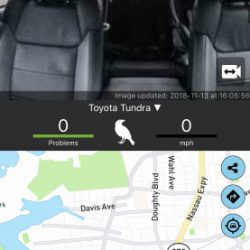
Screenshots of outward and in-cabin app views (Views can be fullscreen as well):


Here is actual footage downloaded from the camera. (The footage was not edited and is exactly as it was when downloaded including the speed of the video):

Here are screenshots of types of warnings and notifications that you receive on your mobile device:
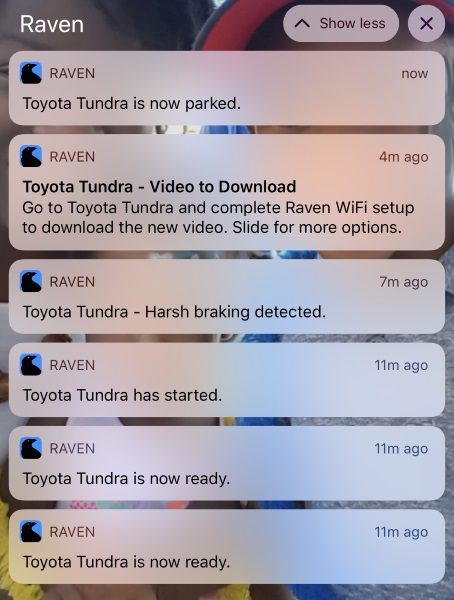
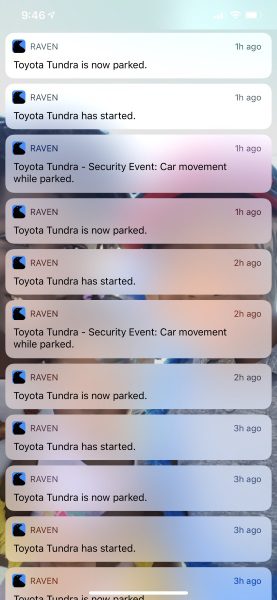

Screenshots of fullscreen in-app navigation. Navigation directions are voice enabled:


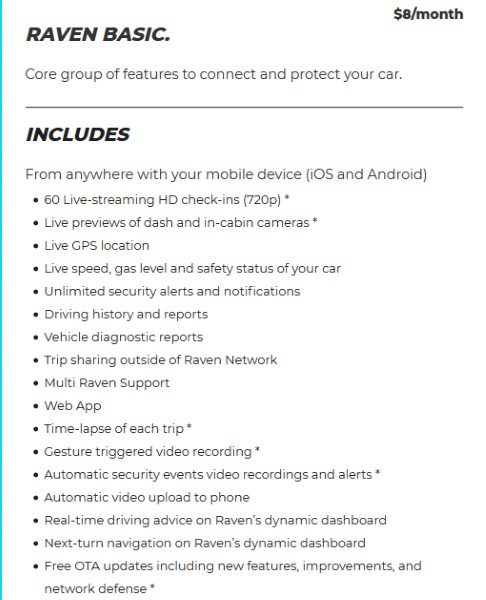
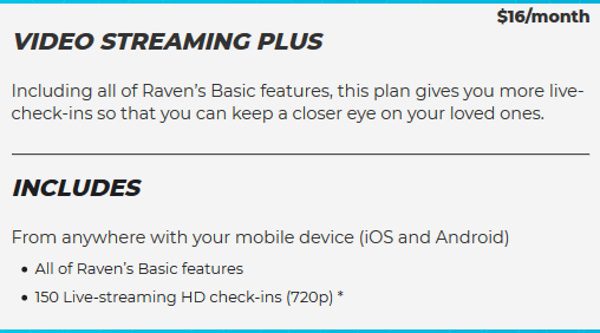
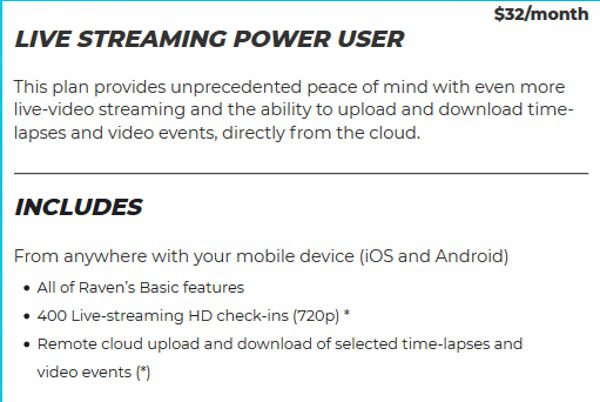
If you choose to continuously use all of the features and functionality of the Raven, there are 3 data plans to choose from:
What I like

  • The look
  • The build quality
  • The features and functionality

What can be improved

  • The length of the OBD connector cable so that larger vehicles are accommodated
  • Additional built-in cameras to provide a 360-degree view
  • Options for cell service. T-Mobile does not have the best coverage in NYC.
  • Addition of remote start feature since the OBD connection is being used (More like my personal wishlist item)

Final thoughts

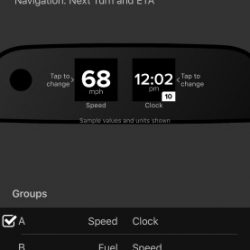
After not expecting too much more than a dash cam from this device, the Raven has won me over in many ways. I love having this device and I love using its features and functionality. Having the ability to view my car when it is parked at the railroad station and in the garage or on the street is great, and the alerts are also great. Having that kind of heads-up display that gives me the option to view various parameters is a plus, and while my truck does have the navigation, having a second option is just a bonus. For my personal use, I can’t say enough about how much I like this device. I have actually replaced what was my favorite dash cam with the Raven. Each person has their personal preference, so keeping that in mind, I give the Raven a big two thumbs up!! If they add 360-degree camera views and remote start capability to the next version, I may have to get more thumbs.

Price: Two options – $299 plus a choice of a monthly data plan – $8, $16 or $32; With Affirm Credit starting @ $30 monthly for 12 months with 1 year of data included. The first 3 months of use are free for 24/7 connection to your car.
According to Raven, you can choose the additional following option:
“RAVEN WITHOUT A PLAN – Though you won’t have access to Raven’s LTE features, you’ll still be able to use Raven as a dashcam for full-length videos, gesture triggered videos along with time lapses. You’ll also be able to use Raven’s displays to show driving data such as speed, compass, fuel, altitude etc. In the app, you’ll have access to the media manager, settings, historical trips, and historical driver reports.”
Where to buy: Raven website and Amazon
Source: The sample for this review was provided by Raven

Filed in categories: Reviews

Tagged: ,

Raven dashcam and connected car system review originally appeared on The Gadgeteer on November 19, 2018 at 12:00 pm.

Note: If you are subscribed to this feed through FeedBurner, please switch to our native feed URL http://the-gadgeteer.com/feed/ in order to ensure continuous delivery.

LiftMaster WLED Garage Door Opener review

REVIEW – You probably don’t think of a garage door opener as being something super techy or cool right? I didn’t either until LiftMaster changed my mind when they offered to let me test their WLED garage door opener with built-in Corner to Corner Lighting system. Let’s check it out.

What is it?

The LiftMaster WLED DC Battery Backup LED Wi-Fi Residential Garage Door Opener is just you have already guessed it is. It’s the motor box that lifts and lowers your garage door. But this one from LiftMaster has some great tech features built-in like high powered LED lights, motion detection, WiFi control, and more.

What’s in the box?

I don’t have a complete listing of what was in the box because the LiftMaster WLED garage door opener is packaged for professional installation and not for a DIY homeowner installation. Chamberlain, LiftMaster’s parent company, sells similar products online and through major retailers (e.g. Home Depot, Lowes, etc.) for those homeowners who wish to install it themselves (no dealer necessary). Chamberlain’s version of this particular WLED can be found here.

  • LiftMaster WLED garage door opener
  • Installation hardware
  • 2 3-button car remotes with clips
  • Wall door controller
  • User guide

I have a 3 car garage that has one overhead door that has to be lifted manually and two others that have Craftsman openers.


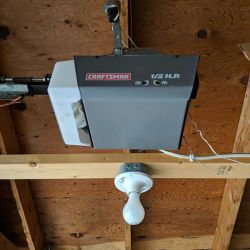
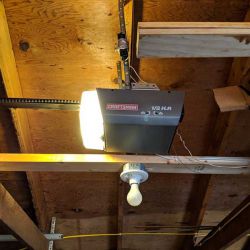
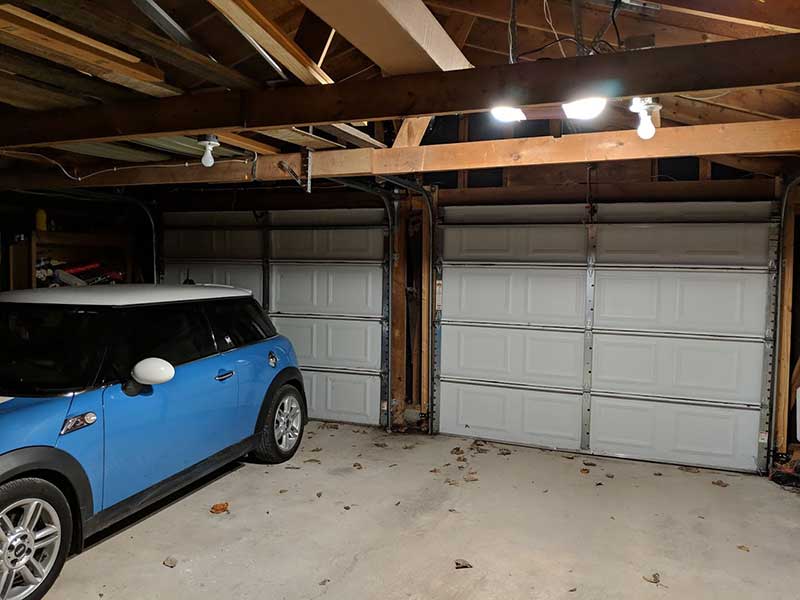
I’ve not had any troubles with the Craftsman openers except that the one on Jeanne’s side of the garage has a really crummy 1-bulb light built into it.

Here’s the light from the old garage door opener

Jeanne’s always complaining that the light isn’t bright enough to see to get her belongings out of the car when she gets home at night. The garage doesn’t have any windows, so it’s pitch black except for the garage opener light when she gets home after dark.

Besides the dim light, neither openers work if the power is out. Unhooking the openers so that they can be lifted manually isn’t difficult, but getting them hooked back up later is always a pain in the you-know-what. I don’t know why, but I always have a heck of a time reattaching chain thingy. Yes, that’s what I call it. Don’t judge me!

Design and features

When LiftMaster contacted me to ask if they could install their WLED WiFi enabled garage door opener so I could test it and write about it, I immediately thought of Jeanne and her complaints about the lighting in the garage and said heck yeah to their offer.

They shipped me the box with all the hardware and then set up an appointment to have a local garage door company come to do the installation for me.

The LiftMaster WLED garage door opener features:

  • Built-in Wi-Fi and myQ technology: provides the ability to open and close the garage door from anywhere and send alerts if it’s left open. 
  • Battery Backup: Keeps the opener working in a power outage so you don’t have to raise and lower the door manually.
  • Quiet Operation: An ultra-quiet DC motor and soft start/stop vibration reduction.

Installation

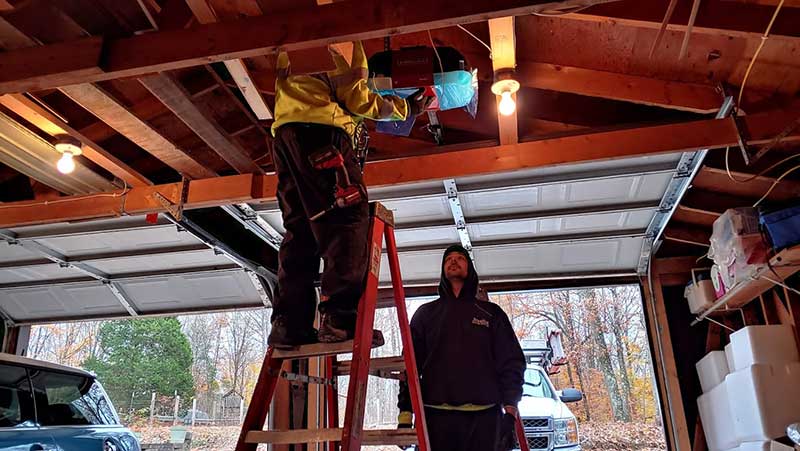
On a cold afternoon a couple weeks ago, two guys from Sterling Garage Door in Columbus, Indiana arrived and got to work on the install. I didn’t stick around to watch them install it because it was about 40 degrees outside (and in the garage since it’s not heated).

Less than an hour later, they were gone and I was left with a brand new shiny new garage door opener with a nice set of tech features that I never knew I needed until that day.

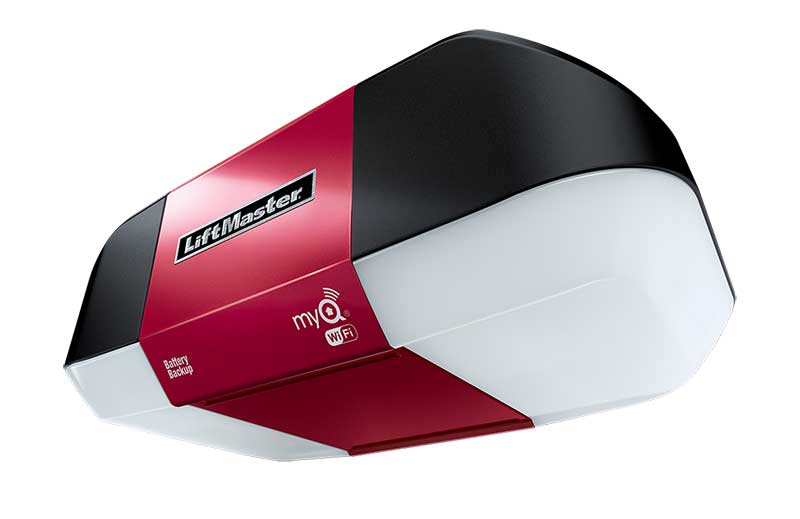
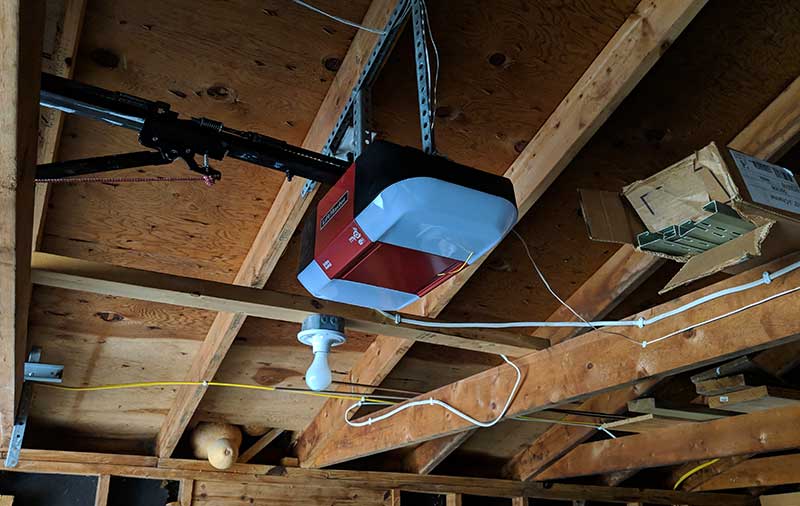
The LiftMaster garage door opener is larger than the one that was previously installed in the same space as it has lights on both ends instead of just the one.

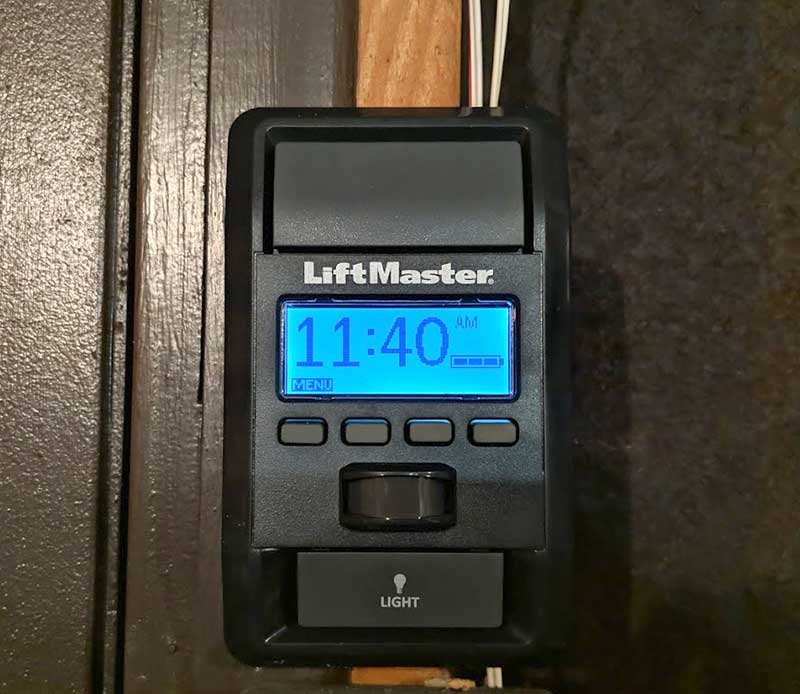
A nod of satisfaction came when I went to the newly installed controller mounted where the old one had been. I guess I should have taken a picture of the old one before it was removed but it was basically one button like an old-school doorbell. As you can see, the new one has a bright backlit screen with the time of day in large easy to read numbers. The display cycles between showing the time and temperature which I really like. It also shows the built-in battery capacity of the opener in event of a power outage.


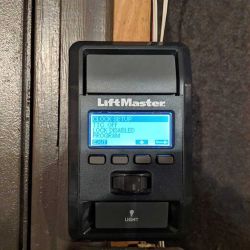
Above the display is the opener button and below the display, there are four buttons which are used to interact with the menus to customize settings for the clock, time to close, language, lock, WiFi setup, and more.

Below the buttons are two more features that I like. First of all, there’s a motion sensor which will automatically turn on the garage door opener’s lights when it’s tripped. I LOVE this feature because I leave the house before the sun is up and always have to feel around for the opener button to open my garage door when I walk into the garage to leave for work. Now that the LiftMaster WLED is installed, I just open the door to the garage and the motion sensor flips on the opener’s lights.

There’s also a button below the motion sensor that toggles the opener’s lights.

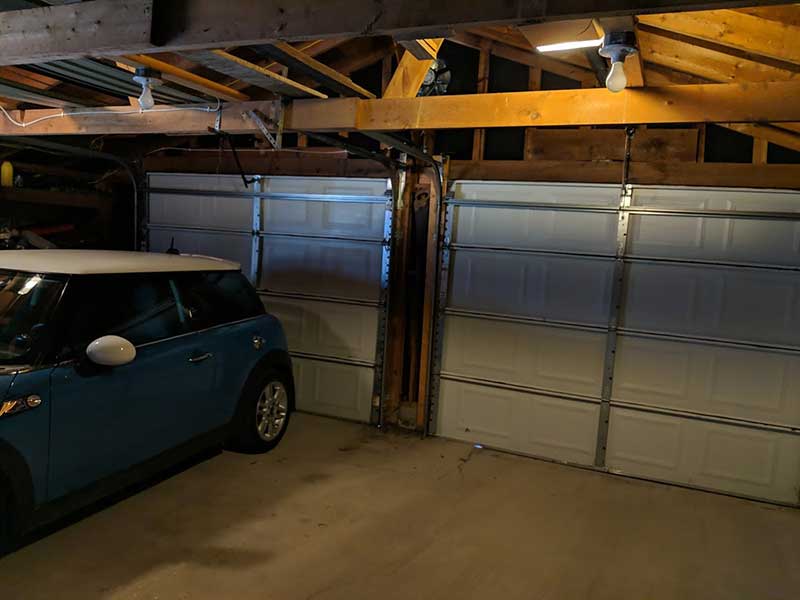
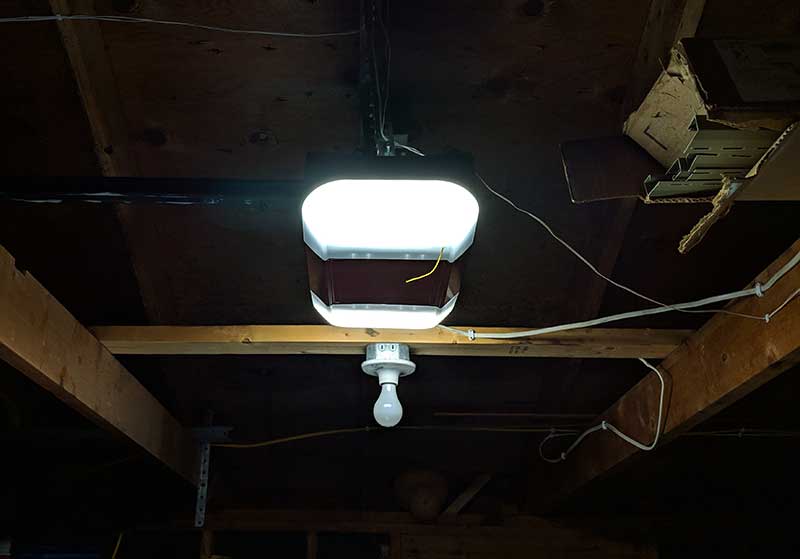
Here’s the light from the LiftMaster WLED garage door opener. Although it looks like it, the bulb next to the opener on the right is not turned on.

If you scroll back up towards the beginning of this review, you can see how the previous garage door opener’s light lit up the garage. Weak right? Now, look at this image. It’s like night and day 😉 Sorry, I couldn’t resist. But seriously, the LED lights on the LiftMaster are really bright. 3100 lumens to be precise. Jeanne no longer complains about how dark the garage is when she gets home at night.

We both love how the lights come on automatically as soon as we open the walk-thru door to walk into the garage. The motion sensors are a great feature especially when your hands are full.

Safety Sensors

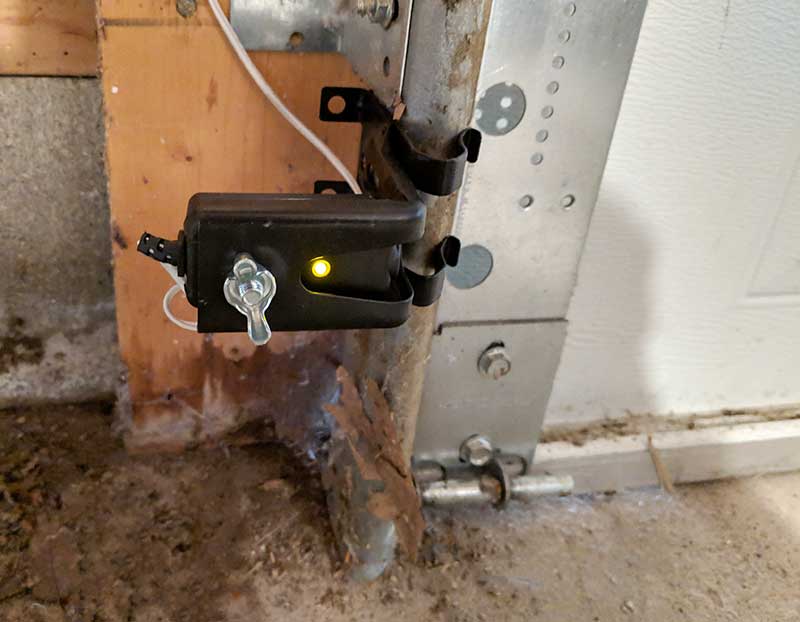
We haven’t had safety sensors configured correctly with the old doors. Whoever installed them, just taped them together and ran the wires out of the way. The guys that installed the LiftMaster had to do the install to code, which means we now have a light beam sensor on each side of the door at the bottom. These sensors are designed to protect people, vehicles, pets, etc. but stopping the door from closing on obstructions and reversing (opening) the door. When this happens, the lights on the opener will flash 10 times to signal the problem.

Time will tell if the sensors become more trouble than they are worth though as we get a lot of leaves that like to pile up in from of the garage and sometimes if it’s windy, they will blow into the garage. I’m curious if we’ll have any issues with the door not wanting to close. I’ll report back if that is the case.

24 hour battery backup

The LiftMaster WLED has a built-in battery that will provide power to the opener for up to 24 hours if the main power goes out. I live in a rural area where the power goes out at least once a month if not a lot more. Heck, I was working on this review a couple days ago and the power was out 3 different times in one day for 1-2 hours each time. I’m lucky because I have a whole home generator, BUT my garage is on its own circuit box. That means if the power goes out, I have to use the emergency release handle and operate the door manually. UGH. I know, first world problems… But with the LiftMaster, I don’t have to worry about that. If the power goes off, I can still operate the door normally. Note that the door will run slower, and the lights will not turn on. But that’s a small price to pay.

Note that I’ll need to replace the battery from time to time, which according to some googling, will cost me around $20-$30 from stores like Walmart.

Using the myQ app

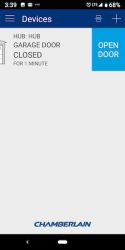
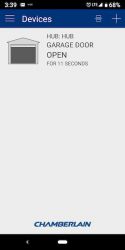
In addition to the features I have already mentioned, you can also control the LiftMaster WLED garage door with your phone. As long as the LiftMaster opener is within range of your home’s WiFi (2.4Ghz, 802.11b/g/n), you can do things like open and close the door remotely, know the status of the door, up or down no matter where you are in the world. You can also set a recurring schedule to close a garage door and use the app as a door opener if you happen to lose remote openers that come with the LiftMaster.


Setting up the myQ app with the LiftMaster was as easy as setting up other smart devices. I just installed the myQ app, then used the wall remote to get into the WiFi setup screens and from there I followed the onscreen prompts in the app which told me what to do on the remote.


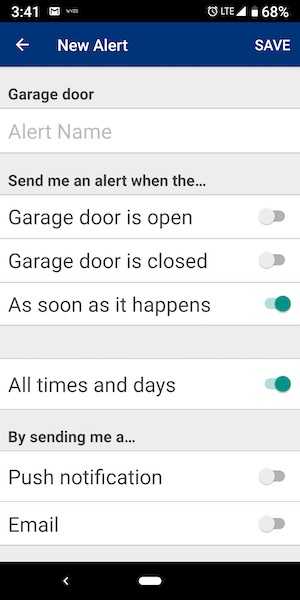
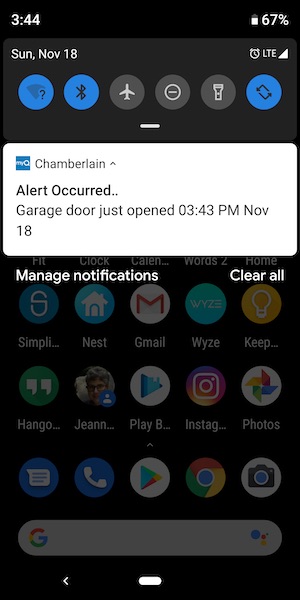
The app can be set up to provide real-time notifications to alert you when the door goes up or down. This is an added home security measure provides extra peace of mind when you’re waiting for someone to come home late at night when you’re already in bed, or when you get an alert when you’re not at home that the door has gone up.


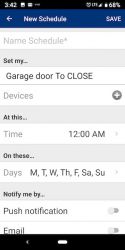
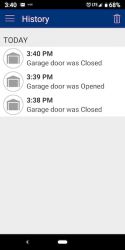
You can also set schedules when to shut the door. I’m not exactly sure why you might want this feature, but it’s there if you need it. Note that you can only schedule a time to close the door. You can set a schedule to open the door and you can see a history of when the door was opened and closed.

I mentioned that you can’t set a schedule to close the door, but you can set the TTC (timer to close) feature which will automatically shut the door after 1-99 minutes. This might be a good thing to set for people who can’t seem to remember to press the remote button after they leave the house 🙂

What I like

  • Bright LED lights that light up the whole garage
  • Quiet, smooth operation
  • Motion detector on the wall remote automatically turns on the lights when you walk in the door
  • Ability to know the status of the garage door (up or down) using the myQ app
  • Lifetime warranty on motor

What needs to be improved

  • Nothing

Final thoughts

The LiftMaster WLED garage door opener was a product that I didn’t know I needed or wanted until I got one. From the ultra quiet operation, extra light that it provides in my garage, and the fact that I can control the door remotely with my phone and get notified when the door opens provides extra home security benefits, the LiftMaster gets two thumbs up from me. Now I want to replace my other opener so I have a matching set.

Price: $450 – $500 (including installation)
Where to buy: LiftMaster certified dealers, or the DIY Chamberlain version is available on Amazon.
Source: The sample for this review was provided by LiftMaster.

Filed in categories: Reviews

Tagged: ,

LiftMaster WLED Garage Door Opener review originally appeared on The Gadgeteer on November 19, 2018 at 10:00 am.

Note: If you are subscribed to this feed through FeedBurner, please switch to our native feed URL http://the-gadgeteer.com/feed/ in order to ensure continuous delivery.
Audew Cordless Air Compressor Review

REVIEW – When I was given a chance to review this, I thought I was getting some kind of canned air that recharges. You know, the kind you use to blow dust out of keyboards? Nope, the Audew Cordless Air Compressor is a handheld rechargeable tool that lets you inflate automotive tires, bike tires, pool toys, balls, etc.

What is it?

This is a cordless, handheld air compressor for tires, bikes, balls, air mattresses, or anything else that needs inflation. Also comes with a 12v DC adapter for use in the car.

Hardware specs

-Rated voltage: DC-12V
-Rated power: 120W
-Max pressure: 150PSI
-Maximum current: 10A
-Maximum continuous working hours: 10mins ( 0~35Psi )
-Cable length: 118 inches
-Air hose length: 7 inches
-Size: 9.4*7.5*3.1 inches
-Weight: 2.8 lb

What’s in the box?

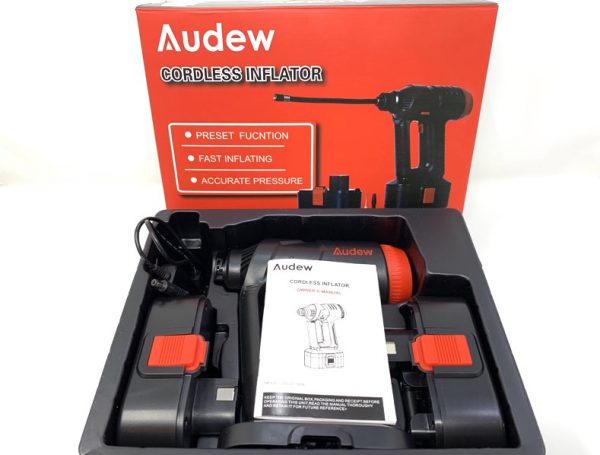
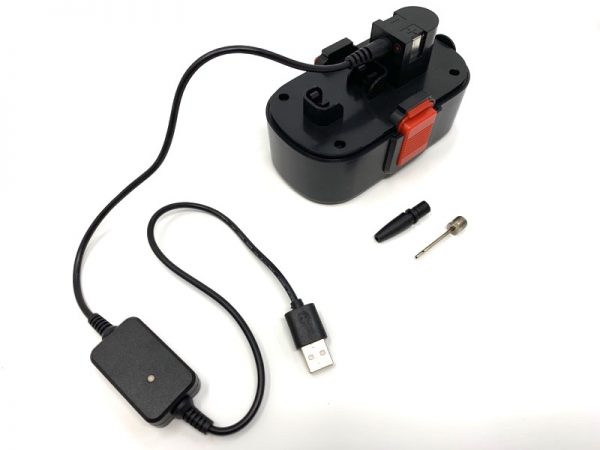
The package comes with the inflator, rechargeable battery, multiple tips/nozzles, and a 12V car adapter base.

Design and features

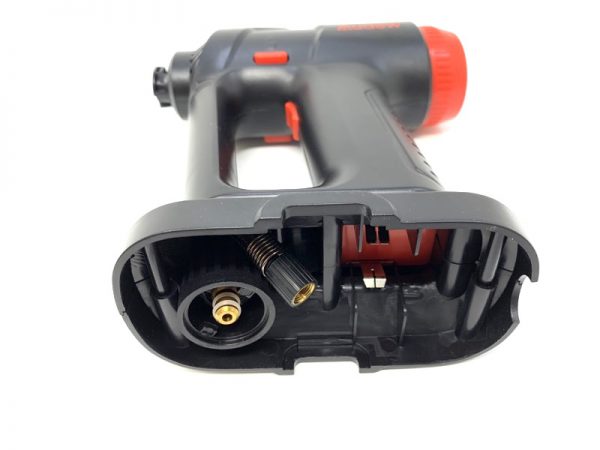
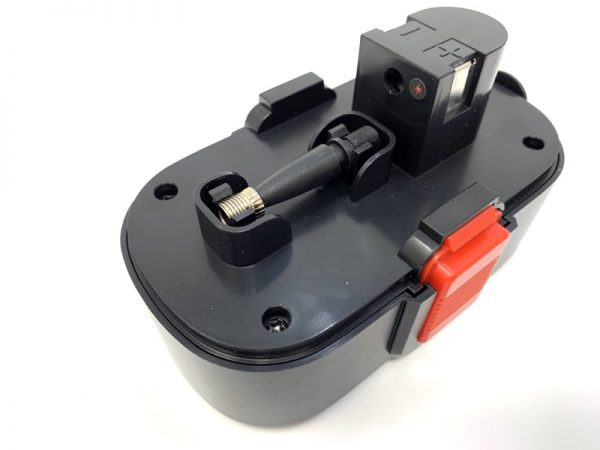
On the bottom of the base is a clever storage compartment for the flexible nozzle. It stores in the hollow portion of the “finger guard.”

The rechargeable battery also has a built-in storage for two nozzle tips. The black tip is a plain cone, and the familiar needle tip for balls. There’s a USB recharging cable that plugs into the base of the battery. An LED on the cable “box” lights up when charging.

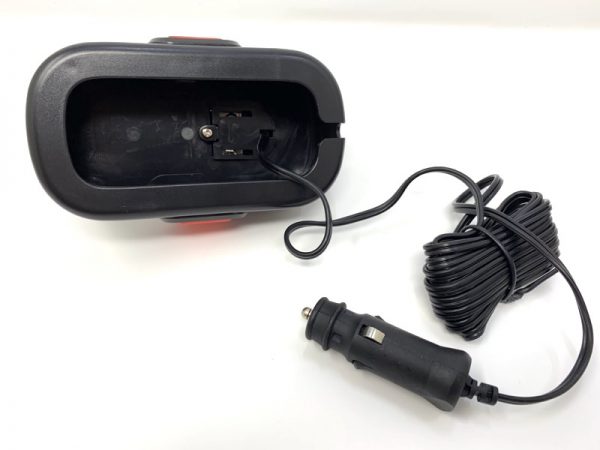
There’s a 12V car adapter option included as well. This clever “battery” is actually hollow, and the cigar lighter plug stores in the empty base.

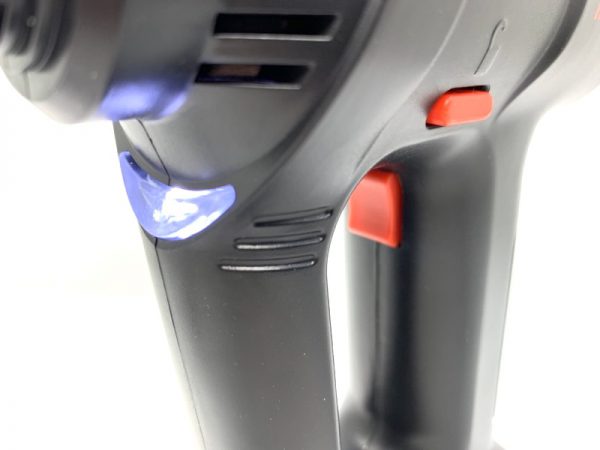
The tool has a lock, a trigger to turn the compressor on and off, and an LED area light.

Setup

You need to attach the flexible hose to the tip of the compressor. Here, I’ve used the needle tip to inflate a small ball.

Performance

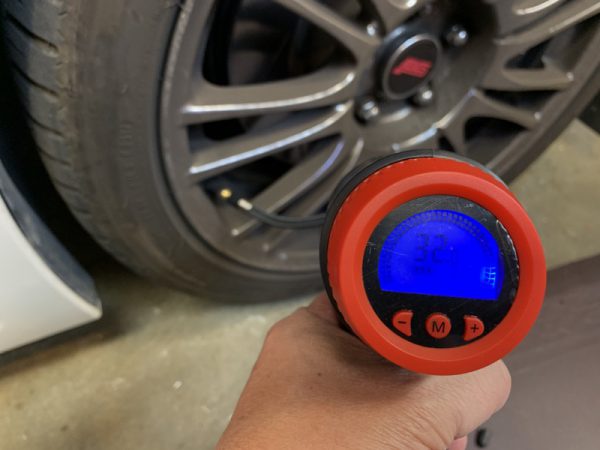
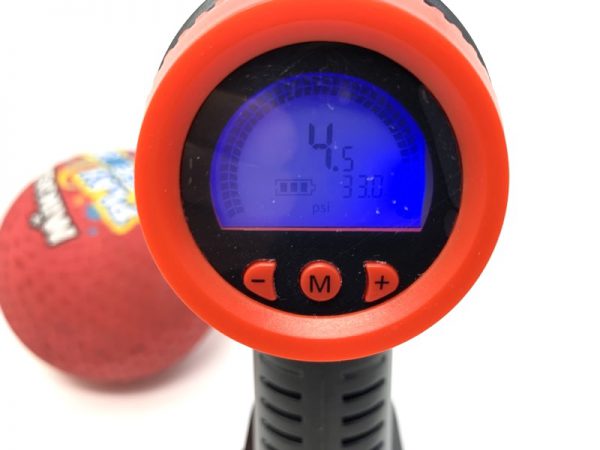
I noticed that the LCD display indicates the current pressure. You can use the buttons to set the automatic shutoff point. Once the preset pressure is reached, the compressor turns off automatically. Yes, the compressor works with car tires as well.

If you’ve never used an electric compressor before, it does make quite a bit of noise. It’s definitely not a stealthy tool.

What I like

Clever storage for all the tips and adapters. The ability to program a preset pressure shutoff is a nice touch.

What needs to be improved

The plastics feel slightly cheap, but it keeps the weight down.

Final thoughts

If you’re tired of the traditional bike pump, or you don’t feel like traveling to the gas station to get air for your tires and pool toys, look no further than the Audew Cordless Air Compressor. I have a shop compressor in my garage, but it’s not portable and lightweight.

Price: $64.99
Where to buy: Amazon
Source: The sample of this product was provided by Audew.

Filed in categories: Reviews

Tagged: ,

Audew Cordless Air Compressor Review originally appeared on The Gadgeteer on November 16, 2018 at 9:00 am.

Note: If you are subscribed to this feed through FeedBurner, please switch to our native feed URL http://the-gadgeteer.com/feed/ in order to ensure continuous delivery.
6 Gadgets you should have in your car for winter emergencies

ARTICLE – Winter is just around the corner, and most people can’t completely avoid driving in the treacherous conditions that typically characterize the season.

In addition to being extra cautious behind the wheel, it’s wise to invest in these six winter-ready gadgets.

1. The Trac-Grabber

There’s nothing quite like the heart-sinking sound of car wheels spinning in the snow because the vehicle is stuck. Trac-Grabber is a portable traction device that helps a car wheel get the grip it needs to move freely again. It has straps and a block of material that grips the snow. A user loops the Trac-Grabber straps around an affected wheel, then secures them.

Then, they get in the car and try to drive out of the spot where the vehicle is stuck. In some cases, it’s necessary to repeat the process for all wheels. An included Trac-Grabber pouch allows for quickly stashing the accessory in a console or seat pocket until the next use.

2. The Zone Tech Heated Ice Scraper

Many people already have the hard plastic ice scrapers in their cars during the winter, but this product goes beyond what those accessories offer. It plugs into a car’s outlet to heat up and has a cord that’s over 12 feet long. The gadget also features an LED light that makes it easier to see the surface of the windshield and find the areas with the most buildup even in the dark.

3. The STABILicers Original Maxx Cleats

Ice and snow make it difficult to stand or walk outside without slipping. Then, it’s challenging to assess the extent of the winter weather emergency while on the road. These easy-to-use cleats strap onto boots and give snow-gripping capability via the studs extending through the forefoot to the heel. The replaceable cleats also make these accessories a good value for multi-year use.

4. A Portable Air Compressor

A flat tire disrupts a road trip at any time, but especially when you’re subjected to harsh winter conditions. A portable air compressor allows inflating the tire quickly and resuming the journey instead of spending time shivering in the driver’s seat while waiting for roadside assistance.

People should look for portable air compressors with tanks no smaller than three gallons. Also, the compressor should ideally offer 0.5 CFM and 90 PSI, so it’s smart for buyers to read the product specs before finalizing their purchases. The CFM is cubic feet per minute, and it represents the air output or flow level of the compressor. The PSI is pounds per square inch, and it’s a measure of force given by the compressor.

Some portable air compressors come with carrying bags, making them easy to pack into the car before a trip or keep in the vehicle until needed.

5. The Resqme Quick Car Escape Tool

Seatbelts and door locks are designed to keep people safe, but sometimes they malfunction, leaving individuals trapped. Some people wonder if they should drive with their doors unlocked to prevent a door lock malfunction. However, experts say that even when people don’t engage the locks, the impact of a crash could make the door not work as expected.

Being trapped in a car is dangerous at any time, but the risk of severe consequences goes up if a person is in a collision during subzero temperatures. The Resqme Quick Car Escape tool fits on a keyring and has attachments that break window glass and cut through seatbelts. The effective yet compact design also means it won’t get in the way of a house key or other things on a keyring.

6. A Heated Travel Blanket

Once the thermometer plunges below zero, it’s possible to suffer from frostbite after only minutes of exposure. The risk is still present at higher temperatures too, especially when people don’t prepare for the weather. A blanket carried in a car is a multipurpose item because a person could kneel on it while inspecting the underside of a vehicle, use it for a pillow while waiting for rescue and, of course, rely on it for warmth.

A heated travel blanket is even better, provided that the car’s 12-volt outlet still works during an emergency. Some blankets come with cords long enough to reach the back seat and are wide enough to cover two adults. Besides the potential threat to one’s well-being for not being ready for the cold, frigid temperatures make waiting for help substantially unpleasant. A user-friendly blanket offers practicality and comfort.

Get Prepared for Winter Auto Emergencies

Some people who anticipate crises happening while driving won’t ever need to use the tools they buy.

However, circumstances could change in seconds during an otherwise uneventful journey. That’s why it’s essential to stock up on these gadgets and anticipate winter’s ferocity.

Image by Chris Peeters

Filed in categories: Articles

Tagged: ,

6 Gadgets you should have in your car for winter emergencies originally appeared on The Gadgeteer on November 11, 2018 at 10:30 am.

Note: If you are subscribed to this feed through FeedBurner, please switch to our native feed URL http://the-gadgeteer.com/feed/ in order to ensure continuous delivery.
Nonda ZUS Wireless Smart backup camera review

On a recent vacation, we were not able to get the usual tiny car we like to rent, and instead were “upgraded” to a crossover SUV. While initially irritated, the Gadgeteer side of my nature soon kicked in and I started enjoying the bits of tech that our cars don’t have. A backup camera was possibly the nicest of the lot, so when the offer for the ZUS Wireless Smart backup camera from NoNDA came to the team, I scrambled to volunteer. I’ve had it for a few weeks now, so it’s time to report.

Note: Photos may be tapped or clicked for a larger image.

What is it?

The ZUS wireless camera is built to be installed into the license plate holder that all cars in the US have as a standard feature. There are two pieces: one that mounts onto the car and holds the plate in place, and a second that has the camera, sensors, and battery. This allows the user to remove the camera module and take it somewhere to charge, even if that’s only in the trunk with a powerbank. Installation is simple, according to the package.

Hardware specs

  • Size: 1.29 x 10.74 x 1.14 in / 33 x 273 x 29 mm
  • Batteries: 2×18650(Total 5200mAh)
  • Weight: 8.48oz / 240.4g
  • Camera: Panasonic 34210
  • Size: 1.44 x 0.68 x 3.33 in / 36.05 x 17.36 x 84.64 mm
  • Storage Temperature: -40°F ~ 176°F / -40°C ~ 80°C
  • Operating Temperature: -4°F ~ 122°F / -20°C ~ 50°C
  • Lens: 170 HD Wide-angle Lens
  • Wireless Connection: Bluetooth4.0 2.4Ghz

What’s in the box?

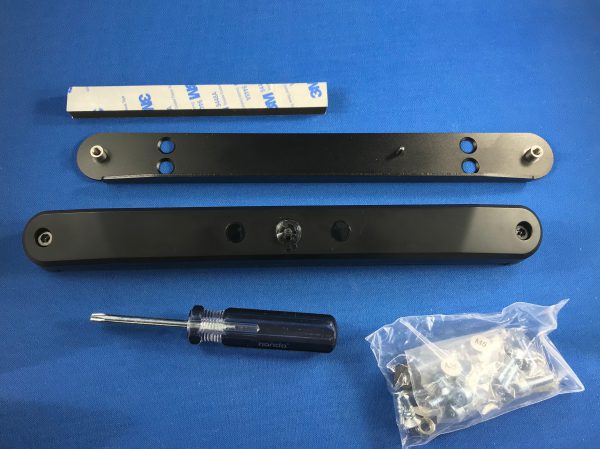
  • Outer piece with the camera, battery, and weather-resistant charging port
  • Mounting plate
  • Mounting kit with 8 pairs of nuts and bolts in various sizes
  • USB charging cable
  • Foam mounting tape
  • Hex wrench
  • Star safety bolt screwdriver

Design and features

The kit itself is packaged securely but ecologically in a cardboard box with minimal anti-scratch film. The camera bar is in the center, with a long cardboard box holding all the mounting hardware bits and bobs, and a matching one with the mounting plate that holds your license plate to your car and has threaded screws for the camera unit. The mounting plate is a heavy gauge steel angle with a shelf on one side. (This thing is a much heavier gauge than any license plate frame I have ever seen anywhere!)

There are two sets of counter-sunk mounting holes on either side to align with your car and license plate. There are also two outer threaded tubes that will accept the captive safety screws from the camera unit. There is also a mounting pin that helps to prevent the camera from being inserted upside down. There is a hole in the rear of the camera unit that accepts the pin.


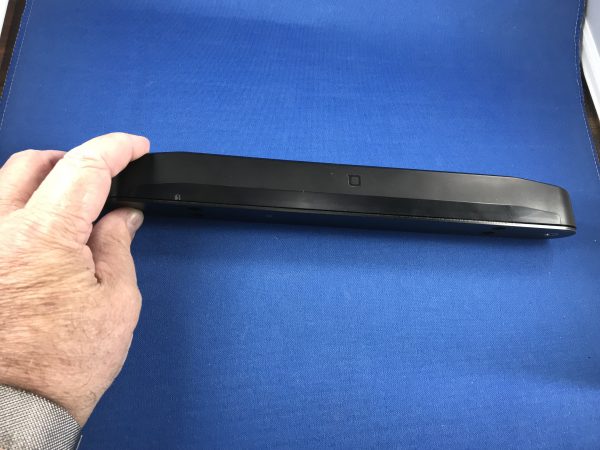
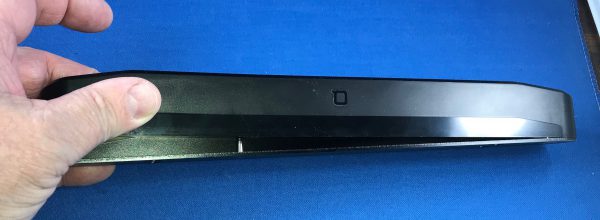
The camera unit has, obviously, a camera mounted in the center, with a pair of sensors to either side, about an inch away. On the far ends are the captive star screws for attaching to the mounting plate. The security star head, while not common, is used in many places where you don’t want folks to remove screws. It won’t stop a determined thief, but it’s going to stymie kids out being kids who say, “Look! There’s a camera on that car’s license plate holder! Let’s grab it!”

Setup

Despite the clear 4-step “Install and Use” diagram on the back of the box, the setup is fraught with issues. First of all, the instructions list installing on the car in steps 1 and 2 and pairing with your phone in step 4. In order to initiate pairing, you have to access the rear of the camera module where the reset button is. You’ll also have to have it fully charged as well, and the charging port is also sealed off when it’s fully installed.


The app goes through a much better and clearer process after you’ve downloaded it and created your account. To pair, you have to press the reset button and wait for three flashes of the light from the LED under the camera. The reset button is not a nice little pinhole, but a membrane button with a hard nub that you have to press. It takes quite a bit of pressure to make it engage at all, so holding it through three flashes to get pairing mode took quite a toll on my finger.

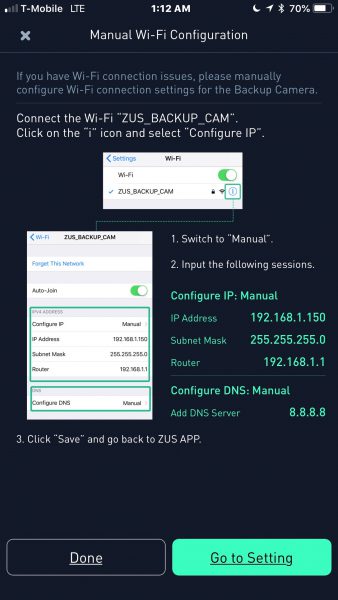
The app then states you need to connect to the wifi network of the camera. In order to do this, you have to totally remove any other saved networks from your device, because the wifi radio of the camera is a bit spotty, and takes a bit of work to join. (I found this out after my first contact with Tech Support.) I performed this step sitting in my office with the unit on my desk. Once I finally removed my home wifi settings from my phone, I was able to connect, and the camera went into an actual “Connecting” phase for several minutes. I checked with support, and they said I should move closer to the camera. I guess four inches is too far.

I finally did get to the “downloading image” screen but was never able to get an actual image, let alone a live video feed from the backup camera. I went through several rounds with support, and they finally said there are engineering issues they have been seeing with “certain mobile providers”.

Performance

Since I never got it to actually connect, I’d say performance is not acceptable.

What I Like

  • Kit contains all hardware and tools needed to install and use
  • Support is very helpful, if not successful.

What needs to be improved

  • Requires removal of all saved access points at any place you intend to use the backup camera.
  • Will only work with some cellular networks.
  • Requires launching app, waiting for a connection, and then viewing display anytime you back up.

Final thoughts

I really want a backup camera for my car that I don’t have to drill and thread wires for. This unit promised that, but never even got close. I’m sure it can be done, so the search is on. If you’re not on T-mobile, maybe this unit will work for you, but make sure the vendor has a good return policy.

Price: $96.00
Where to buy: Amazon
Source: The sample of this product was provided by Nonda.

Filed in categories: Reviews

Tagged:

Nonda ZUS Wireless Smart backup camera review originally appeared on The Gadgeteer on November 10, 2018 at 2:34 pm.

Note: If you are subscribed to this feed through FeedBurner, please switch to our native feed URL http://the-gadgeteer.com/feed/ in order to ensure continuous delivery.