Rowkin Pulse wireless Bluetooth headphones review

Seems like just yesterday the world was introduced to wireless headphones, now they’re everywhere. So many models and price points to choose from it can literally make ones head spin. So what makes a good pair of wireless headphones? Well, that can vary from person to person. For me its a few things. Style, comfort, durability and most importantly sound quality. Then there’s the choice between in ear or over the ear styles. Since I LOVE listening to music while I’m at the gym, I prefer the in ear style because they tend to stay in place better while exercising and do a better job of keeping noise out. Do the Rowkin Pulse wireless headphones have what it takes to standout from the crowd? Let’s take a look.
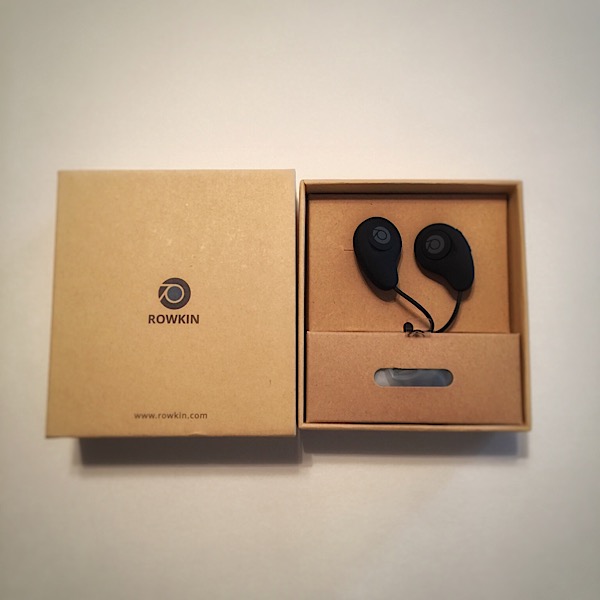
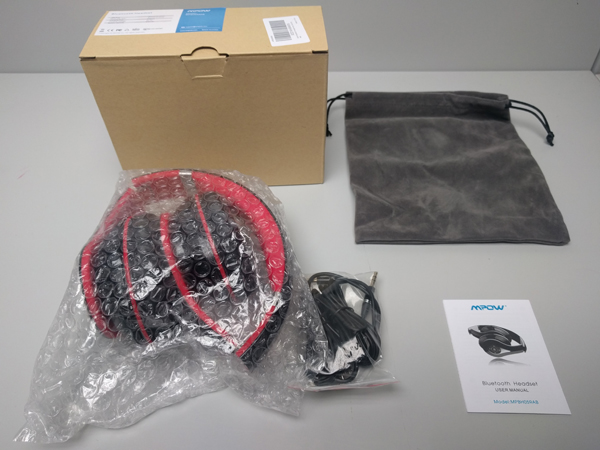
In the box:

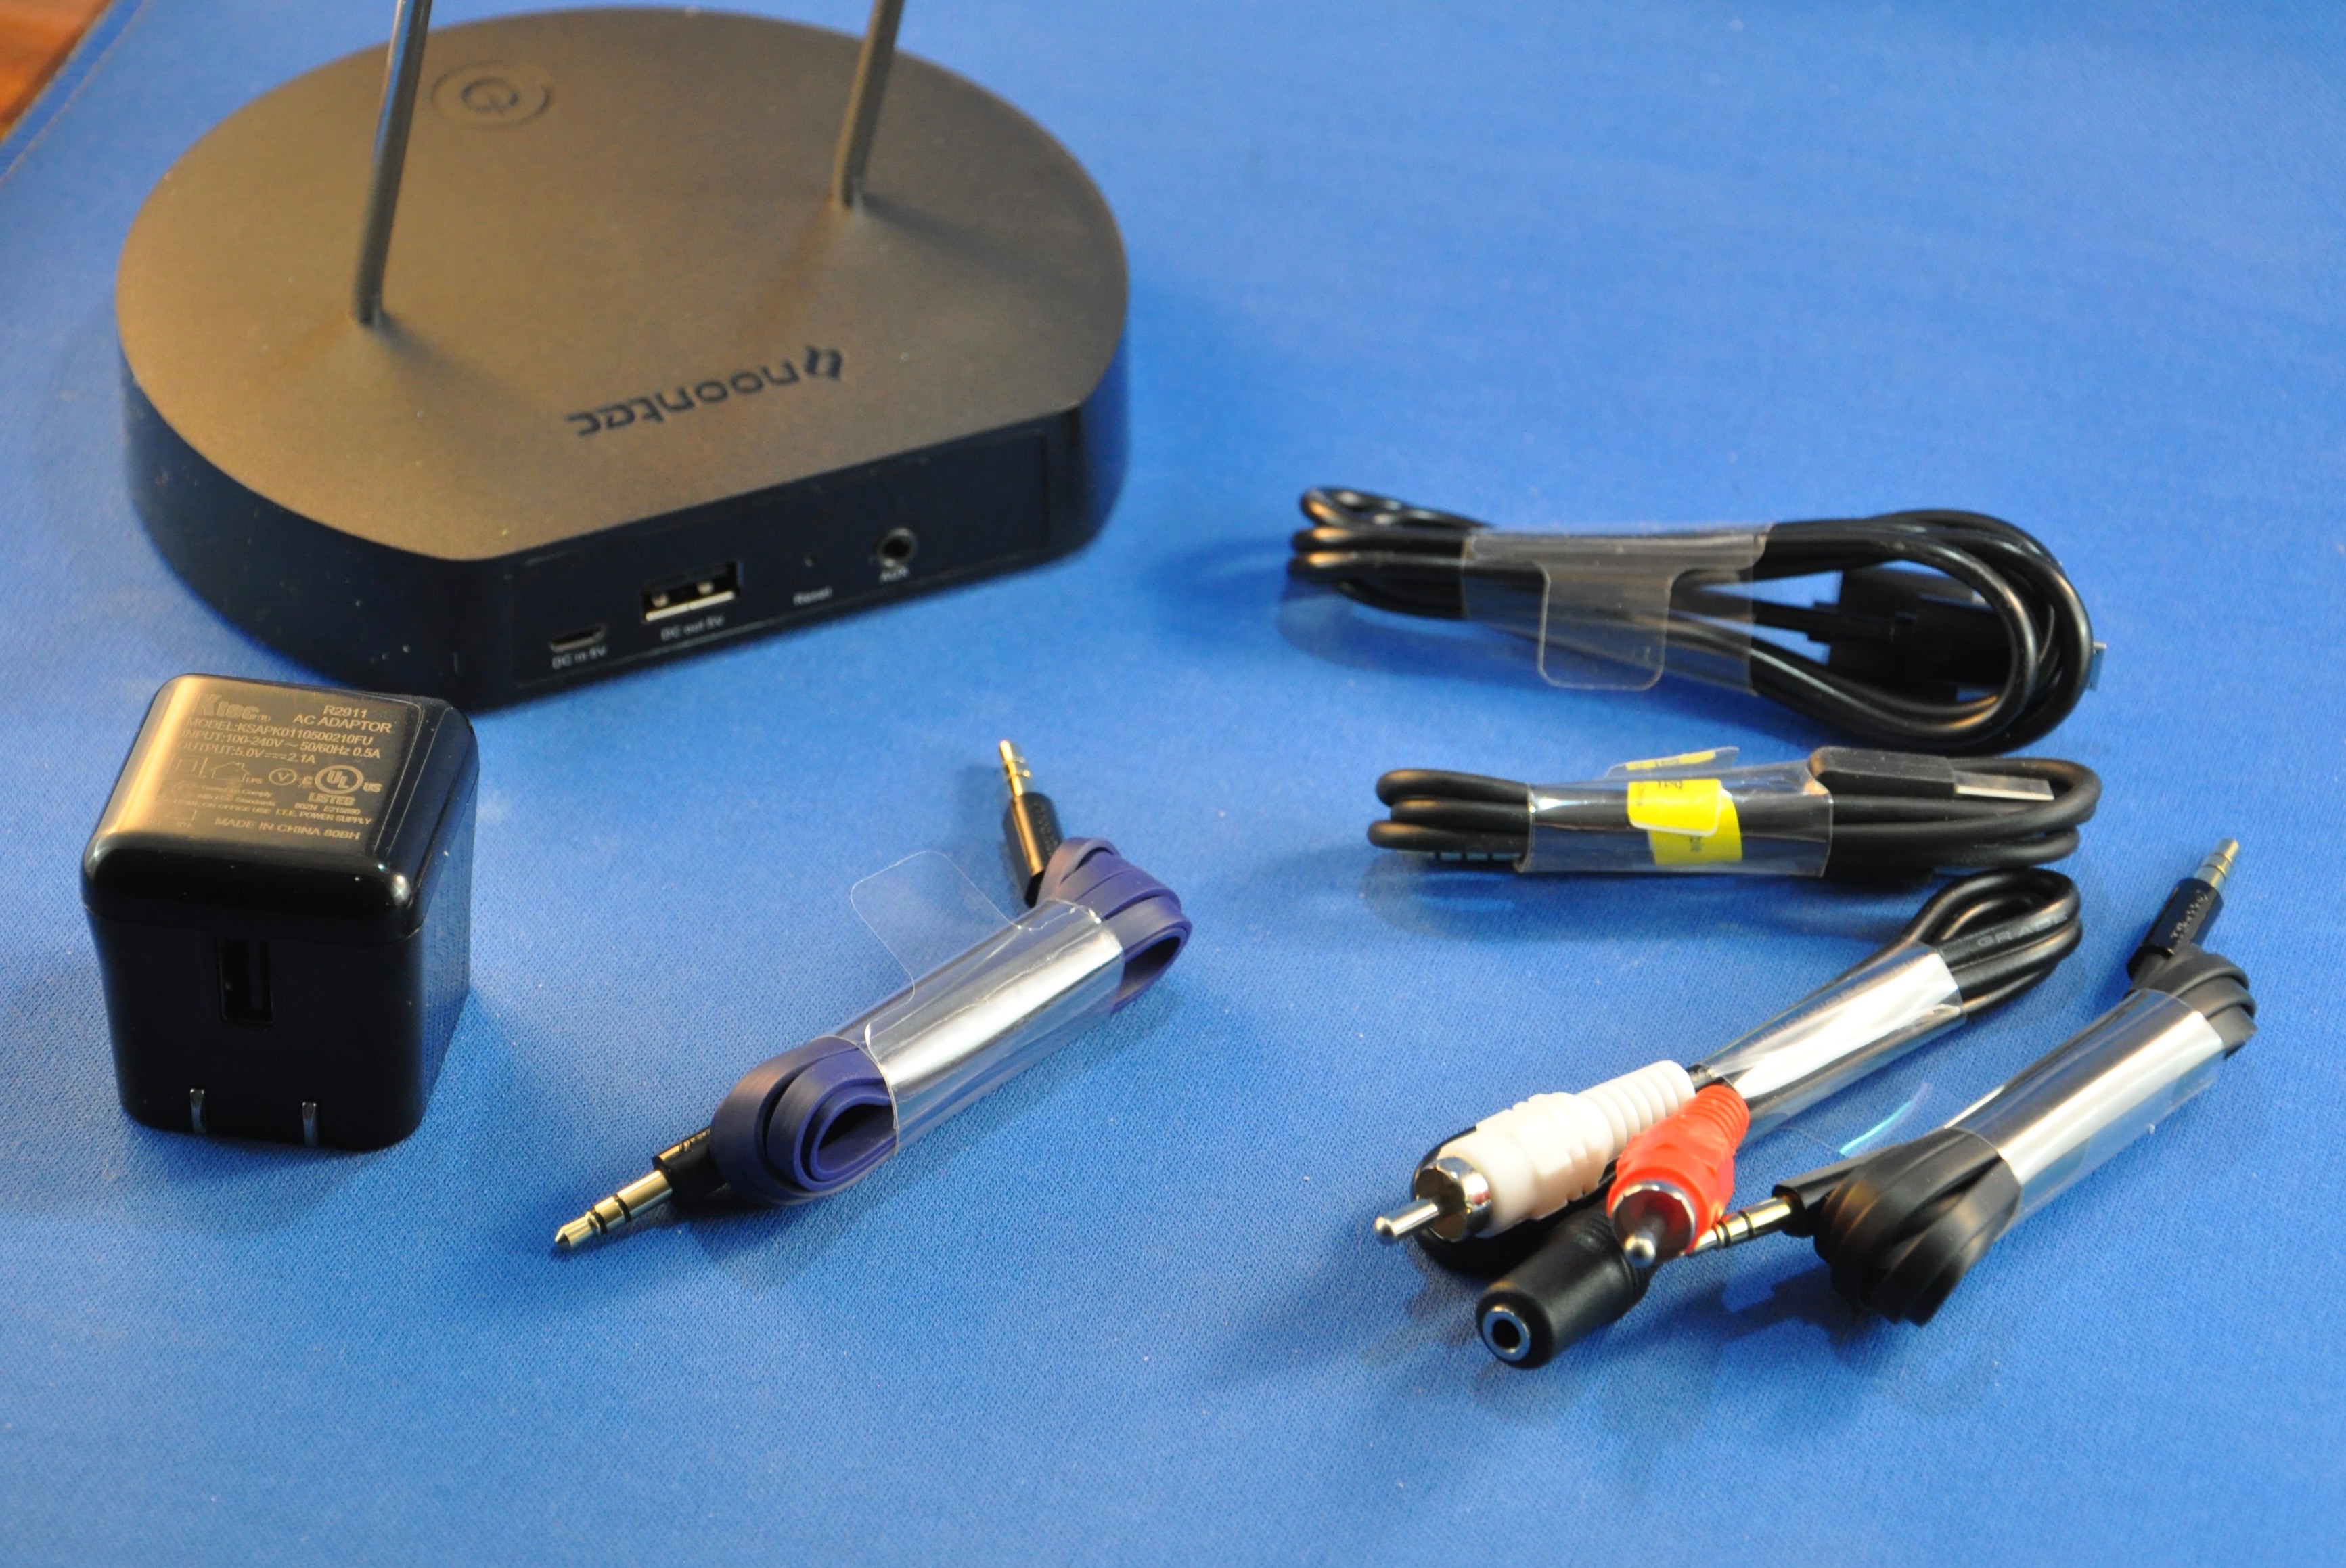
  • A pair of Bluetooth Earbuds
  • 1 USB Charging Cable
  • 9 Ear Tips: Small, Medium, Large (3 colors)
  • 6 Ear Hooks (3 colors)
  • 1 User Manual

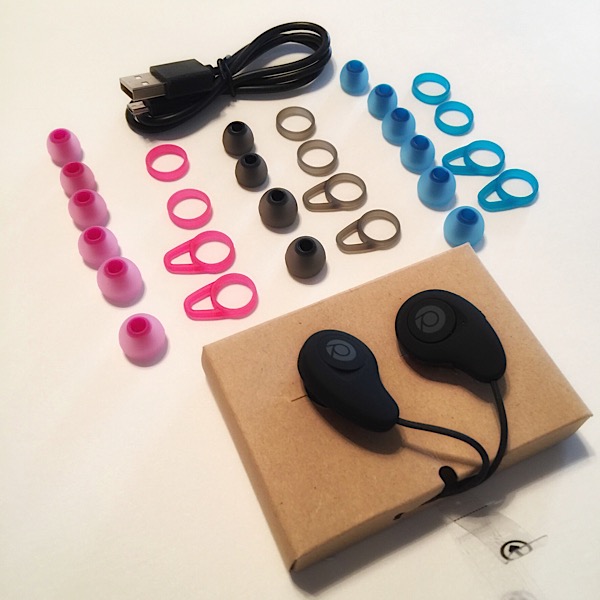
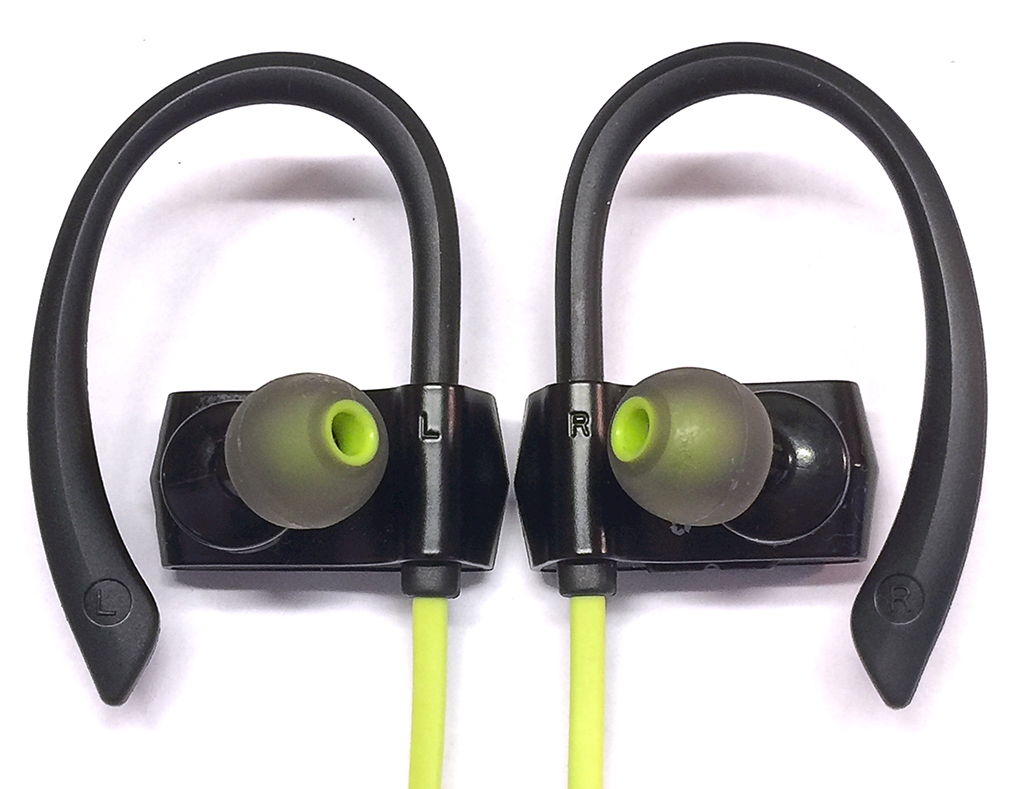
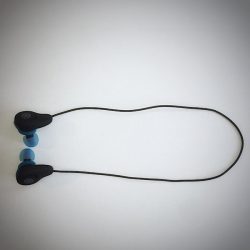
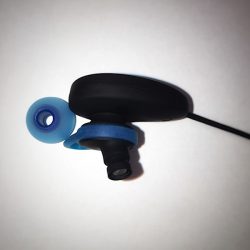
Pulse comes with a nice variety of replacement ear tips, in 3 different sizes and colors, with corresponding ear hooks. I like that Rowkin gives you so many ear tip choices, it assures that you’ll get the best fit for your ears. I also like the color variety which includes black, cobalt blue and fuchsia pink, giving you up to 18 different possible color combinations. There’s also a USB charging cable and a users manual.
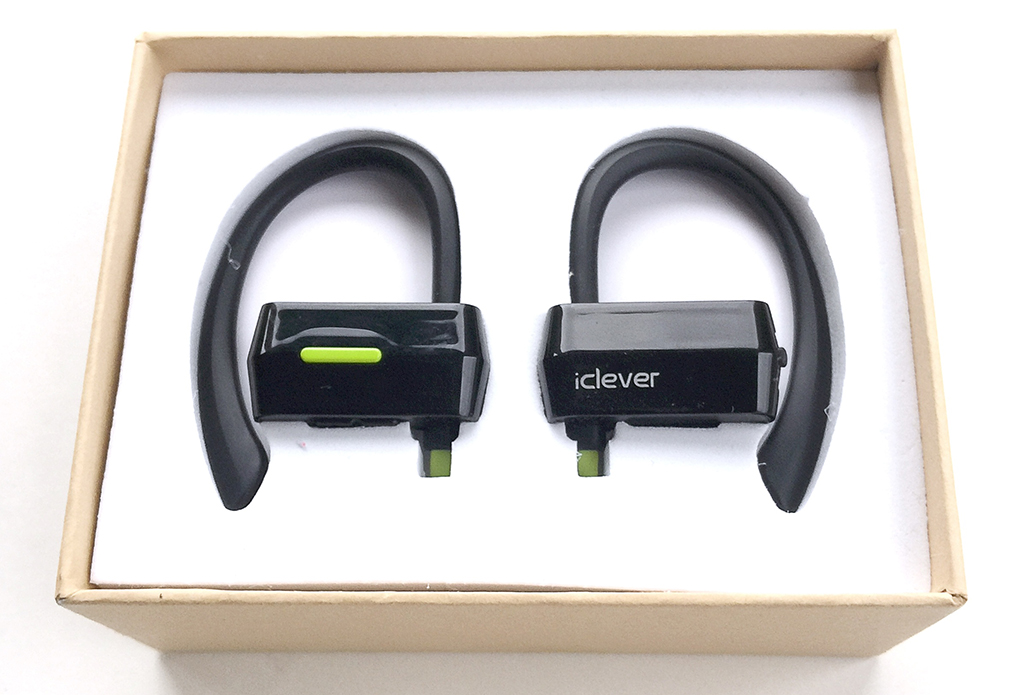
Design and Build:

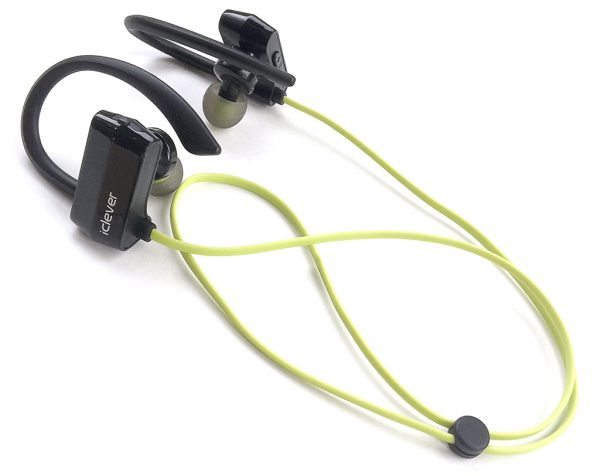
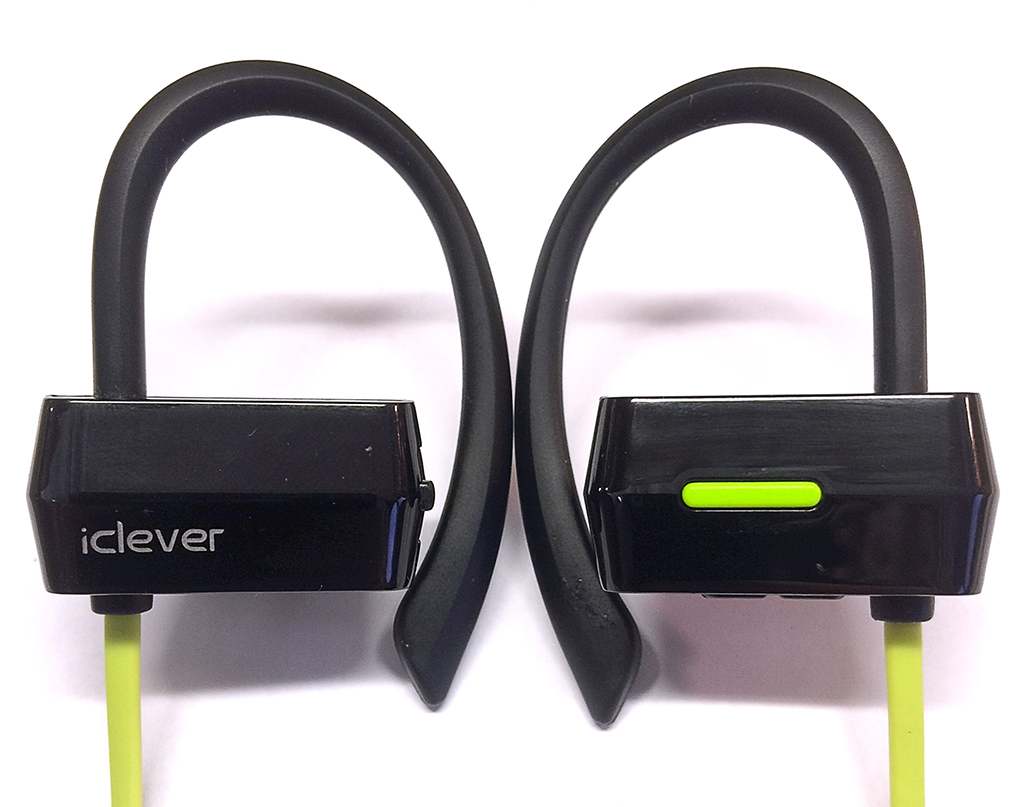
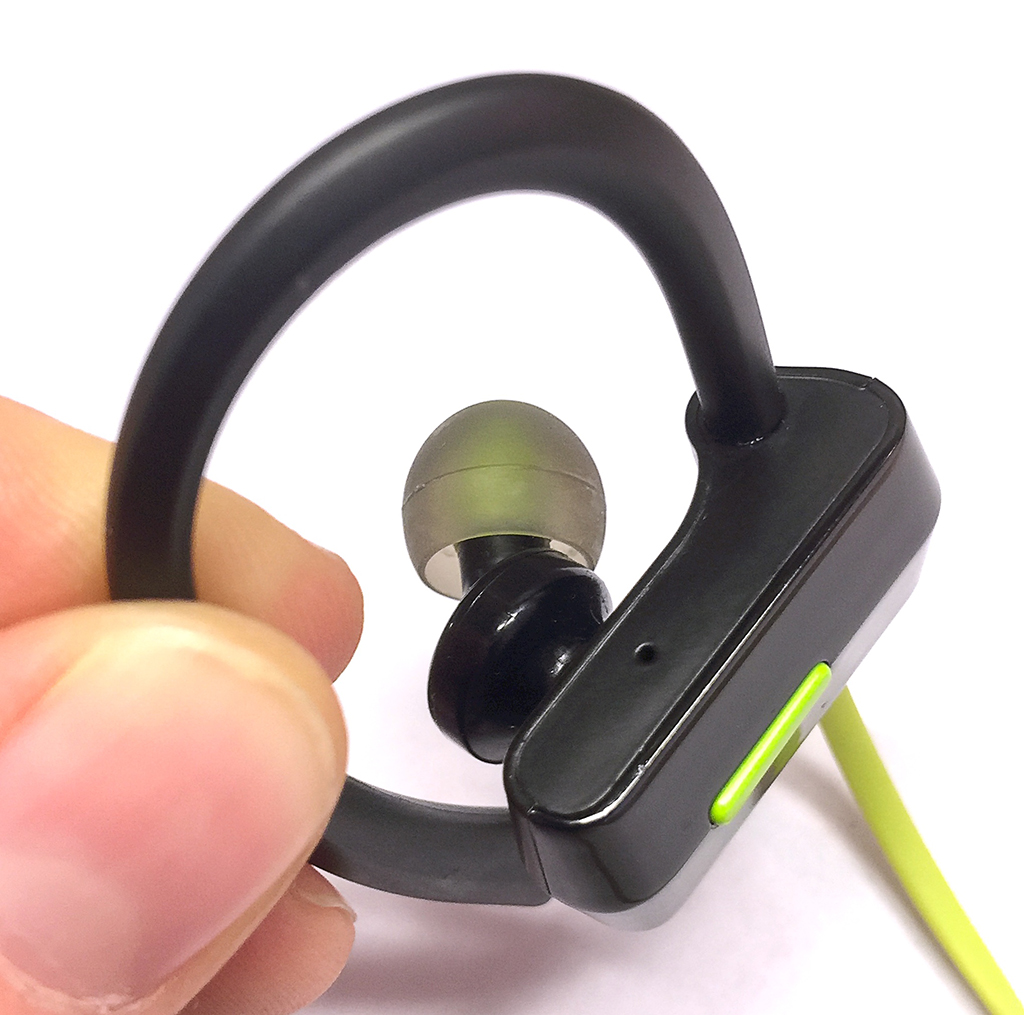
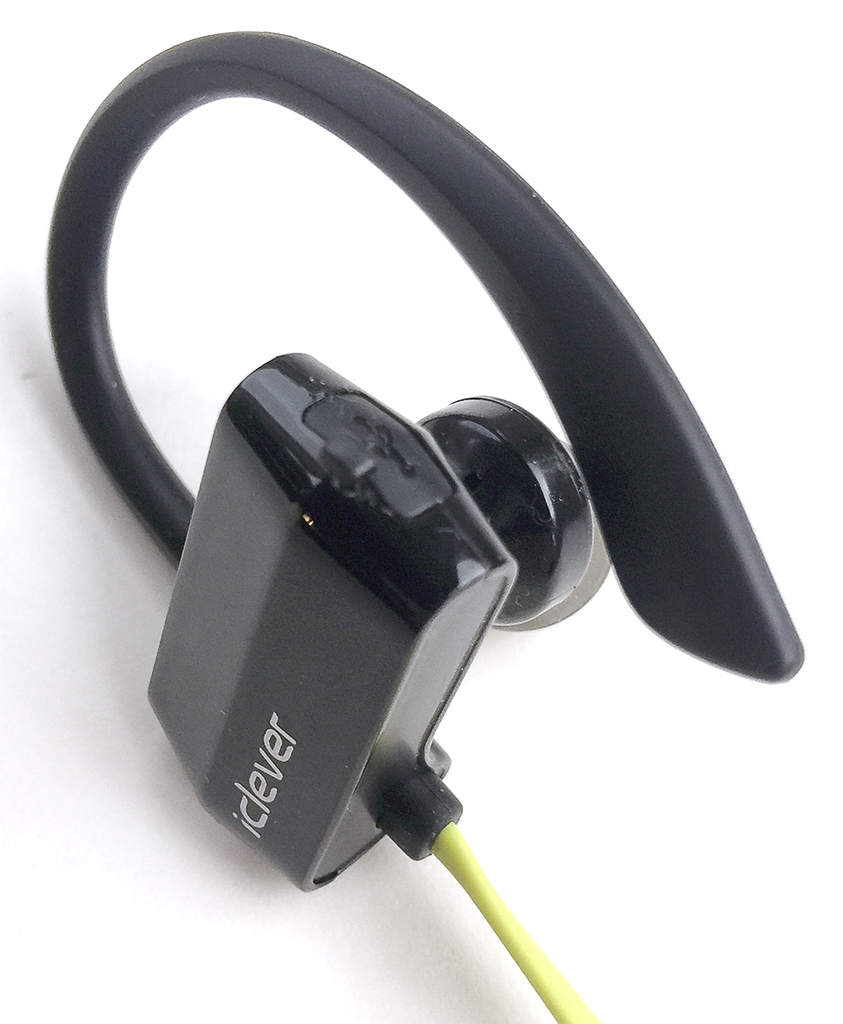
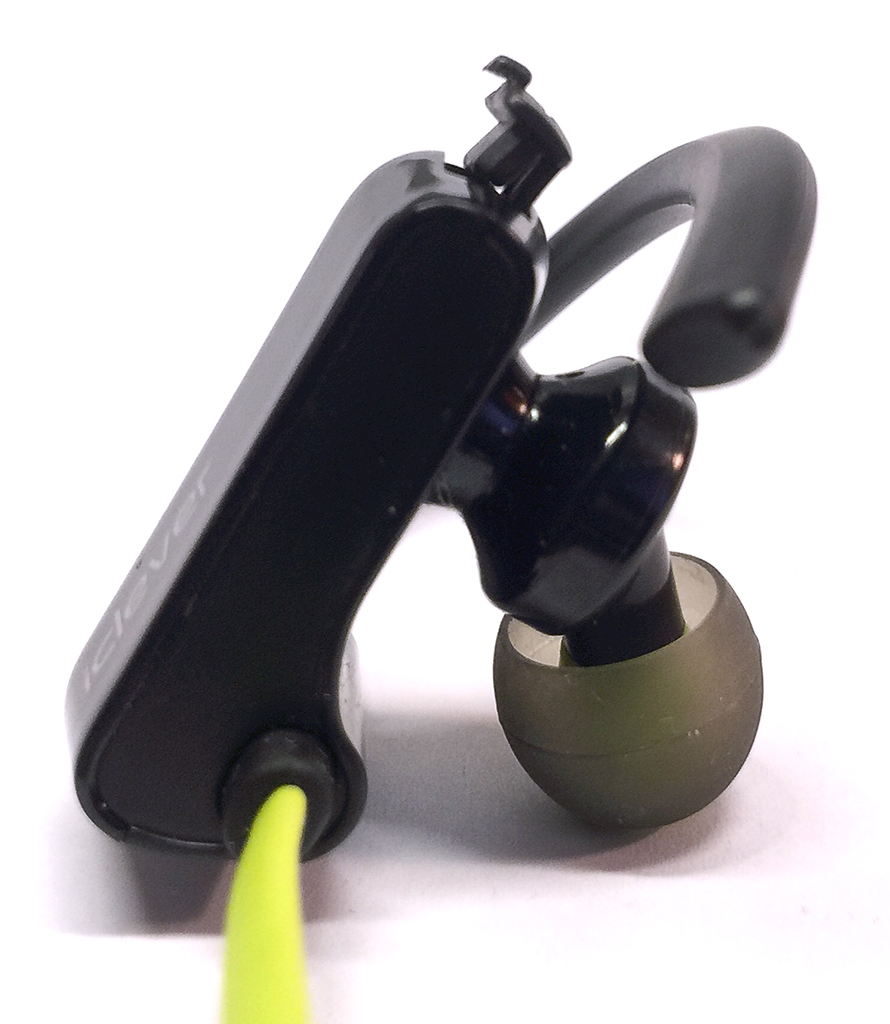
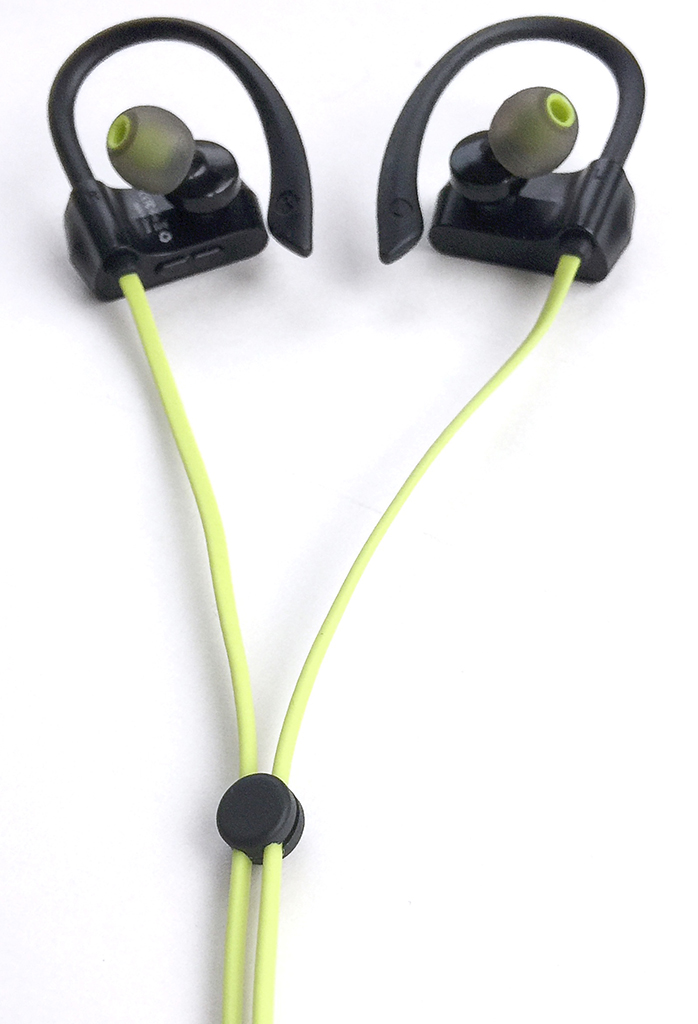
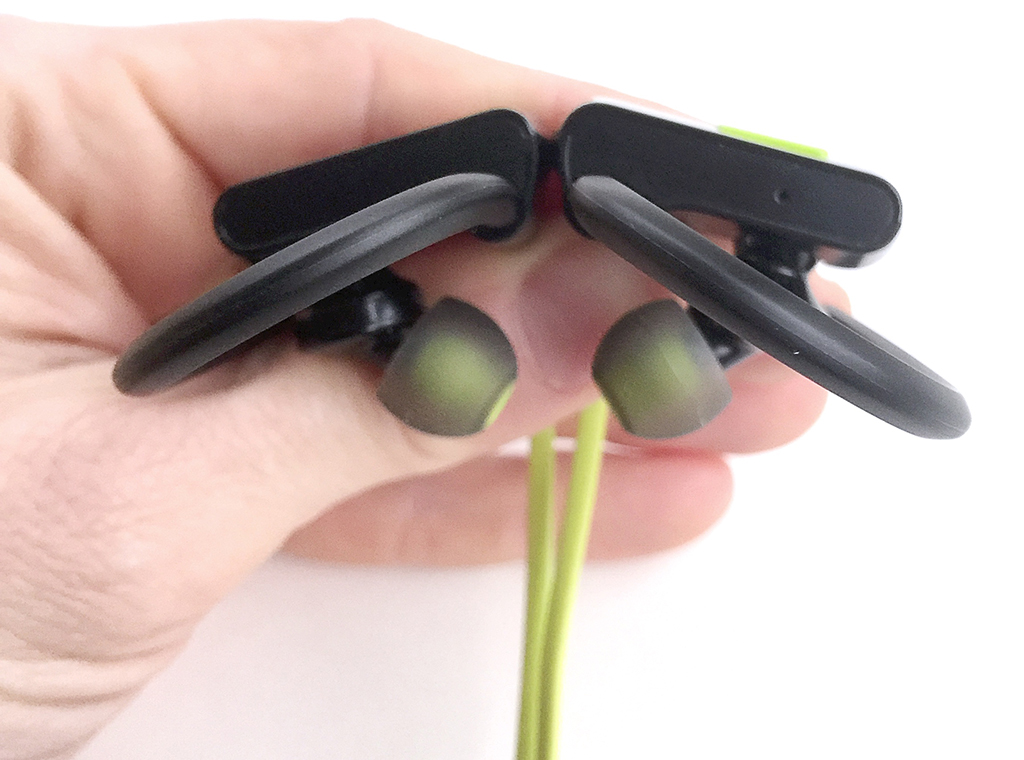
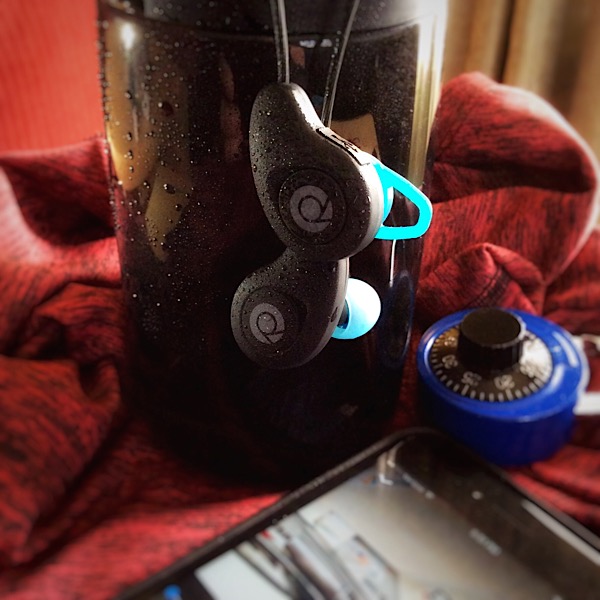
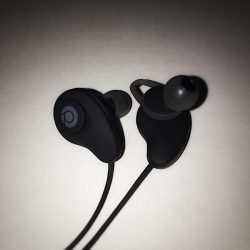
The design of the Pulse is sleek, with a modern look and matte black finish; or if you prefer they’re also available in bright white. The earbuds are small which gives them a nice low profile when in your ears. Build wise they’re very lightweight,  yet they don’t feel cheap and all the function buttons are well defined and easy to use. Rowkin also uses WaterSafe nano-coating technology, which makes the headphones sweat proof, water resistant and IPX5 compliant. Perfect for running, biking, hiking, exercising, and any other activity.


Charging:


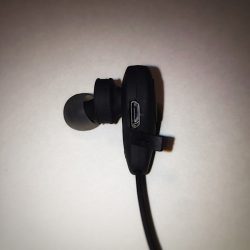
Charging the Pulse is done by plugging the provided USB charging cable into the Micro-USB port which is located on the back of the right earbud. The port is covered by a small plastic piece which is very easy to remove and once put back into place blends in nicely, making it unnoticeable. While charging, the small LED indicator light glows red. Once the headphones are fully charged the LED indicator light turns white. Full charge out of the box took about an hour. The manual states that music listening time on a full charge is 4 hours and I found this to be pretty spot on. They also boast a standby time of 12 hours (power on).

Pairing:


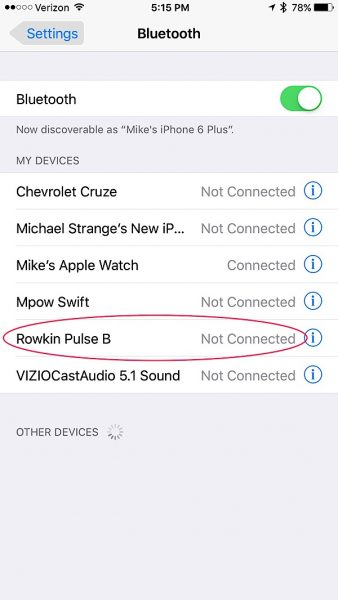
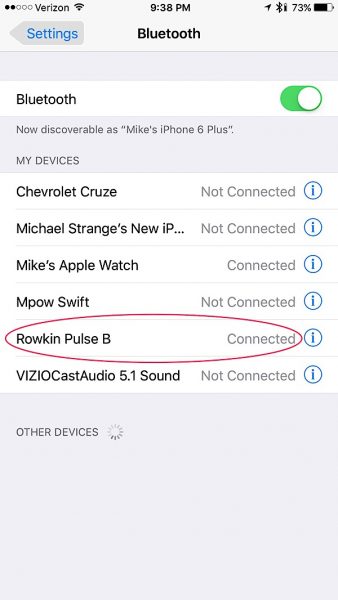
Pairing the Pulse is easy. Press and hold the control button for 6 seconds, and the LED indicator light will blink red and white alternately. This puts the headphones into pairing mode. Select ‘Rowkin Pulse’ on your device and connect, once connected the LED indicator will begin flashing white. Pulse uses Bluetooth 4.1 technology to connect to your smart device giving you a working distance range of up to 25 feet. In my testing, I was able to walk out of my house to my car without losing connection to my iPhone, approximately 30 feet. I like the freedom of being able to set my iPhone down and bebop around the house without having to worry about losing the connection.

Fit & Comfort:

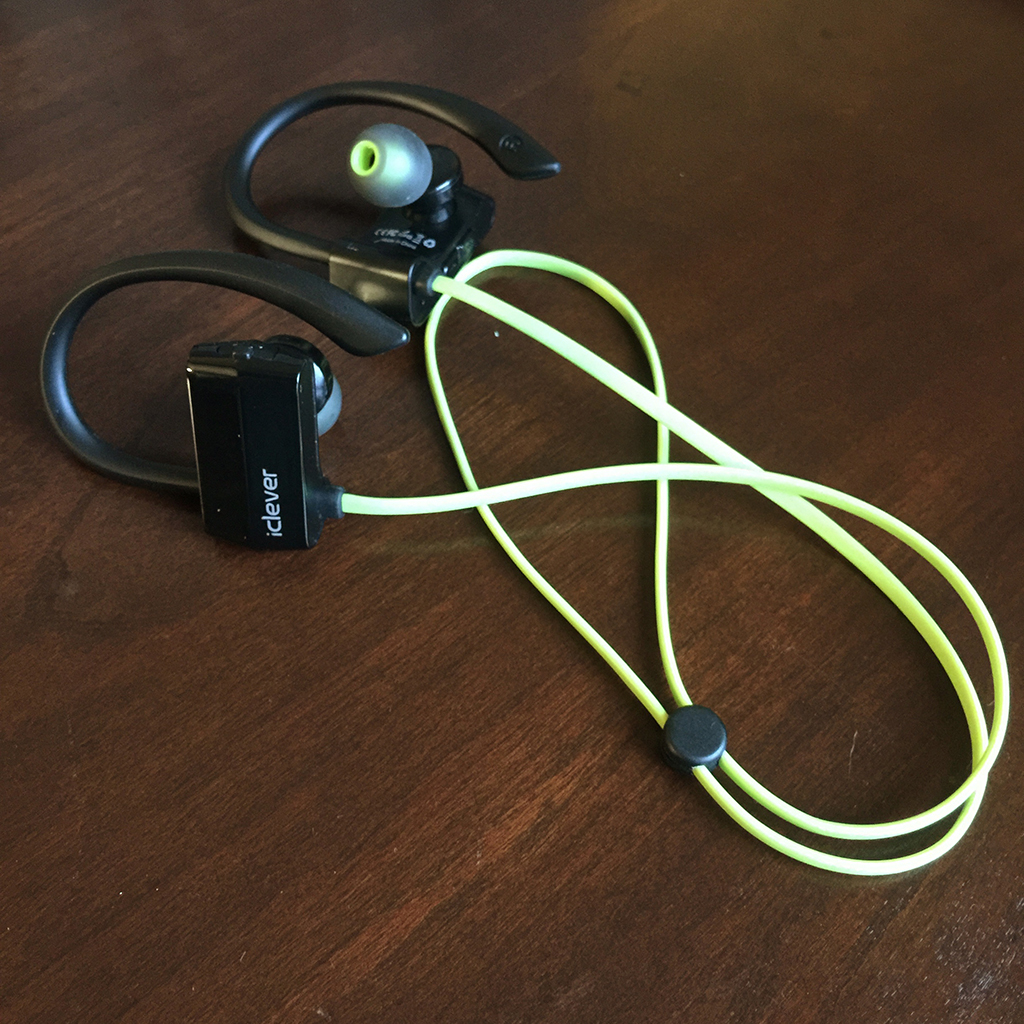
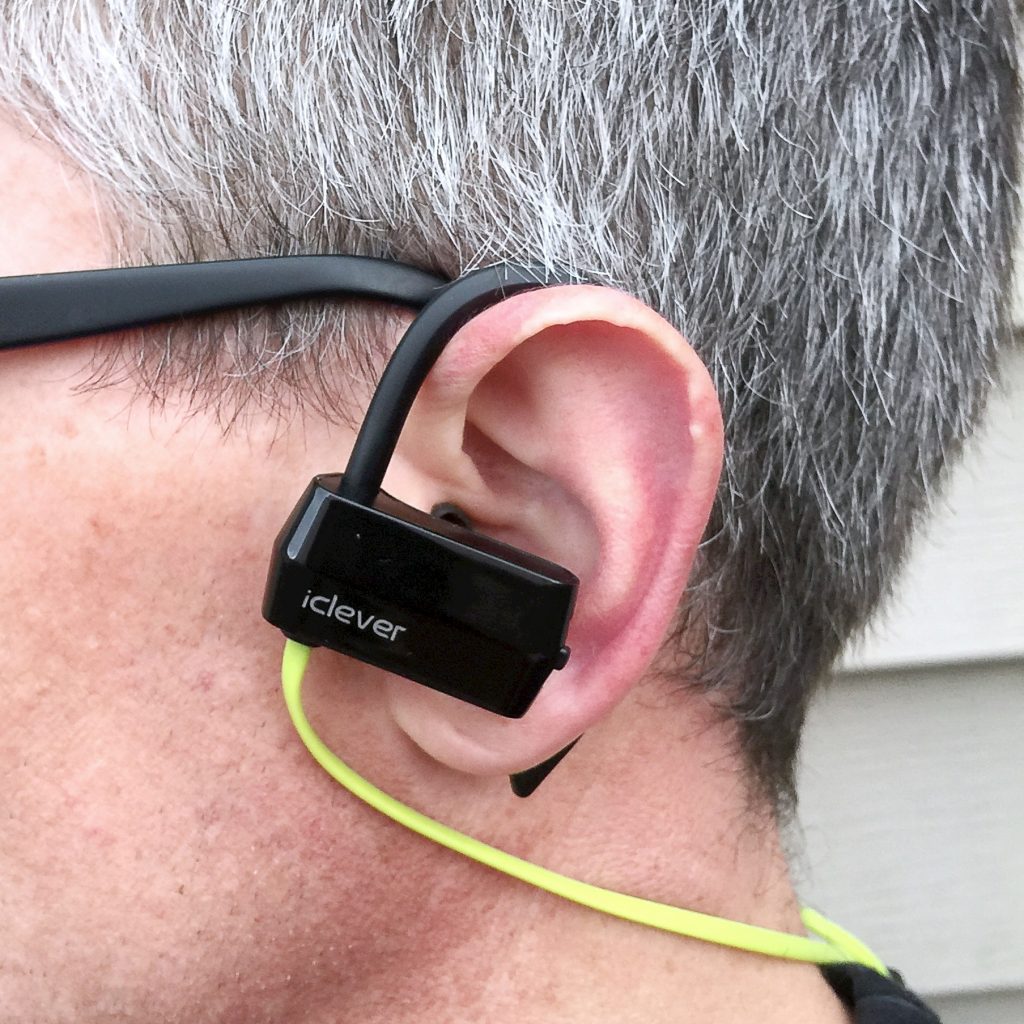
Now that setup was complete it was time to see how the headphones actually felt in my ears. I decided to stay with the ear tips and hooks that originally came on the headphones. I found the Pulse to be very lightweight and comfortable, the earbuds are slightly angled which gives the headphones a more natural fit. The ear hooks, although minimal in size, do a good job of making the fit snug and secure. The cord on the headphones is a nice length too. There’s not a lot of excess cord hanging off the back of your neck. Its so thin and light that you really don’t feel it at all and maybe more importantly, it’s tangle free. Rowkin uses almost invisible grooves to keep the cords In place, so you can toss the Pulse into your gym bag, purse or pocket without worrying about pulling out a tangled mess.

Music & Phone Controls:

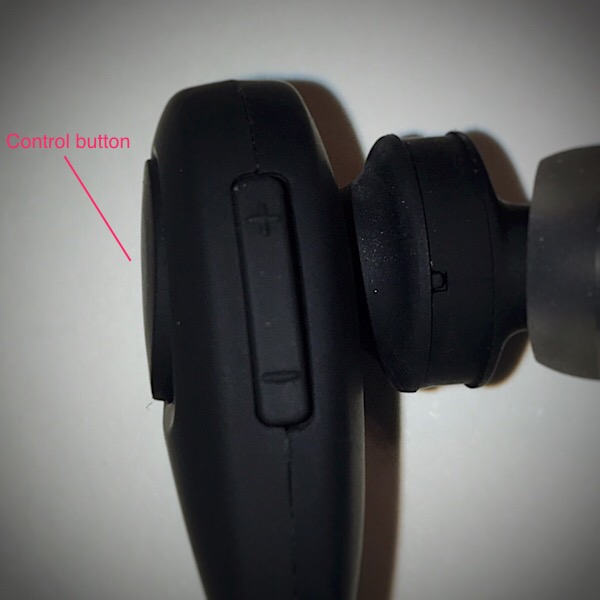
Controlling music on the Pulse headphones is done using the control and volume up (+) volume down (-) buttons. Press the control button once to play music and once to pause. The volume up and volume down buttons are used to control next and previous tracks. Hold volume up 1 second for next track and volume down 1 second for previous track. Pulse also has a built-in microphone for making and receiving phone calls. Answering incoming calls is done by pressing the control button once. Ending the call is done the same way. If you want to reject an incoming call just press and hold the control button for 2 seconds. The built in mic also allows you to access Siri and Google Assistant with just a couple taps of the control button. Giving you a genuine hands-free, wireless stereo experience.

Calling Feature:

I’ll admit I don’t normally use my headphones to make a lot of phone calls, but for the purpose of this review, I used the Pulse to make a phone call while out walking my dog. It was a cold day and I was bundled up pretty good. Hat, gloves and winter coat. My iPhone was inside my coat pocket, so instead of pulling off my gloves and fumbling for it, I decided it would be a perfect time to try out Pulses Siri voice activation. I was able to double-tap the control button thru my hat to trigger Siri and ask her to make a call. She had no problem hearing my command even though I was outside where there was a lot of ambient noise. Once my call was connected the voice of the person I was talking to was crisp and clear, they said my voice sounded clear without any background noise. Like I said, I don’t use my headphones a lot for phone calls, but with spring and summer coming I’ll be spending a lot more time outdoors and its nice to know that the call feature is there if I need it.

Listening Experience:

Most of my music listening is done while I’m working out, so I thought the gym would be the perfect place to put the Pulse to the test. There were two things I was looking for specifically. How well the noise reduction and echo cancellation handled the ambient noise inside the gym and how well they stayed in my ears while I worked out. The first thing I noticed is that the Pulse didn’t get quite as loud as other wireless headphones I have used, however, the music sounded very crisp and clear with a surround sound like quality. Pair that with the noise reduction / echo cancellation and it made for a very pleasant listening experience. I didn’t hear any of the ambient noise that is always present in my gym (music from the sound system or the clanking of weight machines) while music was playing on the headphones. As far as comfort while working out is concerned, the Pulse passed with flying colors. The fit was very natural and comfortable. I never felt like the earbuds were going to pop out and I never had to readjust them or fuss with the cord. Something I was constantly doing with other headphones. My experience with the Pulse was so good that they’ve become my go to workout headphones.

Wrapping it up:

There’s not a lot of bells and whistles with the Rowkin Pulse wireless headphones, but sometimes more isn’t always better. In my opinion, that’s the case with the Pulse. They’re very user-friendly. Both music and phone calls sound crisp and clear. They check all of the boxes when it comes to what I’m looking for in a pair of wireless headphones. Modern style, lightweight comfortable fit, durability and very good sound quality. Are there better sounding headphones out there?  Sure, but in most cases, in order to get premium sound you’re going to pay a premium price and even then there are no guarantees. I think the Rowkin Pulse wireless headphones do a very good job of living up to their $49.99 price tag. So if you’re in the market for a pair of wireless headphones do yourself a favor and check out the Rowkin Pulse wireless headphones. I think you’ll be glad you did.

Source: The sample in this review was provided by Rowkin. Please visit their website or Amazon to purchase them.


Product Information

Price: $49.99
Manufacturer: Rowkin
Retailer: Amazon
Pros:
  • Lightweight
  • Durable
  • Sweat proof and water resistant
  • Comfortable
  • Very good sound quality
Cons:
  • Bass could be deeper

Filed in categories: Audio, Video, TV, Bluetooth Gear, Reviews

Tagged:

Rowkin Pulse wireless Bluetooth headphones review originally appeared on on March 28, 2017 at 7:36 am.

Note: If you are subscribed to this feed through FeedBurner, please switch to our native feed URL http://the-gadgeteer.com/feed/ in order to ensure continuous delivery.

iClever BoostRun BTH07 Bluetooth Sport Headphones review

If you’ve been a patron of The Gadgeteer for some time, you may likely surmise that I’ve been on a quest to identify a pair of Bluetooth wireless headphones that will perform well for me in a variety of situations, but mainly for use during heavy exercise. After evaluating a variety of similar products, all of which basically fell out while working out, I realized that I hadn’t yet tried any of the style that “hook” over the ears, which I thought might be a helpful feature for someone with cavernous ear canals (like me). When I had the opportunity to evaluate a pair of iClever BoostRun BTH07 Bluetooth Sport Headphones, I thought they might fit the bill. Let’s see how they worked out. Gadget on!

Packaging

The BoostRun BTH07’s packaging was a simple cardboard box with the iClever logo in metallic red centered on the top of the lid.  If you’ve read my reviews, you know that my preference is that product packaging include some type of window or other transparent feature that allows the prospective buyer to see the actual product inside before purchasing it.  Of course, this is most useful for retail produce packaging, but not so useful for products that are only sold online, which I suspect the BTH07 might be.

I removed the lid and the BoostRun BTH07 headphones were presented neatly inside, encased within a white foam tray, as seen above.  The foam tray had cutouts to hold the headphones snug and to protect them during shipping and handling.  The foam tray pulled out easily and BTH07’s cord and other accessories (see below) were located below.

Contents

Inside the box were all of the items show above, which included:

  • BoostRun BTH07 Bluetooth Stereo Headset Sport Headphones
  • 3 pairs of silicon earbud tips in small, medium and large sizes (the medium size was attached to the headphones initally)
  • USB to micro USB charging cable
  • User Manual
  • Warranty Card

Specs

Below are some of the technical specifications of the BoostRun BTH07 headphones per the iClever site:

  • Model number: IC-BTH07
  • Bluetooth version: Bluetooth 4.1
  • Bluetooth profile: HFP, A2DP, HSP, AVRCP
  • Working time: up to 7 hours
  • Standby time: up to 160 hours
  • Charging time: about 2 hours
  • Weight: 19 g/0.67 oz
  • Waterproof rating: IPX4

Features, Functions and Performance

My initial impression of the BoostRun BTH07 headphones was that they seemed…well, a bit clunky.  But I was willing to give them the benefit of the doubt because I hadn’t yet tried any headphones with these over-the-ear hooks.  Plus I was immediately a fan of their black-and-neon green color scheme.

Like most earbuds today, the BoostRun BTH07 headphones feature silicone ear tips that fit into your ears canals. I planned to swap the medium-sized tips, which had been installed from the factory, with the large-sized tips, because I know from past experience that the medium-sized tips would fall out of my larger-than-average-sized ear canals immediately.  In fact, I tried the factory-installed mediums, and they did fall out, so on went the larges.

One of the main features of interest to me with the BoostRun BTH07 headphones was their over-the-ear “hooks” that were intended to help stabilize the headphones and help keep them on your ears during strenuous exercise.  More on these below.

In the photo above, you can see the + and – buttons that are located on the underside of the BoostRun BTH07’s right headphone.  These buttons are very tactile and produce a definitively “clicky” feel, but without being difficult to depress.  I found them very easy to operate once I memorized which was + and which was -.  These two buttons function as volume up/down (short press) as well as music forward/rewind (long press).  Also visible in the photo above is the tiny microphone hole used when making phone calls.

On the outside of the right headphone is also a single long, green button that is the Multi-Function Button (MFB), so named because it serves multiple purposes.  First, it is used to power on/off the headphones—depressing it for 2 seconds powers on the device and a British-accented, female voice prompt alerts you, “Power on.”  Initial pairing is then accomplished by going to your phone’s Bluetooth settings and selecting “IC-BTH07” from the list of devices.  The BTH07 then indicates “Device connected.”  It was just that simple, and the headphones paired automatically and immediately after powering them on every single time—I never once had to manually re-pair them.  A 2-second press of the MFB also powers the headphones off, with power-down confirmed by the voice prompt, “Power off.”  Additionally, the MFB pausing music, accepts or hangs up a phone call, and so forth, with all of its functions detailed in the included manual.

In the photo above, the BoostRun BTH07’s micro USB charging port cover can be seen on the rear of the left headphone.  This cover is made from a hard rubber material and fits very securely down into the charging port, but also includes a small protrusion that is easy to get a fingernail underneath to remove it, so that the charging cable can be inserted (see below).  Additionally, a tiny LED is located in the left headphone that indicates the device is charging when it is lit red and fully charged when lit blue.

Above, you can see that I’ve popped open the USB port cover.  I like the material that iClever used for this little cover.  It is flexible so it moves out of the way easily to access the USB port, but still fairly rigid, so there is less risk of it getting torn off like the USB port covers on many of the other devices I’ve tried.

Above, the included 20-inch long, micro-USB to USB charging cable has been plugged into the BoostRun BTH07 headphones for charging.  With the battery fully drained, the BTH07 headphones took between 1.5 and 2 hours to completely charge back up to full capacity and provided enough charge for about 4 to 6 workouts, or about 6-7 hours of life.  When the battery approaches the end of its charge, that familiar female voice prompt indicates, “Battery low,” so you know it is time to think about recharging the headphones.

The BoostRun BTH07 headphones feature a neon-green, 22-inch long, flat, ribbon-type cable that both virtually eliminates tangling and aids in visibility in case you lose it at the bottom of your gym bag or EDC pack (like I did a few times).

It also has a pre-installed cable connector that can be adjusted by sliding it up and down to tighten the slack in the cable.  The cable connector can be easily removed completely or reattached if desired.

One of the features that I really came to appreciate about the BTH07 headphones was that there is no in-line control unit as with several of the other Bluetooth headphones I have reviewed.  All of the controls are located in the right headphone, so the cable connecting the right and left sides is just that—a cable.  I’ve found that with the headphones I’ve tried in the past that included an in-line control unit, the headphone on the side with the control unit tends to fall out more often due to the weight of the control unit pulling on that side, especially while exercising.  The BTH07 does not have this issue.

Another feature of the BTH07 headphones that I came to appreciate was that its earpieces are actually angled 15 degrees from the main body of each headphone, which can be seen in the above image and is demonstrated in the image below.

Although I had initially thought that the BTH07 headphones looked bulky, the reality is that they really are not all that bulky when wearing them.  In the image above, you can see that, at least partially due to the 15-degree angled ear tips, they do hug the ear fairly well and don’t protrude excessively like I thought they would.

How did they sound?  They sounded good, especially with them pushed snugly into my ears, which reduced ambient sound and helped concentrate the sound from the headphones.  The overall dynamic range is decent, for music, which is what I often use the BTH07’s for, and I also used them while watching a movie or two, and they gave good sound for explosions and the like.

The BTH07 headphones felt comfortable to wear.  For the most part, they did stay on my ears even during exercise.  However, as with every other Bluetooth headset I’ve tried, eventually, as my sweat production increased along with my workout intensity, the left headphone actually fell off of my ear.  Even with the ear hooks.  I supposed that being a heavy sweater with large ear canals and doing loads of burpees and other similar movements was too much even for the BTH07 and its ear hooks.  However, for everyday, less strenuous use, and I would even say for most types of exercise, I think the BTH07 headphones perform quite well just fine.

iClever claims the BTH07 to be “Sweatproof Sport Headphones,” so I feel I should mention their moisture resistance. The iClever site claims an IPX4 rating, which generally means that they can be splashed fairly heavily with water and still remain undamaged.  The Amazon retail site claims an IPX5 rating, which means an even stronger resistance, so there is some discrepancy between these two reported ratings.  In any case, as mentioned above, I sweat quite heavily and work out quite strenuously, but never did this seem to affect the BTH07 headphones.  What’s more, one day I was caught out in a thundershower, a heavy downpour in fact, for about 20 minutes, and it didn’t even phase these headphones.  It was impressive.

Conclusion

Although my initial impression of the iClever BoostRun BTH07 Bluetooth Sport Headphones was that they looked a bit clunky, I was happy to find out that I was wrong.  Their 15-degree angled ear tips helped them feel comfortable on my ears, and their ear hooks did help keep them on my ears during exercise, although my combination of profuse sweat in my giant ear canals during strenuous exercise meant that they did fall off of me on occasion.  Functionally, they performed well.  Their sound is good and their combination of Multi-Function Button and + / – buttons are simple and easy to use.  Charging and usage time were very serviceable, but its water-resistance was downright impressive.  Especially for their cost, I would recommend giving the BTH07 headphones a look, and a listen.

Source: The sample for this review was provided by iClever. Please visit their site for more info or Amazon to order.


Product Information

Price: $21.99
Manufacturer: iClever
Retailer: Amazon
Requirements:
  • A device with Bluetooth connectivity
  • USB charging
Pros:
  • Hooks help it stay secure in the ear, even during strenuous exercise
  • No in-line control unit to throw it off balance
  • Impressive moisture resistant
  • Comfortable to wear
  • Affordable price
Cons:
  • Very secure, but still managed to fall out of my ear on occasion

Filed in categories: Audio, Video, TV, Reviews

Tagged:

iClever BoostRun BTH07 Bluetooth Sport Headphones review originally appeared on on March 25, 2017 at 8:31 am.

Note: If you are subscribed to this feed through FeedBurner, please switch to our native feed URL http://the-gadgeteer.com/feed/ in order to ensure continuous delivery.

Noontec Hammo TV headphones and listening station review

There are times you want to watch TV, not the computer, and those in the general vicinity don’t really want to hear the sound. (This is known as an opportunity for innovation, or the start of an argument, depending on how it’s handled and the personalities involved.) Recently, I was offered the Noontec Hammo TV headphones and listening station, and hoped this would help in my situation. Let’s take a look. 

Note: Photos may be tapped or clicked for a larger image.


The Hammo TV comes with everything you’ll need to connect to most modern TV audio: the headset with charger, the base station (which includes a stand), cables to connect to miniAUX or RCA outputs, and a power cord for the base unit. There is also a clear installation diagram for those whose minds don’t run toward the technical.

Once set up, the unit can hide behind the TV or be visible – it’s not unattractive. My Lovely Bride suffers through a lot of tech lying about our home with few complaints, so I opted to hide as much as possible behind our TCL 40″ flat panel. Check the before and after pics below and see how well I did.


Once installed, you only have to connect the output to the Hammo’s input and watch as normal. I found it to be quite easy to use, even with the hassle of plugging and unplugging the jack. The base station has a bright green LED, which shows the connection. This blinks when you have turned off the wireless headset until you hold the power button down and turn the entire unit off.


The earcups are over-ear, so they are big enough to have decent sound and allow for long viewing/listening sessions. The sound quality is such that music, spoken words, and sound effects are all “present” in full stereo. It’s actually more engrossing than my TV speakers unless I have the volume up pretty loud.


If you’re someone who travels, this unit packs down to a fairly small size, and the headphones collapse like true travel headphones. Sitting in your TV area on the stand unfolded, they still don’t take up much room. But if you’d rather, you can store them in the (included) velveteen travel pouch.

One of the things I wasn’t happy about is that only a single person can use them at once – no shared listening while kids sleep, for instance. I’m sure this could be worked around, but it would be nice to see a company-initiated solution, like a wiring harness solution or similar. Also, there is no gauge for battery level on the headphones. I never had them run out in the middle of a show or anything, but there’s also no way to tell if I should charge them, or just hang them up after use.

I’ve found that having this setup gives us options to read and watch TV while in the same room and not disturbing each other. Sometimes the Lovely Bride wants to watch yet another British crime drama and I need to update an article or play World of Tanks, and yet we can sit together and snuggle, each in our own worlds. And that’s a great technical innovation!

Source: The sample for this review was provided by Noontec. Please visit their site for more info and Amazon to order.


Product Information

Price: $119.95
Manufacturer: Noontec
Retailer: Amazon
Requirements:
  • Sound source with RCA or miniAUX output
Pros:
  • Private listening to TV
  • Wireless
  • Over-ear ear cups are comfortable for long wear
Cons:
  • Only a single person can use them at once – no shared listening while kids sleep
  • No gauge for battery on headphones.

Filed in categories: Audio, Video, TV, Reviews

Tagged:

Noontec Hammo TV headphones and listening station review originally appeared on on March 24, 2017 at 3:54 pm.

Note: If you are subscribed to this feed through FeedBurner, please switch to our native feed URL http://the-gadgeteer.com/feed/ in order to ensure continuous delivery.

StarTech USB-C Video Adapters with Presentation Mode Review

As a frequent business meeting presenter, I have a variety of device-to-display adapters in my travel bag.  And this collection continues to evolve over time when newer technology such as USB-C video output becomes more prevalent.  Keeping up with this trend, StarTech offers a line of USB-C video adapters and provided VGA and HDMI versions to review.  Additionally, as a product differentiator, StarTech adds a “Presentation Mode” feature to make your meetings smoother and more convenient.  After testing the adapters at home, I’ve also had the opportunity to test in real world situations on a long business trip.  Let’s see how they do…

MANUFACTURER SPECIFICATIONS

StarTech provides a unique feature called “Presentation Mode”.  When “Presentation Mode” is switched on, your device is prevented from entering a sleep or screen saver state.  With this feature, the user no longer has to toggle off these sleep or screen saver states through your OS.

USB-C to VGA Adapter
USB-C 24 pin male to VGA 15 pin female
Supported resolutions @ up to 60Hz

  • 1024×768
  • 1280×720
  • 1920×1080
  • 1920×1200
  • 2048×1280

USB-C to HDMI Adapter
USB-C 24 pin to HDMI 19 pin female
7.1 surround sound
Supported resolutions up to 60Hz

  • 1024×768
  • 1280×720
  • 1920×1080
  • 1920×1200
  • 2560×1440
  • 2560×1600
  • 3840×2160

UNBOXING

Both adapters come in cardboard packaging, which I personally find as a welcome respite from products housed in hard plastic packages.  The interior cardboard packaging secures the adapters and includes a small paper quick start guide.

PRODUCT IMPRESSIONS

Both adapters are approximately 7 1/2″ long from end to end.  The USB end is a 5″ length of 3/16″ cable that is flexible, yet stiff enough to stay in whatever position you want to bend it in up to 90 degrees.  The cable feels sufficiently protected with a 1/4″ stiff plastic strain relief at both the USB and video ends.  The video port end is enclosed in a 1 1/2″ x 2″ plastic housing that also includes the “Performance Mode” toggle switch.  The entire adapter is a matte black sheen with a small StarTech.com logo on the housing.  It is absent of any gaudy colors or logos, which I find appropriate for a business meeting setting which these adapters seem intended for.

TEST EQUIPMENT

For this review, two different devices were used that represent my likely personal usage scenarios:

Cube I7 Book Tablet PC referred to as the “Cube Tablet”

  • USB-C port for video output
  • Capable of 4K 60 Hz video output

Nokia Lumia 950XL  referred to as the “Lumia”

  • USB-C port for video output
  • Full screen app mode using Windows Phone Continuum

Different displays were used depending on the adapter and situation:

  • Dell S2309 2048×1152 monitor to test the VGA adapter
  • Dell S2817Q monitor with 4K resolution and 60Hz frame rate to test the advertised HDMI adapter capabilities
  • VGA and HDMI projectors from various businesses and companies, model numbers unknown
  • TVs with HDMI input from various hotels, model numbers unknown

TESTING

The following scenarios will be tested with the StarTech adapters:

  • Both devices will be tested with both monitors.
  • A variety of monitors, projectors, and TVs will be tested dependent on my business trip environments.
  • Video playback and Microsoft Office will be used to judge presentation quality.
  • The “Presentation Mode” will be tested with both devices having their screen savers/timeouts enabled.
  • Additionally, the Lumia with Windows Mobile 10 has the Continuum feature which allows the use of a connected monitor to enable a desktop-like experience.

Both adapters were brought on a recent multi-destination business trip to test in real world presentation situations.

INSTALLATION AND USAGE

Using either StarTech adapter is just a matter of inserting the USB-C plug into the device and inserting the video cable into the HDMI or VGA port.

I also tried a variety of HDMI and VGA cables I personally had on hand, and they all fit well on the adapters.  On the Lumia, the USB-C plug fit well and felt secure.  On the cube tablet, the USB-C plug felt looser than what I would have liked, but that is more of an issue with tablet port as other USB-C cables felt just as insecure.

The Cube tablet also initially had issues recognizing the device but this turned out to be an issue with Windows 10.  The solution was to go into the Device Manager and right click on the Properties option of the USB Root Hub.  On the Power Management tab, disabling the “Allow the computer to turn off this device to save power” allowed Windows to recognize the adapter.

VGA ADAPTER IMPRESSIONS

Cube tablet

Upon device discovery, Windows by default replicated the display.  The Dell VGA monitor has the same 1920×1020 resolution, so everything scaled perfectly.  The output came out clear with no perceptible lag.  The adapter worked in all situations of my trip which included hardware such as projectors, computer monitors and even hotel TVs with VGA inputs.  I was successfully able to show a Powerpoint presentation at a business that only had a VGA projector.

Lumia

The Lumia does not output via VGA in Continuum mode, so no impressions could be made in this instance.

HDMI ADAPTER IMPRESSIONS

Cube Tablet

Again, upon device discovery, Windows by default replicated the display with no issues.  Switching to “extended display mode” took better advantage of displays with additional real estate and resolutions.  In a variety of situations on my trip, the adapter had no issues connecting to projectors, computer monitors, and hotel TVs.

The adapter advertises the ability to transmit 4K at 60Hz, which the Cube Tablet is capable of outputting.  To test the entire hardware toolchain, I acquired a 4K test image commonly used to test AV equipment.  The image consists of a series of pixel wide lines and gaps that can only be discerned in a 4K display.  In this case, I can confirm that the adapter transmits the 4K image properly.

To test the 60 Hz adapter capability, a 60 Hz video supplied from StarTech was used.  Without having any sort of metric tool to test for frame rate, I resorted to a subjective test by playing the same video back and forth between a work laptop (with only 30 Hz output capability) and the Cube Tablet.  So while I can’t completely confirm output frame rates, subjectively I could perceive a far smoother viewing experience with the Cube Tablet at 60 Hz.

Lumia

After the HDMI adapter was inserted into the Lumia, the Continuum app was activated and “wired dock” mode was selected.  The Lumia immediately recognized the adapter and a Windows Mobile full-screen display mode presented itself on the Dell HDMI monitor.  I was successfully able to connect with a variety of computer monitors, projectors, and hotel TVs on my trip.  In all cases, the display was clear and responsive, and I was able to show Powerpoint presentations and work on Microsoft Office applications without any issues.

PRESENTATION MODE IMPRESSIONS

The “Presentation Mode” feature is physically enabled on or off with a small sliding toggle switch next to the video port end of the adapter. When the switch is set to ‘on’, StarTech states that the adapter sends out ‘small cursor movements’ to prevent your operating system from sensing user inactivity.  Since the USB-C port on both my devices also accept input devices like keyboards or mice, “Presentation Mode” sounds like a clever way of tricking the device to stay active.

For this portion of testing, I initially set the “Presentation Mode” to ‘off’ to confirm that the screen and monitor go blank after 5 minutes of inactivity.  Then the switch was set to ‘on’ and left my devices sitting idle for an hour and the displays continued to stay on.

For both the VGA and HDMI adapters using the Cube Tablet, “Presentation Mode” worked as advertised.

Additionally, for the Lumia, one of my current annoyances with Continuum is that the screen will lock after 5 minutes of inactivity and there does not appear to be a way to disable or lengthen this timeout in the software.  The Microsoft helpdesk and other Windows Phone forums have many posts seeking solutions to no avail.  So it was interesting to see if this adapter would work on the Lumia.  With presentation mode switched to ‘off’, the screen timeout occurred as usual.  However, switching to ‘on’ effectively prevented the screen from timing out and I was extremely happy to finally have a solution to this issue.

FINAL THOUGHTS

If I were shopping for a video adapter, I would have to admit the “Presentation Mode” feature isn’t something I would have immediately sought out.  However, I found that having a physical “Presentation Mode” hardware switch was very convenient.  And it beats having to go into your device settings to fish around with your power and display modes every time.  So for my usage scenario, as a frequent business meeting presenter, the Startech adapters have found a permanent place in my presentation gear bag.

Source: The sample for this review was provided by StarTech.  For more info visit their site and Amazon to check prices.


Product Information

Price: $47.99 (VGA), $45.99 (HDMI)
Manufacturer: StarTech
Retailer: Amazon

Filed in categories: Audio, Video, TV, Reviews

Tagged: ,

StarTech USB-C Video Adapters with Presentation Mode Review originally appeared on on March 24, 2017 at 8:02 am.

Note: If you are subscribed to this feed through FeedBurner, please switch to our native feed URL http://the-gadgeteer.com/feed/ in order to ensure continuous delivery.

Mpow Bluetooth Over-the-Ear Bluetooth Headphones review

These Mpow Bluetooth headphones are a decent, moderately priced option for people who prefer traditional over-the-ear headphones versus earbuds. They are stylish, portable and offer the choice of a wired connection as well as Bluetooth.

In the box:

  • Mpow Bluetooth Headset
  • 3.5mm Audio Cable
  • USB Charging Cable
  • Packing Bag
  • User Manual

Specifications:

  • Bluetooth Version: 4.0
  • Range: 33 feet (10 meters)
  • Talking Time: Around 15 hours
  • Playback Time: Around 13 hours
  • Charging Time: 4 hours
  • Charging Voltage: 5V
  • Battery Capacity: 420mAh

Design:

It is very obvious that Mpow mimicked the design of the more expensive Beats Studio Wireless headphones when designing this unit. It has similar curves and angles to the Beats and a shiny black plastic exterior with plastic silver inlays over cups.

I did appreciate the small but clear indicators on the inside of the headband denoting the left and right cups.

Comfort:

The inside of the headband is matte red plastic with a very thin “memory-protein material” cushion for the top of your head and the same “material” on the cups for your ears. The cups are oval and quite narrow so these may cause discomfort for users with larger ears. The headphones were very uncomfortable for me after about thirty minutes of continued use. The headband has seven notches for adjustment, but even with that range I experienced some pressure on top of my head and ears. My ears also felt very warm after a short time.

Use:

Following the included instructions I was able to connect via Bluetooth to both my Android Nexus 5X and Apple laptop very easily. Setup is aided by a female voice which tells you when the headphones are powered on or off, when in pairing mode and when you’ve reached the maximum volume.

The controls are on the outside of the right cup and are a little difficult to access when you are wearing the headphones. You have to feel around a bit for the buttons and the clicks on the controls are very loud and require some pressure. The controls include volume up and down, next and previous track, power, play/pause, and call. The buttons don’t light up and are marked in very light grey on the black headphones, so they are difficult to see. The only lit area of the controls is a small ring around the center play/call button which blinks blue when powered or red and blue when pairing.

You can also connect the headphones to your device with an included male-to-male 3.5mm audio cable and an audio port on the bottom of the left cup. It is nice to have the option to use these as wired headphones, but once connected by wire neither the controls nor the microphone work. The sound quality of the wired connection and Bluetooth connection was the same in my testing. The bass was a little light on most tracks and on higher volumes the sound suffered from slight distortion and a loss of clarity. There were occasional dropouts in sound when connected through Bluetooth.

There is significant sound leak at all volumes. You would not be able to use these in an office environment or in public without annoying those around you. This is most likely because these headphones are designed to be passive noise isolating, as opposed to having active noise cancellation. Passive noise isolation simply means that once you have the headphones on and are listening to content, you can’t hear any outside noises. Active noise cancellation counteracts outside noises by creating an inverted waveform to cancel out the noise waveforms and requires extra power.

For phone calls or chatting via computer, there is a small microphone hole on the lower right cup, but maybe because of the design, my voice was muffled on all calls. The sound quality of the caller was fine, but I would not use these as my main headphones for calls or chatting on my computer.

Storage:

The headphones fold at hinges just above the cups for storage in the included case. When fully opened, the cups lock into place with a satisfying click.

Power:

The headphones charge via a micro USB port on the outside of the right cup with included USB cable. The unit takes about four hours to attain a full charge. In my tests, the battery life for playback was right along with Mpow’s specifications, about 12-13 hours. This amount of playback time is great for a set of headphones you plan on using a lot during the day.

Final thoughts:

The Mpow Bluetooth over-the-ear headphones aren’t a great piece of audio equipment by any measure, but for the price, portability and option of a wired or Bluetooth connection, they are a good back-up set to have around.

The sample for this review was provided by Mpow. Please visit their website or Amazon to order.


Product Information

Price: $36.69
Manufacturer: Mpow
Retailer: Amazon
Requirements:
  • Bluetooth Version 4.0
Pros:
  • Moderately priced
  • Bluetooth and wired connection
  • Included carrying bag
  • Passive Noise Cancellation
Cons:
  • Significant sound leak at every volume level
  • Cheap plastic build
  • Poor sound quality at higher volumes
  • Controls difficult to use when wearing
  • Uncomfortable after prolonged use

Filed in categories: Audio, Video, TV, Bluetooth Gear, Reviews

Tagged:

Mpow Bluetooth Over-the-Ear Bluetooth Headphones review originally appeared on on March 23, 2017 at 7:08 am.

Note: If you are subscribed to this feed through FeedBurner, please switch to our native feed URL http://the-gadgeteer.com/feed/ in order to ensure continuous delivery.