ODRVM 1080P waterproof Wi-Fi action cam review

I wouldn’t describe my family as overly adventurous, but we do participate in our share of outdoor activities. We enjoy trips to the beach, water parks, and amusement parks. We also enjoy riding our bikes and we’re hoping to get our children into snowboarding this winter.

For these reasons, I’ve been toying with the idea of purchasing an action camera.

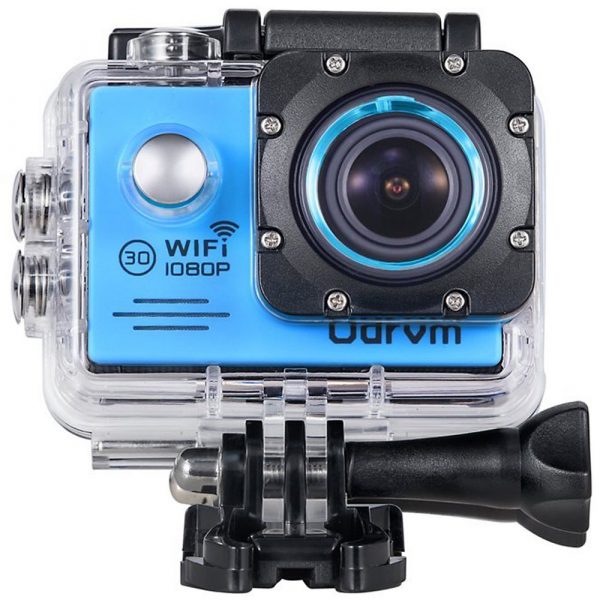
Fortunately for me, I was offered the chance to review the ODRVM action camera. It’s a 1080p waterproof camera that can be connected to your smartphone via Wi-Fi.

I’m hoping this is the perfect camera to catch my families outdoor moments.

Specifications

  • Lens – 170 degree wide-angle
  • Video Resolution – 1080P (30FPS) / 720P (60FPS) / VGA (60FPS) / QVGA (60FPS)
  • Video Format – MOV
  • Photo Resolution – 12MP/8MP/5MP
  • Battery Capacity – 900 mAh
  • Waterproof Depth – 30M (100 ft)
  • Memory – supports up to 32GB class 10 micro SD

Design

I’ve never used an action camera before, but I’ve seen others use them; as far as I can tell this camera looks similar to every other action camera I’ve seen.


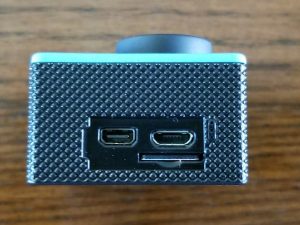
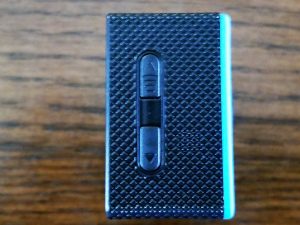
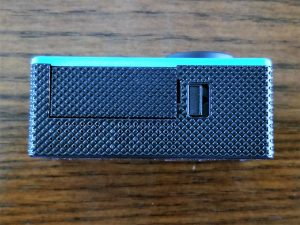
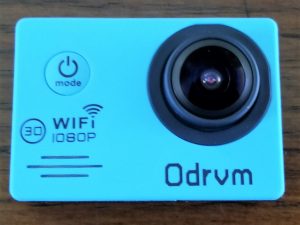
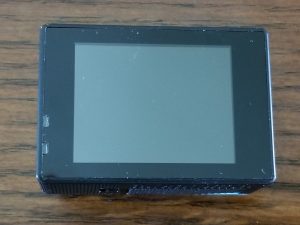
The front of the camera contains the lens and the power/mode button. On the back is the display and two LED indicators. The top of the camera has an “OK” button and another LED indicator. One side of the camera contains an HDMI port, USB port, Micro SD slot, and the mic opening, while the other side contains the Wi-Fi button and up/down selectors. Finally, the bottom of the camera is where you insert the battery.

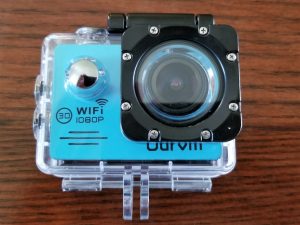
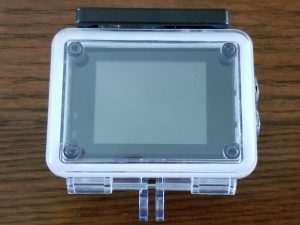
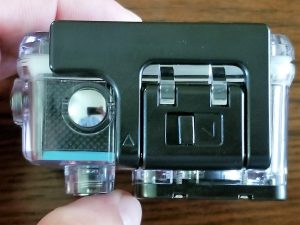
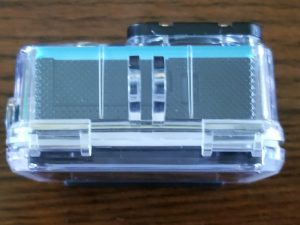
As the title of the review implies, the camera is waterproof; however, you have to insert the camera into a waterproof case first.


There isn’t much to the case; it fully encloses the camera, while still allowing you to access all of its buttons.

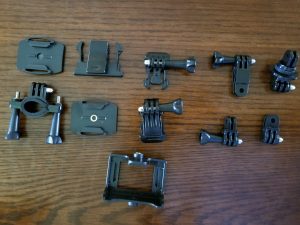
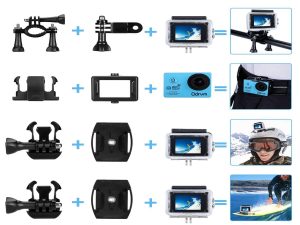
When the camera is inside the case you can use it with a variety of different mounting options.


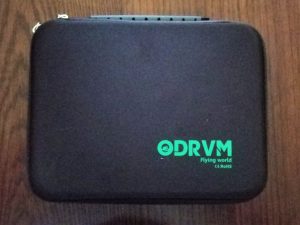
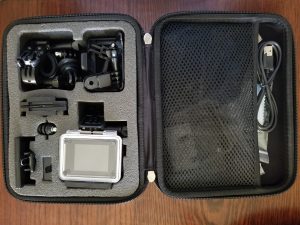
Finally, everything can be stored in the included carrying case.


You have to position all the accessories like you’re playing a game of Tetris, but they’re all able to fit inside.

Performance

The action camera is capable of taking both videos and photographs; it’s incredibly easy to use.

When you’re in video mode, you can start and stop recording by pressing the “OK” button.

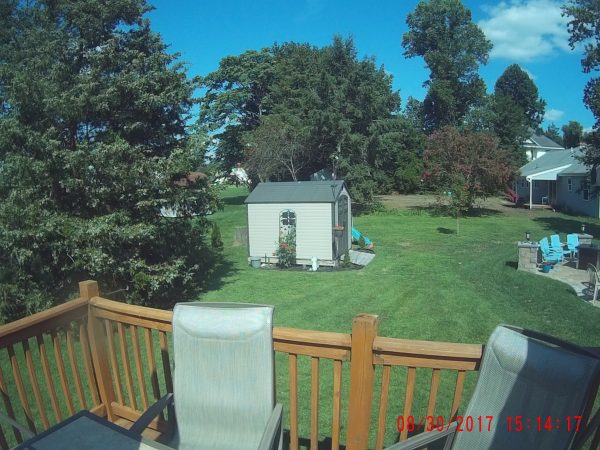
I first tested the camera by taking a quick movie in my parent’s yard.

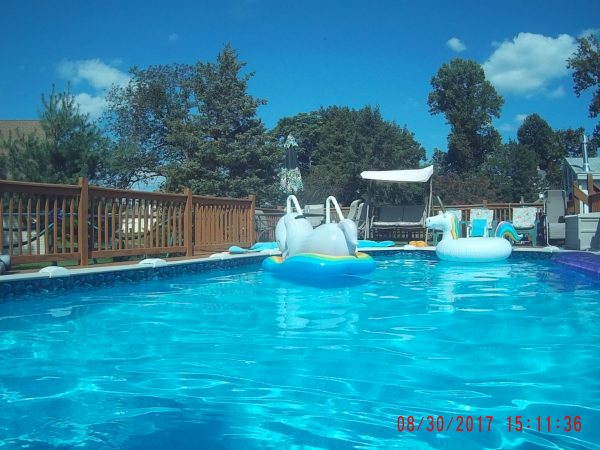
I was very impressed with the video; I’ve previously reviewed devices that claimed to record HD video but found the video dark and grainy. This camera’s video was very clear; if you pause the video you can make out fine details.

The part of the camera I was most excited about was its ability to function up to 30 meters (100 feet) underwater.

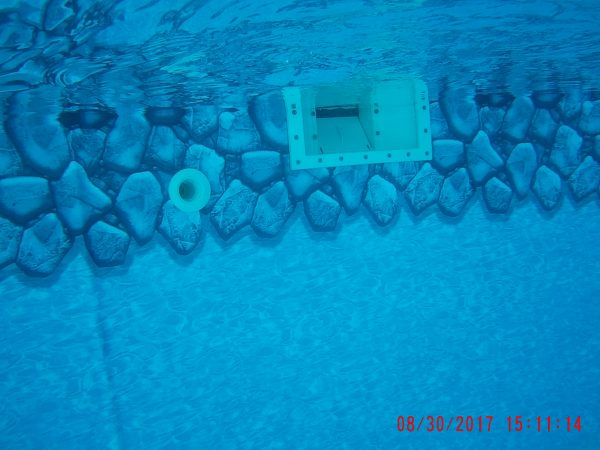
To test this feature, I literally jumped into my parent’s pool and began to record.


The video was a bit darker but just as clear as before; you can actually make out wrinkles in the pool’s liner.

After testing the recording capabilities, I decided to leave the camera in my bathing suit pocket so it would remain submerged for an extended period. After approximately 15 minutes I removed the camera from my pocket and found it worked perfectly fine.

I next decided to take a few pictures with the camera.


As with the videos, I found the photos to be very clear.

I was pleasantly surprised with this camera. It produces quality photos and videos, something I can’t say about every High-Def device I’ve reviewed.

App

The camera also works with an app, ZSANYCAM, which is available for Android and iOS.


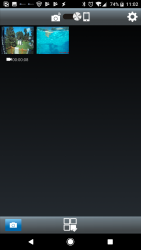
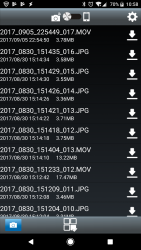
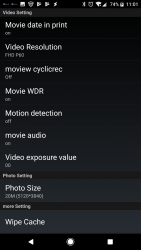
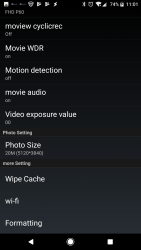
I didn’t find the app particularly useful; it connects to the camera via Wi-Fi and allows you view a live feed, the videos/photos that have been recorded, and change some camera settings.

I tested it for a few minutes and never found the need to access it again.

Conclusion

I was really impressed with the action camera. It was very easy to use and took really good quality videos and photos.

The camera is waterproof and comes with a variety of accessories so you can use it for a variety of reasons. I plan on bringing it to every vacation and outdoor family adventure.

Along with all the camera’s great features, it’s also incredibly affordable at $49.99.

If you’re into outdoor activities and want to capture some great moments, I can’t think of a reason not to purchase this action camera.

Source: The sample for this review was provided by Odrvm. Please visit their site for more information and Amazon to order.


Product Information

Price: $45.99
Manufacturer: ODRVM
Retailer: Amazon
Pros:
  • Good quality videos and photos
  • Plenty of accessories
  • Easy to use
Cons:
  • Video slightly dark underwater
  • Accompanying app not very useful

Filed in categories: Reviews

Tagged:

ODRVM 1080P waterproof Wi-Fi action cam review originally appeared on The Gadgeteer on September 24, 2017 at 8:45 am.

Note: If you are subscribed to this feed through FeedBurner, please switch to our native feed URL http://the-gadgeteer.com/feed/ in order to ensure continuous delivery.

SJCAM SJ6 Legend 4K camera review

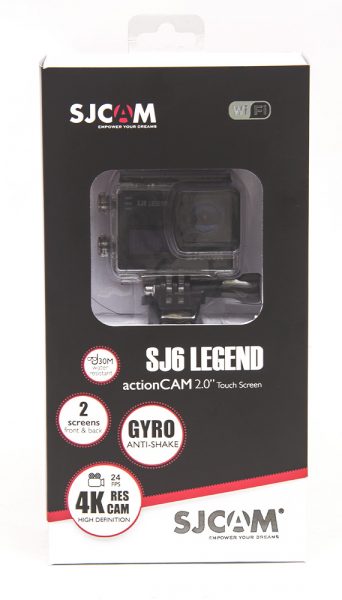
The SJ6 Legend from SJCAM is a 4K camera in their arsenal of budget conscious action cameras. From the other action cameras I have reviewed, there were some that I was truly happy with in reviewing, and then there were some that left me feeling quite disappointed. There was plenty of flash but they didn’t deliver on performance. However, looking at the specs and features of the SJ6 Legend, I can honestly say that it grabbed my attention.

Now, let’s see if the SJ6 will live up to its name or just get lost in the proverbial pages of history.

The SJ6 Legend has your typical rectangle matchbox shape similar to most action cameras on the market. However, when I picked up the camera the first thing I noticed is that it had some weight and felt solid. Although it has a plastic body, the SJ6 didn’t feel lightweight or fragile. It felt beefier than most action cameras I have handled, and that was a nice change. And from what I can tell it has a sleeker and thinner form compared to other SJCAM cameras such as the SJ4000 and the X1000.

The SJ6 Legend has a 16MP CMOS Panasonic Sensor 166° wide angle lens that is capable of recording video at 4k@24 fps, 2K @30fps, 1080@60/30fps, 720@120/60/30.
The nice thing I noticed about the image the SJ6 Legend captures is that the wide angle didn’t have a very strong barrel distortion. As a matter of fact, there is a setting in the Menu that you can turn on or off for the Distortion Correction.

What sets this camera apart from other cameras is the 2″ inch LCD touchscreen on the back. The touchscreen screen was fairly responsive considering it’s size and was nice and bright too. You can reach the camera’s menu by the LCD touch screen or by the lower button on the camera’s side. Scrolling through the menus did take some getting used to since the buttons on the side aren’t like the typical SJCAM action camera. Along with the 2″ screen on the back is a smaller 0.96″ screen on the front of the camera that displays info on the camera. This is really handy because you won’t have to rely on the back of the camera to check the camera’s status since it will display it up front.

The Power button is no longer at the front of the camera but rather at the side on the top. And below that is the Settings button that brings you to the Menu. Hold this button and it will bring up the camera’s WiFi. And speaking of the Power button, SJCAM made the power button on the SJ6 so much better than on some of their previous cameras such as the SJ400 or the X1000. When I slightly touched or grazed the Power button it would turn on the camera. I couldn’t stand when that happened. There have been plenty of times when I just picked up those cameras and I accidentally tapped the Power button and it came on. Now with the SJ6, you have to hold the Power button down for about 4 seconds for the camera to boot up. Keep in mind to turn off the camera, it only requires a second of holding the Power button down.

Some other physical features that I found appealing on the SJ6 is the change in the battery door. No longer is it the typical removable door that pops off and could get lost if you dropped it, but now it is a slide door with a spring hinge. And the hinge feels solid as well. When it pops open it feels durable and not flimsy at all. The door didn’t feel like it would fall or break off at all. This type of battery door is so welcoming and overdue. It is so much quicker and easier to remove the battery on the SJ6 than from the SJ4000 or the X1000. I’m sure many other users will agree.

Another nice, yet simple, feature on the SJ6 Legend is the 1/4″ screw thread on the bottom of the camera. No longer would you need the waterproof case or even the clip that has the tripod screw on it if you don’t want to. I can attach the SJ6 to any tripod, table top tripod, or car mount without any extra mounts which is not only convenient but makes for a fast setup. And the screw thread is metal and not plastic which could wear down in time from overuse.

On the opposite side of the Power and Settings button is the SD card slot, mini HDMI, and USB charging port. Keep in mind that the USB port is the mini USB type and not the micro USB, which many cameras tend to have. So, you can’t go swapping out another cameras micro USB cable or for that matter, your cell phone’s micro USB cable. This means that you will have to break out those older mini USB cables that you probably have stashed in a drawer somewhere. That is if you still have them since most devices nowadays use the micro USB cables.

Speaking of the mini USB, you can connect an optional lavalier microphone to the SJ6 via the mini USB port for capturing better sound. I’m not sure how likely you would use a lavalier microphone with an action camera when you are trying to capture action shots. However, I can see this being very useful for doing interviews and capturing good dialogue with the camera.

Another optional accessory for the SJ6 Legend is the waterproof housing with a USB charging cable. Basically, you can have constant power running the SJ6 while using the waterproof housing so you are no longer limited to the mercy of a standard battery. You can have more power to record for a longer duration without worrying about your battery dying or having to switch out a battery for a fresh new one.

Another helpful accessory for the SJ6 is the selfie stick with an RF remote. The selfie stick is an aluminum telescopic selfie stick that you can attach the SJ6 to the end of it and record some great action shots. The selfie stick comes with a removable 3m waterproof remote. I really liked the remote because it is so small and compact and it works flawlessly. The buttons are very responsive and it has several key buttons on the front of the remote such as the On/Off button, Start/Stop, WiFi, and more.

Another accessory that the SJ6 Legend has, that I was surprised to find out about, is a filter adapter for the lens. It is an actual threaded adapter for filters such as a UV Filter. Although it may look odd that it is so large for such a small lens, it does a job to keep your lens protected. I use UV filters on all my lenses video cameras and DSLR cameras mainly to protect the camera’s lens. Since the adapter is threaded there may be other options to replace the UV filter with other filters on the market such as cooling or warning filters or circular polarizers.

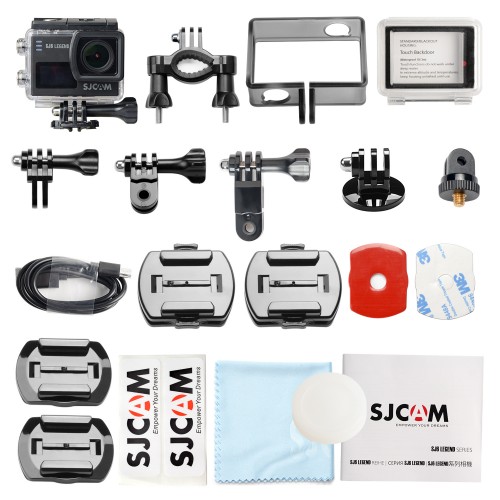
The SJ6 Legend does come with extra accessories, clips, and attachments in the box so you are pretty much ready to mount the camera where you can. The only thing I would say about the included accessories that action camera companies give is that I wish they gave a suction cup type mount. Even if a small and simple one. But I get that companies need to make that extra add on sale. However, it would be nice. I’ve bought a couple of suction mounts for the inside of my car and each mount literally cost me $2 or $3 dollars on Amazon and they work really well. I have one mounted and it has not dislodged yet.

Aside from some of the physical attributes mentioned above, the SJ6 Legend is full of camera options. You can record in a .MP4 or .MOV format. Also, the SJ6 has the ability to capture photos in JPEG or RAW. The SJ6 also sports a Gyro Anti-Shake feature which helps the camera record super smooth shots. This is helpful when you are recording with that selfie stick, on a drone, or on a bike mount, and more. Basically, it helps smooth out those rough and jarring movements that the camera normally gets.

With or without the Gyro Anti-Shake, the SJ captured some really decent quality footage. The 4K looked really nice all the way down to the 2K, to 1080, and to the 720 video settings. I have to admit, although the SJ6 can record in 480 I didn’t bother testing that low resolution. For me, long gone are the days of SD, so I just kept my tests to the HD settings. Besides, HD seems to be the resolution that many care about anyway.

To sum it up, the SJ6 Legend from SJCAM not only shot great footage but also had some nice physical improvements from their other cameras like the SJ4000 and X1000. I love the touchscreen and the extra attachments and accessories that the camera offers like the external microphone, waterproof housing with power cable, and filter adapter. As of right now, because I really like what this camera has to offer, is now my go to action camera. I plan to shoot more often with it and I plan on using it on many of my upcoming projects. I think SJCAM is on the right path to becoming an affordable and alternative to other major action camera companies and I hope to see more new cameras and new improvements from them in the coming years. And if the SJ6 Legend is an example of what’s to come then we should expect great things from SJCAM.

Source: The sample for this review was provided by SJCAM. Visit their site and Amazon for more info.


Product Information

Price: $159.00
Manufacturer: SJCAM
Retailer: Amazon
Pros:
  • 4K at 24fps.
  • Hinged battery door.
  • Sturdy and solid body.
  • Responsive LCD touchscreen.
  • Dual screen.
  • Non-sensitive On/Off button.
  • Tripod screw thread on bottom of camera.
  • Gyro stabilization.
Cons:
  • No suction cup mount included.

Filed in categories: Reviews

Tagged:

SJCAM SJ6 Legend 4K camera review originally appeared on The Gadgeteer on August 4, 2017 at 11:07 am.

Note: If you are subscribed to this feed through FeedBurner, please switch to our native feed URL http://the-gadgeteer.com/feed/ in order to ensure continuous delivery.
MGCOOL Explorer ES action camera review

With so many action cameras on the market today, the only real decision you have to make is how much you want to pay. Sure, you can spend hundreds for the top of the line POV action camera but what if your budget isn’t hundreds of dollars? Well, with the MGCOOL Explorer ES I think you will be pleasantly surprised at the price that it goes for.

The MGCOOL Explorer ES is a mid-range action camera that has a price point of less than $40.00 and is geared toward the average consumer looking to capture high quality HD footage without spending that high end camera price. Nowadays, people using action cameras aren’t just the usual extreme athlete from the earlier days of extreme sports trying to record themselves jumping off of bridges on bungee cords, or parachuting out of a plane, or jumping huge gaps on a mountain bike, or skating a huge session on a vert ramp or surfing the Banzai Pipeline in Hawaii.  More and more people using action cameras today are your everyday people like a mom or dad on a family vacation, a college student at a music festival, or a kid filming an intense water balloon fight at their birthday party.

The specs on the camera as follows: first of all it can record in 3K, 2.7K, 1080, 720, and 480.  Keep in mind that shooting in 3K there is only a 15fps frame rate when recording in this setting. Although the footage is usable, you won’t get that fluid motion that you would get a recording in 30fps or for even smoother footage recording at 60fps. And if you are looking for the more cinematic look, there are action cameras that record at 24fps.

The next setting down is 2.7K, which records in 30fps, then 1080P at 60fps and 30fps and then 720P at 120, 60, and 30fps. The MGCOOL Explorer ES records at an MP4 video format and has a H.264 compression mode.

In still camera mode, you can capture in 16M, 12M, 8M, 5M, and 2M.

The Explorer ES has a nice 170° wide angle lens so capturing all the action in front of the camera won’t be missed. It has a 2.0″ inch screen display on the back which is great to help frame your shots and it makes it easier to review your captured footage so you won’t have to squint to see it.

The Explorer ES has the familiar rectangle shape that is common whenever anyone thinks of an action or POV camera. It is 2.3″ in. x 1.61 in. x 1.14: in. and it weighs in at 1.94 ounces.

One thing that I paid close attention to is the picture quality of this camera. I wanted to see how good the quality was on a mid-range camera versus the quality of a higher priced high-end camera. On a bright sunny day, the video was good and picture quality on the MGCOOL Explorer ES looked great for a mid-range camera. However, in low light, the camera struggled a bit. There was graininess and soft images. But, if you aren’t doing a lot of low light or night shot then this camera will do just fine.  How can you go wrong on a camera for under $40 dollars?

The images from a sunny day and well it rooms looked crisp and clear and there was a good balance between the brightness and contrast.  However, I did notice that the center of the footage was the sharpest and around the edges were a little soft but not too soft to be a deal breaker.  Not bad for a mid-range camera at this price.

Keep in mind that since this is a mid-range camera you don’t have much control over the camera settings. There is only a setting for Exposure and White Balance. You can increase or decrease the brightness in the Exposure settings and select between Auto, Sunny, Cloudy, Incandescent Light, or Florescent Light for the White Balance.

The MGCOOL Explorer ES has a microSD card slot on the side of the camera and directly beside that slot is the microUSB charging port. The Explorer ES can support microSD cards up to 64GB.  Although, there are microSD cards that are geared specifically towards recording 4K, 3K and 2.7K footage, I used an 8GB Centron microSD card while recording in 3K and had no problems whatsoever. I tested out the other resolutions and the Explorer ES did just fine. Just be sure the microSD card you are using is a Class 10 card. Anything lower than that and you could have issues recording in high HD resolutions, especially recording in 3k or 2.7K.

Aside from the minimal camera controls, another thing to point out that puts this camera into the mid-range category is the lack of a mini-HDMI out port. Unless you find yourself constantly connecting your action camera to your TV to view your footage, then the lack of the mini-HDMI port won’t be missed. I know that I myself typically view my captured footage on my computer after I insert the microSD card into a card reader, so not having a mini-HDMI port wasn’t a big deal for me. I can still review footage I shot on the camera with the large 2″ inch LCD screen on the back if I need to.

On the plus side, although this is a mid-range camera it does have WI-Fi capabilities so you’ll be able to monitor and review your camera from your Android or iOS device via MGCOOL’s app for Android and iOS devices. I was happy to see that there was barely any lag from the camera to my LG G4 Android phone. Some action cameras I have used there was a lag in the app’s video monitor when I moved the camera. There was about a one second delay after I move the camera. With t he MGCOOL Explorer ES, the movement was almost instant. For me, the delay, or lag, is more of a pet peeve. For some users out there it may not bother you. You’ll have to play around with it and see what you think. The connection distance between your device and the Explorer is a 10m or 30ft. To activate the Wi-Fi, you can just press the top toggle button on the side of the camera and it will activate the camera’s Wi-Fi. If you look very closely you can see the Wi-Fi icon on the top button.

Another nice feature that the Explorer ES can do is the option to record in Driving Mode. Basically, you can use this camera as a dash camera in your car. In this setting, the camera will automatically write over the microSD card when it gets full. This is good to have when the camera records all the action in front of your car in case you find yourself in a fender bender.

The MGCOOL Explorer comes with a 1050mAh Li-ion battery which is nice compared to other action cameras that only come with a 900mAh Li-ion battery.  The bigger battery gives you some extra juice for the camera. As a matter of fact, I tested the camera shooting in 1080P/60fps and managed to squeeze out 2 hours on a single charge. While I was surprised at that battery life I tested it again on another day using the same 1080P/60fps settings and got the same 2 hours out of the battery. In the 3k setting, I got and hour and 30 minutes and in the 2.7K I got one hour and 20 minutes. So, I’m not sure if shooting in a lower resolution helped prolong the battery life but I would need to do more testing. Either way, having a 1050mAh battery is a nice option to have with action cameras. The more juice the better.

For a mid-range camera, the MGCOOL Explorer ES is an action camera that captures high-resolution footage at a low price range. And when  I saw low price range I mean low.  So for people out there that want to get into shooting with action cameras but don’t want, or need, to spend a lot of money, the Explorer ES by MGCOOL is a perfect camera to introduce yourself into the world of action and POV cameras. I would say this is a great starting camera if you want to dip your proverbial foot into the pool of action cameras and find out what quality and resolution you have a need for.

The Explorer ES comes with several accessories and mounts to get you going and to start using the camera in many action scenarios. For the quality and price of this camera, you can get several Explorer ES cameras for the price of one high-end camera. MGCOOL also offers a 2 year warranty on this camera.

Although I really don’t like uploading videos larger than 1080 to Youtube because of Youtube’s compression, you can check out a small test clip I shot with the Explorer ES below.

You can purchase the MGCOOL Explore ES camera here: https://goo.gl/bTYLha
And to learn more about this camera, here are a couple of links to visit:
http://www.mgcool.cc/goods.php?id=52
https://www.facebook.com/Mgcool.fans/

Source: The sample for this review was provided by Gearbest. Please visit their site for more info.


Product Information

Price: $40.00
Manufacturer: MGCOOL
Retailer: Gearbest

Filed in categories: Reviews

Tagged:

MGCOOL Explorer ES action camera review originally appeared on on July 8, 2017 at 8:25 am.

Note: If you are subscribed to this feed through FeedBurner, please switch to our native feed URL http://the-gadgeteer.com/feed/ in order to ensure continuous delivery.
WiMiUS Q4 4K action camera review


As you may or may not know, there is a sea of POV action cameras, aka sports cameras, out there in the market today. Some that you immediately recognize by their commonly used name and some you have never heard of. But one thing is for sure, camera makers are making their move to the 4K resolution for everyday consumers.

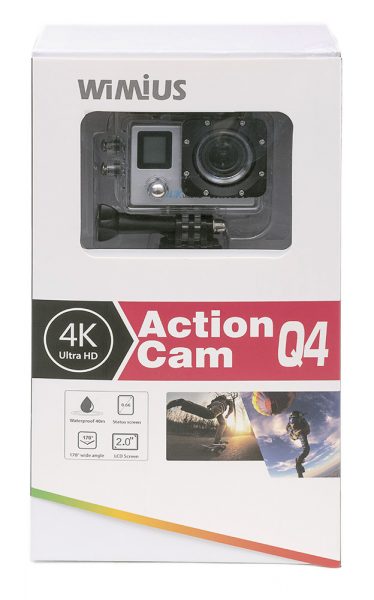
This review is for the Q4 4K WiFI Dual Screen action camera from WiMiUS. This is just one of WiMiUS’s model in their line of 4K cameras so be sure to head on over to www.wimius.com and check out their other cameras.

Let’s go ahead and get the specs out of the way first.  The Q4 has the same rectangle matchbox shape that most POV cameras have. It has a nice big 2.0″ in. LTPS screen on the back and a 0.66″ in. Status Screen on the front. The Q4 records to Micro SD cards and up to 64GB.
The camera body itself is 59.2×40.5×23.9 (2.3″in x 1.6in ” x 0.94in”) and weighs 45.1g/1.6oz. (61.7g/2.18oz. with battery).

The Q4 camera is WiMiUS’s double screen design that has the screen on the back as well as a Status Screen on the front. Although the Status Screen is a great feature, it does not illuminate in any way so it is hard to see in low light and impossible in the dark. But in daylight and in a well-lit area it is a great addition to the camera. It would be nice if it had some kind of backlight for those low light conditions because I do use POV cameras like this in low light and sometimes dark locations from time to time. For example, I set up action cameras on a stage at concerts or shows for B-roll footage where lighting is very dim or limited.

The camera has a 170° CMOS wide angle lens with a Sony IMX179 image sensor. It records in an MP4 video format and can shoot video in 4K@30fps, 2.7K@30fps, 1080P@60/30fps, and 720@120/60/30fps.

Unfortunately, the Q4 only records 4K at 30 frames per second. I would have hoped to record at 60fps or 24fps to get the ultimate 4k experience. However, the camera does offer, slow motion (1080P@60/30fps or 720@120/60/30fps), Time-lapse, loop recording, and a Car Mode.

The Q4 has megapixel photo resolutions at 16M, 12M, 8M, 5M, and 2M.  Along with Single shooting, the camera has other photo options such as Burst Mode and Self-Timer modes. One thing I did notice is that in Still Camera it mode did pretty good taking photos in low light.

One of the great features I like about this camera is that it comes with an extra 900mAH battery along with a charging cradle. Not only do you have an extra battery that you don’t have to purchase, but you don’t need to keep the battery in the camera to charge. This way you can have a fresh battery charged and ready to go when you need it. The battery life is about 90 minutes and has a charging time of 3 hours.

Although the WiMiUS Q4 only records 4K resolution at 30fps, recording at 30fps does reduce the file size so you won’t fill up your card’s space as quickly. However, if you do have the card space why not have the option to record at 60fps or 24fps in 4K? According to their website, the Q4 supports microSD cards up to 64GB.

I recorded some footage using the 4K,  2.7K and 1080P options but upon review of what I shot I wasn’t too impressed with the quality of the recording.  I saw a lot of digital artifacts and digital noise in all the resolutions except the 4K setting. Even the 2.7K and 1080P still had artifacts and the 720 wasn’t great at all. Overall, shooting in 4K just looked like footage recorded in 1080 at best.

One thing I noticed is that the Q4 became very warm when I was shooting it in the 4K setting.

Keep in mind that to view the 4K footage properly in all its glory you need a monitor that can support 4K video. Unfortunately, not unlike the majority of people out there, I don’t have a 4K monitor to reference but you can definitely tell the higher quality difference when you review the footage recorded in 4K. 

I tried exporting out a sample video in 4K resolution but I couldn’t get a proper clip exported from Premiere Pro. I was editing with CS5.5 and each time I exported out a 4K clip using a .h24 codec preset I kept getting an exported video in a .m4v extension when the extension should have been .mp4.

So, when I uploaded the clip to YouTube I would get this notice from YouTube: “We did not recognize the format of this file, but we will try to process it anyway. See this article on recommended formats for more information.”

YouTube doesn’t support .mk4 files so what ended up happening is that YouTube took my 4K sample video clip and downconverted it to 720 each time. So naturally, I didn’t see a reason to view a 4K sample clip in 720 resolution so I didn’t want to upload that clip to YouTube.

I guess I need to convert or encode my sample clip to a format that YouTube supports before uploading. I am looking more into this issue so I can upload a 4K  sample in the future.

4K Screen Capture

2.7K Screen Capture

1080P 60fps Screen Capture

I have included a few screen captures of stills from different resolutions taken with the Q4. You will notice that the 4k resolution(1st screen capture) is the only one that truly looks crisp.  The 2.7K wasn’t bad, however, the 1080P (last screen capture) had plenty of noise and digital artifacts which you can tell in the blue sky. I reviewed the footage and extracted the stills on a 21.5″ in. iMac so the native screen resolution was at 1920×1080.

The large 2.0″ inch screen is great for reviewing footage on the camera. You won’t have to squint as you replay your footage and it makers framing your shots easier since you will be able to see more clearly what is in or out of the camera view. The smaller Status Screen on the front of the camera is handy to have and I like having the camera stats readily displayed. It is definitely handy to see the status of things such as the remaining battery life, if WiFi status, shooting mode, and more.

Since this camera is WiFi supported, there is an app that you can download for your Android and iOS devices to control the camera and review videos and photos you have shot. Unfortunately, it seems like the app needs a little work because I had few issues when trying to connect to the Q4 with the app. The first time I couldn’t get the app to cooperate. The app crashed the first time I tried using it and a couple of times after. When I finally got the app to work it was buggy. Some features worked while other features such as reviewing captured footage caused the app to crash or freeze forcing me to restart the app.  The app seemed useful when it worked.

The Q4 comes with several mounts and other accessories such as a camera clip, a drawstring carrying bag, a tether wire and more. You can mount the camera right away on just about anything so you can start using the camera right away. The Q4 action camera also comes in a Black color as well.

For the price, you can’t go wrong if you want to start shooting with a camera in 4K resolution. The 4K resolution from the Q4 is surprisingly nice, however, just keep in mind that the other camera resolution settings below 4K are okay at best. So you might just have to keep this camera in the 4K setting to get that crisp high-quality footage that many action cameras are moving up to.

Source: The sample for this review was provided by WiMiUS. Please visit their site for more info and Amazon to order.


Product Information

Price: $55.99 on Amazon
Manufacturer: WiMiUS Technologies Company Ltd.
Retailer: Amazon
Pros:
  • Low price.
  • Has 4K and 2.7K resolutions.
  • Status Screen on the front.
  • 1080P/60fps or 720/120fps Slow Motion setting.
  • Extra battery supplied.
  • Battery charger adapter.
  • Don't have to charge battery in camera.
Cons:
  • Only 4K resolution is free of noise and digital artifacts.
  • Status Screen has no backlight.
  • No 60 or 24 frame rates in 4K and 2.7K. Only 30fps.
  • Camera became very warm while recording in 4K.

Filed in categories: Reviews

Tagged:

WiMiUS Q4 4K action camera review originally appeared on on May 27, 2017 at 9:00 am.

Note: If you are subscribed to this feed through FeedBurner, please switch to our native feed URL http://the-gadgeteer.com/feed/ in order to ensure continuous delivery.
Monster Vision 1080p+ action cam review

The Monster Vision 1080p+ is an action / sports camera that can capture video at 1080P resolution. I recently reviewed my first action cam (the Andoer 4K action camera) and wasn’t overly impressed. When I was offered the chance to review another camera by a well-known name, I was happy to check it out. Let’s take a look.

What is it?

The Monster Vision 1080p+ action cam is a 1080P camera that can capture video with audio, and images. This camera can also be used as a dashcam.

What’s in the box?

Monster Vision 1080p+ action cam
16GB micro SD flash card
micro USB charging cable
Waterproof housing
Variety of mounting hardware for handle bars, tripod, window and more.
Quick start guide

Hardware specifications

Optics: 8MP CMOS 170 degree wide angle lens
Video: 1440p 1920×1440 30fps, 1080p 1920×1080 6fps, 720p 1280×720 60fps & 120fps
Video Format: MOV (H.264)
Photo: 3,5,8,10 & 12MP
Photo Format: JPEG
WiFi control via mobile app
Memory: 16GB micro SD card is included
Battery: Li-ion 1200mAh

Design and features

The Monster Vision 1080p+ action cam looks very similar to the 100’s of other action cameras on the market. It’s a rectangular black plastic camera with a lens on the front. Also on the front in the lower right corner is a charging and recording status LED. It lights up in blue while charging and blinks red while recording.

On the left side of the camera is the WiFi toggle button which doubles as the down button when navigating through on-screen menus.

On the opposite side of the Monster Digital action camera, you will find a speaker at the top and a micro SD card slot below it. A 16GB card is included with the camera. There’s also a micro USB port for charging and a mini HDMI port if you want to connect the camera to a display. Note that a micro HDMI cable is NOT included with the camera.

On the back of the action camera is the 2-inch color LCD display. In the upper left corner is the Power / recording status LED which glows solid red with the camera is powered on, and blinks while recording. On the right side of the LCD display is the Display / Menu button. This button can be used to toggle the display off and on and brings up the camera’s settings menu when you’re not recording video.

The menus are pretty standard for an action camera. You can switch video modes, resolutions, tweak white balance, etc.

On the bottom of the camera is the battery compartment. Note that the battery is rated for only about 1 hr and 75 minutes of video capture per charge and it takes 2-4 hrs to recharge it.

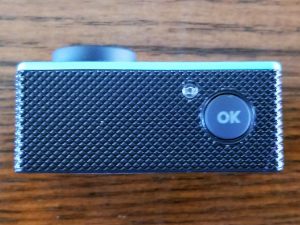
And on top is the power / mode button and the OK button which is used to select items in the menus.


Operating the camera

Like most action cams, operating it is pretty simple. Just get in the mode you want and start recording. For the Monster Digital camera, you can switch modes just by pressing the power / mode button on the top of the camera. Holding down the button for a few seconds toggles power and when the camera is on, pressing the button will cycle through video, photo, dashcam and playback modes. The camera is supposed to remember which mode you were in and will start back in that mode upon cycling power. I found this to be true, but only for video and dashcam modes. If you turn off the camera in photo or playback mode, it starts back up in video mode.

Controlling the camera via WiFi and the Monster Digital mobile app


To control the camera remotely, you have to install the free Monster Digital mobile app, turn the camera on, press the WiFi button on the side, switch to that WiFi connection on the mobile device, type in the password and go back to the app. You’re then able to remotely change settings, see a live view of the camera, snap photos, capture video and even play back photos and video.

Playing back video is a little wonky though. Most of the time I could hear the audio, but the image remained black.

Sample images


The photo capturing capability of the Monster Digital 1080p+ is ok. I wouldn’t consider using it as my primary camera, but in a pinch, it’s better than no camera at all.

Close up images like the first image on the left will show some slight bulging due to the wide angle lens. You don’t notice this with longer range shots.

Sample videos

I think this camera’s video quality which I had set at 1080p 60fps is pretty good. I’m not going to say that it blew me away because I feel like my Nexus 6P smartphone does a much better job capturing super clear video. But for a $100 camera, it’s not bad.

There are a couple things to mention though. First of all, the camera has an image stabilization feature that can be toggled on and off in the menus. I captured video with it enabled and disabled and could not tell any real differences. In the video sample above, the feature was enabled as I was walking around in the woods with the camera attached to the IK Multimedia iKlip Grip Pro.  I was also not overly impressed with the audio capture quality as it sounds a bit fuzzy and muffled to me.

Final thoughts

Is the Monster Vision 1080p+ the best action camera on the market right now? I think it’s safe to say that it isn’t. But when it’s all said and done, I do think the Monster Vision 1080p+ action cam is a decent sports / action camera that is easy to use, captures good quality video and isn’t overly expensive.

Source: The sample for this review was provided by Monster Digital. Please visit their site for more info.


Product Information

Price: $99.99
Manufacturer: Monster Digital
Pros:
  • Easy to use
  • 16GB microSD card included
  • WiFi mobile control
Cons:
  • Built in image stabilization seems to have no effect
  • Audio quality is not the best

Filed in categories: Camera Gear, Reviews

Tagged:

Monster Vision 1080p+ action cam review originally appeared on on March 3, 2017 at 7:06 am.

Note: If you are subscribed to this feed through FeedBurner, please switch to our native feed URL http://the-gadgeteer.com/feed/ in order to ensure continuous delivery.