I have been building home theater PCs (“HTPCs”) for almost fifteen years. My current HTPC configuration includes an Intel Celeron CPU capable of decoding various AV codecs, a high end Nvidia GPU card, a large capacity hard drive, and an M-Audio sound card capable of 7.1 surround sound. The entirety of this system is housed in a large HTPC ATX case the design of which is to stylistically match a high end audio/video component enclosure. Over time, dedicated TV boxes have emerged in the AV market. The Beelink SEA Android TV box is one such example in a package at a fraction of the volumetric size of my HTPC. In this review, we will see if the SEA can ultimately replace my HTPC as my main home theater device.
SPECIFICATIONS
The SEA is powered by a Realtek Quad-Core ARM Cortex CPU with an ARM Mail GPU.
It includes 2 GM DDR4 of ram memory and 32 GB eMMC internal storage in this review unit whereas a less expensive unit with 16 GB is also available. Additional storage is available with a full size SD card slot and an internal SATA III 2.5″ hard drive slot.
Connectivity options include WiFi 2.4G and 5.8G capability, an RJ45 ethernet port, Bluetooth 4.0, one USB 2.0 port and one USB 3.0 port.
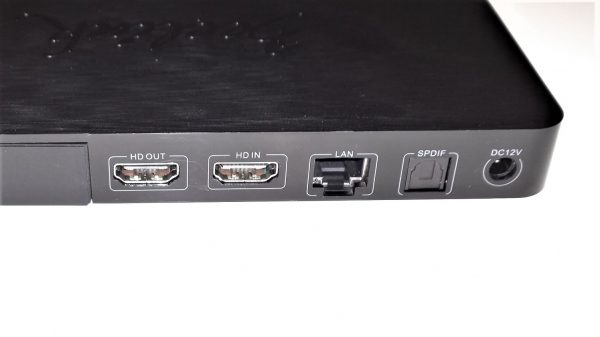
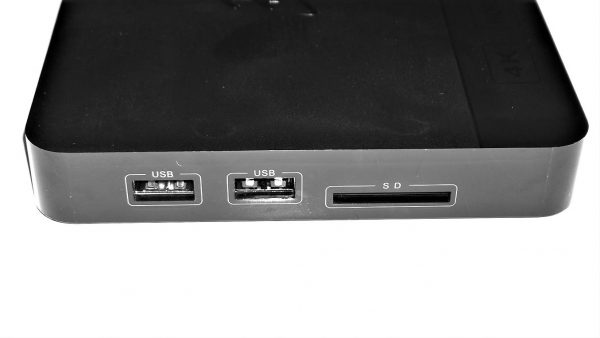
Audio/Video ports include HDMI in, HDMI out, and SPDIF audio.
The SEA is powered by a 12V/1.5A DC wall adapter. There is no actual power switch on the SEA, as it powers on as soon as you plug the DC adapter in.
UNBOXING
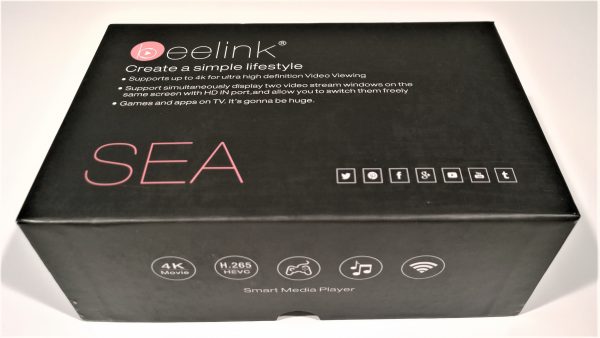
The SEA is housed in a compact box about the size of the ATX power supply on my HTPC. After removing the cover, there is a 2 page guide that mostly points out the different ports on the SEA. Inside the box, the SEA itself is wrapped in plastic situated on top of a plastic support carton. The remaining contents below include an HDMI cable, remote control and DC adapter.
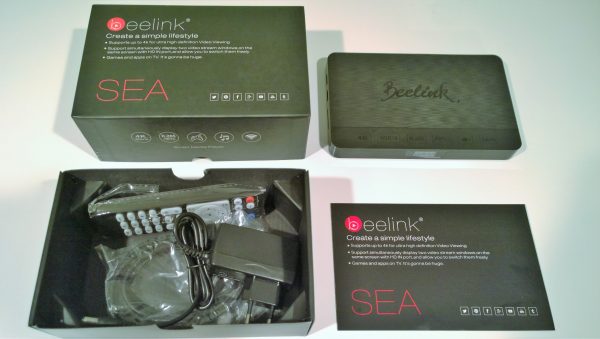
As shown in the pictures, my review unit came with a EU power adapter. Customers can order an adapter for US, EU, or UK plugs.
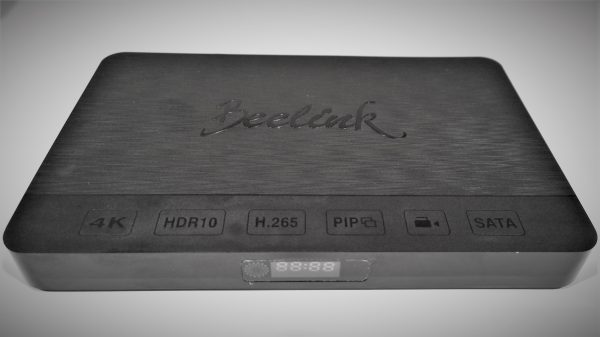
The SEA itself is only approximately 7.5″ long by 0.75″ high by 5″ deep. The majority of the top surface is a matte black color with a pattern that resembles a brushed metallic surface. There is a substantial cursive Beelink logo that is not all that perceptible given that it is in a glossy black color. The sides are all glossy black with the front center featuring a small LED display for time or status. There are small rubber feet/pads on the bottom corners. I personally like the plain black box design as it blends in unobtrusively with the rest of my home theater equipment.
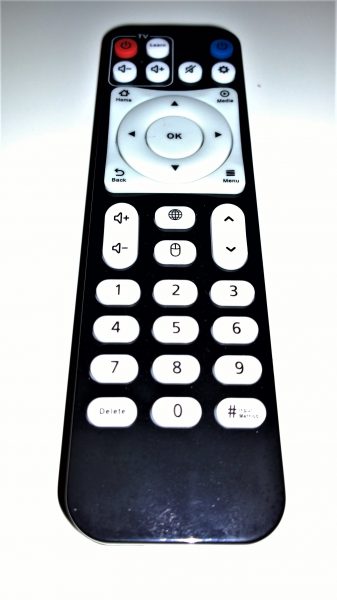
The included remote control is similar in looks and function to the variety of HTPC remotes I own. You will need 2 AAA batteries as they are not included.
REVIEW EQUIPMENT
For this review, I essentially used the SEA to replace the HTPC component of my home theater system which also consists of a 1080p Panasonic Plasma flat screen TV via HDMI, and a Yamaha amplifier via SPDIF. I also used my Dell 4K PC monitor as a separate test of the 4K video capabilities of the SEA.
A variety of ripped 4K Ultra HD and 1080p movies, and CD media were transferred to the internal storage of the SEA for playback testing.
USAGE
Immediately out of the box, I attached the HDMI cable between the SEA and my TV, and powered it up with the DC adapter.
Upon powering the box, you’ll see a blue ‘boot’ LED messsage on the front display panel and a couple of splash screens on the TV. It took approximately 30 seconds to boot. If this is the first boot, the SEA will go through a setup process with a series of guide screen choices such as network configuration and screen size adjustments.
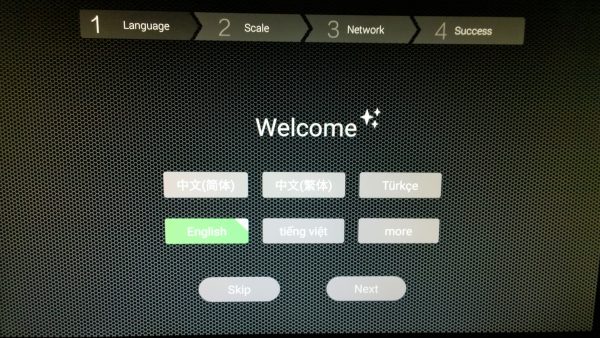
Since the OS is Android 6.0 (Marshmallow), the basic UI screen reminds you of a smartphone. The home screen has a notification/status bar as well as a large widget-like element displaying time and location. There are other icons in tiled/gridded format to invoke various apps and utlities like: internet, file explorer, play store, settings, and memory usage. The right third of the entire UI has a container where you can store commonly used app icons. Furthermore, this home screen can be ‘swiped’ left or right to give you additional app storage windows.
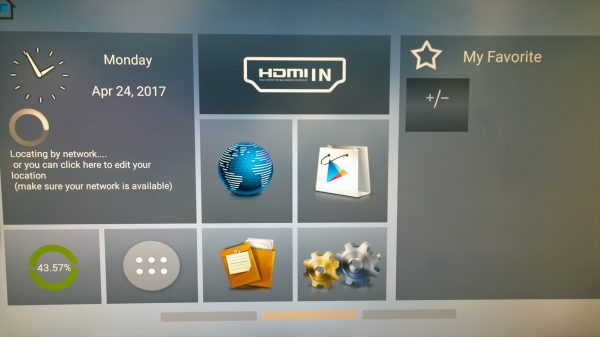
There was no documentation enclosed to help you navigate the UI. However, if you are familiar with Android on phones, you’ll eventually meander your way through all the menus and UI elements to find what you need. I imagine those without Android familiarity will probably fumble around the UI much more.
The UI can be navigated using the remote control arrow pad, ‘OK’, and back buttons. There are also dedicated buttons for one-click access such as web browser or settings. At times, I found it was easier just to plug a keyboard and mouse into the USB ports to navigate the UI and use apps effectively. This is especially the case with apps like Chrome browser or the Play Store where you want to gain focus on a text field or do any sort of text entry. Ideally, I prefer not to have to use a mouse or keyboard on my HTPC. In the case of the SEA, if you’re going to do basic home theater tasks like media playback, using just the remote control generally works.
The remote control additionally has a learn function that allows you to control your TV. Thankfully, documentation for this learn function does exist, but it is in the form of small lines of text on the bottom of the remote. Your button options are limited however, as you only have on/off and volume buttons.
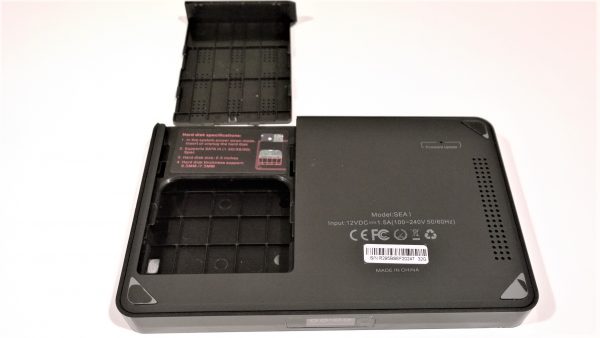
The file explorer app allows you to explore the storage locations in the SEA to access all your files and media. Since the internal storage is only up to 32 GB on my unit, the additional SATA III 2.5″ hard drive slot is a welcome expansion option. The hard drive enclosure is accessible underneath the unit. No hand tools are required to access the drive door, which slides out when you depress a tab. In this case, I added a 2 TB SSD, by sliding it through the opening until it snugly attaches to the SATA port. The SATA connector is the only means of securing the drive as there are no additional screws or fasteners involved. Since the SSD is thinner than a typical 2.5″ spinning hard drive, the SSD can rattle if you shake the SEA vertically.
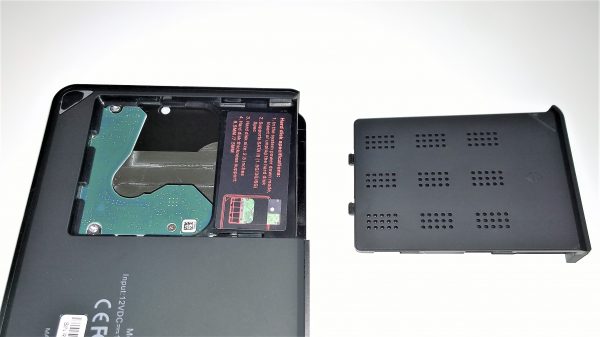
The SSD was brand new, so after rebooting, the additional hard drive was not found. I assume in this case that Android had no drive formatting capability. I removed the drive and reformatted it externally using a Windows PC. After reinstallation in the SEA, the SSD and it’s full capacity was finally recognized.
One thing I’ll note, the SSD was very difficult to remove from the SEA. The way the brackets and drive housing was designed, there was no easy way for me to grip the end of the SSD to slide it off the SATA connector. This, along with the aforementioned size disparity between the SSD and housing, made me worry that I would break the SATA connector as I was wiggling the drive out. After managing to get the SSD out with some small electronic tools, I’m hoping that I will rarely have to replace this drive.
Video Playback
The SEA supports MKV, WMV, MPG, DAT, AVI, MOV, ISO, MP4, and RM video formats with the native video player. However, I found that when using this player, some of my 1080p videos had stuttering issues. Even my smallest filesize video would not play back smoothly which seemed odd. I immediately went to the Play Store to install Kodi which is a media player software app and VLC which is a video player. Using either player, the videos played back smoothly as I would expect from a dedicated media player.
As a final video test, I plugged the SEA into my Dell 4K monitor. Using a sample 4K UltraHD video, I was able to get it to successfully to play on this monitor. However, none of my 4K videos would play smoothly with slight stuttering no matter whether I used the internal video player, Kodi, or VLC. To be fair, my HTPC doesn’t play these files smoothly either since it lacks the horsepower to do so. Since my regular flat screen TV is only 1080p, the 4K stutter didn’t bother me in my usage situation.
One other thing I’m trying to sort out is that the remote control doesn’t have an official “Play” button. There is an arrow keypad with an OK button in the center. I find that the OK button can serve as a “Play” button in Kodi, but it doesn’t work that way in VLC as it seemed to access a menu instead. So, once again, I had to plug in a mouse to play a movie. So, currently, there is inconsistency between remote control operation and apps that I still have to rectify.
Audio Playback
The SEA can play MP3, AAC, WMA, RM, FLAC, and OGG files using the native audio player. I transferred a variety of familiar FLAC files to the SEA and played each of them successfully. I’m the first to admit that I’m not an audiophile, but I felt that I could pick out the same details in the playback with the SEA as I can using my HTPC.
Image Playback
Using the file explorer, I accessed a folder of JPG images stored on the SD card. Clicking on each JPG file brings up the image on a viewer as expected. However, after a number of images, the viewer failed to display the picture and showed a error symbol instead. I tested the same SD card on a PC and had no issues viewing every single image. So it wasn’t entirely clear why I was getting an error. Personally, picture viewing and slideshows are features I will probably never use on the SEA or any HTPC anyway. So I didn’t spend any further time trying to diagnose this issue.
FINAL THOUGHTS
Even though I am personally familiar with Android because of my smartphones over the years, after three weeks of usage, I still have this nagging feeling that I am missing some cool features or not taking full advantage of this device. I feel a lot of this is because there is no documentation at all with the SEA and I could not find any manuals on the Beelink website. There is a forum on the Beelink website where you can ask specific questions to Beelink employees or pick up tips from other users. Ultimately, that is where I think I will be slowly building up knowledge to explore the full potential of the SEA, as it is a fun device to play with if you like to tinker.
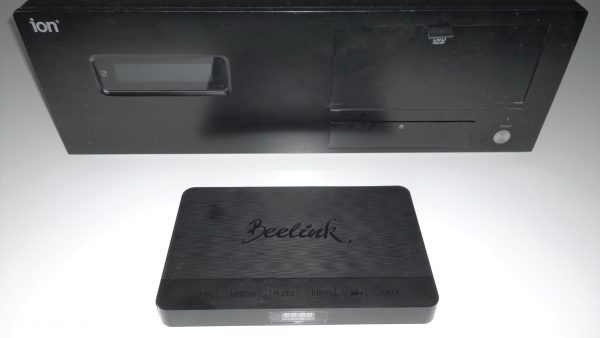
So, does the Beelink SEA 4K Android TV Box replace my HTPC? The answer for me is, not yet, but eventually. I will need to spend some time experimenting with apps and configurations to get it operating to the level that I had my HTPC running.
Source: The Beelink SEA 4K TV Box for this review was provided by GearBest, please visit their site for more info.
Product Information
| Price: |
$103.99 |
| Manufacturer: |
Beelink |
| Retailer: |
Gearbest |
| Pros: |
- Compact footprint
- Android OS allows for UI and App/player customization
- Expandable storage with SATA III
|
| Cons: |
- No documentation
- Remote control features are not consistent with Apps
- Hard drive difficult to remove
- UltraHD videos didn't play smoothly
|
Filed in categories: Reviews
Tagged: Android TV
Beelink SEA Android 4K TV box review originally appeared on on May 16, 2017 at 10:00 am.
Note: If you are subscribed to this feed through FeedBurner, please switch to our native feed URL http://the-gadgeteer.com/feed/ in order to ensure continuous delivery.
