Miggo Pictar Plus iPhone camera grip review


I fashion myself as somewhat of an amateur photographer. I’ve been fascinated with photography ever since I took Mr. Bunton’s “Intro to Photography” class way back in the ninth grade. And like a lot of people I love taking photos with my iPhone. Apple forever changed the way we take photographs when they introduced the first iPhone 10 years ago. With each iteration, the iPhones camera gets better and better. It takes amazing photos, but taking them has always presented different issues. The fact is the iPhone isn’t a camera, it’s a phone, and holding it with one hand to take a photo can be tricky. And if you want to use a tripod you have to buy special cases and or mounts made specifically for the iPhone. Miggo has changed all of that with the Pictar and Pictar Plus. Pictar is a camera grip that claims to turn your iPhone into a DSLR camera. Since I love taking pictures with my iPhone both recreationally and for my product reviews for the-gadgeteer, I jumped at the chance to review the Pictar Plus. Does it really turn the iPhone into a DSLR camera? Let’s take some photos and find out.

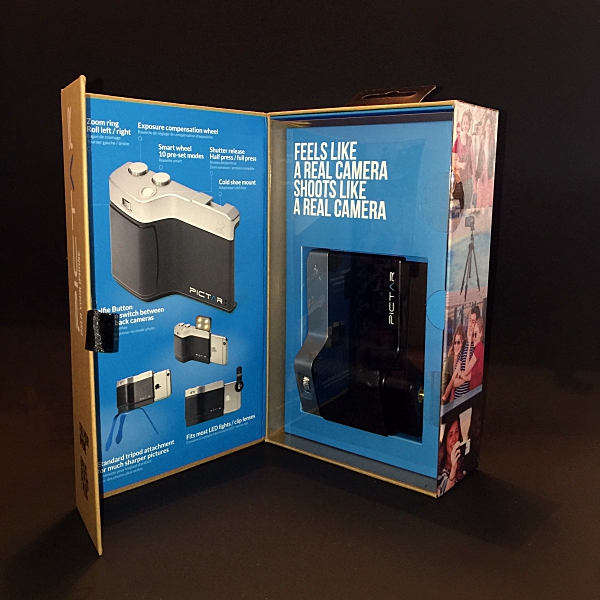
I don’t usually start off a review by talking about the product’s packaging, but when I received the Pictar Plus from Miggo I was really impressed. I thought to myself “Wow if they put this much thought and innovation into the packaging I can’t wait to try out the actual product”. The box opens like a book (the front flap is held closed by a magnet) and the Pictar Plus is displayed behind a plastic window. The box itself is covered with lots of information about the Pictar Plus. A real nice presentation that I thought was worthy of a mention.
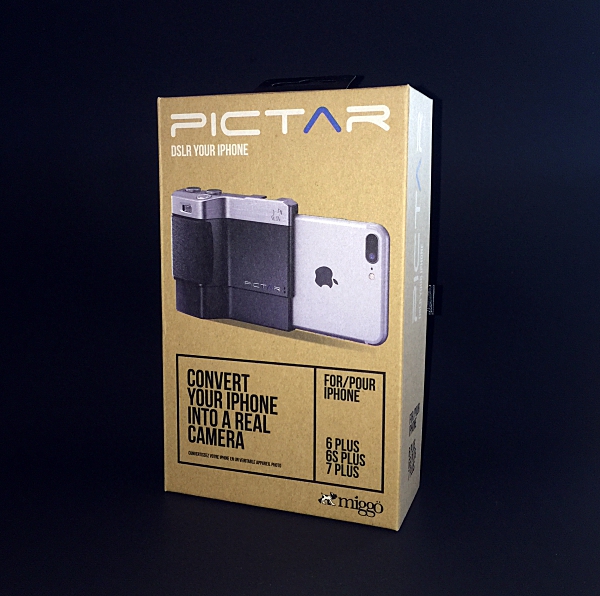
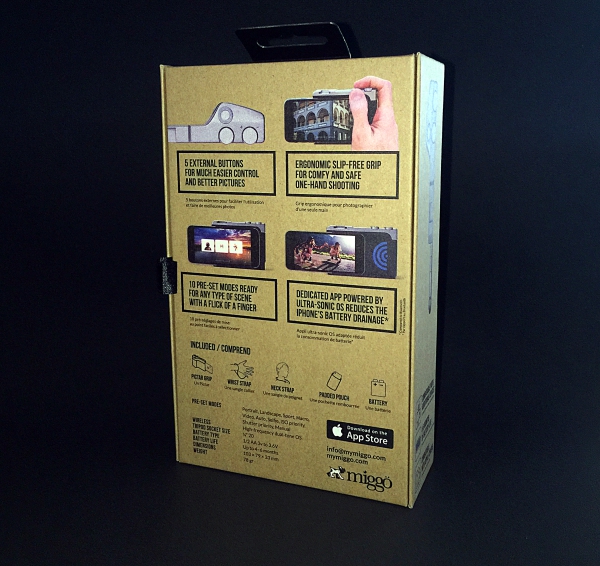
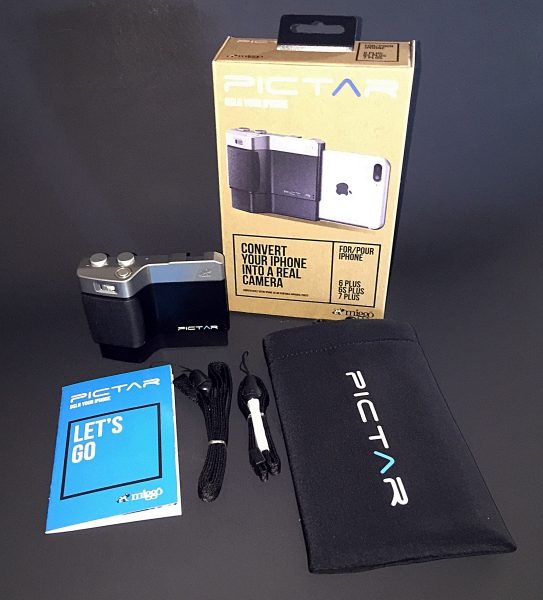
Inside the box, you get the Pictar Plus, wrist strap, neck strap, neoprene padded carrying case and Users Manual.
The Pictar comes with a CR1/2AA battery already installed. To activate the battery, first, open the battery compartment by pushing in the release catch and removing the battery cover. Then pull out and discard the pull tab at the bottom of the battery. This will then allow the battery to connect fully with Pictar. Then click the battery cover back in place. According to Miggo, the battery should last up to 6 months with normal use.

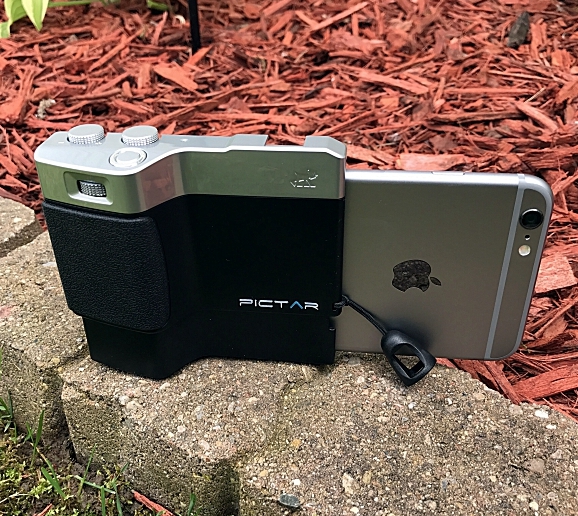
Installing my iPhone into Pictar was easy. After taking it out of its case (you can use Pictar with some very slim-fitting silicone bumper cases) I slid it into the spring loaded bottom of the Pictar, with the back of the phone facing in. Then pressed down until the top of the iPhone clicked into place. Removing it was just as easy.
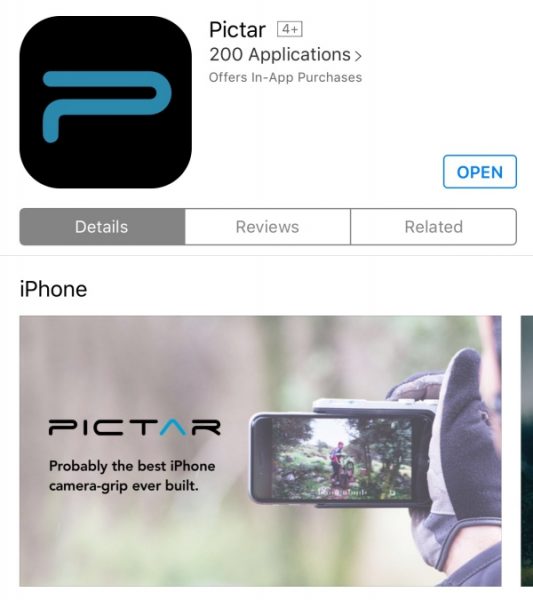
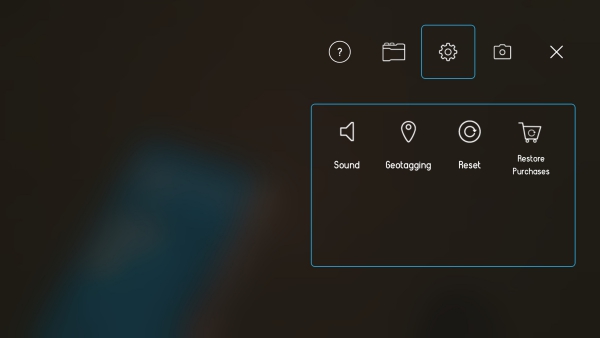
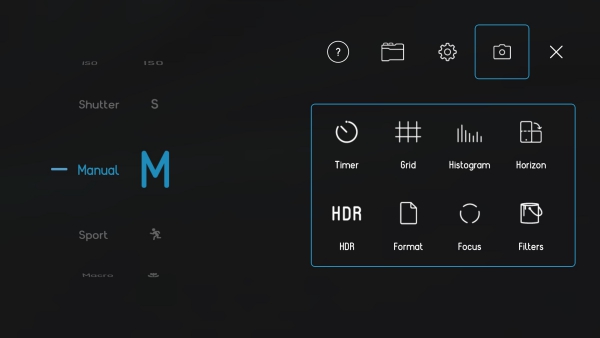
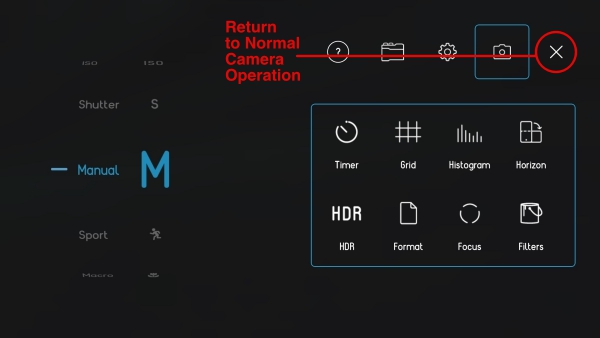
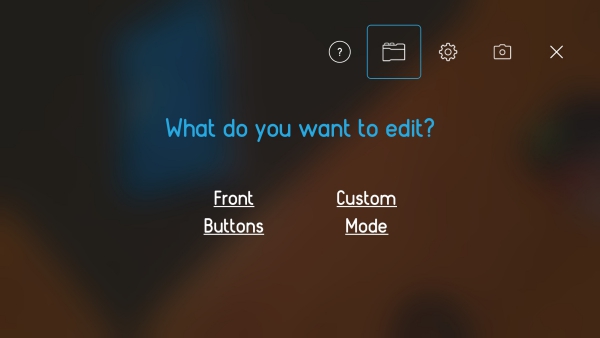
Before you can use Pictar you have to download their free app from the app store. The app is really the brains of the whole operation. Pictar’s Camera app unlocks key features that are inaccessible on iPhone’s native camera app. It connects with the iPhone using a high-frequency dual tone that is inaudible to the human ear. When used, each dial and button emit a unique tone that is detected by the app generating a corresponding action. This also significantly increases the battery life when compared to Bluetooth connectivity. The app itself is easy to use. The first time you launch it there is a short tutorial that prompts you to use each different dial and button, showing in real time what function each performs. The app has nine different built-in modes, Auto, Sports, Macro, Shutter priority, ISO priority, Manual, Selfie, Movie, and Filter. A note about the Filter mode. There are 38 different filters that can be applied before taking a picture which is really cool. However, only 2 of them are free to use. If you want to use any of the other 36 you have to purchase them. Separately each is a $1, or you can buy the bundle for $10. All things considered, that’s not bad, but it would have been nice to include more than 2 free filters. Clicking on the gear icon in the upper-right corner of the Home screen allows you to change and customize lots of settings. There are five main icons at the top right of the settings screen. The question mark icon takes you to the Tutorial / User Guide menu, the Pictar icon to the customization of buttons menu, the Gear icon to Sound, Geotagging, Purchase Restore and Reset menu, the Camera icon to the camera settings menu and the X returns you to normal camera operation.

Much like a DSLR camera, Pictar Plus offers five external control buttons. This allows you to easily change settings and take pictures with one hand. No more tapping your iPhone’s screen to set focus, exposure, etc.
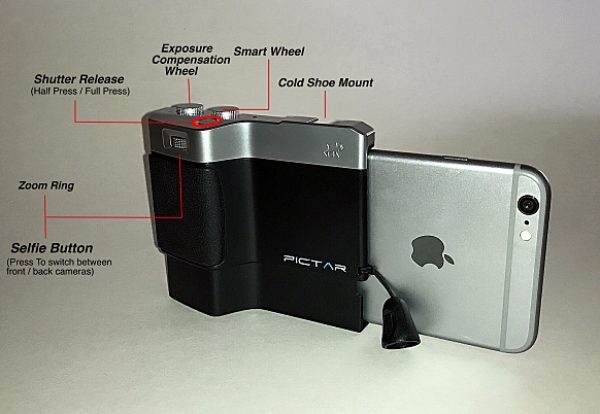
The Smart wheel allows you to choose between Pictar Plus’s 9 different modes. The Exposure compensation wheel allows you to control brightness levels even before shooting. And just like with an advanced camera, the exposure compensation wheel changes the exposure in steps of 1/3 aperture, and the clear display appears at the bottom of the iPhone screen. The Shutter release has two functions. A half-press locks focus and exposure for easy tracking of a moving object and a full-press for immediate shutter release. The shutter button also allows you to take pictures while wearing gloves during the cold weather. The Zoom Ring allows you to zoom in on a subject without having to touch the screen to pinch-and-zoom. It also doubles as a Selfie button. Clicking the Zoom ring will switch between the iPhone’s front and back camera for easy “selfie” shots. The Virtual Wheel is located on the right side of the Camera app screen and allows you to control different modes such as Flash modes, Shutter speed, ISO and more – simply by using your thumb.
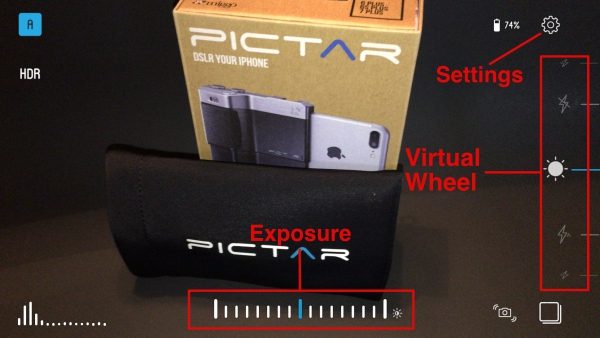
The dials can all be reprogrammed to do different things. For example, you can have the Zoom Ring control the flash, white balance, etc. In that case, zoom in and out would be done by “pinching” the iPhone’s screen, like before. All of this can be done in the settings menu I mentioned earlier.

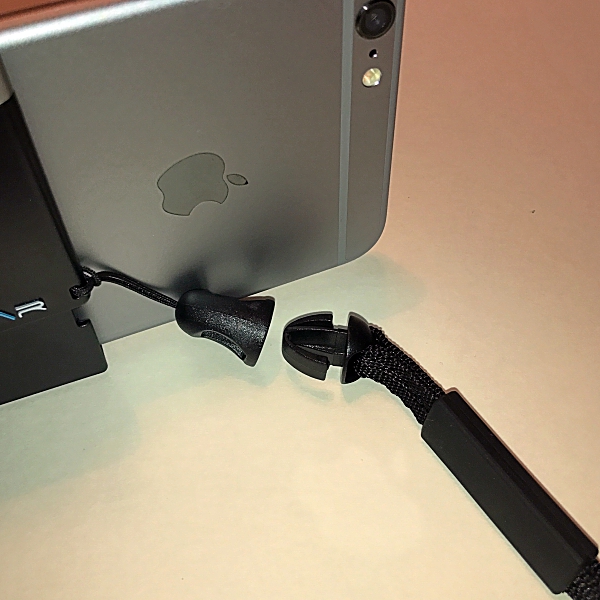
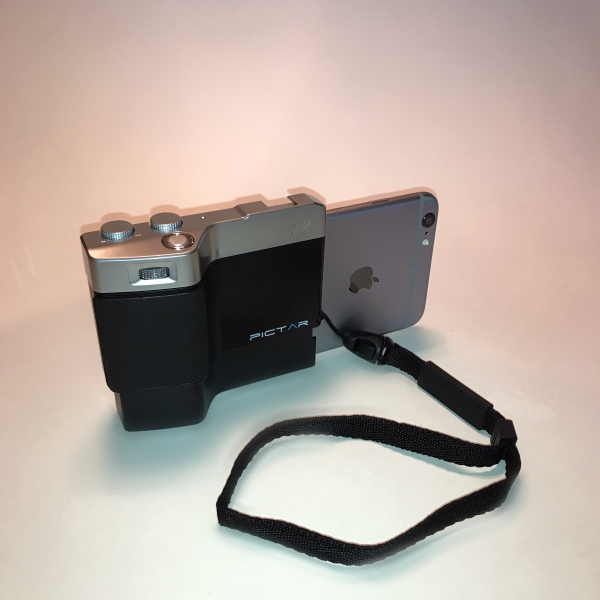
The Pictar Plus also comes with wrist and neck straps. This is nice because if you’re like me you’ve dropped your iPhone more than once trying to get that perfect shot. Once you attach the connector to the Pictar Plus you can easily change between the two straps with just a snap.
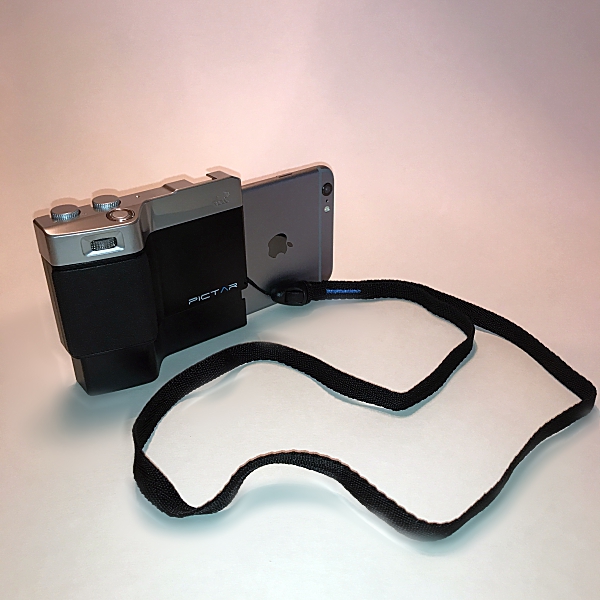
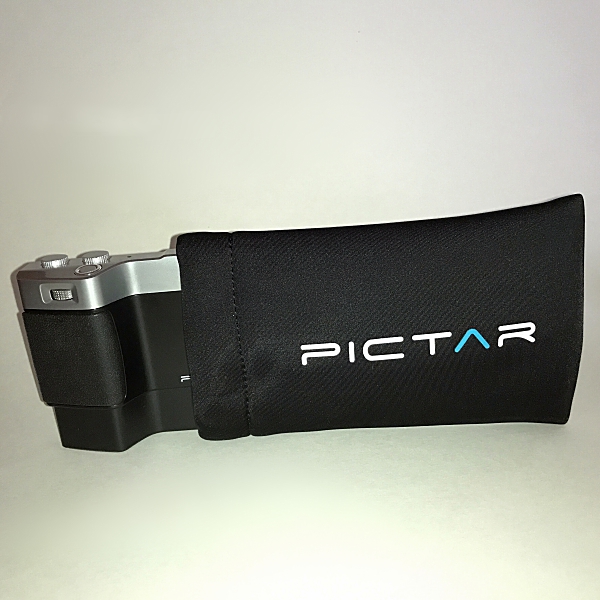
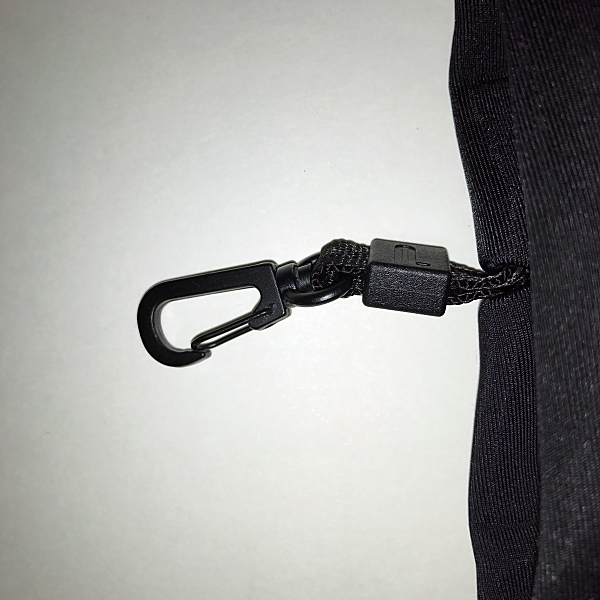
There’s also a nice neoprene padded carrying case for the Pictar Plus. It comes with the added feature of a small metal carabiner that can be attached to a bag or belt loop.
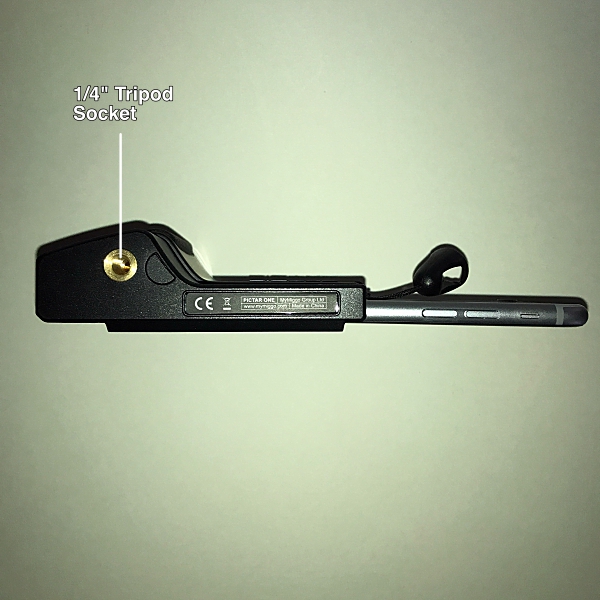
Just like a real camera, Pictar has a standard 1/4” thread tripod socket on the bottom. This is ideal to attach a tripod or other stabilization device and is great for selfies or night time shots, that require long exposure times where the camera needs to be steady.
The top of the Pictar has a standard-size cold shoe mount to allow you to attach many full-size camera accessories, such as LED lights or microphones. I also like that the iPhone’s lens is open when attached to Pictar, giving you the ability to attach most ‘clip on lenses’.

I really loved using the Pictar Plus. It turned taking pictures with my iPhone into a more camera-like experience. It’s really light weight coming in at .17 lbs. so it doesn’t add any extra weight to the iPhone. I like how it’s designed to be held and operated with one hand. And the non-slip grip and wrist strap gave me a real sense of security. I took Pictar Plus along with me while walking my dog and took some photographs using some of the different functions and modes. I was very impressed with how much easier the Pictar Plus made taking photographs. I took a selfie with my dog Zoey and liked being able to switch cameras from back to front simply by pressing the Zoom Ring.

Using the Action Mode I took pictures of the flags that were flying above the local High School football field. It was really windy, but with the Action Mode I was able to capture the flags with no blur, and the images came out sharp and clear. With the Zoom Ring, I was even able to get a close up of Old Glory.

Miggo even provides a link to a Mobile Photography Workshop that has videos on how to use Pictar to capture better pictures in different scenarios. Definitely worth checking out before using Pictar. I look forward to using these tips on my next photography adventure with the Pictar Plus.
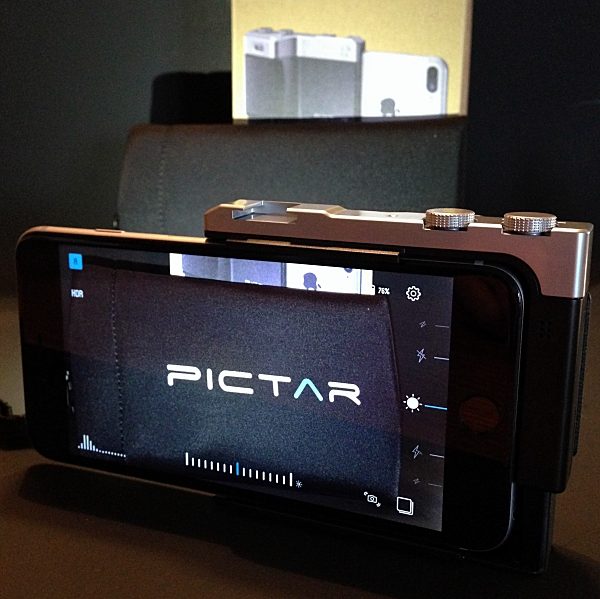
Does the Pictar Plus turn your iPhone into a DSLR camera? I might not go that far, but it’s pretty darn close. All and all I think it’s a great product. It makes taking photographs with your iPhone fun and easy, whether you’re an amateur like me or a seasoned photographer. And with all of the Pictar Camera apps built-in features, the photo possibilities are endless. I know it got me excited about taking pictures with my iPhone and I’m sure it will do the same for you.

Pictar comes in 2 models, Pictar, for iPhone sizes, 4s / 5 / 5s / 6 / 6s / SE and 7 and, Pictar Plus, for iPhone, 6 Plus / 6s Plus and 7 Plus. They’re priced at $99.99 and $109.99 respectively.

Source: The sample for this review was provided by Miggo. Please visit their website for more info, or Amazon to purchase.


Product Information

Price: $109.99
Manufacturer: Miggo
Retailer: Amazon
Pros:
  • Easy to use
  • Can operate with one hand
  • Lightweight
  • Wrist and neck straps
  • Multiple modes and settings
  • Neoprene carrying case
Cons:
  • Not enough included free filters in Camera app

Filed in categories: Reviews

Tagged: , ,

Miggo Pictar Plus iPhone camera grip review originally appeared on on June 23, 2017 at 8:46 am.

Note: If you are subscribed to this feed through FeedBurner, please switch to our native feed URL http://the-gadgeteer.com/feed/ in order to ensure continuous delivery.

Braven performs a 360 with the new STRYDE portable speaker


It really wouldn’t be summer without Braven dropping a new speaker on us. And 2017 is no different. True to form, Braven has gone 360° full circle with their new STRYDE 360 portable Bluetooth speaker.

Braven has crafted a soda can shaped speaker to fit into any active lifestyle where water, salt, sand, and snow are as plentiful as air.

The STRYDE 360 is a speaker made to take on the elements with a full IPX7 waterproof rating and with a shockproof exterior for truly roughing it outdoors. Its cylindrical shape will deliver 360-degree sound from dual passive radiators with custom, in-house tuning—all on a 12 hour single charge from its built-in 2500mAh rechargeable battery. The lightweight and vertically shaped STRYDE 360 easily fits in cup holders and water bottle cages as well as backpacks, sport bags or purses. There’s also built-in voice control that works with a smartphone to give a command or make and take calls hands-free.

“Our BRAVEN team believes that you should be able to listen to your favorite music everywhere you go, rain or shine,” says Kristin Archer, Marketing Director BRAVEN Audio. “With the STRYDE 360, our customers are finally able to have a speaker that is compact and portable enough to bring anywhere with sound loud enough for all of your indoor and outdoor summer activities.”

The STRYDE 360 is available now in Silver/Electric or Slate/Crimson for $99.99 US at BRAVEN.com and Amazon.

Filed in categories: Reviews

Tagged:

Braven performs a 360 with the new STRYDE portable speaker originally appeared on on June 23, 2017 at 7:25 am.

Note: If you are subscribed to this feed through FeedBurner, please switch to our native feed URL http://the-gadgeteer.com/feed/ in order to ensure continuous delivery.

The HYLETE icon 6-in-1 backpack 40L is way more than a carry-on bag


I have more carry-on bags than I would like to admit. The reason is simple, I haven’t found one that fits all my travel needs. Do I want a backpack or a roller bag? Can I use it when I get to my destination without looking like I am carrying a carry-on bag? So, basically, I am still looking for a bag with versatility. 

HYLETE has a new bag called the icon 6-in-1 backpack 40L that seems to address my needs. The icon 6-in-1 backpack 40L (a mouthful I know) is built off of another model the icon 6-in-1 backpack 60L. The icon 6-in-1 40L has the ability to be carried in six configurations; backpack, extended backpack, small duffle, extended duffle, removable daypack and messenger bag.

The two features that stand out to me are the expandable compartment and the removable daypack. Available at the HYLETE website for $200, this bag could be the solution to mine and your travel needs.

Filed in categories: News

Tagged: ,

The HYLETE icon 6-in-1 backpack 40L is way more than a carry-on bag originally appeared on on June 22, 2017 at 2:06 pm.

Note: If you are subscribed to this feed through FeedBurner, please switch to our native feed URL http://the-gadgeteer.com/feed/ in order to ensure continuous delivery.
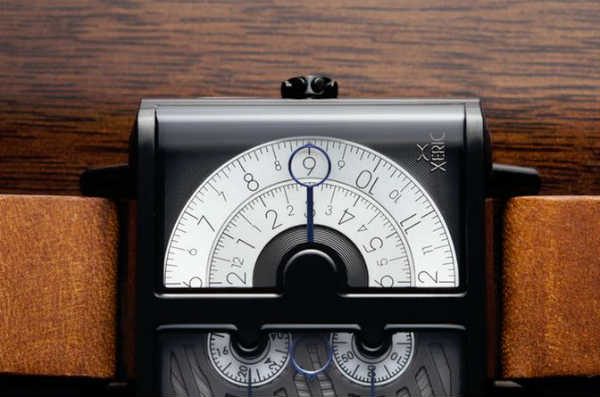
#ad Xeric’s Fifth Kickstarter Proves Crowdfunded Watches Are Here to Stay


This post is sponsored by Watches.com

As retailers and marketers have gained expansive access to new markets through the internet in the past couple of decades; there has been growing distance between big brands and consumers that can result in “lost markets.”

The rise and rise social media, mobile and the struggling challenges of reaching millennials has lead to massive changes in the way consumers make purchases and interact with brands. 

To stay competitive and thrive in this new landscape, companies need to evolve the way they do business. Now more than ever, customers are longer passive observers but have become active participants, educating themselves about products and services before ever engaging with a brand. A traditional business that does not adapt will simply get left behind.

Kickstarter and social media allow businesses a return to the consumer by establishing a template for a direct relationship during every part of the process. And it does this not only by assisting businesses in jumpstarting their projects, but also in keeping an active and open line of communication through which ideas, feedback, and even criticism can be leveraged and brought back to a market where consumers could are able to vote with their money on the products that they truly want to be a part of.

A Tradition Built On Success

Xeric sees themselves as a design centric, Kickstarter first, brand. Unlike traditional swiss watch brands which design watches in silos and then market them using standard channels, Xeric turns to crowdfunding and social media to find out what their audience likes. They’ve resolved to talk directly to these consumers, find out what satisfies them (and what doesn’t).

Xeric is founded behind the team responsible for Watches.com. The family run team has seen considerable success from their followers for the crowdfunding campaigns.

The response to the Xeriscope, Xerics initial Kickstarter campaign, was positively humbling. The campaign quickly overtook its modest $40,000 goal and went on to raise $444,370 in pledges from 1,148 backers. Encouraged by their success, they began work on designing the Halograph and Soloscope. With expanded variation in limited-run designs, they once again saw that their idea of a unique, modern-but-timeless mechanical watch brought something to market that had, up until then, been hard to find in a wristwatch. 2015 and 2016 would see the Soloscope Kickstarter receive $679,310 in support from 1,623 backers, and the Halograph an incredible $885,593 in pledges from 2,409 backers.

In the course of their Kickstarter campaigns, they’ve received over $2M in backing for their designs. Clearly, what they were doing had struck a chord.

Xeric attributes a measure of this success to a three key factors:

• People just want to stand out – Xeric’s distinctive design flair and limited-edition mechanical watches were sure to be peerless in nearly any room full of people.

• Price and value are a factor for the buyers – customers want both superior artistry and high quality from their timepieces, and Xeric’s lower-than-luxury price-point was an ideal fit for this market. This notion of affordable luxury has been a driving factor for them in all of their subsequent watch designs.

• Design and aesthetic must not be lost in the presentation – Such a large part of the appeal of their watches, Xeric’s in-house photographers and videographers stopped at nothing when it came to bringing their designs to life in every intricate detail. Not only are the watches themselves beautiful; but the presentation of their watches online is near perfection.

The team also learned more about the audience they’d resonated with:

• Approximately 60% of their backers were from outside the US, indicating a wide international audience.

• The cities of Singapore, Tokyo, London, Melbourne, Sydney, Los Angeles, New York, San Francisco, Brisbane, and Toronto were their top markets.

• Roughly two-thirds of their backers had already backed another Kickstarter campaign before backing Xeric’s.

Continued Success Through Kickstarter

Having already traveled the world to collect unique watches for their retail collection, the international nature of their consumer base was no great surprise. But that two-thirds of their support was from returning Kickstarter backers seemed to lend credence to what they had suspected all along — that Kickstarter represents entire groups of consumers who want something they simply cannot find anywhere else.

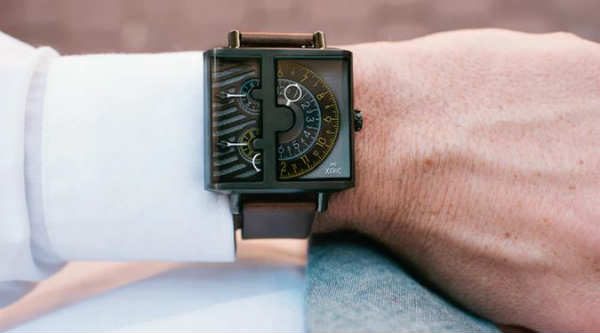
It’s something they feel so strongly about that the team is already looking forward to continuing this relationship with the Kickstarter audience through establishing a regular release of new designs – as two campaigns are being launched in 2017. Q1 saw the launch of the Evergraph Automatic Watch — A unique mechanical automatic timepiece with a design blending classic and modern. Inspired by the past, designed for the future. For Q2, Xeric launched it’s fifth and most current Kickstarted campaign, One-Handed RQ & SQ Watch Collections. Complete with two different case shapes (round or square) and multiple strap options, there are over 30 different options to choose from giving the customers the one thing they care about the most – personalization.

Xeric have become the authority in using the response from crowdfunding to drive the products that they create and introduce to the market, and their continued success coupled with innovative new designs (and campaigns) prove that crowdfunded watches are here to stay.

This post is sponsored by Watches.com

Filed in categories: News

Tagged: , ,

#ad Xeric’s Fifth Kickstarter Proves Crowdfunded Watches Are Here to Stay originally appeared on on June 22, 2017 at 9:42 am.

Note: If you are subscribed to this feed through FeedBurner, please switch to our native feed URL http://the-gadgeteer.com/feed/ in order to ensure continuous delivery.
Logitech Spotlight Wireless Presenter review


Throughout most of recorded history, a pointed staff has been the preferred method of directing an audience’s attention towards an item displayed during a presentation. A significant advancement came in the 1980’s with the advent of the laser pointer, which allowed presenters to identify specific items on large screens from great distances.  These days, in large venues it isn’t uncommon for the presentation to be displayed on multiple screens. Furthermore, the presentation may be simulcast to remote locations. In these situations a software pointer is needed; a means to control that software pointer is the most pressing need of the modern presenter. The Logitech Spotlight Wireless Presenter is a remote control which allows control of the presentation and can remotely move the mouse pointer by sensing movement of the remote. Let’s see how it works!

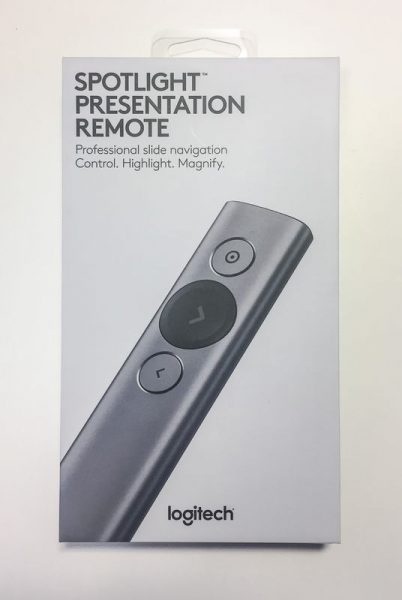
Th Logitech Spotlight Wireless Presenter comes in an attractive gray hard cardboard box, suitable for presentation as a gift to your most esteemed lecturer.

The back of the box summarizes some of the key features of the device. Some of the features include: the capability of highlighting and magnifying circular regions on the screen, using the remote to control the position of the cursor, receiving a vibration alert 5 minutes before the end of the presentation, quickly charging the remote one minute for three hours of use, and using the remote up to 100 feet from the receiving computer.

Opening the box is easy, but the process of unboxing the presenter is designed to be a noteworthy experience. Removing the top cover reveals the remote secured in gray foam with an accented green circle around the next (slide advance) button. The base of the remote is shrouded by a piece of cardboard that requests you download the driver software for the remote.  We’ll review the functionality of the software later in the review.

The remote itself is a very sleek and minimalist design of an aluminum wand 5.1 inches long and 1.1 inches wide. The cross section is somewhat like that of a pharmaceutical tablet. It is finished in an anodized coating of either gold, slate, or silver. The slate model (which is the color of the model The Gadgeteer is reviewing) has dark gray contrasting colors for the next button, USB receiver, battery\antenna cover, and end pieces. The other two color options have white contrasting colors. The top of the remote has three buttons: a large scalloped next button in the contrasting color is set between the pointer button above and back button below. The pointer and back buttons are circular and set slightly below the surface of the remote so that their location is easily determined by feel alone. Holding the remote is very natural. There is no sense of worry about if the right button is being pressed. It feels natural and substantial at the same time.

The front of the remote has a dull plastic cap that hides a white LED underneath. The LED pulses while charging and is illuminated continuously when charging is complete. The LED is also briefly illuminated when the unit is turned on.

The bottom of the remote has a patch of material that is roughly 1″ wide and 3″ long that covers the battery and antenna. This remote includes a rechargeable battery even though most other presentation remotes are powered by replaceable batteries. The theory is that the replaceable batteries are easily obtained and replaced more quickly than the time it takes to find the right cable and sufficiently charge a rechargeable battery. The Spotlight gets around this in two ways: The recharging cable is (almost) a standard type-C device and the charge time for a 3-hour presentation is about 1 minute.

I qualify the type-C cable because the design of any type-C cable that is used for charging the remote must fit within the narrow channel that surrounds the female socket.

I only have one other type-C cable and this just barely fits. I imagine that some USB cables may be thicker around the plug and some may be thinner, as is the case with the many mini and micro USB cables I have.

When not in use, the USB receiver that comes with the remote can fit into the base of the presenter. The receiver is held in place by two plastic tabs that grab the receiver by the indentations on either side.

Back to unboxing; removing the remote reveals a pull tab which allows you to access the charging cable stored under the top layer of packaging.

The charging cable is made from a soft-touch plastic and is almost 5 1/2″ long tip to tip. It is for the most part a conventional type-A to type-C device except that it has an extra-long body on the type-C side. Even though the shroud around the type-C side is longer, it is still only flush when inserted into the remote, which means that one must pull the plug in order to remove the cable. It would be better to make the shroud even longer or come up with some other creative way of charging the presenter.

Under the cable is another compartment that holds a storage pouch the pouch is made from imitation leather and has an imitation felt inside

The storage pouch is a bit too small to hold the charging cable as well as the presenter. But, if you wrap the charging cable around the presenter it fits nicely.

The box also has directions on how to remove the battery from the electronics at the units end of life; the backing is pried off with a flat screwdriver and the battery is removed from within.

Now that you are thoroughly familiar with the hardware it is time to use this on a presentation. The software is downloaded from the Logitech site and installed on your computer.  However, the driver software isn’t entirely necessary. Without the software the remote functions as a mouse and allows forward or reverse slide progression by pressing the next or back buttons (emulating the left and right arrow keys), movement of the cursor by holding the pointer button, and emulating the left mouse button click by clicking the pointer button. If you do decide to install the software you get a host of other features. Either way, it would be great if the USB dongle which fits in the base of the unit were designed as a USB hub, so that it could function both as a USB receiver for the remote and as a USB thumb-drive for a presentation or for storing the actual drivers.

The software is signed by Logitech so there shouldn’t be any issues with installing this on most systems. After installation the software walks you through installing the charging cable, and while the computer counts down one minute of charging, which should provide 3 hours of presenting, the installation program describes the features of the long life battery (how a full charge lasts 3 months), the fast charging, and the intelligent power management (it turns off after 5 minutes of idleness). After the charging is complete the installation walks you through installing the USB receiver or connecting with Bluetooth.

After the device is connected the installation runs a feature tour which highlights some of the most basic features, such as advancing and reviewing slides and using the pointer to highlight and select a button on the screen.

The main window of the installed software has a Windows mobile style to it. the buttons are big so that it is easy to manipulate with the pointer or finger. The main screen shows what the timer is set for, what each of the buttons does if they are long-pressed, the battery state and an icon for settings.

I have the pointer set up for multiple states so that I can switch from highlight to magnify and then to circle by double clicking the top button. This sub-menu also allows adjustment of the side of the items. The size is independently adjustable for each mode, but the color is only displayed in white. The cursor icon to the right of the size slider can be hit to enable or disable the cursor display, and this is also interdependently adjustable for each mode.

The hold next and hold back sub-menus are very similar and determine what to do when the button is long pressed. For the hold back button, I have determined that it should emulate shift-F10, which is the context menu, or right button menu, in Windows. Mac users need to enable universal access and then a right mouse click then can be achieved by Ctrl + 5 on a keyboard with a num pad or Fn + Ctrl + I  on a laptop. These features enable the pointer to act almost like a gyro-mouse, although the hold to move, click to left click, hold another button to right click is a bit cumbersome, it does give a significant amount of control.

The settings screen has 4 tabs for Pointer, Alert, Connectivity and About. The pointer menu adjusts the delay of the pointer movement and the auto center feature. I think that the auto center feature is indispensable so that you don’t have to go searching for the pointer after a brief pause. I have turned the pointer speed all of the way up since a delay in the speed feels like lag in the transmission. Slowing the speed down does appear to make the movement of the pointer more fluid in the screen and a slower pointer may be easier to follow, so this really should be set to your individual presentation style.

The alert settings allow you to set the speed of the vibration and enables or disables the time alert and battery alert. I’m not sure if the battery alert is different than the time alert.

The connectivity screen provides a Bluetooth or receiver setup for connecting the presenter to the computer. If the Bluetooth method is used the computer instructs you to press the pointer and back buttons simultaneously to pair the pointer to the Bluetooth receiver. The about screen provides permission settings for updates, auto start, and anonymous data collection.

To give an impression of how this actually works I made a quick presentation video. I wanted to show how the presenter worked in comparison to a laser pointer so i shot this with a video camera against a screen.

In conclusion, this is a very powerful, very sleek and sturdy device.  As you may imagine, all of these features come at a premium price. The presenter retails for $129.99, which is about the most expensive presenter you can buy. Gyro mice generally cost a bit less than this and will not have the magnification or highlighting capability out-of-the-box.

The software opens up a host of possibilities for presentations as I have briefly demonstrated in the video above. By enabling magnification of the presentation materials the software improves the information density of the presentation – a real game changer for how presentations are prepared and delivered. I recommend this for anyone who is a frequent presenter.

Source: The sample for this review was provided by Logitech. Please visit their site for more info and Amazon to order.


Product Information

Price: $129.99
Manufacturer: Logitech
Retailer: Amazon
Requirements:
  • Windows® 10 or later,
  • Windows® 8
  • Mac OS X 10.10 or later
  • Chrome OS™
  • Android 5.0 or later
  • Logitech Proprietary Receiver:
  • Windows 10 or later,
  • Windows 8,
  • Windows® RT,
  • Windows® 7
  • Mac OS X 10.05 or later
  • Chrome OS
  • Linux®
Pros:
  • Intuitive usehiglight
  • Stylish
  • Robust
  • Unique software
Cons:
  • Software must be installed (downloaded on presentation computer or carried separately)
  • Cannot configure highlight color
  • Cannot adjust 5:00 warning timer
  • Cannot change size of time display on window
  • Expensive

Filed in categories: Reviews

Tagged:

Logitech Spotlight Wireless Presenter review originally appeared on on June 22, 2017 at 8:10 am.

Note: If you are subscribed to this feed through FeedBurner, please switch to our native feed URL http://the-gadgeteer.com/feed/ in order to ensure continuous delivery.