We all love our gadget and gear hauling bags, but sometimes we don’t want or need to lug around that full-sized backpack or messenger bag. I’ve seen several smaller alternative options pop up over the years, but many of them either looked like a strange purse, a European man-bag, or just plain weird. The Mission Workshop Axis Modular Waist Pack is none of those things. In fact, I very quickly got past the fact that the Axis resembles a “fanny pack.” The Axis is low-profile in both design and styling, build from high-quality, durable materials and it is compatible with Mission Workshop’s modular Arkiv® system. Let’s check it out! Gadget on!
What is it?
The Mission Workshop Axis is a lightweight Arkiv-compatible waist pack built with rugged materials and a weatherproof design that is intended to carry essential gear close to the body.
Hardware specs
- Model number = HT500
- Color options = Black (reviewed here), Gray, Black Camo
- Materials =
- High Tenacity 500D nylon
- TPU coated nylon liner
- YKK urethane coated zipper
- Laser cut back panel
- Dimensions = Height: 5” x Width: 10.25” x Depth: 3.4”
- Total maximum circumference = 50″
- Internal volume = 2.5L
- Weight = 8 ounces
- Country of manufacture = Built by hand in small batches in the USA
- Lifetime guarantee
What’s in the package?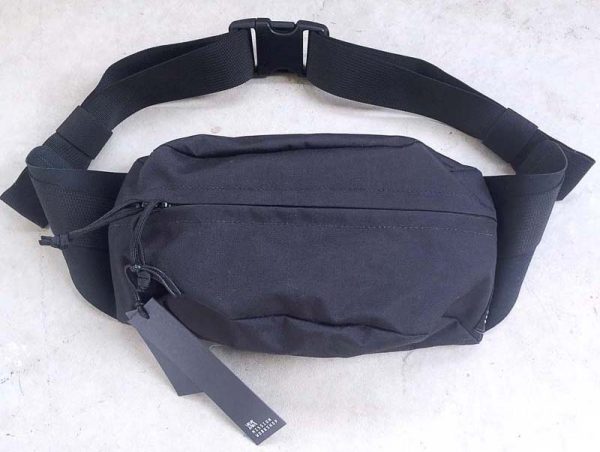
- Mission Workshop Axis Modular Waist Pack
Design and features
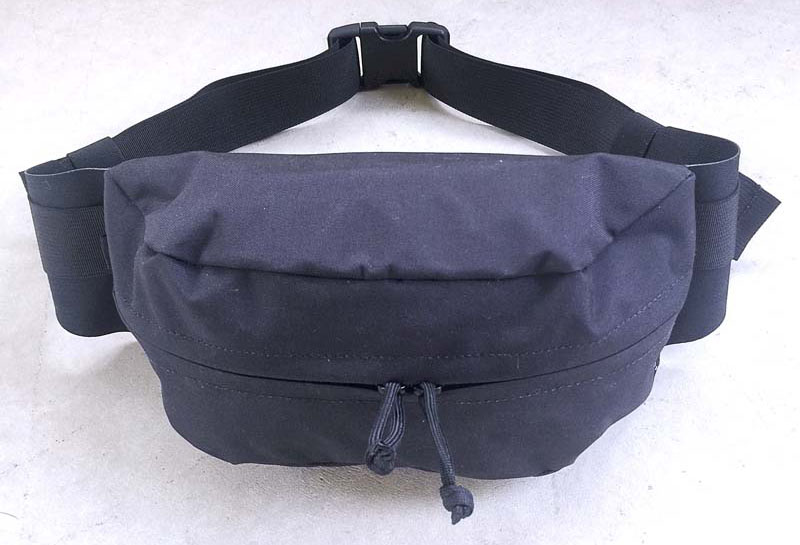
OK, let’s get this out of way early: Yes, the Mission Workshop Axis Modular Waist Pack does resemble the “fanny pack” that was so very popular in my formative years, the Decade of Excess, the 1980s. But I was totally willing to overlook that for a few reasons. First, I’ve never owned or tried anything from Mission Workshop, but their products look very much my style, very functional, and I’ve read that their products are extremely well-made and very durable. Second, the online photos of the Axis made it look a lot more like a tactical/”tacti-cool” pouch than one of the gaudy, dorky fanny packs from the 80s. And once I slid the Axis from its shipping pouch, I knew that I had made a good decision to volunteer to try it out. Immediately the Axis felt like it had been built from super high-quality materials and with the highest attention to detail and quality in the build process. The main material and the one used to build all of the exterior parts of the Axis is High Tenacity 500D nylon. This is a great material for a small pack like this because it is very strong yet flexible and lightweight, quite abrasion resistant, has a fairly high degree of moisture resistance and is weave is relatively tight, so it will not tend to abrade your clothing light higher-denier nylon fabrics.

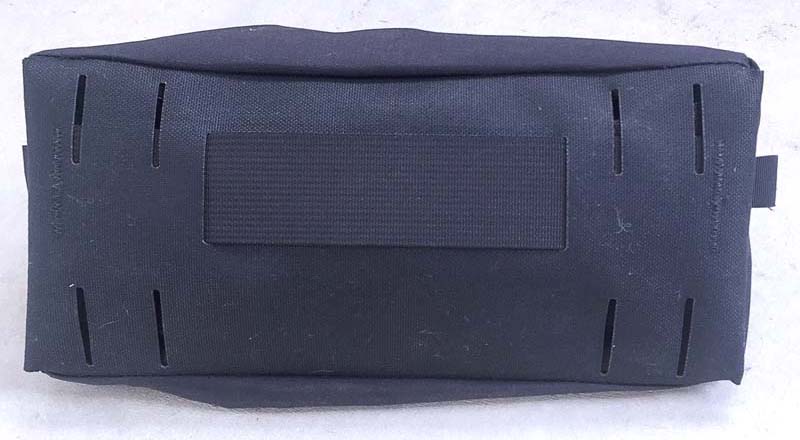
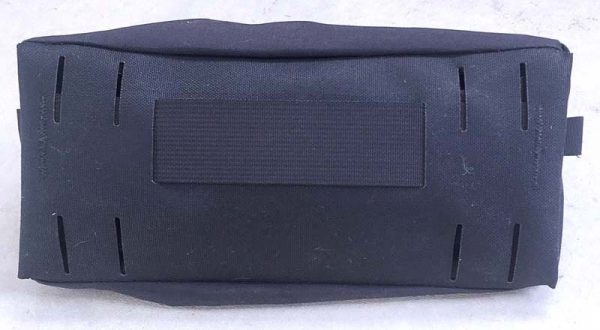
I’m going to start from the rear of the Axis first, beginning with the photo above. The first of many features worth pointing out is something you can’t see from the outside but adds greatly to the overall product durability and performance, and that is a laser-cut panel made of semi-rigid plastic that is enclosed in the back of the Axis. This panel serves a few functions. First, it gives the Axis a bit of rigidity, preventing it from being completely floppy and unstructured. Second, this panel helps when wearing the Axis, because it provides a flat, solid shape up against your body (it will curve slightly to help confirm, however, which is also helpful for comfort).
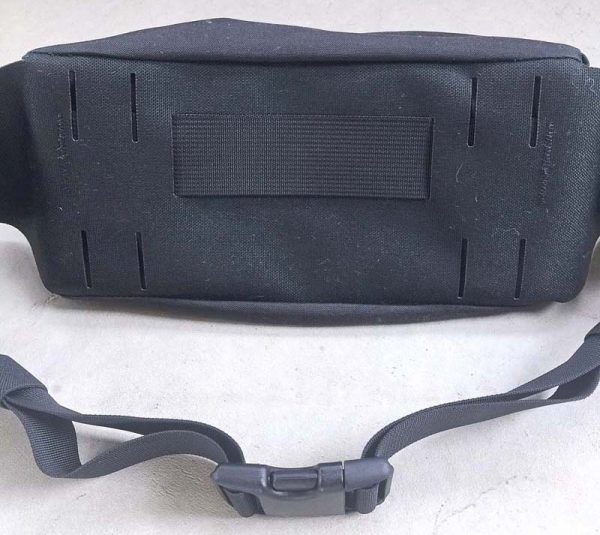
The back of the Axis also has a short length of webbing that at first I thought was some type of handle, but the placement seemed odd to me. Then I realized that this strip of webbing is actually a holder for a mini bike U-lock. Just slip the mini U-lock down through the webbing and it will be held securely while you ride, then pull it back out when you need to lock up your bike. My apologies that I don’t own a mini U-lock or I’d show a pic to demonstrate this functionality.
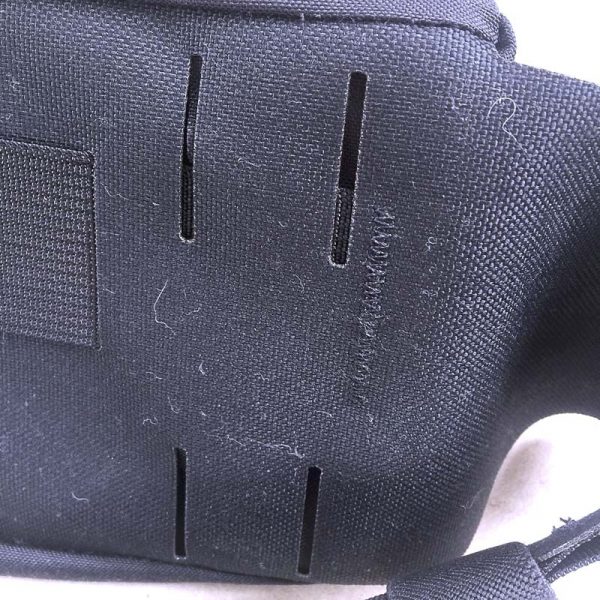 The final feature on the back of the Axis is a series of four pairs of laser-cut slots that are specifically designed and built to allow the Axis to be compatible with Mission Workshop’s Arkiv modular system. The Arkiv system utilizes webbing straps and small metal clips, which are available separately in a set of 4 for $10, to attach all sorts of modular accessories to the Arkiv line of backpacks. Alas, as this is my first Mission Workshop item, I do not have any of their Arkiv-compatible products to evaluate with the Axis, but the principle and method they employ for achieving modularity does seem very sound and functional.
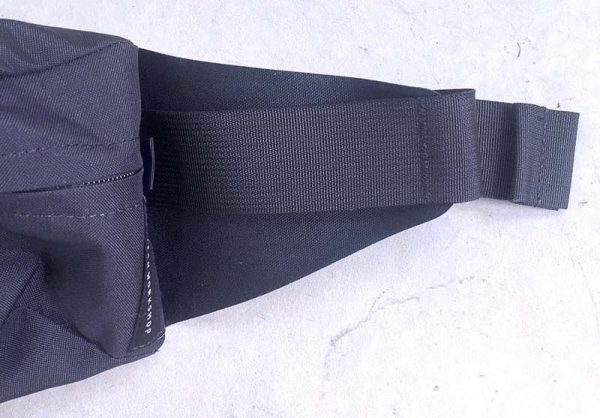
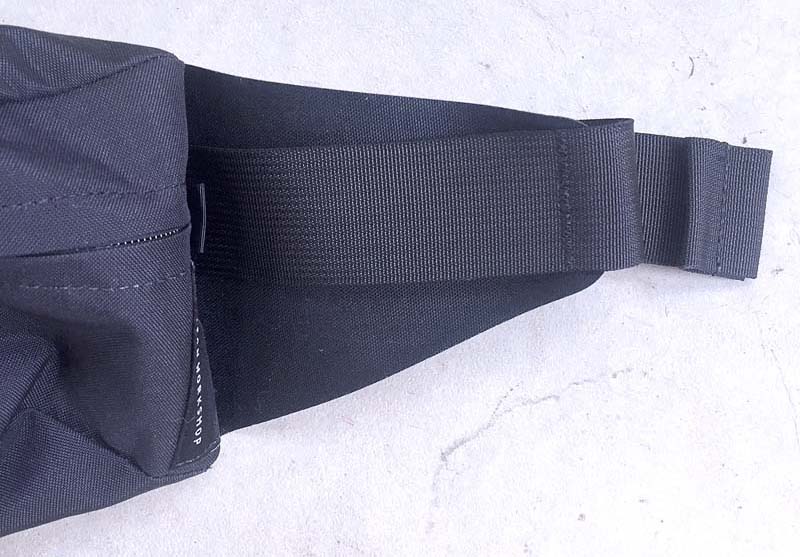
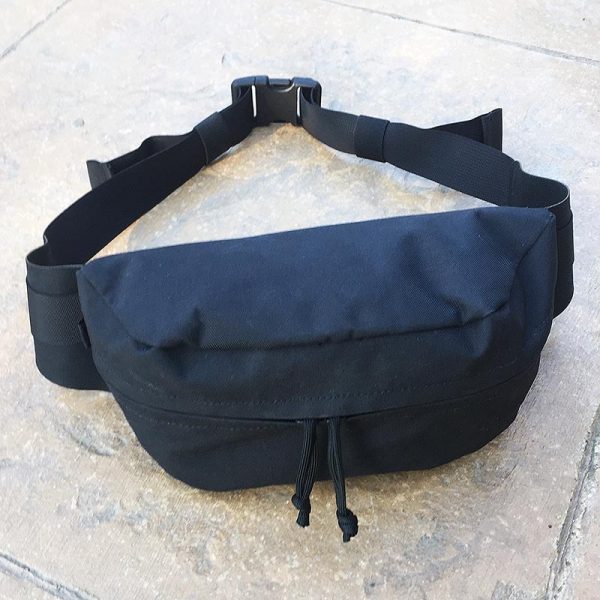
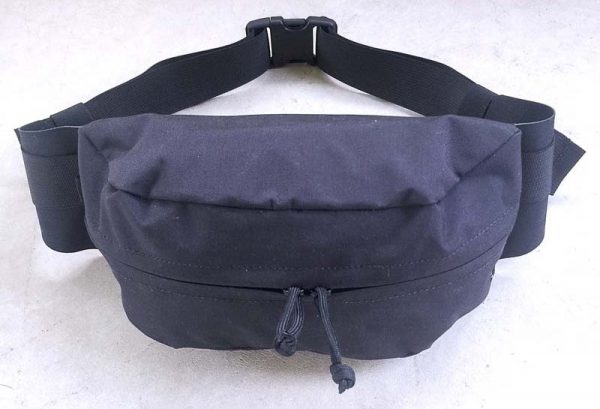
Working our way towards the front of the Axis, let’s check out the belt itself. The belt is actually a strip of heavy-duty, laser-cut nylon webbing material. Additionally, on either side of the Axis are two triangular “wings” (seen above) under the belt that help give it extra support when the Axis is in contact with your body, and the belt is stitched to the wings in such a way that a length of the belt (seen above) can be used as an attachment point for other items using carabiners or other, similar types of fasteners.
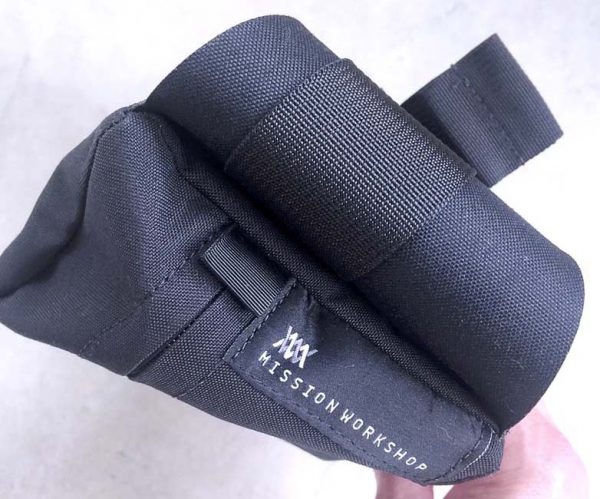
I just wanted to briefly touch on the Mission Workshop external branding, which is a subdued label stitched to the side of the Axis, as seen in the image above. I really like that Mission Workshop does not feel the need to include overly visible (i.e. obnoxious large or eye-catching) branding on the Axis. This very much add to the clean and low-profile look of the Axis, which I think is one of its selling points. Good job on this.
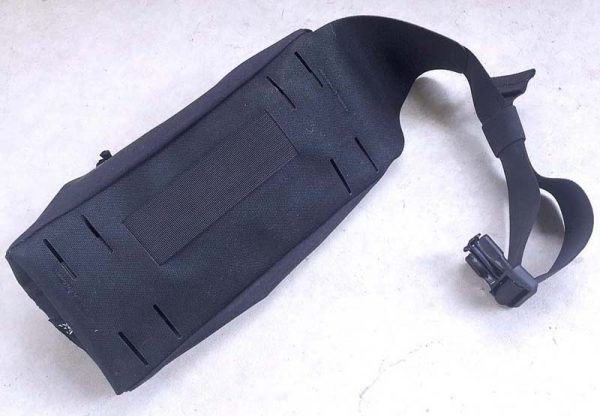
Now back to the belt. The belt is stitched to the Axis, so it can’t be separated from the main Axis body. However, what Mission Workshop has done is, I think, actually more clever and useful than simply a removable belt. As shown above and below, the belt ends can be slid back inside the main body of the Axis, effectively hiding them and getting them out of the way. This does two things: prevents you from ever losing the belt, and makes it easier when using the Axis with the modular Arkiv system, because the belt would typically not be needed when attaching the Axis to an Arkiv-compatible pack. Nice feature!

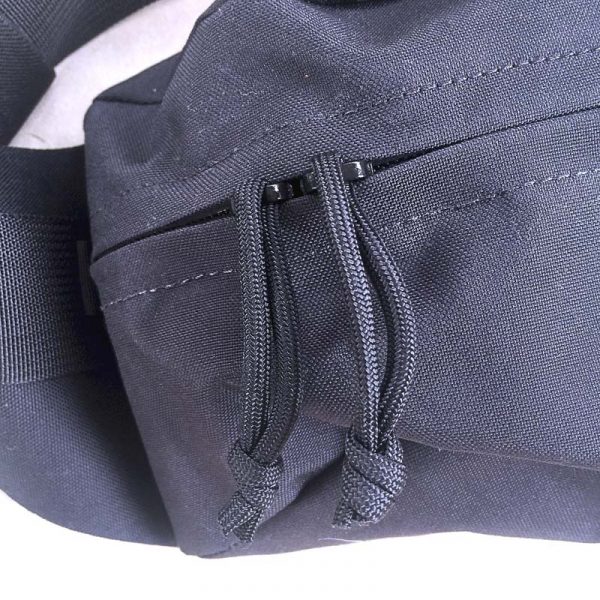 Next, let’s start moving toward the front and inside features of the Axis. Its compartment is accessed via a YKK urethane coated zipper with a slim top and bottom flaps “kissing flaps” that have been perfectly cut and sewn to join together, helping to prevent moisture ingress into the compartment. The zipper pulls on the Axis are made from tied loops of 550 Paracord material. I think this is a great feature because 550 Paracord pulls are ninja silent, unlikely to wear out, and can be easily swapped out for a multitude of 550 Paracord colors if they do happen to actually wear out, or if you would like to do a bit of customization to your Axis. The knots also make them easier to grip than a standard zipper pull.
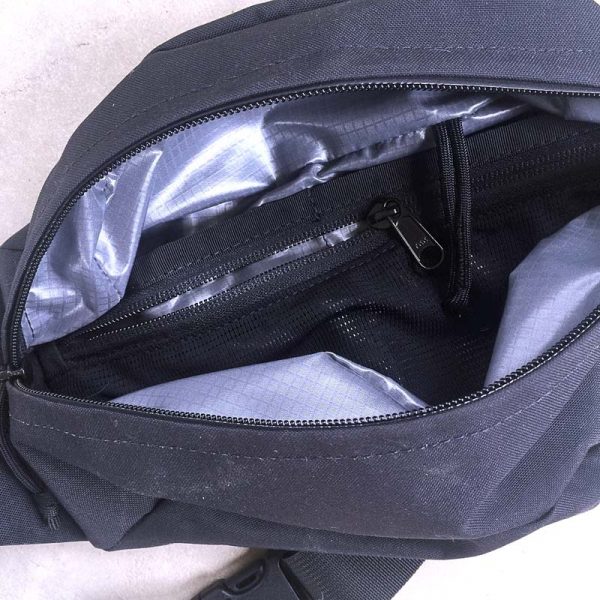
Opening the Axis reveals an interesting lining and some organizer features. Let’s start with the lining. While the front of the Axis, as detailed above, is made from High Tenacity 500D nylon material, which is fairly water-resistant itself, the Axis also has a “floating liner” made from TPU coated nylon, which is the gray, grid-pattern material seen in the photos above and below. This floating liner is intended to provide an addition layer and higher level of moisture and water protection for any sensitive items you may want to carry inside the Axis, like your phone, earbuds or a camera. Additionally, there is an organizer along the flat back of the compartment that consists of a long mesh zipper pocket plus two pockets behind the mesh zipper pocket, all of which are very handy for stowing smallish items. And, with a 2.5L capacity, the main compartment will hold quite a few larger items as well.
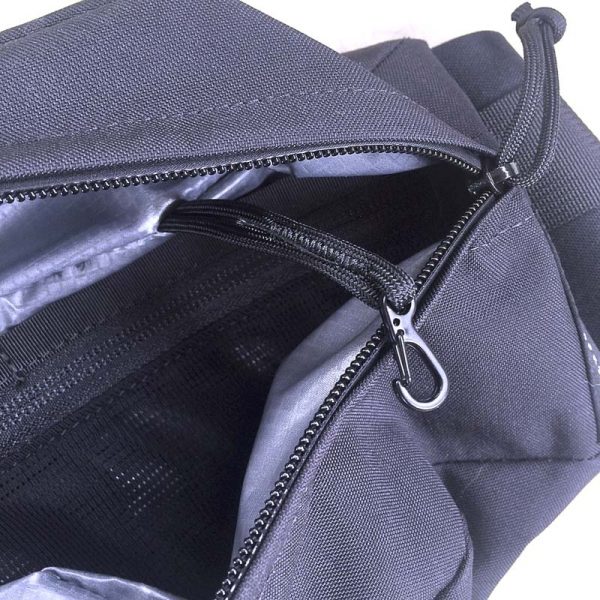
The final organizational feature is a spring hook that is attached to the inside of the Axis by a loop of 550 Paracord. This spring hook is not a cheap, fragile plastic hook, no sir. It is a metal hook with a black finish. This could be used to secure your keys or other similar items.
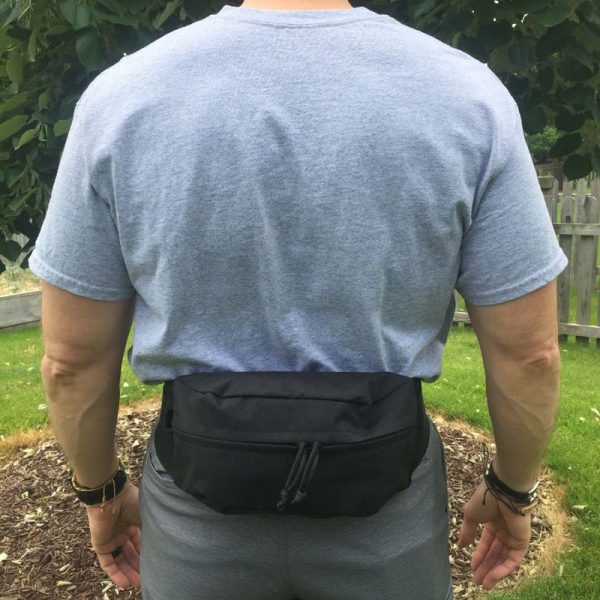
Next let’s take a look at various carry options for the Axis, starting with the most obvious, wearing it in the lower back/lumbar region (yes, the classic “fanny pack” position). I’ll be honest, once I cinched it down, it was very comfortable, more than I even thought it would be, and its easy to spin around to the front to retrieve items, then spin it back. It only weighs 8 oz while empty, which helps. Plus, I think it actually looks pretty cool. The materials and design certainly contribute to this.
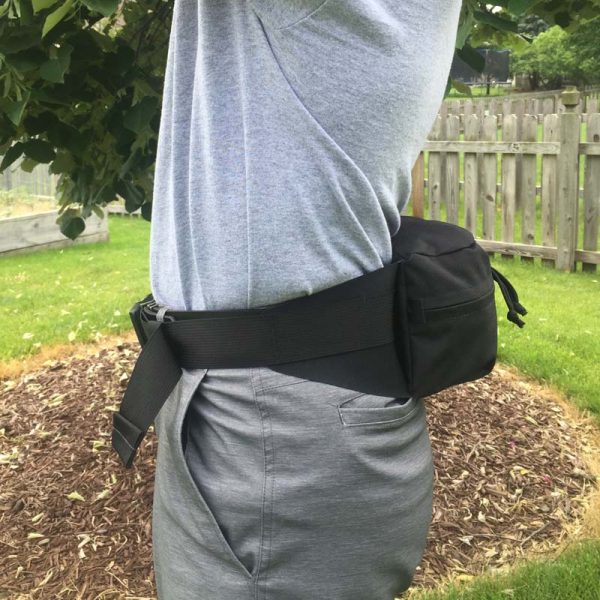
I think the plastic back plate combined with the wide belt strap and the “wings” all contribute to the Axis feeling quite comfortable when worn in this position. I barely noticed that I had it on.

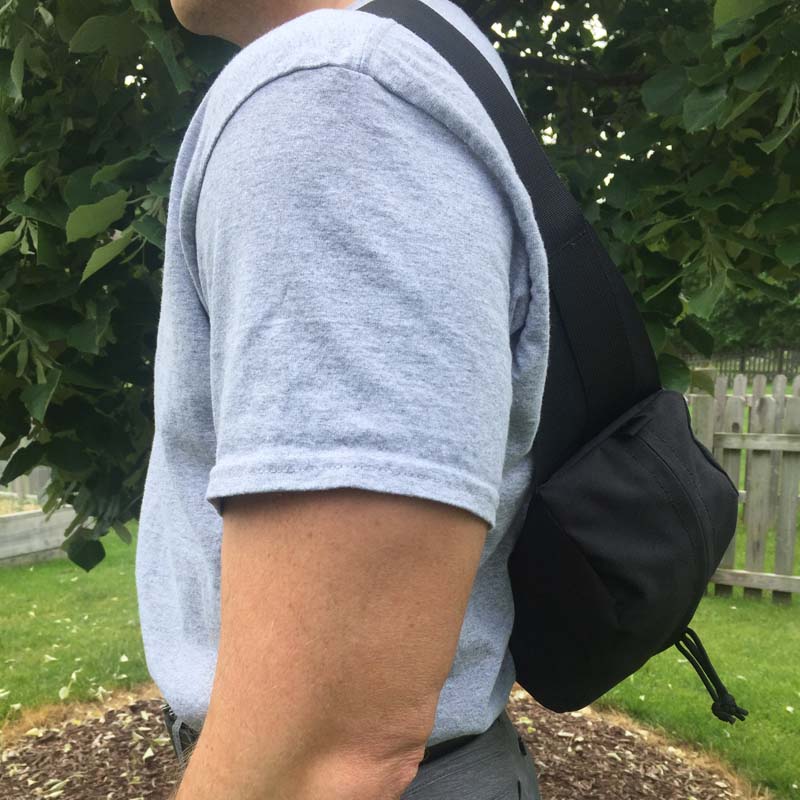
Next, I wanted to try the sling bag style carry position, with the Axis slung over my left shoulder. Looking at these photos as I type this, I think I probably could have tightened the Axis’ belt strap a bit, because it seems to be hanging a bit low on my back, but honestly it felt fine like this to me. 
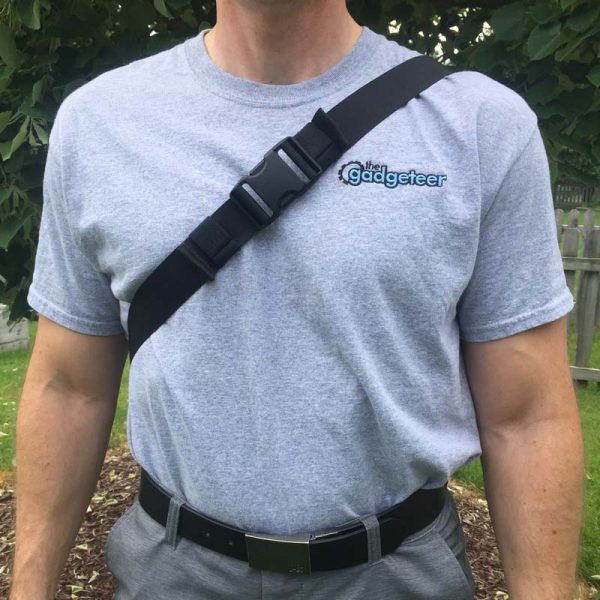
With the Axis in this sling bag style carry position, it made it easy to tighten or loosen the belt strap so that I could adjust how high or low the Axis would sit.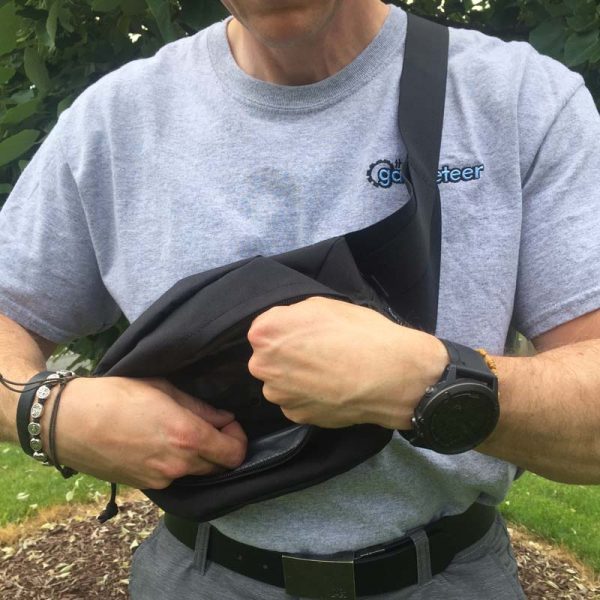
Additionally, this sling bag carry style allowed me quick access to the Axis’ contents; all I had to do was rotate it around up under my right arm and the Axis was right in front of my chest in just the right position to get inside and retrieve or store an item, which was convenient.
What I like
- Well-designed, sturdy build, smart + durable
- Weatherproof materials keep contents dry
- Stowable belt straps
- Compatible with Mission Workshop’s modular Arkiv system
What needs to be improved
- Pricey. Way pricey. While I fully understand and appreciate that Mission Workshop’s products are made in small batch size in the USA, $120 is still pretty expensive for a bag of this size and type. Though it does have a lifetime guarantee.
Final thoughts
The Mission Workshop Axis Modular Waist Pack defies the socially-stigmatized reputation of its 1980s “fanny pack” ancestor. It is a versatile, sleek, low-profile, well-designed and even more well-built mini waist pack that is actually quite comfortable to wear. The only drawback I see is that it is a bit pricey for what it is, but I can somewhat understand its pricing considering its quality of materials and construction, its USA manufacturing and its lifetime guarantee. For further evaluation, I plan to bring the Axis on a 2-week family vacation to Europe in a few weeks and I will report my findings here.
Price: $120.00
Where to buy: Mission Workshop
Source: The product sample for this review was provided by Mission Workshop.
Filed in categories: Reviews
Tagged: Bags
Mission Workshop Axis Modular Waist Pack review originally appeared on The Gadgeteer on June 14, 2018 at 11:00 am.
Note: If you are subscribed to this feed through FeedBurner, please switch to our native feed URL http://the-gadgeteer.com/feed/ in order to ensure continuous delivery.

 Inside of the Scosche box, you’ll find: