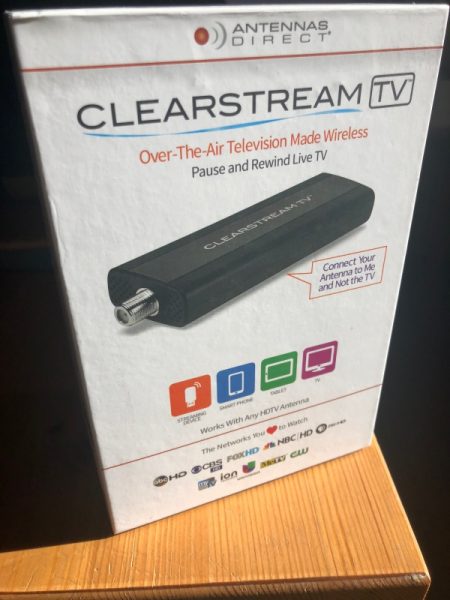
Light your room with an eco-friendly piece of art

If you purchase these E.P. Eco-Friendly LED light bulbs, you’ll need a lamp that doesn’t have a shade.  These bulbs are little works of art, and they are too pretty to be covered up.  They are all handmade from a resin to which some colorant is added to give the bulbs a look inspired by a Jackson Pollock painting.  The resin is break-resistant, making these bulbs safer than standard glass bulbs.

The E.P. Eco-Friendly bulbs are “green” in many ways:

  • Made from green, recyclable materials
  • LED bulb saves up to 60% more energy than regular lights
  • Won’t get hot even after hours of producing rich, radiant light, thus keeping the room cooler
  • Uses only 3W of power

They are good for the Earth, and they’re good for your wallet, too.  They are rated for 100,000+ hours, saving on replacement costs.  The screw bases are designed to fit standard E27~E26 sockets.  And they are backed with a 1-year warranty.

There are six styles of these bulbs, but each bulb will be unique.  The actual color and curves will vary because of the handmade nature of the bulbs.  The E.P. Eco-Friendly LED light bulbs are normally $24.95, but they are $19.95 at the time of writing.  Purchase at the Popular Science Shop.  You can find a larger variety of the E.P. bulbs, plus a variety of light fixtures designed for these bulbs, at the E.P. DesignLab website.

The post Light your room with an eco-friendly piece of art appeared first on The Gadgeteer.

Filed in categories: News

Tagged: ,

Light your room with an eco-friendly piece of art originally appeared on The Gadgeteer on June 25, 2018 at 10:00 am.

Note: If you are subscribed to this feed through FeedBurner, please switch to our native feed URL http://the-gadgeteer.com/feed/ in order to ensure continuous delivery.

Abox 4 Android TV 4K Streaming Box review

These days, many people are looking to find alternatives to cable services and cable boxes. This is primarily so because of the continuously rising costs of cable TV and the way their “packages” provide less versatility. In response to the cable companies, numerous devices have “popped up” on the market and they claim to provide alternative options at a lower cost. Let’s take a look at one:

What is it?

The Abox 4 Android TV box is an Android OS based streaming device that provides a way to stream TV programming via various services, as well as the ability to stream from other sources on the same network.

What’s in the box


1 x Abox 4 Android TV Box
1 x AC Adapter
1 x HDMI Cable
1 x Remote Control
1 x Instruction Booklet
1 x Micro Fiber Cleaning Cloth

Design and features

Specifications

Operating system: Android 7.1.2
CPU: Quad Core Cortex A53 2.0GHz 64bit
GPU: Penta-Core Mali-450MP GPU at 750 MHz
ROM: 2 GB DDR3
RAM: 16GB EMMC FLASH
Bluetooth: V4.0
3D: Hardware 3D graphics acceleration
HDD file system FAT16 / FAT32 / NTFS
Supported subtitles: SRT / SMI / SUB / SSA / IDX + USB
High-definition video output: 4k * 2k
LAN: Ethernet: 10 / 100M, standard RJ-45
Wireless: Supports 802.11 a / b / g / n at 2.4 GHz
Supported Airplay / DLNA / Miracast & H.265
Supported decoder format: HDMPEG1 / 2/4, H.265,4K-HD, HD AVC / VC-1, RM / RMVB, XVID / DIVX3 / 4/5/6, REALVIDEO8 / 9/10
Supported media format: AVI / RM / RMVB / TS / VOB / MKV / MOV / ISO / WMV / ASF / FLV / DAT / MPG / MPEG
Supported music format: MP3 / WMA / AAC / WAV / OGG / AC3 / DDP / TrueHD / HD / FLAC / APE
Supported Photo Format: HD JPEG / BMP / GIF / PNG / TIFF
Supported subtitles: SRT / SMI / SUB / SSA / IDX + USB
Supported language: English / French / German / Spanish / Italian and more
Power supply: DC 5V 2A

The Abox 4 Android TV 4K Streaming Box is a streaming box that provides access to numerous streaming app including, Netflix, Hulu, Crackle, Amazon, and all apps in the Google Play Store. It also allows you to add almost any Android app via the standard .apk file. (Some Android apps added via their .apk files may not provide 100% compatibility). Once connected to your network, this device also acts as a single point of streaming for all of your shared media on your network including, pictures, movies, music, etc. The Abox is small and compact and has ports on 2 sides, a display on a 3rd side, and the brand name on top. On one side there are the following ports from left to right:
Audio out
Ethernet
AV port
HDMI
Audio out

On the 2nd side, there are 2 USB ports and one micro SD card port to add external storage devices

The remote control provides the standard functions of a media remote control, along with a microphone button that allows you speak commands, like “find the latest action movies” or just action movies”, or something more specific. There is also a button that toggles a “mouse” option on and off. With the mouse “on”, you can use the circular control to move the mouse. Other functions include volume, page up/down, power on/off, home, mute, return, etc.

On the front of the Abox, there is an LCD with a time display and the power on indicator along with the WiFi status symbol. On the top of the Abox is the brand name that lights up blue. The picture on the bottom right below shows the HDMI and power cables connected.


Operation

Once the Abox is plugged in, and the basic initial setup of language, time and network access are completed, the main screen is launched. On the main screen there is a preview of Google Play movies selection, a couple of rows showing some of the most/recently used apps, and the icons for the “settings” screen, the “Network setup” screen and the “app drawer”. The “settings” screen provides access to all settings as seen below. The “network” screen provides access to all of the network access related settings, and the “app drawer” screen shows all of the apps that you have downloaded and installed.
I have also included the screens that show the “on Demand” movie/series option, the File Explorer screen that allows you to access all of your shared network drives, and a screen that shows the tv guide from my cable TV app. Unfortunately, I could not get the remote to properly navigate the tv guide to make that app usable. While I think that I was doing everything correctly, I am not ruling out “lack of knowledge by user” 🙂
There is also a screen showing access to Spotify to listen to online streaming music.


Performance

I was able to watch movies from my USB drives and across my network via WiFi and wired ethernet with no issues, and they played flawlessly and in full HD. Installing apps from the Google Play store is very easy, and all of the apps that I tested worked well. The cable TV app that I referred to was one that I installed via an external website, and not from the Google Play Store apps offered from within the box. Once the Abox is on your network, you have the option of adding Android apps using a computer on the same network. It is important to note that I installed the cable tv app via a networked computer since it was not showing as an available app when I searched the Play Store from the Abox. This is likely why it is not fully compatible and functional.

I am not a gamer, so I cannot provide too much information on those types of apps. However, based on the overall performance of the Abox, I would suspect that they will work flawlessly as well. The Abox also offers the ability to connect a keyboard and mouse via Bluetooth, and they sell a combination keyboard via the Abox-tech website for $34.88.

What I like

I really like that the Abox provides access to all of my shared media on my home network and that even via WiFi it maintains a strong connection. I also like that I can add drives directly to it vis the built-i USB ports and that is with the apps from the Google Play Store, I can play all of my various types of files with ease.

What can be improved

My biggest issue with the Abox is the inability to navigate certain apps properly when using the remote. For example, I am used to watching my Cable TV programming using my Roku Streaming Box and the cable TV app. With the Roku remote, I can use the up/down functions of the remote to scroll through the TV guide. This function does not work with the Abox remote, and for me, that is a big deal.

Final thoughts

The Abox 4 Android TV 4K Streaming Box offers a lot of options and convenience for the price. The 2 USB jacks along with the card slot and network capabilities make it easy to integrate it into your network of devices. While I do find the Android OS and the remote response somewhat sluggish when compared to my IOS devices, I do enjoy using the Abox and for now, it has a permanent place among my media equipment.

Price: $79.99
Where to buy: Abox-tech website and Amazon.
Source: The sample for this review was provided by Abox.

The post Abox 4 Android TV 4K Streaming Box review appeared first on The Gadgeteer.

Filed in categories: Reviews

Tagged: ,

Abox 4 Android TV 4K Streaming Box review originally appeared on The Gadgeteer on June 25, 2018 at 9:00 am.

Note: If you are subscribed to this feed through FeedBurner, please switch to our native feed URL http://the-gadgeteer.com/feed/ in order to ensure continuous delivery.

This insulated bag doesn’t look like a lunchbox

Sometimes you need to carry along heat-sensitive items – like medicines, cosmetics, or even a snack for later.  You need to keep these items at a cool temperature, but there are times when you don’t want to look like you’re traveling with a lunchbox.  The Black Insulated Bag from Cool-It Caddy does the job of keeping things cool while looking more sophisticated.

The bag has a textured leather look, but it is made of polyurethane.  Coolant inside the bag’s structure replaces the need for those blue freezer packs.  You can keep the bag in the freezer so it’s ready when you need it.

The Cool-It Caddy insulated bag measures 8.5″ x 5.5″ x 3″, so it’s big enough to carry most anything you need.  It can keep contents cool for up to five hours.  If you are carrying medicine, you should monitor the temperature to be sure the meds aren’t getting too cold or too warm.  To ensure best performance, keep the bag out of direct sunlight, especially on really hot days.  The bag is water-resistant, so you won’t need to worry about soggy sandwiches from splashes while you’re lounging around the pool.

The Black Insulated Bag from Cool-It Caddy is $33.95 at The Grommet.

The post This insulated bag doesn’t look like a lunchbox appeared first on The Gadgeteer.

Filed in categories: News

Tagged: ,

This insulated bag doesn’t look like a lunchbox originally appeared on The Gadgeteer on June 25, 2018 at 8:00 am.

Note: If you are subscribed to this feed through FeedBurner, please switch to our native feed URL http://the-gadgeteer.com/feed/ in order to ensure continuous delivery.

Saddleback Leather adds a new color to their canvas bag lineup, and it’s a beauty!

I’ve been a big fan of the Saddleback Leather waxed canvas bags; the Front Pocket Gear Bag was one of my favorite products in 2017. So I’m very excited to see that Saddleback is expanding the product line with a new color option. The new Sand Canvas color is gorgeous. While keeping with the natural & rugged flavor of the product designs, it adds just a *hint* of a dressed-up look that may be more appealing to city dwellers and office crawlers over the original moss green color. It also contrasts beautifully with the dark brown leathers used in the bag.

Ain’t it pretty? I love my moss green bag, but I may need to add one of these to the collection as well (I’m eyeing up that Indiana Gear Bag). Check out the new waxed canvas bags from Saddleback Leather!

The post Saddleback Leather adds a new color to their canvas bag lineup, and it’s a beauty! appeared first on The Gadgeteer.

Filed in categories: News

Tagged:

Saddleback Leather adds a new color to their canvas bag lineup, and it’s a beauty! originally appeared on The Gadgeteer on June 24, 2018 at 11:00 am.

Note: If you are subscribed to this feed through FeedBurner, please switch to our native feed URL http://the-gadgeteer.com/feed/ in order to ensure continuous delivery.

ClearStream FLEX Wireless HD Antenna review

What is it?

The ClearStream FLEX Wireless HD Antenna is a unique cable-cutting solution in that it allows you to receive HD channels over-the-air (OTA) and then broadcast those channels over your WiFi network to be accessible for your other devices. Does it work? Let’s find out.

Hardware specs

Antenna range: 40 Miles
Antenna beam angle: 470 to 700MHz: 70º (horizontal plane) – wide reception pattern
Antenna gain: UHF-3.6 dBi | VHF-2.1 dBi
Antenna dimensions: 12 x 16 x 1/4” (antenna only)
Antenna weight: 6 oz
WiFi range: 20 feet
Requirements: a Wifi network, a compatible smartphone, tablet or streaming media player and the Clearstream TV app (free)
Compatibility: Android 4.2 or above, iOS 8.4 or above, tvOS 10.2 or above, Roku v7.50 b4099 or above, and Amazon Fire devices from 2013 or newer.

What’s in the box?

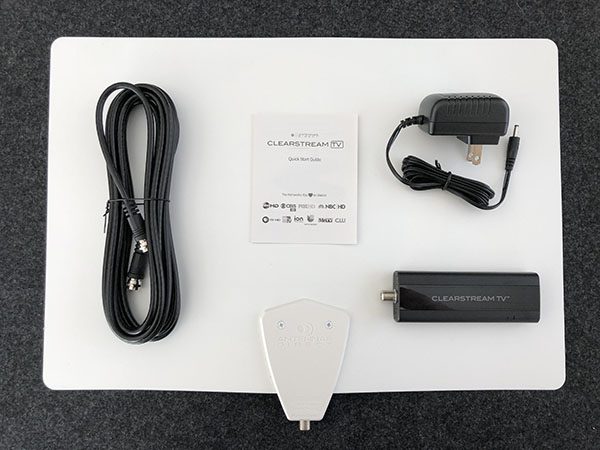
  • ClearStream FLEX TV Antenna with Sure Grip
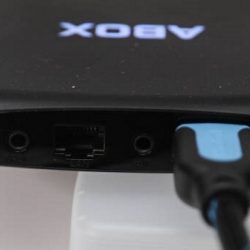
  • ClearStream TV WiFi Tuner Adapter
  • 12 ft. High-Performance Coaxial Cable
  • Power Adapter with 4 ft. Cord
  • Step-by-Step Instructions

Design and features

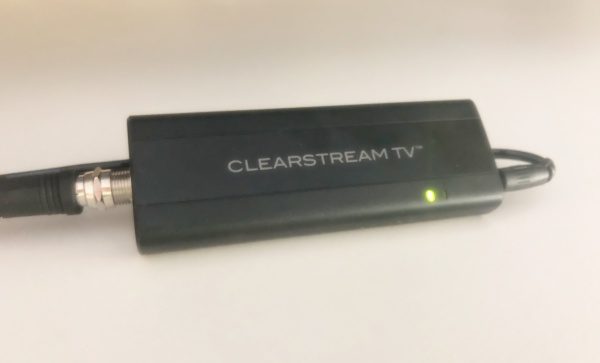
The design is really an exercise in blending in. The antenna is thin and rectangular with one side black and the other white. You can choose whichever side you’d prefer to see and it is paintable so you can really make it blend in. The rest of the elements are meant to not be noticed. The WiFi Tuner Adapter is minimally sized. The power cables can be tucked behind shelves and the coax painted if necessary or replaced with white coax if you have some on hand.

The part of the system you’ll interact with most is the mobile app or a on a streaming device like a Roku, so let’s dive into the setup.

Setup

Let’s set it up. Start by placing the antenna in the best possible location within 20 feet of your wifi router. I was lucky to have a window right next to mine facing the city. You’ll likely end up experimenting with placement so use some painters tape to hang it for now.

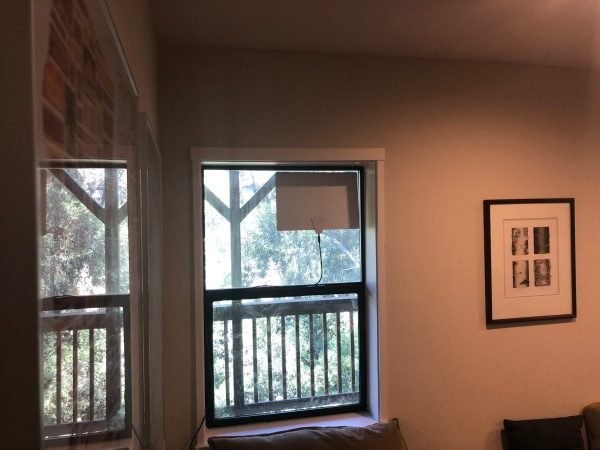
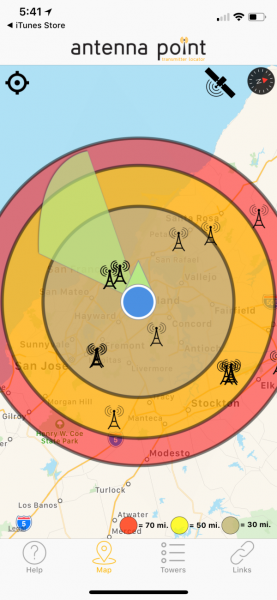
Antennas Direct has an app (and website) called Antenna Point which will help you with placement if you’re unsure. Antenna Point confirmed that I was within about 10º of optimum placement, so I went ahead and used the included clear double-sided tape to secure the antenna to the window. Here’s a screenshot of their app at work.

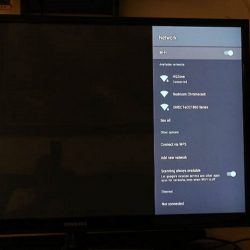
Next, connect the power adapter to an outlet and to your WiFi Tuner Adapter, then connect one end of the coaxial cable to your antenna and the other end to the tuner adapter. The light on the WiFi unit will blink blue and red during startup and then change to a green. That’s your signal to set up WiFi.

Download the ClearStream TV app on your phone or tablet and launch it. It will walk you through the setup which includes connecting to the WiFi broadcast by the Tuner where you can then enter your information to have it connect to your network. When complete, the tuner reboots and you’ll scan for channels. This step is as easy as hitting the scan button and then waiting for the process to finish which is between 15 and 30 minutes.

Performance

The setup was pretty smooth, so I was very interested to see what the rest of the experience had to offer on different devices.

The first thing I discovered is that the setup is only complete for the device I used in the first step. Both Roku and an iPad obviously required downloading their app but also needed to repeat the scan for channels step. Fortunately, that’s only a couple of clicks and another 15-30 minutes one time per device. They also mention that Roku is currently not able to do that initial setup of the WiFi unit, so that should be done with a mobile device.

On iPhone/iPad

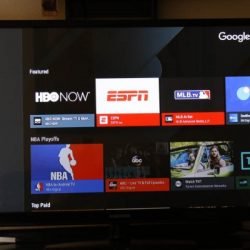
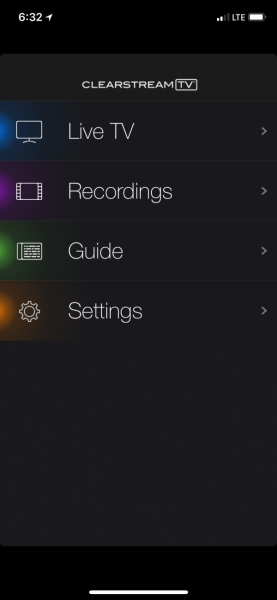
Launch the Clearstream app and you’re presented with four options. Live TV, Recordings, Guide, and Settings. The next few images will bounce back and forth between iPhone and iPad depending on where I took screenshots.

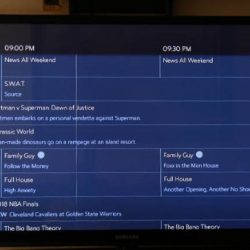
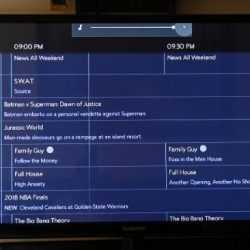
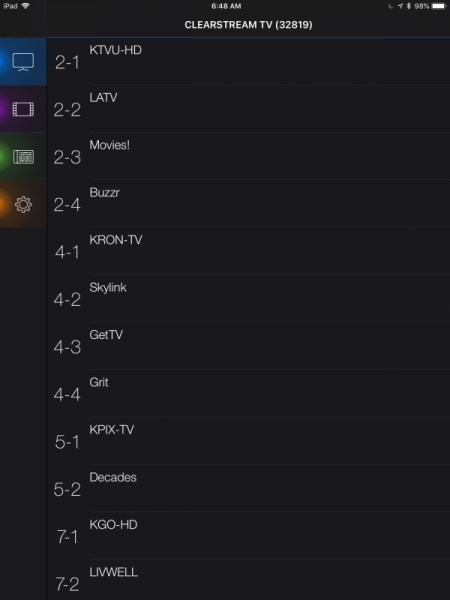
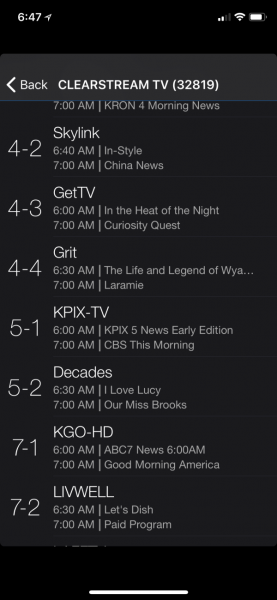
Live TV presents you with a list of channels which in my case are 2-1 (KTVU-HD), 2-2 (LATV) etc. as you can see in the screenshot.

On initial load, that’s all you’ll see, but after a bit, the program information starts to fill in.

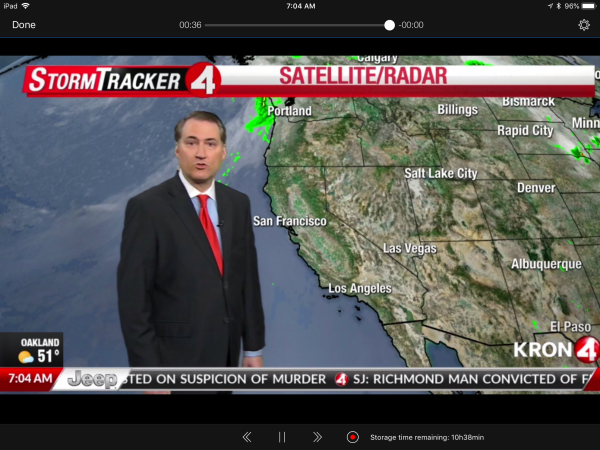
Choose a station and after a few seconds of buffering, the program starts to stream in a small section above the channels. Rotating the device to landscape automatically takes the program full screen. With one tap you have access to play/pause, FF/RW in about 10sec increments and a record button.

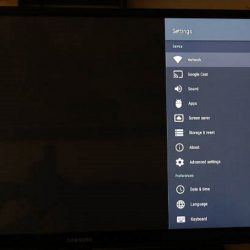
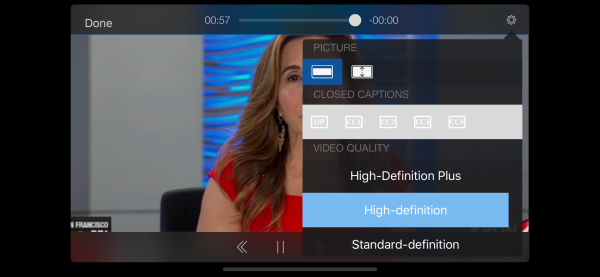
You also have a settings icon in the upper right which provides screen ratios, closed captioning and video quality settings which get applied across all channels.

Tapping the record button starts a recording as you might expect and you’ll see some small text next to the button with recording time remaining. Tapping again stops the recording. You’ll find anything you’ve recorded in the Recordings option from the main screen.

The Guide is surprisingly good although it takes a fair amount of time to update with information as it seems to do so in batches of a few channels at a time instead of grabbing the next two hours for all channels first which is what you’re more likely to want to see. The only other quirk is that once you find what you want to watch, you’ll need to note the channel and bounce back to Live TV in order to launch that channel.

I was able to send the video to Apple TV easily using the mirror function, but the app does not have a built-in cast function for either Apple or Chromecast.
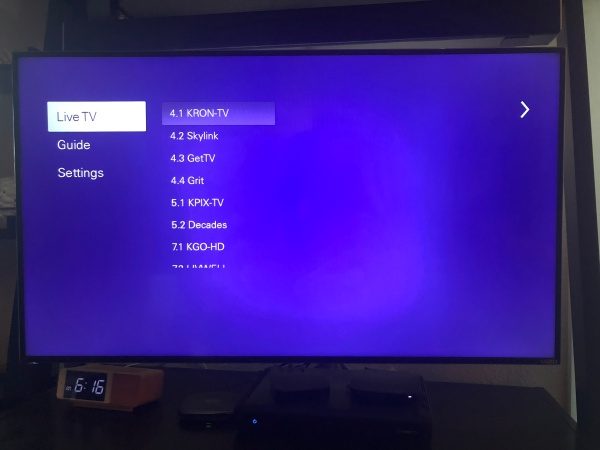
On Roku

Much the same here, but it obviously feels much more like cable when full screen on your TV and a remote in your hand. There are only three options on the main screen as interestingly, recording is not an option on Roku.

All the settings are done from this menu so the watching experience is really just channel switching and enjoying the picture. The Guide seems to start fresh every session which each channel listing displaying “No information” at first, and if you’re searching towards the end of your channels it might be a while before it updates.

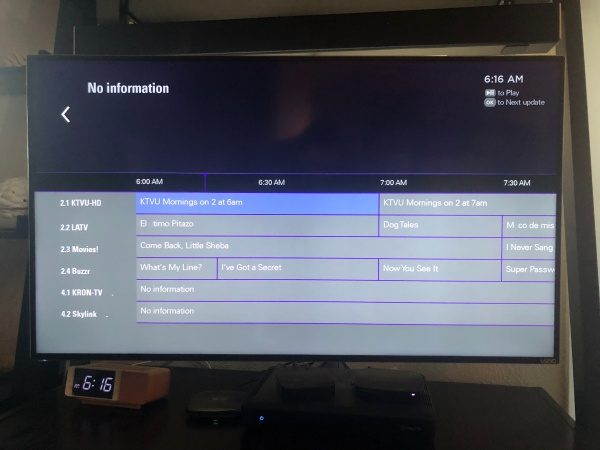
The Live TV screen here is pretty sparse as it does not pull the program information like on iOS. Beyond that, the quirks are about the same.

Overall

The picture is great on all devices, especially if you bump up the resolution to High Definition Plus. The only reason to knock it down would be if your bandwidth is limited. You’re still going to have some channels that stutter, but the majority of the 60 that came in for me were as clear as what I get with DirecTV.

Small catches

The system only supports a single device at a time. I first noticed this waiting to see how long it would take for the program information to fill in on my iPad while I had Roku running. Clicking on the Guide prompted the below message.

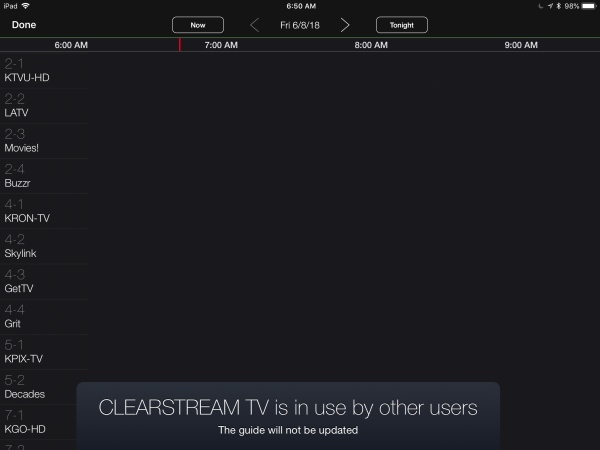
A similar message pops up if you click on Live TV giving you the option to choose “use” which boots the other device off so you can watch.

Recordings are not shared across devices as they are stored locally on the device where your recorded the program.

What I like

  • A minimal amount of hardware
  • Relatively easy set up
  • Great picture
  • Channel guide
  • Support for different devices

What needs to be improved

  • Support for simultaneous devices
  • A way to share channel scans across devices
  • Chromecast support

Final thoughts

If you’re looking for a way to cut the cord on cable or satellite, this is an option worth considering. The cost is pretty low and a one time fee instead of a recurring monthly charge which seems to be increasingly rare. You’ll need internet and a strong WiFi network with good speed. Lastly, you’ll need to be okay with only being able to watch on one device at a time. This last point is the hardest to overcome if you’ve got a family or roommates, but then again maybe the only time you’d be streaming live TV is for group events like sports so maybe it’s less of a blocker? Head on over to Antennas Direct for additional details.

Price: $119.99
Where to buy: Antennas Direct
Source: The sample of this product was provided by Antennas Direct.

The post ClearStream FLEX Wireless HD Antenna review appeared first on The Gadgeteer.

Filed in categories: Reviews

Tagged:

ClearStream FLEX Wireless HD Antenna review originally appeared on The Gadgeteer on June 24, 2018 at 10:00 am.

Note: If you are subscribed to this feed through FeedBurner, please switch to our native feed URL http://the-gadgeteer.com/feed/ in order to ensure continuous delivery.