Updated type experience coming to Adobe InDesign CC and Illustrator CC

NEWS – Anyone who has used the latest Adobe Creative Cloud versions of InDesign or Illustrator has probably noticed that font selection is a little unwieldy. I use InDesign every day and whenever I’m looking for a specific sort of typeface to use, like a nice handwritten font, I find myself squinting at the tiny font sample next to the name. But fear not, Adobe has heard your cries!

In the upcoming version of InDesign and Illustrator, a vastly improved type menu will allow for customized sample display text and integrated access to the 9,000 TypeKit fonts that are included with a Creative Cloud subscription. You will be able to browse this font library in the app and quickly preview your chosen text in any font of your choice.

Check out the video on Adobe’s blog for a closer look. I’m very much looking forward to this small but potent improvement!

Filed in categories: News

Tagged: ,

Updated type experience coming to Adobe InDesign CC and Illustrator CC originally appeared on The Gadgeteer on August 10, 2018 at 2:19 pm.

Note: If you are subscribed to this feed through FeedBurner, please switch to our native feed URL http://the-gadgeteer.com/feed/ in order to ensure continuous delivery.

The Lightning Bug will give you the bug to capture amazing lightning shots!


NEWS – Some time ago, I was fortunate enough to get the opportunity to review the MIOPS Smart device, which allows me to photograph water drops, and other events triggered by sound, or movement or lightning. While I have used the MIOPS Smart exclusively for water drop photography, I have been thinking about trying it with lightning which is not an easy task. As I continue my planning for the lightning test, I started to wonder if there is a similar device that is designed specifically for lightning as opposed to multiple types of events. My hope was that such a device would make the setup and process easier.

Just recently I came across just such a dedicated lightning capture device call the Lightning Bug. This device claims to provide specific functions and features to allow you the required and desired customization aimed at capturing the best lightning photos. Its features include 26 levels of sensitivity for control in any type of lightning situation (LED Bar Graph built-in), the ability to adjust frames per second from 1 to 10, and a simple 3-button control of all functions via a water-resistant soft-touch panel.

This device is compatible with a large number of various brands and models of cameras. You can see the compatibility list here.

If you would like more information on the Lightning Bug, or you would like to purchase one, you can head over to the MK Controls website or Amazon to pick one up for $179. This price includes the compatible cable for your camera.

Filed in categories: News

Tagged: ,

The Lightning Bug will give you the bug to capture amazing lightning shots! originally appeared on The Gadgeteer on August 10, 2018 at 12:00 pm.

Note: If you are subscribed to this feed through FeedBurner, please switch to our native feed URL http://the-gadgeteer.com/feed/ in order to ensure continuous delivery.

Vena 6Netic Magnetic Smartphone Bike Mount review

REVIEW – My husband and I have always been bicycle riders.  Back in the day, we used to do the MS Bike to the Beach here in Texas where we rode 150 miles over 2 days for Multiple Sclerosis.  Since then we have notbeen the true roadies we once were.  We have started to ride the numerous bike paths that they have finally built here in the San Antonio, Texas area.  In an effort to make himself use his bicycle more, my husband expressed a desire to be able to mount his IPhone to his bicycle’s handlebar so that he may use his bike as a method to easily get more Pokemon.  Yes, he is a die-hard fan of the game.  We have gone through several different mounts and not found one that is really stable and easy to use.  So when I got the chance to review the Vena Magnetic Bike Mount I jumped at it.  Let’s see how it worked out.

What is it?

The Vena 6Netic Smartphone Bike mount is a bike mount that uses two different methods to keep your phone safe and secure on your bicycle.  It uses a six magnet phone mount and a rubber strap system to securely hold your phone in place.

What’s in the box?

The box itself could not be any plainer.  There was no outside writing on it to even describe what was in the box.  However, everything inside was well packed and protected.   Inside the box I found:

  • The mount itself
  • A long bolt with a plastic screw head and nut that is used to attach the mount to the bike
  • Two different colored rubber strap systems (red and black)
  • Instructions on a single sheet of paper
  • A GoPro screw you can use to mount a GoPro camera to the front of the mount
  • Two rubber pads used to hold the mount on the bicycle handlebars
  • Two metal plates – one with 3m tape on one side and one plain
  • Sticker from Vena

Design and Features

The picture below has the GoPro mount highlighted on the bicycle mount itself.  I do not own a GoPro so since I could not use it, I removed it from the mount.  This was easy to do with two small Phillips screws at the back of the mount.  The Vena website states that you can even mount some compatible headlights using this particular mount.

The next picture below shows you what my husband’s bike handlebars look like.  He has a Specialized Sirrus which we bought last year.  The handlebars are unusual in that they start off fat in the center by the stem and then go down to normal size when you get to the handlebars.  This has presented us with issues when trying out other bike mounts.  I would place the mount as close to the stem as possible and tighten down, but inevitably the mount would start slipping down the handlebar.   A lot of this had to do with the mounts tightening down using just a basic screw that I had to tighten down with a screwdriver.  Many of the mounts were awkward to mount and made tightening the mount really hard to do.   The Vena mount with its large hand screw made mounting really simple.

The next picture below shows the mount completely open where it would go around the handlebar.  I have just placed the two rubber grip strips inside the mount.  This was very easy to do and they mounted with the 3M tape that was already attached to one side of the rubber.  A lot of mounts will just give you a rubber strip you have to manually hold in place while you tighten down the mount.  Having these stuck in place made mounting very easy.

The next two pictures show how I mounted the rubber strap to the main mount.  The picture on the left is showing the back side of the mount.  This is the side that would be facing out towards the street in front of you.  You can see the two screw holes where I removed the GoPro mount.   The picture on the right is the side of the mount that would be facing the rider.  I simply slid the magnet holder up and it popped off the mount.  You are looking at the back side of the magnet on the right of the mount.  I then slid the rubber strap over the magnet mount then clipped the magnet back in place.   There were two identical circles in the rubber strap so I just picked on and left the larger part of the strap system sticking out of the top of the mount.  The instructions were not very helpful in showing how to mount this rubber strap.

In the picture below you can now see the mount on the bicycle.  The knob on the right lets you adjust the angle in which the phone is viewed.

The next two pictures show you how the mount looks with my husband’s iPhone 7s installed.  Something to note, I wonder if you had an iPhone X with no bezels if the rubber straps would interfere with phone usage?  I took one of the metal plates and placed it inside the phone case between the phone and the case.  I could not even tell it was there once mounted.  I then place the phone on the mount where it was held in place by the magnet.  Finally, I pulled the rubber straps out and around each corner of the phone.  Let’s just say that phone is going nowhere.   I literally picked the bike up and bounced it several times on the tires in an effort to dislodge the phone and it never budged.    Time, of course, will tell if the mount itself will slip on the handlebars, but at least my husband will be able to hand tighten it out on the trail.

What I like

I love how easy it was to mount this smartphone holder on to the bicycle.  Just being able to have a nice sturdy plastic screw head to be able to hand tighten down the mount without any tools was awesome.  I also loved how they gave you the capability to easily change the angle at which you view the phone.  Finally not having to manually hold a rubber strip in place while trying to tighten down the mount was also a big plus.  So far the mount has held steady over a couple of rides with no issues.

What can be improved

The only concern I would have is what I mentioned before about the rubber straps going over a screen instead of just bezels like on the iPhone 7.  I wonder if the touch screen would think the straps are fingers touching the screen.  Maybe someone who has used a similar mount can comment on this.  They also could improve their instructions so they could show exactly how the rubber strap should go on the mount.

Price: $16.99
Where to buy: Amazon
Source: The sample for this review was provided by Vena.

Filed in categories: Reviews

Tagged:

Vena 6Netic Magnetic Smartphone Bike Mount review originally appeared on The Gadgeteer on August 10, 2018 at 10:59 am.

Note: If you are subscribed to this feed through FeedBurner, please switch to our native feed URL http://the-gadgeteer.com/feed/ in order to ensure continuous delivery.

Sony Introduces the 500 Million Limited Edition PS4 Pro

NEWS: As a thank you to Playstation fans for hitting 500 million systems sold, Sony is releasing a beautiful translucent blue 500 Million Limited Edition PS4 Pro. Each system will have a copper plate accent on the front, and Limited Edition serial number etched in. There will also be a few extra special units with serial numbers that commemorate important events in the history of PlayStation.

The 500 Million Limited Edition PS4 Pro system will sell for $499.99 in the US, or you can grab the Limited Edition DualShock 4 standalone for $64.99. The Limited Edition gold wireless headset will also be sold separately at $99.99.Quantities are limited to limited to 50,000 units worldwide, so let us know in the comments if you grab one on August 24th when they will be released! You can read more over at the Playstation blog.

Filed in categories: News

Tagged:

Sony Introduces the 500 Million Limited Edition PS4 Pro originally appeared on The Gadgeteer on August 10, 2018 at 10:00 am.

Note: If you are subscribed to this feed through FeedBurner, please switch to our native feed URL http://the-gadgeteer.com/feed/ in order to ensure continuous delivery.

Pandorra Willgoo Carrying Case and Power Bank for Apple Pencil

REVIEW – Tired of hauling your Apple Pencil accessories around in a zip bag so that you don’t lose them? Me too. The Pandorra Willgoo carrying case solves that problem for you and acts as an alternative charging source for your Pencil to boot. Let’s have a look!

What is it?

It’s a travel case for your Apple Pencil and all it’s accessories that also serves as a charging station.

Hardware specs

  • Length: 7.95 inches
  • Width: 1.73 inches
  • Height: 1 inches
  • Weight: 5.2 oz
  • Battery Capacity: 1700mAh
  • Input: 4.2V
  • Output: 0.3V-4.2V

What’s in the box?

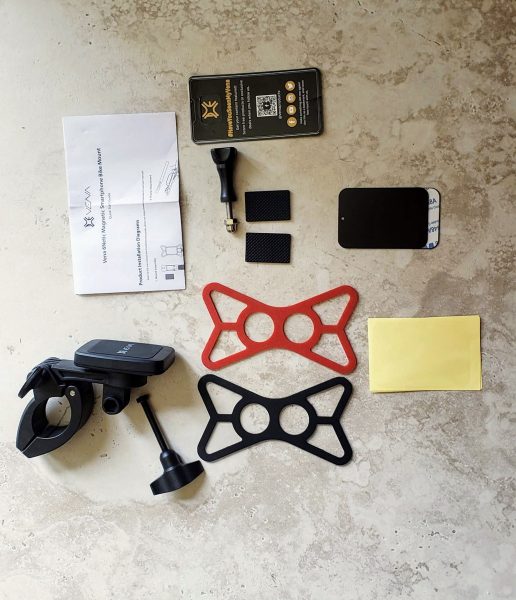
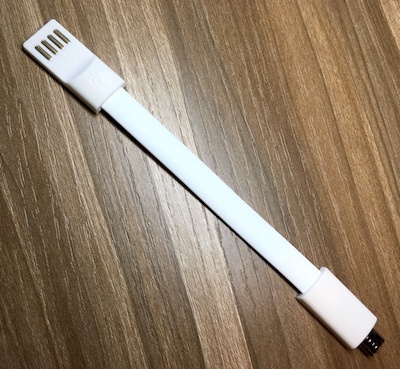
The Pandorra Wilgoo Carrying Case comes with the case and a USB cable to charge the unit. You’ll need to bring your own USB Lightning cable to charge your pencil.

Design and features

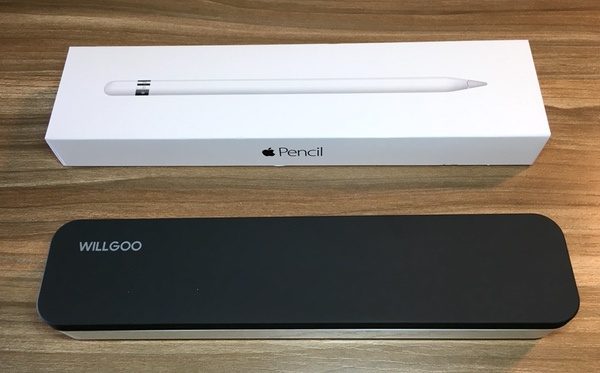
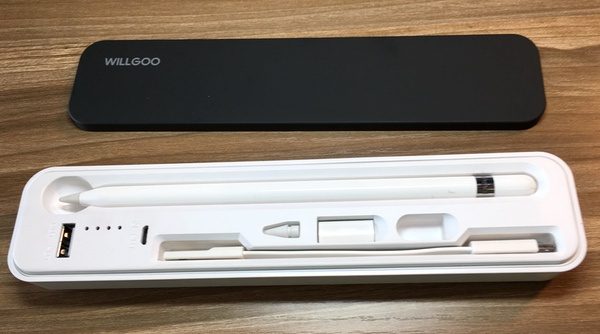
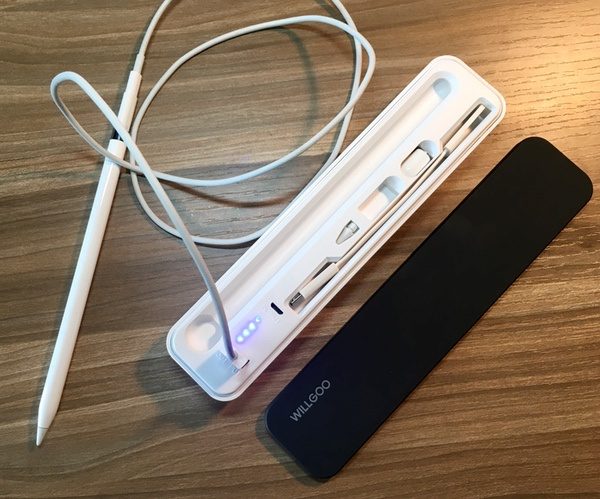
The Willgoo is a sharp looking case, made from solid hard plastics with a magnetic lid. The case itself is *just* a bit smaller than the Apple Pencil box itself (see pic below for reference). At roughly 8” by 1.75” by 1” it’s not super-compact, but it does slide easily into open spaces or slightly larger pockets in your bag.

The hard plastic case does a good job of protecting your Pencil from knocks and bumps. The magnetic lid is secure enough that it won’t come loose in the jumble that is your bag. It’s also got a soft-touch padded on the underside to protect the components.

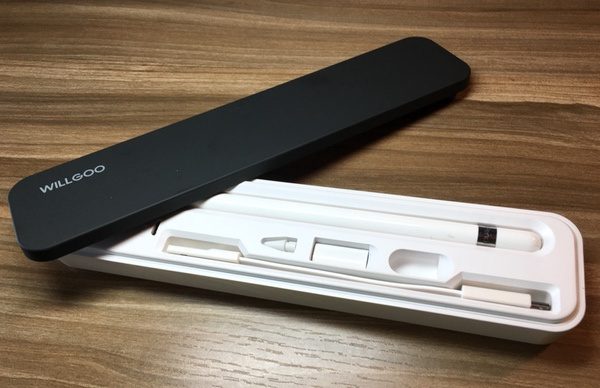
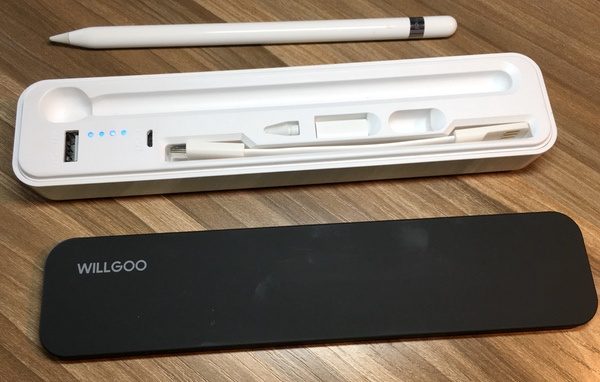
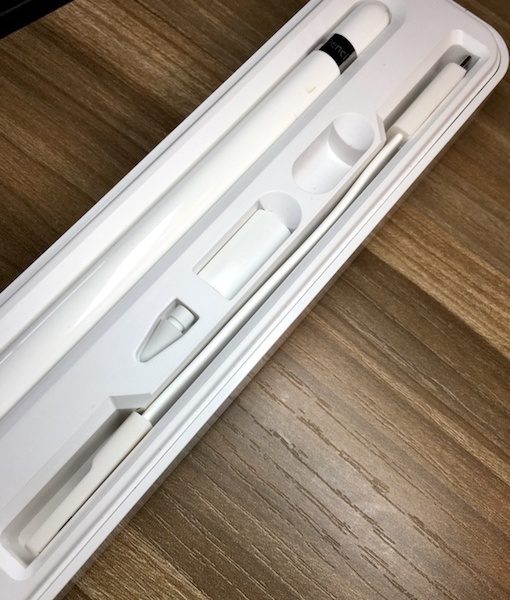
Pop off the lit and you’ll find a set of slots for your Pencil, the charging adaptor, an extra nib & the Pencil cap when charging. The included USB-to-microUSB charging cable also has its own place. Everything has a happy resting place.

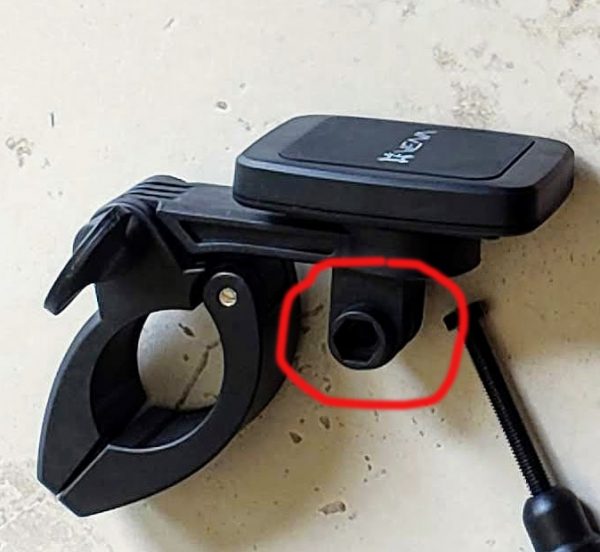
You’ll also find two ports on the Willgoo: one for charging the unit (marked “input”), and one for charging your Apple Pencil (marked “output”).

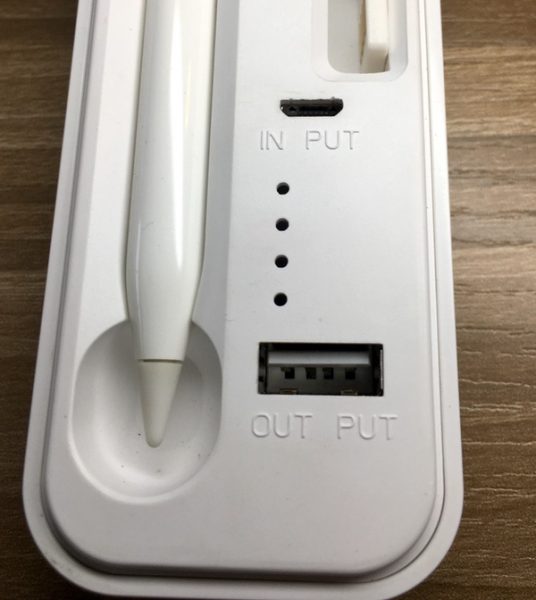
To charge the unit, you’ll plug the included cable into the “input” micro-USB slot, and then into a USB port. Blue indicator lights let you know your charge level.

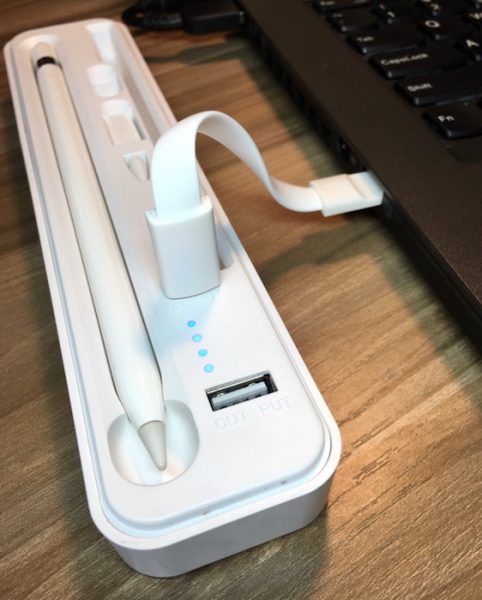
To charge your pencil, plug a lightning cable into the USB port on the unit. The same blue indicator lights are activated to let you know how much capacity the battery has left. Note that the cap sits nicely in its slot and hasn’t run off to get into mischief…

The case has a battery capacity of 1700 mAh, which will give you plenty of charges for the Pencil (86 mAh capacity). You could use it to give you a partial charge for other devices, but it won’t get you too far.

Performance

The Pandorra Willgoo Carrying Case and Power Bank for Apple Pencil solves a couple of storage problems. It’s a great solution to keep around the office. I like the peace of mind it brings… I was always worried about losing the cap or that little charging adaptor. Mine is parked on the desk in my family room, keeping the whole kit in one space when I need it.

As far as travel and commuting go… well, it depends on your intended use.

For the day tripper, the Apple Pencil already has great battery life and portability. For that reason, most Apple Pencil cases are simply sleeves that you can attach to your iPad or a pocket. While this case does give you a spot for all your components, it is a bigger solution that will take up space in your bag. It seems like the unit is excessively beefy for what it holds and does, so carry minimalists may not be a fan of the solution.

If you’re traveling and foresee a need to charge your iPad on the go, you’re all set here. It will happily find an open space in your backpack, carry-on or messenger bag (or larger briefcase) and give you quick access to all the parts. While the charging capability isn’t an absolute necessity, it gives you a nice option if you need it. I’d like to see a design that’s a bit more compact, but the pros outweigh the cons in my mind.

I should also note that the components do sit loosely in those little slots. If you turn the case upside down with the cover off, they will spill out. It’s something to consider if you’re on the run.

What I like

  • A well-organized solution for your Apple Pencil & accessories
  • Nice protection in your bag or briefcase
  • Magnetized lid
  • Charging feature is a bonus, but not completely necessary

What needs to be improved

  • Could be more streamlined; probably too chunky for those with minimalist bags like thin briefcases or portfolios
  • Components will spill out of the case is flipped over with the lid off

Final thoughts

The Pendorra Willgoo Carrying Case and Power Bank is a nice solution for managing the Apple Pencil and its components. There are a few things I’d change in the design, but it’s a solid overall performer that has found a place in my daily kit. I’m happy to send the zip bag I was using for those little parts to the recycling bin.

Price: $25.99
Where to buy: Pendorra web site and Amazon
Source: The sample of this product was provided by Pendorra.

Filed in categories: Reviews

Tagged: , ,

Pandorra Willgoo Carrying Case and Power Bank for Apple Pencil originally appeared on The Gadgeteer on August 10, 2018 at 9:00 am.

Note: If you are subscribed to this feed through FeedBurner, please switch to our native feed URL http://the-gadgeteer.com/feed/ in order to ensure continuous delivery.