Store your bicycle on the horns of a Longhorn

NEWS – The Longhorn Bicycle Rack is a whimsical piece of art for your walls when it’s not in use.  It’s a convenient rack to hang your bike out of the way when needed.  The Longhorn was created by Phillip Stone and is handmade in his Oregon workshop.  It’s crafted of Oregon fir, a vegan leather recycled bicycle seat, and aluminum road bike handlebars.  When hanging on the wall, the rack looks a bit like, and was inspired by, the head and horns of the Texas Longhorn cattle.

The rack mounts to the wall with two screws; be sure to screw it into a stud or use wall anchors.  It measures 12″ tall x 16″ wide x 9″ deep, and it can support a bike up to 65 pounds.  The Longhorn Bicycle Rack is $110.00 at UncommonGoods.

Filed in categories: News

Tagged:

Store your bicycle on the horns of a Longhorn originally appeared on The Gadgeteer on August 27, 2018 at 8:00 am.

Note: If you are subscribed to this feed through FeedBurner, please switch to our native feed URL http://the-gadgeteer.com/feed/ in order to ensure continuous delivery.

Renogy 10,000mAh Solar Panel Water Resistant Power Bank review

REVIEW – Voice in your Head: Here we go again, another portable charging solution.  Me: Ah, but this one has a bit of a twist.  The Renogy 10,000mAh Solar Panel Water Resistant Power Bank has not only a solar panel for backup charging, but is also water-resistant.  Other products may offer one or the other of those features, but how well did Renogy combine them?  Let’s check it out!  Gadget on!

What is it?

The Renogy 10000mAh Solar Panel Water Resistant Power Bank is a water-resistant, shock-resistant and dustproof portable phone charger with a solar panel backup.

Hardware specs

  • Battery = 10,000mAh lithium battery
  • Dual USB output ports, 2.1A for tablets, 1.0A for phones
  • Micro USB input port
  • Water- and shock-resistant
  • Solar panel for backup charging
  • Dimensions = 5.4 x 2.9 x 0.6 inches
  • Weight = 8 ounces

What’s in the package?

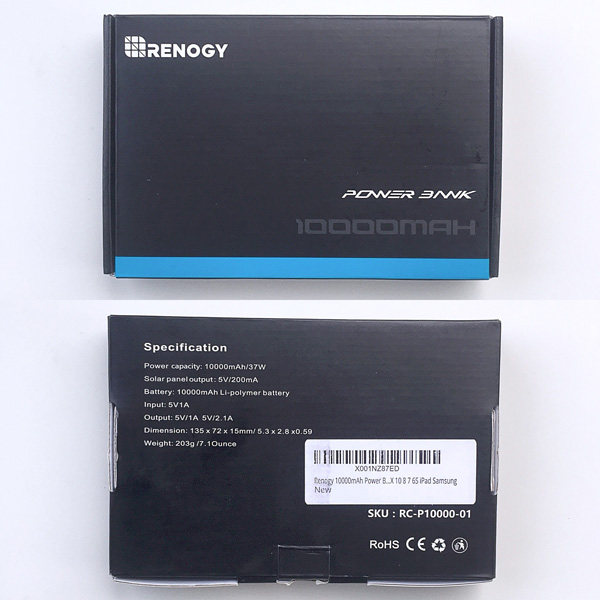
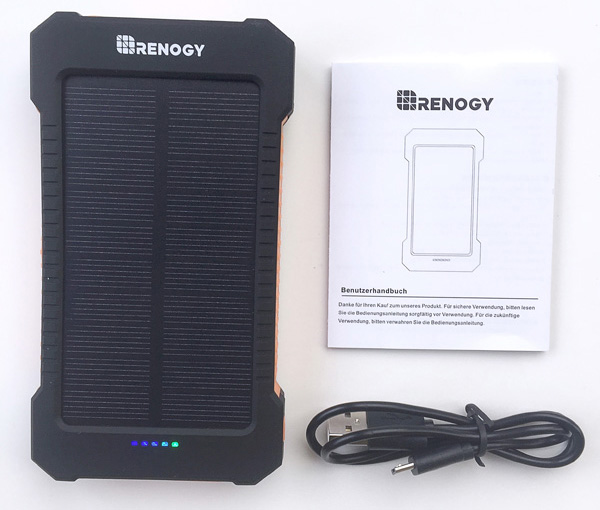
The product packaging is shown in the photo above.

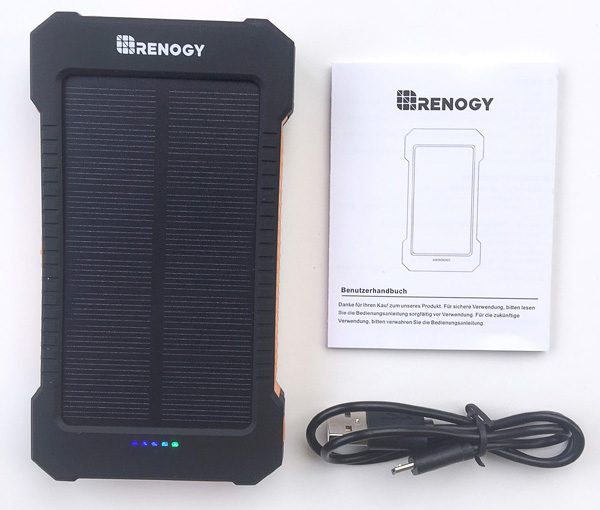
The photo above shows the contents of the package, which are as follows:

  • Renogy 10000mAh Solar Panel Water Resistant Power Bank
  • USB to Micro USB cable
  • Instruction booklet

Design and features

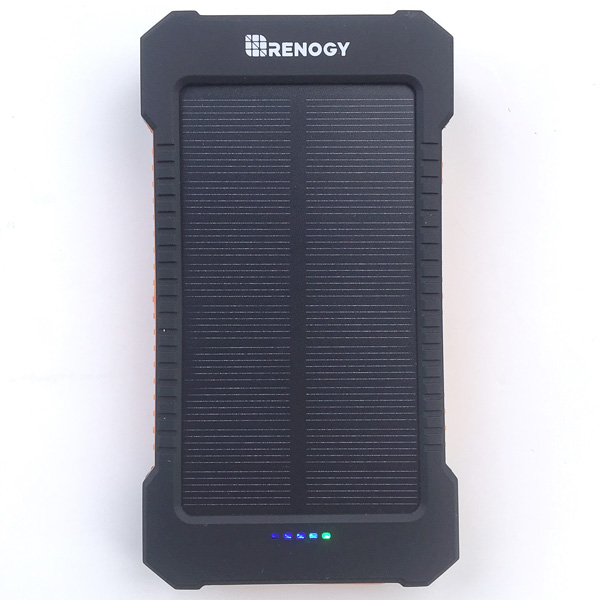
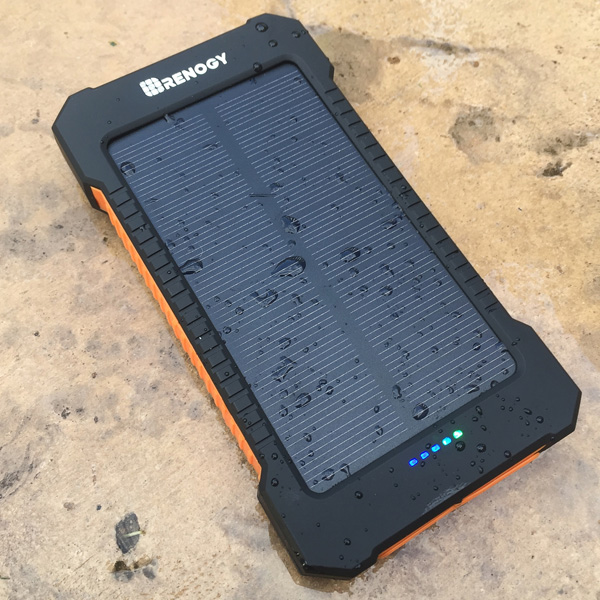
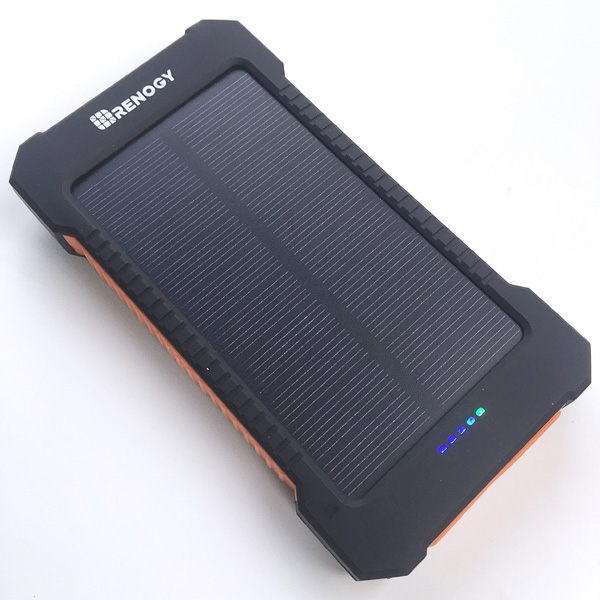
The very first thing I noticed above the device was its soft, matte finish, which felt very comfortable to the touch.   Additionally, a solar panel covers most of the top of the device, as seen in the photo above.

Also, despite it having a water-, shock- and dust-resistant case, the device had a nice size and relatively slim profile, and looked rugged.  In addition, each of the corners is built-up to provide additional shock- or drop-resistance.

The device is a nice size and fits well in my hand.  I also like the side notches as well as the scallops on the front and back.  All of these contribute to providing a bit more grip on the device.

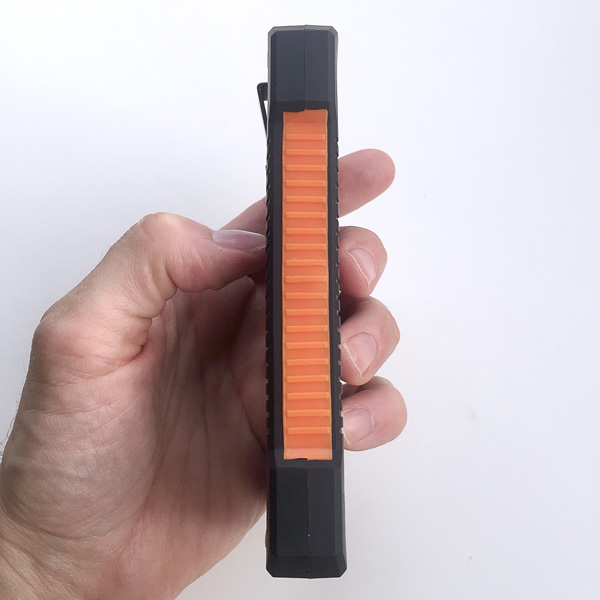
The sides of the device have orange silicon panels which not only aid in grip, but also give it a bit of visibility.  Why is this useful?  Because I found myself digging around in the bottom of my EDC bag for this device on a couple of occasions when the lighting was sub-par, and the various orange silicon panels held me locate it.

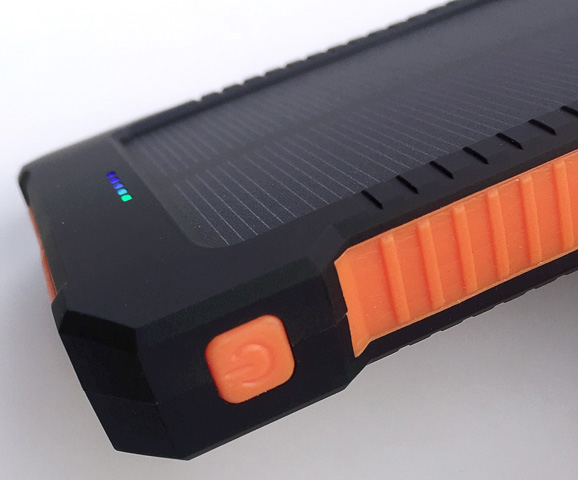
There is a single push button-style power button along the side corner of the device.  It has the same orange silicone coating as described above, which contributes to the device’s water- and dust-resistance.  This button can be pressed to activate charging if it does not begin automatically when something is plugged into it, as I found occasionally happens.

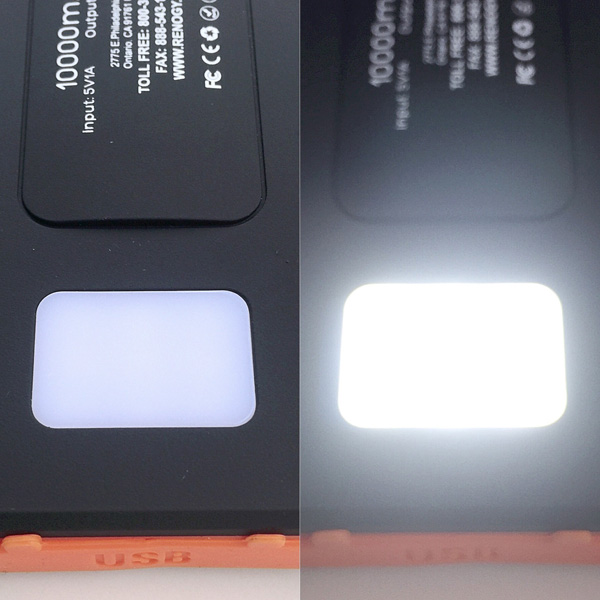
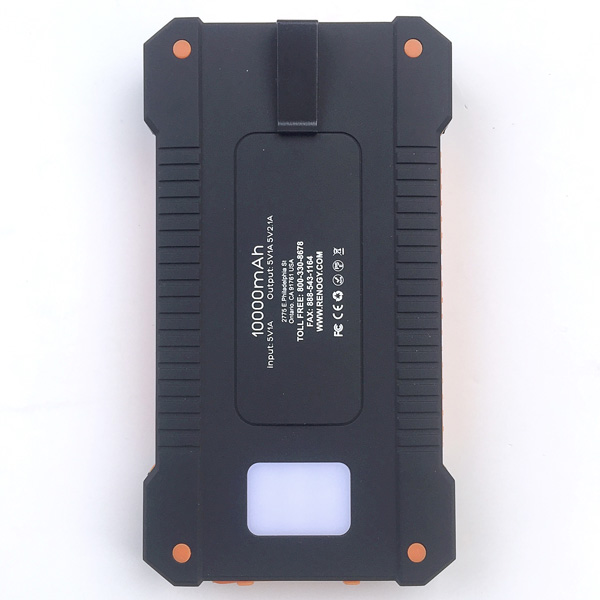
The device is equipped with a light on the back, which is activated by holding down the Power button for a few seconds (see photo above).  Once illuminated, the light can be made to flash in an emergency strobe mode by holding down the button for another xx seconds.  Another press deactivates the light.  The light is bright enough for nearby, but not bright to light your way through a dark woods on a moonless night (it doesn’t throw light very far).

There is a small plastic clip on the back of the device.  Because it’s plastic, it looks and feels a bit flimsy.  I haven’t broken it (yet), but it feels as if it were flexed too far it would simply snap off.

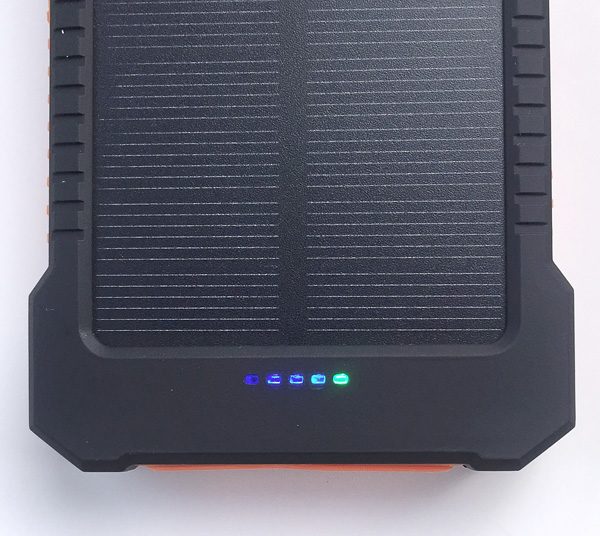
The device’s power level indicator consists of a row of five tiny LEDs.  During charging, the LEDs illuminate to indicate charging status; when the LEDs turn off, the device is fully charged.

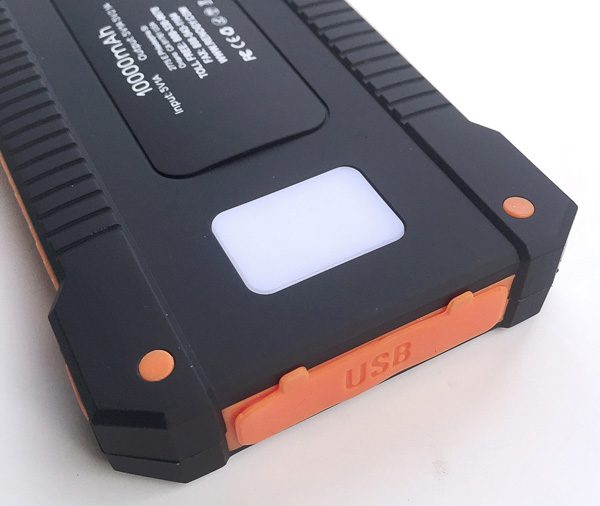
The device has a cover made from the same flexible orange silicone material as described above.  This cover protects all of the ports (see photo below) from dust, water splashes or perhaps even a light rain, but I have my doubts that it would protect the ports against a heavy rain and certainly not against full submersion, at least for very long.

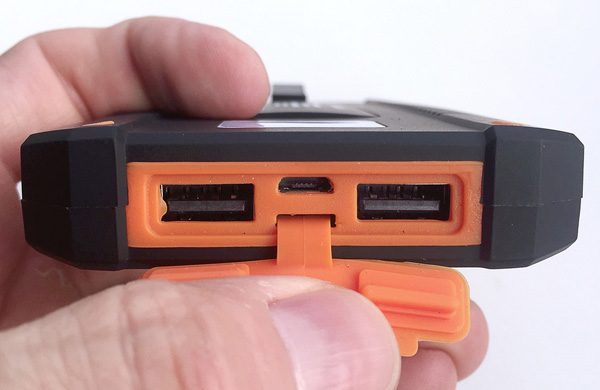
As seen in the photo above, the device has two (2) USB output ports positioned to the left and right a single Micro USB input port. One of the USB output ports provides 2.1A for charging tablets while the other provides 1.0A for charging phones.  I like that it has two output ports to allow charging of two devices simultaneously, but there is no indicator as to which is the 2.1A and which is the 1.0A.  Frustrating.

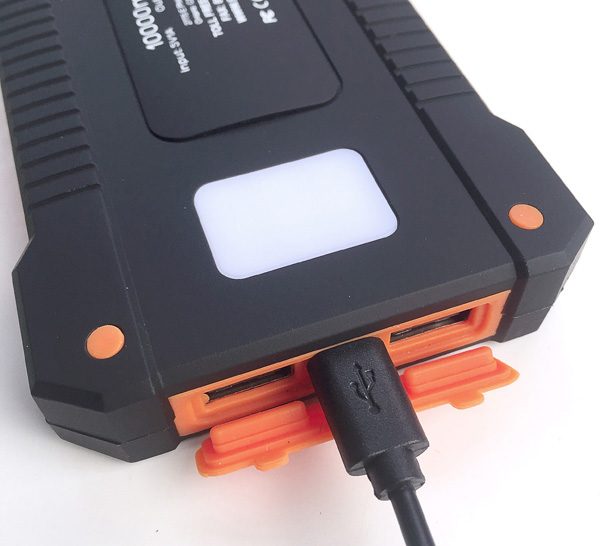
The instruction booklet recommends that the devices primary charging method is via the micro USB input port (see included cable plugged into the input port in the photo above), which does charge the device faster than the solar panel.

The device’s instruction manual recommends solar charging as a backup/emergency charging method only, because it is slower than wall charging via the micro USB port.  However, I noted that the device basically charges any time the solar panel is exposed to a light source, whether it be direct sunlight or artificial light.  As with USB cable charging, when the device is turned toward a light source, the bank of LED lights illuminate to indicate charging status.

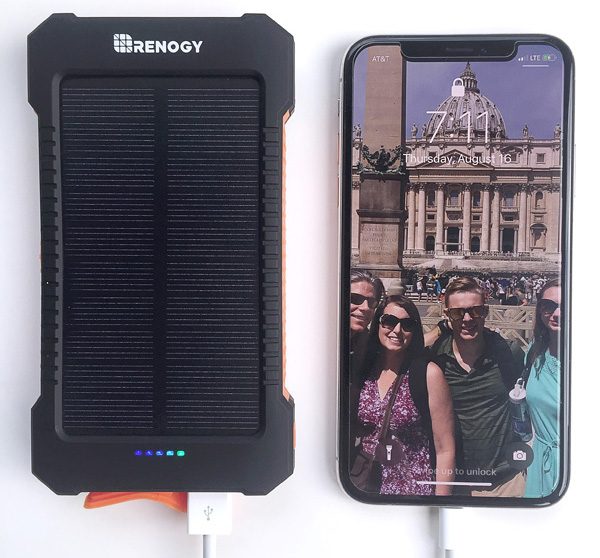
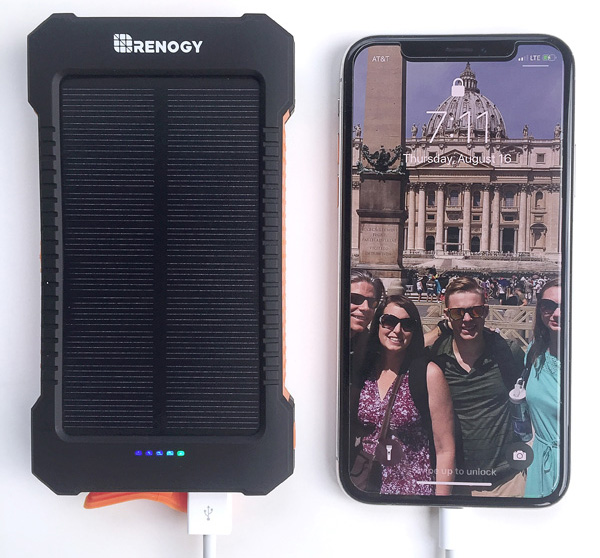
I used the device to charge both my wife’s iPhone X (pictured above) and my iPhone 6 Plus, and it charged both phones at a reasonable rate.  It also charged my Garmin Fenix 3 HR GPS watch without an issue.  However, this device does not include pass-through charging, meaning it cannot be used to charge a device while being charged itself.  This is a big minus for me as when I travel I often take a single portable power bank that has multiple USB ports and use it to charge multiple devices while I charge the power bank itself, rather than take several individual chargers.

What I like

  • Backup solar charging
  • Water-resistant
  • Light with emergency flash mode

What needs to be improved

  • No pass-through charging
  • No way to identify the 2.1A vs. 1.0A USB output ports

Final thoughts

The Renogy 10,000mAh Solar Panel Water Resistant Power Bank is overall a well-built and useful piece of gear.  I like that I can toss it into my EDC ruck and have not only a backup power source for my devices, but the solar panel means I have an emergency source if necessary and also I don’t have to be as concerned about getting it wet or dropping it as I would be with devices that are less rugged. Overall, for its fairly unique feature set, its price of $20.99 seems like a pretty good deal.

Price: $20.99
Where to buy: Amazon
Source: The product sample for this review was provided by Renogy.

Filed in categories: Reviews

Tagged: ,

Renogy 10,000mAh Solar Panel Water Resistant Power Bank review originally appeared on The Gadgeteer on August 26, 2018 at 10:57 am.

Note: If you are subscribed to this feed through FeedBurner, please switch to our native feed URL http://the-gadgeteer.com/feed/ in order to ensure continuous delivery.

Use the magic of Harry Potter to learn programming

NEWS – Kano who produces a variety of STEM kits for kids (and adults) to learn to build their own computers and learn to code have partnered with Warner Brothers to offer the Harry Potter Kano Coding Kit. This kit allows kids to build their own wand and then use it to control onscreen objects and characters through 70 programming tasks inspired by the Wizarding World.

If you’re not already familiar with STEM, it stands for science, technology, engineering, and mathematics and it’s a way to teach these important disciplines to kids and adults.

The wand in the Harry Potter Kano Coding Kit uses a series of gestures that your iOS, Android, Mac and Windows PC will translate into commands to control objects in the Kano app while teaching basic programming fundamentals like IF/THEN logic, loops, variables, and more.

The Harry Potter Kano Coding Kit is priced at $99.99 and ships on October 1st, 2018. Head over to Kano.me or Amazon to pre-order.

Filed in categories: News

Tagged: , ,

Use the magic of Harry Potter to learn programming originally appeared on The Gadgeteer on August 26, 2018 at 10:00 am.

Note: If you are subscribed to this feed through FeedBurner, please switch to our native feed URL http://the-gadgeteer.com/feed/ in order to ensure continuous delivery.

GEKO STARLIT S200 Full HD 1080p Dashcam review


REVIEW – I’ve reviewed a couple of dash cams, but both were from the same company (PAPAGO), so I jumped at the opportunity to review the Geko Starlit S200 dash cam so I could see how other cams measured up to those. Turns out the Geko is also made by or at least owned by PAPAGO, so I’m not sure if this is really “another brand”.

What is it?

The Geko Starlit S200 dash cam is a vehicle dashcam that can record day or night Full HD video, or capture photos. It features a 140-degree wide-view lens, Sony Starvis sensor, and a 64GB SD card capability.

What’s in the box?

  • Geko S200 dash cam
  • Adhesive mount
  • Suction cup mount
  • Window Mount sticker
  • Power cord
  • Mini-USB cord
  • 16GB micro SD Card and Adapter
  • User Manual


Design and features

The Geko S200 is pretty much your typical dash cam, featuring a 2-inch screen and five control buttons. It comes with 2 mounting options, a window sticker with an adhesive mount and an adjustable suction cup mount.

The S200 can record in 1280×720, 1920×1080, or 1728×1296 resolutions. The photo capture mode can record in various sizes up to 14mp. The video mode can capture in 1080p at 30 frames per second, h.264 mov format.

I had difficulty using both mounts in my pickup truck. The adhesive mount wasn’t the correct angle for my windshield and the suction cup mount would not adjust to an angle that I could see the screen correctly, however, the camera view was correct. The lens pivots and adjusts, but it doesn’t appear to stay where you put it. It appears as though they designed this camera to be high on the windshield and for a driver that sits lower in the seat.

The video captured by the camera is outstanding. The Sony Starvis sensor in this camera really is one of the best. Signs and license plates could be made out at a fair distance, and the image was clear even when driving into the setting sun.

Daytime
Sunset
Night time

The Geko S200 has the ability to playback captured video and photos, which is something that the other dash cams I reviewed didn’t do. I had assumed that was simply because it took more processing power to playback than to record, but apparently, it is possible in these small devices.

I found the buttons a bit hard to press. When you press them it requires enough force that it also moves the camera position. There’s no reason to have such buttons on a device like this where you won’t really be accidentally pushing the buttons.

The Geko S200 has three modes: Video, Photo, and Playback. The video mode is self-explanatory, capturing video as you drive. The photo mode will take a single photo, or multiple photos at specified intervals of 2, 5, or 10 seconds. The Playback mode will allow you to view videos and photos that reside on the memory card.

It took me quite a while to figure out how to get the camera to switch between video, photo or playback mode while it was plugged in. The menu system gets locked at various times, which is indicated by a key icon on the screen. To enter the settings, you have to press the power button to unlock it. That’s very non-intuitive.

The S200 also has G-Sensor-enabled recording that detects impacts, drastic braking, or sharp turns and will save the video so it will not be overwritten. As a typical dash cam does, when the memory card is full, it deletes the oldest clips so that you’re always recording. The camera can record loops in the following lengths: None, 3 min, 5 min, or 10 min.

The following is a list of the menus. The included manual includes what settings are possible with each menu. You can download the manual PDF here.

Video Mode Menus
Resolution
Loop Recording
HDR
Exposure
Motion Detection
Record Audio
Date Stamp
GSENSOR
Date/Time
Parking Monitor
Beep Sound
Language
Screensavers
Frequency
Format
Default Setting
Version

Camera Mode Menus
Capture Mode: Single, 2, 5, 10-second intervals
Resolution: 2M to 14M
Sequence: On/Off
Quality: Fine/Normal/Economy
Sharpness, White Balance, Color, ISO, Exposure
Anti-Shaking: On/Off
Quick ReviewOff/2 sec/5 sec
Date Stamp: On/Off

One thing that I really didn’t care for is the on-screen icons that are always visible. This includes a battery icon that is always blinking when the camera is plugged in.

Sample Video

Night video starts at 3:00 minutes into the video.

What I like

  • Excellent video quality
  • Video playback capability

What needs to be improved

  • Too many on-screen icons
  • Mounting bracket needs to be designed differently
  • Constant blinking battery icon
  • Hard to press buttons

Final thoughts

The S200 records great video and photos, which would be expected for an item at this price point. The playback feature is very nice and could be quite handy if you needed to transfer a video file via a smartphone or tablet while away from home. However, the camera and screen positioning features leave much to be desired unless you just happen to have the right vehicle.

Price: $159.99
Where to buy: BestBuy
Source: The sample of this product was provided by Geko.

Filed in categories: Reviews

Tagged: ,

GEKO STARLIT S200 Full HD 1080p Dashcam review originally appeared on The Gadgeteer on August 26, 2018 at 9:00 am.

Note: If you are subscribed to this feed through FeedBurner, please switch to our native feed URL http://the-gadgeteer.com/feed/ in order to ensure continuous delivery.

Learn calligraphy or take your lettering to a new level with the Ensō Parallel Pen set from Pilot

NEWS – If you’ve ever wanted to learn calligraphy, the Ensō Parallel Pen Set from Pilot can help you on your way.  Pilot says these pens are a major breakthrough in calligraphic pen design:  “The nib consists of two parallel plates and allows for sharp, monoline writing with the narrow edge, and expressive, calligraphic writing with the broad edge.”  Ensō Parallel nibs also allow you to easily draw color-blended letters by simply touching the nib of a pen filled with one color to the nib of a pen filled with another color.

The Parallel Pen set consists of four pens with 1.5 mm, 2.4 mm, 3.8 mm, and 6.0 mm nibs; 18 refill ink cartridges (12 assorted colors and 6 black); a pipette; a nib cleaner; and an instruction book to get you started.  Check out Pilot’s product page to see examples of hand lettering done by some of their customers.

The Ensō Parallel Pen Set is $47.08 at Pilot.  The same kit is available at Amazon for only $28.49.

Filed in categories: News

Tagged: ,

Learn calligraphy or take your lettering to a new level with the Ensō Parallel Pen set from Pilot originally appeared on The Gadgeteer on August 26, 2018 at 8:10 am.

Note: If you are subscribed to this feed through FeedBurner, please switch to our native feed URL http://the-gadgeteer.com/feed/ in order to ensure continuous delivery.