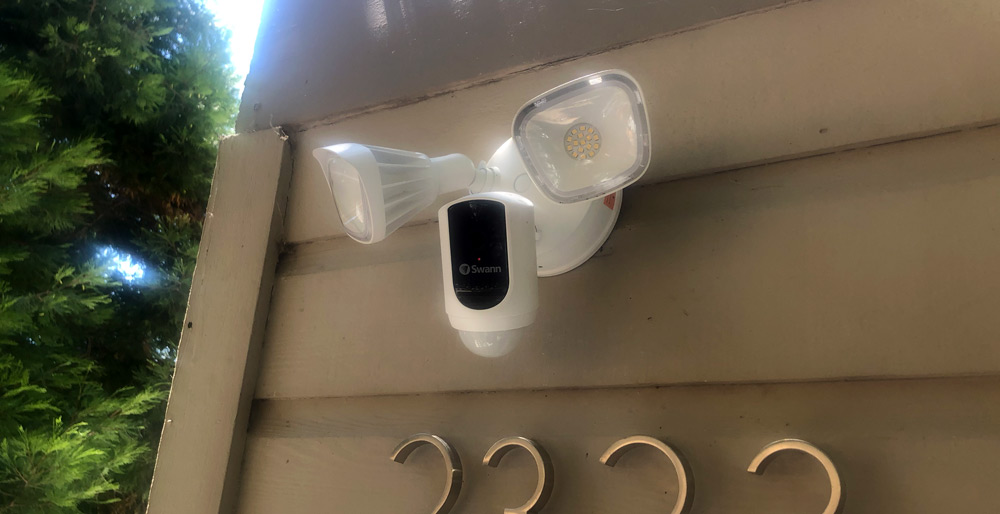
REVIEW – Not all that long ago we had an event where someone let themselves into our unlocked car (my bad), and root through our glovebox. Not unexpected as we live in an area where cars are broken into frequently and packages are stolen all the time. What was infuriating is that I had/have a nest cam clearly visible on the garage and this person sat in the car with the door open for 15 minutes and casually looked through all the papers in our car. Time to up the game. Swann has a new Floodlight Security Camera with motion detection, siren and two-way audio. Review time! To the keyboard.
What is it?
What do you call a floodlight that also has a security camera? It should have a name that aptly describes what it is without further definition… Hmm. How about a Floodlight Security Camera? All kidding aside, Swann has given it a name that ensures it will show up in search results which is likely more than half the battle in getting eyes on your product. As you would expect, this is an all-in-one unit that could result in you having fewer things hanging off the side of your house or garage.
What’s in the box?
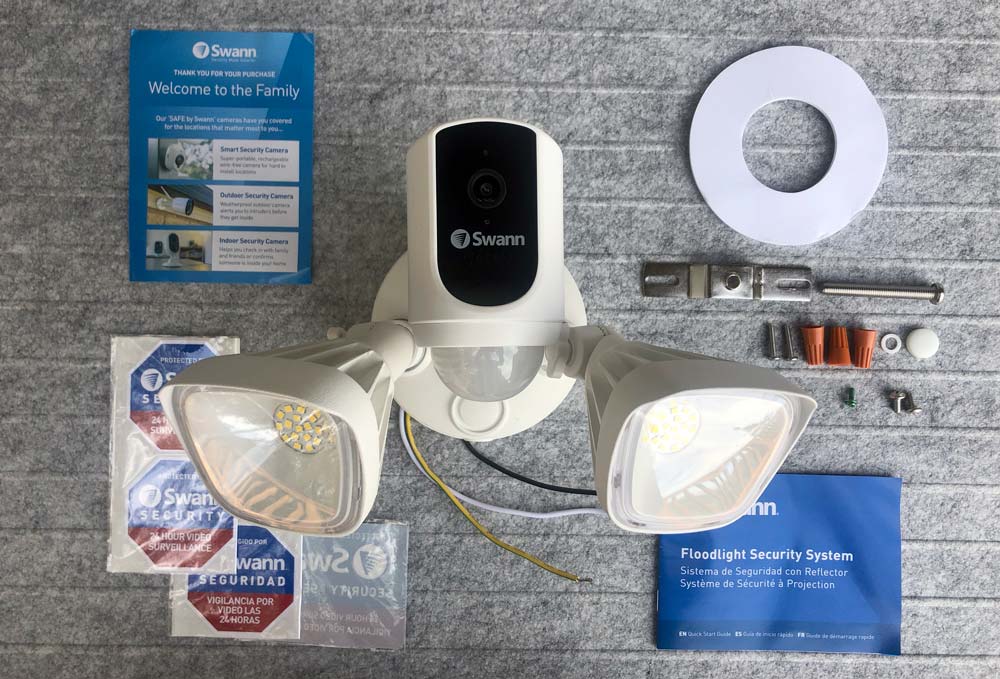
- Security Floodlight Camera
- Double-sided foam mounting ring
- Mounting hardware and wire nuts
- Manual and welcome card
- Security stickers and window badge
Hardware specs
Video storage: Internal & Secure Cloud
Audio: 2-Way Audio (microphone & speaker), Siren (≤ 75dB)
Operating temperature: -4ºF to 140ºF / -20ºC to 60ºC
Dimensions and weight: 9.5″ x 9.5″ x 6.7″, 2.44lbs
Weather resistance: Indoor & outdoor ready (weatherproof IP65 rated)
Power Source: Hard Wired. Connects to existing wiring, 100~240V AC 50/60hz, 30W power
Wi-Fi Frequency: 2.4GHz (wireless range up to 65ft/20m*)
App: SAFE by Swann (available on iOS & Android)
Design and features
The most relevant design feature is that this looks like a traditional floodlight. It’s not immediately obvious that this product has a camera and that’s to its advantage. Thieves and nefarious types scoping your property may be less concerned with a floodlight than with something that is clearly a standalone camera until that floodlight is more than a floodlight.
It has two-way audio so you that you can use your app to speak directly through the fixture as well as hear what’s going on. A built-in siren can be set to automatically sound on motion detection.
The fact that it’s hardwired is also great as it means you’re not at the whim of battery issues unless of course there’s a black out or your power is cut. You likely have a bigger problem in both of those cases.
Setup
I’ll refer to the Security Floodlight Camera as SFC going forward to keep things easy. You’ll need to be comfortable with some electrical wiring and lightweight home-fix-it skills. For this install, we’ll make the assumption that you are replacing an existing light fixture. Let’s get set up.
Go to your electrical panel and find the breaker switch for the light you’re replacing. Make sure to switch it off and check that power is not present.
1. Remove your current light fixture and mounting bracket (likely a combination of screws and electrical wire-nuts). Take note if this light is connected to a switch. If it is you’ll want to bypass, or tape/mark that switch not to be used as you will not want the SFC accidentally switched off.
2. Install the double-sided mounting tape circle to the back of the SFC.
3. Install the mounting bracket for the SFC allowing the home’s electrical wires to extend beside the main arch.
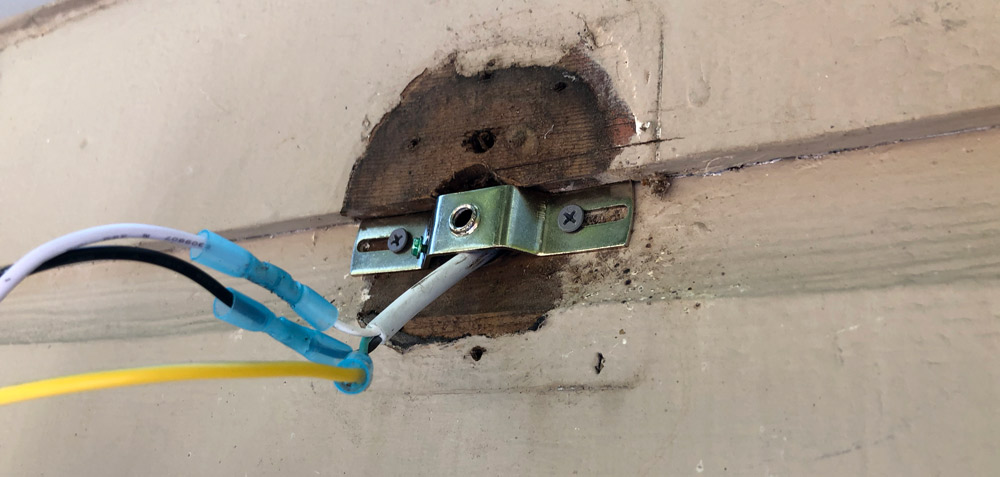
4. Wire the positive, negative and ground wires to your home’s electrical wires using the supplied wire-nuts. (You’re likely to have a more traditional junction box than my above scenario where I used crimp connectors that I had on hand so that I could feed the excess wiring through the hole before mounting.)
5. Turn on your breaker and confirm that you have the SFC correctly connected. The lights should come on initially (but could time out) and the blue LED should start blinking for pairing the wifi. If all is good, turn the power back off and finish the hardware install.
6. Peel the remaining backer off the mounting tape, insert the long mounting bolt through the SFC with the rubber o-ring in place into the mounting bracket and tighten (If you missed the adhesive step earlier, cut the ring in one spot so you don’t have to undo the wiring).
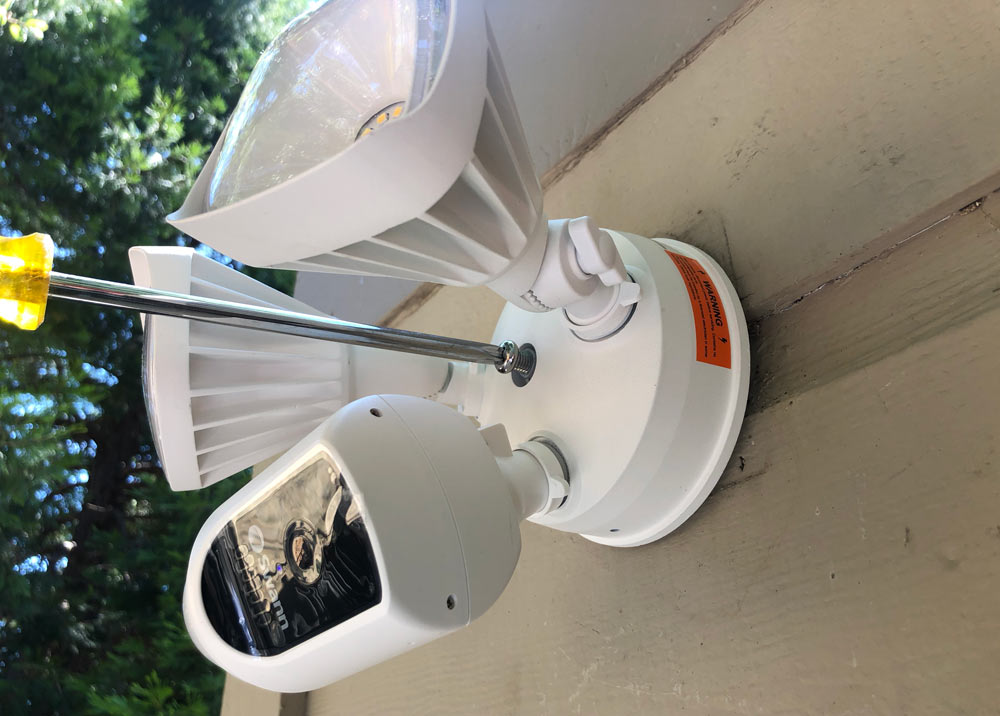
7. Position your lights and camera by using the wingnuts to adjust the toothed pivots. Use the collar to adjust the rotation. Use care to turn any of these in the direction that involves the least rotation to avoid pulling internal wires unnecessarily. Leave them a bit loose as you’ll end up adjusting them to suit your specific situation after the next steps.
Now it’s time to set up the app.
8. Find the app in the appropriate store for your device, download, open and register for an account.
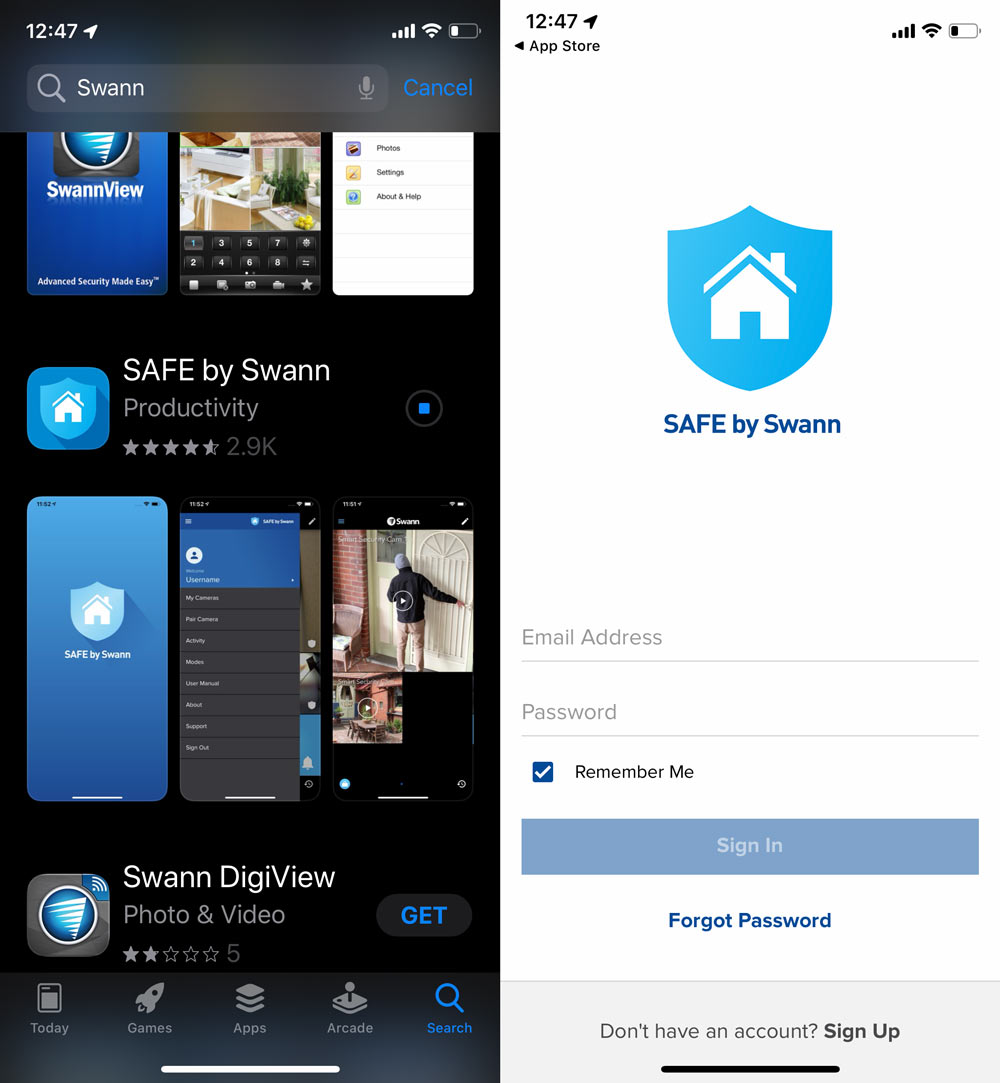
9. Turn on your breaker switch (hopefully for the final time) to power up the SFC and confirm the blue LED is blinking.
10. Open the app and follow the instructions to pair your new camera. You’ll need to know your wifi network name and password and be prepared to do the app to settings, back to app jump that all the kids are doing these days.
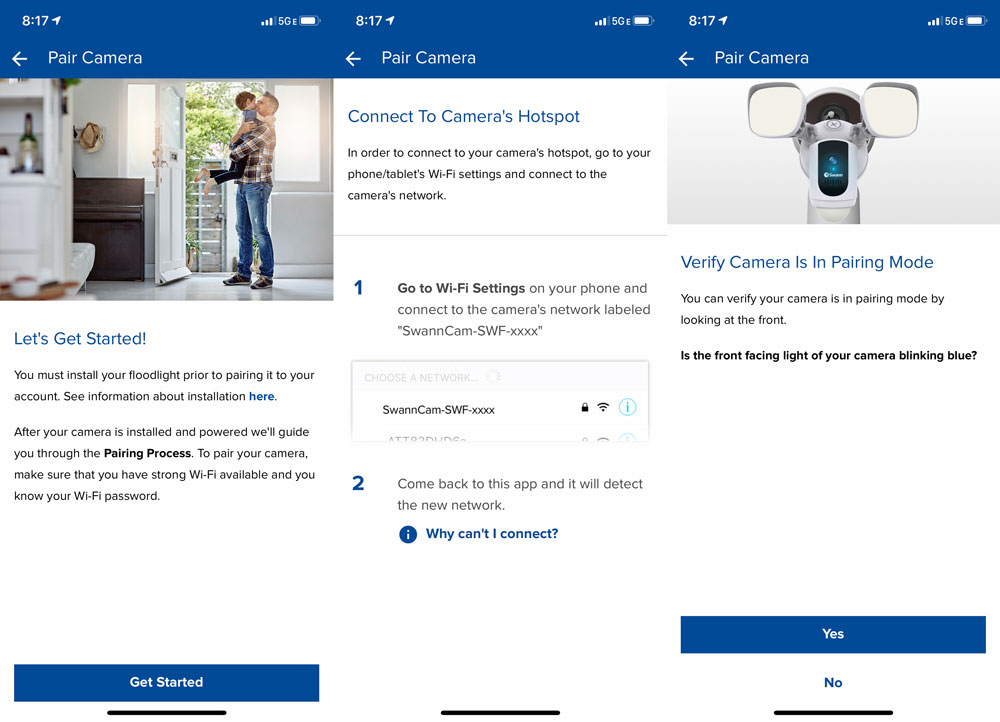
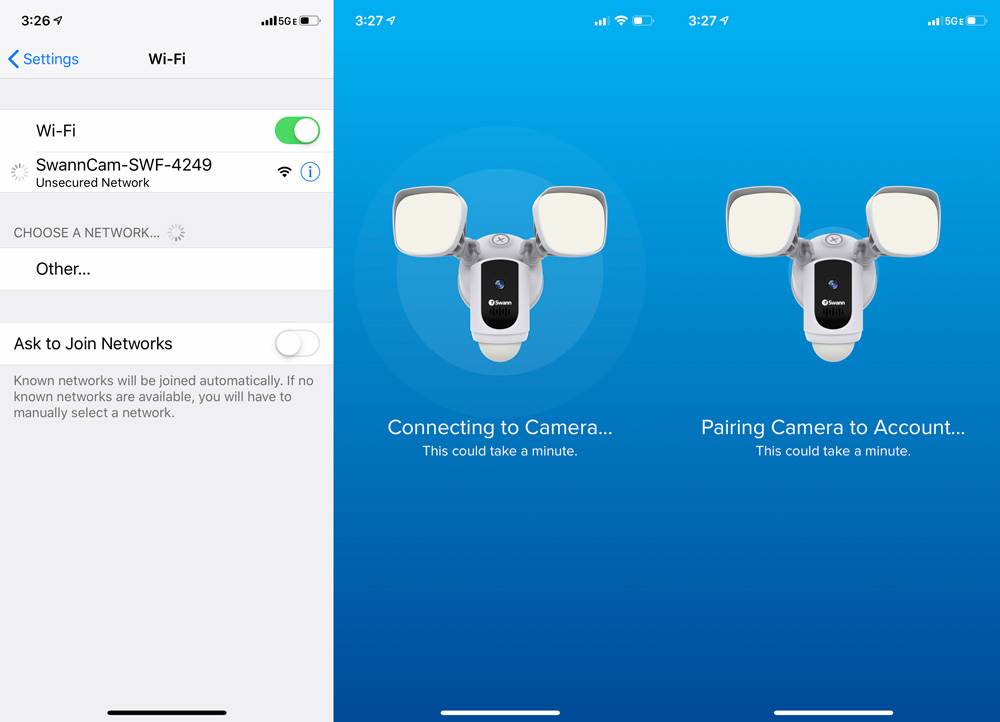
11. If all that finished properly you should be good to go. The remaining set-up is all physical positioning and app preferences which ends up being a bit of back and forth between both of those. Let’s move on to performance and address that in the rest of the review.
Performance
Once everything is up and running, the system works like this…
When the Security Floodlight Camera detects motion the light, siren and camera activate based on how you’ve set them up in the app. Simultaneously you will receive a push notification on your device through the app. Click on the message and you’re taken into the app, directly to the Activity page where you will find recorded clips ordered from most recent to oldest. Here’s a screenshot of the video quality which is set to medium quality for this review.
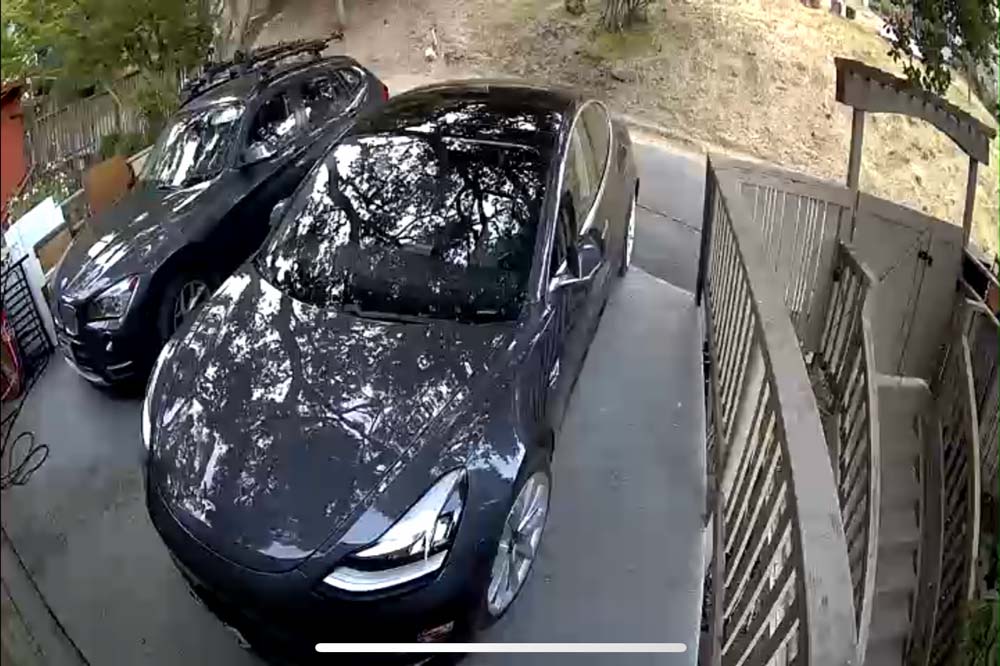
Swann recommends that the fixture is mounted at least 8 ft off the ground. My garage is only 8 feet tall total so using the existing mounting location it sits just under 7′. As you can see my driveway is also pretty short so there are a couple of camera settings I needed to make right away. Here’s what those settings screens look like.
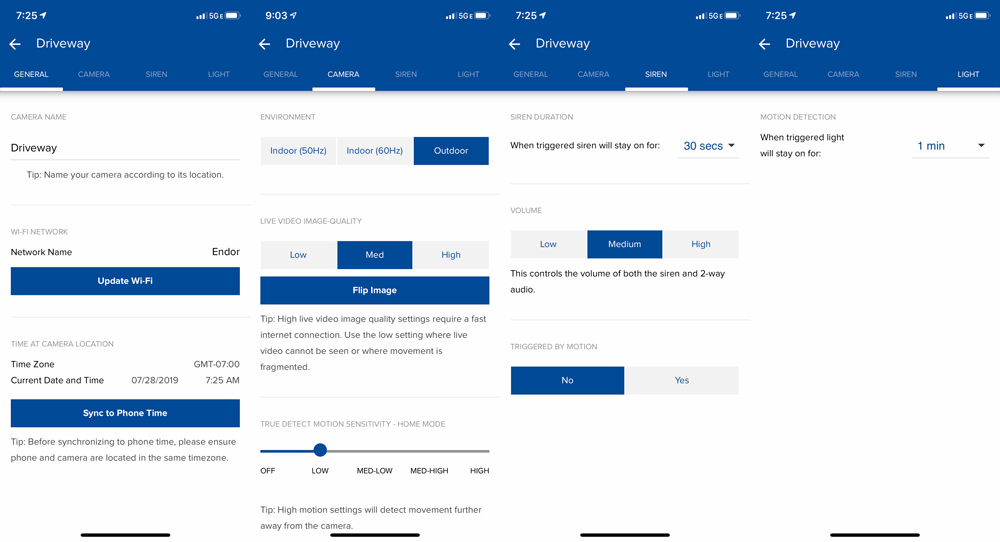
Under the Camera tab, I had to set the motion sensitivity to Low, as anything higher generated an alert for every single car driving by as well as anyone walking their dog. These were also triggering push notifications (as they should) which meant I was getting a couple a minute during the day as we’ve got a lot of construction activity on our street. I went ahead and turned off motion detection until I could fix the settings.
Even at the low sensitivity setting, I was getting too many false motion detects. Each setting is a discrete position on that slider instead of a 0-100% bar where you can just find the real setting you need. To solve that I had to tilt the camera down further to shorten the range. This is a trial and error adjustment as there’s no visual in the app to estimate where the “trigger” line is for motion. My situation may be an edge case so ignore if your setup is more traditional. Now set up, I re-enabled the motion detection.
When you hop into the app normally, your landing page gives you access to Lights and Siren toggle buttons as well as a live view you can click into. I named the camera ‘Driveway’ so this will be whatever location name you choose.
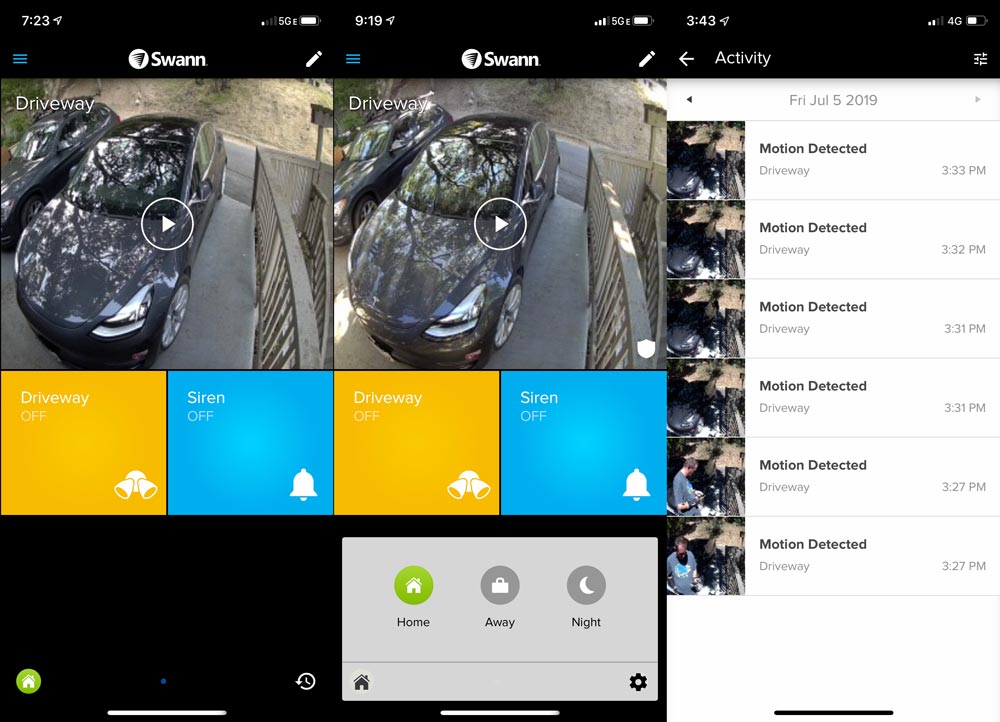
The bottom left icon lets you toggle between Home, Away and Night settings and will show whatever icon is currently active. Each of these can be set up with their own settings for camera, siren and lights to match your needs.
The bottom right icon is a quick jump into activity recordings. The built-in memory card stores 8 days on a rolling basis where day 8 overwrites day 1 to start the cycle again. If something isn’t visible on the Activity page, check the backup at the very bottom of the camera settings in the app by pressing ‘View Camera Backup’. You can upload clips to Swann’s Secure Cloud for two days and if you need more storage you can upgrade to a subscription plan that includes 30 days of storage for $4.99/month within the app.
The app takes a little navigating to get used to as almost every screen has additional settings and buttons so allow yourself some time to get comfortable in there. Clicking into the live view (main image) gives you access to lights and siren as well as additional buttons for Talk, Record and Capture.
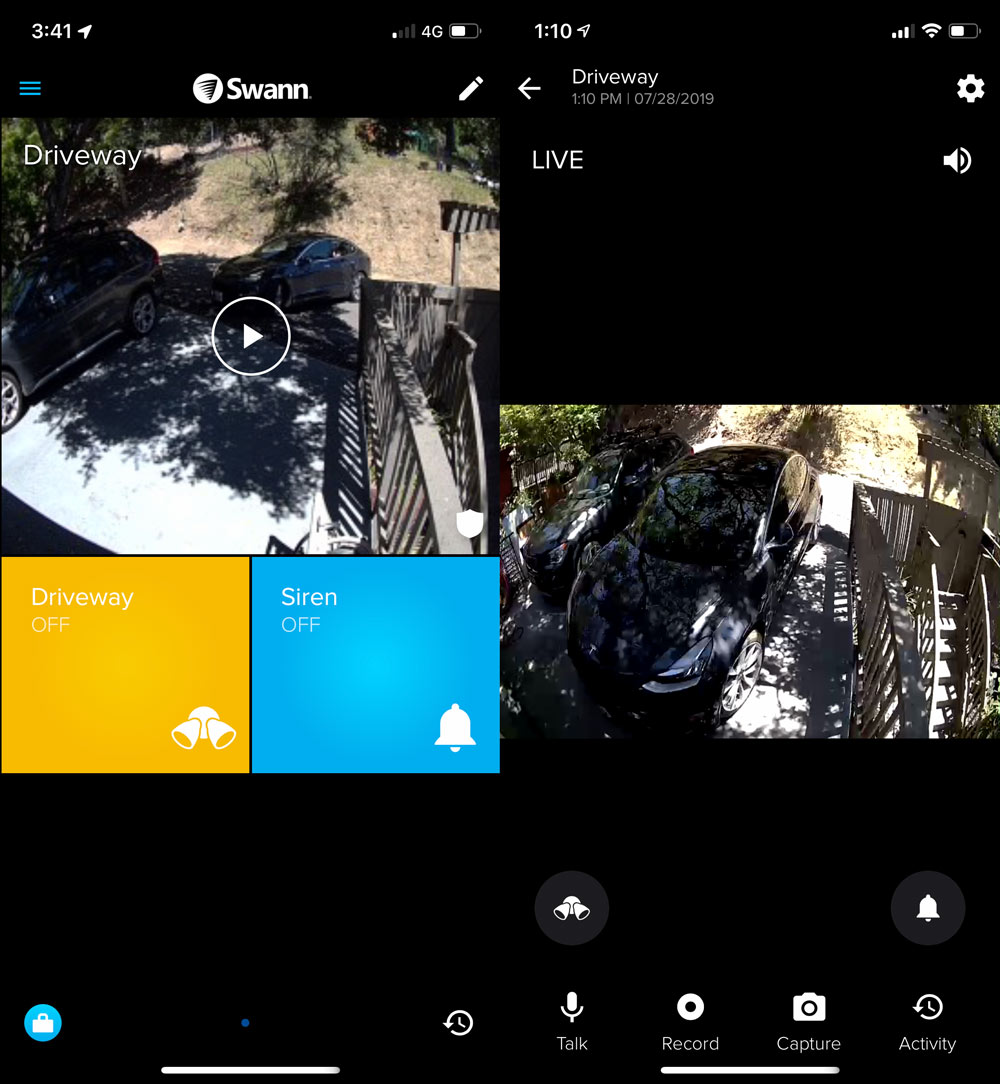
With talk you can converse with your thief, or tell your kids it’s time to put down the basketball and come in for dinner. Record starts a video recording whereas Capture takes a photo.
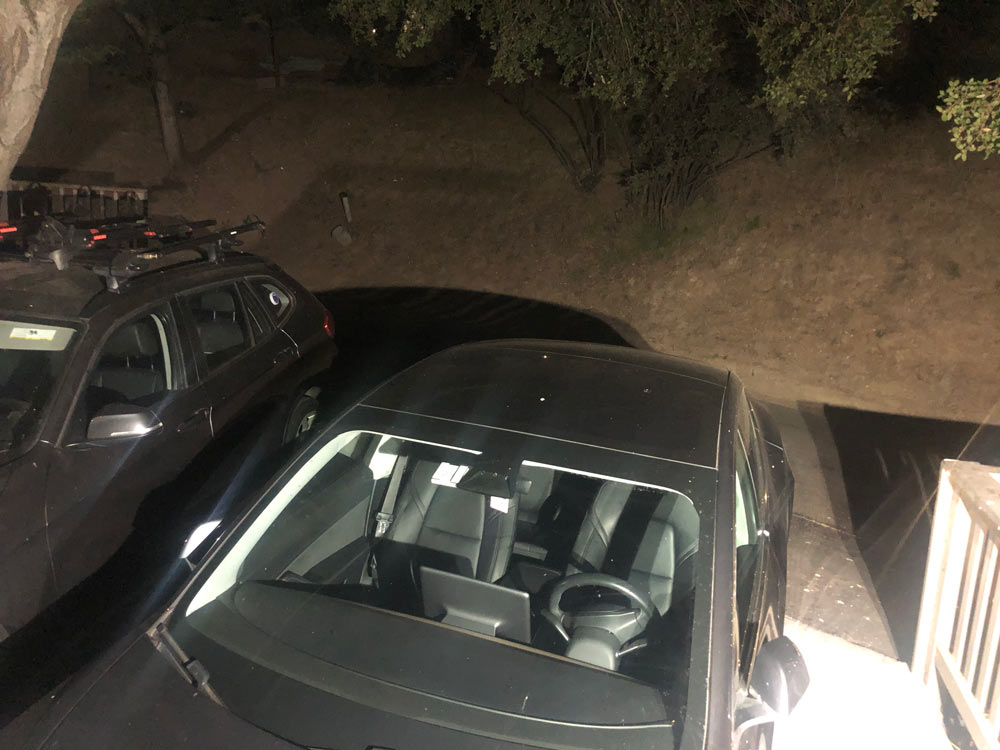
The light settings can be set to stay on for .5, 1, 2, 5, 10 or 15 minutes after motion detection and you can set the brightness level anywhere from 1-100%. You should also know that the lights will not activate in sunlight (which in general shouldn’t be an issue). I’ve currently got the brightness set to 35%, but here’s a shot with the light at 100% for reference. Plenty bright to illuminate a shady character or wildlife in the dark.
The siren has its own Yes/No toggle for responding to motion and can be set to sound for seconds (5, 10, 15, 30) or minutes (1, 2, 5) at Low/Medium/High volume which also sets the level for 2-way audio. Sirens are not very effective here in Oakland unless you’ve got a subscription with a security service to respond, so it’s more for the owner’s benefit in that case. Our driveway is also covered by a large tree that moves a lot in wind resulting in false alarms, so I have the siren set not to activate. I did test the siren though and the low setting isn’t loud enough to cause anyone any fuss, so I’d recommend setting to High if you’re actually trying to use the alarm as a deterrent.
You’ll definitely want to set up the Home, Away and Night settings so that the alerts that come through are ones that matter. With four of us at home on different schedules, it’s unlikely this will get switched when it needs to. Here’s a friendly nudge at Swann to look into supporting IFTTT for helping that automation take a step forward.
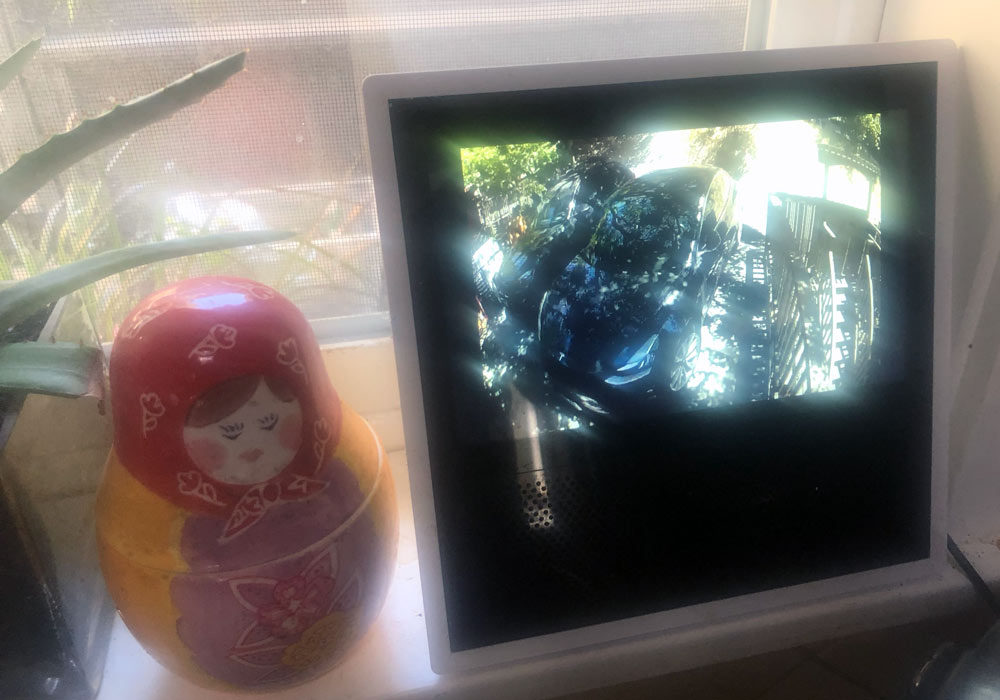
There is integration with Alexa or Google Assistant for working with some home devices you might have. Ask Alexa to “Show Driveway” and you get a live view after about 15 seconds of thinking.
What I like
- Pretty low effort install
- Bright lights with good coverage
- Easy to access recordings without recurring monitoring fees
- Very configurable (lights, siren, motion detection)
What I’d change
- Better method for determining detection range during setup
- Automation for determining Home, Away, Night
Final thoughts
The Swann Floodlight Security Camera is installed and my driveway lights up when entered and I get a motion alert on my phone and watch. I haven’t had and uninvited car visitor since installation and continue to hope I won’t, but I do feel safer and more aware of what’s happening in my driveway. The lighting is superb and the automatic recordings make it easy to see and hear what happens in my driveway when I’m not around. Thanks Swann!
Price: $179
Where to buy: Swann and Amazon
Source: The sample of this product was provided by Swann.
Filed in categories: Reviews
Tagged: security camera
Swann Floodlight Security Camera review originally appeared on The Gadgeteer on August 2, 2019 at 11:00 am.
Note: If you are subscribed to this feed through FeedBurner, please switch to our native feed URL http://the-gadgeteer.com/feed/ in order to ensure continuous delivery.


 PIR thermal/motion sensor (≤ 32ft, 270º)


